If you have ever worked with JavaScript or tried building a web app, you have probably come across the term Node Package Manager (npm) . But what exactly is npm and why does every developer seem to use it? It is a free, open-source tool that comes bundled with Node.js. It helps developers install, share and manage reusable pieces of code called packages or modules in their JavaScript projects.
Instead of writing everything from scratch, developers use npm to pull in ready-made solutions and focus on building what matters. Whether you are just starting out in web development or trying to make sense of the JavaScript ecosystem, this beginner’s guide will break it all down for you in the simplest way possible.
TL;DR (Too Long, Didn’t Read?)
Node Package Manager (npm) is the default package manager for Node.js. It helps developers install, manage and share reusable code packages called modules.
At its core, npm has three main parts:
| Registry | CLI (Command Line Interface) | Package Manager |
| A massive online database of open-source packages | A tool you run in your terminal to install and manage packages | Handles dependencies for your project automatically |
📌 Instead of writing everything from scratch, npm helps you install ready-made solutions. For example, if you need a date library or a UI tool, you can install it instantly with a single command.
Example
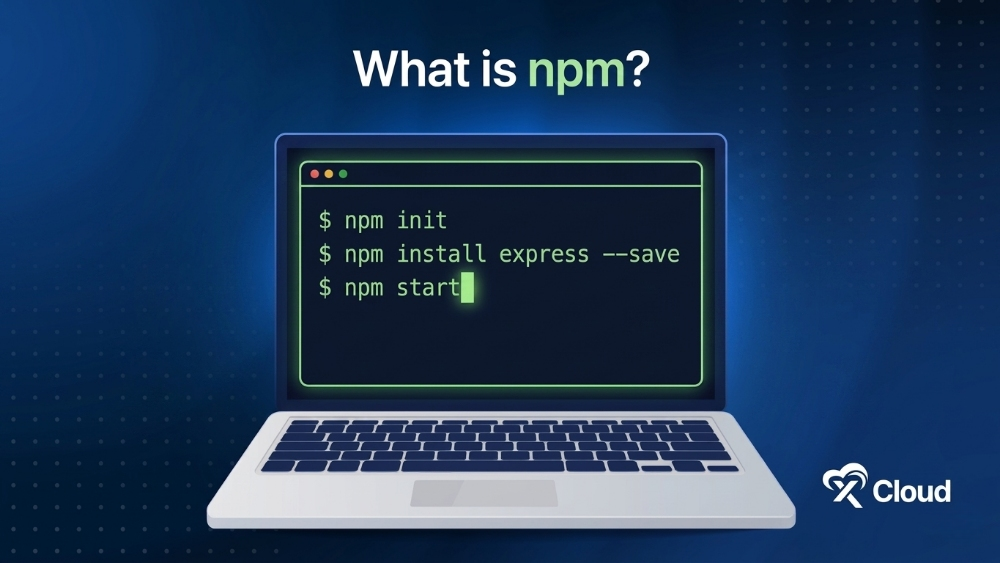
You can install a package like this:
npm install express
This downloads the popular web framework Express.js and adds it to your project.
| Topic | Key Takeaway |
| What is npm? | The default package manager for Node.js and the largest software registry in the world |
| What does npm do? | Installs, updates and manages JavaScript packages and their dependencies |
| How to install npm | Download Node.js from nodejs.org and npm comes included |
| Key files | package.json stores project info; package-lock.json locks exact versions |
| Most used command | npm install <package-name> to add a package to your project |
| Who uses npm? | JavaScript and Node.js developers worldwide |
| Why it matters | Saves development time by providing access to over 2 million packages |
What Is Node Package Manager (npm)?
Node Package Manager, commonly known as npm, is the default package manager for the JavaScript runtime environment Node.js. It was first released in 2010 and has grown to become one of the largest software registries in the world. npm does not publish a single official live package count. Research studies estimate that the npm ecosystem contains over 2 million packages.
Think of npm as an enormous digital library. Every book in this library is a JavaScript package. When you need a specific feature in your project, instead of writing that code yourself, you simply ‘borrow’ a package from the library using npm.
npm has three core roles that together make it an essential tool in modern JavaScript development:
- A registry that stores and serves publicly available JavaScript packages
- A command-line interface (CLI) that lets you install, update and manage packages directly from your terminal
- A dependency manager that tracks which packages your project needs and ensures the right versions are installed
According to the official Node.js documentation, npm is the standard tool for managing packages and is automatically included when you install Node.js on your machine.
Why Do Developers Use Node Package Manager?
Before tools like npm existed, JavaScript developers had to manually download code libraries, manage file paths and handle updates on their own. That process was messy, time-consuming and prone to errors.
Why developers rely on the Node Package Manager today:
- Saves time by letting you install powerful libraries in seconds instead of writing code from scratch
- Manages dependencies automatically so you never have to track down which packages your project needs manually
- Provides access to millions of open-source packages covering everything from utility functions to full frameworks
- Handles version control so your project always runs on compatible package versions
- Enables easy updates with simple commands to keep packages current and secure
Popular JavaScript libraries like React, Angular and jQuery are all available through npm. Instead of hunting for downloads, one command gives you instant access.
How Does npm Work? A Simple Breakdown
Understanding how npm works does not require deep technical knowledge. The process is straightforward once you understand its three main components.
The npm Registry
The npm registry is a massive online database of JavaScript packages hosted at npmjs.com. Anyone can publish a package to the registry and anyone can install packages from it. When you run an install command, npm fetches the package from this registry and puts it inside your project folder.
The npm CLI (Command Line Interface)
The npm CLI is the tool you use in your terminal. It is the interface through which you communicate with the registry. You use it to install packages, remove them, update them and run scripts. Common commands you will use include:
- npm install to add packages to your project
- npm uninstall to remove packages
- npm update to refresh packages to their latest versions
- npm init to start a new project and create a package.json file
- npm audit to check your project for security vulnerabilities
The node_modules Folder
When you install a package, npm downloads it and stores it inside a folder called node_modules in your project directory. This folder contains all the code for every package your project depends on. You should not edit files inside this folder manually.
What Is package.json & Why Is It Important?
Every npm project has a file called package.json stored at the root of the project directory. This file is the heart of any Node.js or JavaScript project managed with npm. It stores important metadata about your project and tells npm exactly what packages are needed to run it.
package.jsonis generated when you run npm in it and includes the following basic information:
- name: the name of your project or package (must be lowercase and under 214 characters)
- version: the current version using semantic versioning rules (e.g., 1.0.0)
- description: a short explanation to help users find your project on the registry
- main: the entry point file for your project (defaults to index.js if left blank)
- scripts: custom commands you can run with npm (like npm test or npm start)
- dependencies: packages required to run your application in production
- devDependencies: packages only needed during development and testing
Here is what a simple package.json looks like:
{

  "name": "my-project",

  "version": "1.0.0",

  "description": "A simple Node.js project",

  "main": "index.js",

  "scripts": {

    "start": "node index.js",

    "test": "jest"

  },

  "dependencies": {

    "express": "^4.18.2"

  },

  "devDependencies": {

    "jest": "^29.0.0"

  }

}
Difference Between Dependencies vs devDependencies
One of the most confusing parts for beginners is understanding the difference between dependencies and devDependencies. Both appear in your package.json file but serve very different purposes.
Dependencies
Dependencies are packages that your app needs to work in a live production environment. For example, if your app uses Express to run a web server, Express is a dependency. If you remove it, your app breaks.
devDependencies
devDependencies are packages only needed during development. For example, testing libraries like Jest or linting tools like ESLint are only used when writing and testing code. They are not needed when your app is running for end users.
When you install a package, you control where it goes:
npm install express(adds it to dependencies)npm install jest --save-dev(adds it to devDependencies)
When you deploy your project to a server, you can use it npm install --production to install only the packages listed under dependencies. This keeps your production build lean and efficient.
What Is package-lock.json?
Alongside package.json, npm also creates a file called package-lock.json. While package.json describes your project at a high level, package-lock.json records the exact version of every package and sub-package installed.
This file ensures that every developer working on the project and every deployment environment installs the exact same versions of every package. This prevents the frustrating ‘it works on my machine but not yours’ problem that developers often face.
You should commit package-lock.json to your version control system (like Git) to keep your team in sync.
How to Install npm And Get Started
Getting npm on your machine is simple. Since npm comes bundled with Node.js, you just need to install Node.js.
The installation process is simple and beginner‑friendly, giving you the tools to run JavaScript outside the browser. Once installed, you will be ready to take your first steps into creating fast, modern applications.
Step 01: Download the Installer
Visit the official Node.js website at ‘nodejs.org’. You will see two big green buttons. One says ‘Get Node.Js®️’ and the other says ‘Get Security Support’.
For simple installation on Node.js, choose ‘Get Node.Js®️’.
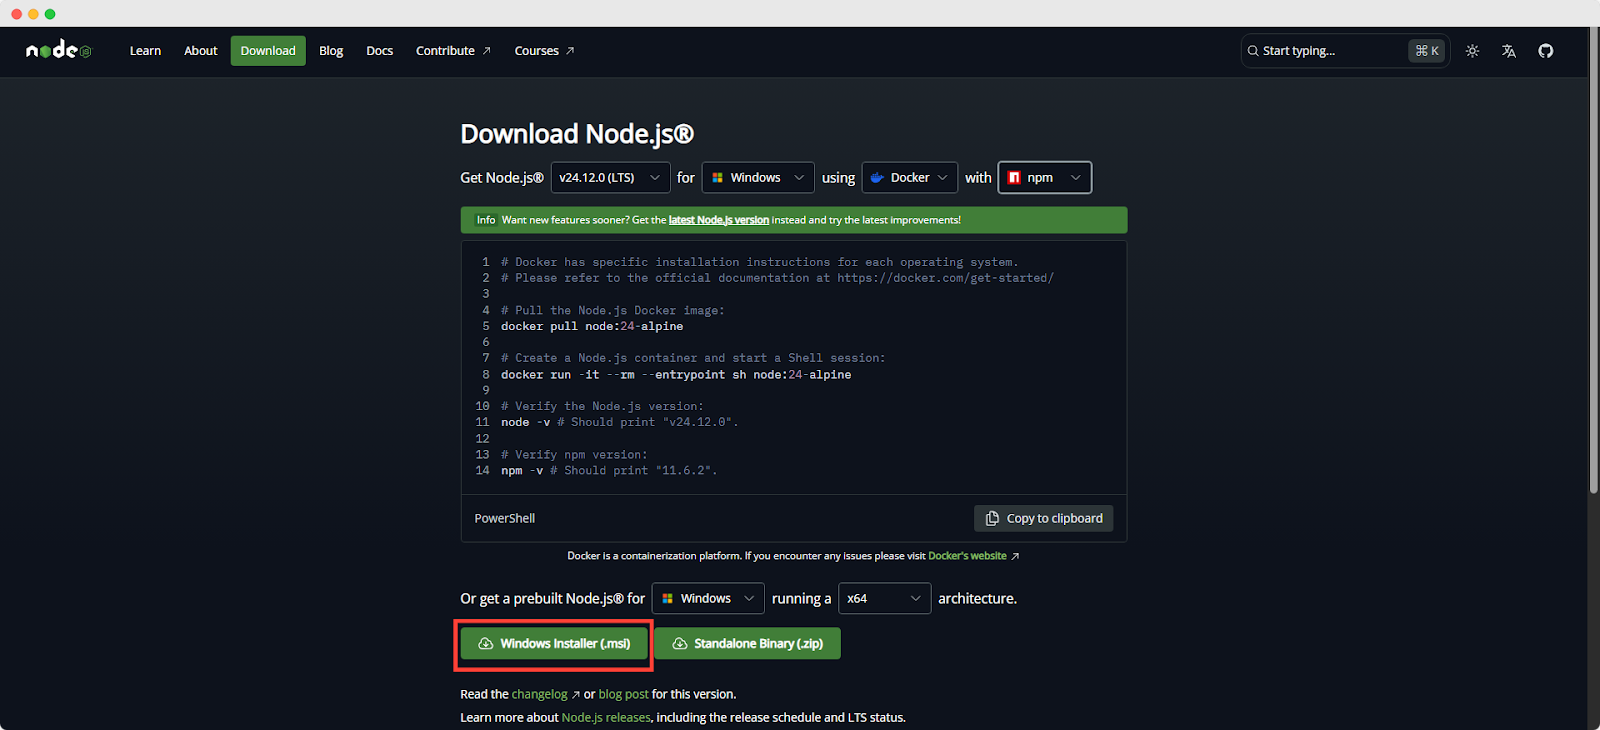
Download the Windows / Mac / Linux Installer that matches your Operating System and system architecture (32‑bit or 64‑bit). For most users, the LTS (Long Term Support) version is recommended because it offers greater stability. The Current version provides the latest features but comes with more frequent updates.
Step 02: Run the Installer & Complete the Setup
Locate the downloaded .msi file and double‑click to launch it. Follow the prompts in the setup wizard, accept the license agreement and proceed with the default installation settings.

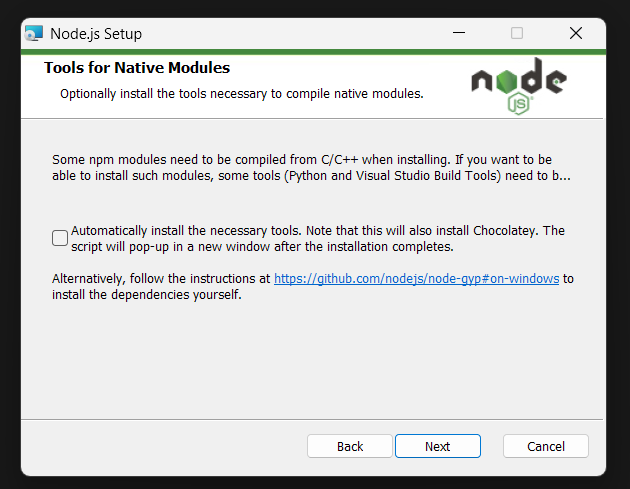
During setup, you can choose additional features such as:
- npm: package manager for Node.js applications
- Native modules: support for building native C++ modules
The installer may prompt you to ‘install tools for native modules.’ Select and click ‘Next’ to continue.
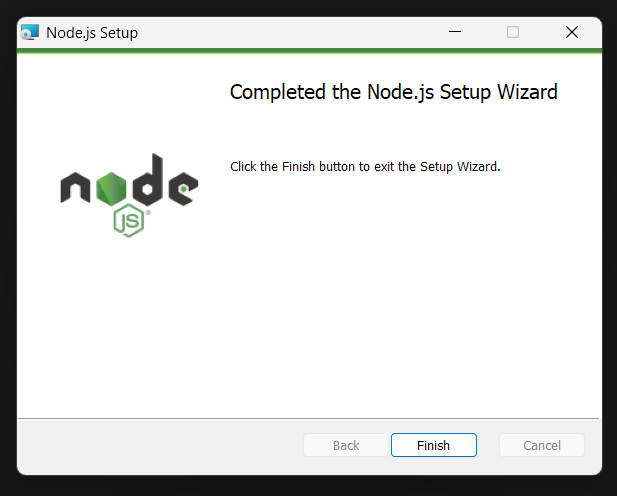
Wait until the wizard displays Finish, confirming that Node.js and npm have been successfully installed.
Step 03: Verify the Installation
Open Command Prompt or PowerShell and check the installed versions by running the following commands:
- Type
node -vand press Enter to display the Node.js version. - Type
npm -vand press Enter to display the npm version.

If both version check commands (node -v and npm -v) return numbers, your installation was successful.
You can run the following command to quickly update npm:
npm install -g npmThis updates the npm CLI client to the latest version.
Starting a New Project with npm
Once npm is installed, starting a new project is easy. Open your terminal, navigate to your project folder and run:
npm initThis will walk you through a series of prompts to create your package.json file. If you want to skip the prompts and use default values, run:
npm init -yYour project is now ready for packages.
How to Install npm on macOS And Linux
Getting started with npm is simple once you have Node.js set up. Since npm ships with Node.js, installing Node.js is all you need in most cases.
Install npm via Node.js
Go to the official Node.js website. Download the LTS version for your system. Run the installer and follow the steps:
| macOS (Homebrew / nvm) | Linux (nvm / Package Manager) |
| With Homebrew: brew install nodeWith nvm: nvm install –lts | Using nvm (recommended): nvm install –ltsUsing package manager (example for Ubuntu): sudo apt install nodejs npm |
Most Important npm Commands Every Beginner Should Know
If you are starting with npm, learning the right commands early can save you a lot of confusion. npm powers how developers install packages, manage dependencies and run project scripts in modern JavaScript workflows.

The npm CLI has dozens of commands but you only need a handful to get started. Here is a breakdown of the most useful ones:
| Installing Packages | npm install <package-name> |
| This installs the latest version of a package and saves it to your dependencies in package.json. For example, to install Express:npm install express | |
| To install all packages listed in an existing package.json file at once:npm install | |
| Installing a Specific Version | npm install <package-name>@<version> |
| For example: npm install express@4.17.1 | |
| Uninstalling a Package | npm uninstall <package-name> |
| Updating a Package | npm update <package-name> |
| Running Scripts | If your package.json has a start script, you can run it with:npm start |
| For custom scripts, use:npm run <script-name> | |
| Checking for Security Issues | npm audit |
This scans your installed packages for known vulnerabilities and tells you what to fix.
Global vs Local Package Installation
When working with npm, understanding how packages are installed is essential for managing projects properly. Some tools are meant for a single project, while others are needed across your system.
When installing packages, you can choose between two modes:
i. Local installation (the default) installs the package inside the node_modules folder of your current project. The package is only available within that project.
ii. Global installation installs the package system-wide so it is available from any directory on your machine. This is best for command-line tools you want to use everywhere.
To install a package globally, add the -g flag:
npm install -g For example, tools like nodemon (which automatically restarts your server during development) are often installed globally.
What Is Semantic Versioning in npm?
When you look at your package.json, you will notice version numbers like ^4.18.2 or ~1.0.4. These are not random. npm uses a system called semantic versioning (also known as SemVer) to manage package versions.
A version number follows the format: MAJOR.MINOR.PATCH
- MAJOR (a big breaking change that is not backward compatible)
- MINOR (new features added without breaking existing functionality)
- PATCH (small bug fixes)
The symbols in front of the version number tell npm how flexible it should be when installing:
^ (caret) :installs the latest MINOR version. So ^4.0.0 can install 4.2.0 but not 5.0.0~ (tilde) :installs the latest PATCH version. So ~4.0.0 can install 4.0.3 but not 4.1.0No symbol :installs the exact version, no flexibility
npm Security: Keeping Your Project Safe
Security is a growing concern in the npm ecosystem. Because anyone can publish packages, there have been cases of malicious packages making their way into the registry. The npm team takes this seriously and has built tools to help.
The npm audit command scans your project’s dependencies and checks them against a database of known vulnerabilities. It then shows you a report with suggested fixes. You can also run:
npm audit fixThis automatically installs patched versions of vulnerable packages when available.
Additional security practices to follow include:
- Only install packages from trusted and well-maintained sources
- Regularly update your dependencies with npm update
- Review the package’s GitHub repository before installing unfamiliar tools
- Use npm ci in automated build pipelines instead of npm install for reproducible installs
npm vs Other Package Managers
npm is the most widely used package manager for Node.js but several alternatives offer different features and workflows.
It is not the only JavaScript package manager out there. Two popular alternatives are Yarn and pnpm.
For most beginners, npm is the best starting point since it comes pre-installed with Node.js. Once you are more comfortable, you can explore Yarn or pnpm for specific use cases.
Here is a quick comparison:
| Feature | npm | Yarn | pnpm |
| Speed | Good | Fast | Very Fast |
| Default with Node.js | Yes | No | No |
| Offline support | Limited | Strong | Strong |
| Disk usage | High | High | Low |
| Workspaces support | Yes | Yes | Yes |
Real-World Use Cases for npm
npm plays a key role in modern Node.js development by powering real-world applications across different project types. Developers use it to manage dependencies, integrate third-party libraries and streamline development workflows.
Most common real-world ways npm is used in production projects:
1. Building Web Applications Faster
Most modern web apps rely on npm to bring in ready-made libraries. Instead of building features manually, developers install packages for routing, state management, UI components and API handling. This reduces development time and keeps code more structured.
For example:
- Frontend frameworks like React or Vue rely heavily on npm packages
- Backend apps use libraries for routing, authentication and database handling
2. Managing Project Dependencies
Every modern JavaScript project depends on external libraries. This is one of the most important roles npm plays in real projects. npm manages these dependencies automatically through a file called package.json.
It ensures:
- Correct versions of libraries are installed
- Conflicts between packages are avoided
- Projects can be shared and rebuilt easily
3. Using Build Tools And Automation
Developers use npm to install tools that automate repetitive tasks. These tools are installed and managed through npm, making development workflows more efficient and consistent. such as:
- Bundling code (Webpack, Vite)
- Minifying files
- Running tests
- Linting code for errors
4. Creating Backend APIs And Servers
With Node.js, npm is used to install server-side packages.This makes it easier to build scalable backend systems without writing low-level code. Some server-side packages are:
- Express.js for routing
- dotenv for environment variables
- cors for security handling
- mongoose for MongoDB integration
5. Supporting full-stack development
Full-stack applications depend on npm for both frontend and backend layers. npm ensures all parts of the system stay consistent and maintainable. A single project may include hundreds of npm packages working together.
Example use cases:
- eCommerce platforms
- SaaS dashboards
- Admin panels
- Real-time chat applications
6. Sharing And Reusing Code
Developers can publish their own packages to the npm registry and reuse them across multiple projects. It also supports the open-source ecosystem, where millions of packages are freely available.
This helps teams:
- Avoid rewriting common logic
- Share internal utilities
- Maintain consistent standards across projects
7. Running Project Scripts
npm also acts as a task runner. This simplifies project workflows into single commands. Developers define scripts inside package.json to run commands like:
- Starting a development server
- Running tests
- Building production files
Example:
"scripts": {

  "start": "node app.js",

  "test": "jest"

}
Start Using Node Package Manager Today
Whether you are building a simple website or a full-scale web application, npm is the tool that ties modern JavaScript development together. It saves time, reduces complexity and connects you to a massive ecosystem of open-source code.
Start with a small project, install a few packages and explore what the Node Package Manager can do for you. The best way to learn is by doing and with npm, you have everything you need to get moving.
If you have found this blog helpful, feel free to subscribe to our blogs for valuable tutorials, guides, knowledge and tips on web hosting and server management. You can also join our Facebook community to share insights and take part in discussions.
Frequently Asked Questions (FAQs) About npm
Check out some of the most common questions people ask search engines about Node Package Manager (npm):
1. What does npm stand for?
npm officially stands for Node Package Manager. It is the default package manager for the Node.js JavaScript runtime. Interestingly, the npm team has also jokingly suggested names like “Ninja Pumpkin Mutants” and “Nonprofit Pizza Makers” on their official GitHub page.
2. Is npm free to use?
Yes, npm is completely free. You can install it, use the public registry and publish your own packages at no cost. There is also a paid tier called npm Pro for private packages and additional team features.
3. Do I need to install npm separately?
No. When you install Node.js from the official website at nodejs.org, npm is automatically included. You do not need to install them separately.
4. What is the difference between npm install and npm ci?
npm install installs packages based on what is listed in package.json and may update versions within the allowed range.
npm ci installs packages using the exact versions listed in package-lock.json without making any changes. Use npm ci in production and automated build environments for consistency.
5. What happens if I delete the node_modules folder?
Nothing permanent. The node_modules folder contains only installed packages and can always be regenerated by running npm install in your project directory. This is why node_modules is usually added to .gitignore and not pushed to version control.
6. Can I publish my own package to npm?
Yes. Anyone can publish a package to the npm registry. You need a free npm account at npmjs.com. Once you have that, log in from the terminal using npm login and run npm publish from your project directory. Make sure your package.json is properly configured before publishing.