Have you ever updated your website content only to see the old version still showing up on your screen? It is a frustrating situation that happens to almost every internet user and website owner. The problem usually lies in something called the cache.
When you browse the internet, your browser saves data to help pages load faster the next time you visit. Clearing your website cache is necessary to resolve these conflicts. In this guide, we will show you how to clear website cache across major browsers, devices and server-side environments.
TL;DR: Quick Summary
| Cache Type | What It Stores | How to Clear It |
| Browser Cache | Images, CSS, JS in your local browser | Browser settings or hard refresh |
| WordPress Plugin Cache | Full-page HTML snapshots | Plugin dashboard (e.g. LiteSpeed, W3TC) |
| Server-Side Cache | Static files served by the server | Hosting control panel or SSH |
| CDN Cache | Copies served from edge locations | CDN dashboard (e.g. Cloudflare) |
| DNS Cache | Domain-to-IP lookup records | Command line (flush DNS) |
| Object Cache | Database query results | Redis/Memcached or Object Cache Pro |
What Is a Website Cache?
A website cache is a temporary storage system that keeps copies of your site’s files so they can load much faster when someone visits again. When a user enters your website address in their browser, the browser normally has to download all the elements that make up the page, such as text, images, background styles and layout files.
Slow websites can lose over 53% of visitors if a page takes more than 3 seconds to load. Users expect websites to appear almost instantly. That’s where website caching becomes essential.
Caching helps reduce this workload. Instead of downloading everything from scratch every time, the browser can reuse stored versions of these files. This significantly speeds up page loading and improves the overall browsing experience.
In fact, caching is a fundamental part of modern web performance. Without it, the internet would feel much slower. Large media files like high-resolution images and complex scripts would force users to wait several seconds for each page to load.
Difference Between Cache, Cookies And History
Many people confuse cache with cookies and browsing history. It is very important to know the difference between these three things. They all live inside your browser settings but they do completely different jobs. If you delete the wrong thing, you might log yourself out of all your favorite websites by accident.
Here is a simple breakdown of what these terms mean:
- Cache: This stores website files like images and layout scripts to make pages load faster.
- Cookies: These store personal data like your login details and shopping cart items.
- History: This is simply a text list of all the web addresses you have visited in the past.
When you only want to see the latest design changes on your site, you only need to delete the cache. You do not need to delete your cookies. If you delete your cookies, you will have to type in your passwords for every single website again. This is a common mistake that causes a lot of frustration for beginners.
Why Do You Need to Clear Website Caches?
Website cache is a technology that saves copies of your web pages, images, and scripts so they load 50% faster the next time someone visits. This is great for speed. But it becomes a problem the moment you update something and those saved copies do not refresh automatically, potentially showing outdated content for hours or days until the cache is cleared.
Think of a cache like a printed photograph. Even if the scene changes, the photo still shows the old version. To see the new version, you need a fresh print. That is exactly what clearing your cache does.
Here are the most common reasons website owners need to clear their cache:
- After publishing a new blog post or page update that is not showing up
- After changing your theme, CSS or page layout
- After fixing a bug that still appears to some visitors
- After switching CDN providers or changing DNS settings
- After installing or updating a WordPress plugin
- After resolving a 500 error or white screen of death
Skipping this step often leads to hours of confusion. Visitors may still see broken designs, developers may think their code is not working, and SEO tools may index stale content. Clearing website cache on a regular basis keeps your site healthy and your visitors informed.
Different Layers of Cache
Before you start clearing anything, it helps to understand where the cache lives. There is not just one cache. There are multiple layers, and each one needs a different approach.
- Browser Cache
Browser cache is stored on your visitor’s device. When someone visits your site, their browser saves images, stylesheets and scripts locally. The next time they visit, the browser loads those saved files instead of downloading them again. This speeds up load times.
The downside is that when you update your website, some visitors will still see the old version because their browser is serving them cached files. The fix is either asking them to do a hard refresh or clearing it from the browser settings directly.
- Server-Side Cache
Server-side cache is stored on your web server. It creates pre-built HTML versions of your pages and serves them to visitors without running PHP or database queries each time. This massively reduces server load and speeds up your site.
If your hosting uses LiteSpeed, Nginx or Apache, there is likely a server-side caching layer in place. Tools like the LiteSpeed Cache plugin on WordPress interact directly with this layer.
- CDN Cache
A CDN (Content Delivery Network) caches your website’s static files at edge servers around the world. When a visitor in Tokyo accesses your site hosted in the US, the CDN serves files from the nearest location instead. This cuts down on latency significantly.
CDN cache is separate from your server cache and must be cleared independently, especially after major design or content updates. If you are using Cloudflare or a similar service, you will need to purge the CDN cache from the CDN dashboard.
xCloud’s Edge Full-Page Cache feature allows you to serve cached versions of your pages through a CDN edge, dramatically improving loading speeds for global visitors.
- DNS Cache
DNS cache stores the mapping between your domain name and its IP address. This allows browsers to look up your site faster. But if you change hosting providers or point your domain to a new server, old DNS records may still be cached on your device or local network.
Flushing DNS cache forces your device to request a fresh lookup. This is especially useful when your site has recently migrated or your domain is not resolving correctly.
- WordPress Plugin Cache
If you run a WordPress site, you almost certainly have a caching plugin installed. Plugins like LiteSpeed Cache, W3 Total Cache and WP Super Cache store cached versions of your pages inside WordPress itself. These plugins offer one-click cache-clearing options right inside your WordPress dashboard.
- Object Cache
Object cache stores the results of database queries so they do not have to run repeatedly. Tools like Redis or Memcached handle this, and platforms like xCloud offer ObjectCache Pro integration for even better performance. Clearing object cache is usually done through the same caching plugin or your hosting panel.
How to Clear Cache in WordPress Website
WordPress caching plugins can speed up your website dramatically, but sometimes you need to clear the cache to see updates or fix display issues. Here’s how to clear cache in some of the most commonly used caching plugins:
LiteSpeed Cache
LiteSpeed Cache plugin is one of the most powerful caching solutions available for WordPress. It works at the server level, which makes it significantly faster than software-only plugins. Make sure you have installed the LiteSpeed Cache Plugin.
To clear the cache using LiteSpeed Cache:
Step 1: Clear Plugin Cache
Log in to your WordPress admin dashboard. From the left sidebar, look for the LiteSpeed Cache icon.
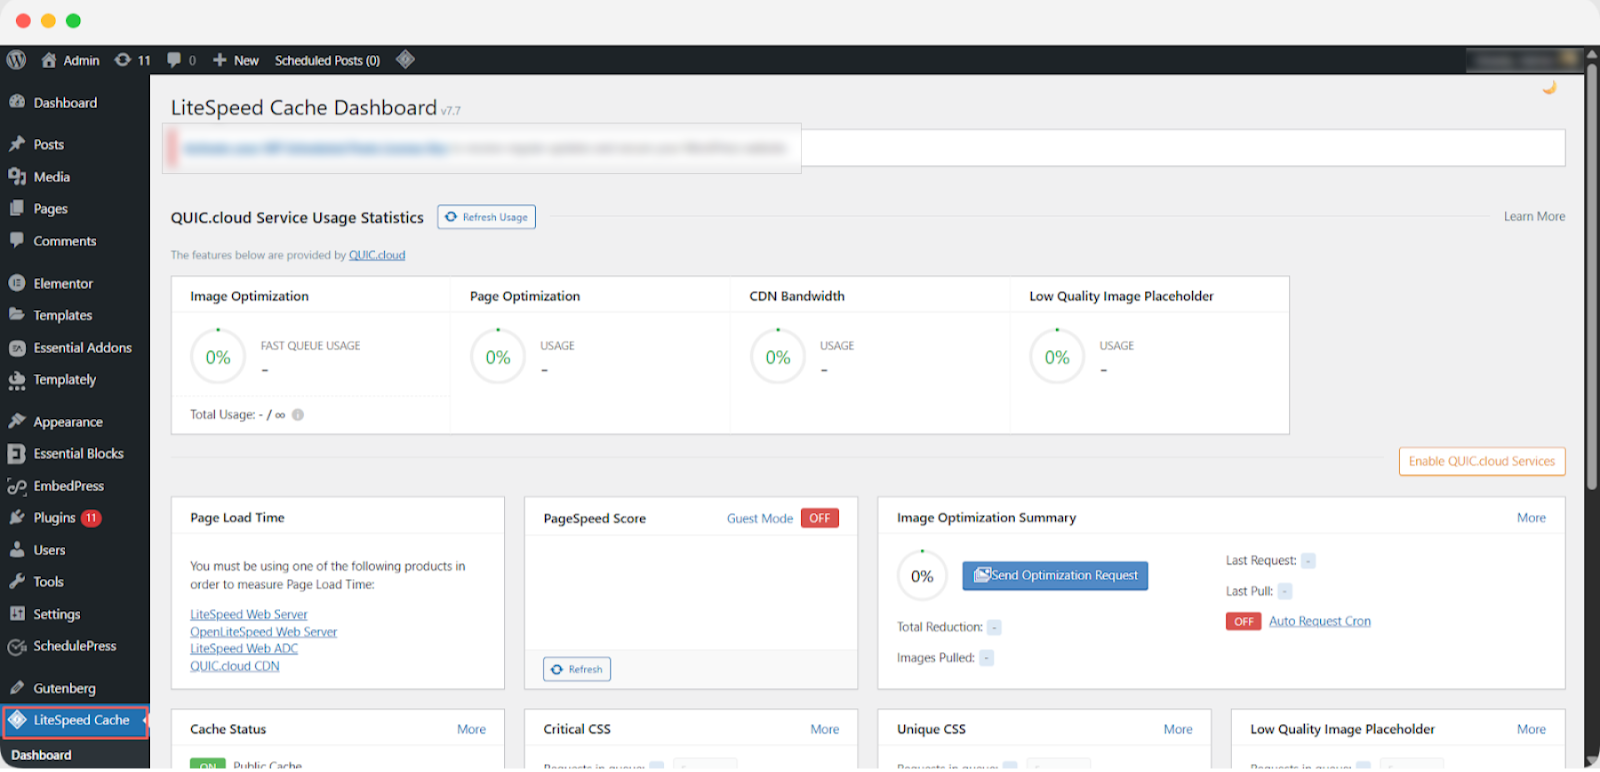
Click the button below and select Cache from the options. Next, enable the ‘Purge All On Upgrade’ setting to ensure all cached files are automatically cleared whenever you update your website. Finally, do not forget to tap ‘Save’ to apply the changes and keep your site running smoothly.
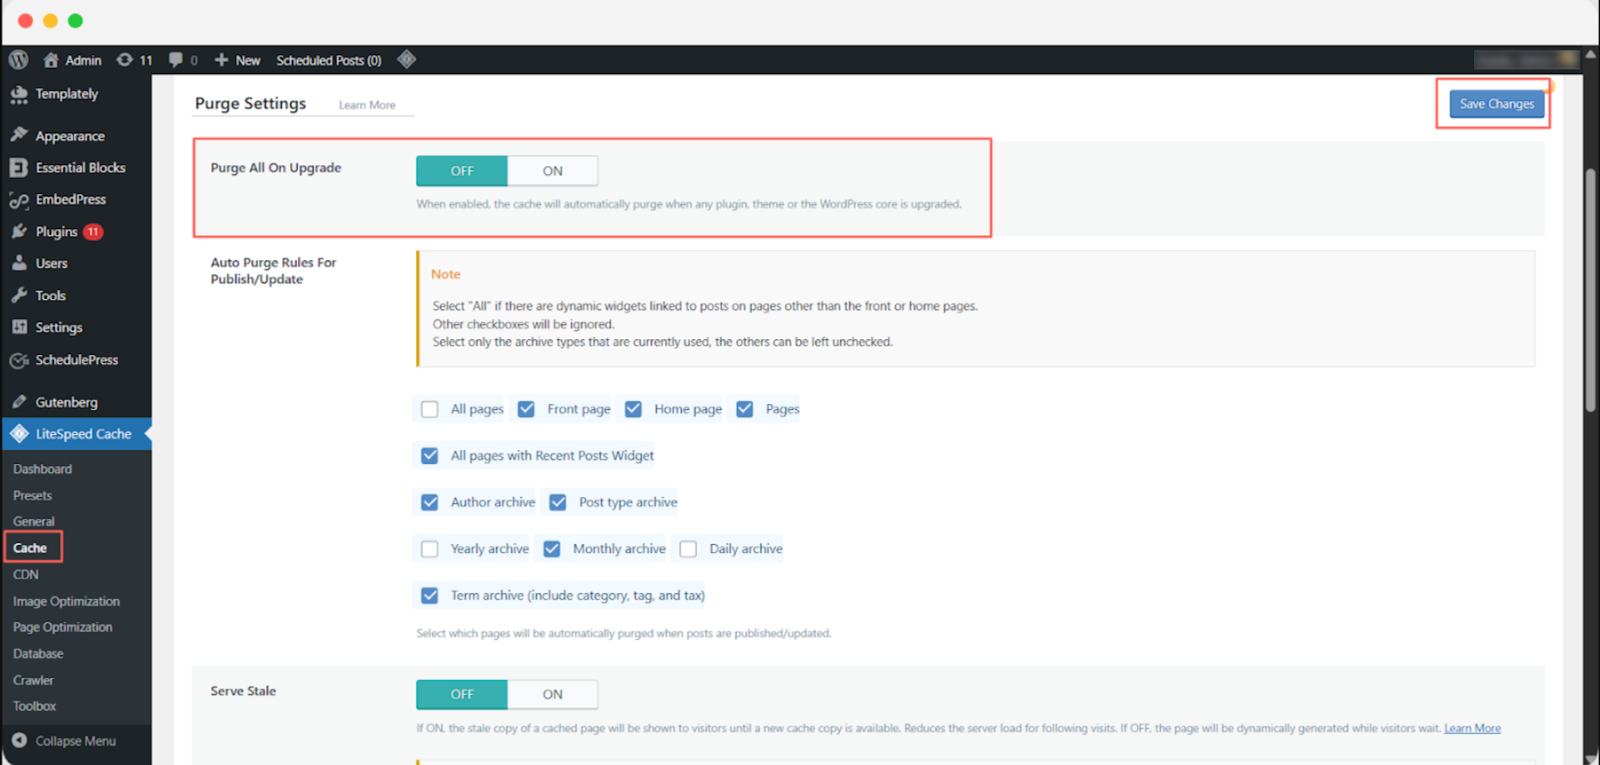
When enabled, the cache will automatically be purged whenever any plugin, theme or the WordPress core is updated.
Step 2: Purge LiteSpeed Cache in WordPress
Clearing your website’s cache with LiteSpeed ensures that visitors always see the latest updates and changes. Follow these simple steps to purge cache efficiently.
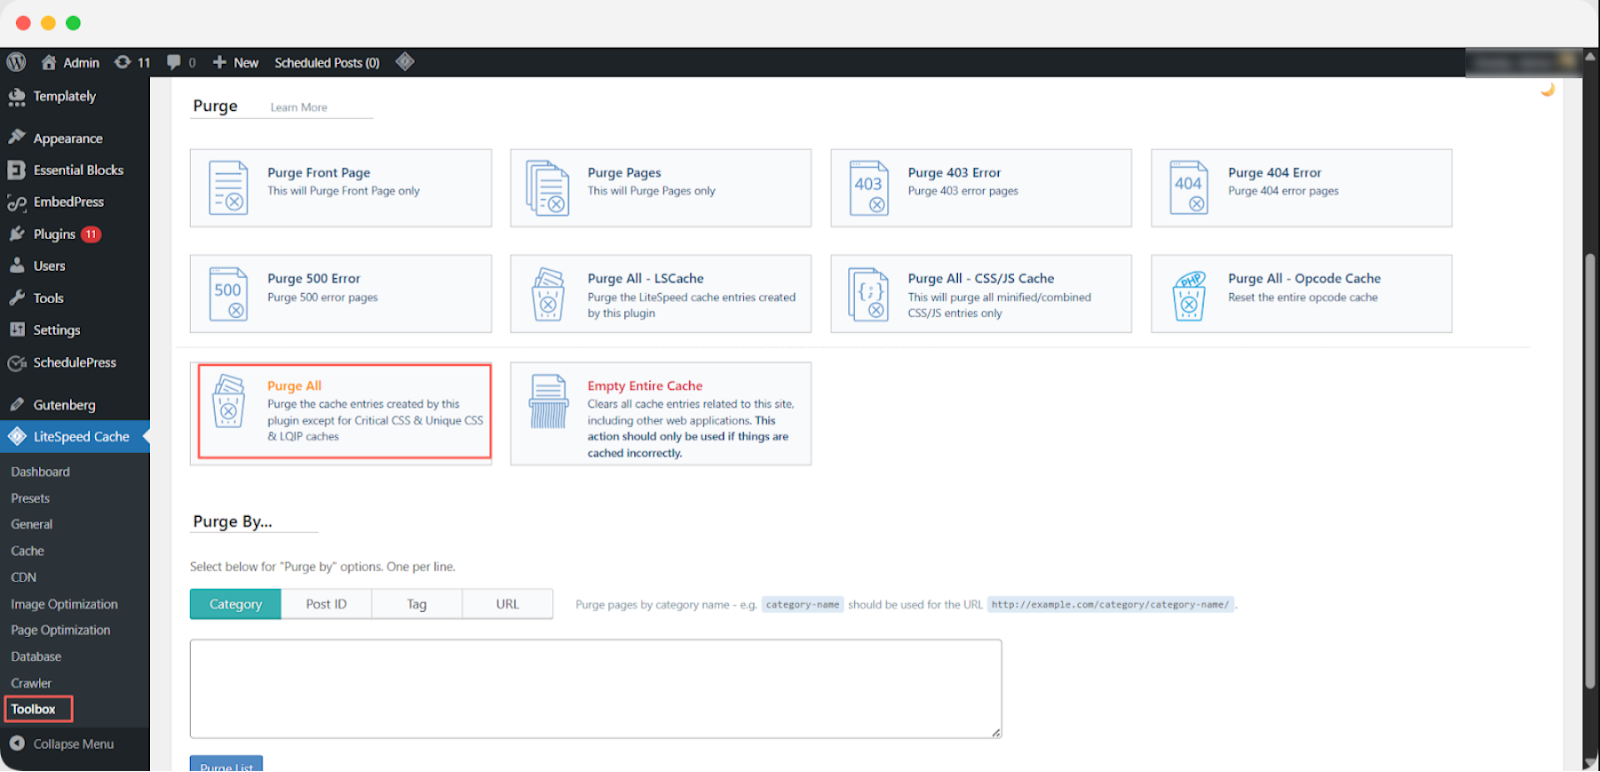
Log in to Your WordPress Dashboard. Access your WordPress admin panel using your credentials.
From the left sidebar, click LiteSpeed Cache, then select Toolbox. Click Purge All to clear the cache for this website only.
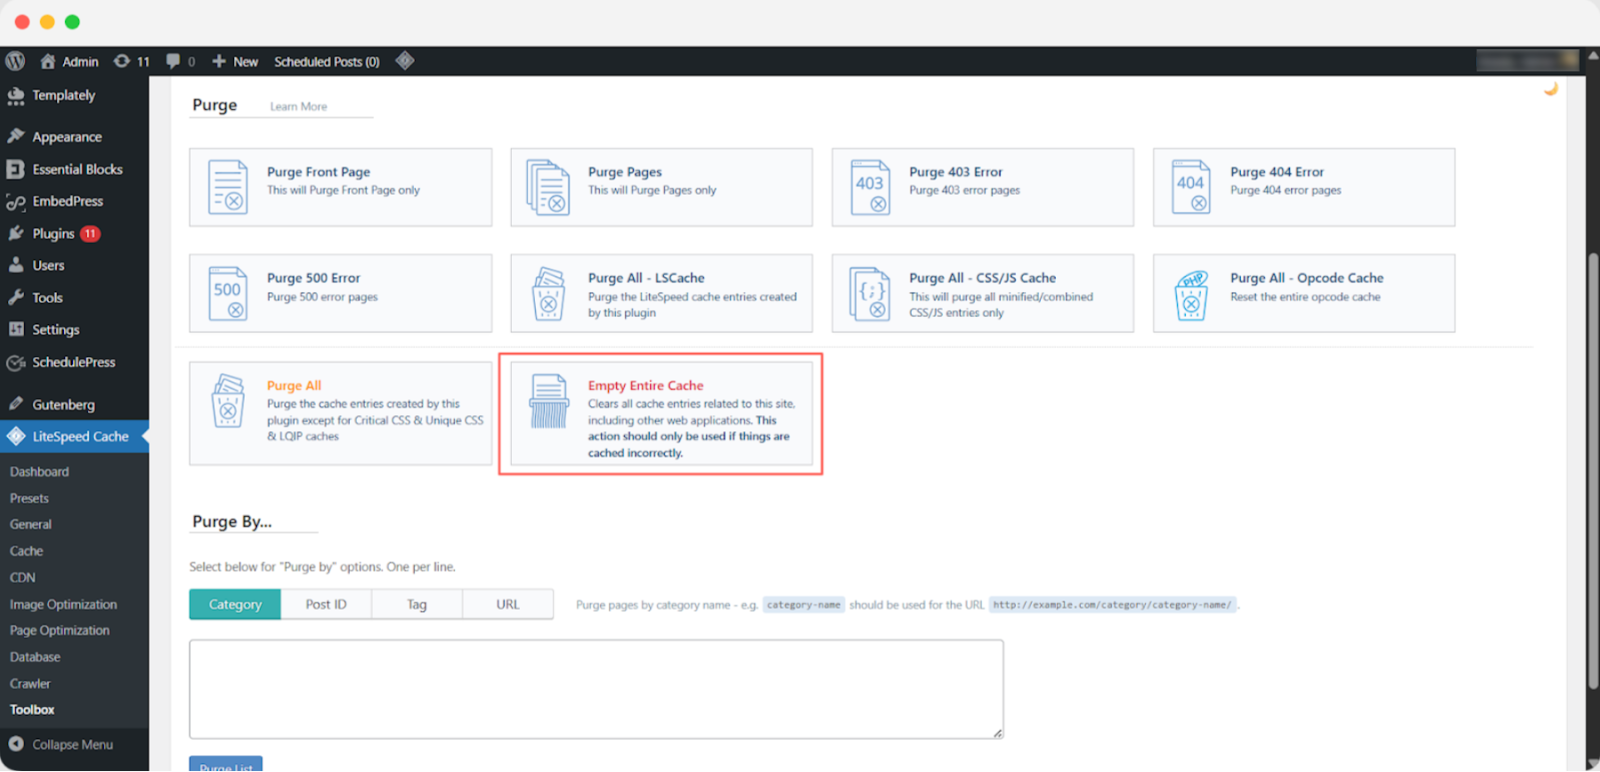
If you want to remove cached data for all websites under the same cPanel account, click Empty Entire Cache.
Purge Cache for a Specific Page (Optional)
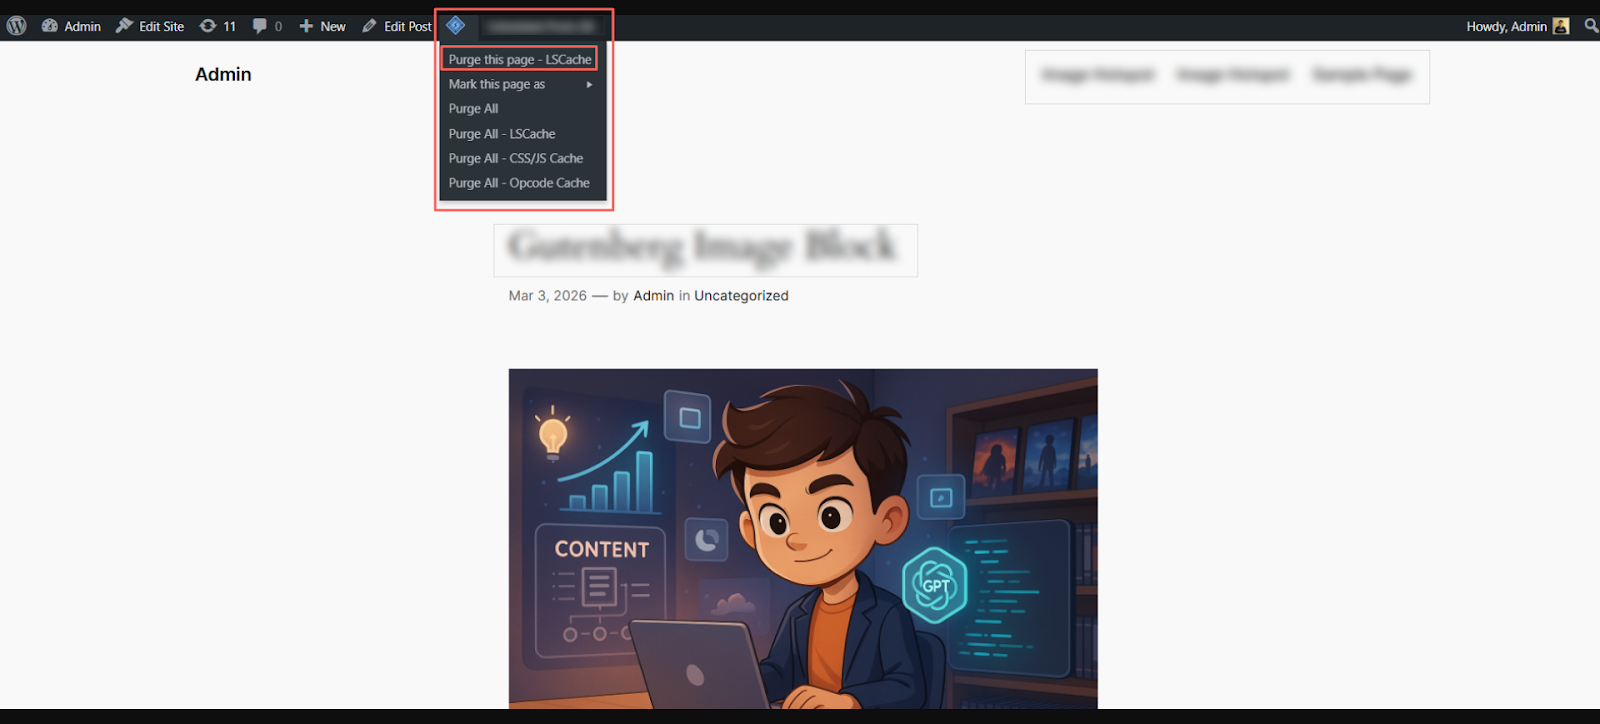
To clear cache for a single page, open that page while logged in as an administrator.
Hover over the LiteSpeed icon in the top admin toolbar and click Purge This Page.
Next, we will explore two more popular plugins that make clearing website cache easy: W3 Total Cache and WP Super Cache.
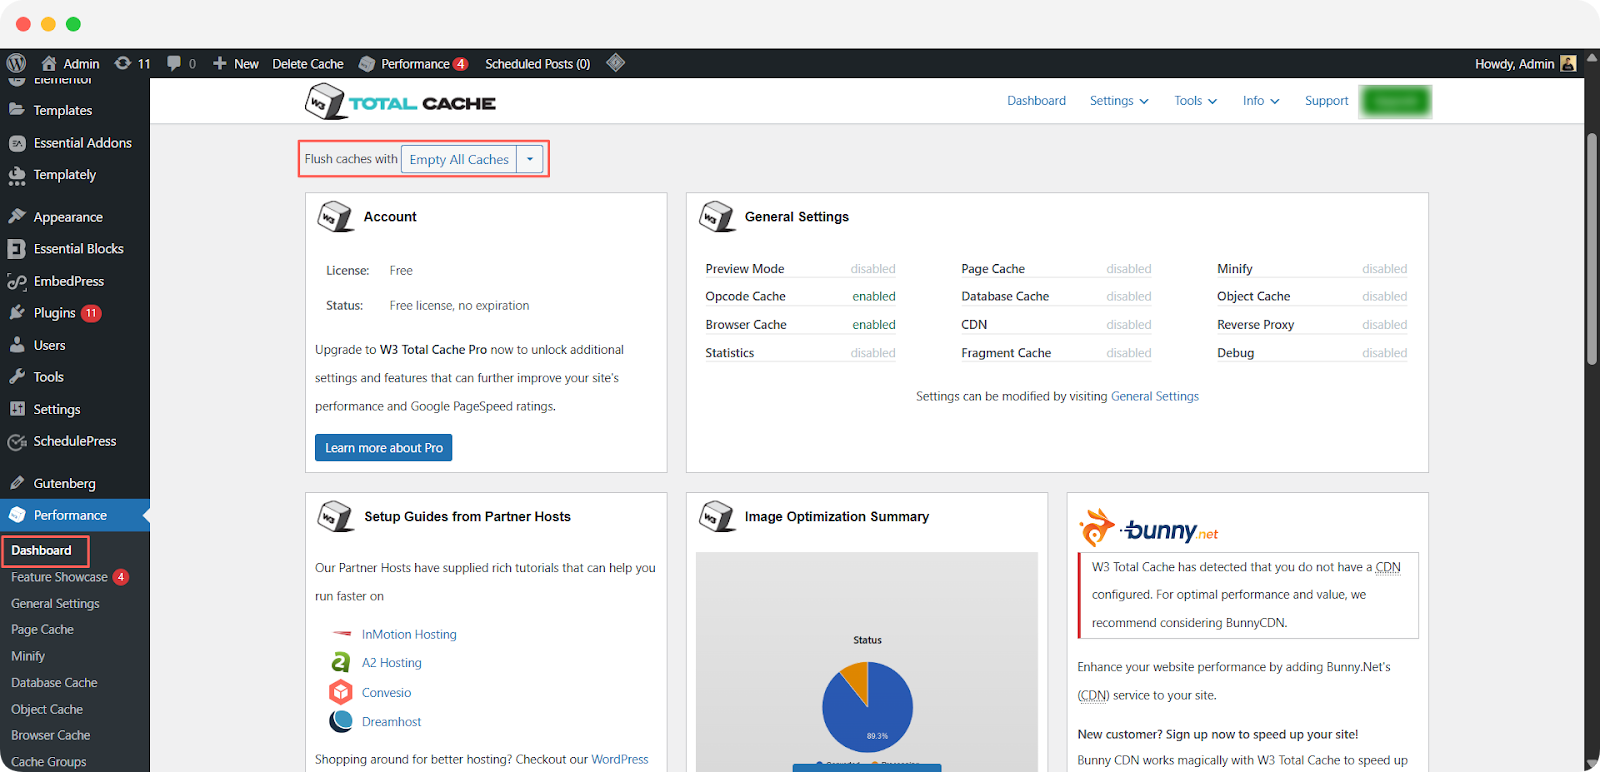
W3 Total Cache
For W3 Total Cache users, the steps are:
Go to Performance in the WordPress sidebar. Click Dashboard and Tap Empty All Caches.
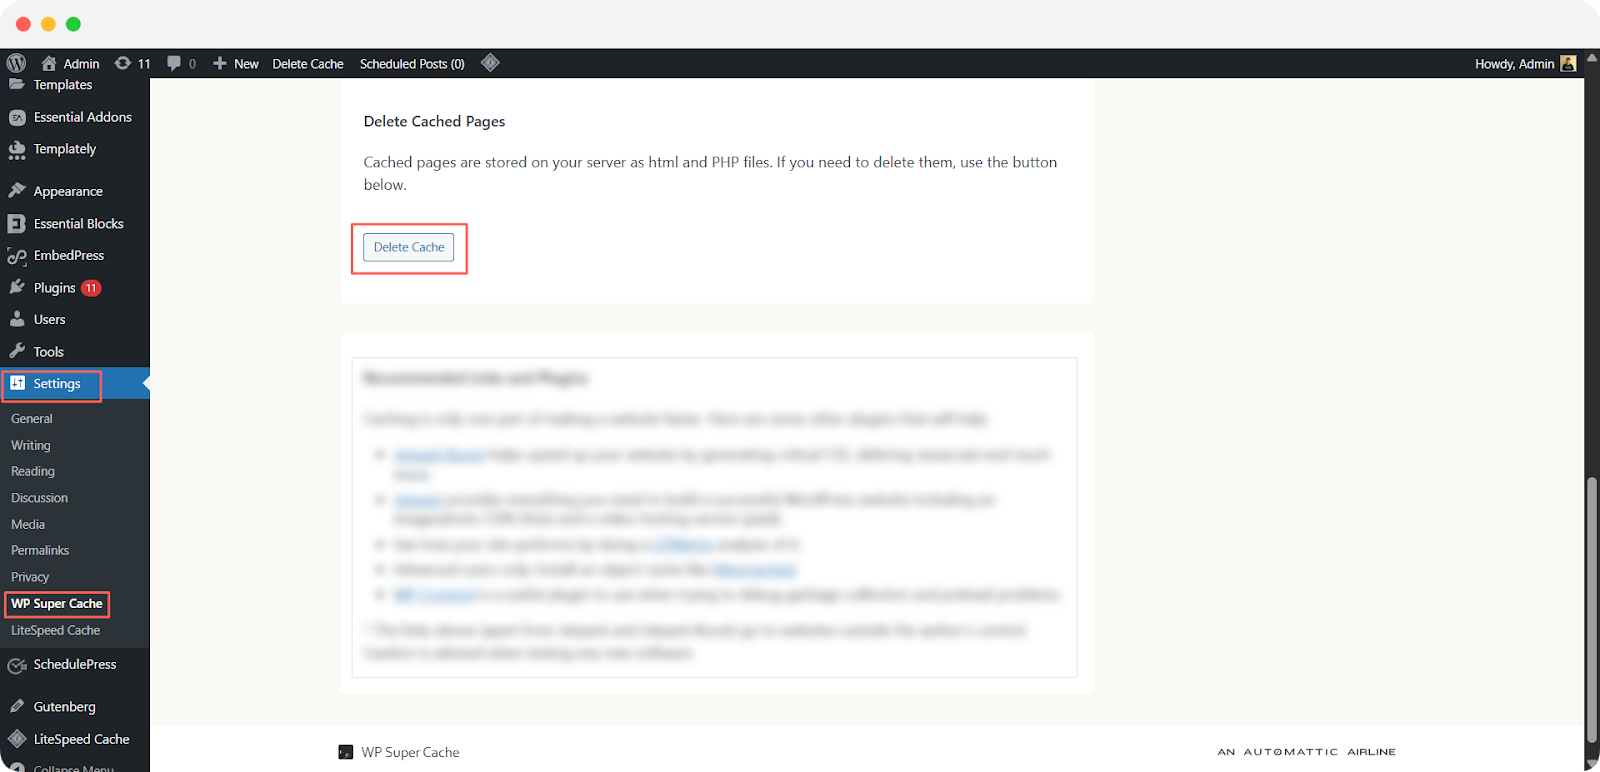
WP Super Cache
Go to Settings, then WP Super Cache. Click Delete Cache under the Easy tab.
After clearing the plugin cache, it is a good idea to also clear the browser, server and CDN cache to ensure every layer is refreshed.
How to Clear Server-Side Cache & Boost Website Performance?
If your website is hosted on xCloud, clearing server-side cache is quick, easy and requires no technical knowledge. The xCloud control panel gives you direct access to both Full-Page Cache and Object Cache settings, so you can manage your website speed efficiently.
What Is Edge Full-Page Cache?
Edge Full-Page Cache is an optional caching layer at the network level that stores your website’s HTML on Cloudflare’s CDN network. By caching HTML pages at the edge, your content is delivered geographically closer to your visitors, enhancing load times, TTFB and overall website performance.
Even if your domain uses Advanced Network or Global Edge Security (GES), most static assets are already cached via Cloudflare. Enabling Edge Full-Page Cache ensures that HTML pages are also served from the edge, further improving speed and reliability.
How Edge Caching Works?
Edge caching distributes copies of your website content across multiple servers in a content delivery network (CDN), placing them closer to end users. Here’s how it works:
- Request Routing: When a visitor requests content like HTML, images, or videos, the request is routed to the nearest CDN edge server.
- Edge Server Selection: The CDN selects the edge server closest to the user based on geographical location, network conditions, and server availability.
- Faster Delivery: With over 200 edge server locations worldwide powered by Cloudflare, your content is delivered quickly from the nearest server. This reduces latency and speeds up page load times, providing a smoother experience for your visitors.
Edge Full-Page Cache: Deliver Content at Lightning Speed
With Edge Full-Page Cache, you can manage and purge your cache directly from the xCloud dashboard. This feature caches your pages at the CDN edge level, delivering content to visitors worldwide from the location closest to them. By doing so, it significantly improves your website’s Time to First Byte (TTFB) and overall page performance.
Caching plays a crucial role in boosting website performance, ensuring faster load times and smoother browsing experiences. At xCloud, we prioritize speed and reliability, which is why Edge Caching saves your website’s page cache across a global network of data centers, giving your visitors instant access to your content.
Alongside edge caching, xCloud implements robust caching layers at the server level, including Page Caching and Object Caching, to guarantee lightning-fast load times for every visitor.
Full Control Over Cache Refresh
By default, the edge cache refreshes every 24 hours but you have full control. You can adjust cache expiration times or manually purge caches whenever needed. Whether you are updating your website, copying content or editing a post, clearing the right cache ensures that your changes appear immediately.
Steps to Enable the Edge Full Page Cache in xCloud
Caching content at the network edge boosts website speed by reducing latency and load times. With xCloud’s Edge Full-Page Cache, you can easily deliver a faster, more responsive experience for your visitors. Follow this guide to enable it step by step.
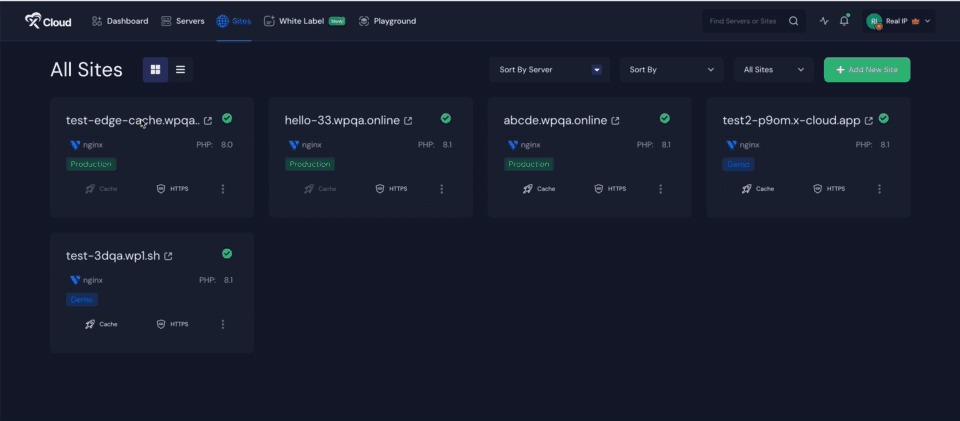
Step 1: Access the Site Dashboard
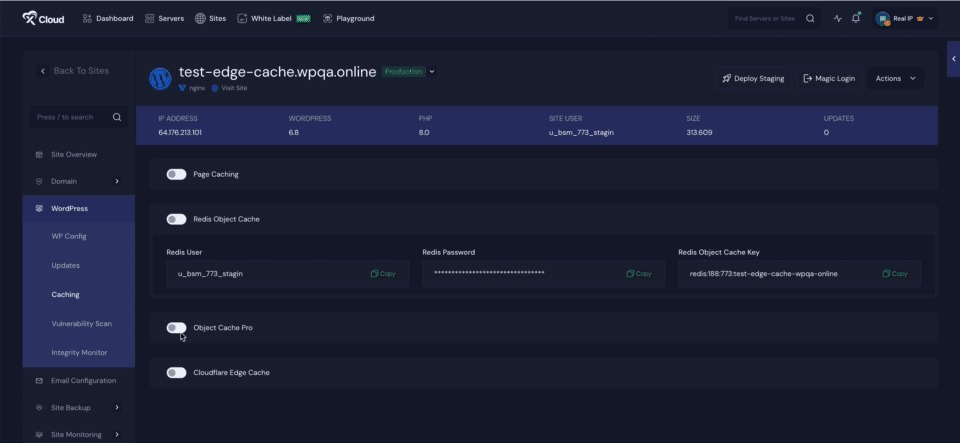
First, navigate to the dashboard of the site where you want to enable Edge Caching. Once logged in, locate and click on the ‘Caching’ option from the main menu.
Step 2: Enable Edge Caching
Within the Caching section, click on the ‘Edge Caching’ button to activate the feature. Next, click on ‘Advanced Settings’ to access additional configuration options.
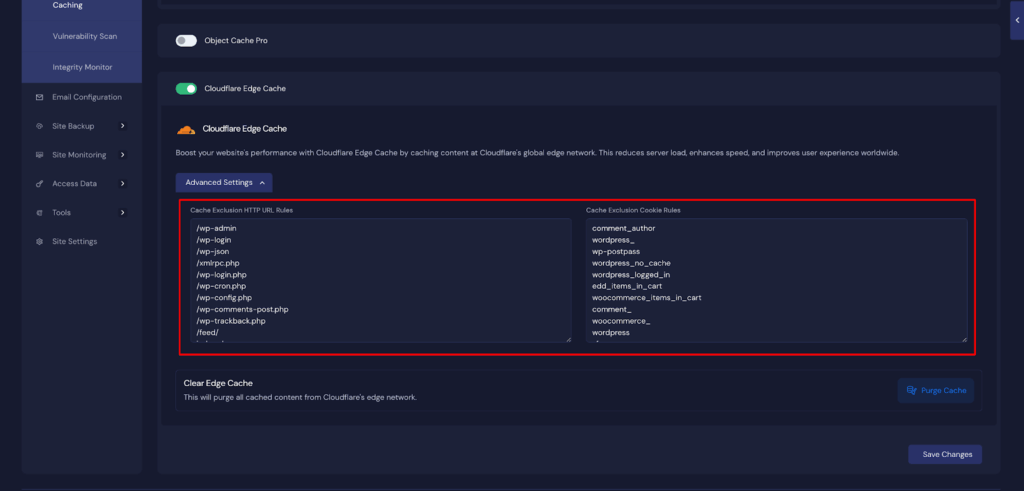
Step 3: Configure Cache Exclusion Rules
In the Advanced Settings menu, you will find options to customize caching behavior:
- Cache Exclusion HTTP URL Rules: Specify URL patterns you want to exclude from being cached.
- Cache Exclusion Cookie Rules: Define cookie-based rules to prevent caching for certain sessions or users.
Set these rules according to your specific preferences or requirements.
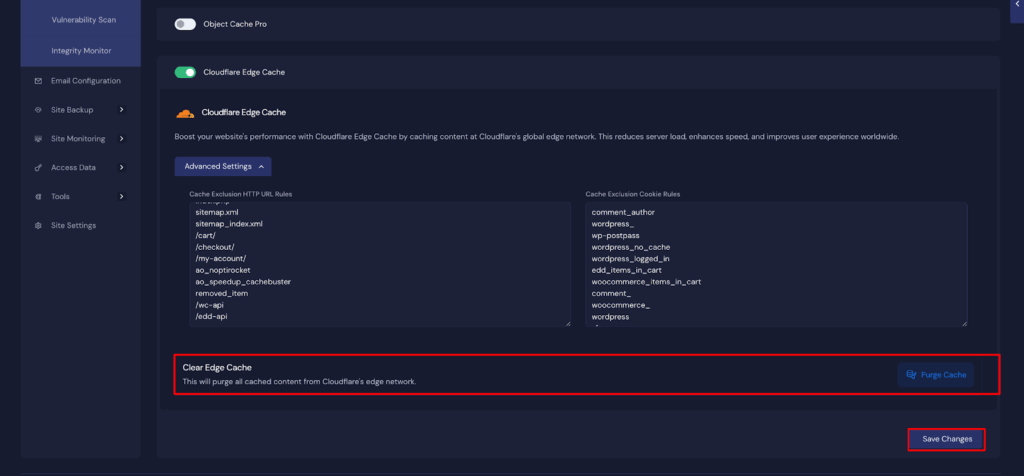
Step 4: Purge Cache
After configuring the caching settings, click on the ‘Purge Cache’ button. This action will clear all previously cached content from Cloudflare’s edge network, ensuring the updated rules are applied immediately. After all the configurations, click on the ‘Save Settings’ button.
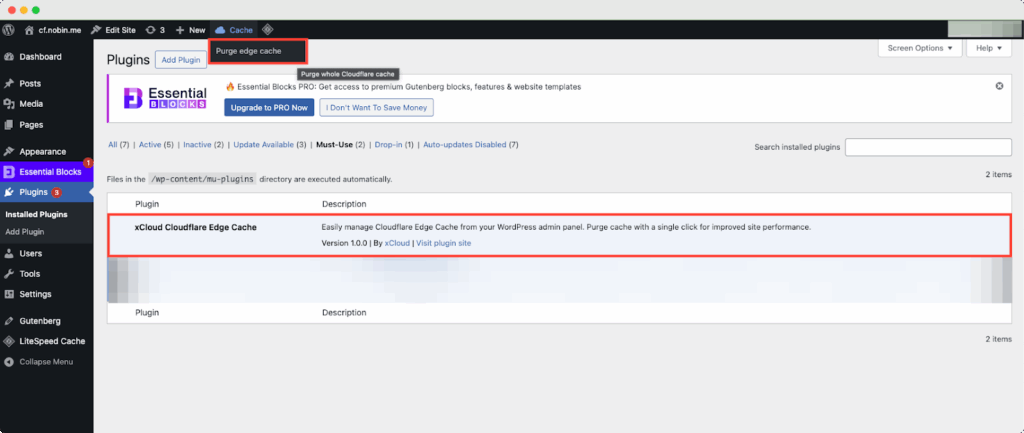
After that, if you go to your WordPress dashboard → Plugins, you will see the plugin ‘xCloud Cloudflare Edge Cache’ has been installed on your site. From here, if you go to the header menu, you will see the ‘Purge Cache’ button from the dashboard, which you can click to purge your site caches easily.
This is how easily you can enable Edge Full Page Cache in xCloud and enhance your site’s performance and user experience. By carefully setting exclusion rules and purging outdated cache, you ensure that your visitors receive the most up-to-date and optimized content.
How to Clear CDN Cache (Cloudflare and Others)
CDN cache is separate from your server and browser cache. If you are using a CDN like Cloudflare, you need to purge the cache from the CDN dashboard whenever you make significant updates to your site.
Clearing Cache in Cloudflare
- Log in to your Cloudflare account
- Select your website domain
- Go to the Caching section in the left menu
- Click Configuration
- Under Purge Cache, click Purge Everything or use Custom Purge to target specific URLs
Cloudflare also allows you to set cache rules and TTL (Time to Live) settings so that certain pages expire automatically after a defined period. This reduces the need for manual purging in most cases.
According to Cloudflare’s official documentation, you can purge cached content by URL, tag or host depending on your plan tier.
How to Flush DNS Cache?
When your site is not loading after a DNS change or server migration, the issue is often a stale DNS cache on your local device. Flushing DNS cache forces your computer to request fresh domain lookup records.
According to Google’s Public DNS documentation, DNS propagation can take anywhere from a few minutes to 48 hours but flushing local DNS cache speeds up the process on your own device immediately.
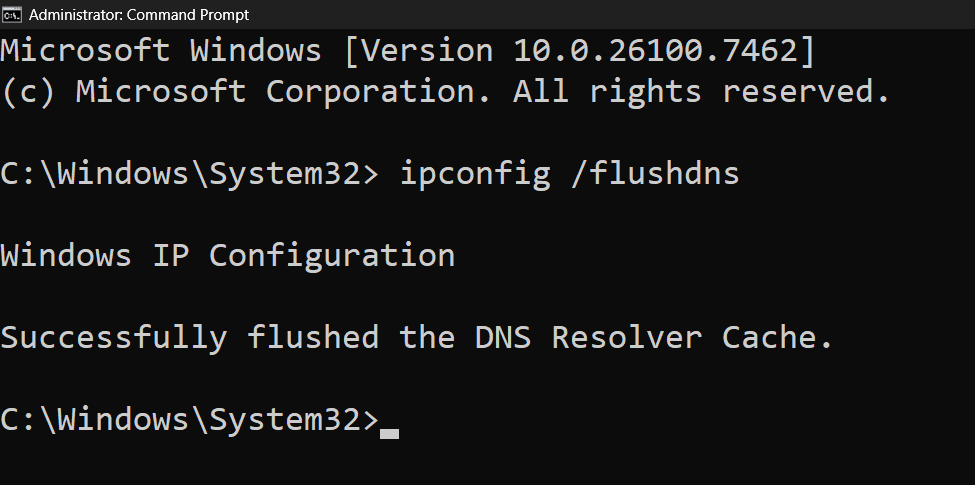
Flush DNS on Windows
Click the Start menu and search for Command Prompt. Right-click it and select Run as Administrator.
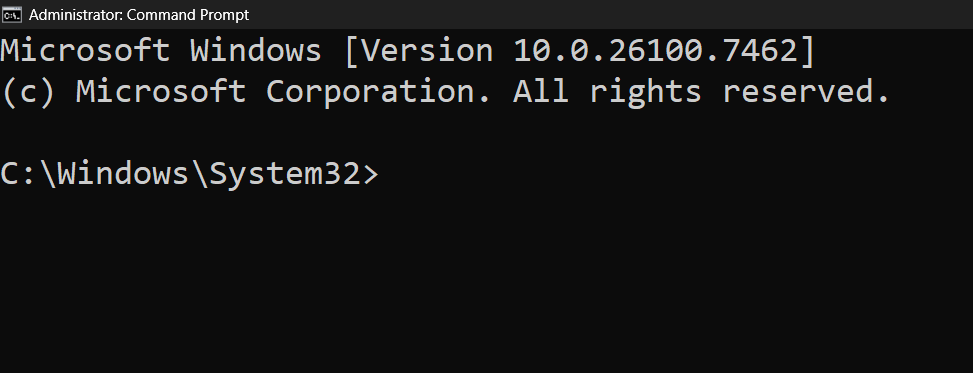
Type the following command and press Enter:
ipconfig/flushdnsYou will see a confirmation message saying the DNS resolver cache was successfully flushed.
How to Flush DNS on Mac And Linux
Flushing your DNS cache can help resolve issues like website loading errors, outdated content, or connection problems. Use the steps below to quickly clear the DNS cache on Mac or Linux systems.
| Operating System | Steps to Flush DNS | Notes |
| Mac | 1. Open Terminal 2. Type sudo dscacheutil -flushcache; sudo killall -HUP mDNSResponder and press Enter 3. Enter your Mac password when prompted | This clears both DNS cache and the mDNSResponder service for up-to-date resolution |
| Linux | 1. Open a terminal window 2. Run sudo systemd-resolve –flush-caches | On some distributions, you may need to restart the nscd or dnsmasq service instead |
Common Website Errors That Cache Clearing Can Fix
If clearing the cache does not solve the problem, the issue may be at the code level, in your .htaccess file, or related to a PHP configuration error. But cache is always the first step in website troubleshooting.
Many errors that seem complex are actually caused by stale cached data sitting somewhere in the stack. Here is a breakdown of common website errors that a cache clear can often resolve:
- White screen of death: A blank page after a plugin update often clears up after purging the WordPress plugin cache and the server-side cache
- Outdated layout: Old CSS still loading after a redesign can be fixed by purging the CDN and browser cache
- Login issues: Session and cookie conflicts sometimes stem from stale cache entries
- 404 errors on new pages: Permalink and page cache issues can make new pages temporarily invisible
- Incorrect metadata in Google: If Google still shows your old meta title or description, clearing your server cache and submitting a fresh crawl request in Google Search Console often fixes it
- 500 Internal Server Error: In some cases, corrupted cache files can trigger a 500 error, and purging the server cache resolves it quickly
Best Practices for Website Cache Management
Managing website cache well means you get the speed benefits without the stale content headaches. Here are the practices that work best for most websites:
- Set a reasonable cache expiry time for static assets like images, fonts and CSS. A TTL of 30 days works well for files that rarely change. For HTML pages, a TTL of a few hours or less keeps content fresh.
- Use your caching plugin’s automatic purge rules to clear cache whenever a post is published or updated. Most plugins like LiteSpeed Cache support this out of the box.
- Keep your CDN cache and server cache in sync. If you purge one, purge the other too. Leaving one layer cached while refreshing the other leads to inconsistent behavior.
- Always clear cache after major WordPress updates, theme changes or plugin installations. This prevents broken layouts and outdated scripts from reaching your visitors.
- Test your site in incognito or private mode after clearing cache. This ensures you are seeing the version your visitors see, without any locally stored browser cache interfering.
Quick Troubleshooting Order
If the changes you make to your website are not showing up immediately, follow this quick troubleshooting order to resolve the issue efficiently:
- Hard Refresh: Force your browser to reload the page and bypass cached files.
- Clear Browser Cache: Remove stored files in the browser to ensure you’re seeing the latest version.
- Purge Plugin Cache: If you use caching plugins, clear their stored cache.
- Purge server cache: Clear your hosting server’s cache to update website files.
- Purge CDN Cache: If you’re using a Content Delivery Network, clear its cached content.
- Flush DNS: Reset your DNS cache to avoid loading outdated site data.
Website caching is a powerful process that speeds up page loading and improves user experience. However, when updates are not showing, understanding how to clear cache at different levels, browser, plugin, server or CDN is essential.
Ensure Your Website Always Loads Smoothly
Properly managing website cache is essential for both user experience and site performance. By clearing browser, plugin, server, and CDN cache when needed, you can prevent common issues, improve load times, and ensure visitors always see fresh, accurate content.
If you want to take your website performance further, you can try xCloud, which gives you built-in tools for edge caching, object caching and server-side optimization all from a single, easy-to-use dashboard. The faster your site loads, the better your user experience, your conversion rate and your search engine rankings will be.
If you have found this blog helpful, feel free to subscribe to our blogs for valuable tutorials, guides, knowledge and tips on web hosting and server management. You can also join our Facebook community to share insights and take part in discussions.
FAQs (Frequently Asked Questions) About Clearing Website Cache
Find answers to the most common questions about clearing website cache, so you can keep your site fast, up-to-date and running smoothly.
1. Will clearing cache delete my website data or files?
No. Clearing cache only removes temporary stored copies of your site’s files. Your actual website content, database, posts and settings are not affected in any way. Cache is just a shortcut for speed. Removing it is completely safe.
2. Why does my website look broken after clearing cache?
If your website looks broken after a cache clear, it likely means there is a conflict between CSS and JavaScript files that were loading from different cache layers. Try clearing all cache layers at once, including browser, plugin and CDN cache. A hard refresh in your browser can also help.
3. How often should I clear my website cache?
There is no fixed schedule. Clear your cache whenever you make changes to your site that are not showing up. For heavily updated sites, configure your caching plugin to auto-purge on publish. For static sites, monthly cache clears are usually more than enough.
4. Does clearing the cache affect my SEO rankings?
Clearing cache itself does not hurt your SEO. In fact, keeping your cache updated ensures search engines index your latest content correctly. Stale cache can sometimes cause Googlebot to crawl outdated versions of your pages, so keeping cache fresh actually supports better indexing.
5. What Is the difference between browser cache and server cache?
Browser cache is stored on your visitor’s device and controls what they see locally. Server cache is stored on your web server and controls what your server delivers to all visitors. Both need to be cleared separately for a complete refresh. Browser cache is user-specific while server cache affects everyone visiting your site.
6. Why is my website still showing old content after clearing cache?
If the old content is still showing after clearing your WordPress plugin cache and browser cache, check your CDN cache and DNS cache as well. There are multiple layers of cache and missing even one can make it seem like nothing changed. Also confirm you are not viewing a cached version in incognito mode before assuming the issue persists.