Modern web development moves fast and beginners need a tool that helps them keep up, not slow them down. That is exactly where Node.js shines. Whether you are creating your first website, testing APIs or planning a full application, Node.js gives you the speed and flexibility you need. It also offers a modern workflow that today’s developers depend on.
This beginner‑friendly Node.js guide explains what is Node.js, how it works and why it has become a key runtime for modern web development.
What Is Node.js?
Before we dive deep into learning Node.js, let us first answer the question ‘What is Node.js?’ The simple truth is that Node.js is not a programming language. Many beginners think it is, but Node.js is actually a runtime environment that allows JavaScript to run outside of web browsers.
Think of it this way. You know how JavaScript normally lives inside websites, making buttons clickable and forms interactive? Node.js is like giving JavaScript a passport to travel beyond the browser and work on servers, handling database operations, file systems and everything that happens behind the scenes of a website.
Imagine JavaScript is a talented musician who only performs in coffee shops (browsers). Node.js is like building a concert hall where that same musician can now perform for thousands of people, with access to stage lights, sound systems and a whole crew.
The Story Behind Node.js
Back in 2009, a developer named Ryan Dahl noticed something frustrating. Traditional server technologies were like old-school bank tellers, one customer at a time, making everyone else wait in line. Even if a task was just waiting for information from a database, the server would freeze until that information arrived.
Ryan created Node.js to solve this problem, using JavaScript’s natural ability to handle multiple things at once.
Why You Should Learn Node.js: A Beginner’s Guide
Node.js has quickly become one of the most talked‑about technologies in web development. But if you are just starting out, you might wonder: why does it matter and what makes it worth learning? Node.js matters for three clear reasons.
One Language for Everything
Before Node.js, web developers had to use JavaScript for the front end and completely different languages like PHP, Ruby or Python for the back end. It created an unnecessary split in the workflow.
Node.js removed that barrier. Now you can use JavaScript across the entire stack, from user interface interactions to server logic and databases. This unified approach makes learning full‑stack web development faster and far more beginner‑friendly.
Speed that Actually Matters
Node.js runs on Chrome’s V8 engine, the same high‑speed technology behind Google Chrome. But its real advantage goes beyond raw power — Node.js excels at handling many requests at the same time, making it fast and reliable for modern, high‑traffic applications
Picture a receptionist at a busy office. A traditional server is like a receptionist who helps one person completely before acknowledging the next person, even if they are just waiting for someone to bring documents from another floor.
Node.js is like a smart receptionist who takes your request, gives you a number and immediately helps the next person while your documents are being retrieved. Everyone gets served faster because nobody’s time is wasted.
A Massive Community of Helpers
When you are learning Node.js for beginners, you are joining millions of developers worldwide. The npm (Node Package Manager) ecosystem has over a million free packages; think of them as pre-built Lego blocks that you can use in your projects.
Need to send emails? There is a package. Want to process images? There is a package. This JavaScript backend has one of the richest toolsets in existence.
How to Install Node.js: Beginner’s Guide
Before you can start building with Node.js, you need to set it up on your computer. The installation process is simple and beginner‑friendly, giving you the tools to run JavaScript outside the browser. Once installed, you will be ready to take your first steps into creating fast, modern applications.
Let us get Node.js on your computer. This is simpler than assembling furniture, I promise.
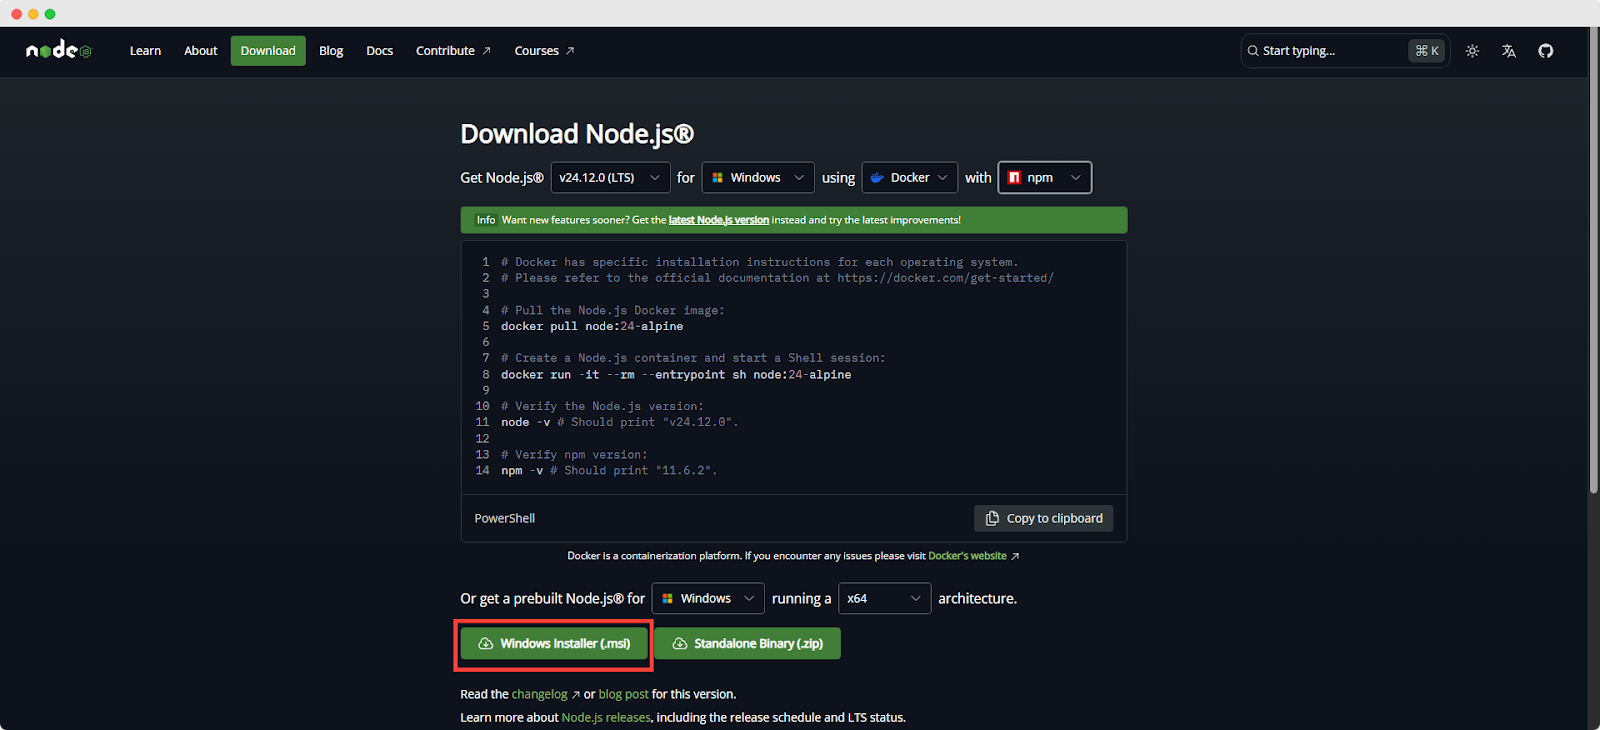
Step 01: Download the Installer
Visit the official Node.js website at “nodejs.org”. You will see two big green buttons. One says “Get Node.Js®️” and the other says “Get Security Support“.
For simple installation on Node.js, choose “Get Node.Js®️”.
Download the Windows / Mac / Linux Installer that matches your Operating System and system architecture (32‑bit or 64‑bit). For most users, the LTS (Long Term Support) version is recommended because it offers greater stability. The Current version provides the latest features but comes with more frequent updates.
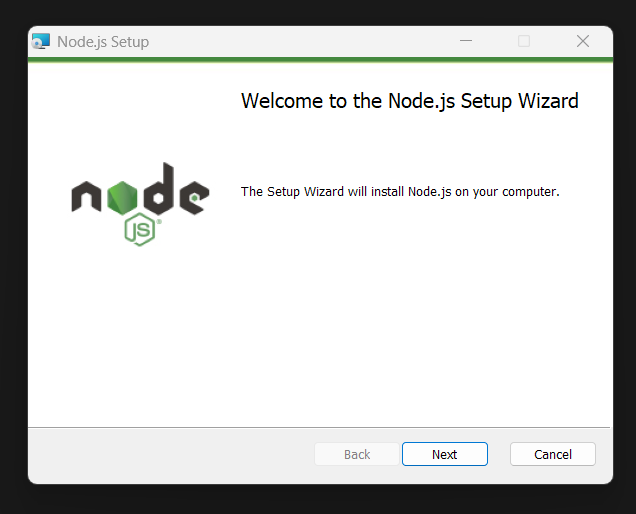
Step 02: Run the Installer & Complete the Setup
Locate the downloaded .msi file and double‑click to launch it. Follow the prompts in the setup wizard, accept the license agreement and proceed with the default installation settings.
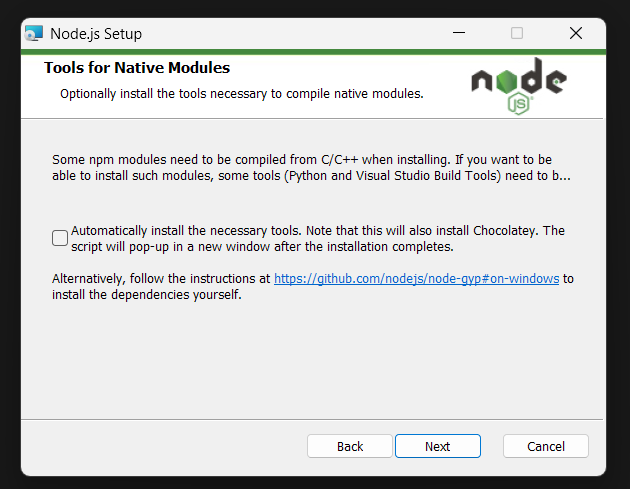
During setup, you can choose additional features such as:
- npm: package manager for Node.js applications
- Native modules: support for building native C++ modules
The installer may prompt you to ‘install tools for native modules.’ Select Install to continue.
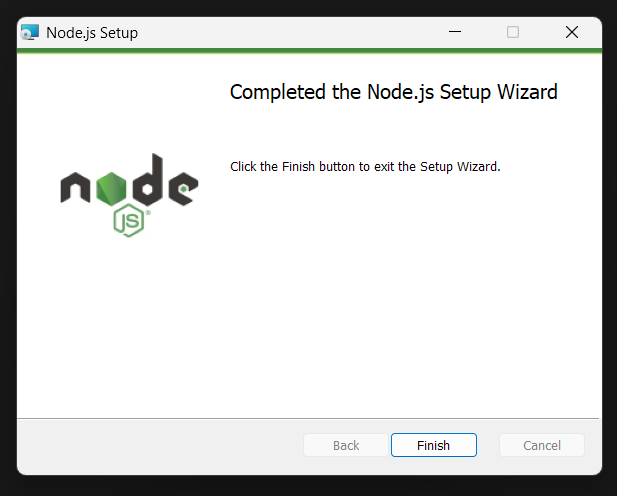
Wait until the wizard displays Finish, confirming that Node.js and npm have been successfully installed.
Step 03: Verify the Installation
Open Command Prompt or PowerShell and check the installed versions by running the following commands:
- Type node -v and press Enter to display the Node.js version.
- Type npm -v and press Enter to display the npm version.
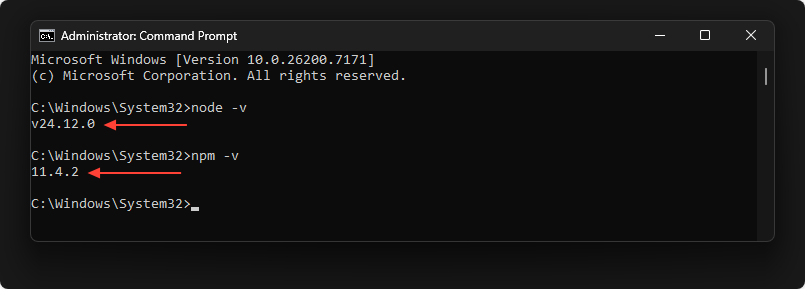
If both version check commands (node -v and npm -v) return numbers, your installation was successful.
Note: You can run the following command to quickly update npm:
npm install -g npmThis updates the npm CLI client to the latest version.
How to Write Your First Node.js Program: The Hello World Moment
Every programmer’s journey includes a ‘Hello World’ moment. It is like learning to say your first word in a new language. Let us create yours.
Create Your First File
Open any text editor, even Notepad works, though I recommend Visual Studio Code (it is free and beginner-friendly). Create a new file and save it as hello.js. The .js extension tells your computer this is a JavaScript file.
Type this code:
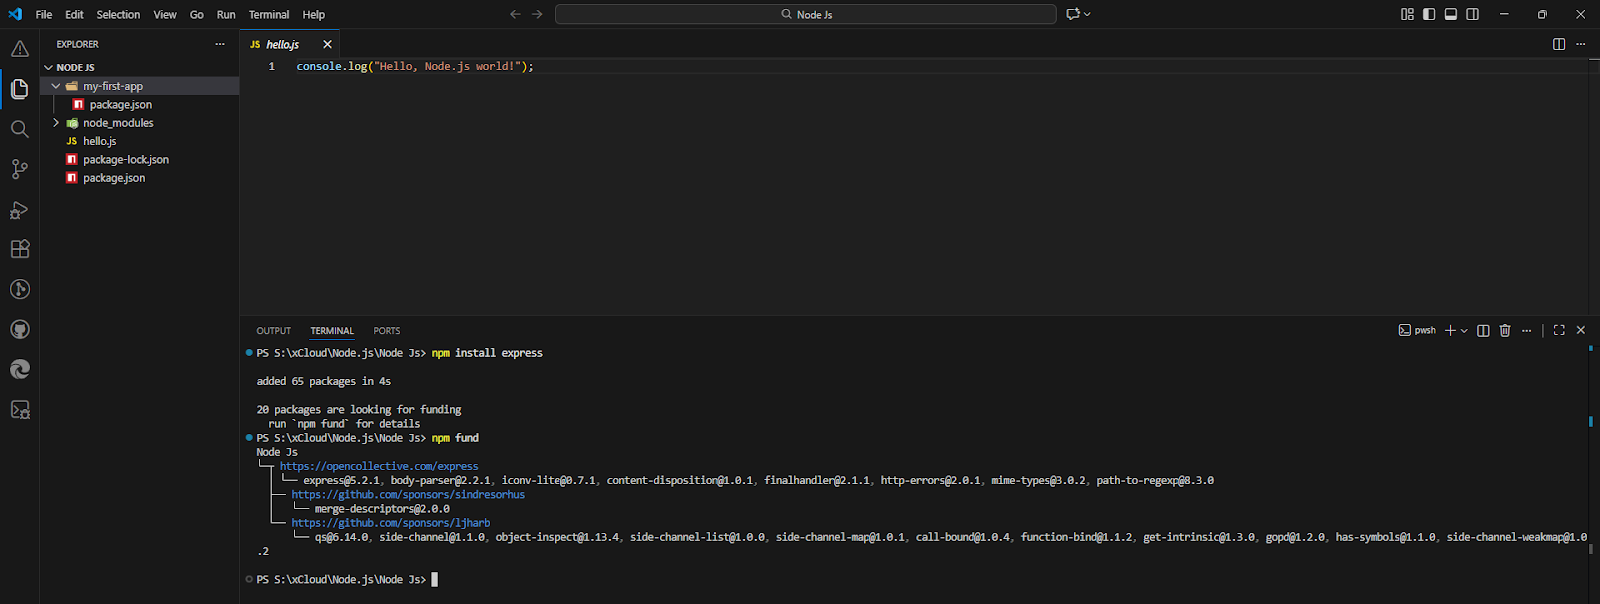
console.log("Hello, Node.js world!");Save the file. Next, open your terminal or command prompt and navigate to the folder where you saved it.
For example, if the file is on your Desktop, type: cd Desktop
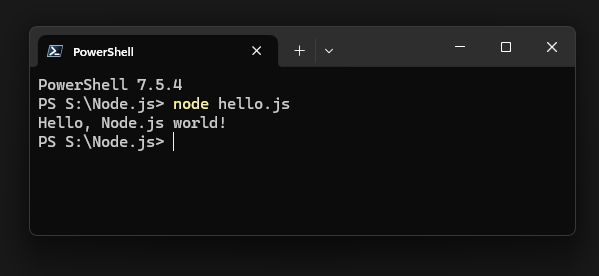
Then run the program with: node hello.js
You will see ‘Hello, Node.js world!’ printed on the screen. This may seem simple but it is your first time running JavaScript outside the browser.
How Node.js Really Works: the Kitchen Analogy
Node.js may sound complex at first but it becomes much easier when explained with a kitchen analogy. Think of Node.js as a busy restaurant where one master chef manages multiple tasks efficiently. This analogy helps beginners clearly understand the event loop, non‑blocking I/O and the single‑threaded model without confusion.
The Event Loop: Your Master Chef
In a traditional server, imagine a chef cooking one full meal before starting the next. If water needs to boil, the chef just waits, wasting time.
Node.js works differently. The event loop is like a master chef with a smart system. When something is cooking, the chef immediately starts preparing the next dish. They keep a mental checklist of all dishes and check them quickly, moving each forward as soon as it is ready.
📌 The event loop constantly checks for completed tasks. If your code asks to read a file, Node.js starts the process and moves on. When the file is ready, the event loop notices and delivers the result.
Non‑Blocking I/O: Taking Multiple Orders
I/O means Input/Output, such as reading files, accessing databases or fetching data. Traditional servers block (wait) until each task finishes.
Node.js does not block. Imagine a waiter taking orders. In a blocking system, the waiter takes one order, waits for the food, delivers it and then returns for the next. In a non‑blocking system, the waiter takes all orders first and delivers food as it is ready.
📌 Node.js can serve many users at once because it does not wait for one task to finish before starting another.
Single‑Threaded But Not Limited
Node.js is single‑threaded, meaning it uses one main worker, like one chef in the kitchen. Beginners often wonder how one chef can serve many customers.
The answer is asynchronous operations. The chef never stands idle. While one dish cooks, they prepare another. This efficiency allows Node.js to handle many users at the same time.
📌 For heavy tasks, Node.js can create child processes, like hiring temporary helpers. But for most web applications, the single‑threaded event‑driven model is more than enough.
How to Build Your First Real Application: A Simple Web Server
Now it is time to build something real. Instead of reading concepts in isolation, you will create a simple web server that responds to browser requests. This small project connects many Node.js fundamentals and shows how they work together in practice.
Creating the Server File
Create a new file and name it server.js. Add the following code:
const http = require("http");
const server = http.createServer((req, res) => {
// Send status code and headers
res.writeHead(200, { "Content-Type": "text/plain" });
// Send response body and end the request
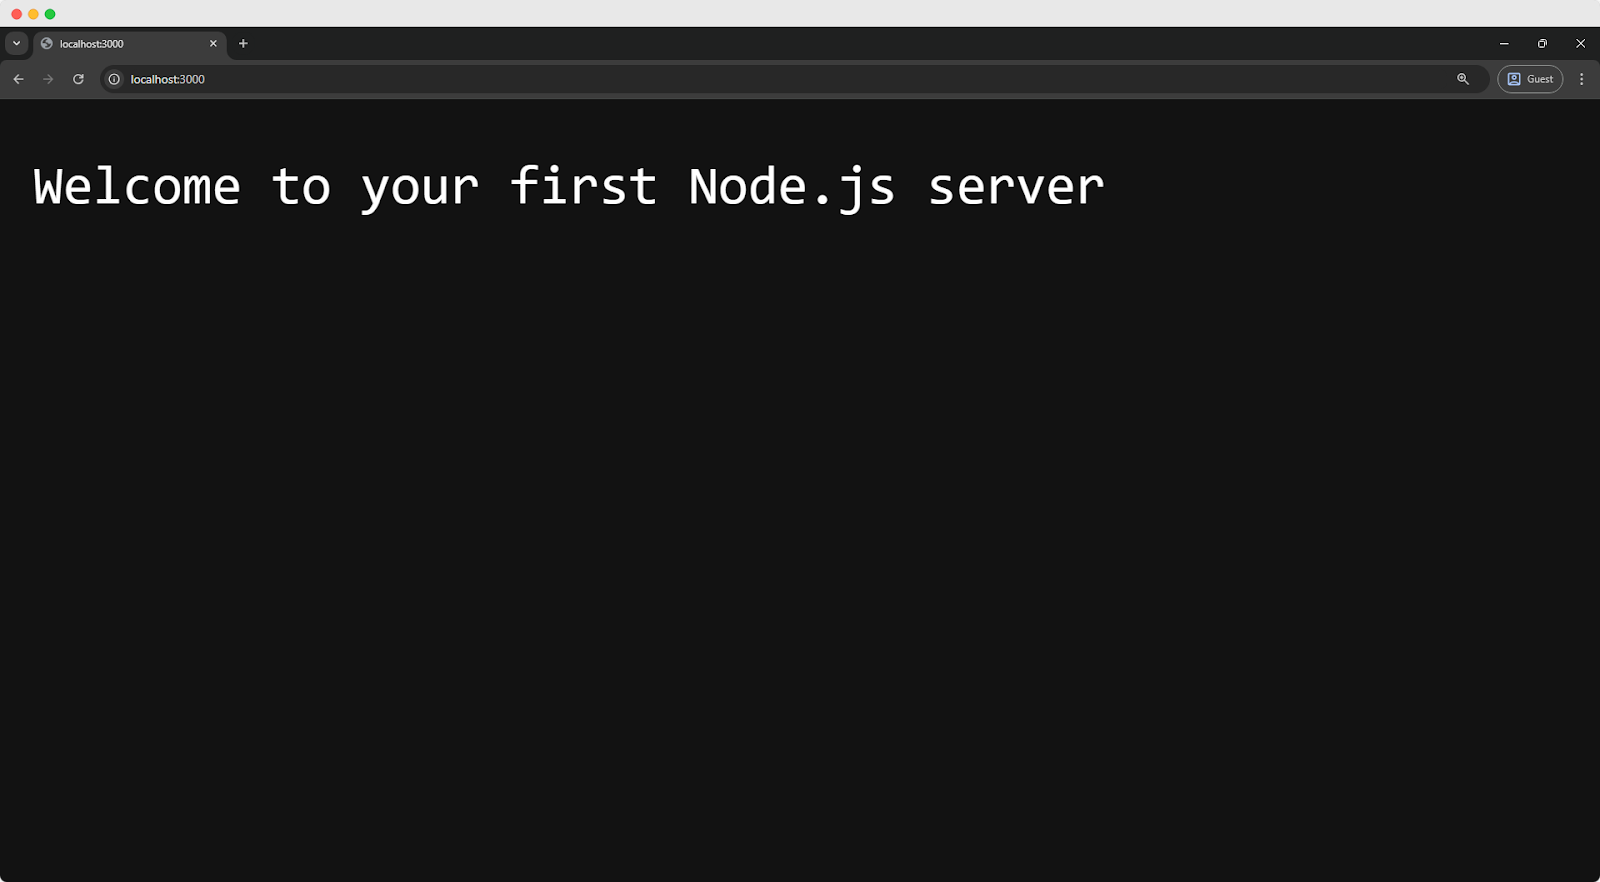
res.end("Welcome to your first Node.js server!");
});
server.listen(3000, () => {
console.log("Your server is ready on port 3000");
});
Node.js Code Walkthrough: Step by Step
Node.js code can feel overwhelming at first but breaking it down step by step makes it simple to follow. This walkthrough explains each part in plain language, helping beginners see how the code works and why it behaves the way it does.
1️⃣ Importing the HTTP Module
const http=require('http');This line imports Node.js’s built-in HTTP module. Think of a module as a toolbox. The HTTP module contains all the tools needed to create and manage a web server. The required function is how Node.js gives you access to that toolbox.
2️⃣ Creating the Server
const server = http.createServer((request, response) => {This line creates the server itself. You can imagine it as opening a small shop. Every time someone visits your website, the server receives a request and prepares a response.
The request object contains information about what the browser is asking for. The response object is how your server talks back to the browser.
3️⃣ Sending a Response to the Browser
res.writeHead(200, { "Content-Type": "text/plain" });
res.end("Welcome to your first Node.js server!");
});
Here, the server sends data back to the browser. The status code 200 means the request was successful. The content type tells the browser to expect plain text. The respond.end() method sends the final message and completes the request.
Once this runs, the browser receives the text and displays it on the screen.
4️⃣ Starting the Server on a Port
server.listen(3000, () => {
console.log("Your server is ready on port 3000");
});
This tells the server to start listening on port 3000. Ports are like numbered doors on your computer. Each service uses a different door to receive traffic. Port 3000 is commonly used for development because it rarely conflicts with other services.
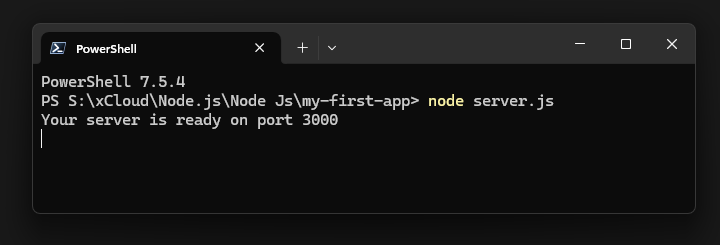
When the server starts successfully, a message appears in the terminal.
▶️ Running Your Server
Open your terminal and navigate to the folder containing server.js.
| Run this command ↓ | You should see this message ↓ |
node server.js | Server is running on http://localhost:3000 |
Now open your browser and visit http://localhost:3000. You will see your message displayed on the page.
Opening your browser and visiting http://localhost:3000 helps you instantly confirm that your setup is working. If the page loads and shows your message, it means your server is running, your code executed correctly and everything is connected.
That is it. Now, you just created a working web server using Node.js. This is a major milestone because it shows how JavaScript can run outside the browser and power real applications.
Stop the server by opening the terminal and pressing Ctrl + C.
How to Use Node Package Manager (npm): Your Package Superstore
One of the biggest strengths of Node.js is npm, which stands for Node Package Manager. When learning web development with Node.js, npm quickly becomes an essential tool. It gives you access to a massive collection of ready-made solutions created by developers around the world.
Instead of solving every problem from scratch, you can install packages that handle common tasks for you.
What Are Packages?
Packages are reusable pieces of code that other developers have written and shared publicly. These packages can help with routing, database connections, authentication, form handling and much more.
Think of building a house. You could create every brick, cut every piece of wood and forge every nail yourself. That would take a long time. Or you could buy quality materials and focus on assembling the house. Packages are those pre-built materials in programming. They save time and reduce mistakes.
Setting Up npm for Your Project
Before installing any package, you need a project folder. Open your terminal and run:
mkdir my-first-app
cd my-first-app
Now initialize npm inside this folder: npm init -y
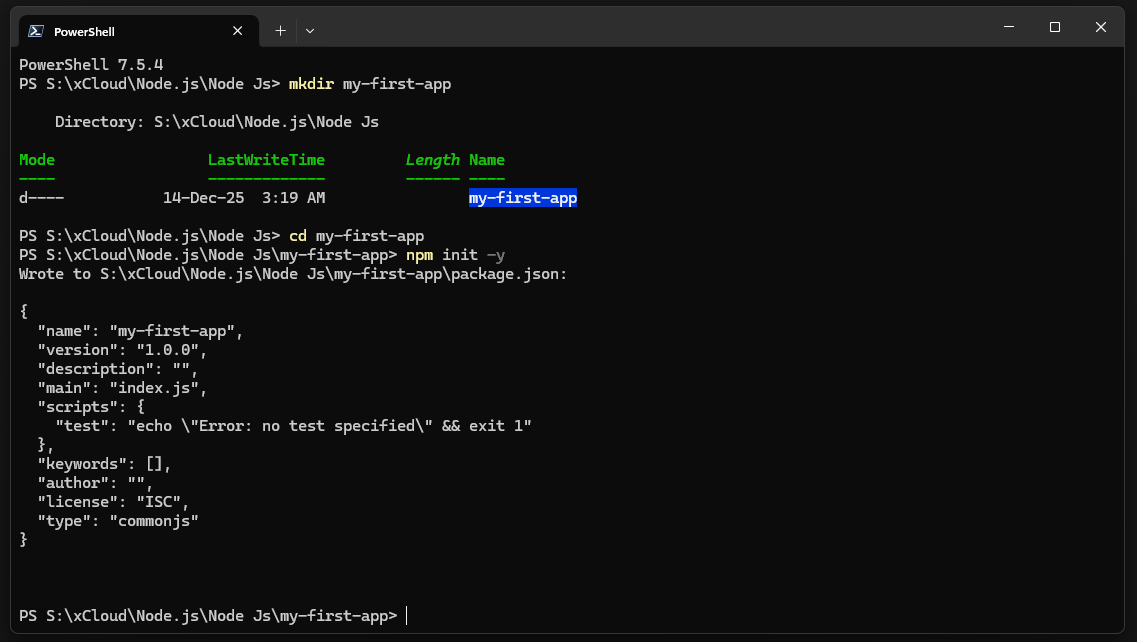
This command creates a package.json file. This file keeps track of your project information and all the packages it depends on. The -y flag automatically accepts default settings, which makes the setup quick and beginner friendly.
Install Your First Package
Now we will install Express, one of the most popular Node.js packages. Express makes building web servers simpler and more readable. Run the following command:
npm install express
npm downloads Express along with its required dependencies. You will notice a new folder named node_modules. This folder stores all installed packages. You rarely need to open it, but it is an important part of every Node.js project.
Build A Better Server with Express
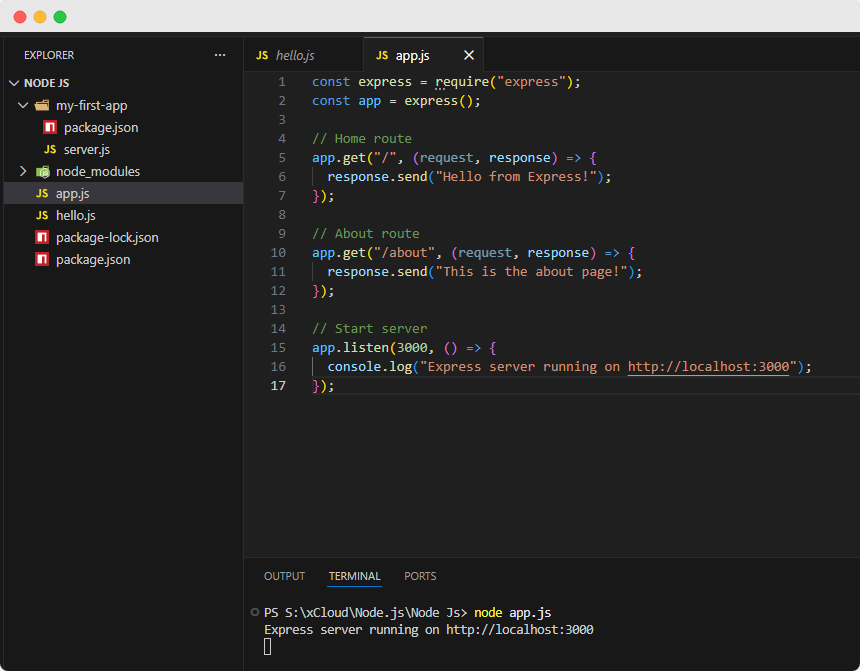
Now you will create a cleaner and more flexible server using Express. Create a file called app.js and add the following code:
const express = require("express");

const app = express();

app.get("/", (request, response) => {

  response.send("Hello from Express!");

});

app.get("/about", (request, response) => {

  response.send("This is the about page!");

});

app.listen(3000, () => {

  console.log("Express server running on http://localhost:3000");

});
This code performs a similar job to the basic server you built earlier but the syntax is simpler and easier to extend.
Each app.get() defines a route. The / route responds when someone visits the home page. The /about route responds when someone visits the about page. Express handles all the lower-level details for you.
Run the Express Server
Express makes it simple to create and run a web server with just a few lines of code. Once the setup is complete, starting the server allows your application to listen for requests and send responses.
In your terminal, run: node app.js
Open your browser and visit:
◾ http://localhost:3000

◾http://localhost:3000/about

You will see different messages for each page. With very little code, you now have multiple routes running on a real server.
Asynchronous JavaScript: the Heart of Node.js
If there is one idea you must understand to feel comfortable with Node.js, it is asynchronous JavaScript. This concept is what makes Node.js fast and efficient but it is also the main reason beginners feel confused at first. Once it clicks, many other things start to make sense.
Synchronous vs. Asynchronous: A Simple Coffee Shop Story
Coffee shops make it easy to understand the difference between synchronous and asynchronous code. Imagine a small coffee shop with a single counter.
In a synchronous world, a customer orders coffee and stands at the counter while the barista prepares it. No one else can place an order until that coffee is finished and handed over. Every customer waits, even if their order is simple.
But, in an asynchronous world, the customer places an order, receives a number, and sits down. The barista immediately takes the next order. When the coffee is ready, the barista calls the number. More people get served in less time because no one blocks the counter.
Node.js works like the second coffee shop. It starts tasks, moves on to the next one, and comes back when results are ready.
Callbacks: the Original Async Pattern
Callbacks were the first common way to handle asynchronous tasks in Node.js. A callback is a function you pass to another function with a clear message: ‘When you are done, run this.’ Here is a basic example:
const fs = require('fs');

fs.readFile('example.txt', 'utf8', (error, data) => {

  if (error) {

    console.error('Error reading file:', error);

    return;

  }

  console.log('File contents:', data);

});

console.log('This prints first!');
When you run this code, you will see ‘This prints first!’ before the file contents. This happens even though the file reading code appears earlier.
Reading a file takes time. Node.js starts reading it and immediately continues running the next line. Once the file is ready, Node.js runs the callback function.
Promises: A Cleaner Way to Think About Async Code
Promises were introduced to make asynchronous code easier to read and manage. A promise represents a value that will be available in the future or might fail with an error. Here is the same file reading example using promises:
const fs = require('fs').promises;

fs.readFile('example.txt', 'utf8')

  .then(data => {

    console.log('File contents:', data);

  })

  .catch(error => {

    console.error('Error reading file:', error);

  });
This style reads more like plain English. Read the file, then use the data and handle any errors if something goes wrong. For many learners, this already feels clearer than callbacks.
Async and Await: The Most Beginner-Friendly Syntax
Async and await build on promises but make the code look almost like normal synchronous JavaScript. The await keyword tells JavaScript to pause inside this function until the file finishes reading. The rest of the program continues running normally. Nothing gets blocked, and performance stays strong.
const fs = require('fs').promises;

async function readMyFile() {

  try {

    const data = await fs.readFile('example.txt', 'utf8');

    console.log('File contents:', data);

  } catch (error) {

    console.error('Error reading file:', error);

  }

}

readMyFile();
For most beginners, async and await are the easiest way to write and understand asynchronous code in Node.js.
Common Beginner Mistakes And How to Avoid Them
Mistakes are a natural part of learning Node.js but beginners often repeat the same ones. These errors can slow progress or cause frustration, yet most are easy to recognize and fix. By spotting them early, you can save time, build confidence and focus on writing better code.
Let’s address the pitfalls most new developers encounter when learning Node.js for beginners. 👉🏻
Mistake 1: Forgetting the Asynchronous Nature
One of the most common mistakes beginners make with Node.js is assuming that code runs line by line in strict order.
In reality, Node.js is built around asynchronous programming, which means certain tasks, like reading files, making API calls, or querying databases, do not block the rest of the program. Instead, they run in the background while other code continues to execute.
| Aspect | Beginner’s Expectation | Actual Node.js Behavior | Correct Approach |
| Thinking Model | Code runs line by line and waits | Code continues without waiting | Use async patterns |
| File Read Method | fs.readFile() blocks execution | fs.readFile() runs asynchronously | Use async/await or promises |
| Execution Flow | File reads first, then next line runs | Next line runs before file read completes | Await the file read |
| Code Example | js fs.readFile('example.txt', 'utf8', callback); console.log('Done reading file'); | Same code executes without waiting | js const content = await fs.readFile('example.txt','utf8'); |
| Expected Output | File content → Done reading file | Done reading file → File content | File content → Done reading file |
| Why This Happens | Assumes synchronous behavior | Node.js is non blocking by default | Async flow is controlled |
| Recommended Practice | Ignore async handling | Understand callbacks and promises | Prefer async/await |
| Learning Impact | Causes confusion | Explains unexpected output | Leads to clean and reliable code |
Mistake 2: Not Handling Errors
Ignoring errors in Node.js can cause your entire server to crash. Beginners often assume everything will work as expected but in reality, you must always check for errors when working with asynchronous functions.
| 🚫 Bad Example (no error handling) | ✅ Good Example (with error handling) |
const fs = require('fs'); | const fs = require('fs'); |
Key Takeaway: Always handle errors in your callbacks, promises or async/await functions. Proper error handling keeps your application stable and prevents unexpected crashes.
Mistake 3: Installing Packages Globally
Beginners often install packages globally but this can cause version conflicts across different projects. Instead, install packages locally within your project using:
npm install package-name
Only use global installation (npm install -g package-name) for tools you need system‑wide, such as nodemon.
How to Host Your First Node.js Project Online
Learning Node.js is only the beginning. Once you understand the fundamentals and build your first applications, the next challenge is getting those projects online. This is where managed Node.js hosting becomes a powerful ally.
Hosting is designed to grow with you, providing simple tools for beginners and advanced features for professionals.
- Simple deployment: Push code directly from GitHub and see your app live in minutes.
- Beginner-friendly setup: Default configurations, free SSL and automated backups mean less time worrying about servers.
- Confidence in learning: Running your app online reinforces concepts like APIs, event-driven architecture and real-time communication.
- Scalability: Handle high-traffic apps, eCommerce platforms or real-time systems with optimized performance.
- Flexibility: Switch between Node.js versions, configure environments and manage both front-end and back-end projects seamlessly.
- Advanced tools: Git integration, serverless functions, caching and CDN support for lightning-fast global performance.
Whether you are a beginner or building advanced applications, the hosting platform you choose matters. A service like xCloud Node.js Hosting handles the technical setup for you, so you can focus on writing code, testing ideas and growing your skills. If you want to learn how to deploy, you are already in the right place.
The Journey Continues: Leveling Up Your Node.js Skills
Learning Node.js is a journey, not a one‑time destination. Every project you create, every error you fix and every package you explore adds to your growth. The most successful developers are not those who know everything from the start but those who keep building, experimenting and learning.
Your first steps with Node.js are complete. Now it is time to take the next ones. The question is simple: what will you build next? If you have found this blog helpful, feel free to subscribe to our blogs for valuable tutorials, guides, knowledge, and tips on web hosting and server management. You can also join our Facebook community to share insights and take part in discussions. And do not forget to share what you have built. We would love to see your work.