Are you planning to create a temporary WordPress website on your web host to test themes, plugins, or code tweaks without messing with your live site? Well, not every hosting provider offers you the feature to do that! But then comes xCloud. You can easily leverage the playground environments in xCloud and create a temporary WordPress demo site in just minutes for all your needs!

💡 Playground Environment in Hosting: the Know-How!
A playground environment in WordPress refers to a temporary, isolated space provided by hosting companies specifically for playing around with WordPress. It is essentially a demo WordPress site you can use for testing purposes without affecting your live website.
Playground environments feature is offered by some web hosting providers, but not all. It allows you to experiment with WordPress functionalities, test changes, and learn new things in a safe and isolated space, ultimately helping you maintain a smooth-running and secure live website.
Here are some common use cases for a WordPress playground environment:
👉 Testing New Themes & Plugins: Before installing a new theme or plugin on your live site, you can try it out in the playground to see how it looks and functions with your existing setup. This helps avoid compatibility issues or unexpected design changes on your main website.
👉 Trying out Code Changes: If you are making modifications to your WordPress code, you can test them in the playground first to ensure they work as expected and do not introduce any bugs.
👉 Collaborating on Designs: If you are working with a designer on a new website layout, the playground can be a useful tool to showcase mockups and gather feedback before implementing them on the live site.
🚀 Playground Environments in xCloud: A Demo Before Going Live
Among a bunch of advanced features to simplify rocket-fast hosting and server management for WordPress, you can leverage the playground environments in xCloud. This will help you create a demo website for 24 hours, explore xCloud features and management options, and let you decide on your live websites. You can quite easily create a WordPress website in minutes with xCloud without being on a hosting plan and try out site functionalities with your team.
Here is a breakdown of what you will have for playground environments in xCloud:
🌟 Isolated Testing Ground
Think of it as a practice zone for WordPress. You can install themes and plugins, experiment with code modifications, or even create mockups of your website design – all within playground environments in xCloud. This way, you can see how changes would look and function before implementing them on your real site.
🌟 Safe Experimentation
Since the playground is separate from your live website, any mistakes you make or compatibility issues that arise will not break your actual site. It is a safe space to test things without risking downtime or affecting your visitors’ experience.
However, it is important to remember that playground environments are usually meant for temporary use and may have limitations. For instance, you might not have access to all the same features or customization options available in a full WordPress installation and a live website.
📝 Use Playground Environments in xCloud: A Step-by-Step Guide
Now that we know how beneficial it is to leverage the playground environments in xCloud and create a demo website let us learn how to use the xCloud Playground environment feature. Here is a step-by-step guideline below.
[Note: If you have premium access already, the Playground feature will not be available for you. We recommend avoiding creating any serious site here as it will be removed after 24 hours.]
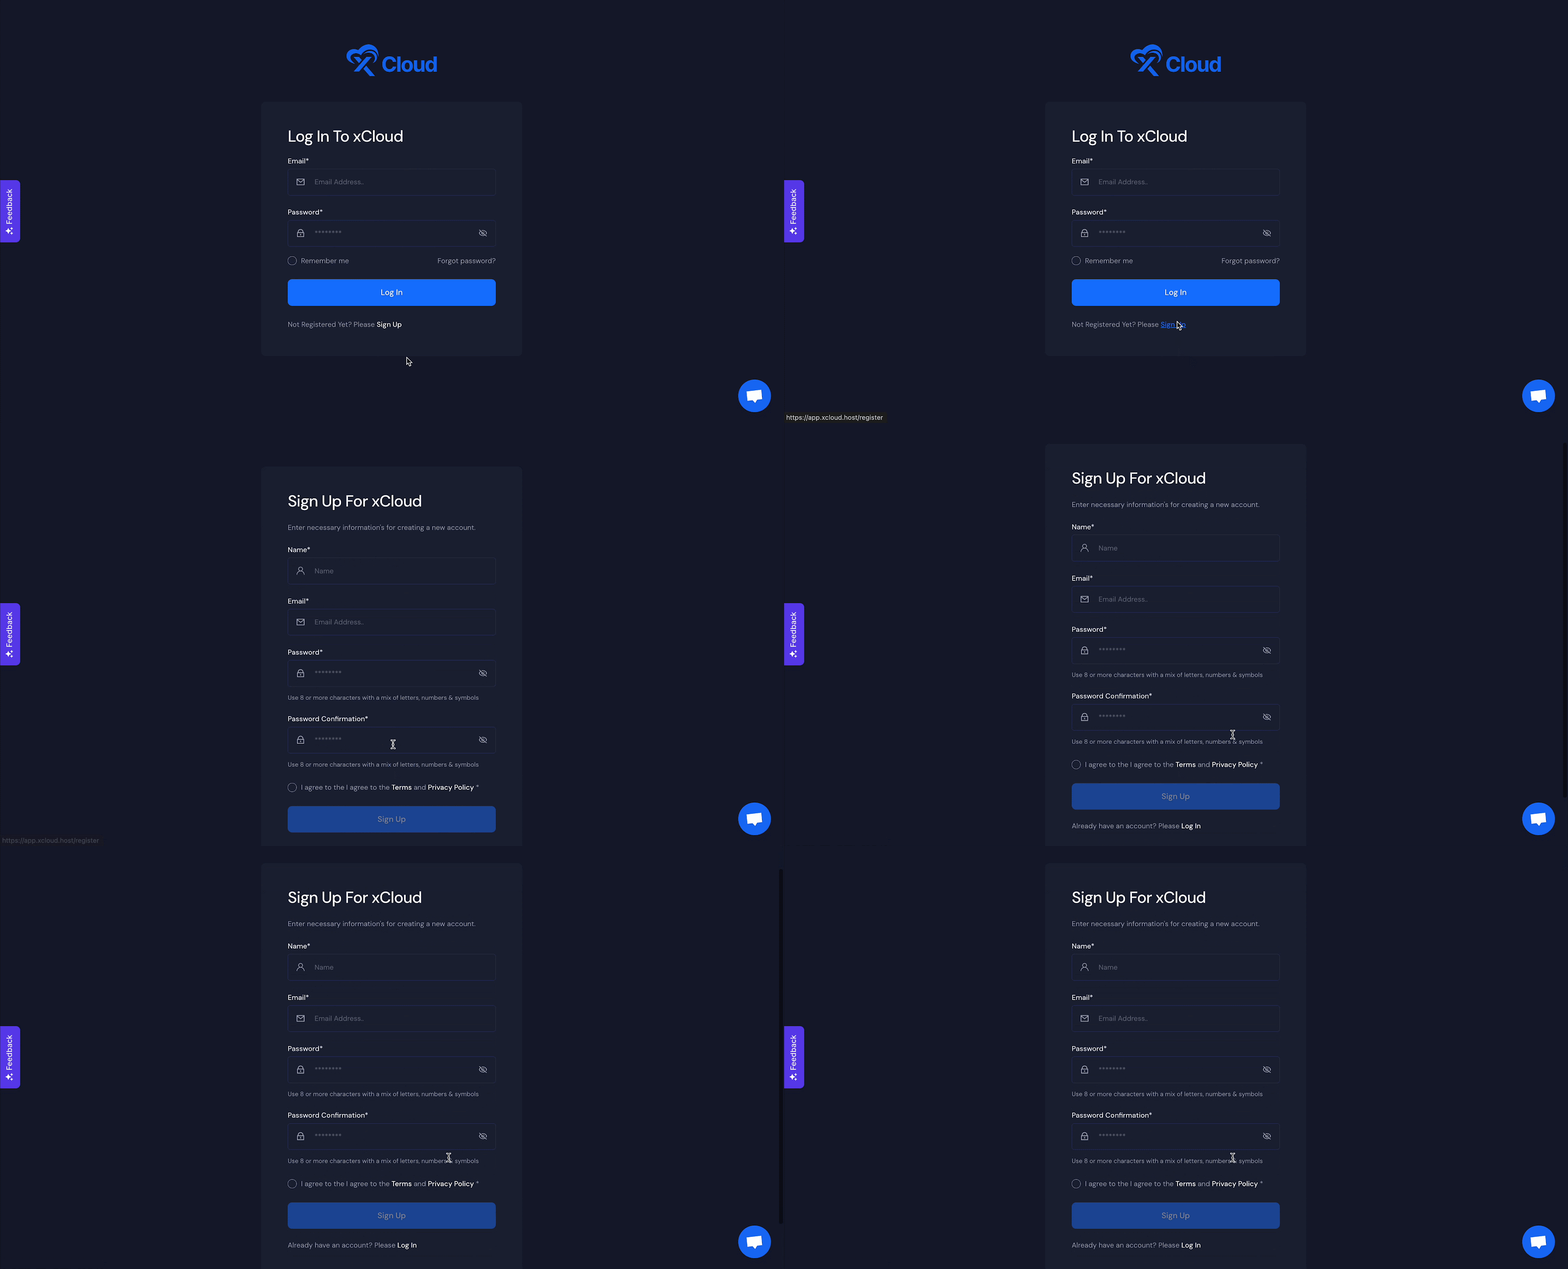
Step 1: Sign up for xCloud
First, visit the xCloud login page and sign up with your credentials. If you already have an account, log in to the app dashboard.
Step 2: Try xCloud Playground
Once you have logged into xCloud, you will see options to try the xCloud Playground environments feature. You can click on the ‘Try Playground’ from the menu bar or click on the ‘Try xCloud Playground’ button from the middle of the dashboard page.

You will now be redirected to the WordPress installation page. Provide your site title and other necessary information before hitting the ‘Next’ button.
You can also try the advanced features below. For that, click on the ‘More Advanced Settings’ button and a drop-down section will appear. Provide your username, and password, as you want. You can also set up PHP versions from 5.6 to the latest version and even WordPress 5.0 to the latest versions as well. Plus, you can deploy scripts from there as well.

By default, you can create a database in the xCloud server for this demo site. However, you can add your existing database as well. To do that, hit the ‘Add Your Existing Database’ button and fill out the necessary fields.

Now, a popup will appear where you need to click on the ‘Accept’ button to be added to the ‘Playground Team’.

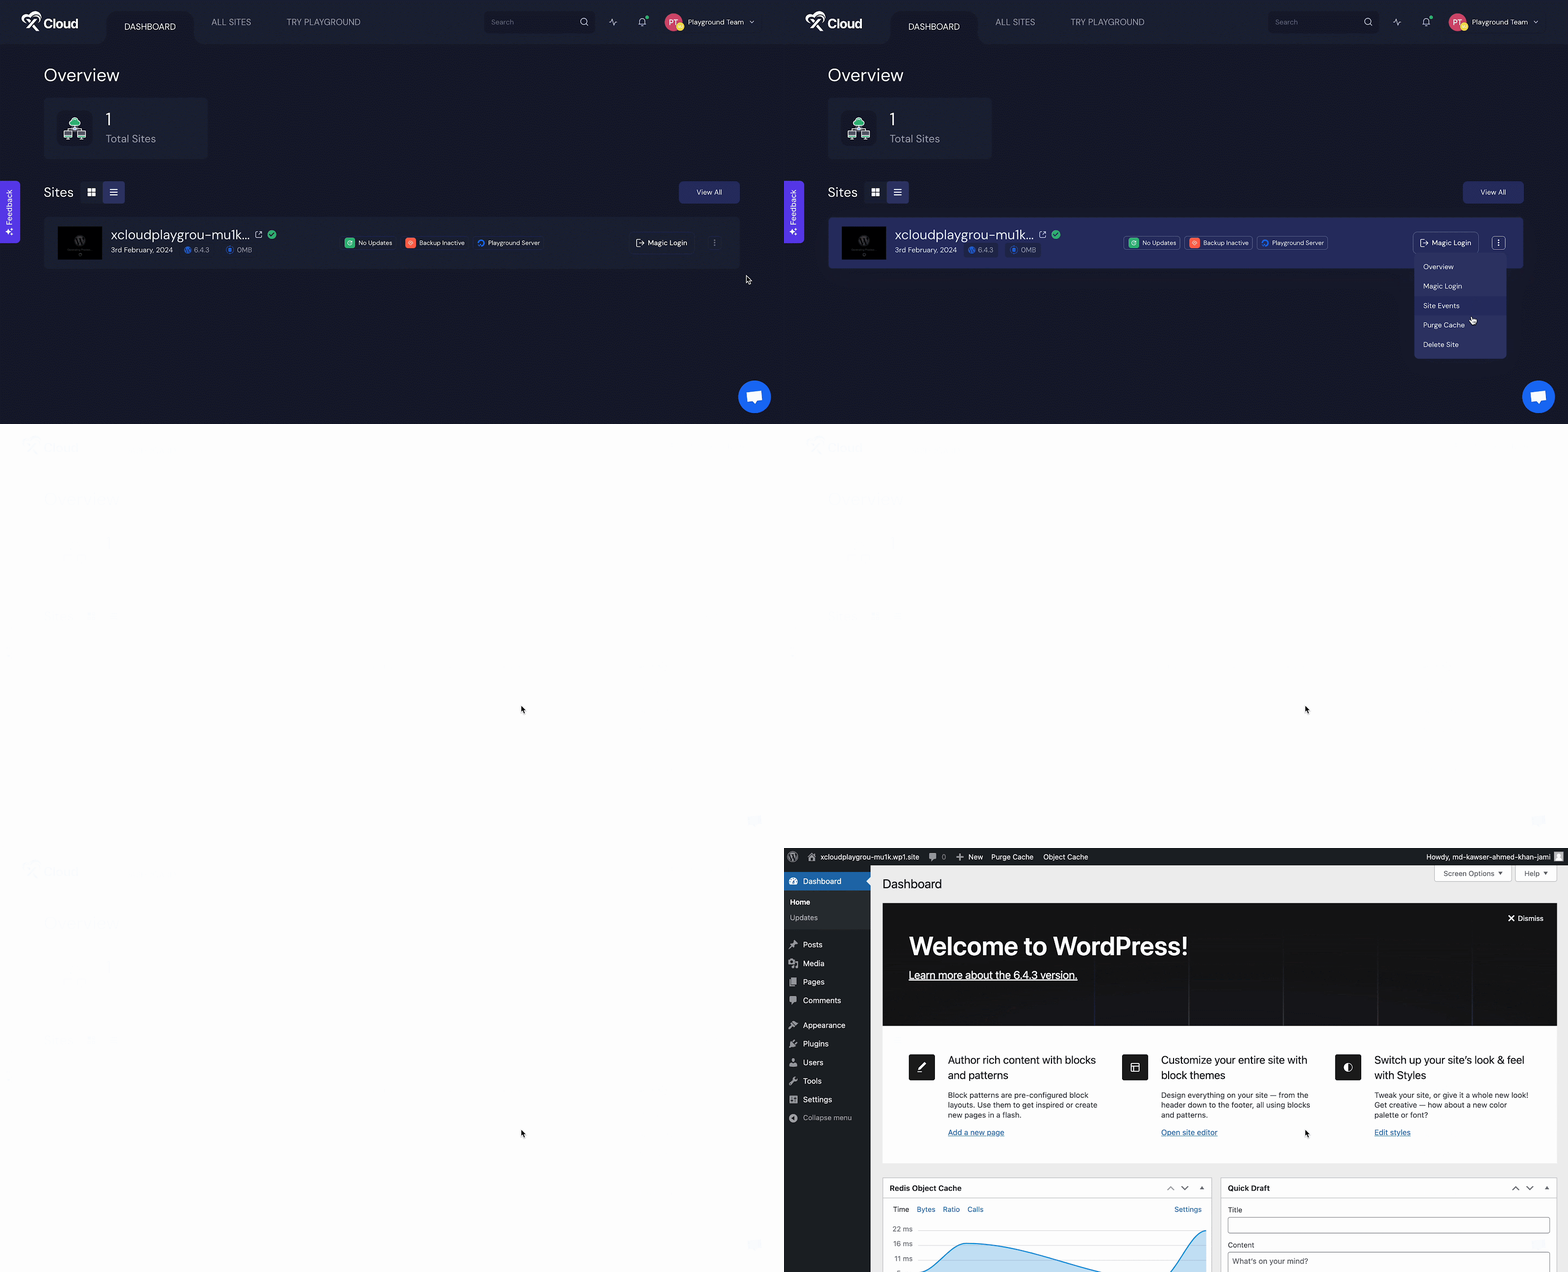
Step 3: Log in to Your Demo Website
Instantly your demo website will be ready to explore. Now, click on the ‘Magic Login’ feature to log in to your demo WordPress website dashboard. You can also view site events, enable Purge cache, or delete this demo site by clicking on the 3 dots button. This is how easily you can create a WordPress website in xCloud Playground at ease.
Step 4: Manage Your WordPress Website
From your dashboard, click on the newly created website. Your website management panel will appear where you can manage your website with ease.
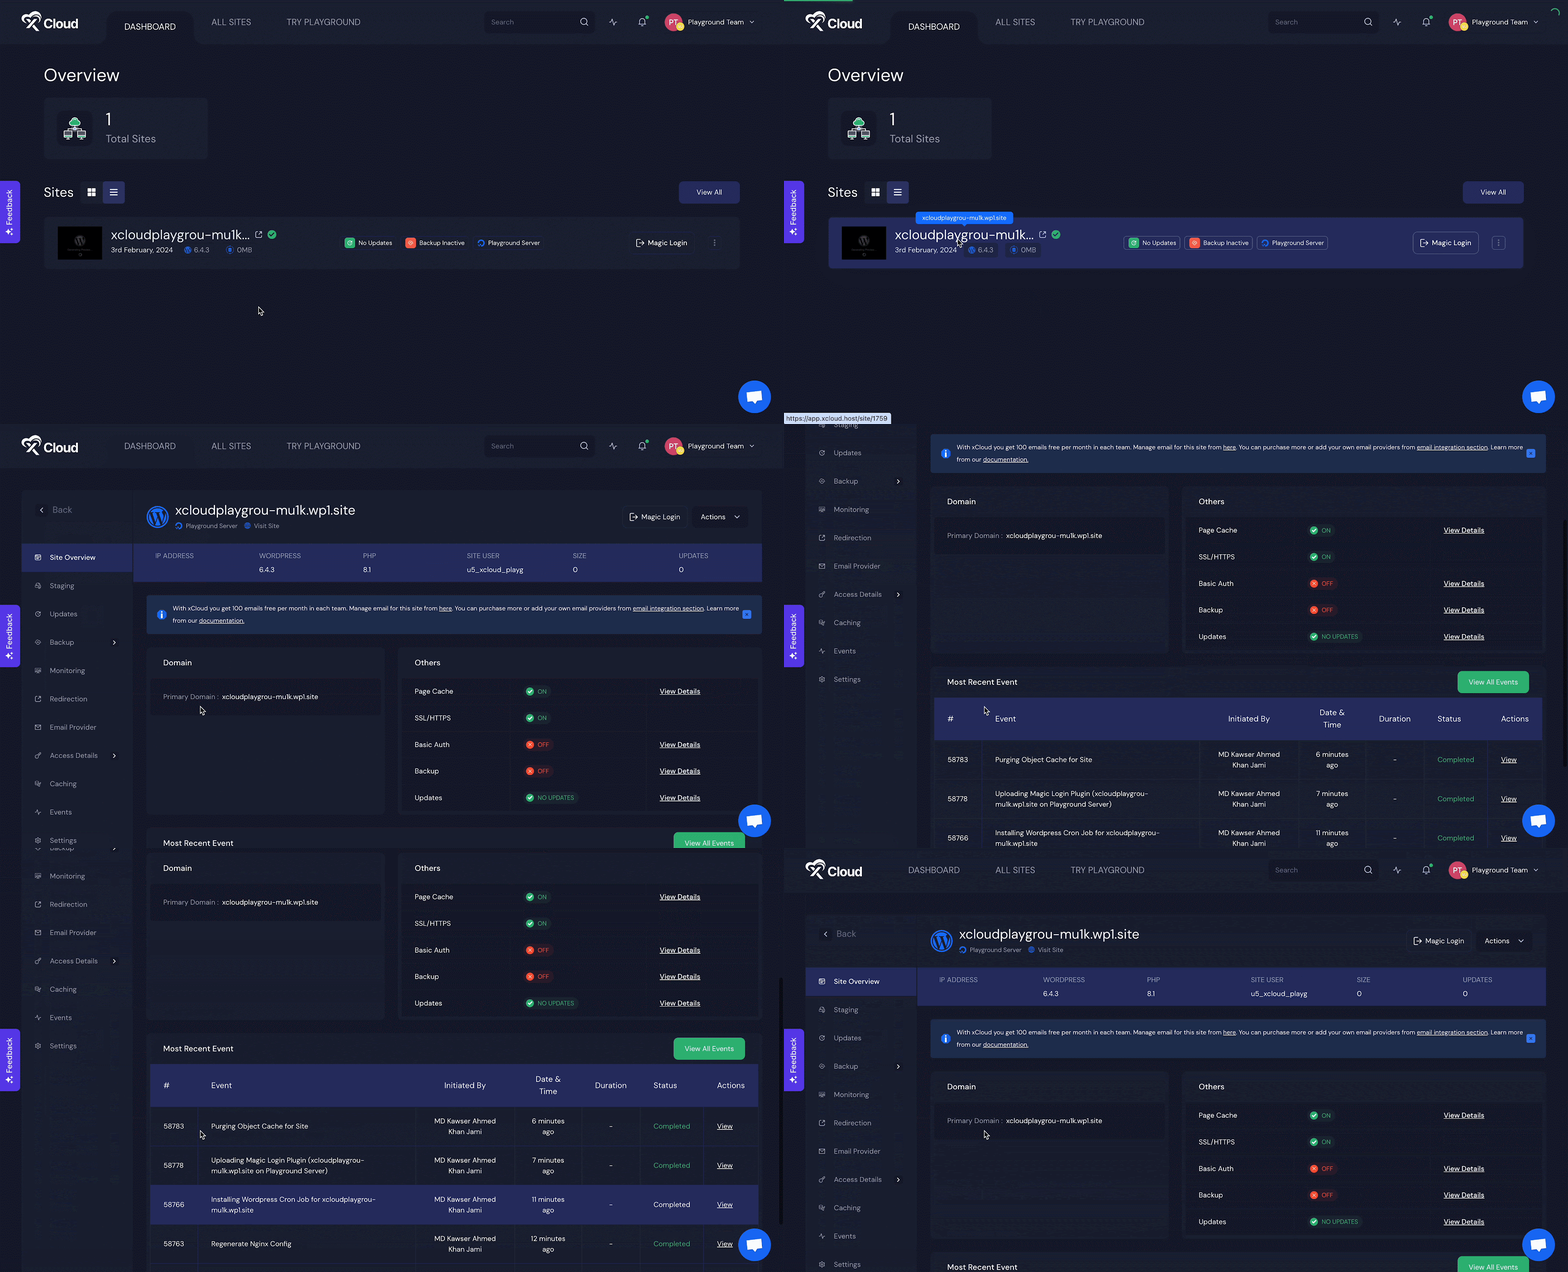
xCloud offers advanced site management features like staging, WordPress plugin and theme management, redirection, caching, event, performance monitoring, and remote and local site backup. You can check out our docs on website creation features to learn more about all of these settings and features.
🎉 Try xCloud Playground Environment Today!
Utilizing playground environments in xCloud offers a seamless and risk-free way to experiment with WordPress functionalities before implementing changes on your live website. With features like isolated testing grounds and safe experimentation, xCloud provides a valuable tool for developers and designers to refine their websites and ensure optimal performance.
If you have found this blog helpful, feel free to subscribe to our blogs for valuable tutorials, guides, knowledge, and tips on web hosting and server management. You can also join our Facebook community to share insights and engage in discussions.

