


Whether you have your own server or using a xCloud managed server, you can easily create a site without any coding with xCloud. This platform aims to simplify the process of hosting and managing WordPress sites, allowing developers and agencies to focus on building fully functional websites without worrying about the underlying infrastructure. Now let us follow these steps to get you started.
How To Create A Site With xCloud #
After you have completed setting up your servers, you are now ready to create your site. Simply follow our step-by-step guide below.
Step 1: Create A Site From The Dashboard #
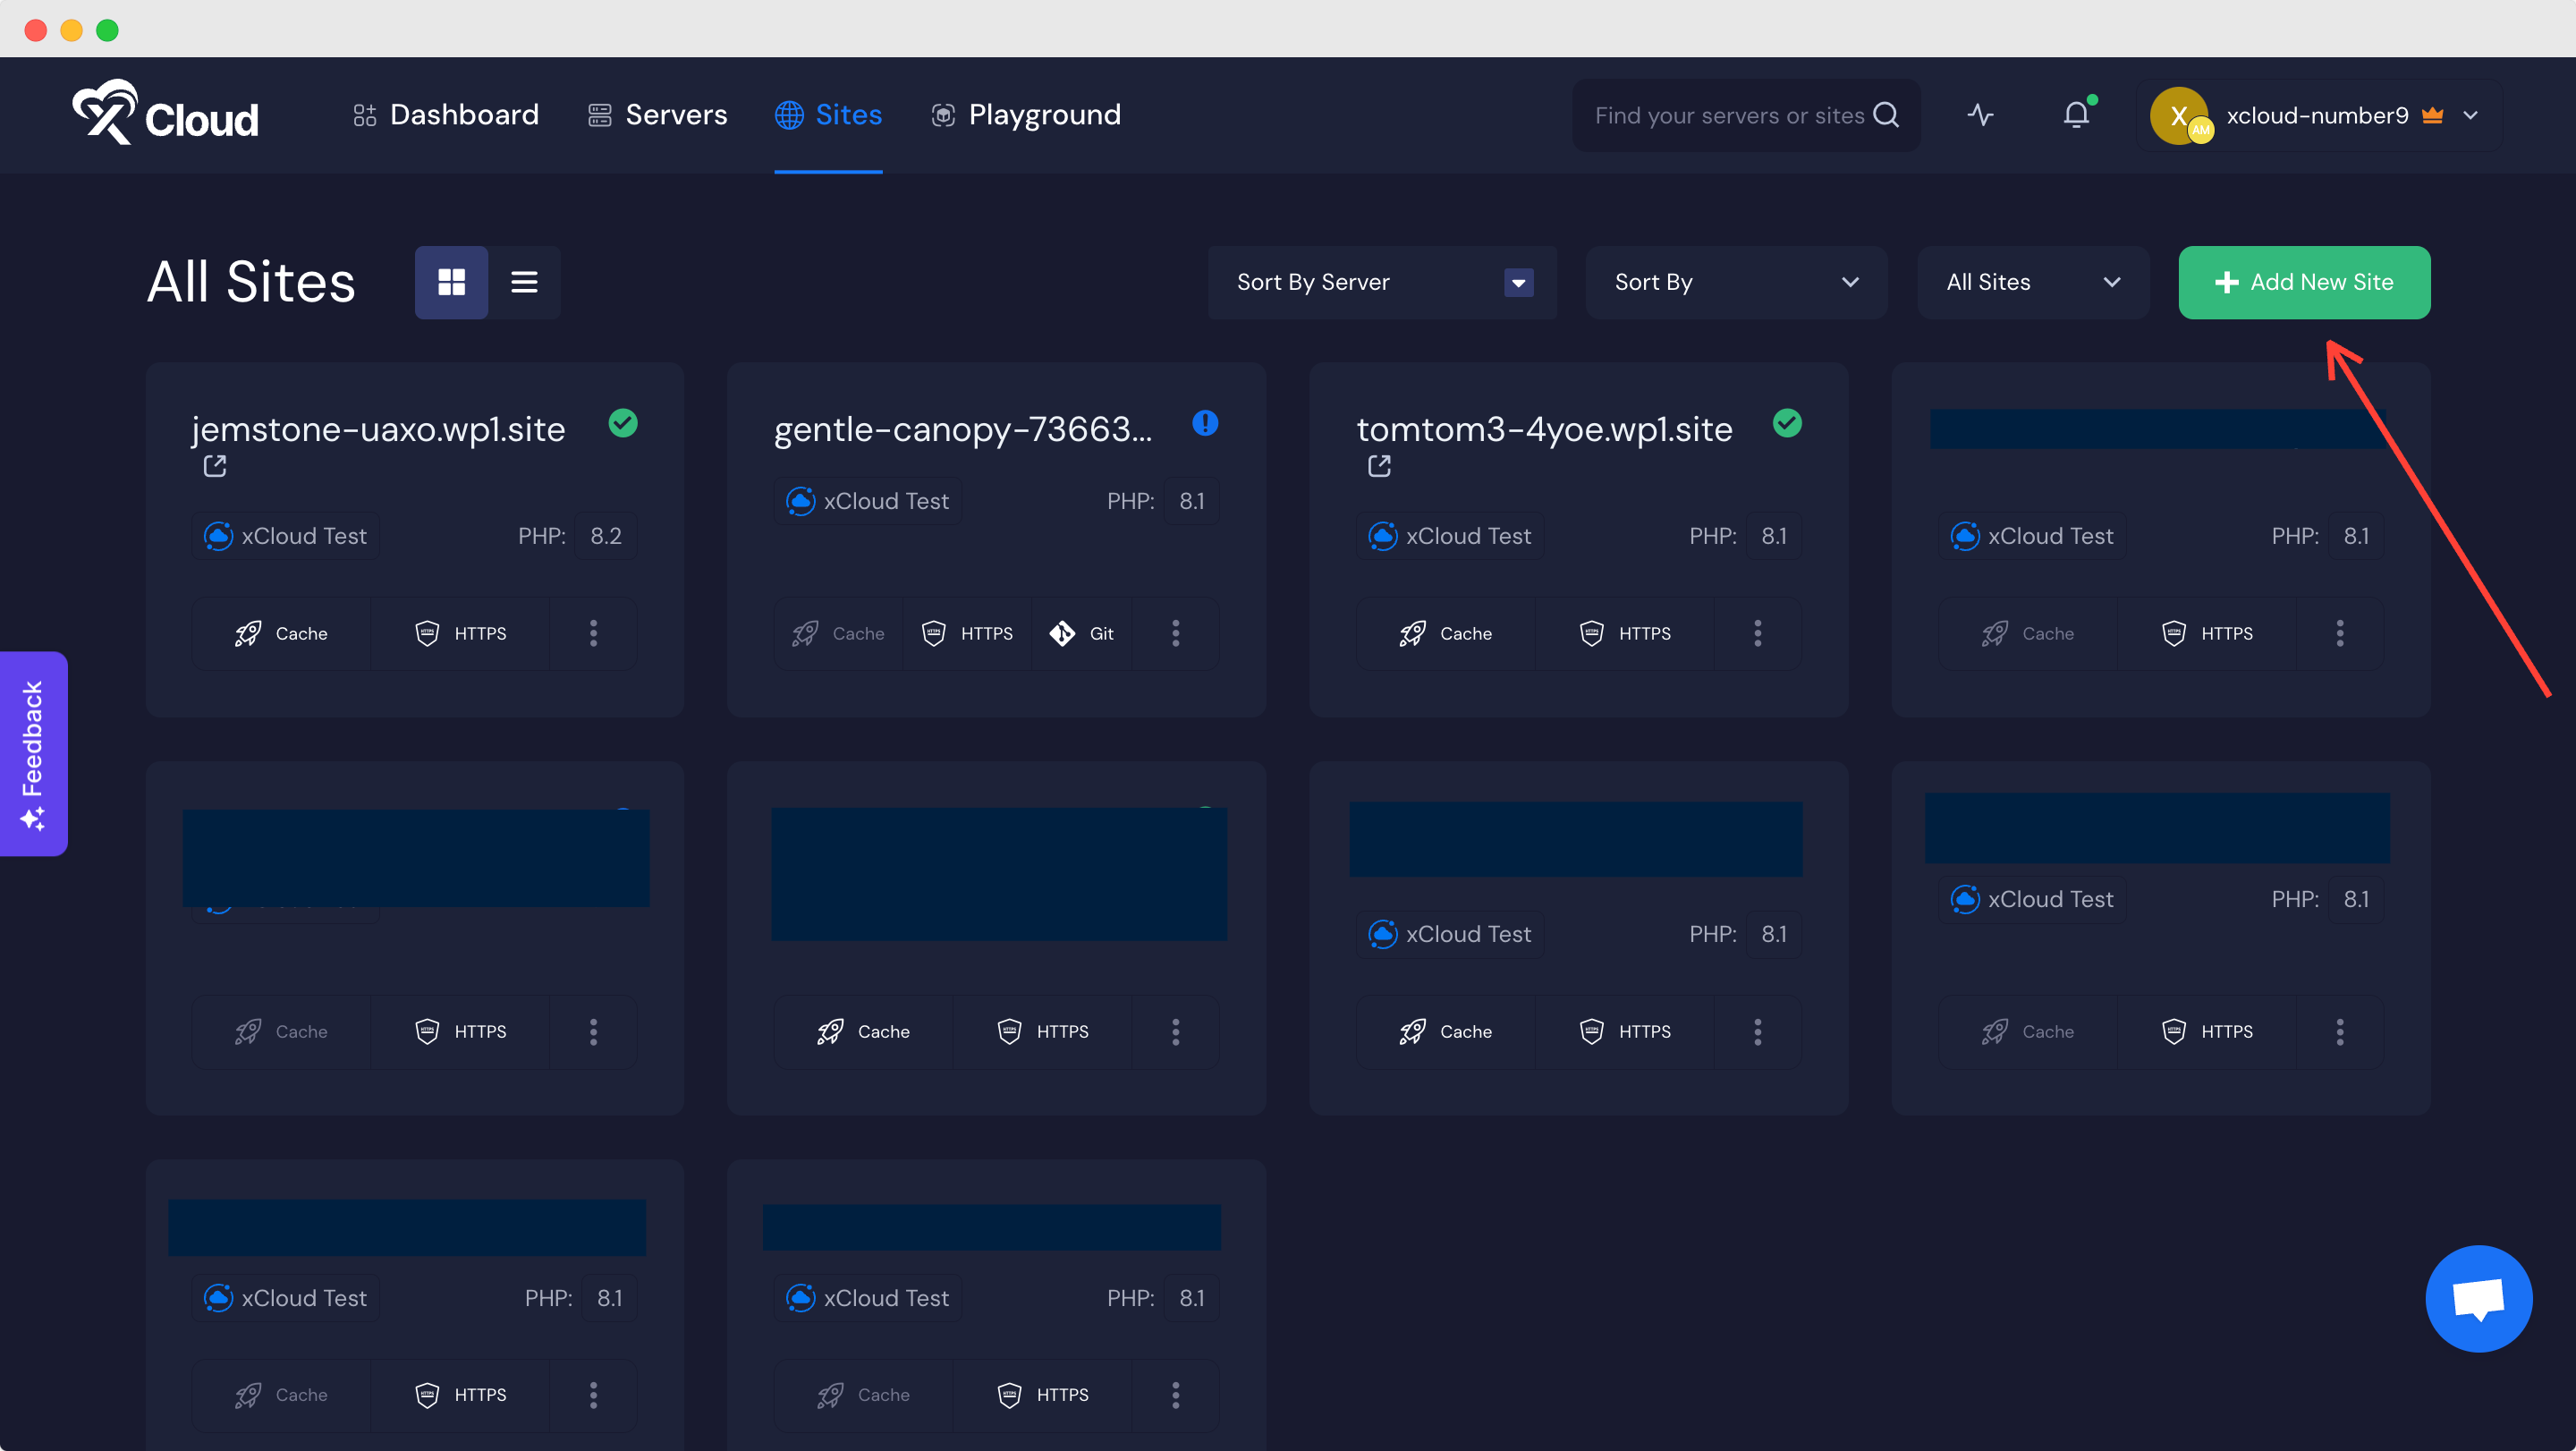
Once your server is connected, you can create a site from the Dashboard or Site List by clicking on the button “Add New Site”.
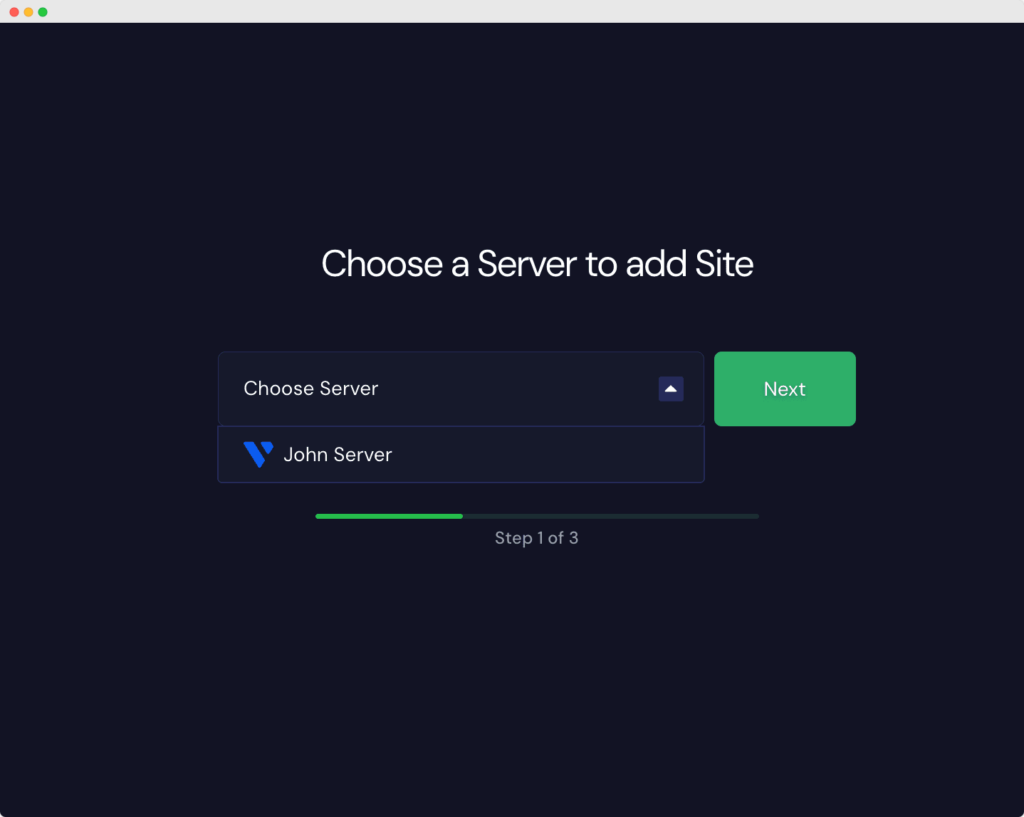
Then you will need to select the server on which you want to install your WordPress website.
Step 2: Choose Your Site & Add Information #
As we will be creating a fresh WordPress site choose the “Install New WordPress Website” options as shown below.

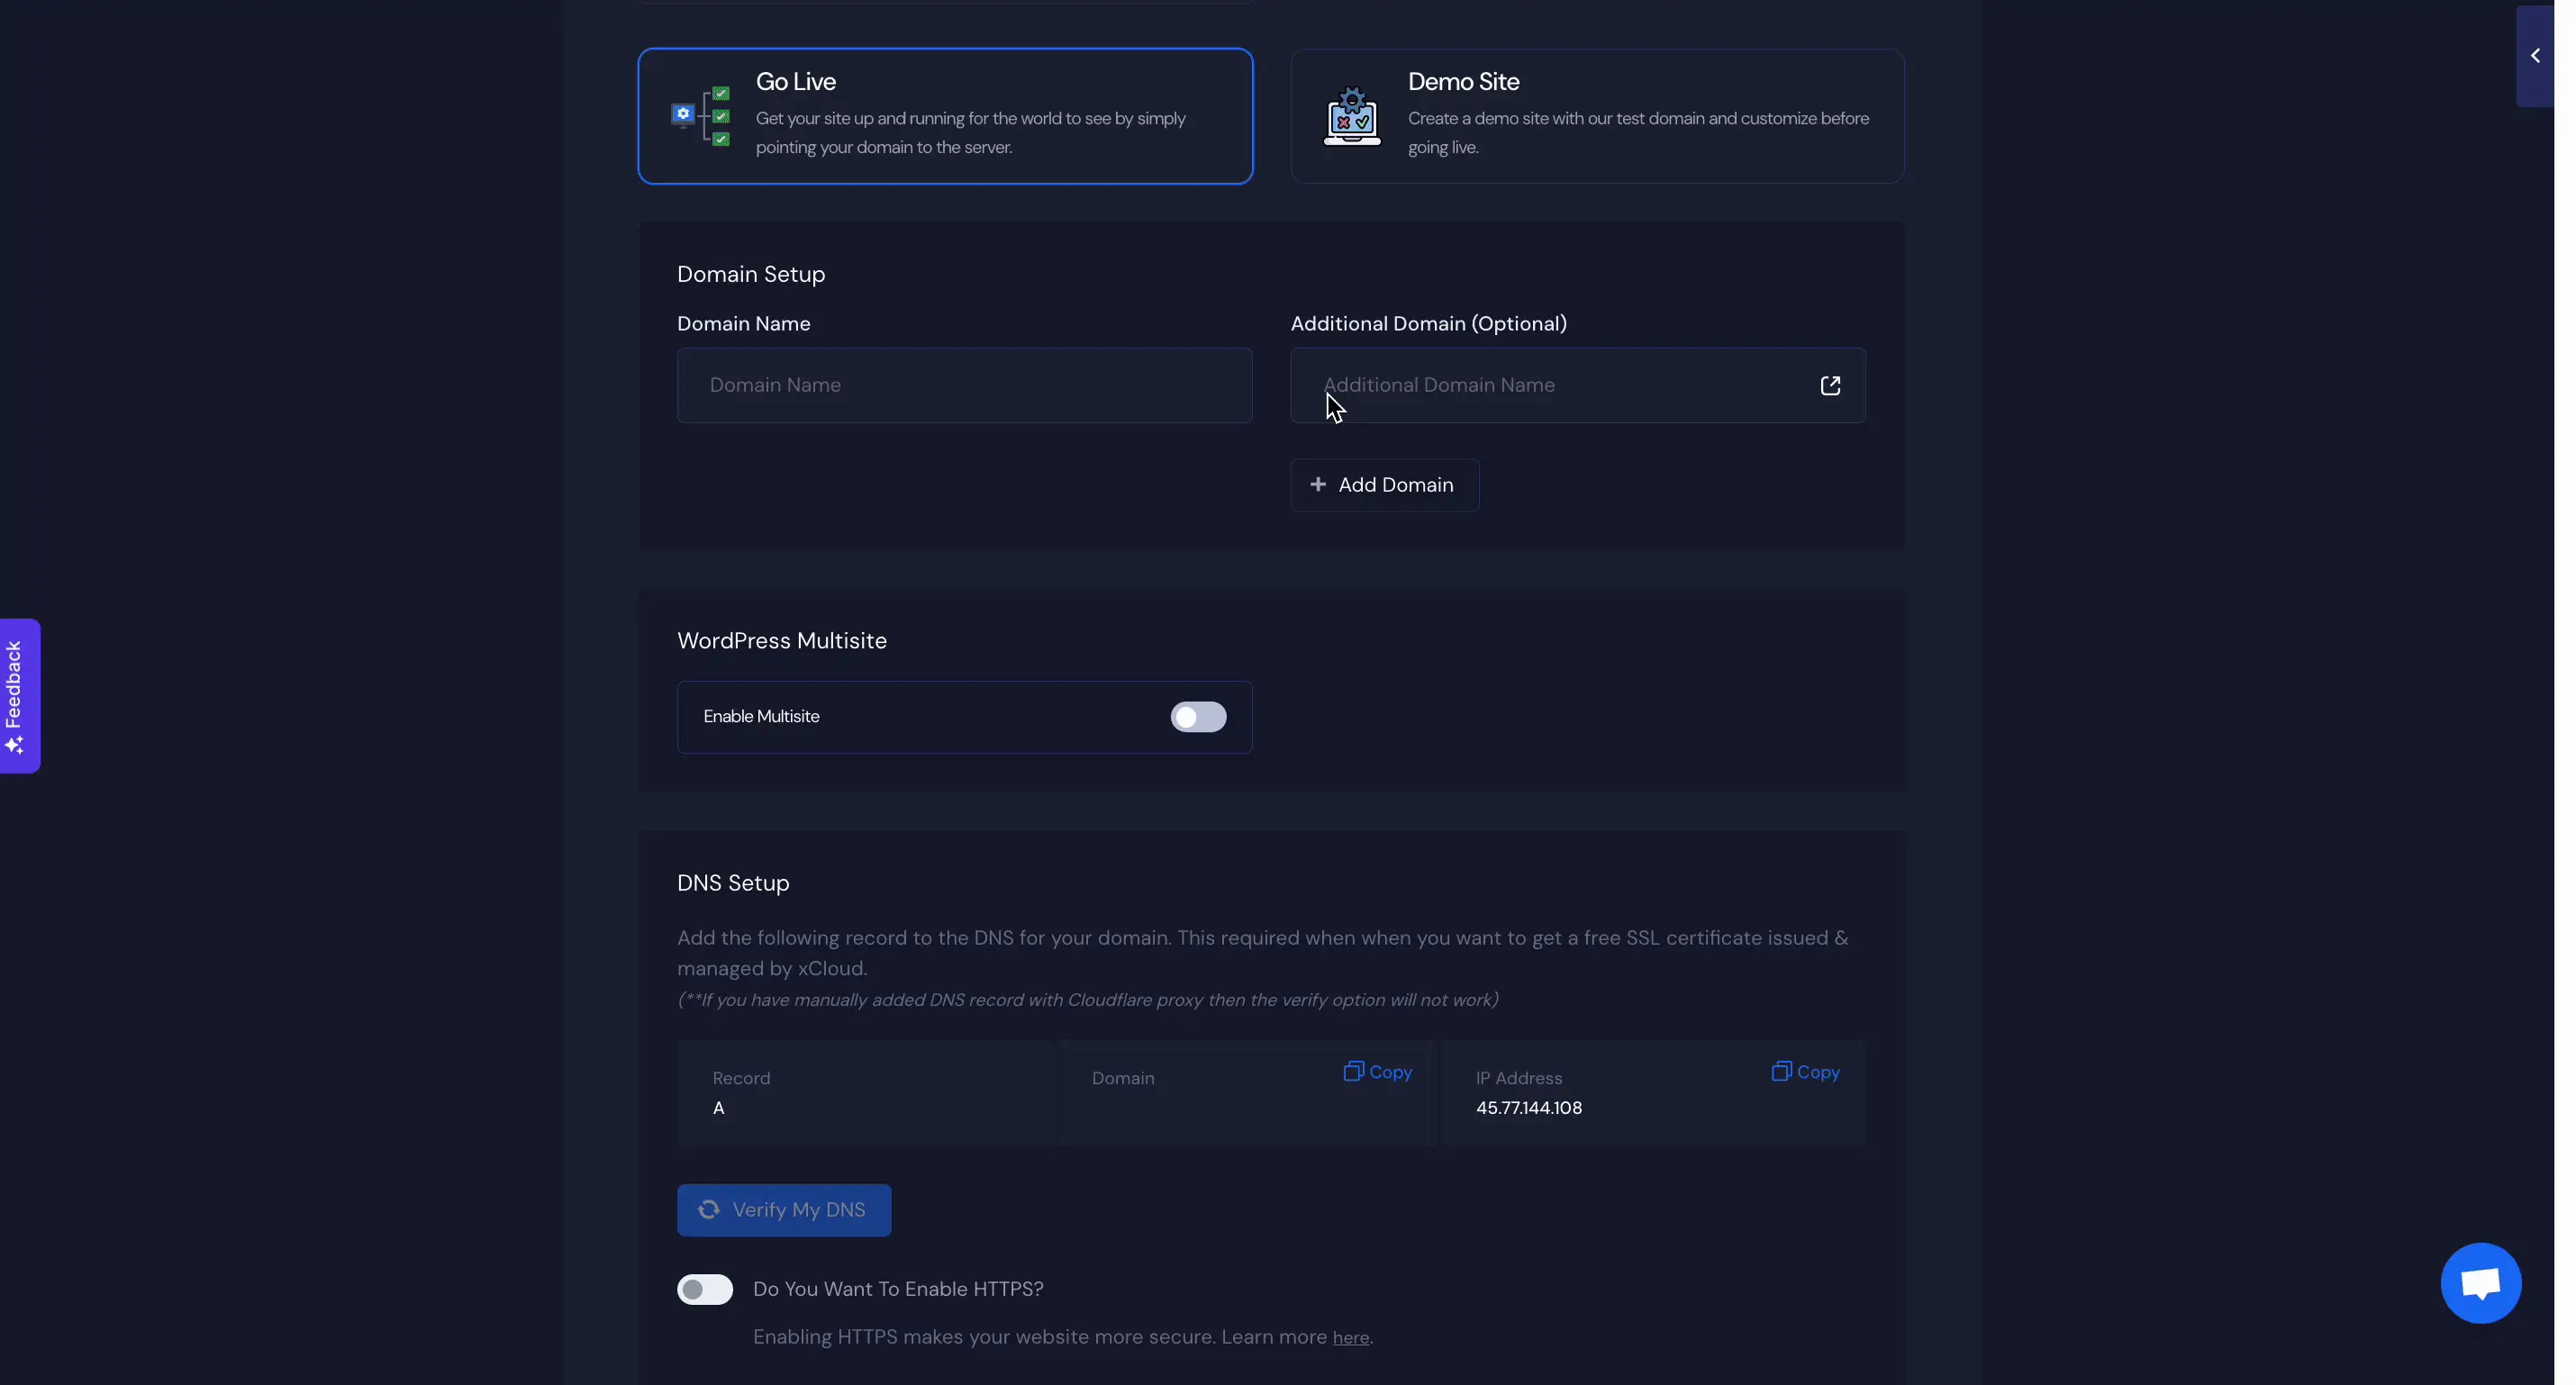
Now all you have to do is install and ‘Go Live’ with your WordPress Site. You can do the next process in a few simple and easy steps.
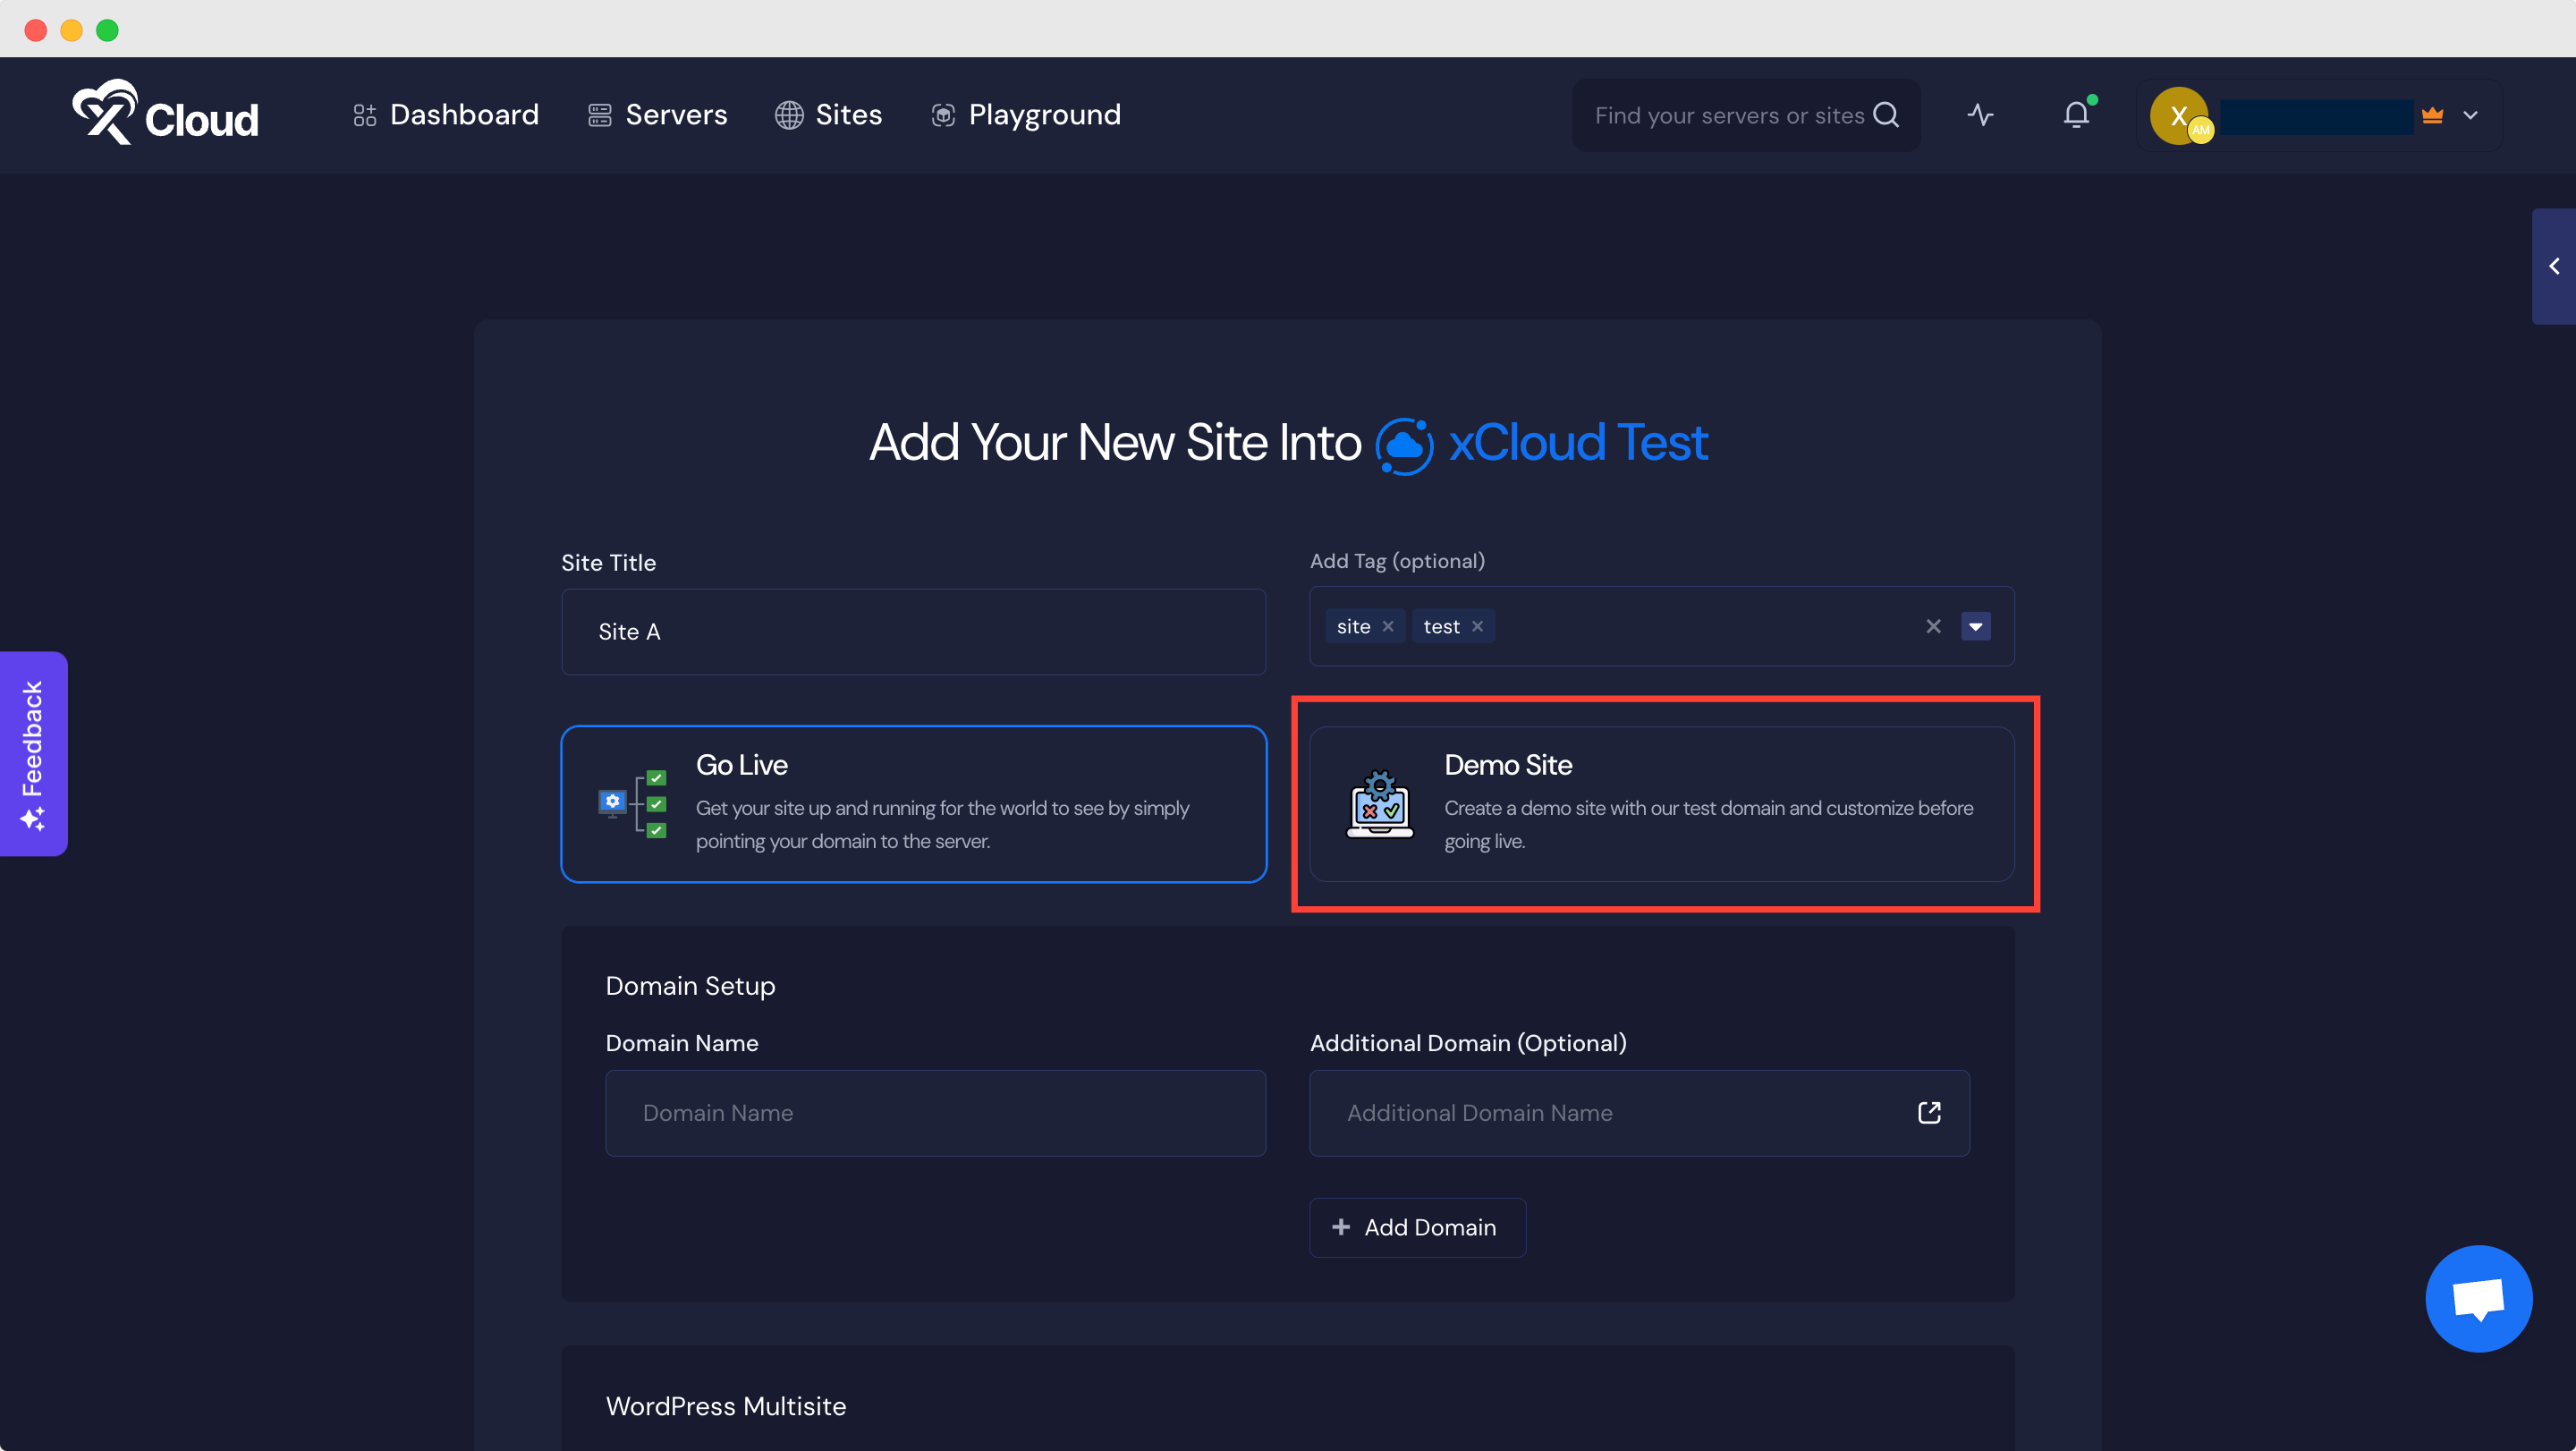
[Note: You can also create a demo site, which you can make live later.]
- Add a Site Title
- Add Tags if you want
- Choose to Go Live
- Add your domain name in the ‘Domain Setup‘ option.
- Below you will find an option to enable ‘Multisite‘. It comes with subdomain and subdirectory options.
- DNS Configuration: If you add the domain and want to visit the live site you need to configure your DNS. xCloud does not handle your DNS but all you need to do is remove any existing A records and add the A record as shown above. For example, if your domain is on Cloudflare then all you need to do is add an A record with the domain name, and your server IP address. Domain. Make sure to add the A record as shown above in your DNS panel.
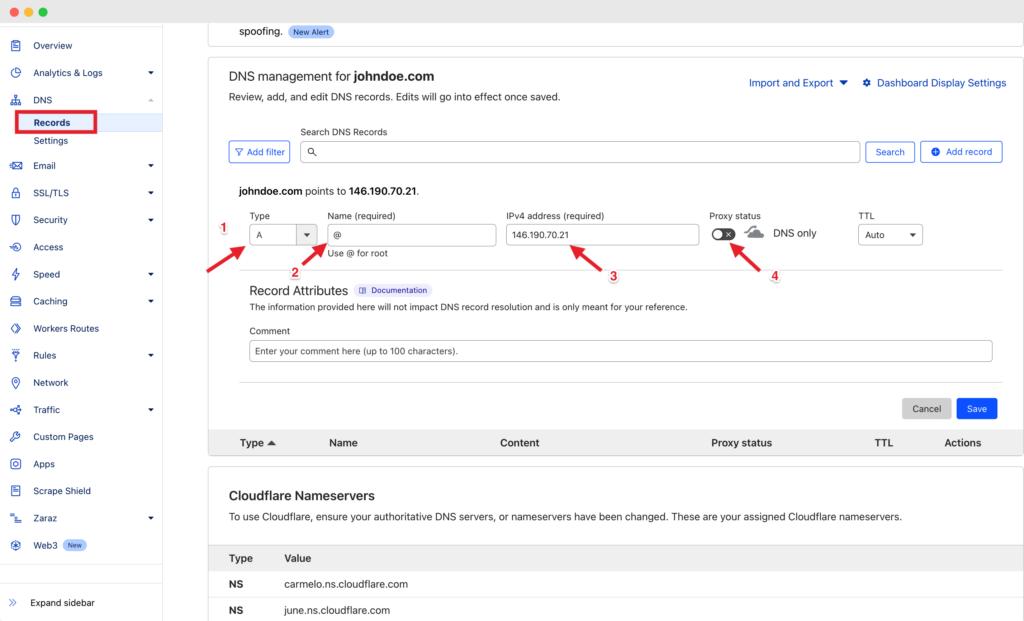
To use a Free SSL certificate by Let’s Encrypt simply turn on the HTTPS enable button and xCloud will automatically set everything for you. However, if you are using Cloudflare then while adding the A record please ensure you have disabled the Proxy to prevent redirect errors.
7. Now, you can enable ‘Full Page Caching‘ and ‘Redis Object Caching‘ to make your site work faster and give your visitors a better experience.
8. Next, you can enable ‘xCloud Managed Email Service‘ to get free 100 emails/month to kickstart your business. You can also purchase more as you need, starting from $1 for 1000 emails.
9. Now, at last, you can enable xCloud Blueprints for pre-saved website settings like theme and plugins. Once you create blueprints in xCloud, you do not have to install certain sets of plugins or themes each time you create a website. While creating a website in xCloud, all you need to do is select a blueprint, and then your plugins and theme will be automatically installed.
You can then simply hit the Next Button to create your site and Go Live instantly.
Configure Additional Settings #
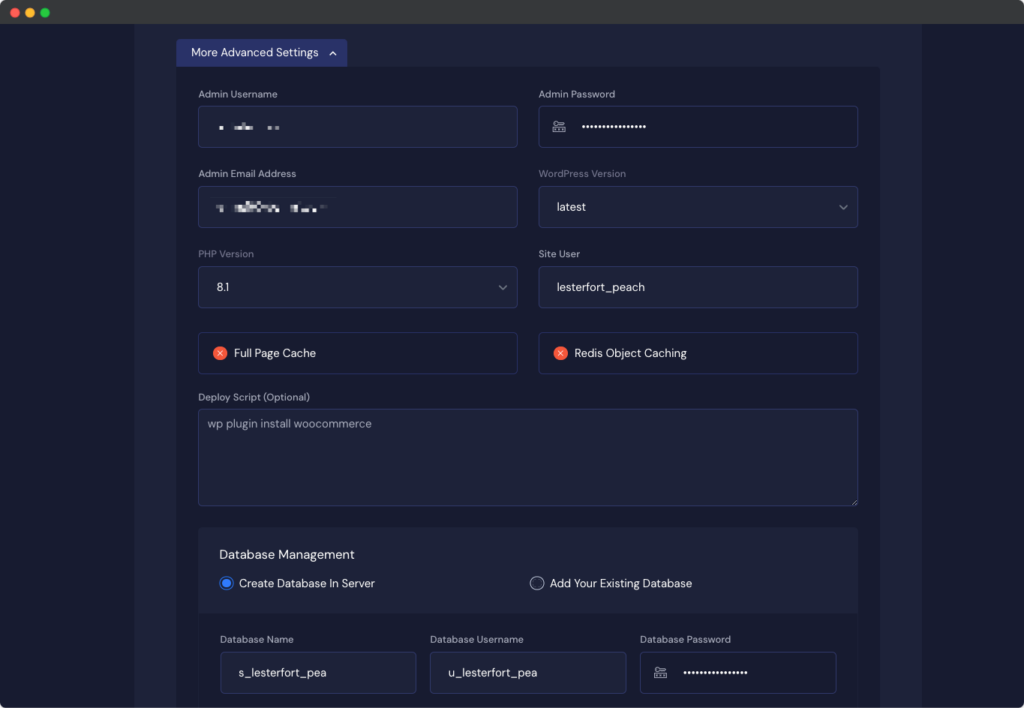
By default, the WordPress admin credentials are autogenerated to speed up the site creation process. As soon as your site is deployed you will receive your Site credentials on your email address. Later on, you can update your password if needed. From “More Advanced Settings” you can update the default Admin Username, Admin Password, Admin Email Address, etc along with other additional settings from here.
Step 3: Review Your WordPress Settings #
After all the information, you can review your settings. Here you will get an overall report of your Domain Name, HTTPS Settings, WordPress Version, PHP Version, and much more.
After the previous step, click on the ‘Next’ button. It might take only 1-2 minutes to create your WordPress site.

Not Ready Yet? Try Demo Site #
Also, If you do not want to point your domain yet then xCloud offers temporary domains to make a demo site with every Site creation method available in xCloud. For that select the Demo Site option.
Start Your Business Journey with 100 Free Emails Monthly #
Get a sweet deal with xCloud—enjoy 100 free emails per month for each team. If you need more, grab additional xCloud email services. And for those who like it personalized, seamlessly integrate your email provider.
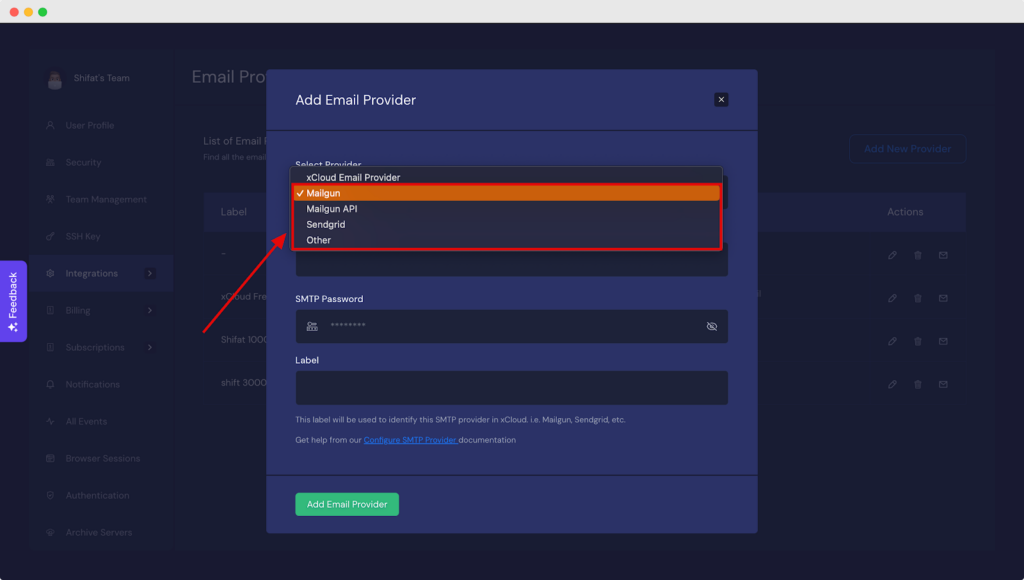
For 1000 emails xCloud will charge you $1/month, and for more additional emails we will charge you only $8/m for 8000 emails.
That is how easily you can create a site in xCloud. Now you can start working on your website, customize it, install themes/plugins (if applicable), and take advantage of xCloud’s optimized server environment for seamless site management.
Still stuck? Contact our support team for any of your queries.


