


xCloud comes with a playground feature that you can try and create a demo website for 24 hours. Learn how to use the xCloud Playground feature from the step-by-step guidelines below.
Note: If you have premium access already, the Playground feature will not be available for you. xCloud Playground feature demonstrates how easy it is to create a website in xCloud. We recommend not to create any serious site here as it will be removed after 24 hours.
Step 1: Sign Up For xCloud With Credentials #
First, you must go to the xCloud login page and sign up with your credentials. Add all the necessary credentials and make sure to add a secure password. If you already have an account login to the app dashboard.
Step 2: Create Demo Website In xCloud Playground #
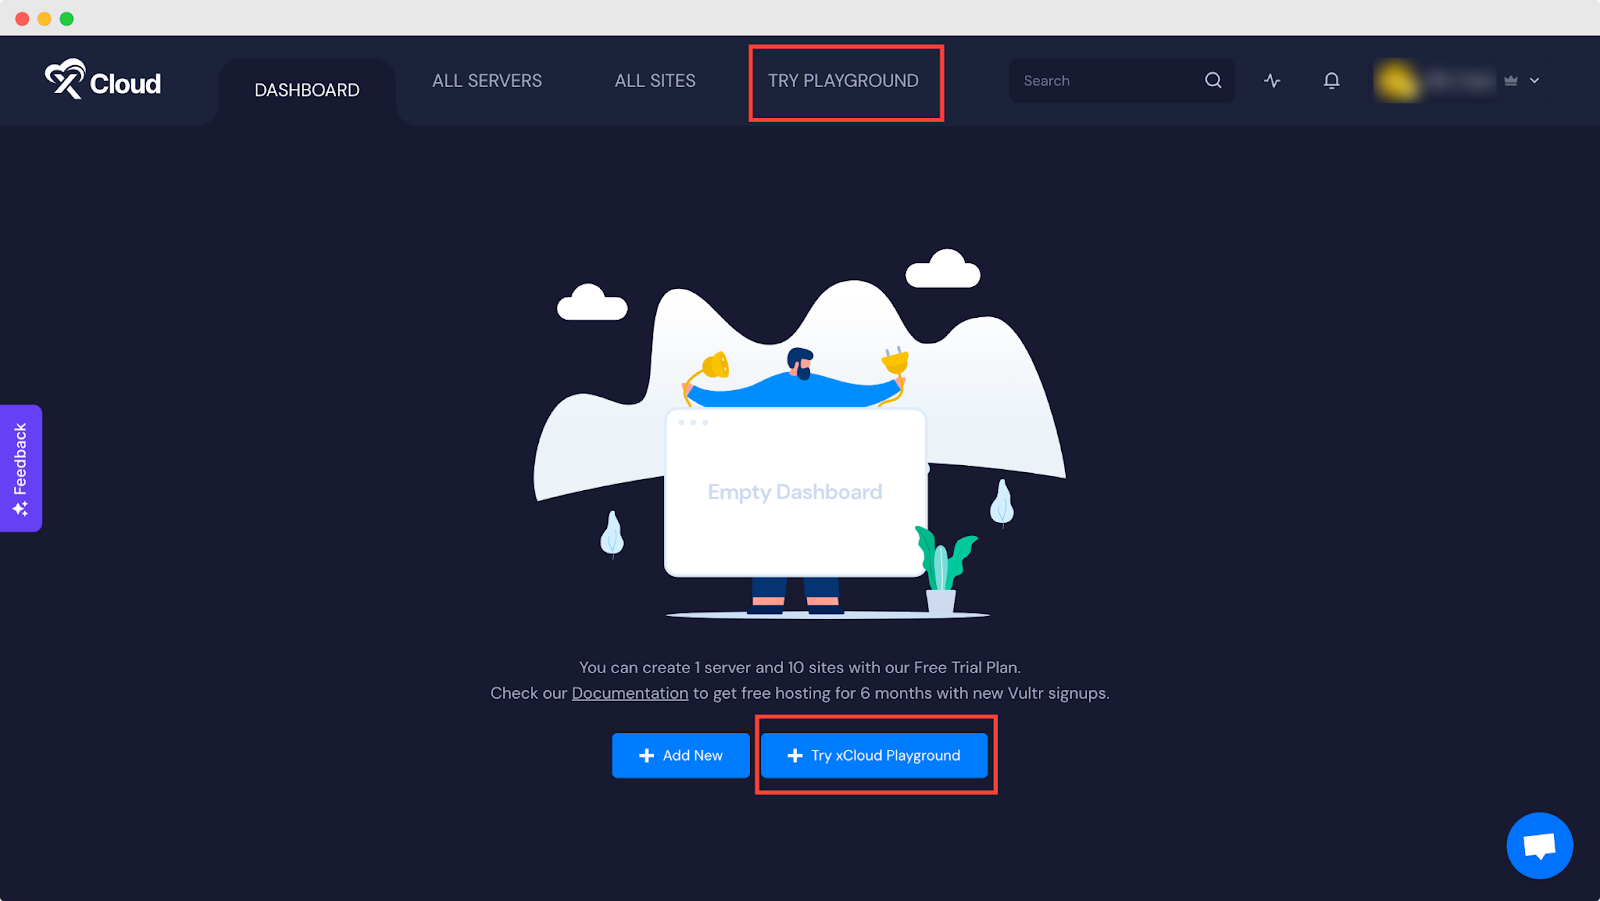
Once you have logged into xCloud, you will see options to try the xCloud Playground feature. You can click on the ‘Try Playground’ from the menu bar or click on the ‘Try xCloud Playground’ button from the middle of the dashboard page.
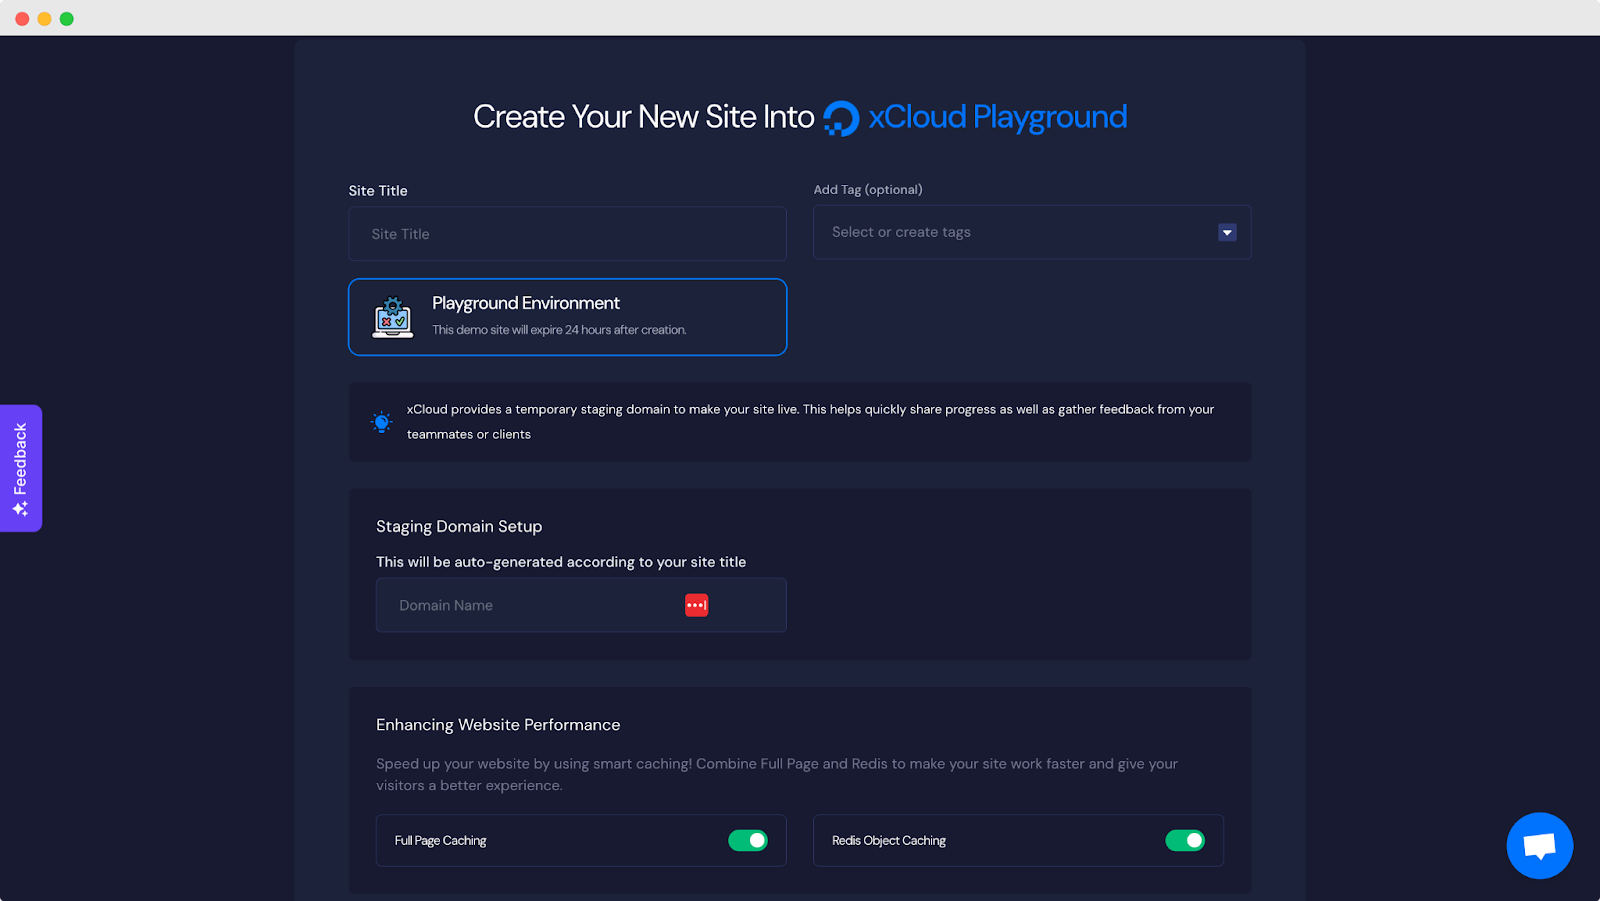
Afterward, you will be redirected to the WordPress installation page. Provide your site title and other necessary information before clicking on the ‘Next’ button.
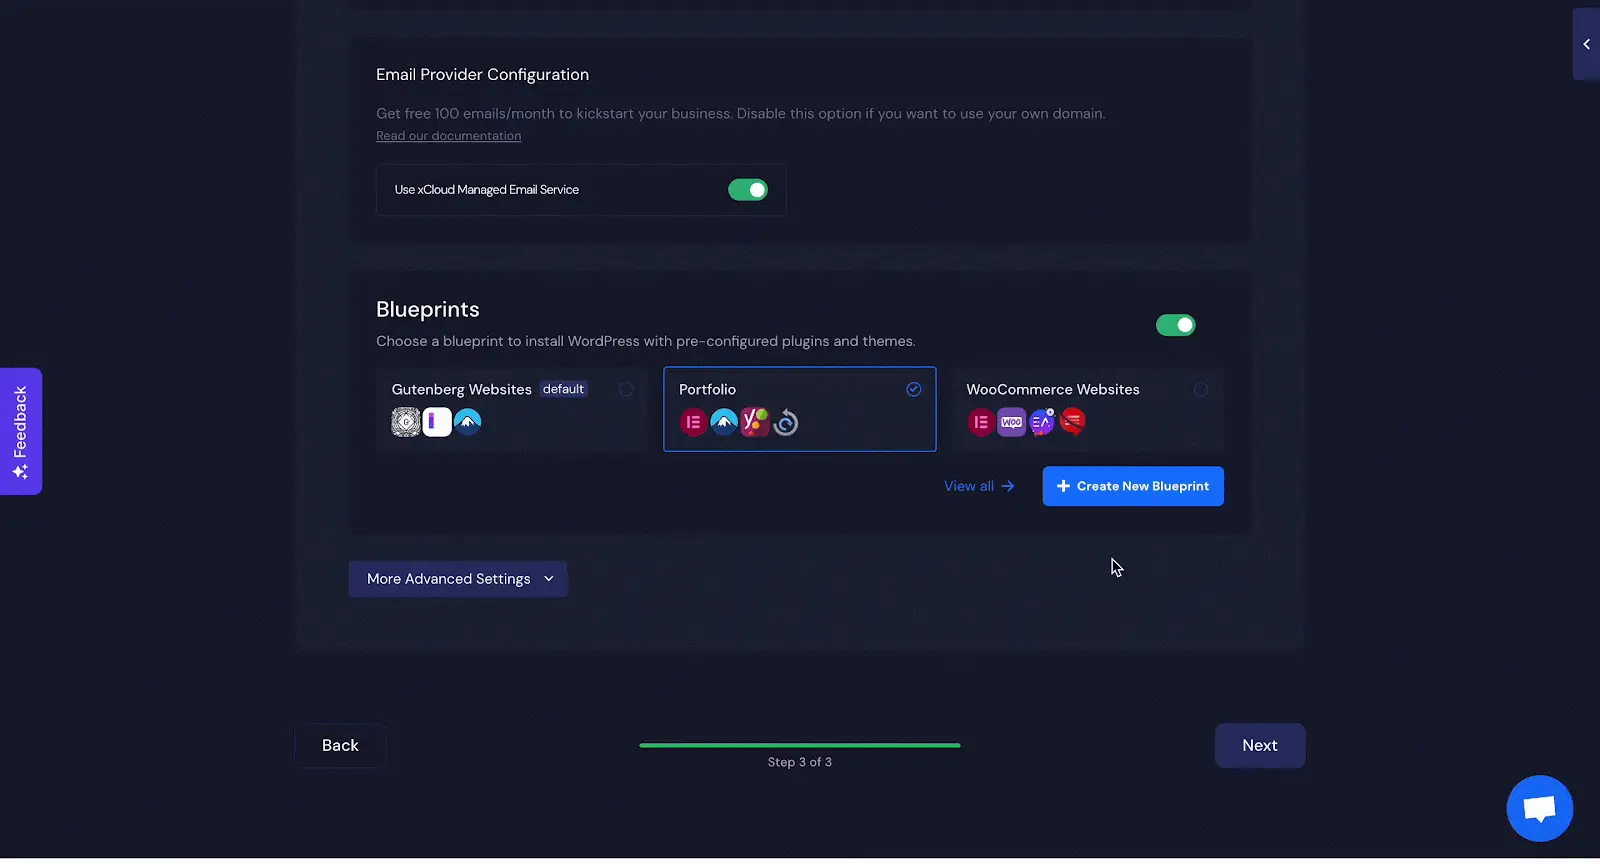
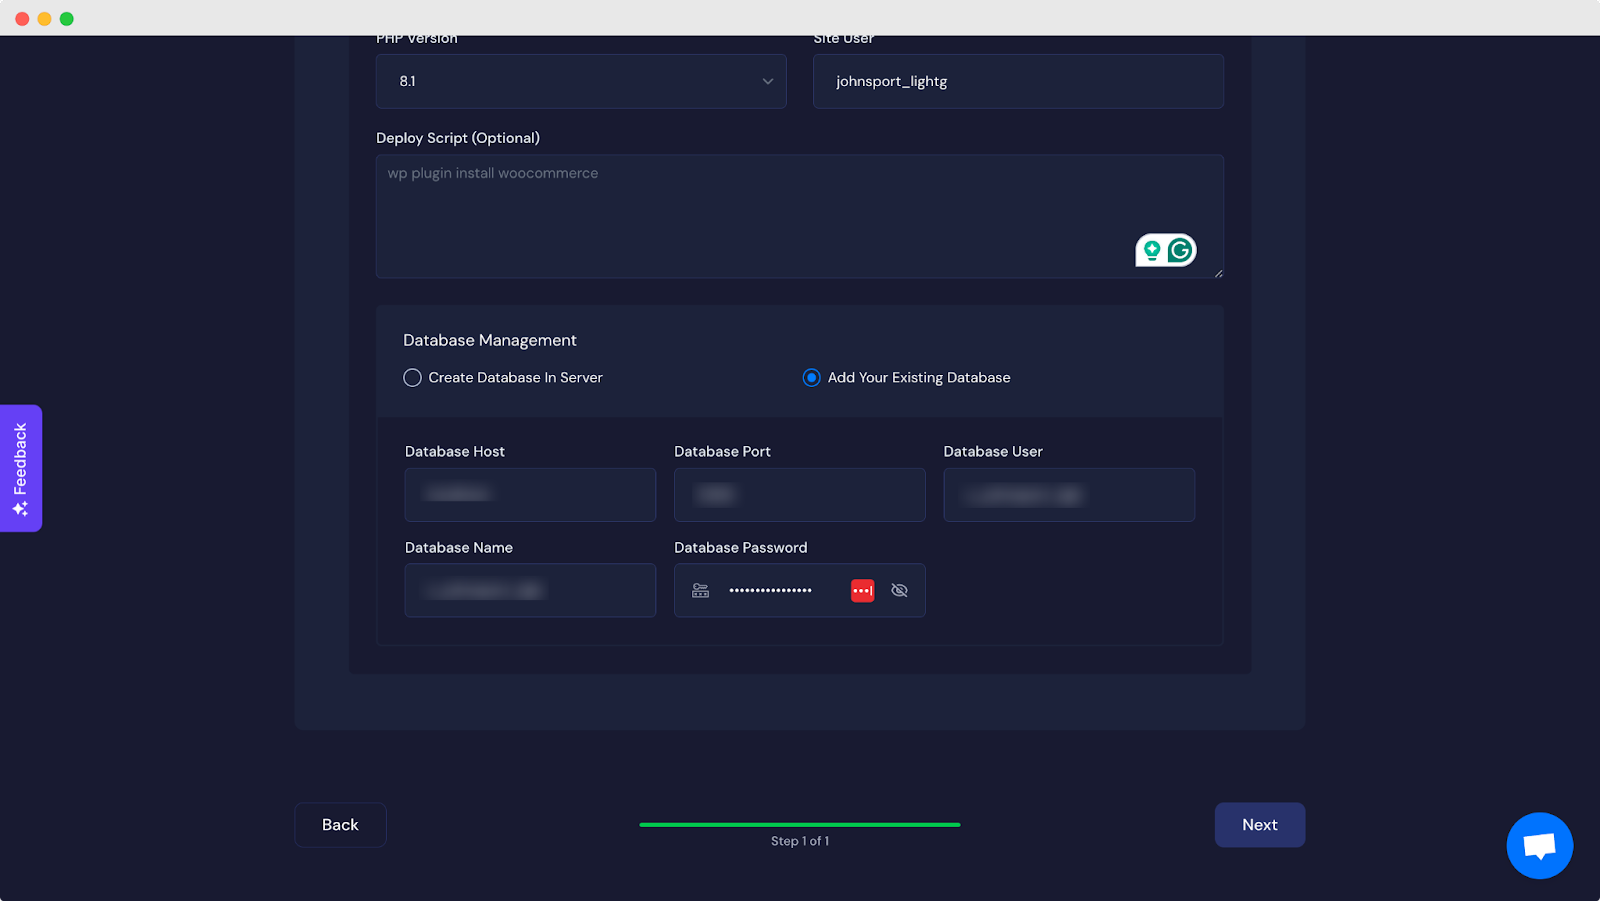
You can also try the advanced features below. Click on the ‘More Advanced Settings’ button and a drop-down section will appear. Provide your username, and password, as you want. You can also set up PHP versions from 5.6 to the latest version and even WordPress 5.0 to the latest versions as well. In addition, you can deploy scripts from there as well.
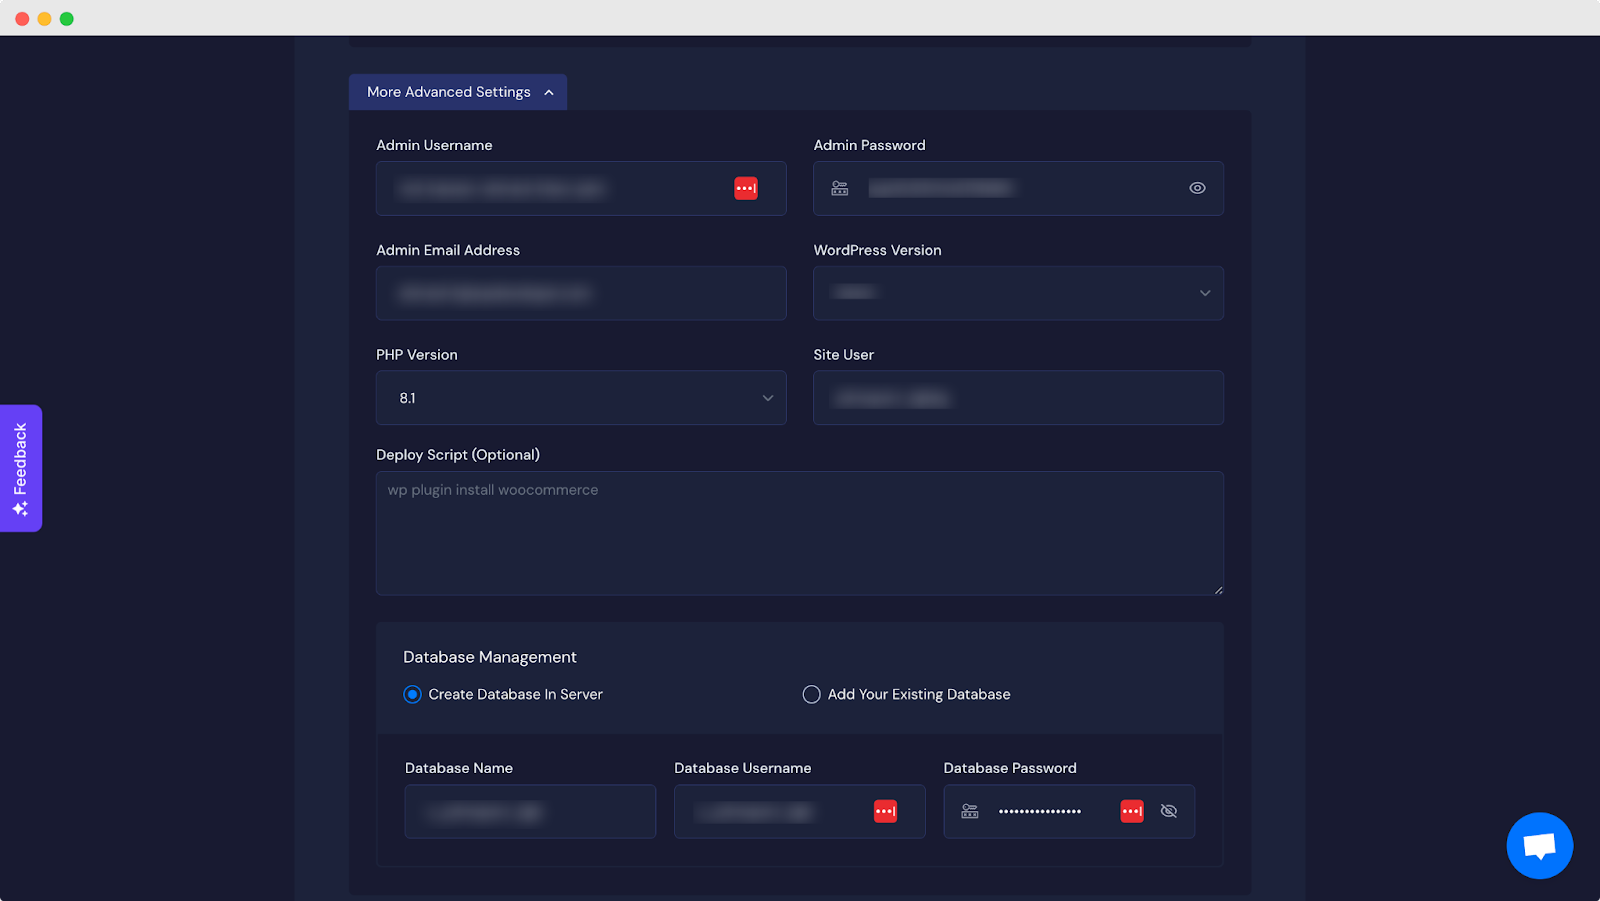
By default, you can create a database in the xCloud server for this demo site. If you want, you can add your existing database as well. To do that click on the ‘Add Your Existing Database’ button and fill out the necessary fields before clicking on the next button.
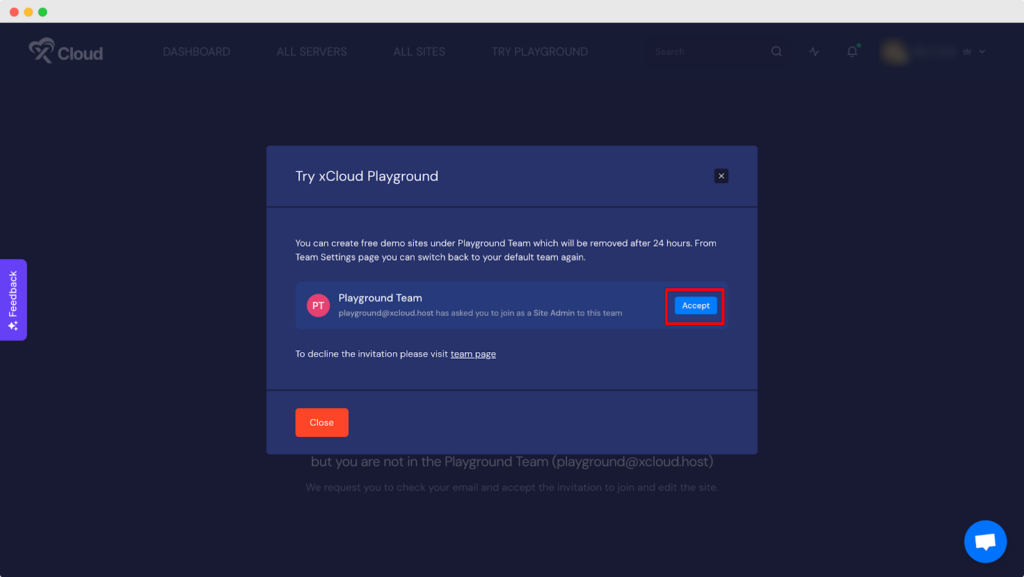
Now, a popup will appear where you need to click on the ‘Accept’ button to be added to the Playground Team.
Step 3: Login To Your Demo Website #
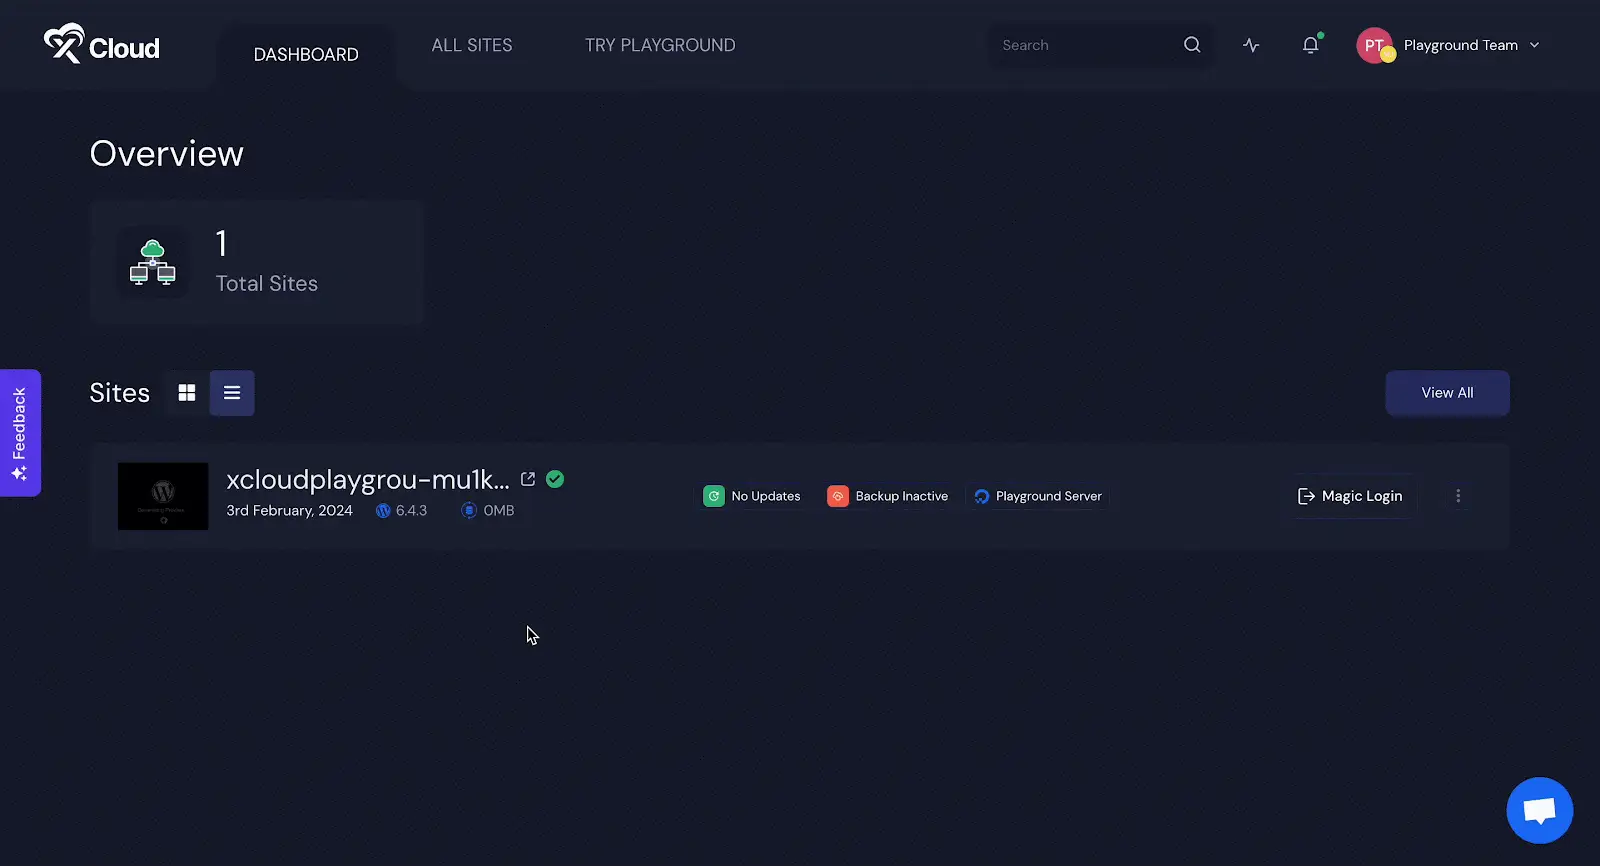
Instantly your demo website will be ready to explore. Now, click on the ‘Magic Login’ feature to log in to your demo WordPress website dashboard. You can also view site events, enable Purge cache, or delete this demo site by clicking on the 3 dots button.
This is how easily you can create a WordPress website in xCloud Playground at ease.
Step 3: Manage Your WordPress Website #
From your dashboard, click on the newly created website. Your website management panel will appear where you can manage your website with ease.
xCloud offers advanced site management features like staging, WordPress plugin and theme management, redirection, caching, event, performance monitoring, and remote and local site backup. You can check out our docs on website creation features to learn more about all of these settings and features.
That’s how you can use the xCloud Playground feature and get a glimpse of what’s inside xCloud.
Still stuck? Contact our support team for any of your queries.


