


Having a delicious meal is only possible when a chef tastes it before serving it to you. Likewise, setting up a staging site is very important to make sure everything is okay with your website, before going live. So if you are someone who wants to setup staging site in WordPress & does not know ‘from where’ & ‘how’ to start, this blog is for you.
In this comprehensive guide, we will let you know how you can setup a WordPress staging site (test site) before going live. Let us jump in!
What is A Staging Site & Why Do You Need to Setup One?
A staging site is like a copy of your real website used for testing changes before you make them live. It helps you find mistakes so you do not mess up your actual website. Previously, setting up a WordPress staging site was tough because of all the manual work. But now it is much easier, even for people who are not familiar with tech and code-related stuff.
Why Do You Need a Staging Site?
Many users install WordPress on their localhost to test changes. Once they are done, they move those changes from their localhost to the real website. But there is something to think about – what if something that worked on your localhost does not work on the real website? Often, the localhost and the website are not set up the same way.
That is exactly where the staging site comes in handy. It lives on the same server as your real website, so it is set up exactly the same. This means you can catch and fix any problems before they affect your live site. Now let us have a look at different versions of the site to distinguish the staging site from them.
However, other than the above-mentioned benefits, there are several advantages of using a staging site. Which includes:
- Solving Problems
Websites are not flawless; they can encounter WordPress errors, plugin clashes, and other technical glitches. Fixing them can sometimes lead to even more issues. With that said, using a staging site is perfect for addressing these problems since it is a safe playground where you can tackle issues without affecting your live website or user experience.
- Safety Measures
In addition to being a safe workspace, a staging environment is excellent for creating backups of your website. Since it is essentially a replica of your live site, creating a staging site ensures you have a secure copy of your work. If anything goes wrong, you can easily revert to the latest version, saving time and keeping users satisfied.
- Experimentation
A staging site is like a lab for your website experiments. It is not visible to the public, so users will not be affected by any changes or downtime. You can also tweak settings to prevent search engines from indexing the site, avoiding negative SEO impacts.
In simple words, in a staging site; you are free to try anything without worrying about consequences.
Best Practices for Staging Sites in WordPress
Before diving into the process of creating staging sites in WordPress, you need to know a few best practices. From backing up to having full control access to your staging site are must things to consider.
Take Backup of Everything
Make sure all your files and databases on your website are backed up before proceeding to create a staging site. Where to back up your things? Either you can go with storing them on your server or off-site so that you can have easy retrieval later on.
It is recommended not to go with partial backups because you might miss the important files and information. Rather try to keep an instant backup just before starting work on staging because automatic backups will take time.
Keep Your Databases Separate
It is crucial to keep your production and staging databases separate to avoid any mishaps. Working on the staging database ensures that your live website remains intact and functional.
Maintain Cache Easily
No matter whether you are an experienced user, dealing with caching can be frustrating most of the time. Clearing your cache when pushing new changes to the live site ensures that updates appear promptly, avoiding confusion.
Manage Staging Site Access
Consider your staging site a confidential area reserved for testing and trial runs. To enhance security measures, ensure it remains hidden from search engine results by implementing techniques such as no-index and no-follow. Furthermore, contemplate adding password protection to restrict entry solely to approved individuals.
Development Site vs Staging Site vs. Production Site: What’s the Difference
In the process of creating a website, it undergoes several versions before going live finally. These changes and checking are crucial for ensuring the final product is free of bugs and effectively serves its purpose.
Here, we will dive into the three main versions in a table for your convenience: Development Sites, Staging Sites, and Production Sites.
| Development Sites | Staging Sites | Production Sites |
| Development sites are where initial development work occurs. It is an isolated environment for testing new features. Changes made here are not automatically reflected in other environments. | Staging sites represent a stage closer to the final version. Errors are rectified here, and changes are prepared for deployment. It is the environment where website changes are tested before going live. | Production sites are the live versions accessible to end users. This is where visitors interact with the website. The goal is to ensure it is error-free and user-friendly, utilizing insights from the development and staging environments. |
| Accessible only to the internal team and not visible to users or search engines. | Also accessible only to the internal team for testing purposes. Not accessible to users or search engines. | Accessible to end users, representing the final version of the website. |
| Used for initial testing and development. | Used for final testing before deployment. | Represents the live version of the website. |
Understanding and effectively utilizing these development environments significantly enhances the chances of having a problem-free and successful website launch.
How to Setup Staging Site: A Complete Guide
A staging sits between the development phase and the live website. There are many methods available to setup a WordPress staging site(e.g., hosting provider, WordPress staging plugin, manual). Among all these three, the easiest and fastest is using a hosting provider.
With that said, xCloud – the next-gen WordPress hosting offers the most seamless process to setup WordPress staging sites. With xCloud, you will have a staging area that includes temporary domains. This lets you make your site live using different methods.
Reasons to Choose xCloud to Setup a Staging Site
As we have already said, setting up a staging site using a hosting provider is much easier and recommended by all. And xCloud stands out by all means in this field. xCloud offers 1-click staging directly from the dashboard. The dashboard is easy to use yet intuitive enough. In xCloud, users can clone & migrate with staging domains.
Moreover, while using xCloud to setup a staging site; you do not need to worry about data loss. xCloud’s staging environment is the perfect bridge between the development and live production environment. Most importantly, you will get a staging environment with temporary domains in xCloud to make your site live with every site creation method available.
All reason being said, now let us move on to the step-by-step process of setting up a staging site. Before creating a staging site for WordPress, you need to have a site open first. If you want to learn how to create a site in xCloud, follow the below documentation.
By following the below simple steps, you can easily setup staging site in xCloud. xCloud offers a simple yet intuitive dashboard for the staging environment from where you can control and set everything before taking your site live. Let’s see how it works:
Step 1: Open A New Site in Your Selected Server
Start with creating a site from the xCloud Dashboard or Site List by clicking on the button ‘New Site.’ After that, choose your server & click on the ‘Next’ button.
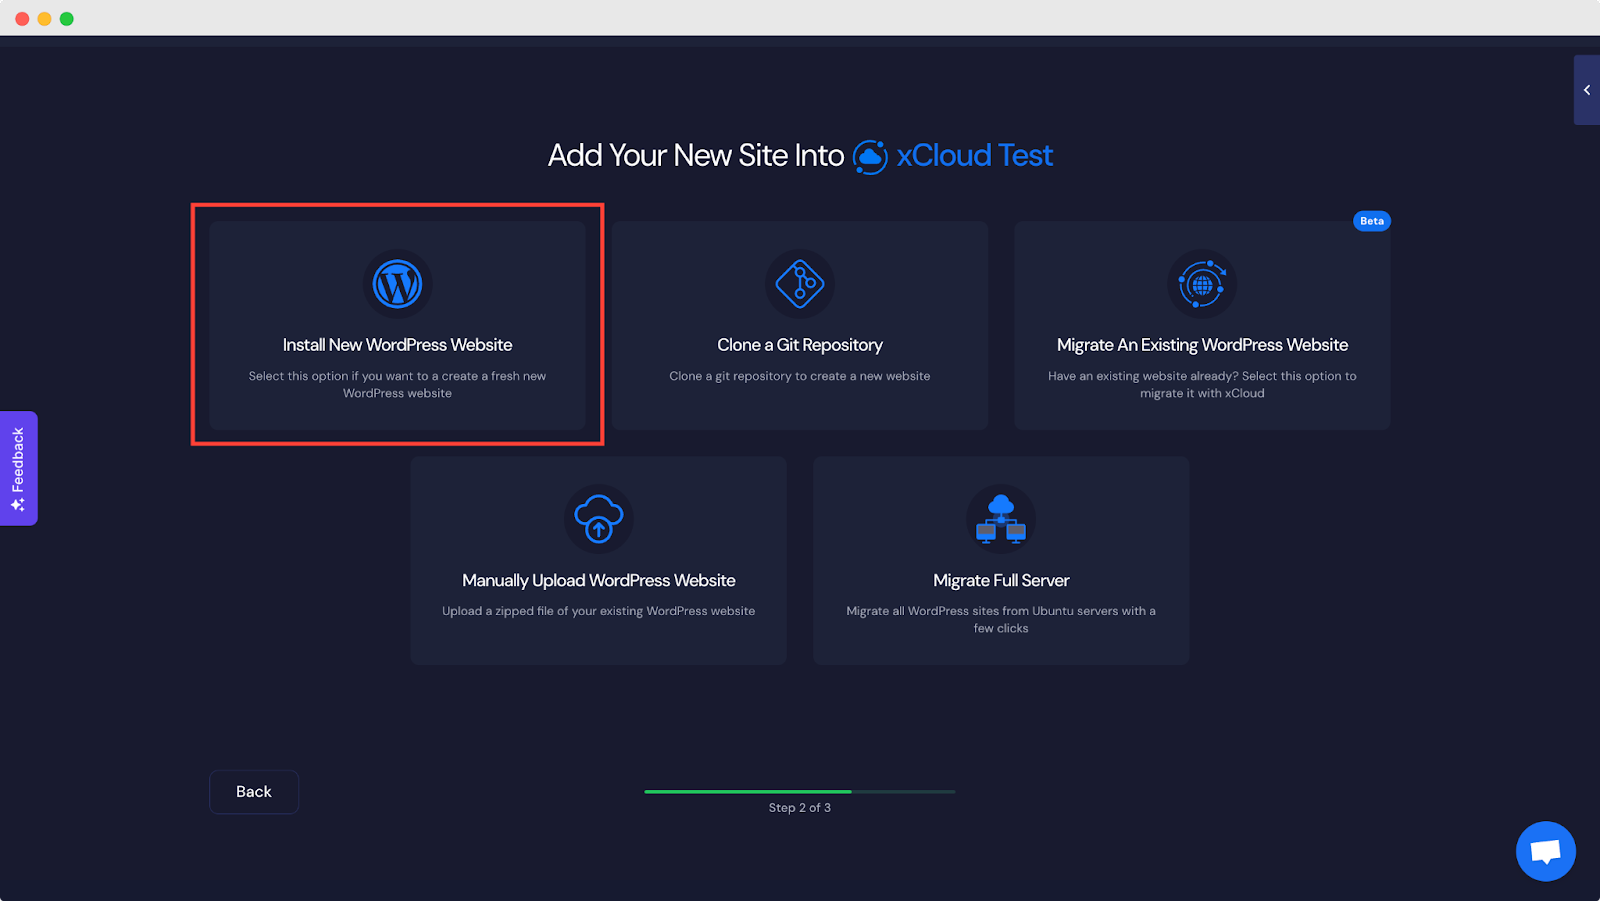
Step 2: Choose Your Site & Add Information
After connecting your site to the server, you will be creating a fresh WordPress site here. So choose the “Install New WordPress Website” option as shown below.
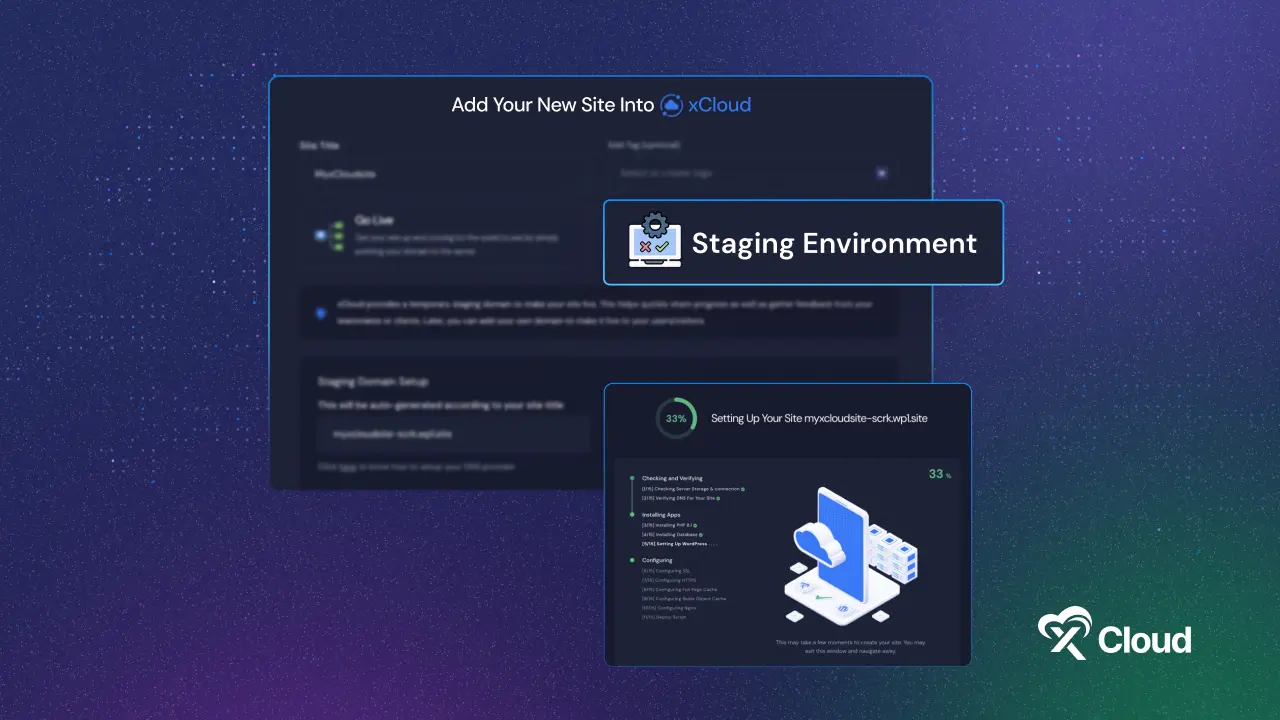
Step 3: Install Your Site Into Staging Environment
Now instead of going live, you need to choose the Staging Environment in this section, as shown below. Your new WordPress site will go into a staging environment before sending it to live.
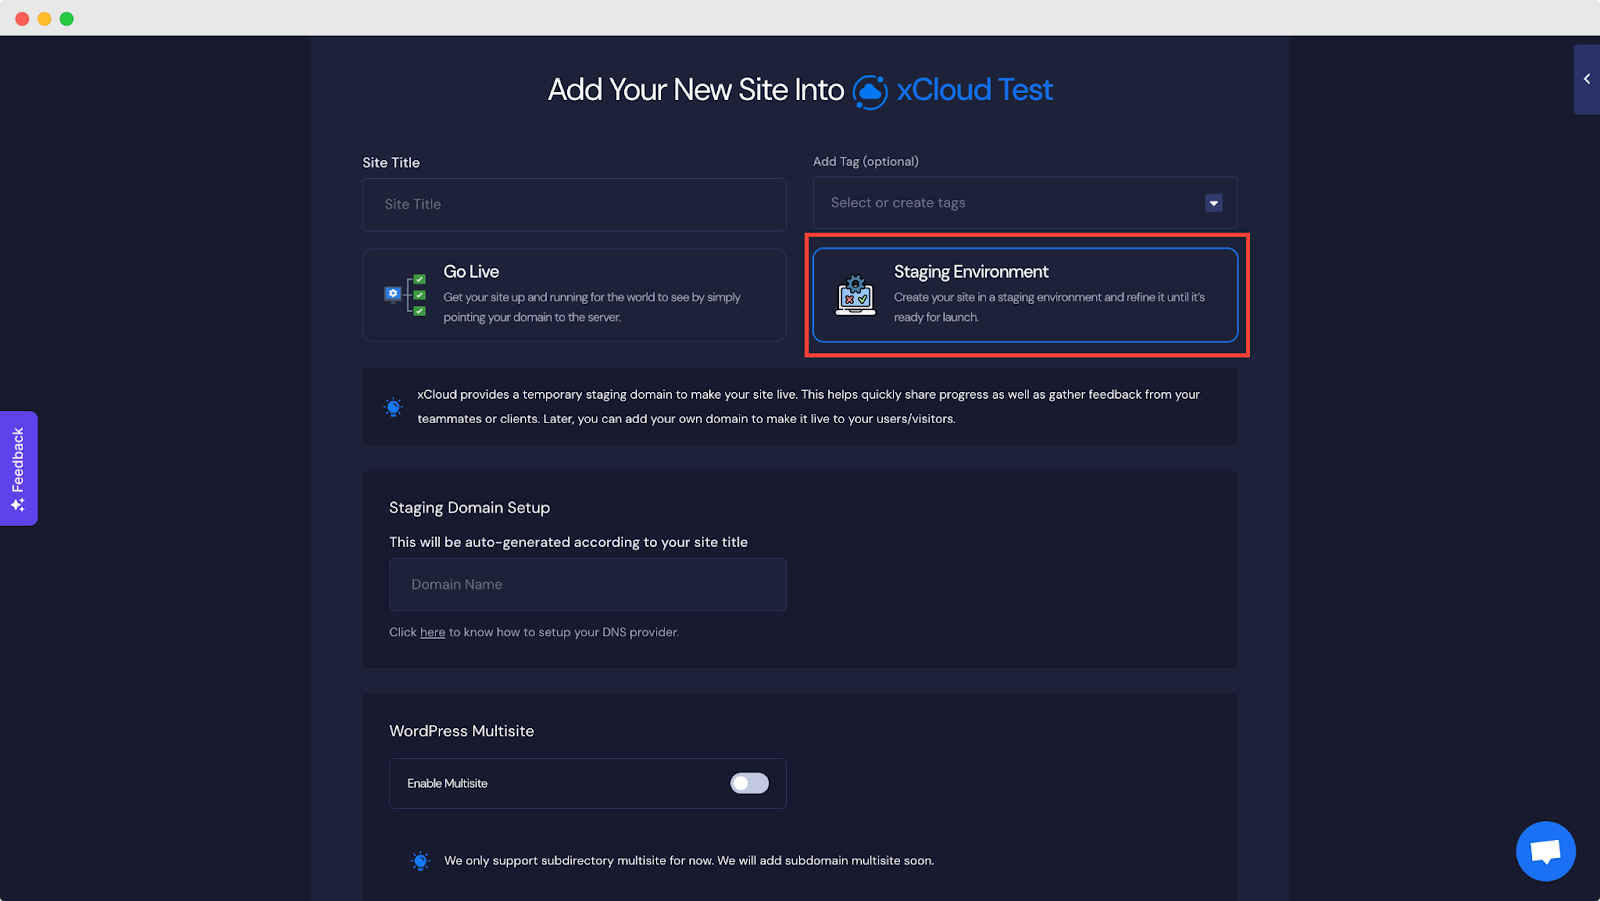
Click on ‘More Advanced Settings’ to expand all the information. Fill in all the information before clicking on ‘Next.’
Step 4: Have Your WordPress Staging Site Ready
There you go! Since xCloud offers a blazing-fast experience; so within a few minutes, your site will be in a Staging Environment & you will be able to manage everything on your site from the xCloud dashboard.

Once your site is ready, go to All Sites in the xCloud dashboard, and click on the site you have just setup on the staging environment. Get the ‘Staging’ option in the left menu bar in the dashboard, click on it & have the staging option there along with the ‘Go Live.’
Common Staging Problems You Might Face (with Fixes)
Usually, people face issues with the staging environment, you might also. With that said, here are some common staging problems encountered during the setup process, along with potential fixes:
- Database Connection Issues
❌ Problem: Sometimes staging site fails to connect to the database, which results in errors.
✅ Fix: Make sure that you configure your database credentials properly in your staging environment. Firewall settings & the database connections need to be double-checked.
- Broken Links and Images
❌ Problem: Images & links are broken & pointing to wrong URLs
✅ Fix: To match the staging environment, you need to update your URLs; most importantly when you are using a temporary domain or any subdirectory.
- Backup and Restore Issues
❌ Problem: Backup is getting failed, or restore is getting errors.
✅ Fix: Need to test backup regularly or you can use a reliable plugin or any hosting provider tools (e.g., xCloud) that offers the backup and restore feature with the dashboard.
Create Staging Sites to Get a Safe Playground for Website Development
Creating a staging site is like having a safe playground for your website. It is basically a copy where you can freely experiment, troubleshoot, and tweak the design before your changes go live. With a staging site, you will not mess up your website’s SEO or make it hard for users to navigate.
You have full control in this playground – you can try out new ideas without worrying about consequences. The easiest and safest way to setup staging site is through your hosting provider (e.g., xCloud). xCloud handles the technical stuff for you, making the process hassle-free.
Did you find this blog helpful? If you do, please subscribe to our blog, and do not forget to join our Facebook Community to get our daily updates.