


Interested in hosting your website with industry-leading technology? Learn how to setup Amazon AWS, a powerful cloud computing platform, to host your websites. This guide will take you through the steps to leverage the robust features of Amazon AWS for easy website hosting, ensuring reliability, scalability, and performance for your online presence.
What Is AWS: Amazon Web Services?
Amazon Web Services (AWS) is a cloud computing platform that offers a wide range of services to help businesses and individuals build and manage their digital infrastructure. When it comes to hosting your website, AWS provides a secure and reliable environment where you can store your website’s files and data.
Here’s how AWS hosting works:
Server Infrastructure: AWS provides virtual servers called EC2 instances, where you can deploy your website’s code and files. These servers are highly scalable, meaning you can easily adjust their capacity to accommodate changes in web traffic.
Storage Solutions: AWS offers various storage options such as Amazon S3 for storing static files like images, videos, and documents, as well as Amazon RDS for managing databases.
Content Delivery: AWS has a global network of servers called CloudFront, which helps deliver your website’s content to users around the world with low latency and high transfer speeds.
Security: AWS prioritizes security, offering features like firewalls, encryption, and identity access management to protect your website and data from unauthorized access and cyber threats.
Monitoring and Management: AWS provides tools like CloudWatch for monitoring your website’s performance and health, as well as services like AWS Management Console for easy management of your hosting environment.
Setup Amazon AWS To Host Website
If you’re looking to host a static website on Amazon S3 and have registered a domain with Amazon Route 53 (like example.com), this guide will show you how to set it up. Learn how to serve content from your Amazon S3 storage for requests made to http://www.example.com and http://example.com, along with creating redirects for a seamless experience.
This tutorial will guide you through the process of connecting an AWS EC2 Instance to xCloud. Before beginning, ensure you have an Amazon AWS account by signing up if you haven’t already.
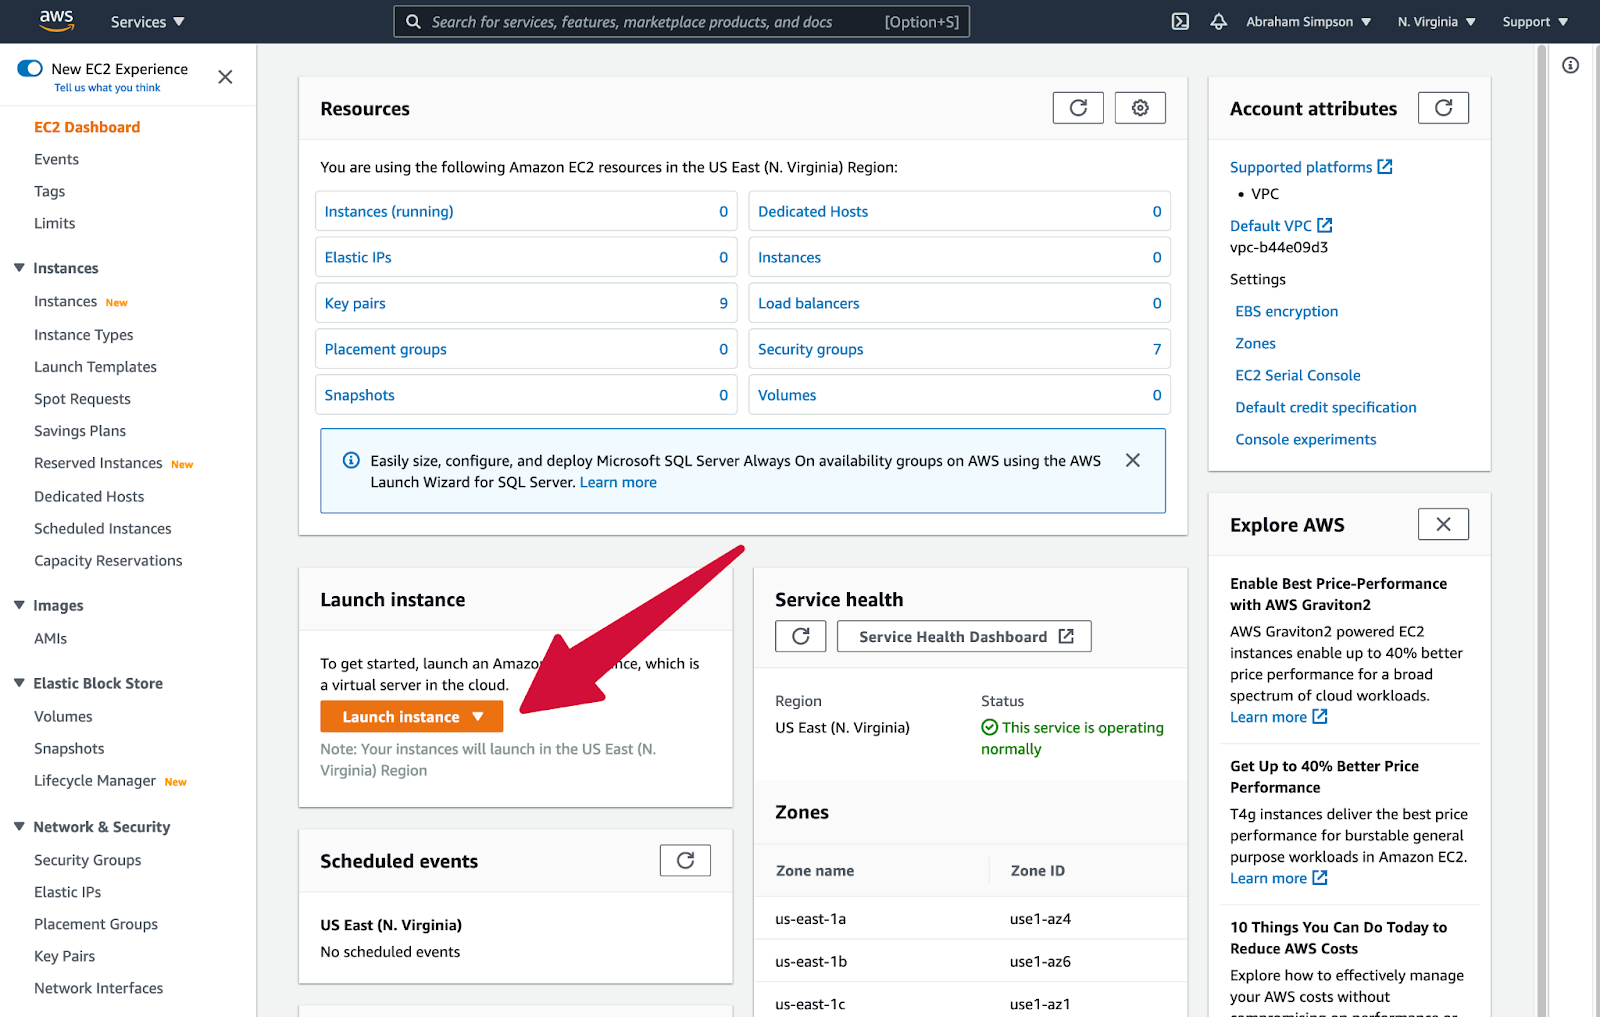
After logging in, go to Services > EC2. If you see the EC2 dashboard, click on Launch Instance located approximately halfway down the screen.
If, on the other hand, you see the list of instances, click on Launch Instances located at the top right corner of that list.
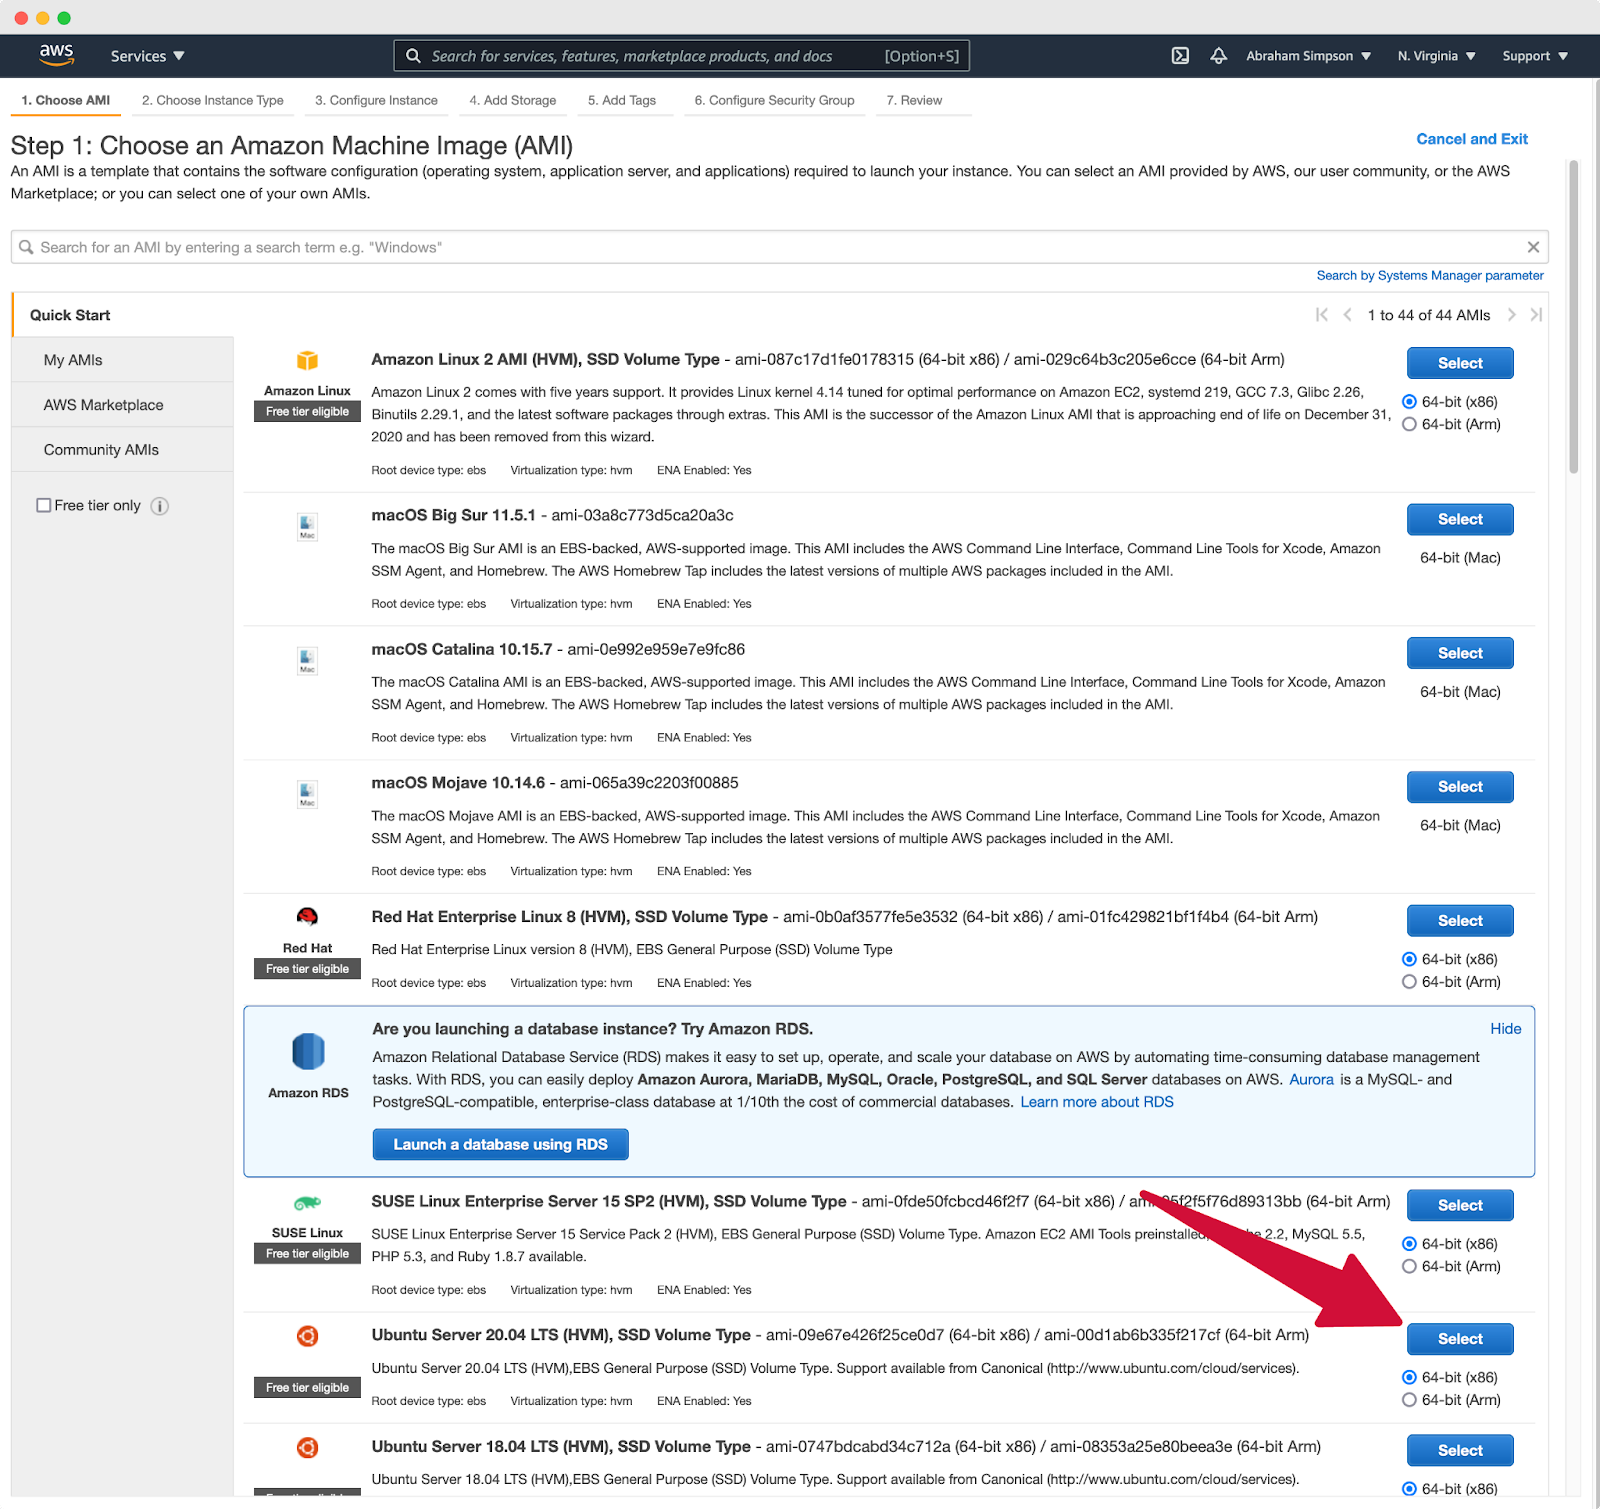
You will be prompted to choose an Amazon Machine Image (AMI). Opt for “Ubuntu Server 22.04 LTS”, selecting the “64-bit (x86)” version.
You will encounter a prompt to select the Instance Type. In this tutorial, we’ll stick with the default “t2.micro” instance, featuring 1 vCPU and 1GB of memory. Proceed by clicking on Review and Launch.
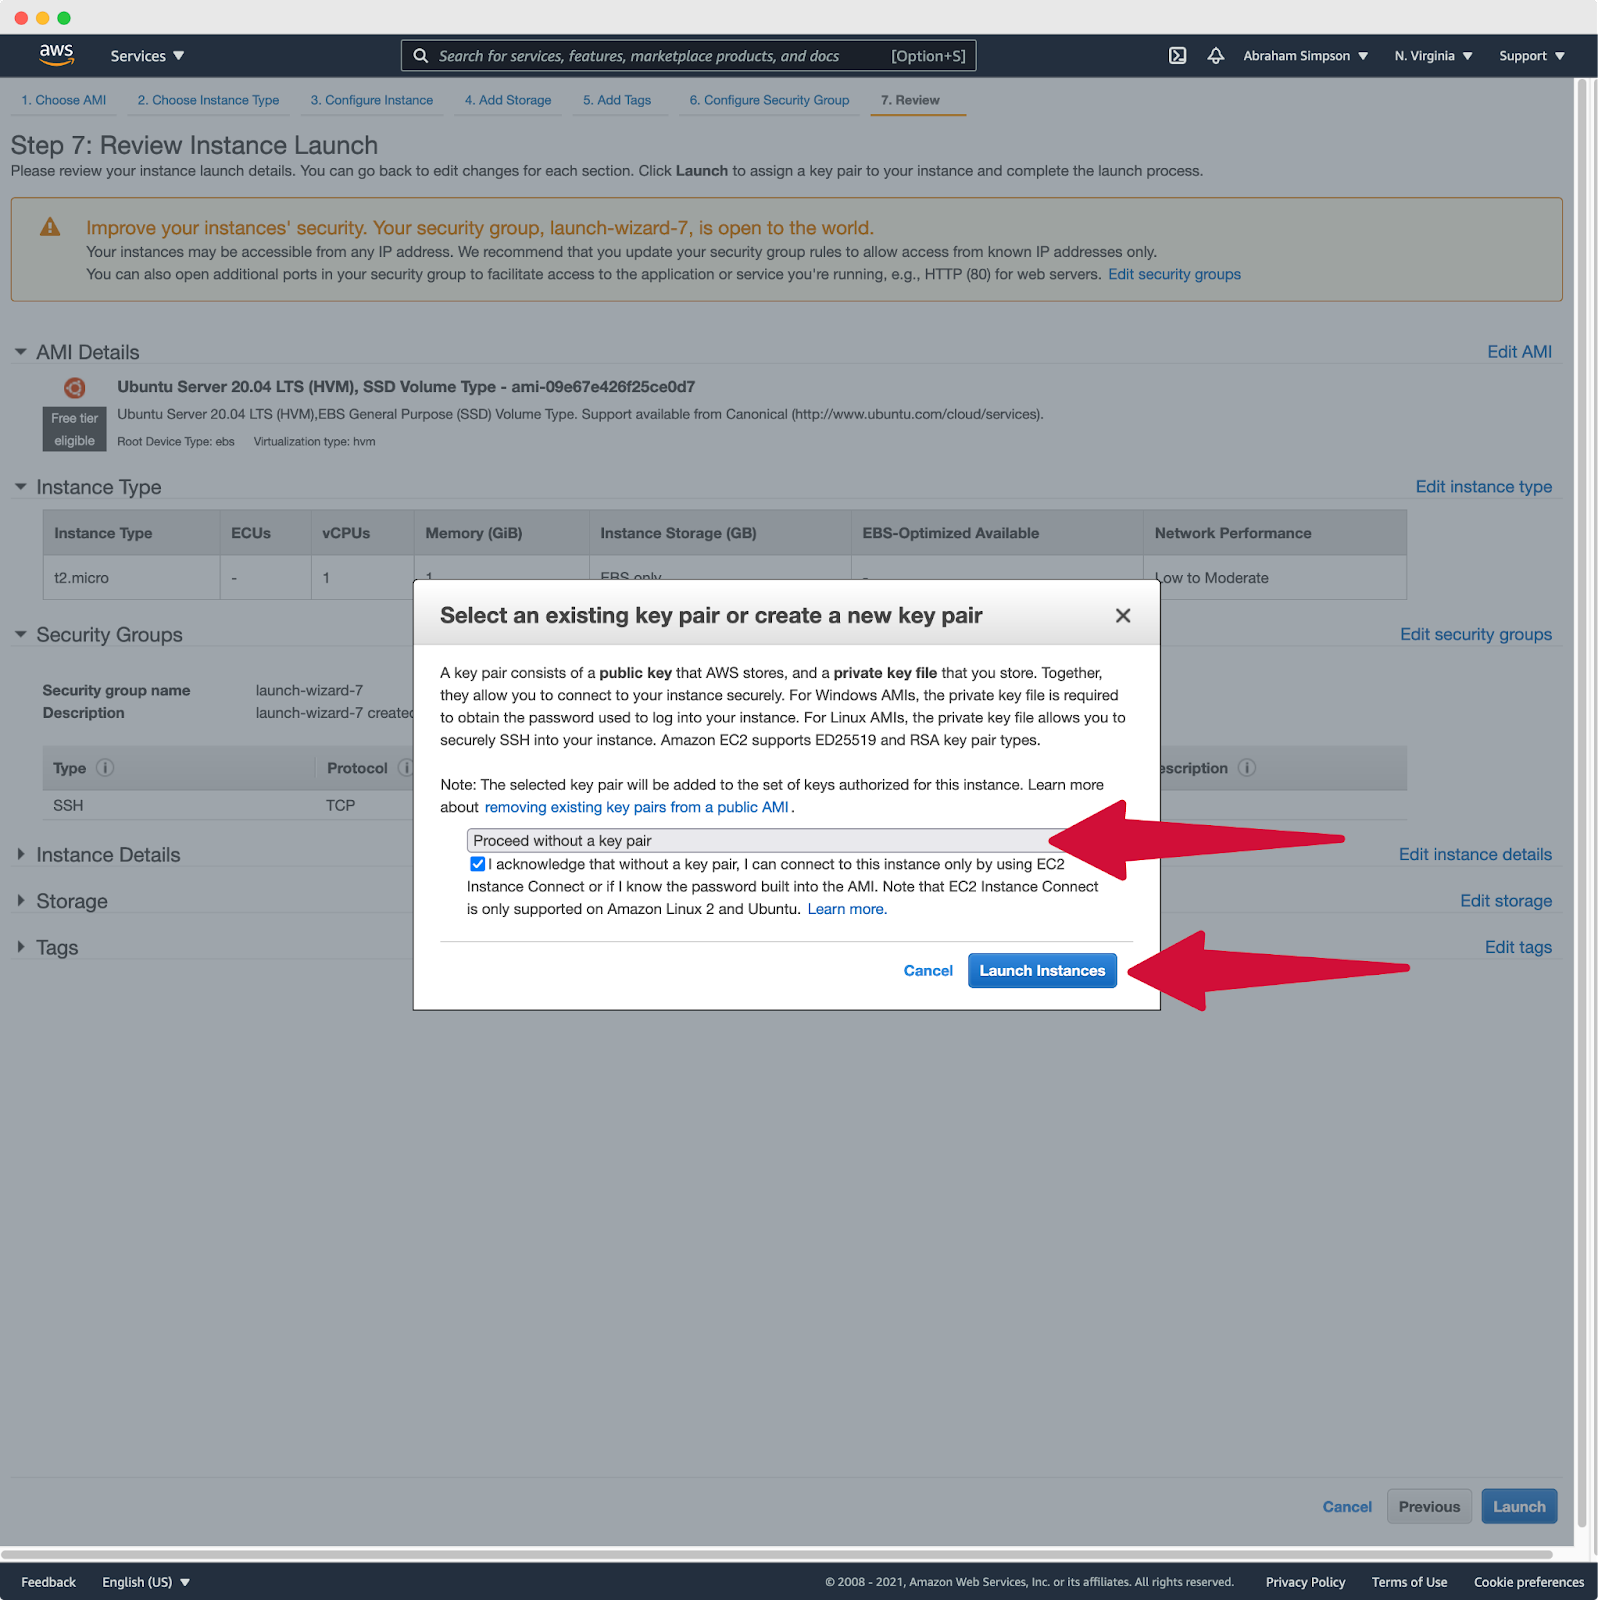
A window will pop up prompting you to select a key pair. Since we’ll be adding the SSH key to the instance’s authorized_keys file before server provisioning, choose “Proceed without a key pair” from the dropdown menu, tick the checkbox, and then proceed to click on Launch Instances.
The instance you’ve just created will show up in your Instances list, displaying an Instance State of “Running”. The following step involves connecting to the instance to add the SSH key to the authorized_keys file. Simply select the checkbox next to the instance in the list, and then proceed to click on the Connect button.
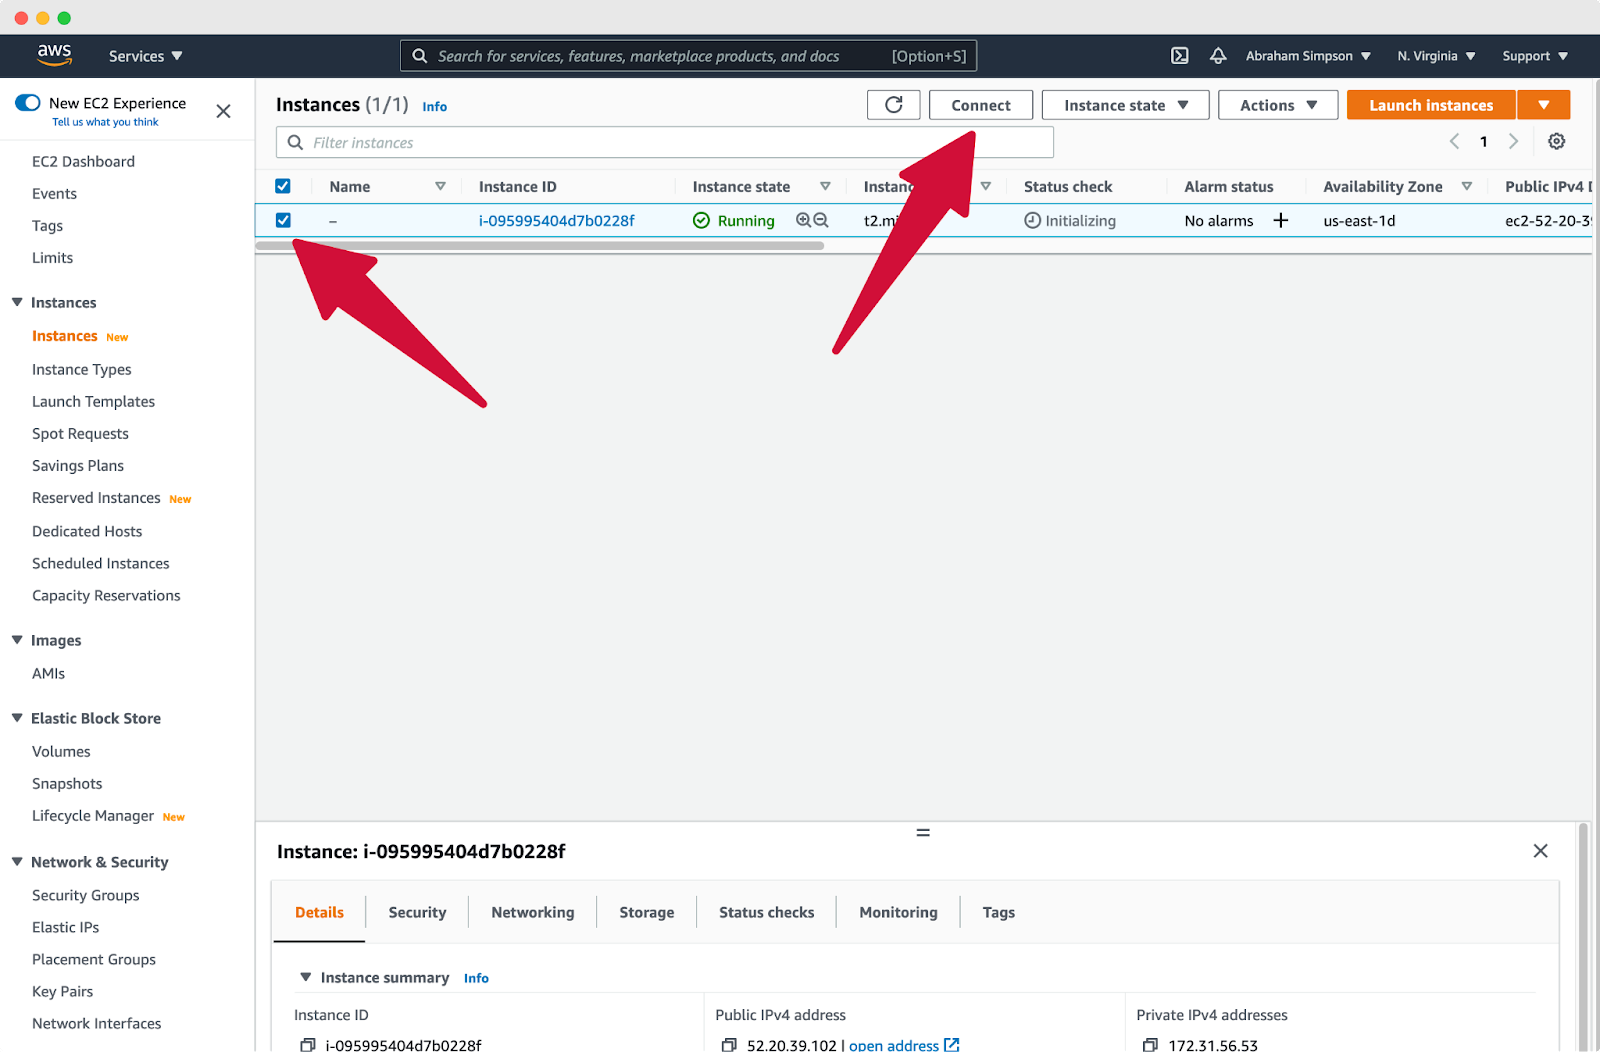
On the subsequent “Connect to Instance” screen, you’ll find the instance details displayed. Take note of the “Public IP address” and proceed to click on Connect. This action will initiate a terminal connection through a new browser window or tab.
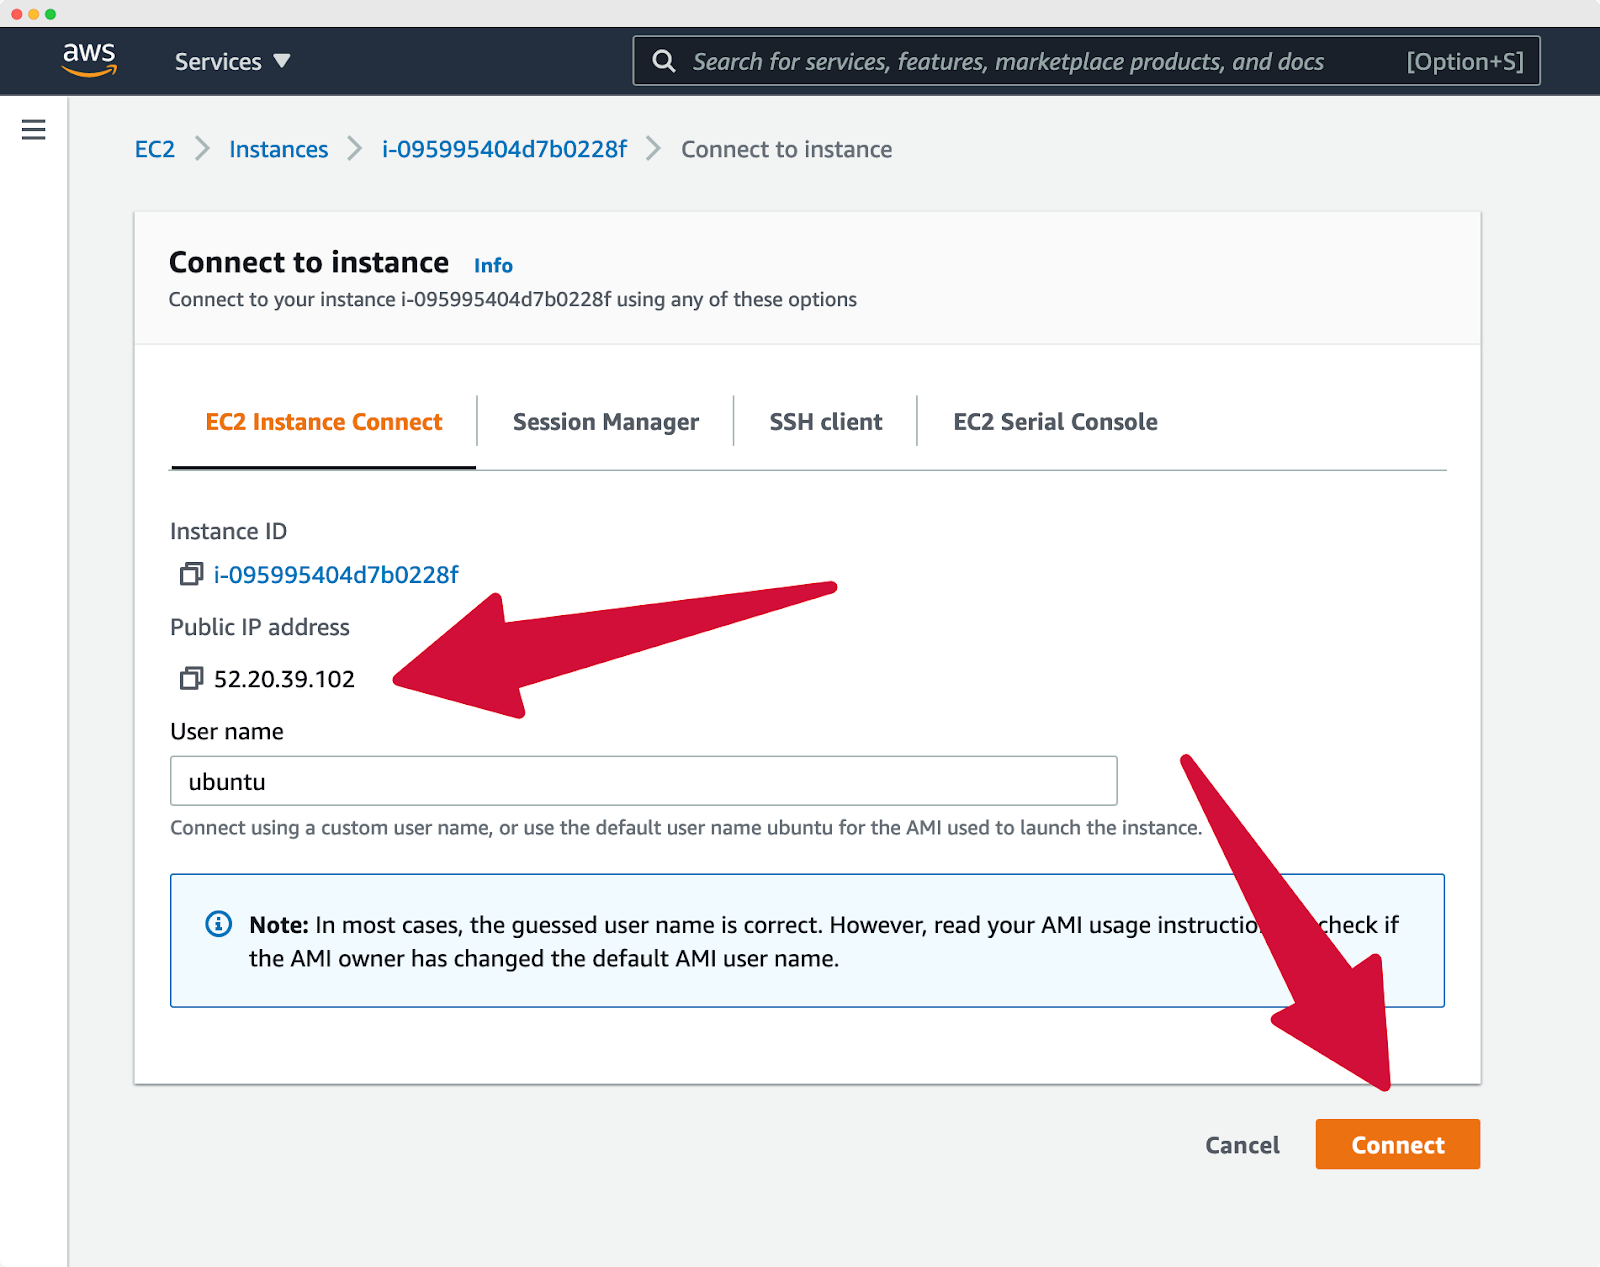
The SSH console will establish a connection using the default SSH user, which is determined by the type of AMI you selected. For Ubuntu, the username is typically Ubuntu. Next, navigate to your provider and choose from which server you will connect to your AWS account. After the server completes provisioning, you’re all set to begin adding sites.
What can you anticipate after adding a site? You’ll be provided with the opportunity to tailor your server and sites according to your preferences through your provider dashboard.
Set Up and Manage Servers Seamlessly with xCloud
With xCloud, setting up your server is incredibly straightforward, as it requires no coding skills. The entire process is uncomplicated and user-friendly, enabling developers and agencies to focus their efforts on creating outstanding websites rather than grappling with technical intricacies.
And guess what? xCloud has recently debuted, offering an exclusive lifetime deal to streamline your WordPress hosting and server management. Visit the deal page for further details and be sure to join our Facebook community to stay updated and avoid missing out on any announcements.