Strengthening your site’s defenses with WordPress security headers is one of the smartest moves you can make to protect it. These hidden heroes quietly guard your website, blocking hackers, preventing data theft, and keeping online threats at bay. Often overlooked, security headers are a simple yet powerful way to ensure your site stays safe and secure. Ready to find out how they work and why they are a must-have for your WordPress site? Let us dive in!
What Are Security Headers in WordPress & How Do They Work?
Security headers act as invisible shields between your website and the browsers accessing it, preventing malicious code from executing. They safeguard both your site and your users by blocking potential threats, like injected code or harmful scripts before they can do any damage.
In WordPress, security headers are delivered directly by the web server (e.g., Apache, Microsoft IIS). Imagine a scenario where a malicious iframe is injected into a page. When the server sends this page to a user’s browser, it also sends security headers. If the correct header, such as X-Frame-Options, is in place, it will stop the browser from displaying the harmful iframe, keeping your users safe.
Why Do We Need Security Headers in WordPress?
HTTP security headers are an essential yet often overlooked way to enhance your WordPress site’s security and performance. They act as invisible shields, protecting your site from threats and optimizing how it interacts with browsers. Here is how they work:
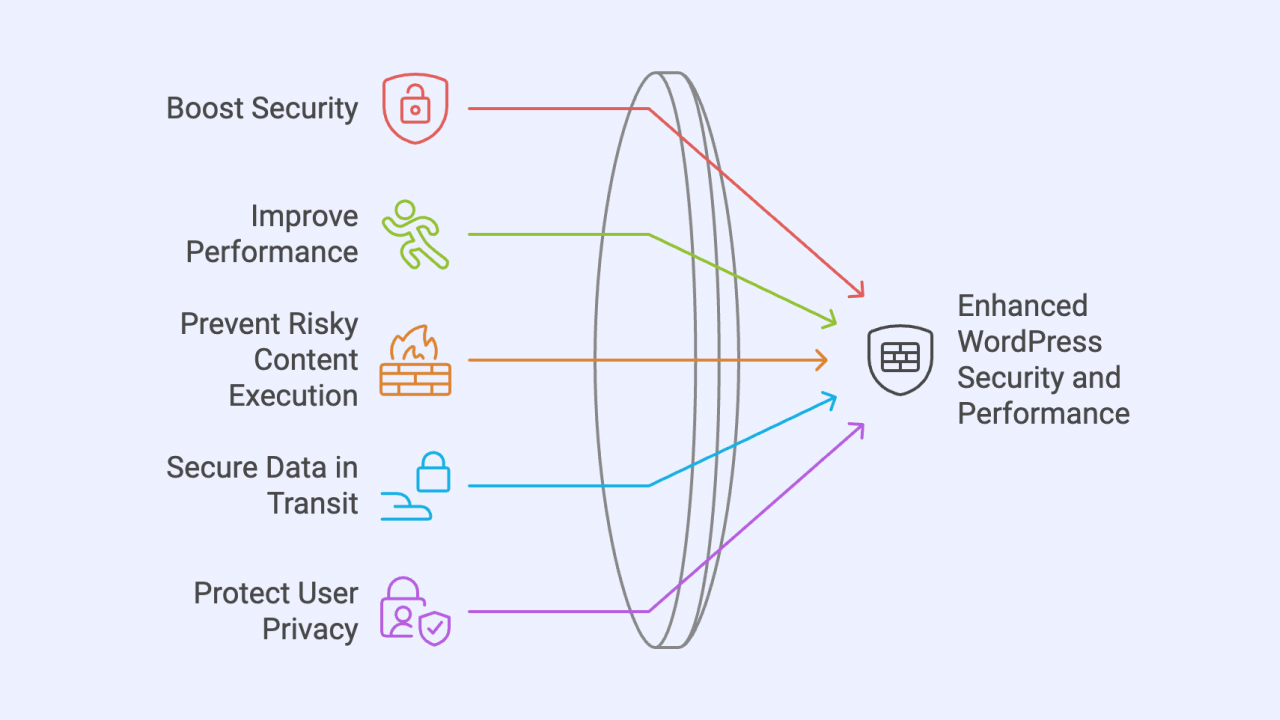
- Boost Security: With headers like CSP (Content Security Policy) and XFO (X-Frame Options), you can guard your site against common attacks like cross-site scripting (XSS) and malicious code injections, keeping your data and users safe.
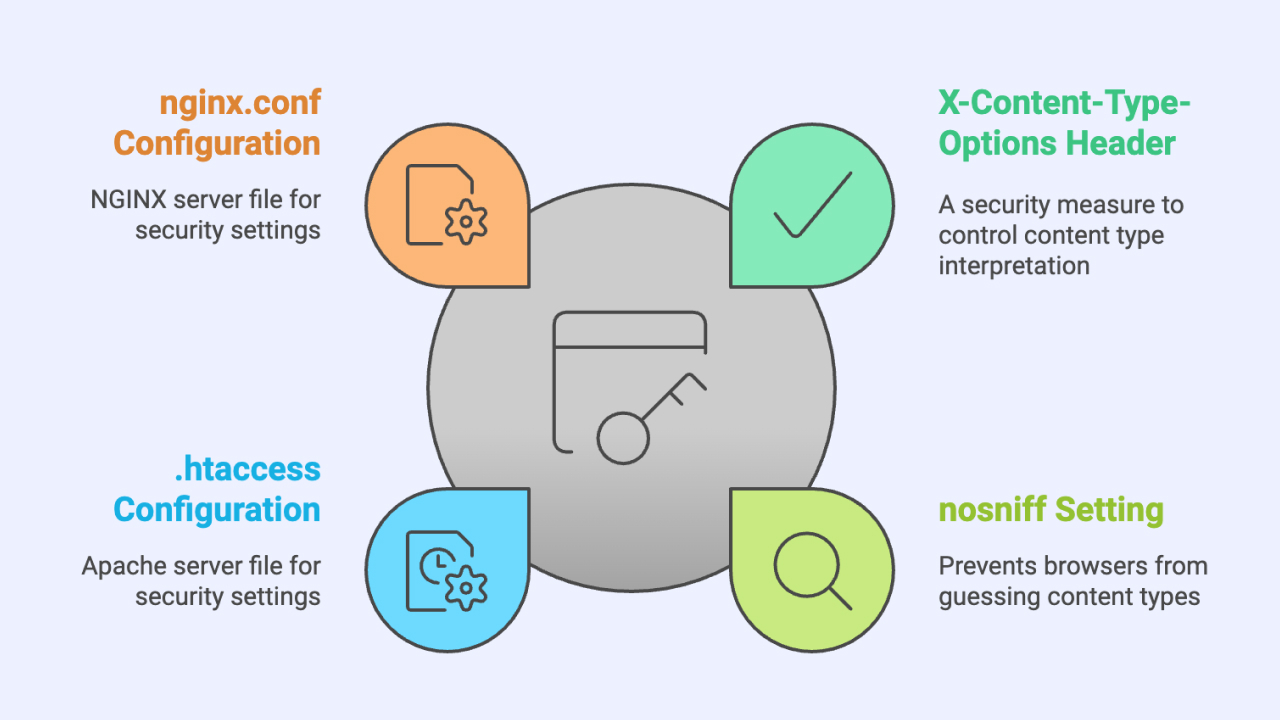
- Prevent Risky Content Execution: XCTO (X-Content-Type-Options) headers help browsers identify content types correctly, blocking potentially harmful files from executing.
- Secure Data in Transit: HSTS (HTTP Strict Transport Security) headers enforce encrypted connections between browsers and servers, ensuring sensitive data remains private.
- Protect User Privacy: Set headers to control how data is shared in web requests, giving you the ability to safeguard user information and maintain privacy.
By implementing HTTP security headers, you’re not just adding another layer of protection—you’re creating a safer, faster, and more reliable experience for everyone who visits your site.
How to Add Recommended WordPress Security Headers?
You need to enhance your website’s security by adding recommended security headers in WordPress. These headers help protect against common threats like XSS, clickjacking and data injection.
Understanding X-Frame-Options Security Header
X-Frame-Options is a security header that protects your website from clickjacking attacks. Clickjacking occurs when your site’s content is embedded into another website using an iframe, tricking users into interacting with elements they believe are safe. This becomes especially dangerous if the user is logged into restricted areas of your site.
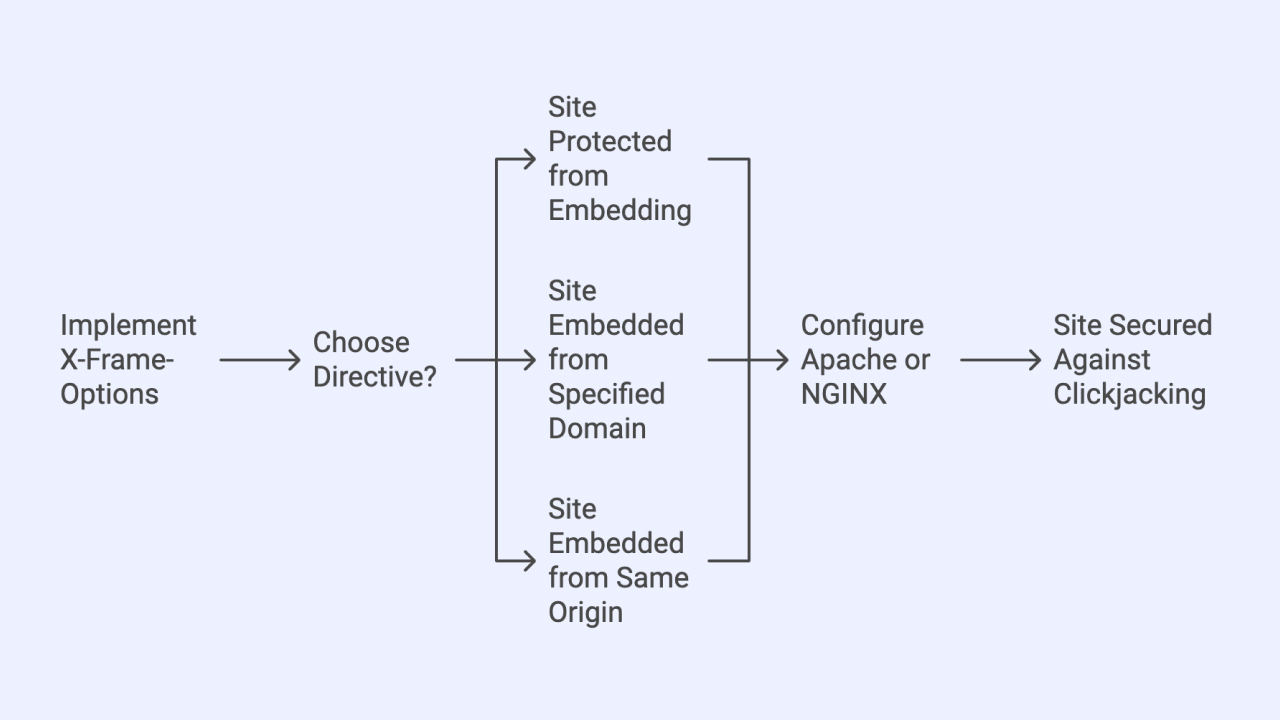
Key Directives of X-Frame-Options
- DENY:
Prevents your site from being displayed in an iframe, ensuring complete protection against embedding.
X-Frame-Options: DENY
- ALLOW-FROM:
This is an obsolete directive. Modern browsers that encounter response headers with this directive will ignore the header completely. The Content-Security-Policy HTTP header has a frame-ancestors directive which you should use instead.
Content-Security-Policy: frame-ancestors ‘self’ https://www.example.com
- SAMEORIGIN:
Allows rendering only when the iframe is loaded from the same origin (domain) as your website.
X-Frame-Options: SAMEORIGIN
Adding X-Frame-Options Security Header to Your WordPress Site
You can implement the X-Frame-Options security header in WordPress by modifying the configuration files of your server: .htaccess for Apache or nginx.conf for NGINX.
For OLS
header add X-Frame-Options “SAMEORIGIN”
For NGINX
add_header X-Frame-Options “SAMEORIGIN” always;
For Apache
<IfModule mod_headers.c>
Header always append X-Frame-Options SAMEORIGIN
</IfModule>
These configurations ensure that your site is safeguarded against unauthorized embedding, maintaining user trust and security.
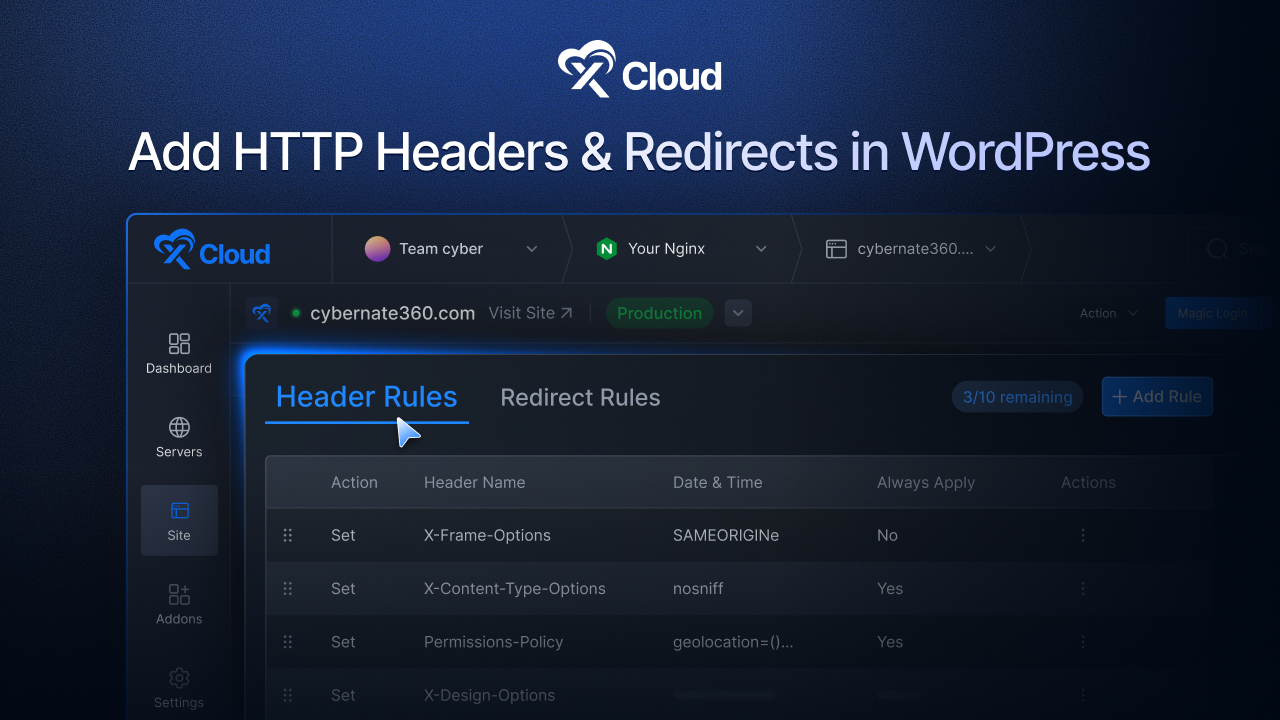
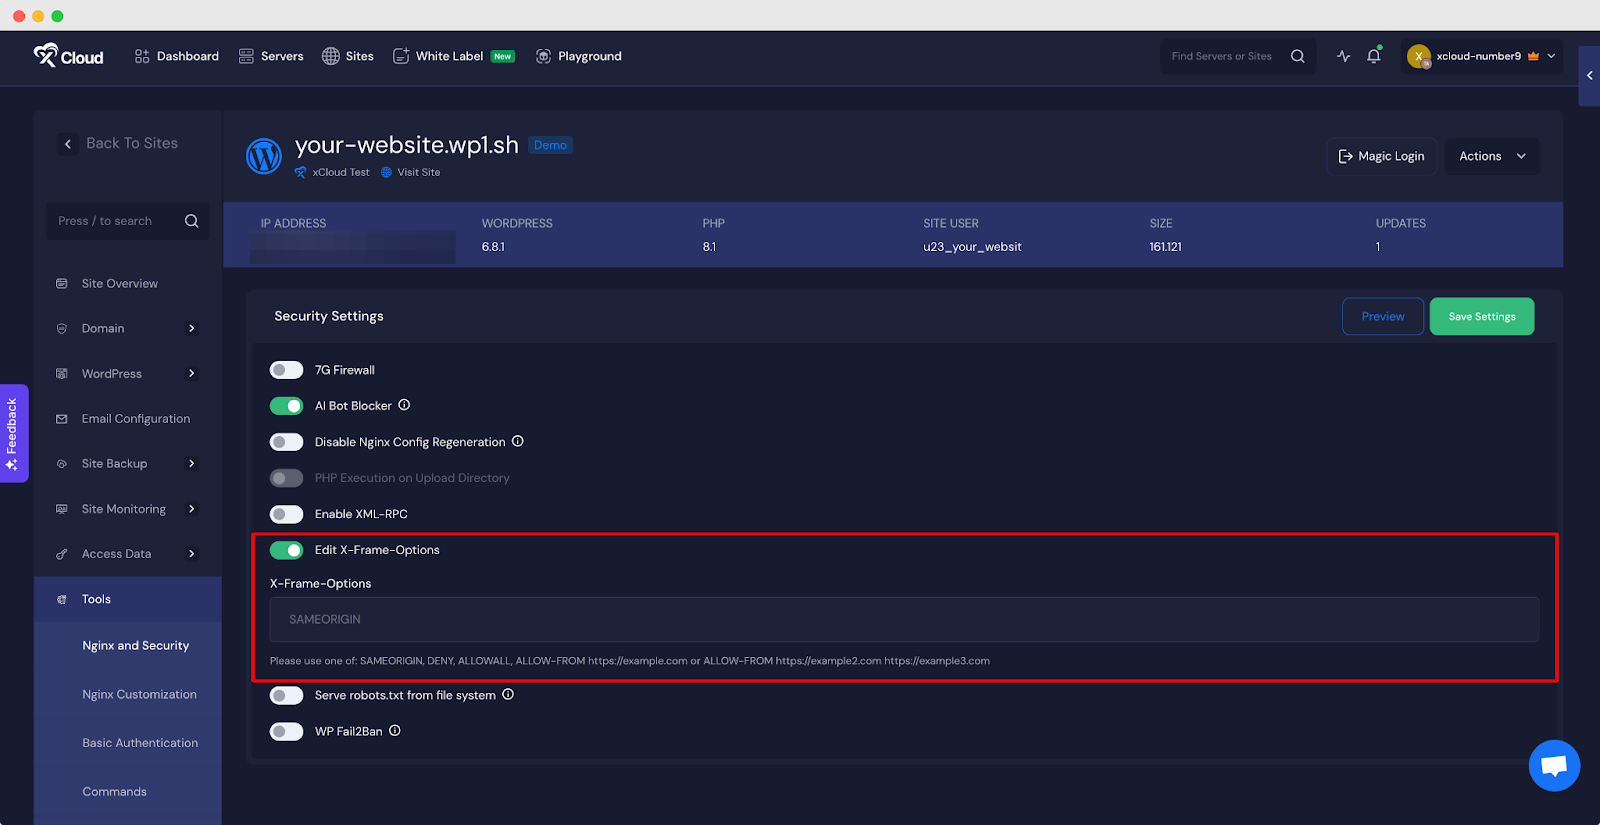
Note: With xCloud, you can edit the X-Frame-Options from Site settings. To do so, you need to navigate to Site → Tools → Security & enable the ‘Edit X-Frame-Options’ toggle.
Understanding HSTS – HTTP Strict Transport Security
HTTP Strict Transport Security (HSTS) is a security mechanism that ensures web browsers only interact with a web server using secure HTTPS connections, completely avoiding the less secure HTTP protocol. HSTS is a standardized protocol defined by the IETF and detailed in RFC 6797, which was approved in 2012.
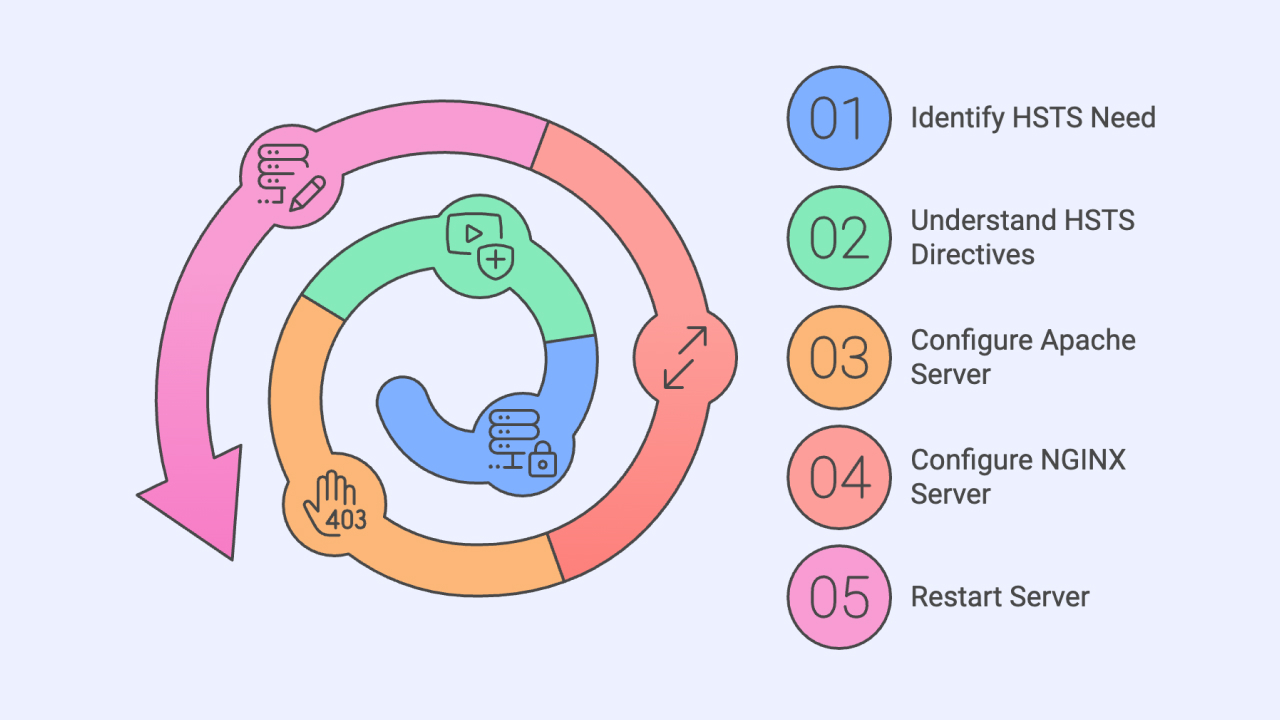
Key directives in HSTS include:
- includeSubDomains: Ensures the HSTS rule is applied to all subdomains of a site.
- max-age: Specifies the duration (in seconds) that browsers should enforce HTTPS-only access to the site.
An Example of an HSTS header
Strict-Transport-Security: max-age=10886400; includeSubDomains
Adding HTTP Strict Transport Security Header to WordPress
Before adding HSTS headers, you need to ensure that your site is using a proper SSL certificate and HTTPS is working properly. Then the users should add this header. Adding this header without an SSL cert is dangerous.
That being said, to implement HSTS on a WordPress site, you need to add the appropriate header to your server configuration. This can be done by editing the .htaccess file for Apache servers or the nginx.conf file for NGINX servers.
OLS Configuration
header add Strict-Transport-Security “max-age=10886400; includeSubDomains”
Apache Configuration
Add the following code to your .htaccess file:
<VirtualHost 88.10.194.81:443>
Header always set Strict-Transport-Security “max-age=10886400; includeSubDomains”
</VirtualHost>
NGINX Configuration
Add this directive to your nginx.conf file:
add_header Strict-Transport-Security “max-age=10886400; includeSubDomains”;
After making these changes, restart your server to apply the new configuration.
Understanding Content Security Policy (CSP)
The Content-Security-Policy (CSP) header is a security feature designed to minimize cross-site scripting (XSS) risks in modern browsers. It allows you to specify which dynamic resources are permitted to load, adding an additional layer of security.
Similar to the X-Content-Type-Options header, CSP offers a wide range of configuration options. Below, we focus on the key directives, which are particularly useful for beginners.
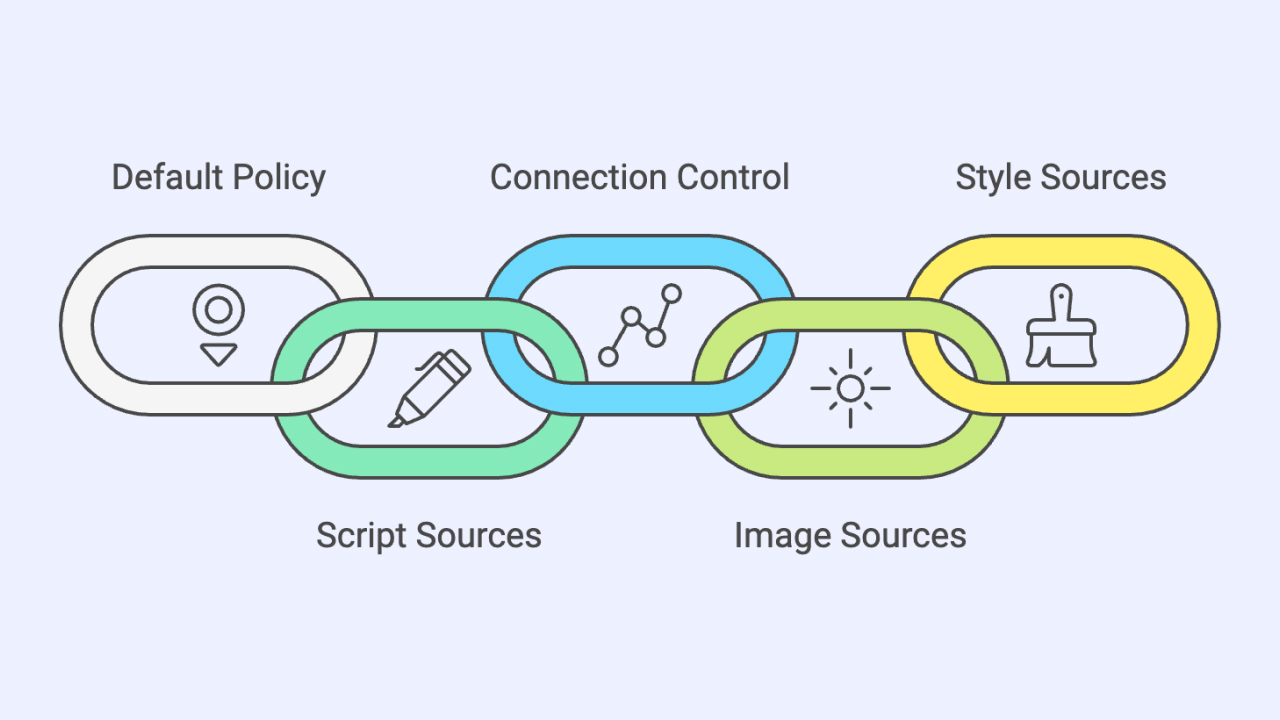
Key CSP Directives
- default-src: Sets the default policy for loading content, including AJAX requests, frames, images, JavaScript, CSS, fonts, and media.
- script-src: Specifies allowed sources for JavaScript.
- connect-src: Controls connections like WebSocket, XMLHttpRequest (AJAX), and EventSource. If a connection isn’t permitted, the browser simulates a 400 HTTP status code.
- img-src: Identifies legitimate sources for images.
- style-src: Defines trusted sources for stylesheets.
Adding a Content-Security-Policy Header
You can implement a Content-Security-Policy header on your WordPress site by configuring the .htaccess file (Apache) or the nginx.conf file (NGINX).
For OLS Servers:
header add Content-Security-Policy “default-src ‘none’; script-src ‘self’; connect-src ‘self’; img-src ‘self’; style-src ‘self’;”
For Apache Servers:
Add the following line to your .htaccess file:
Header set Content-Security-Policy “default-src ‘self’; script-src ‘self’ https://ajax.googleapis.com; img-src ‘self’ data:; style-src ‘self’ https://fonts.google.com/;”
For NGINX Servers:
Add this directive to your nginx.conf file:
add_header Content-Security-Policy “default-src ‘self’; script-src ‘self’ https://ajax.googleapis.com; img-src ‘self’ data:; style-src ‘self’ https://fonts.google.com/;” always;
By setting up CSP headers correctly, you can significantly enhance your website’s security against unauthorized resource loading and malicious attacks.
Understanding X-Content-Type-Options
The X-Content-Type-Options header ensures that browsers only interpret files according to the declared content type in the HTTP headers, enhancing security by preventing content type sniffing. While there are various configuration options and parameters available, the most commonly used setting is nosniff.
Example:
X-Content-Type-Options: nosniff
Adding the X-Content-Type-Options Header in WordPress
You can configure the X-Content-Type-Options header in your WordPress site through the .htaccess file (for Apache) or the nginx.conf file (for NGINX).
For OLS:
header add X-Content-Type-Options “nosniff”
For Apache:
Add the following snippet to your .htaccess file:
<IfModule mod_headers.c>
Header set X-Content-Type-Options nosniff
</IfModule>
For NGINX:
Add this line to your nginx.conf file:
add_header X-Content-Type-Options “nosniff” always;
By implementing this header, you can safeguard your site against potential security risks related to improper content type handling.
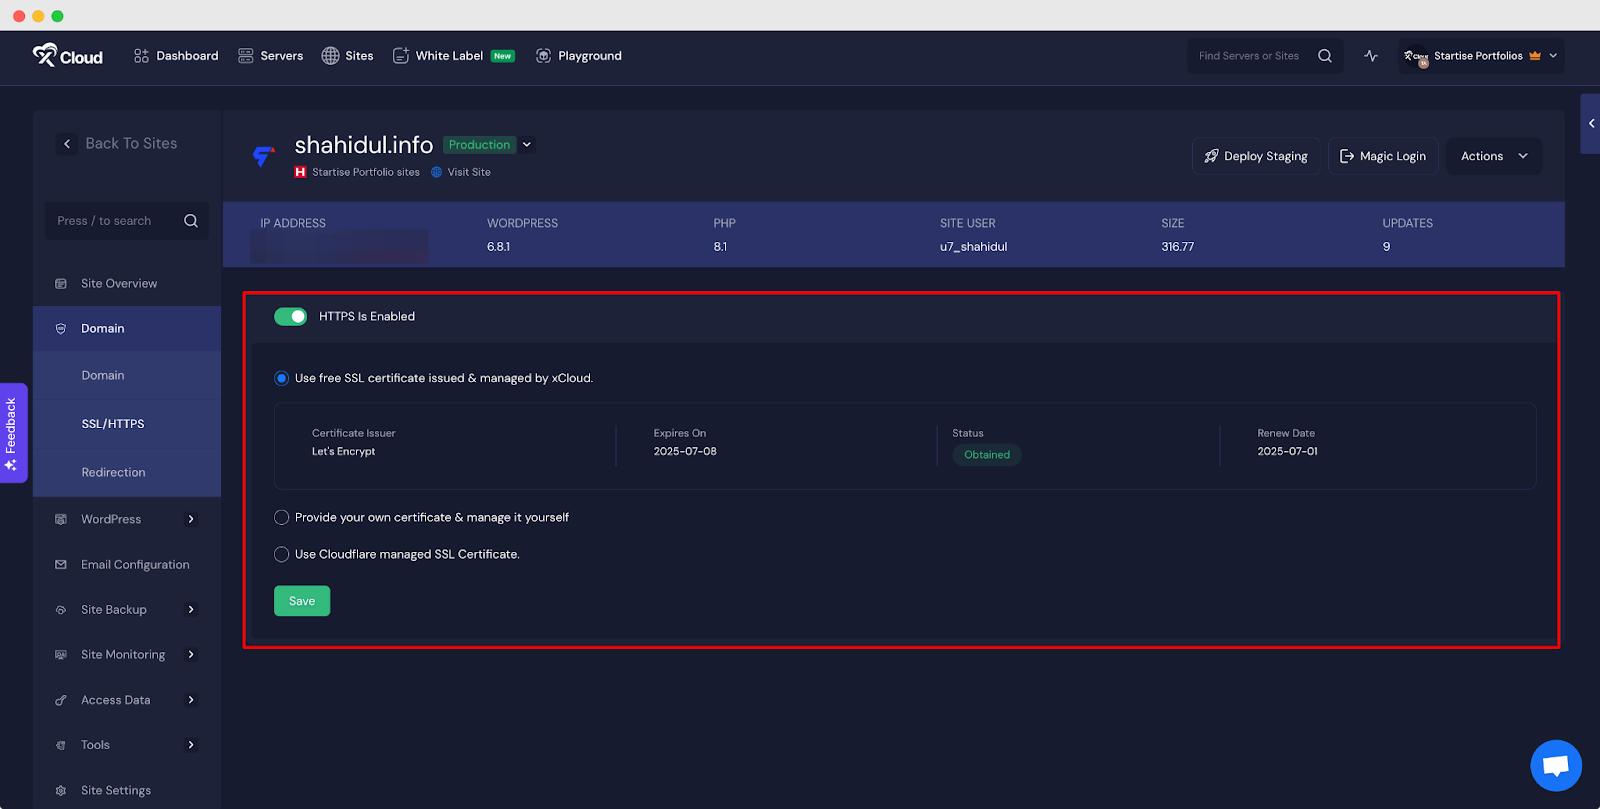
How to Add HTTPS Security If You Have xCloud?
With xCloud, you can easily install the ‘Let’s Encrypt‘ SSL certificate on your site without any complexity. You can directly do it from the dashboard. All you have to do is enable the toggle button of ‘HTTPS Enabled.’
👉 To learn more: How To Easily Install Let’s Encrypt SSL Certificate
How Can You Test Your Website’s Security Headers?
Two ways of testing you can go with—a third-party website or terminal. With this test, you can find out which headings are missing from your website & the status of your newly added security headings, and whether it is working properly or not.
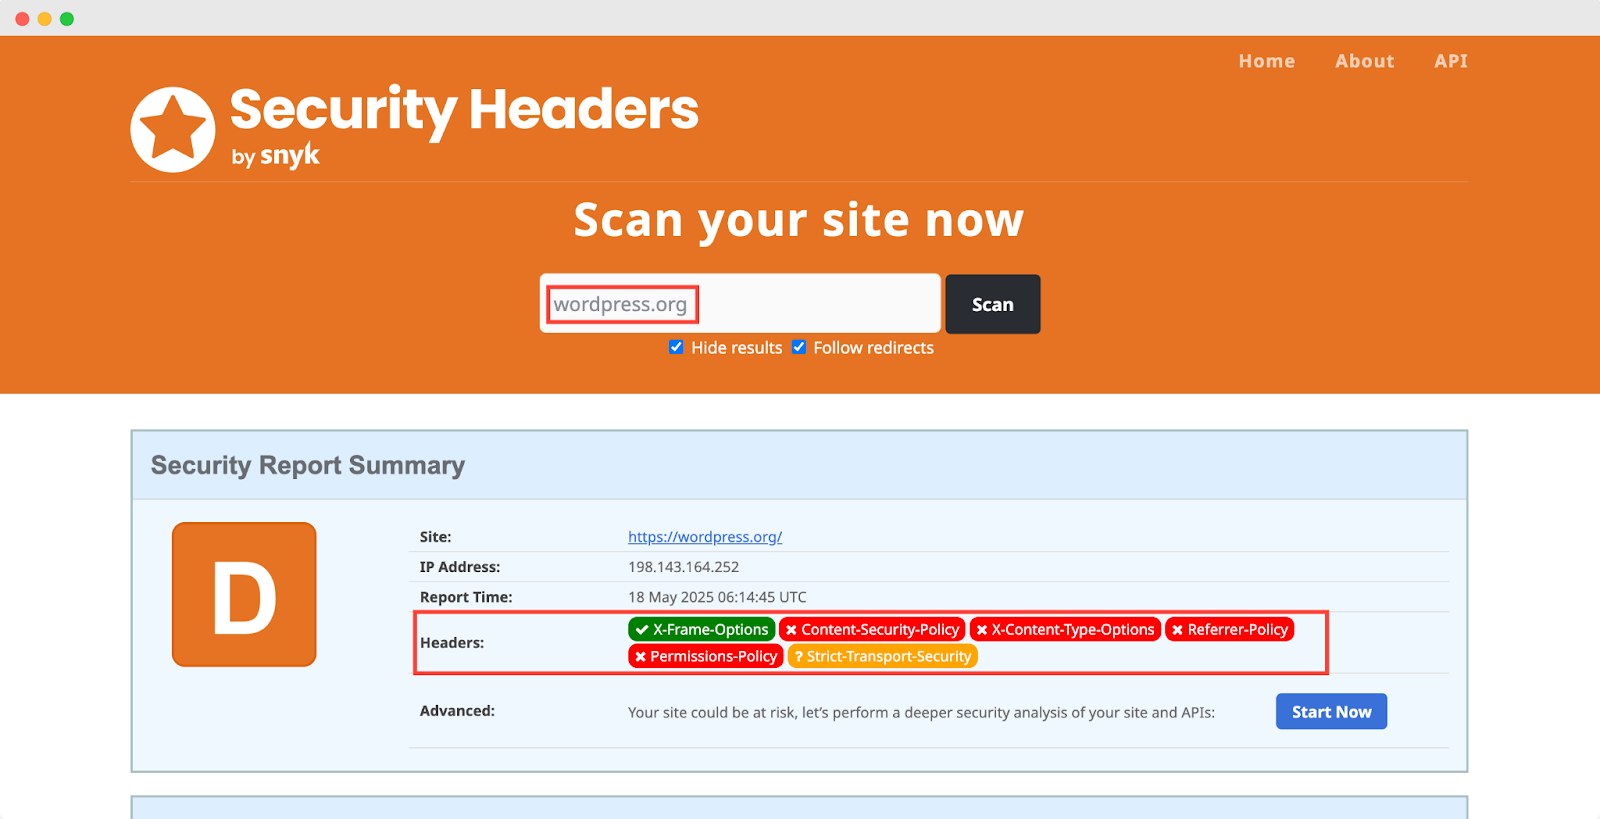
1. Test Your Website Security Headers Using Third-Party App
To test your website security headers, we recommend you use Security Headers by synk.The platform provides scores for security headers, A means excellent. Here we used wordpress.org as an example & it scored ‘D.’ That means, there is a scope to improve more.
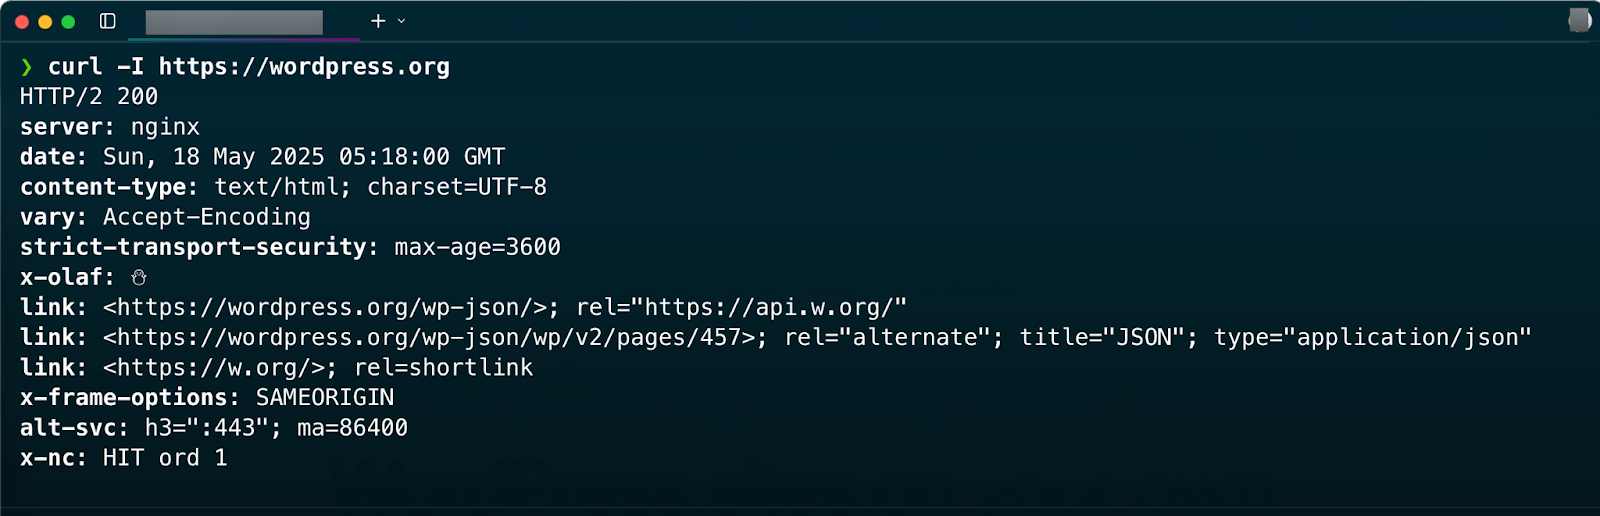
2. Test Your Website Security Headers Using the Terminal
Another way of testing your website security header is running this command: curl -I https://yourwebsite.com. Once you write the command in your terminal, hit the ‘Enter; button & you will get your website security headers result as shown below.
Strengthen Your WordPress Security with Headers to Keep Your Site Secure
WordPress security headers are a simple yet powerful way to protect your website. They act as invisible shields, blocking threats like hackers, malicious code, and data theft. By setting up headers such as X-Frame-Options, HSTS, & CSP you can secure your site, safeguard user privacy, and boost performance.
These headers are easy to implement and provide significant protection against common vulnerabilities. Taking this small step ensures your website stays safe, fast, and trustworthy. Start adding security headers today and keep your WordPress site secure for the future.
If you have found this blog helpful, feel free to subscribe to our blogs for valuable tutorials, guides, knowledge, and tips on web hosting and server management. You can also join our Facebook community to share insights and engage in discussions.