


A Transactional email is a message that businesses send to customers after a specific action has been taken. These emails are usually automatic and triggered by actions like signing up for a service, making a purchase, or resetting a password. Imagine you’re running a business and you want to send out all those important transactional emails, like order confirmations or shipping updates, smoothly and efficiently. Well, that’s where Mailgun comes in! Mailgun is like your trusty assistant for sending out all those emails reliably.
How Mailgun Sends Transactional Email?
Mailgun is like a super-fast email delivery service that businesses use to send important emails to their customers. When you sign up for Mailgun, you connect it to your website or app so that whenever an email needs to be sent, like a confirmation for a new order, Mailgun handles it.
It makes sure the email gets delivered to the right inbox quickly and reliably. Not only does Mailgun deliver your emails, but it also helps you keep track of them. You can see if your emails are delivered, or opened, or if there are any issues along the way. So, Mailgun not only makes sending emails easy but also ensures that you know what’s happening with them every step of the way.
No Coding Guide To Send Transactional Email From WordPress With Mailgun
Recognizing the paramount importance of seamlessly integrating email systems like Mailgun to mitigate the risk of emails being labeled as spam or failing to reach their intended recipients, xCloud hosting has streamlined the process of configuring Mailgun within its environment for site emails. Mailgun emerges as a highly acclaimed email delivery service, boasting a blend of powerful features and compatibility that enhance the efficiency of email communication.
Additionally, it is distinguished by its affordability, offering one of the most economical options available. The Free plan allows users to send up to 5000 emails per month at no cost, while the Flex plan charges $0.001 per email sent.
Step 1: Authenticate Domain With Mailgun
Prior to commencing the Mailgun integration with your xCloud team, it’s essential to authenticate your domain with the email service. Please refer to their comprehensive documentation for detailed instructions on how to complete this process: Mailgun Domain Verification Walkthrough.
Step 2: Connect Mailgun To xCloud
After authenticating your domains with Mailgun, you can incorporate the email service into the xCloud environment using two methods:
- Integrate Mailgun Using SMTP Credentials
- Integrate Mailgun Using API
Step 3: Integrate Mailgun SMTP Credentials
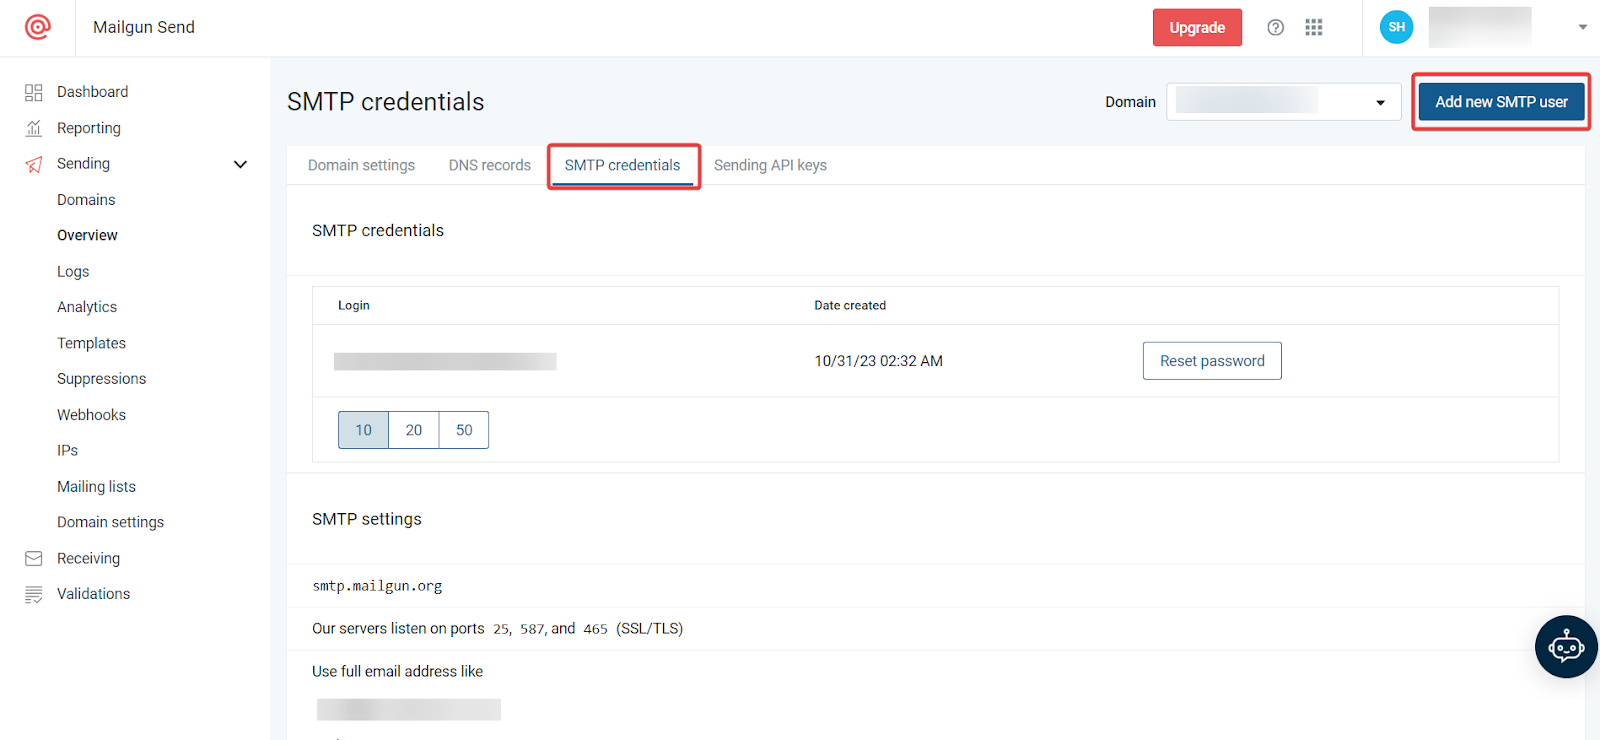
Access your Mailgun account and go to Sending → Domains in the dashboard. Next, proceed to Domain Settings → SMTP Credentials. Click on the ‘Add new domain’ button to add a new domain. After adding the domain, remember to save your login credentials (username and password) for use in the xCloud mail integration.
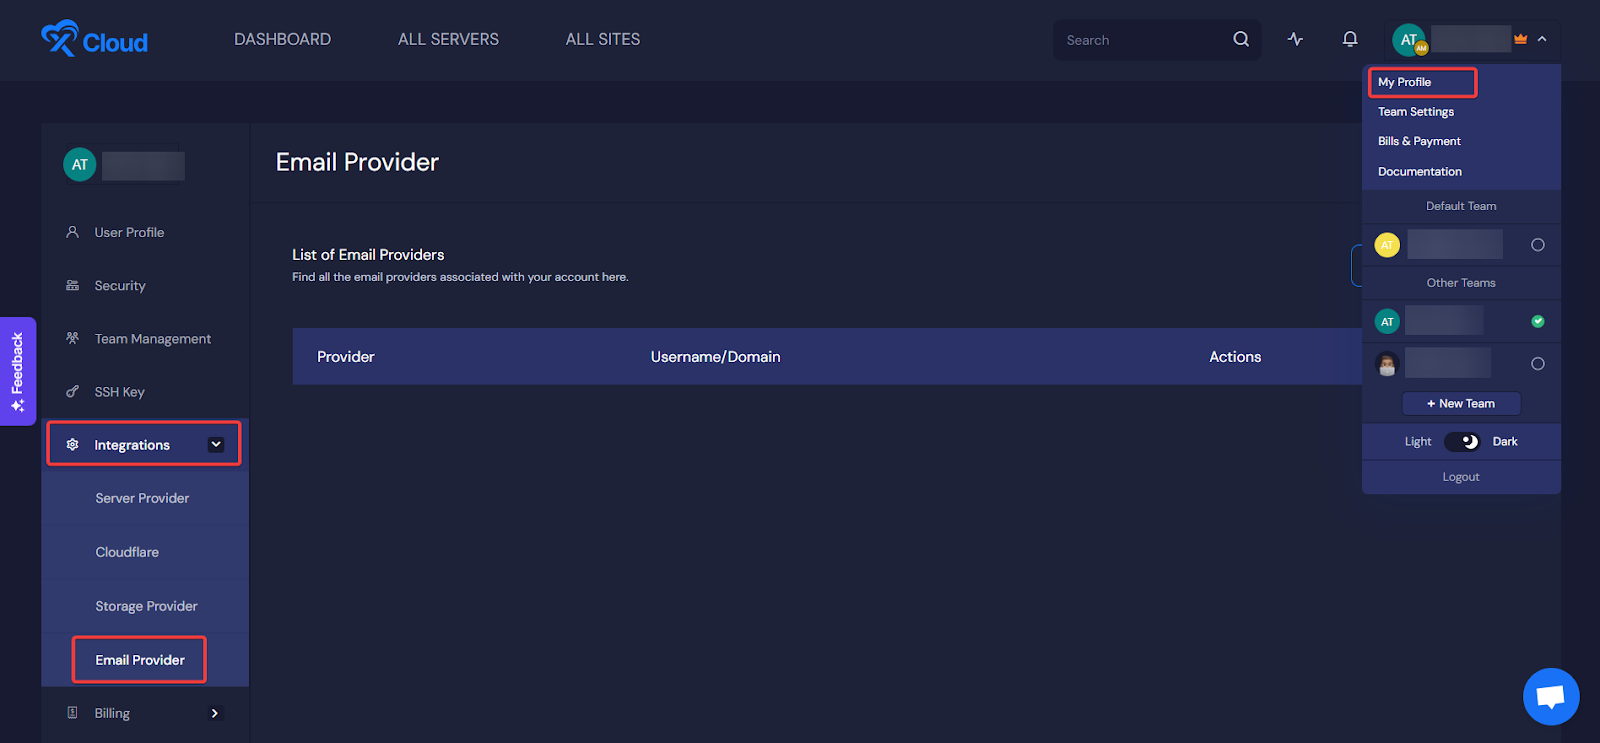
After obtaining your SMTP credentials for Mailgun, proceed to set up Mailgun as the email provider within xCloud. Within your xCloud dashboard, locate My Profile → Integrations → Email Provider. To integrate your Mailgun account domain with the credentials, click on the ‘Add New Provider’ button.
Upon clicking the ‘Add New Provider’ button, a pop-up will appear prompting you to choose the email provider, SMTP username, and SMTP password.
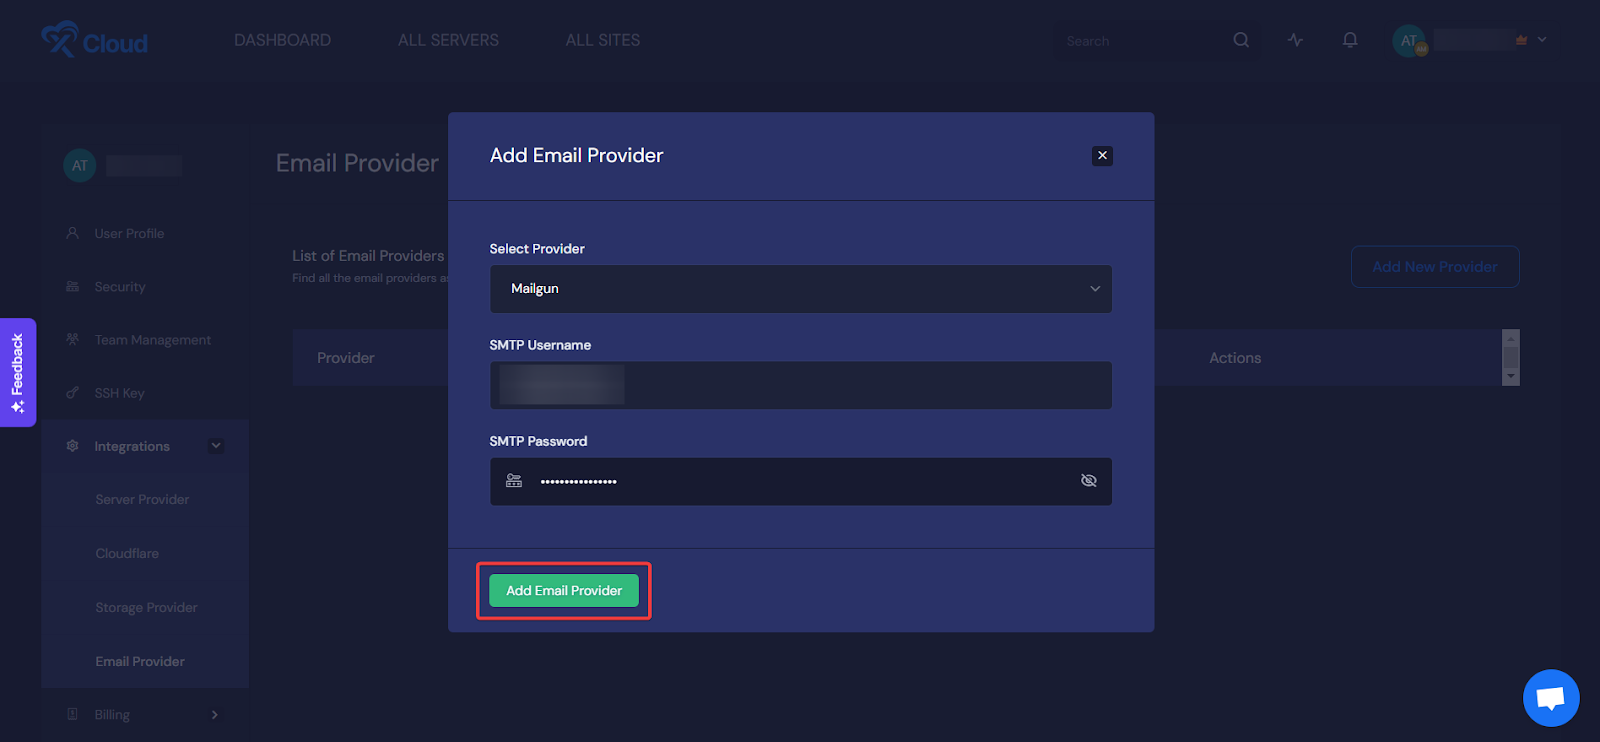
Choose Mailgun as your provider and enter your login details into the SMTP username and SMTP password fields. Your email provider will be added immediately.
Step 4: Integrate Mailgun With API
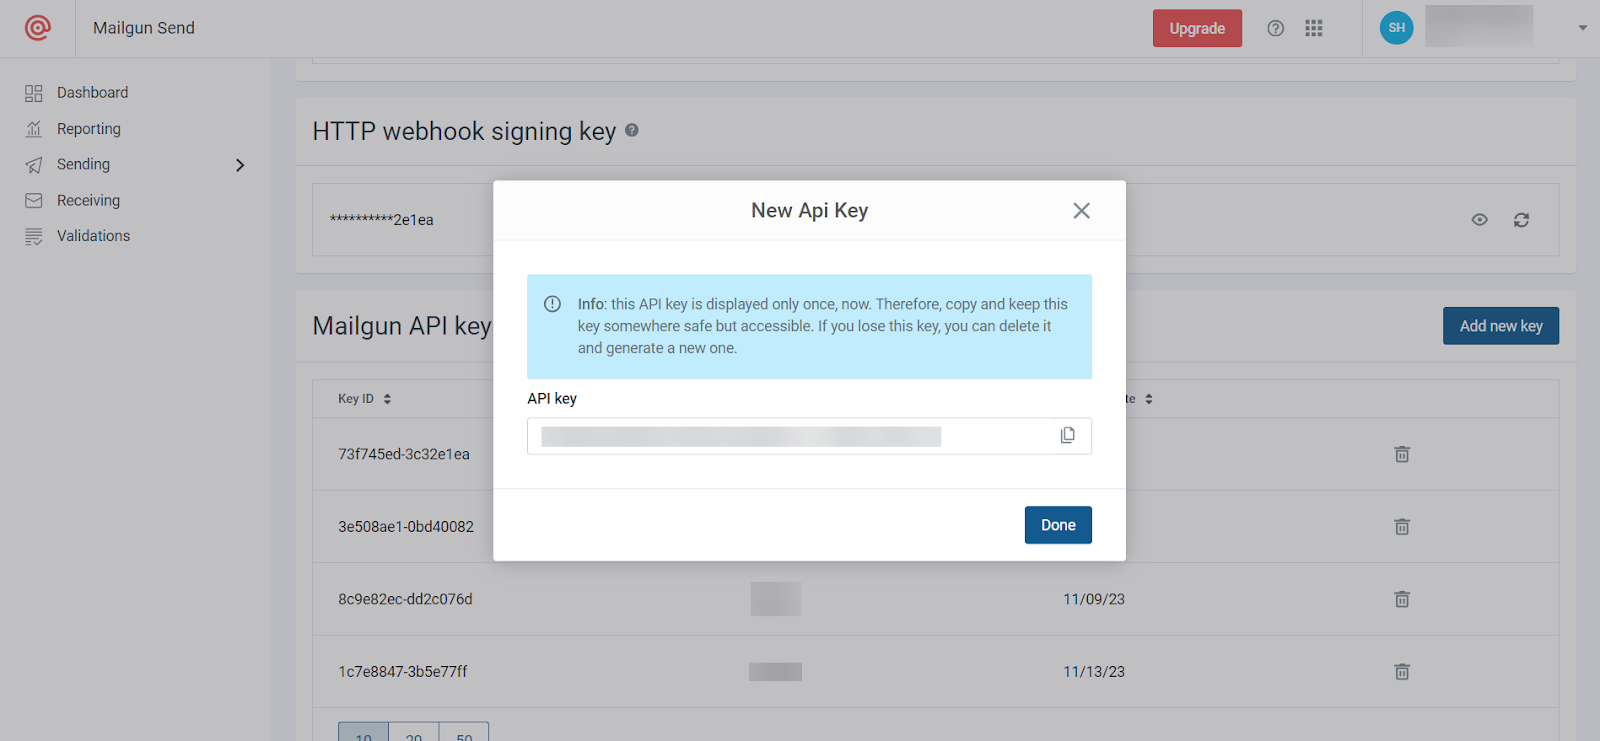
In addition to utilizing the Mailgun SMTP credentials, you have the option to integrate Mailgun with API keys. To do so, sign in to your Mailgun account and go to the API Security page. Create a new key by selecting the ‘Add new key‘ button and providing a description. Remember to save your API key for later use.
Go to your xCloud dashboard and access My Profile → Integrations → Email Provider. To integrate your Mailgun account domain with the credentials, click on the ‘Add New Provider’ button.

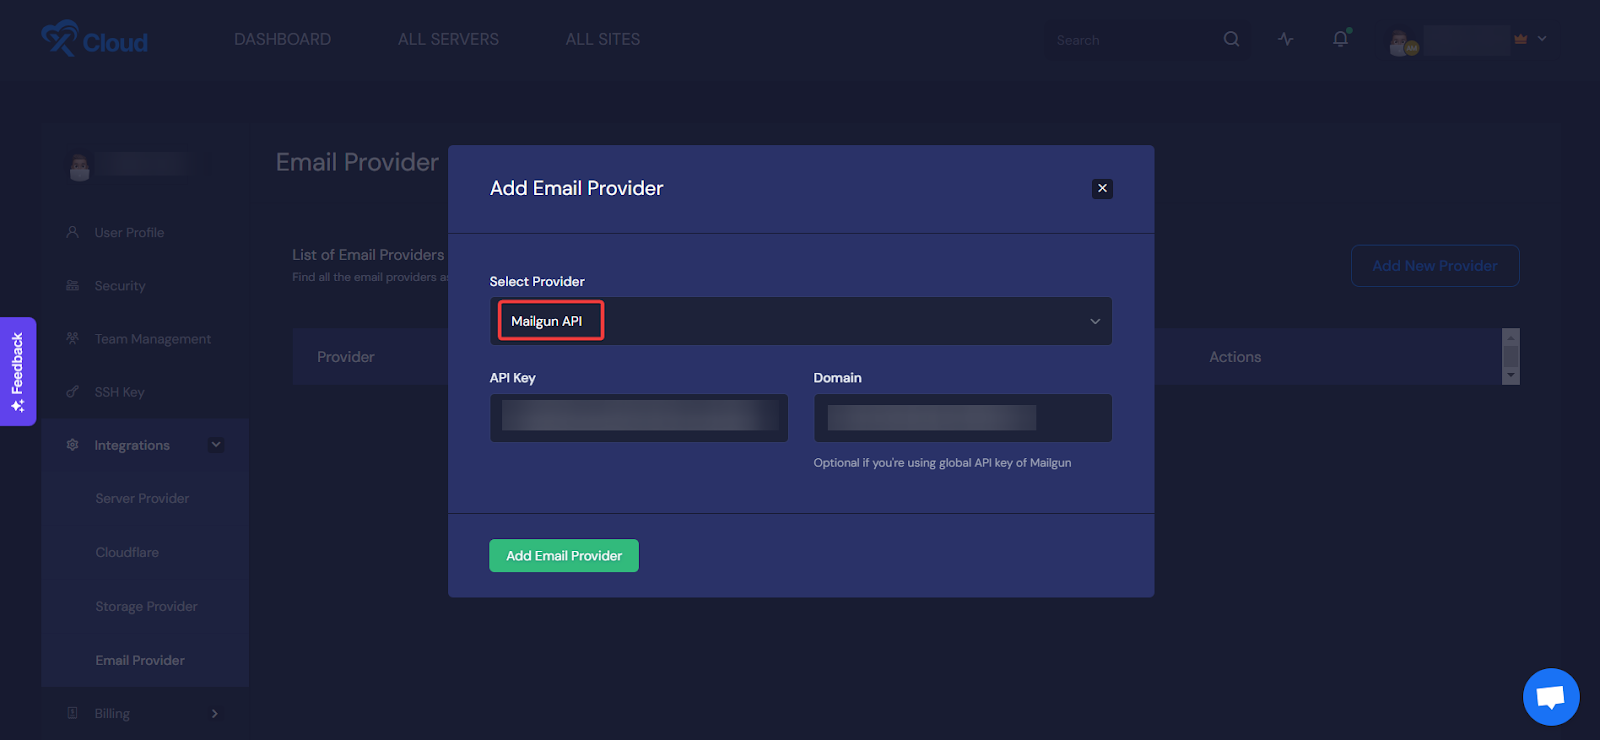
After clicking the ‘Add New Provider’ button, a pop-up will appear prompting you to choose the email provider name. Opt for Mailgun API as the provider and enter the API obtained from the Mailgun API Security page. Subsequently, provide your authenticated domain name and click the ‘Add Email Provider’ button.
This demonstrates the straightforward process of integrating Mailgun into your xCloud team using API keys.
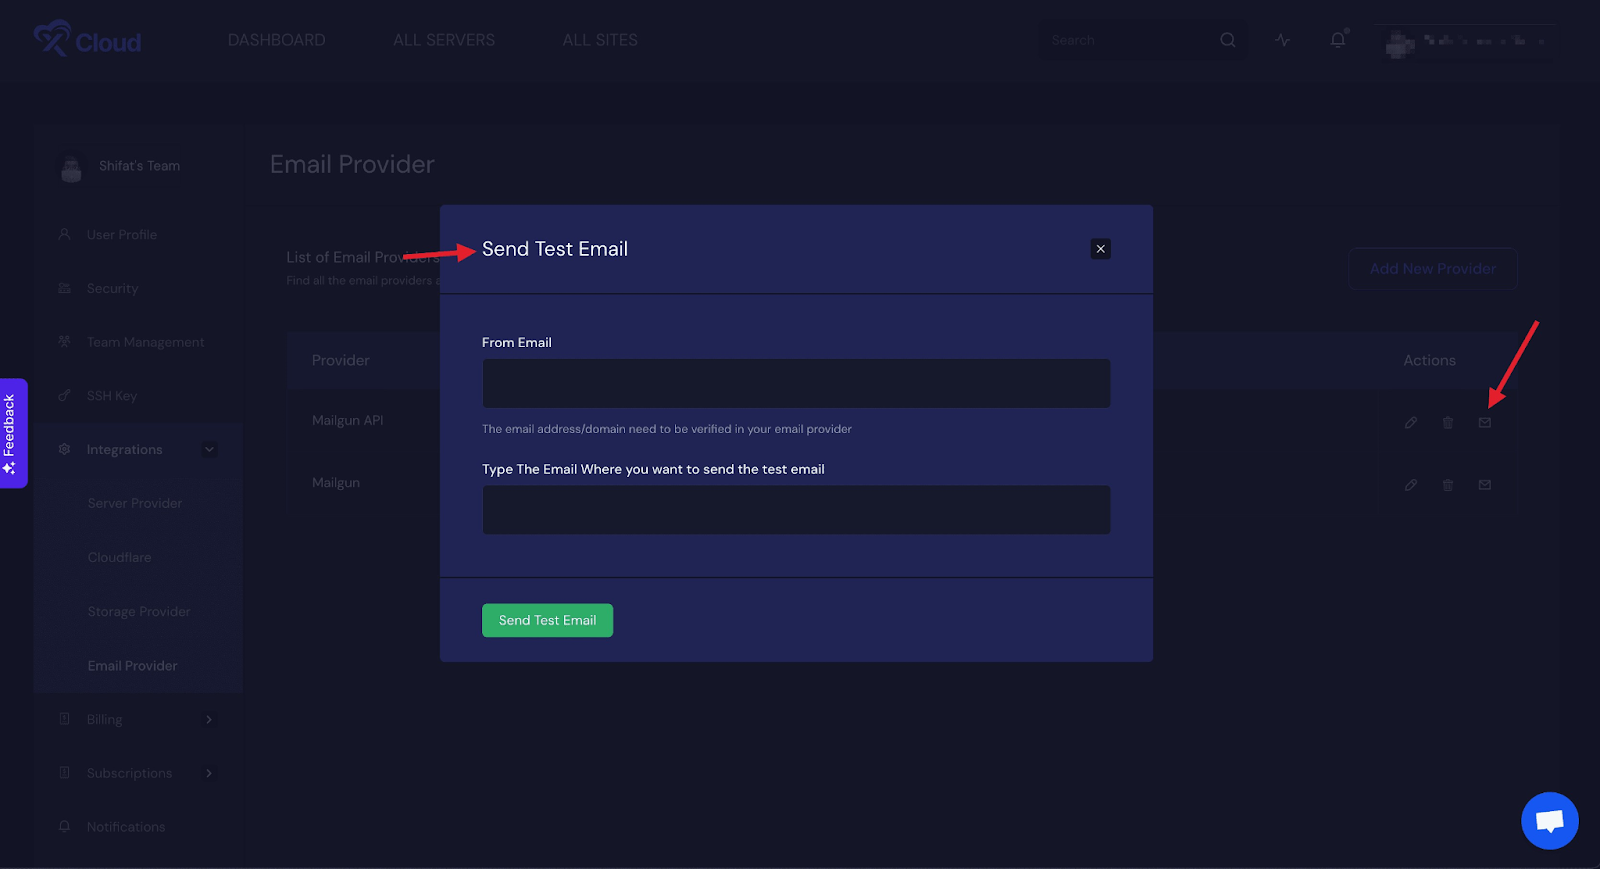
Step 5: Test Your Transactional Email
Once you’ve successfully added Mailgun, you can verify your email service by sending a test email directly from the Email Provider section.
Step 6: Add Mailgun Service To Your Site
Once you’ve integrated Mailgun into your xCloud environment, all you need to do is add the provider to your site. Head to All Sites and select your website to incorporate the email provider. Choose your site and go to the Email Provider tab.
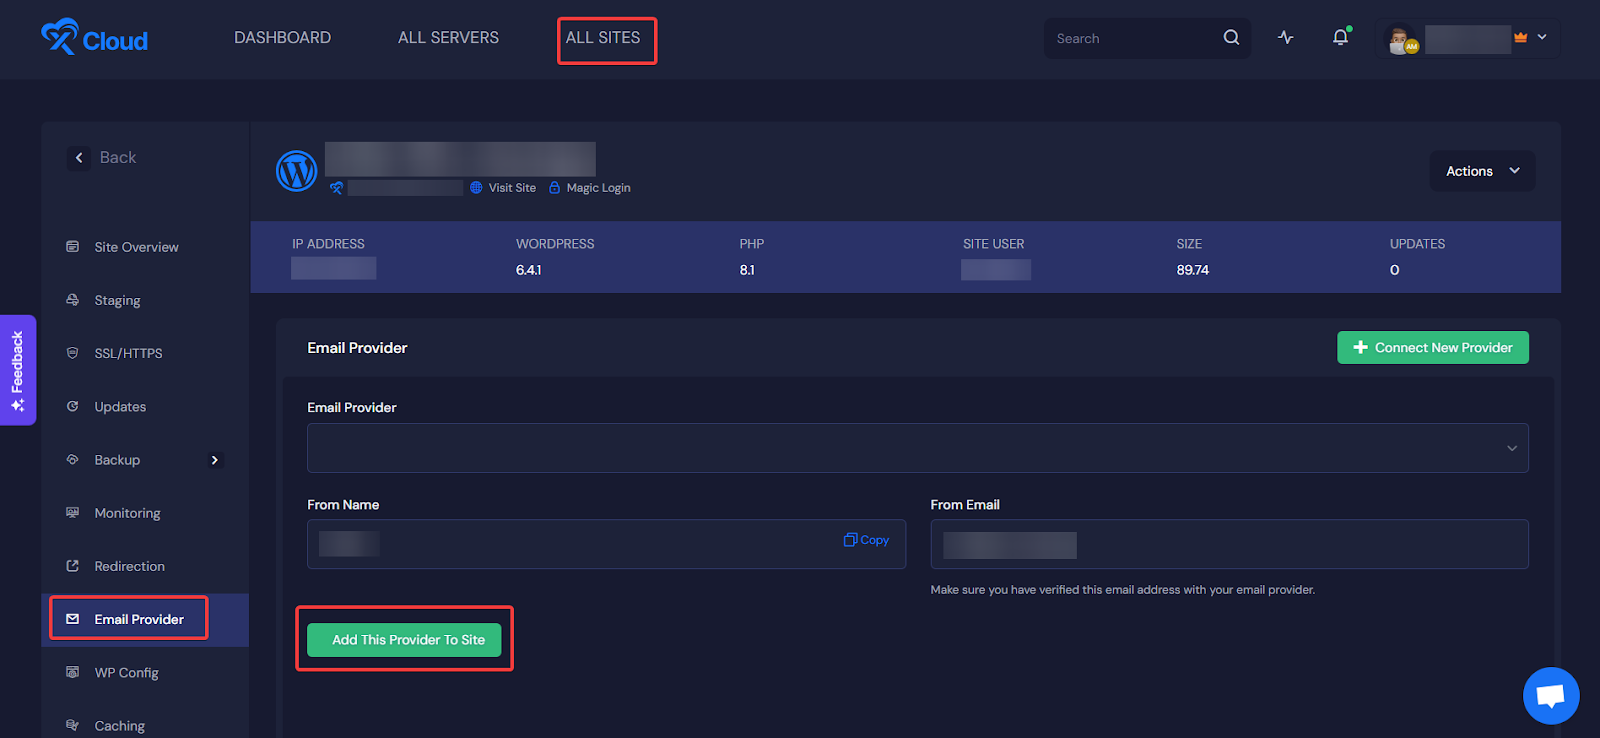
Now, choose your domain from the available ‘Email Provider‘ options, specify the sender’s name in the ‘From Name‘ field, and enter your email sender’s address in the ‘From Email‘ field. Once completed, click the ‘Add This Provider To Site‘ button.
Enhance Your transactional Email Communication With Mailgun
In conclusion, integrating Mailgun with WordPress offers a streamlined solution for transactional email management. By leveraging Mailgun’s robust features and advanced capabilities, WordPress users can ensure reliable email delivery, enhance communication efficiency, and maintain a professional image. With Mailgun’s intuitive setup process and powerful tools, managing transactional emails becomes effortless, allowing you to focus on delivering engaging content and providing exceptional user experiences.
Visit the deal page for further details and be sure to join our Facebook community to stay updated and avoid missing out on any announcements.