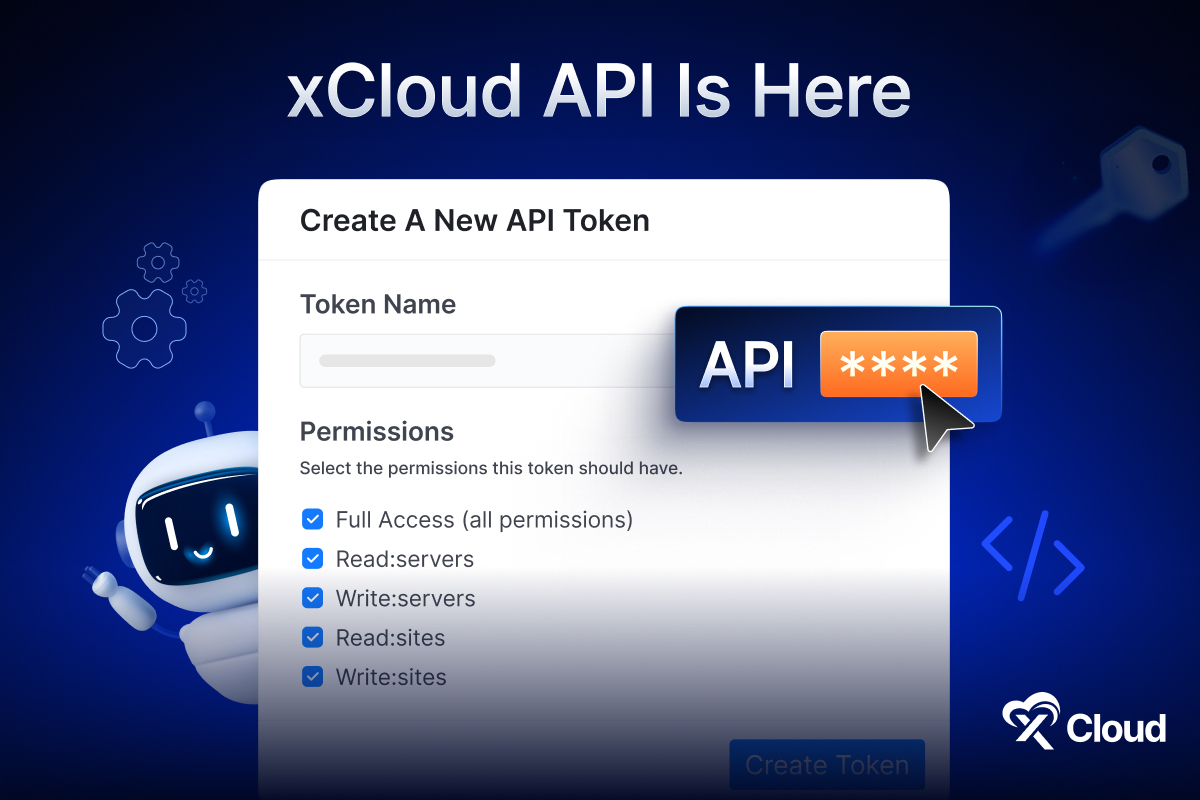
Whether you are performing major maintenance, working on a redesign, or updating a client’s site, taking your site offline can prevent broken experiences and protect your data. If you are looking for ways to unpublish WordPress sites quickly and safely, you are in the right place. What if you could disable site access with a single toggle? No FTP fiddling, no plugin conflicts, no lost visitors! Yes, with xCloud, it is more effortless than you could imagine.
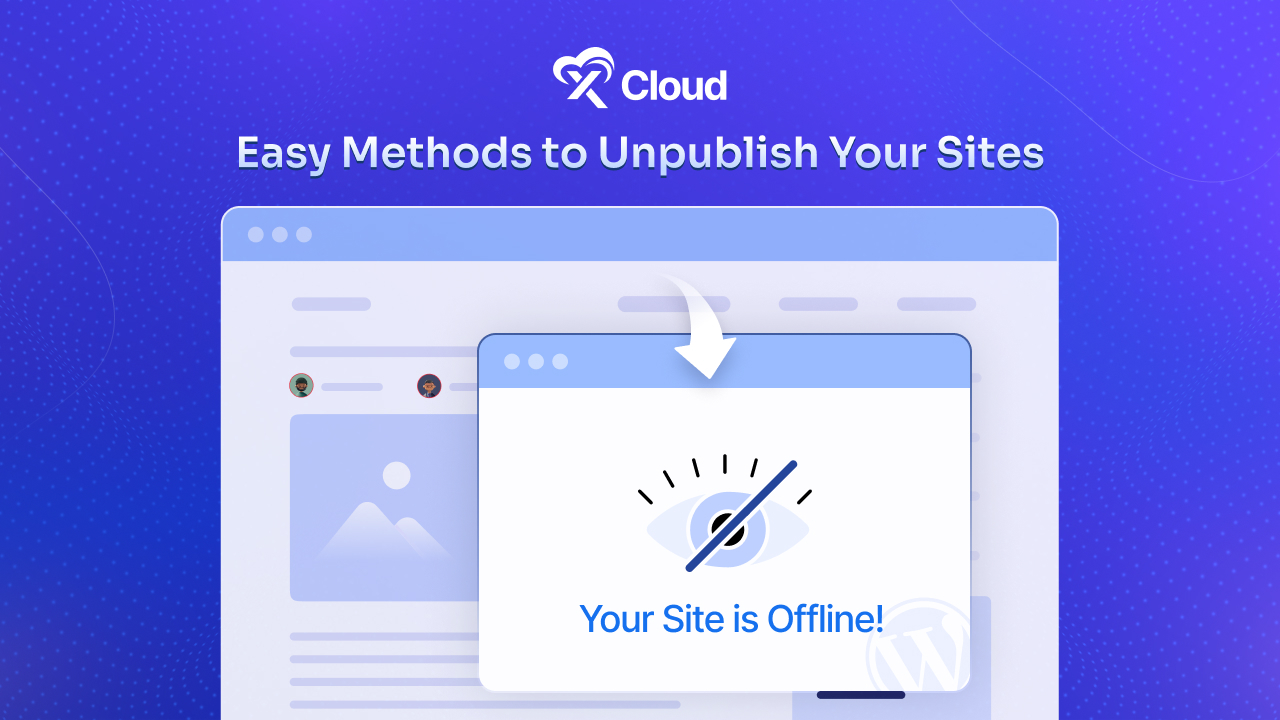
xCloud’s sleek and user-friendly dashboard lets you make your site offline in no time, preserving all your settings and files while blocking web access. Read on to discover why and when to unpublish WordPress sites, know the benefits and drawbacks, and follow step‑by‑step tutorials, especially how xCloud simplifies the process with its built‑in disable website option.
💡 Why You Might Need to Unpublish WordPress Sites
Before getting started with specific methods, it helps to understand the scenarios that often lead site owners to take their WordPress installations offline. Rather than suddenly cutting access, planning out why you are unpublishing can help you choose the most effective approach and keep stakeholders informed.
- Major maintenance or redesign: Rolling out a new theme, fix, or undergoing an update? Pausing your live site from working for a while keeps visitors away from seeing half‑baked pages.
- Security concerns: If you detect a vulnerability or an ongoing attack, it is safer to disable access until patches are applied.
- Testing or staging: You might want to make a site offline for staging content without search engines indexing it.
- Seasonal closures: eCommerce stores can pause during off‑season periods to conserve bandwidth and reduce support queries.
- Core content updates: Bulk editing or rewriting multiple pages or posts before republishing ensures a cohesive launch.
Unpublishing Your Site: Pros & Cons
Every decision to take a site offline carries pros and cons. By weighing these carefully, you could make sure that unpublishing WordPress sites aligns with your broader business goals rather than causing unintended harm. Let us check some more pros and cons.
Pros:
- User experience control: Visitors only see a friendly maintenance page or offline page, not broken elements.
- Data protection: While you are running maintenance or updates, attackers cannot scrape or manipulate your content when you make your site offline properly.
- Resource savings: Pausing a site frees up server and database resources.
Cons:
- Lost traffic & SEO impact: Prolonged downtime can hurt search rankings and ad revenue. Consider using temporary redirects or “Discourage search engines” settings instead of full offline mode to preserve SEO.
- Customer frustration: Returning visitors may assume your business has shut down.
- Technical overhead: Bringing a site back online can lead to configuration issues if not managed well.
🧑💻 Methods to Unpublish WordPress Sites
There is no one‑size‑fits‑all when it comes to taking a site offline. Below are five common strategies, each introduced with context so you can pick the best fit for your needs and technical comfort level.
1. xCloud Dashboard ‘Disable Site’ (Recommended)
If you host with xCloud, this is by far the quickest and most foolproof way to unpublish WordPress sites. Instead of shuffling files or plugins, you simply flip a switch in the dashboard, and your site, including cron jobs and SFTP/SSH access, goes offline instantly.
2. Maintenance Mode Plugins
For users on other hosts, you can find some plugins like Maintenance or Lightstar allow you to show a branded placeholder page. It is perfect when you want visitors to know the site is temporarily closed for improvements, rather than just vanishing.
3. Manual .htaccess or File Permissions
If you need operational control over who sees what, editing your .htaccess file or changing file permissions removes public read access at the server level. It is more technical but works anywhere and does not rely on third‑party tools. It is ideal if you plan to delete WordPress sites later or lock everything down completely.
4. DNS‑Level Suspension
When you need to block access without touching your hosting, simply change your domain’s DNS records or point it to a placeholder IP. This approach effectively makes the site offline at the root level. Consider this handy if you are planning to retire or permanently delete a project.
5. WordPress Core Draft, Private & Bulk Actions
WordPress core gives you built‑in options to unpublish individual or multiple posts/pages, or discourage search engines from indexing your site:
- Single post/page: In the admin dashboard, navigate to Posts or Pages, click Quick Edit, change status from Published to Draft or Private, and click Update.
- Bulk actions: Go to Posts or Pages → All, select multiple items, choose Edit under Bulk Actions, click Apply, set Status to Draft or Private, and click Update.
- Discourage search engines: Navigate to Settings → Reading, check Discourage search engines from indexing this site, and save changes. This is a soft offline mode that retains the site structure while preventing new search traffic.
- Password protection: For selective access, you can password-protect a post/page directly in the visibility settings when editing content.
📋 Step‑by‑Step Guide: Unpublish WordPress Sites with xCloud
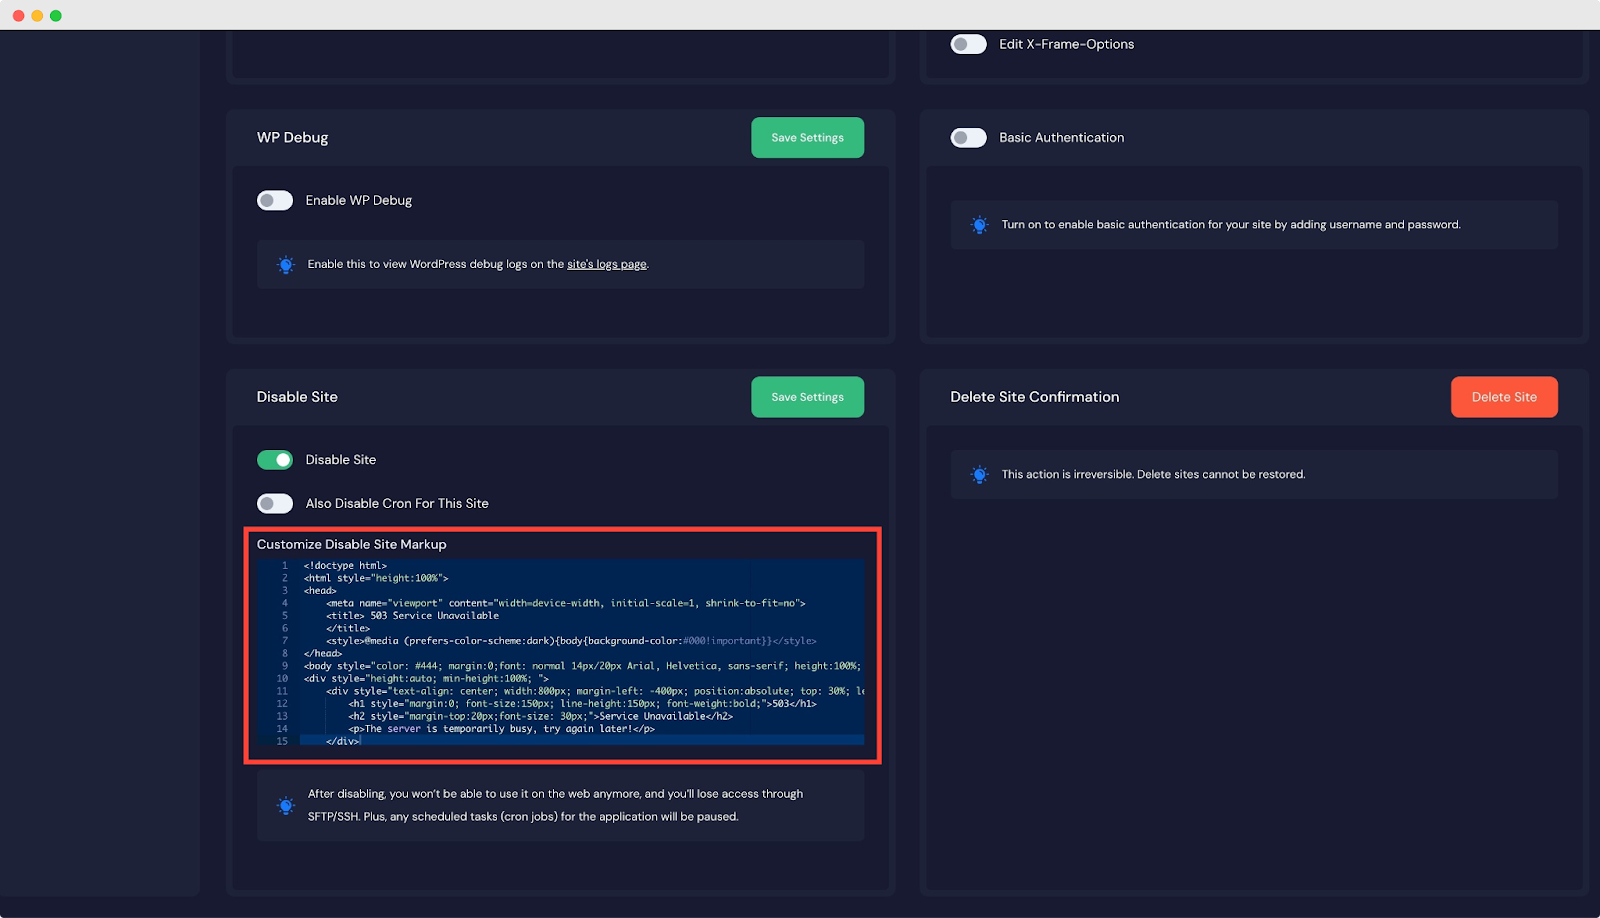
For xCloud customers, unpublishing is a breeze. It has a ‘Disable Site’ feature, which allows you to disable complete access to a site over the web. Plus, your SFTP/SSH access will also be removed along with any cron jobs (scheduled tasks) for that site will be paused by disabling this feature.
This section walks you through the exact clicks and toggles so you can disable WordPress website access in under a minute.
Step 1: Access Disable Site Option
Log in to your xCloud dashboard with the right credentials. Click on ‘All Sites’ and select the running site that you wish to disable. Now, find the ‘Settings’ from the left of the resulting page. Click on it, & scroll down to locate the ‘Disable Site’ option.
Step 2: Disable Site in xCloud Hosting
Now, toggle the ‘Disable Site’ on & click on ‘Save Settings.’ And you are done with disabling the site in xCloud hosting.
Moreover, you can customize your disabled site markup if you wish directly from the dashboard. After changing your markup, simply click on ‘Save Settings.’
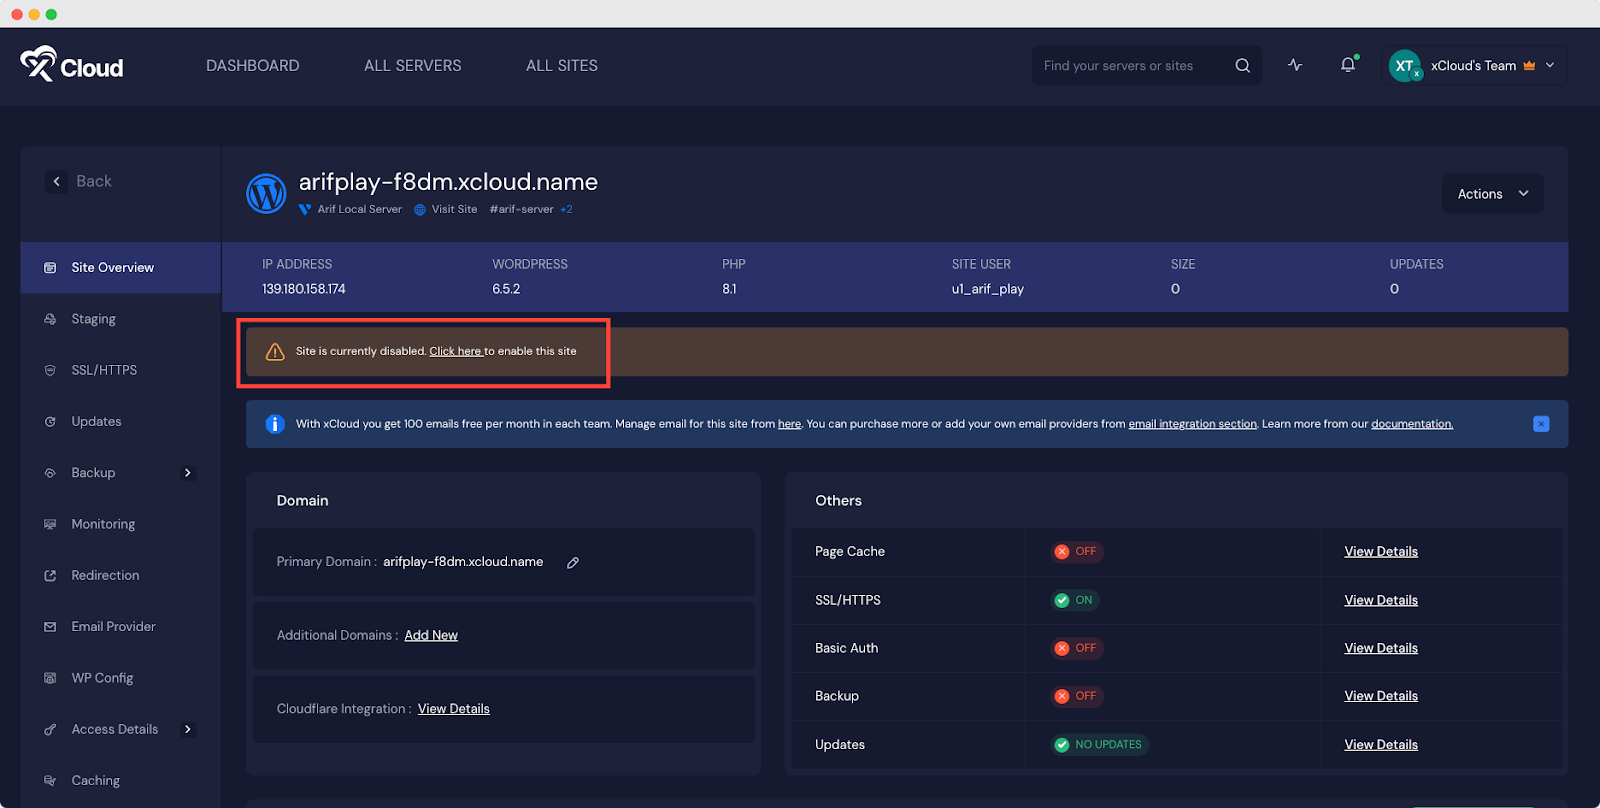
Once you disable your site in xCloud hosting, it will look like as shown below. Moreover, you can enable it anytime by clicking on the mentioned ‘Click here.’
This is how you can easily suspend sites, manage cron jobs & customize markup in xCloud hosting.
Republish/Enable Sites in xCloud
After disabling your site and completing the updates or maintenance, you want to republish the website. It is as easy as disabling the site. From the site overview, where it is mentioned, ‘This site is currently disabled. Click here to enable’ settings, tap the ‘Click here’. You will then be taken to the site settings page.
Alternatively, you can directly go to the site settings page. Then scroll down to the section of ‘Disable Site’. Here, just toggle off the button. Your site will be enabled or republished instantly.
📑 Best Practices for Managing Offline Sites
Putting a site into maintenance or offline mode can backfire if done haphazardly. Follow these guidelines to make the process as smooth as possible for both you and your visitors.
- Schedule maintenance windows: Announce planned downtime to customers in advance via email or social channels to set expectations.
- Use clear messaging: A brief note explaining why the site is down and when it will return helps prevent confusion.
- Backup before disabling: Always take a fresh backup in case you need to restore WordPress sites quickly.
- Monitor & test: After disabling, verify that your site is fully offline and the maintenance page displays as intended on all devices.
- Limit downtime: Aim to unpublish WordPress sites only as long as necessary; extended outages risk SEO and customer satisfaction.
- Implement security measures: Remember that unpublishing does not patch vulnerabilities. Use a security plugin (Wordfence, Sucuri, etc) or follow hardening best practices while offline.
- Plan republishing: Document which content you changed, reverse core draft/private settings, uncheck “Discourage search engines,” and re-enable any disabled plugins.
💻 Take Control of Your Website with xCloud
Temporarily unpublishing WordPress sites can be a strategic move for maintenance, security, or billing reasons, only if executed thoughtfully. xCloud’s “Disable Site” feature lets you make a site offline in seconds and restore it just as easily, combining flexibility with peace of mind. Whether you need to disable WordPress website access, pause WordPress site functions, or prepare to delete WordPress sites entirely, xCloud keeps everything under your control – no developer needed!
Ready to take your site offline without the headache? Host with xCloud and use its seamless dashboard toggle to unpublish WordPress sites quickly, safely, and confidently.
If you have found this blog helpful, feel free to subscribe to our blogs for valuable tutorials, guides, knowledge, and tips on web hosting and server management. You can also join our Facebook community to share insights and engage in discussions.