


Site backups protect your data from accidental deletion, server issues, and cyberattacks. Regular backups help you restore your site quickly and reduce downtime.
With xCloud, you get two types of backup options:
- Site Backup:
Supports both Remote Backup (DigitalOcean, Vultr, S3-compatible providers) and Local Backup (stored on the same server). You can choose full or incremental backups. - Server Backup:
Available only for xCloud Managed Servers with an additional 20% cost. This backup covers the entire server instead of individual sites.
xCloud also offers full backup and incremental backup options for each. Follow this guide to learn how to configure site backups in xCloud.
Step 1: Open Storage Provider Page #
Before getting started, you need to select a storage provider. To do that, visit your xCloud hosting dashboard and navigate to Backup → Backup Settings.
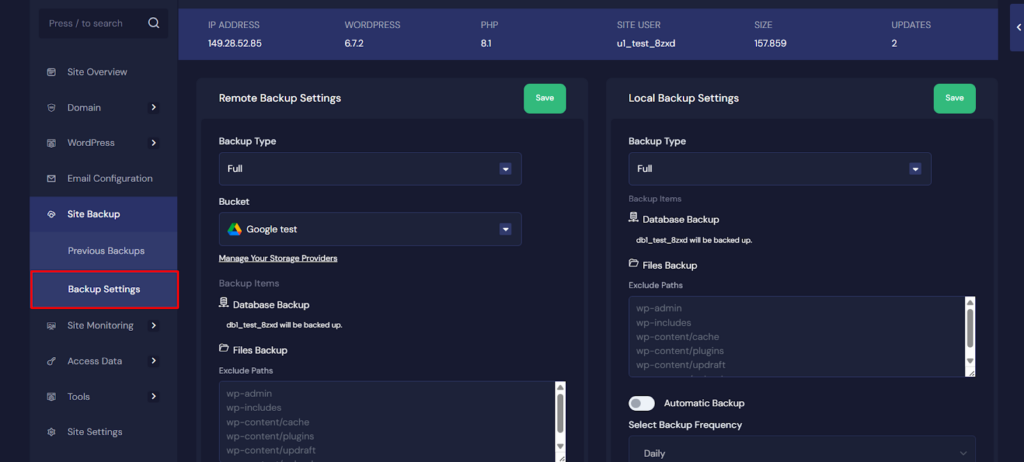
Now, click the ‘Manage Your Storage Provider’ from the Backup Settings. It will take you to the Storage Provider integration page.

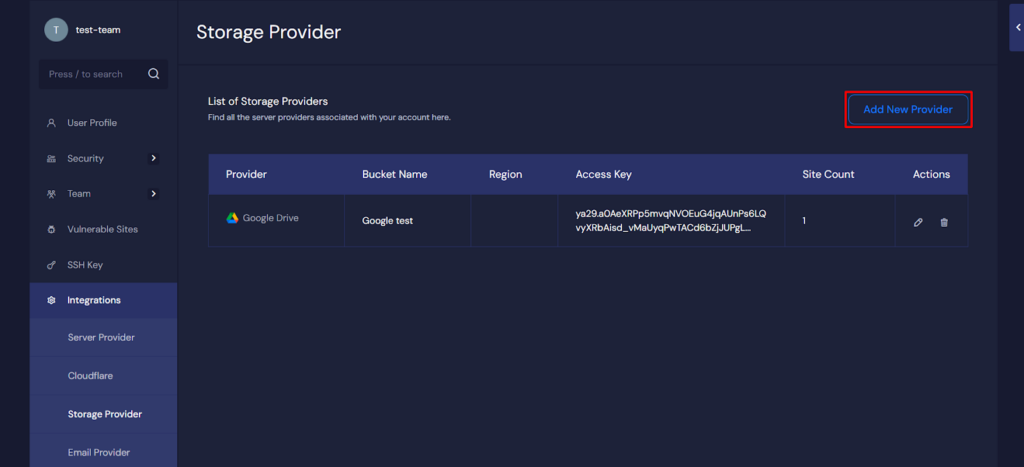
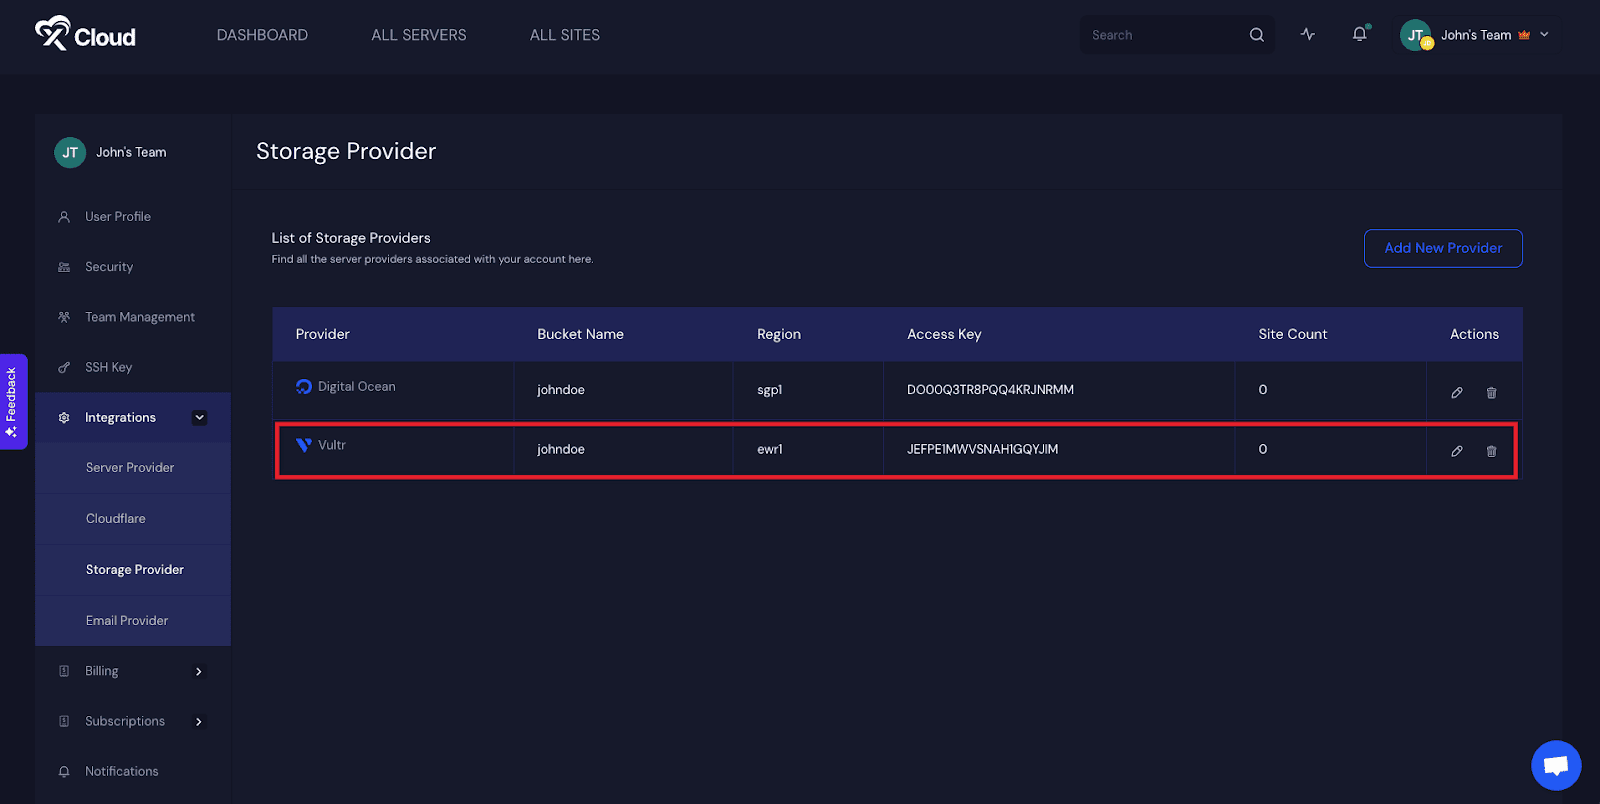
You can also go to ‘My Profile’ and navigate to Integrations → Storage Provider from the left navigation, as shown below.
Step 2: Choose A Storage Provider #
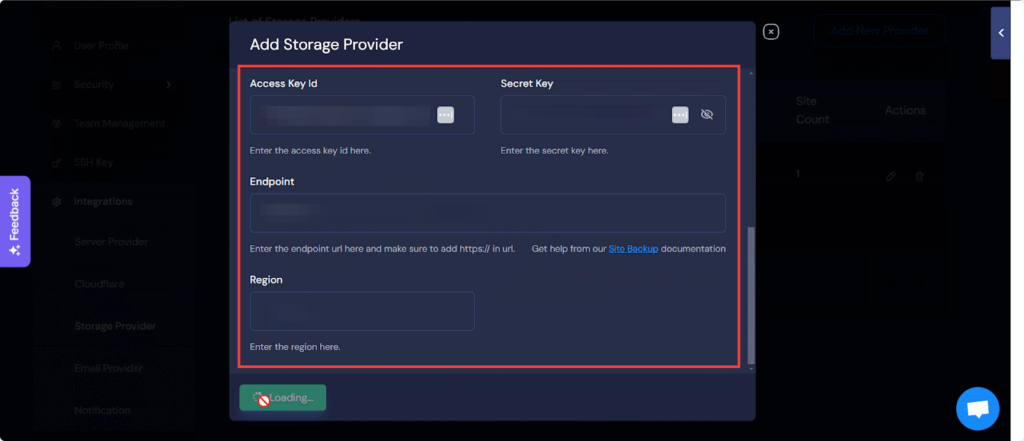
Now, you need to choose a storage provider for storing your backup files. Click the ‘Add New Provider’ button from the Storage Provider page. You will get a prompt to select a provider and input the necessary details.
Note: storage providers Contabo and Min.io are currently not supported within the xCloud platform.
DigitalOcean Spaces #
If your storage provider is DigitalOcean, select DigitalOcean Spaces from the providers list. Insert your Bucket Name, Access Key ID and Secret Key, and add the Endpoint URL. After that, hit the ‘Submit’ button.
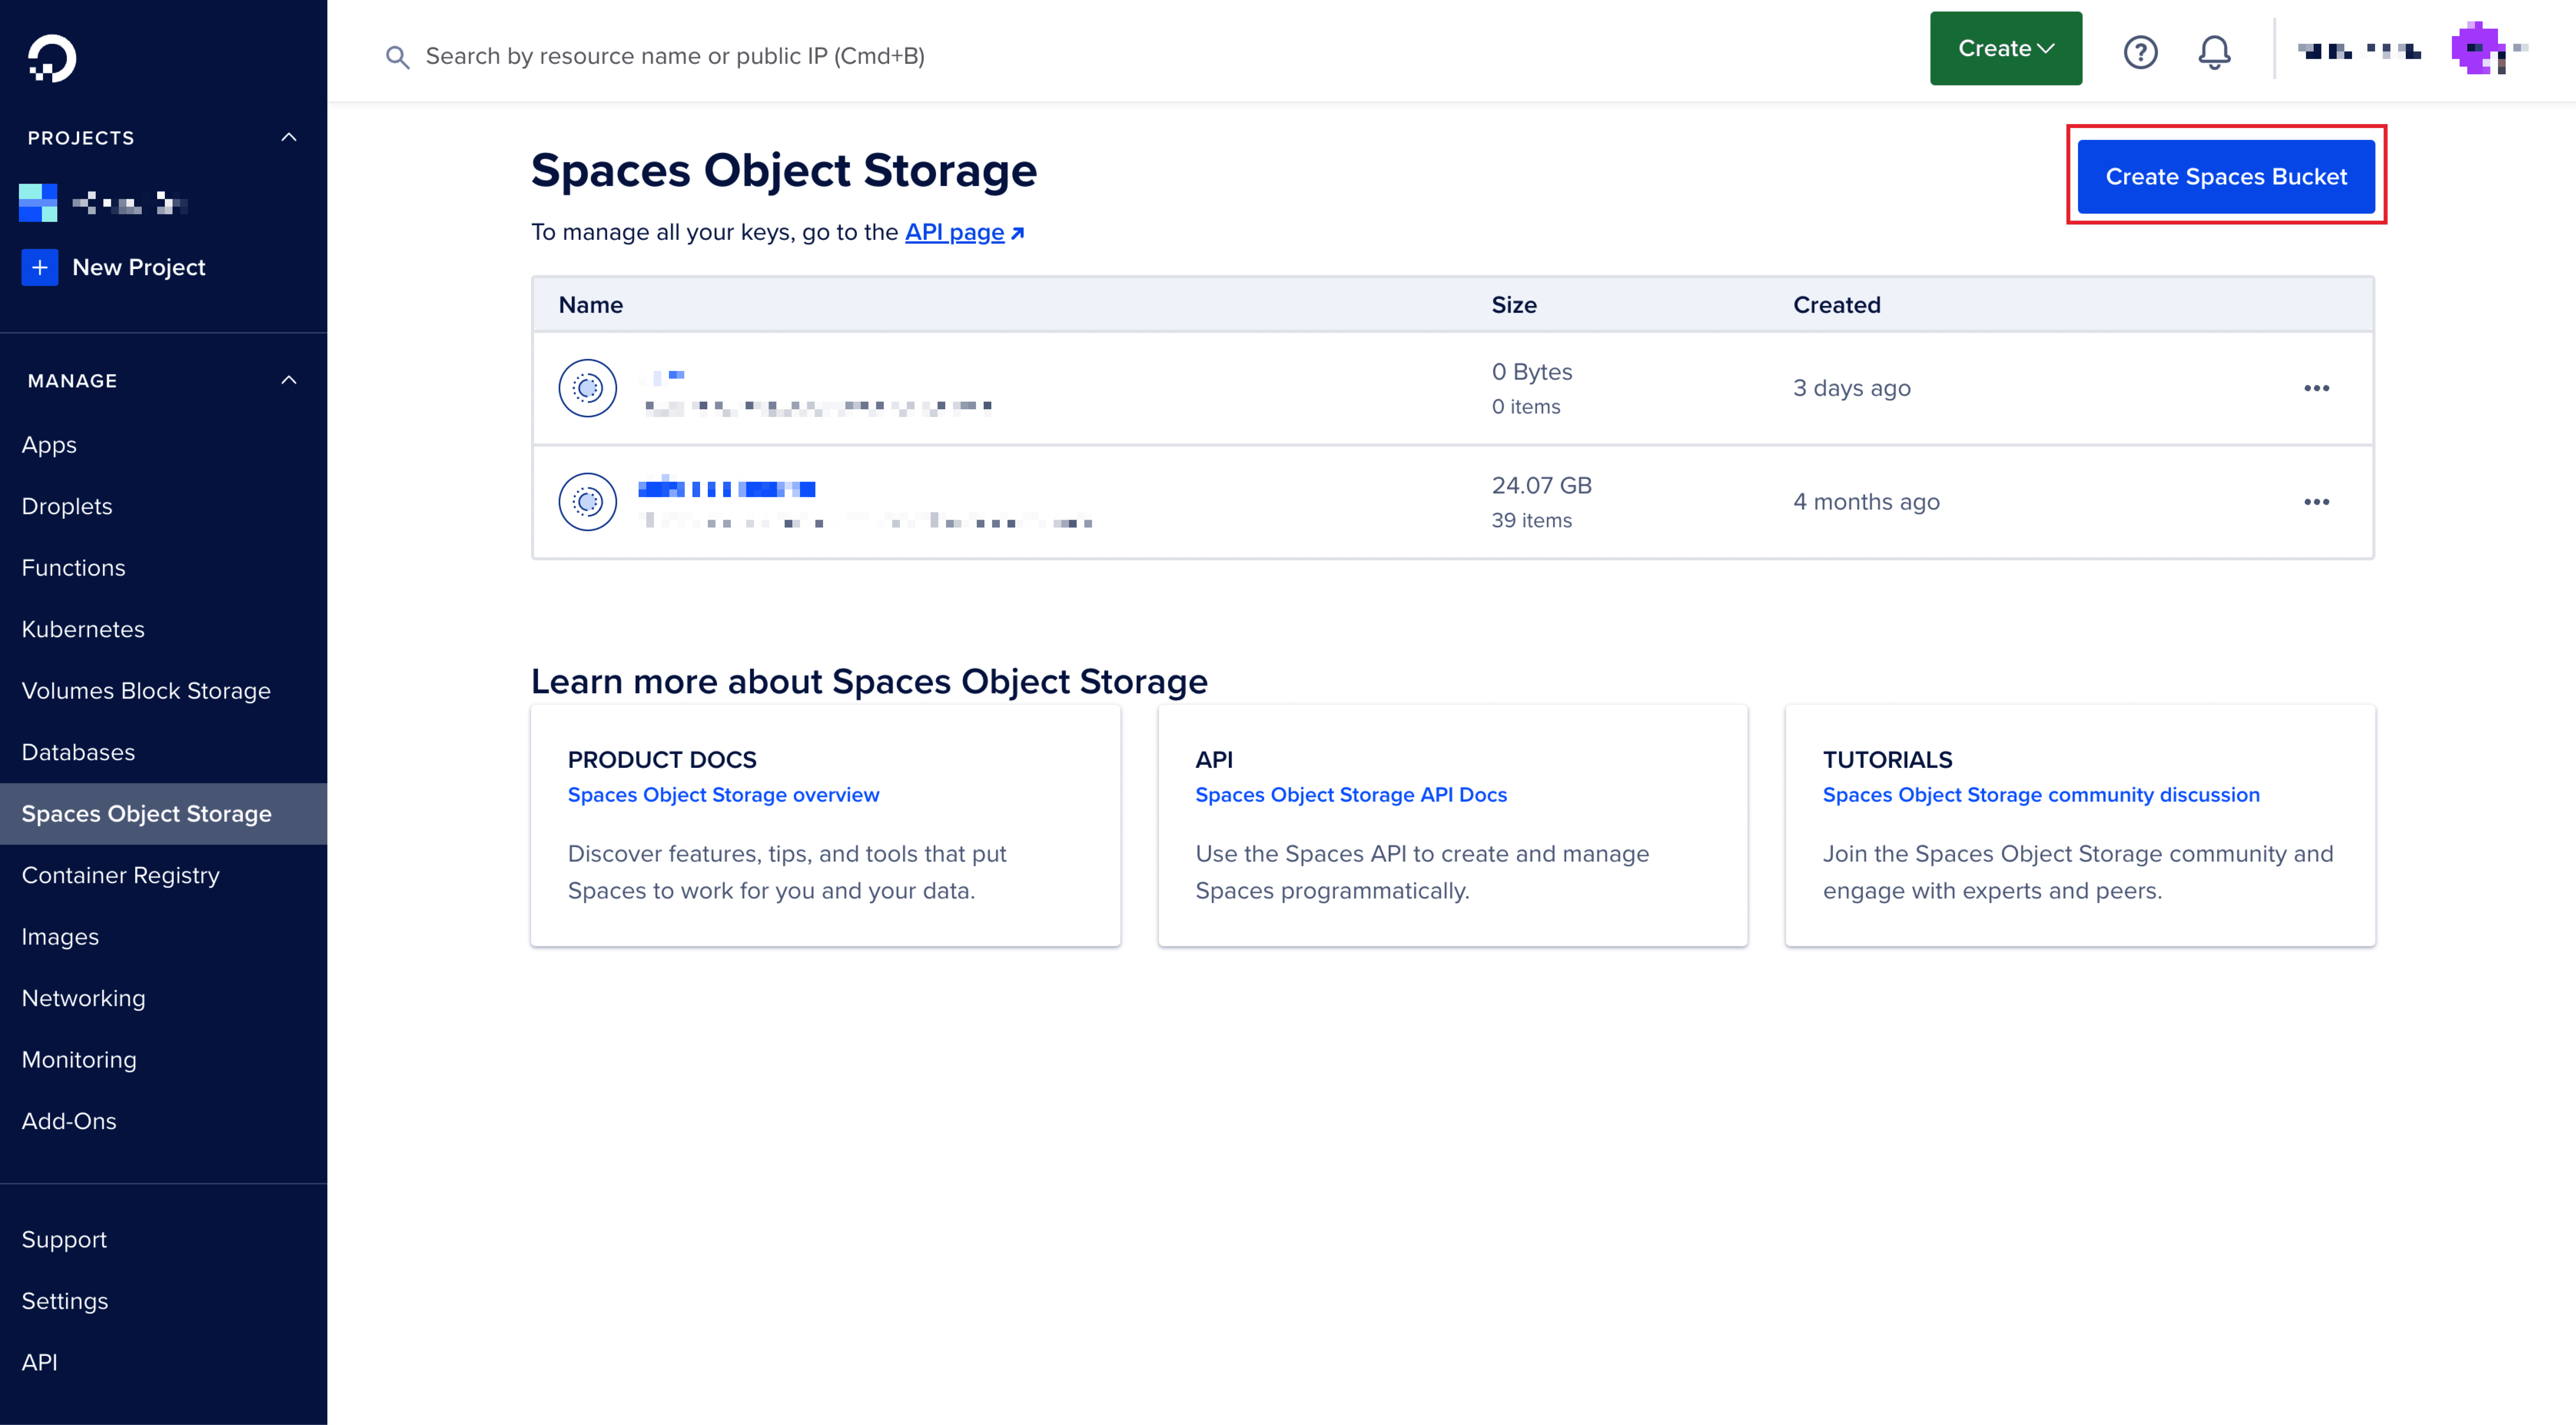
To get Space name, Access Key ID, Secret key from DigitalOcean, open your account dashboard and go to ‘Spaces Object Storage.’ Hit the ‘Create Spaces Bucket‘ button to create a new bucket.
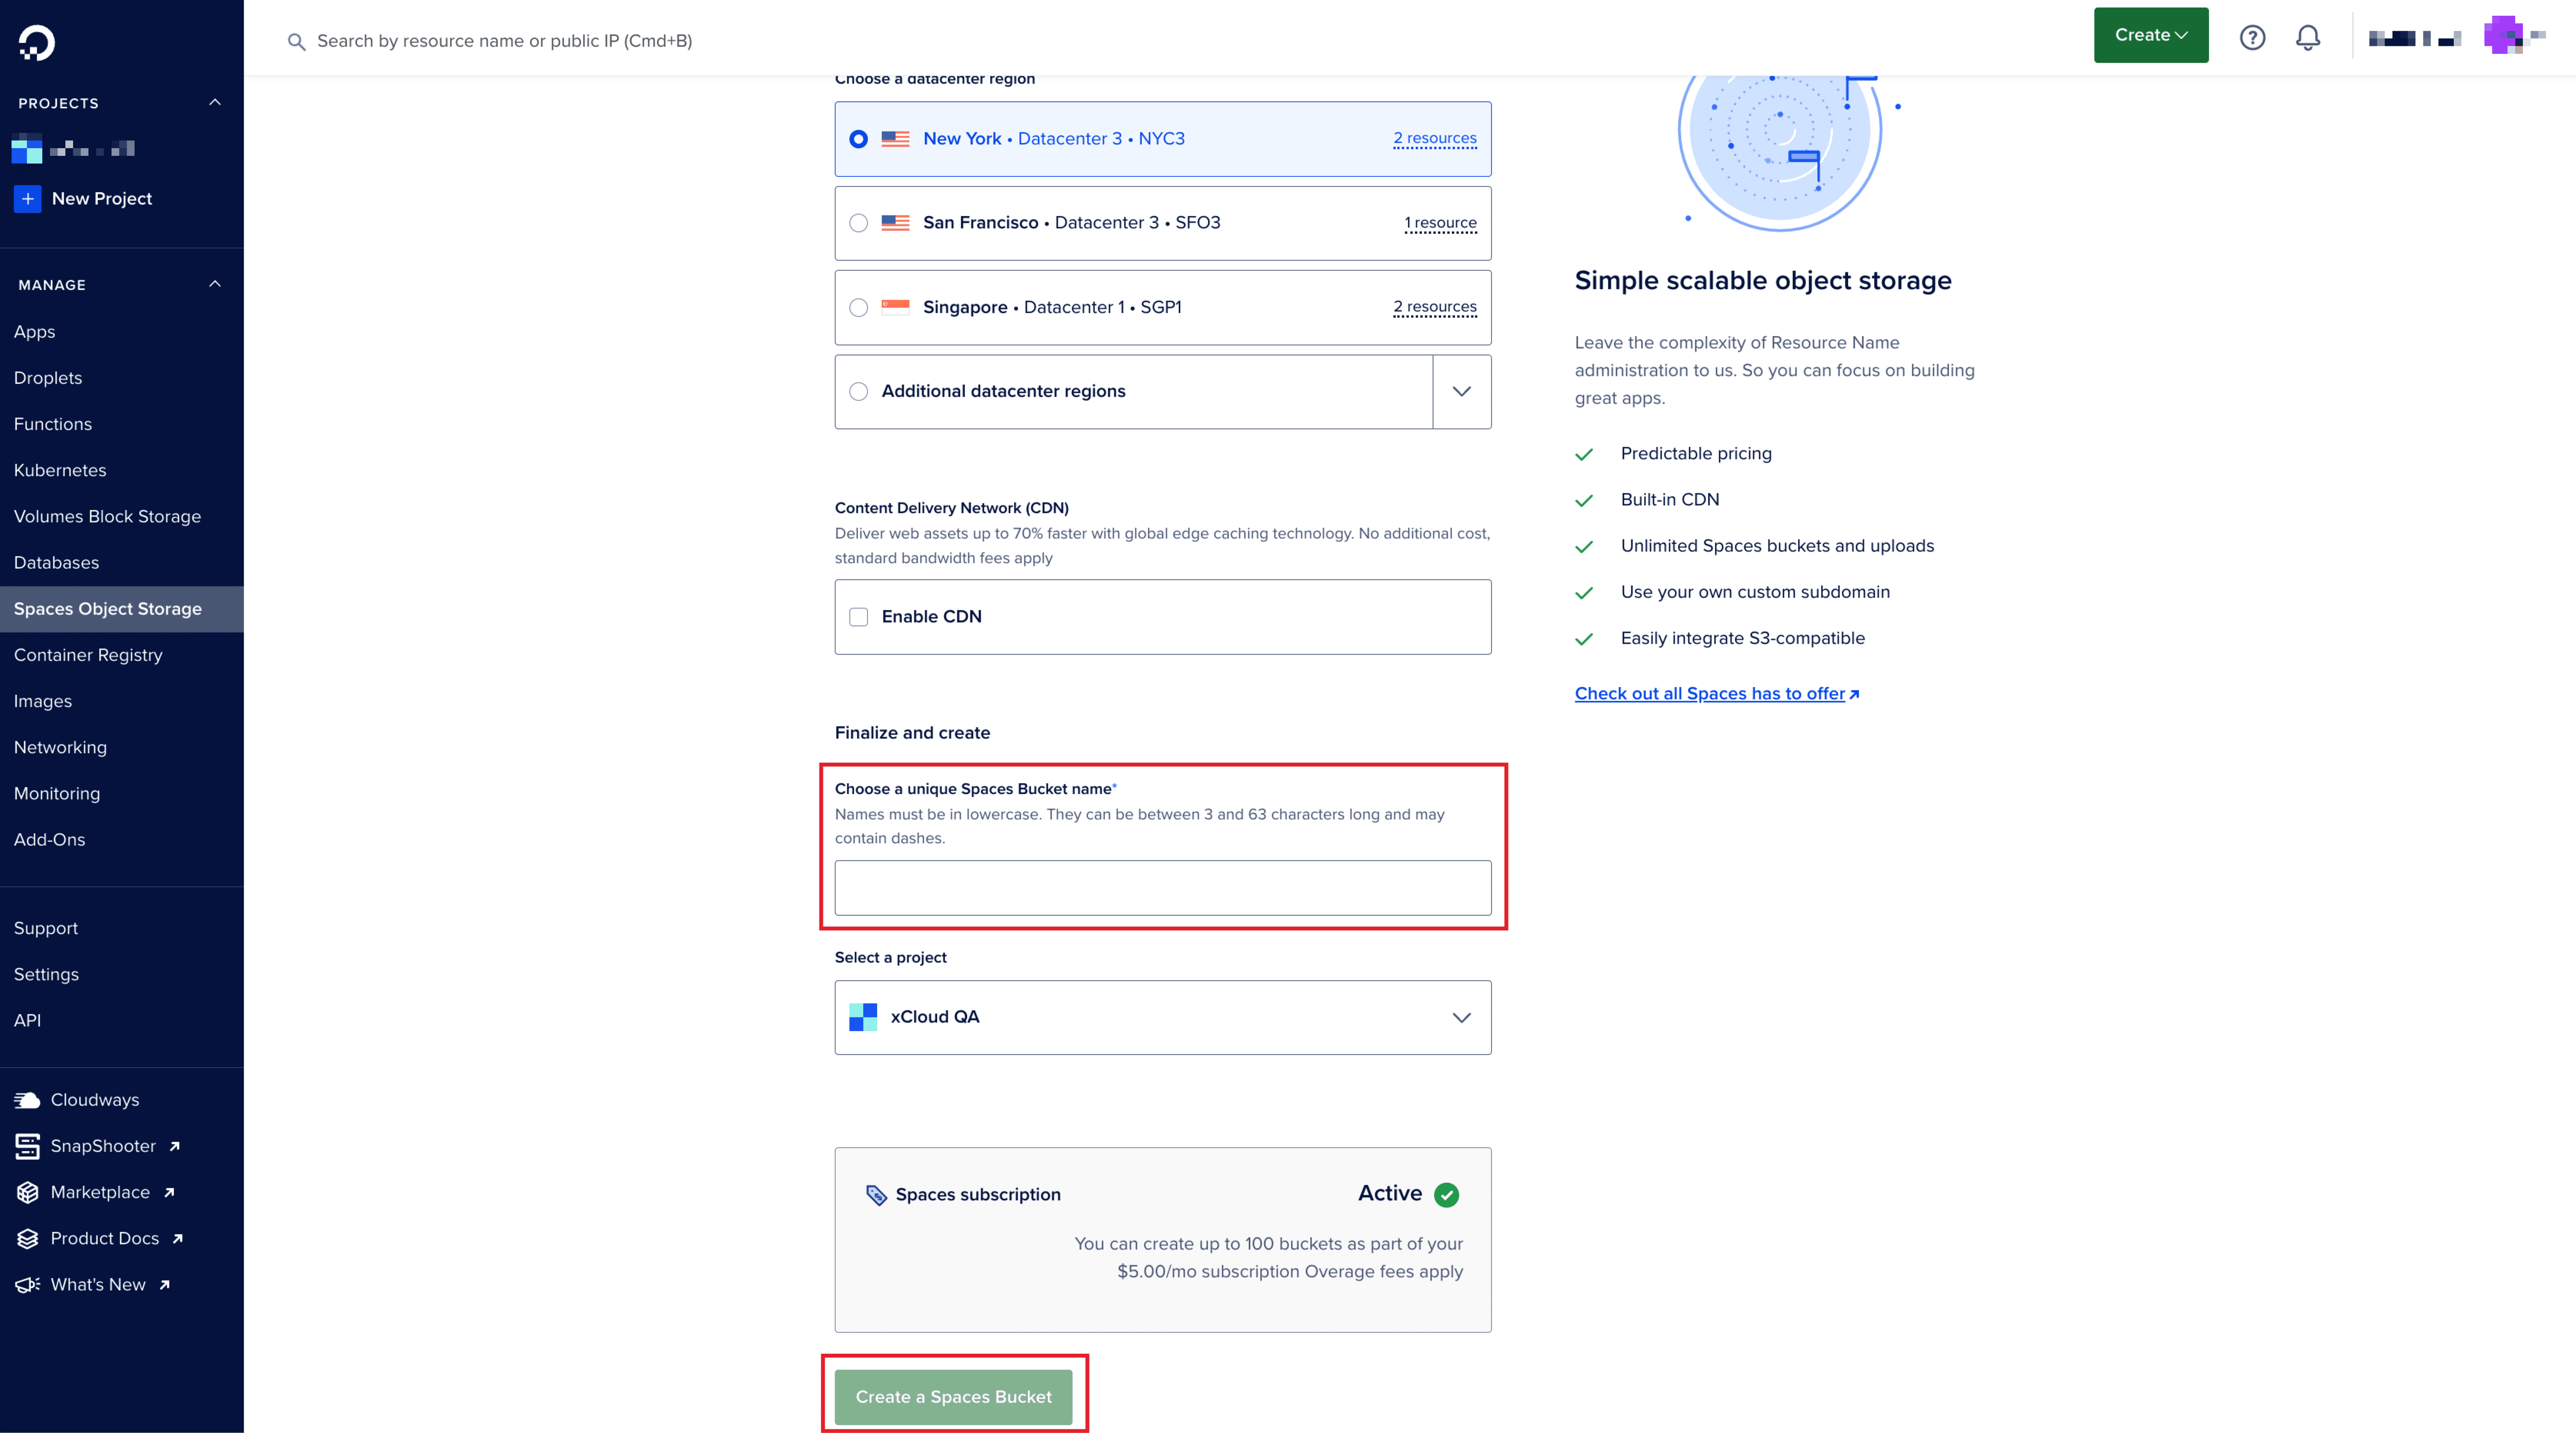
Now, set a unique bucket name in the field that says ‘Choose a unique Spaces Bucket name‘ and hit the ‘Create a Spaces Bucket‘ button.
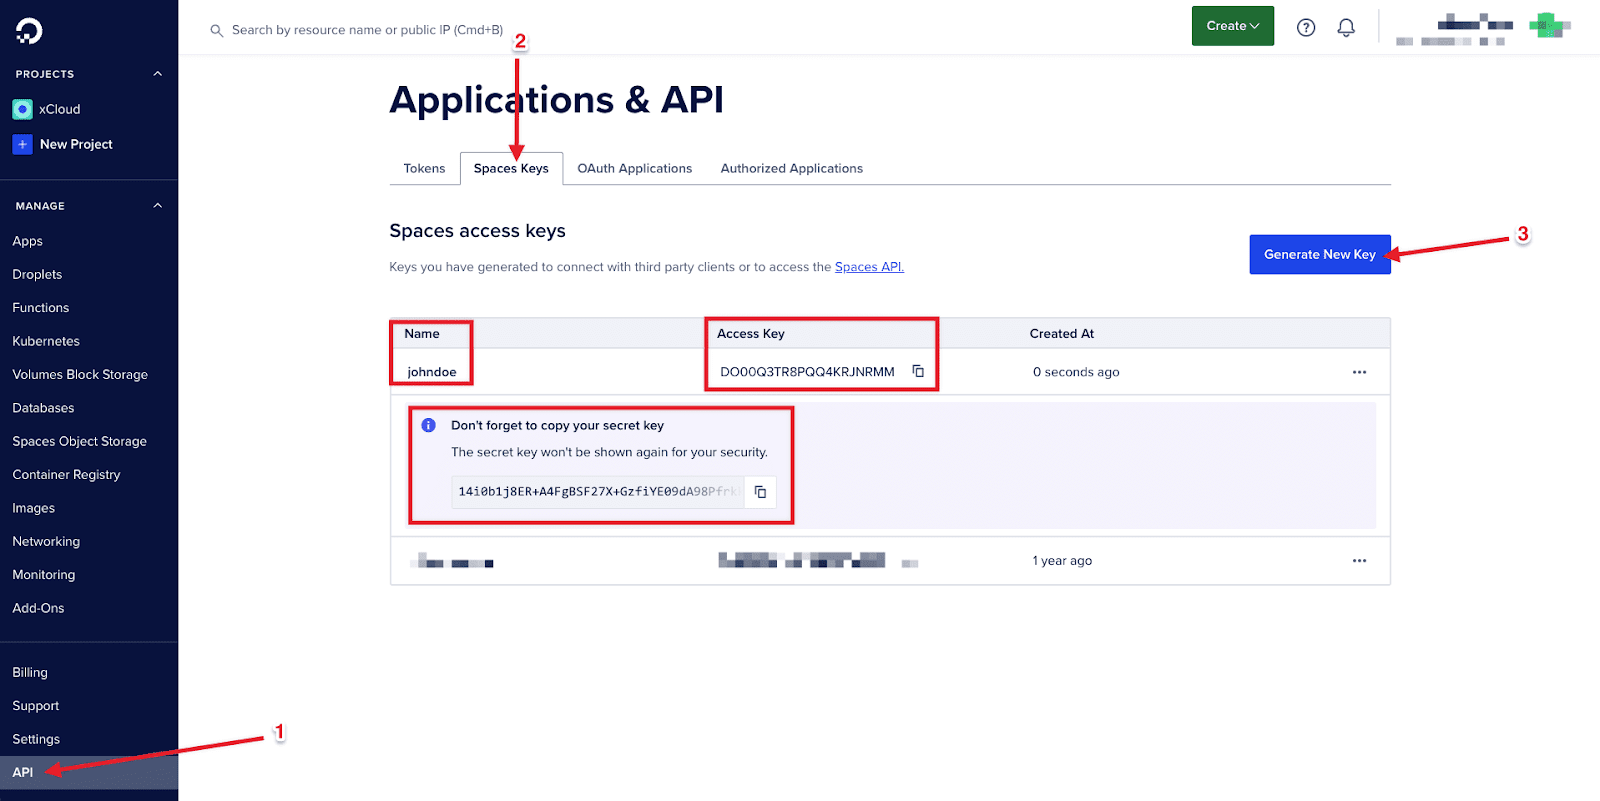
Once done, navigate to API → Spaces Keys from the DigitalOcean dashboard. Hit the ‘Generate New Key’ button to generate and copy your necessary keys.
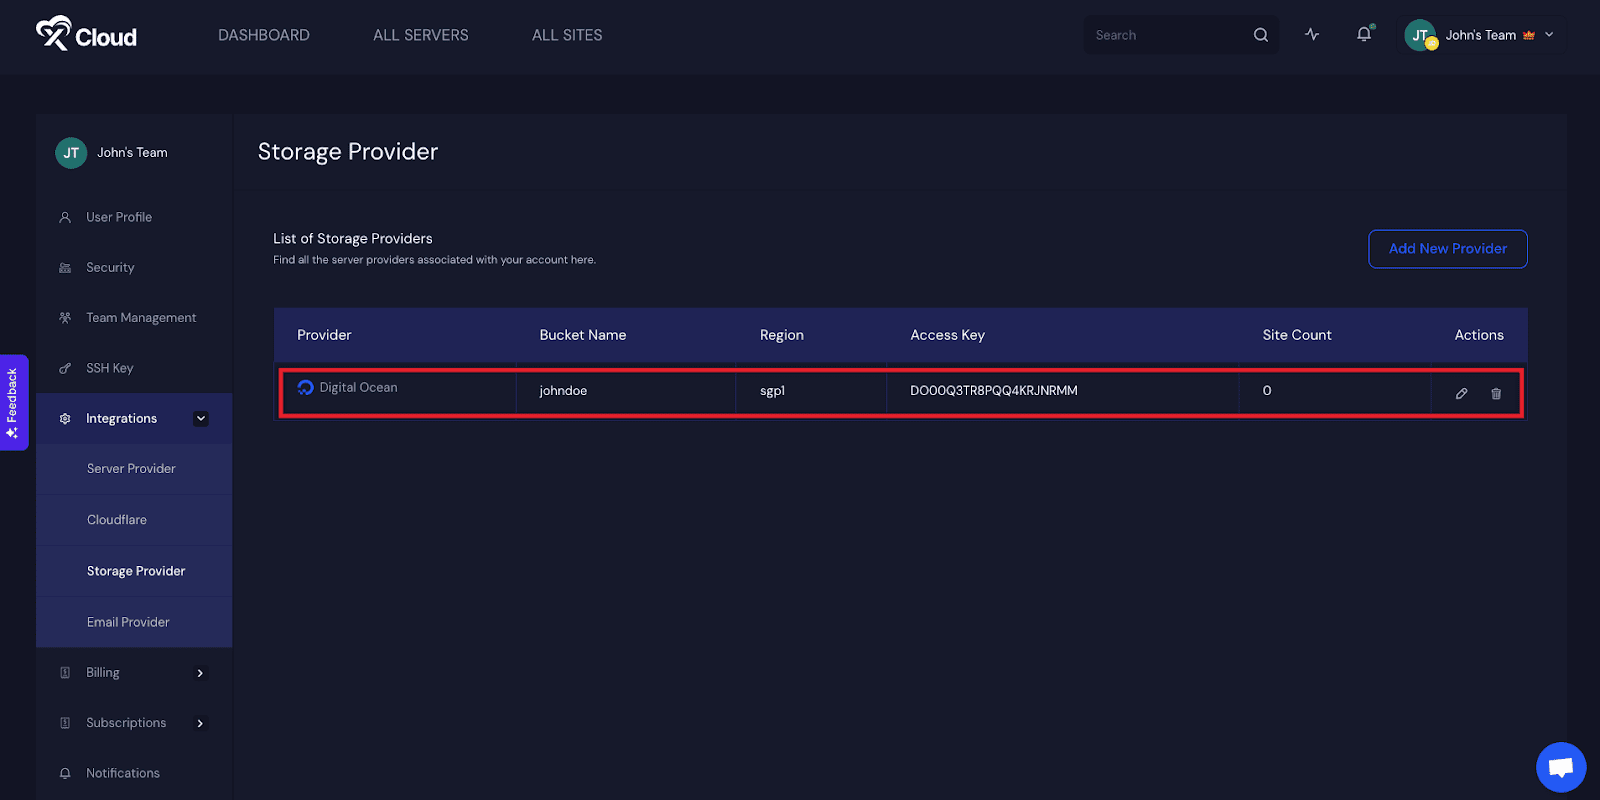
Once you are done adding the necessary information and hit the ‘Submit’ button, your DigitalOcean space will be integrated instantly.
Vultr Object Storage #
If your storage provider is Vultr, select Vultr Object Storage from the providers list. Set your Bucket Name, input Access Key ID and Secret Key, and add Endpoint URL. After that, hit the ‘Submit’ button.
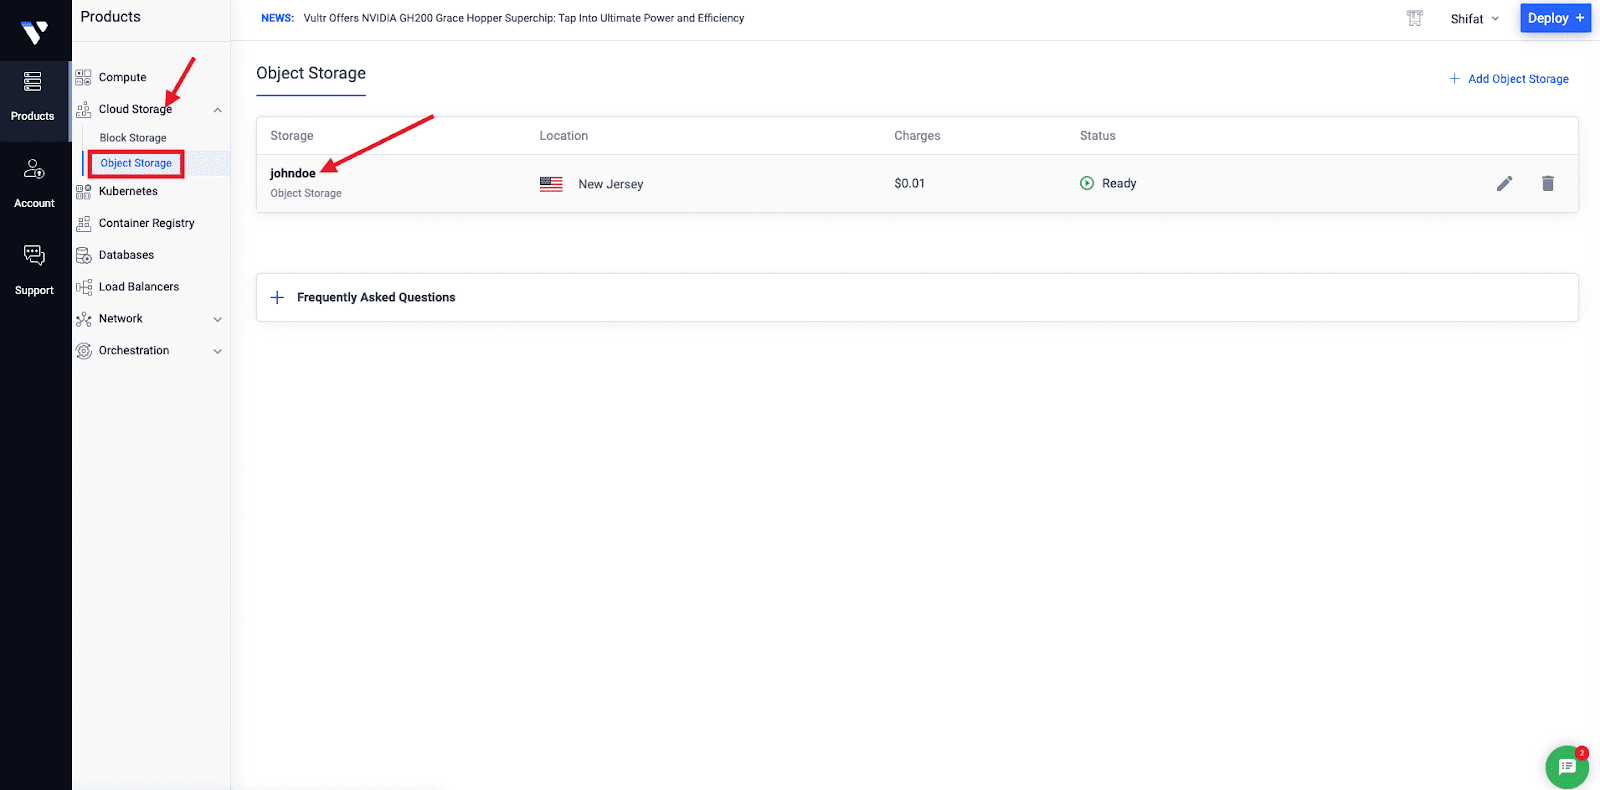
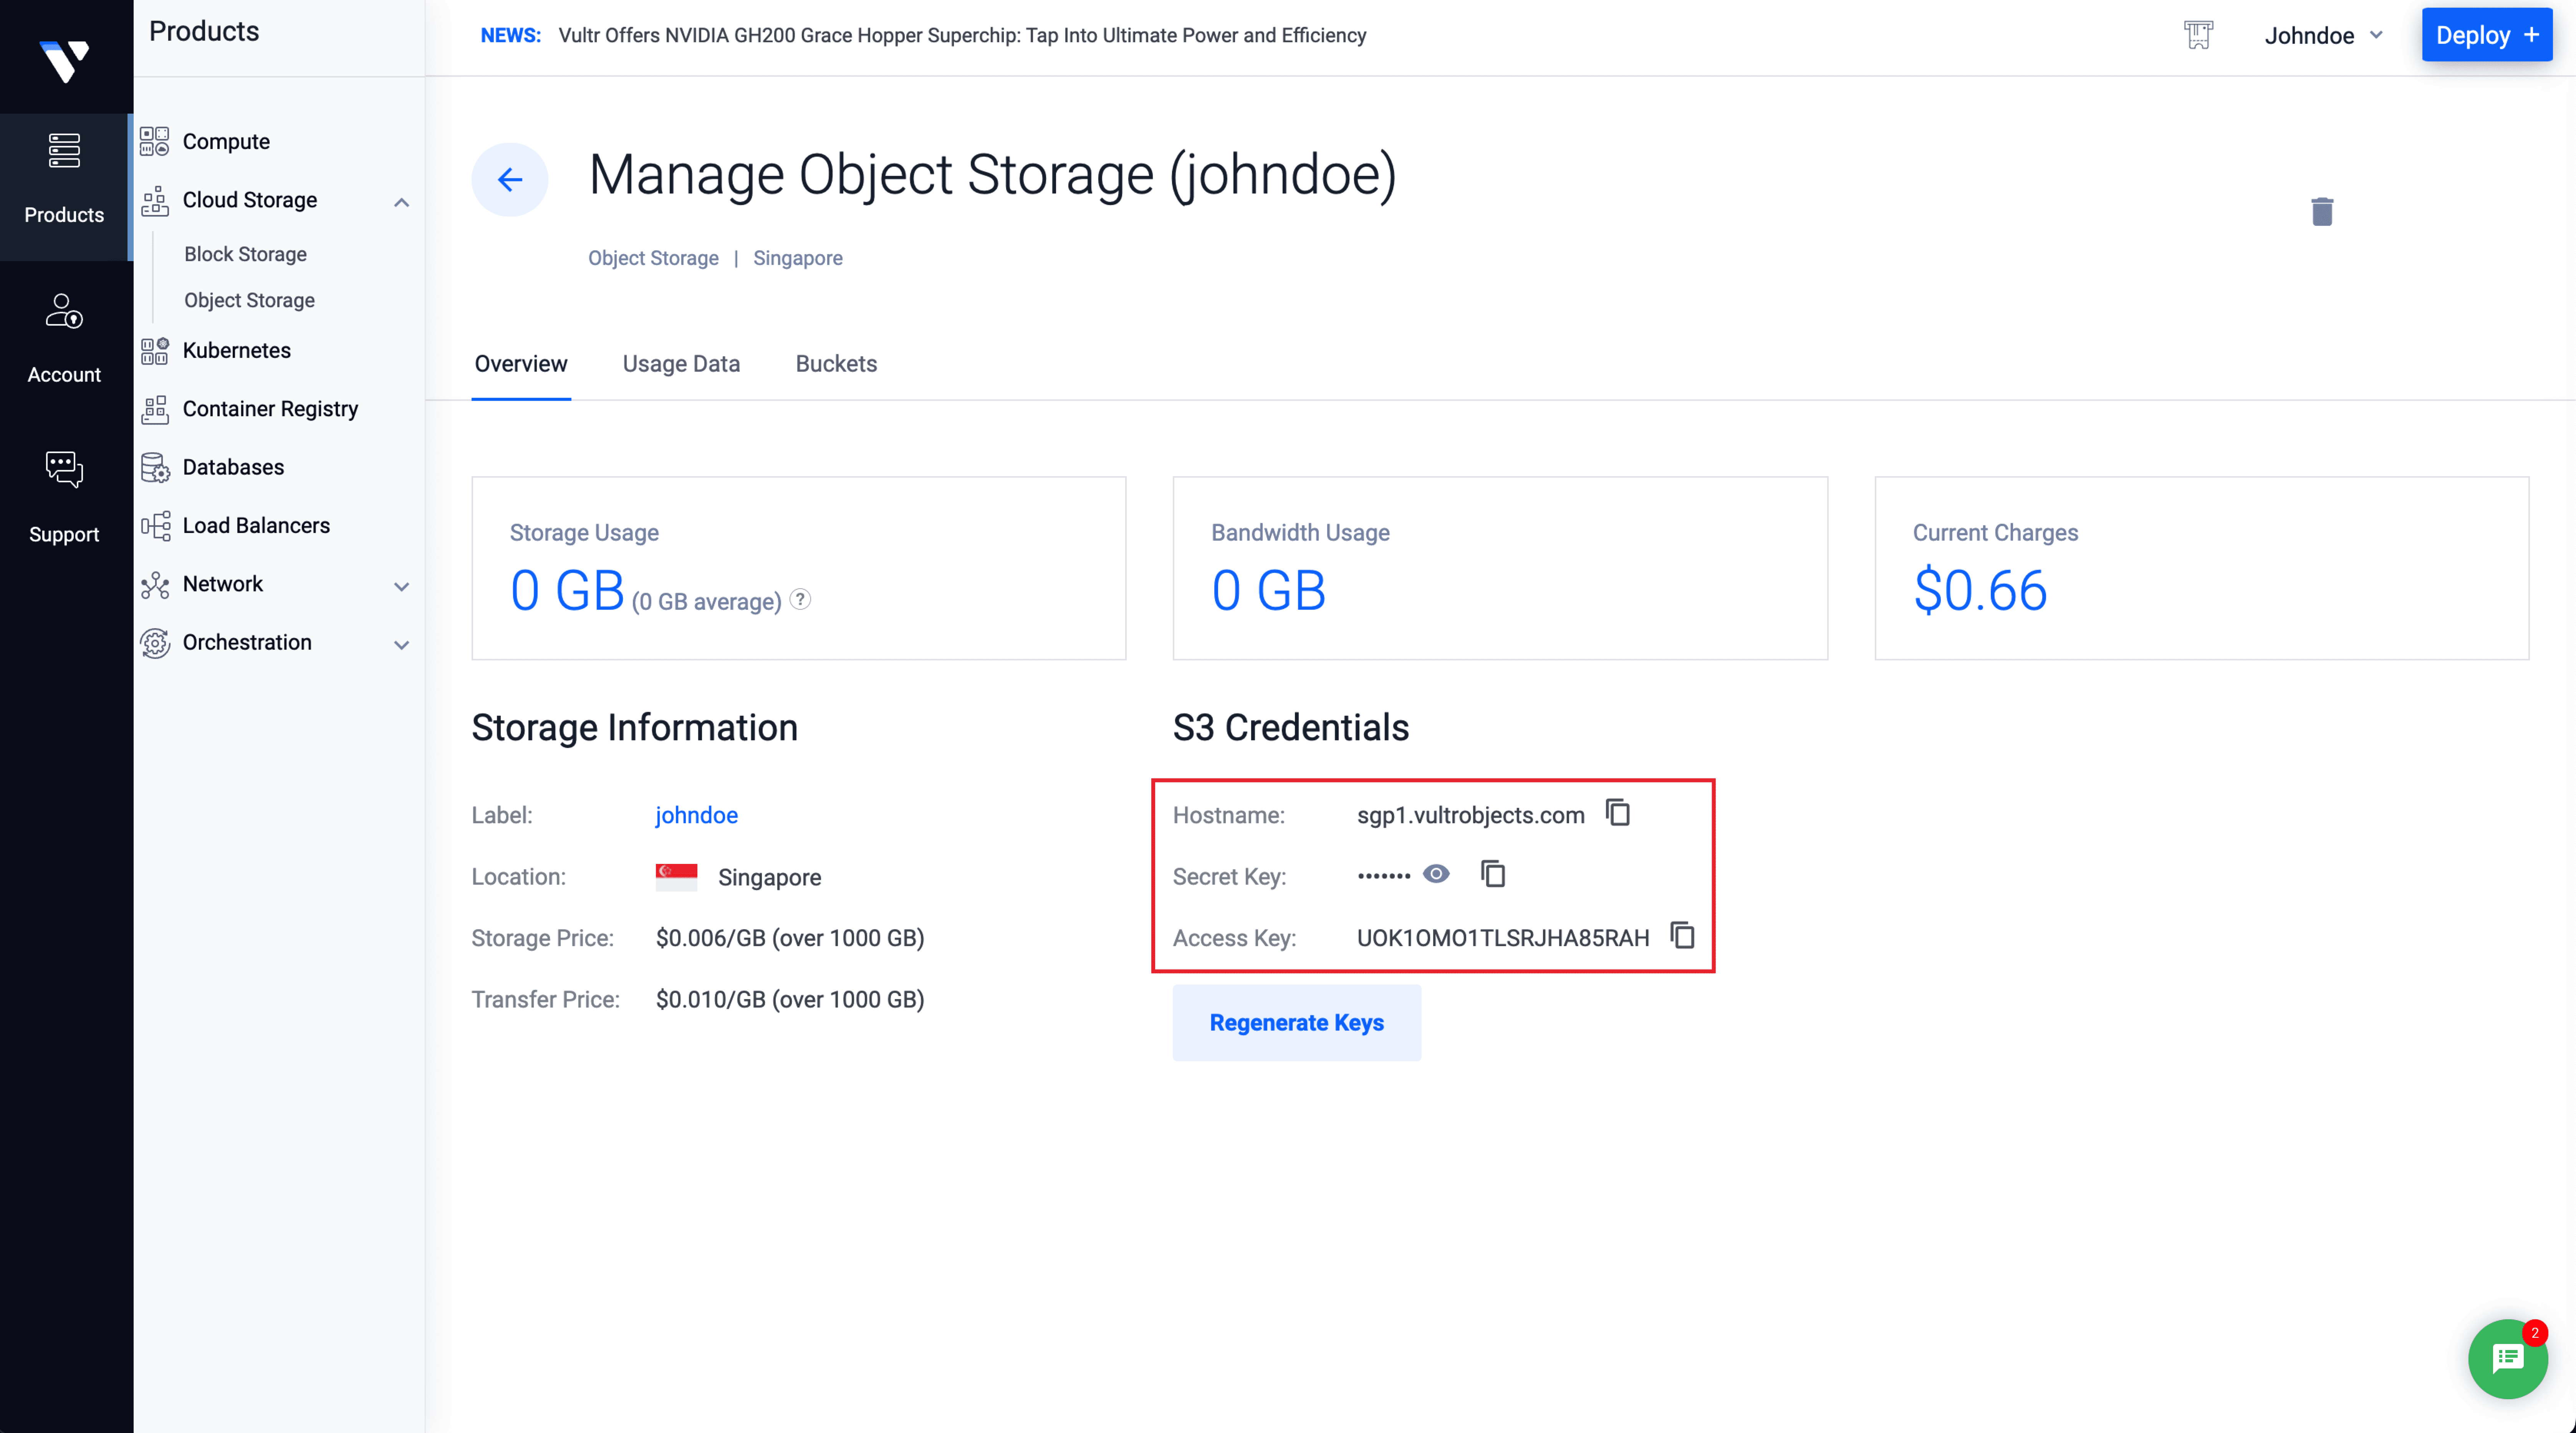
To get Space name, Access Key ID, Secret key from Vultr, open your Vultr account dashboard and navigate to Cloud Storage → Object Storage.
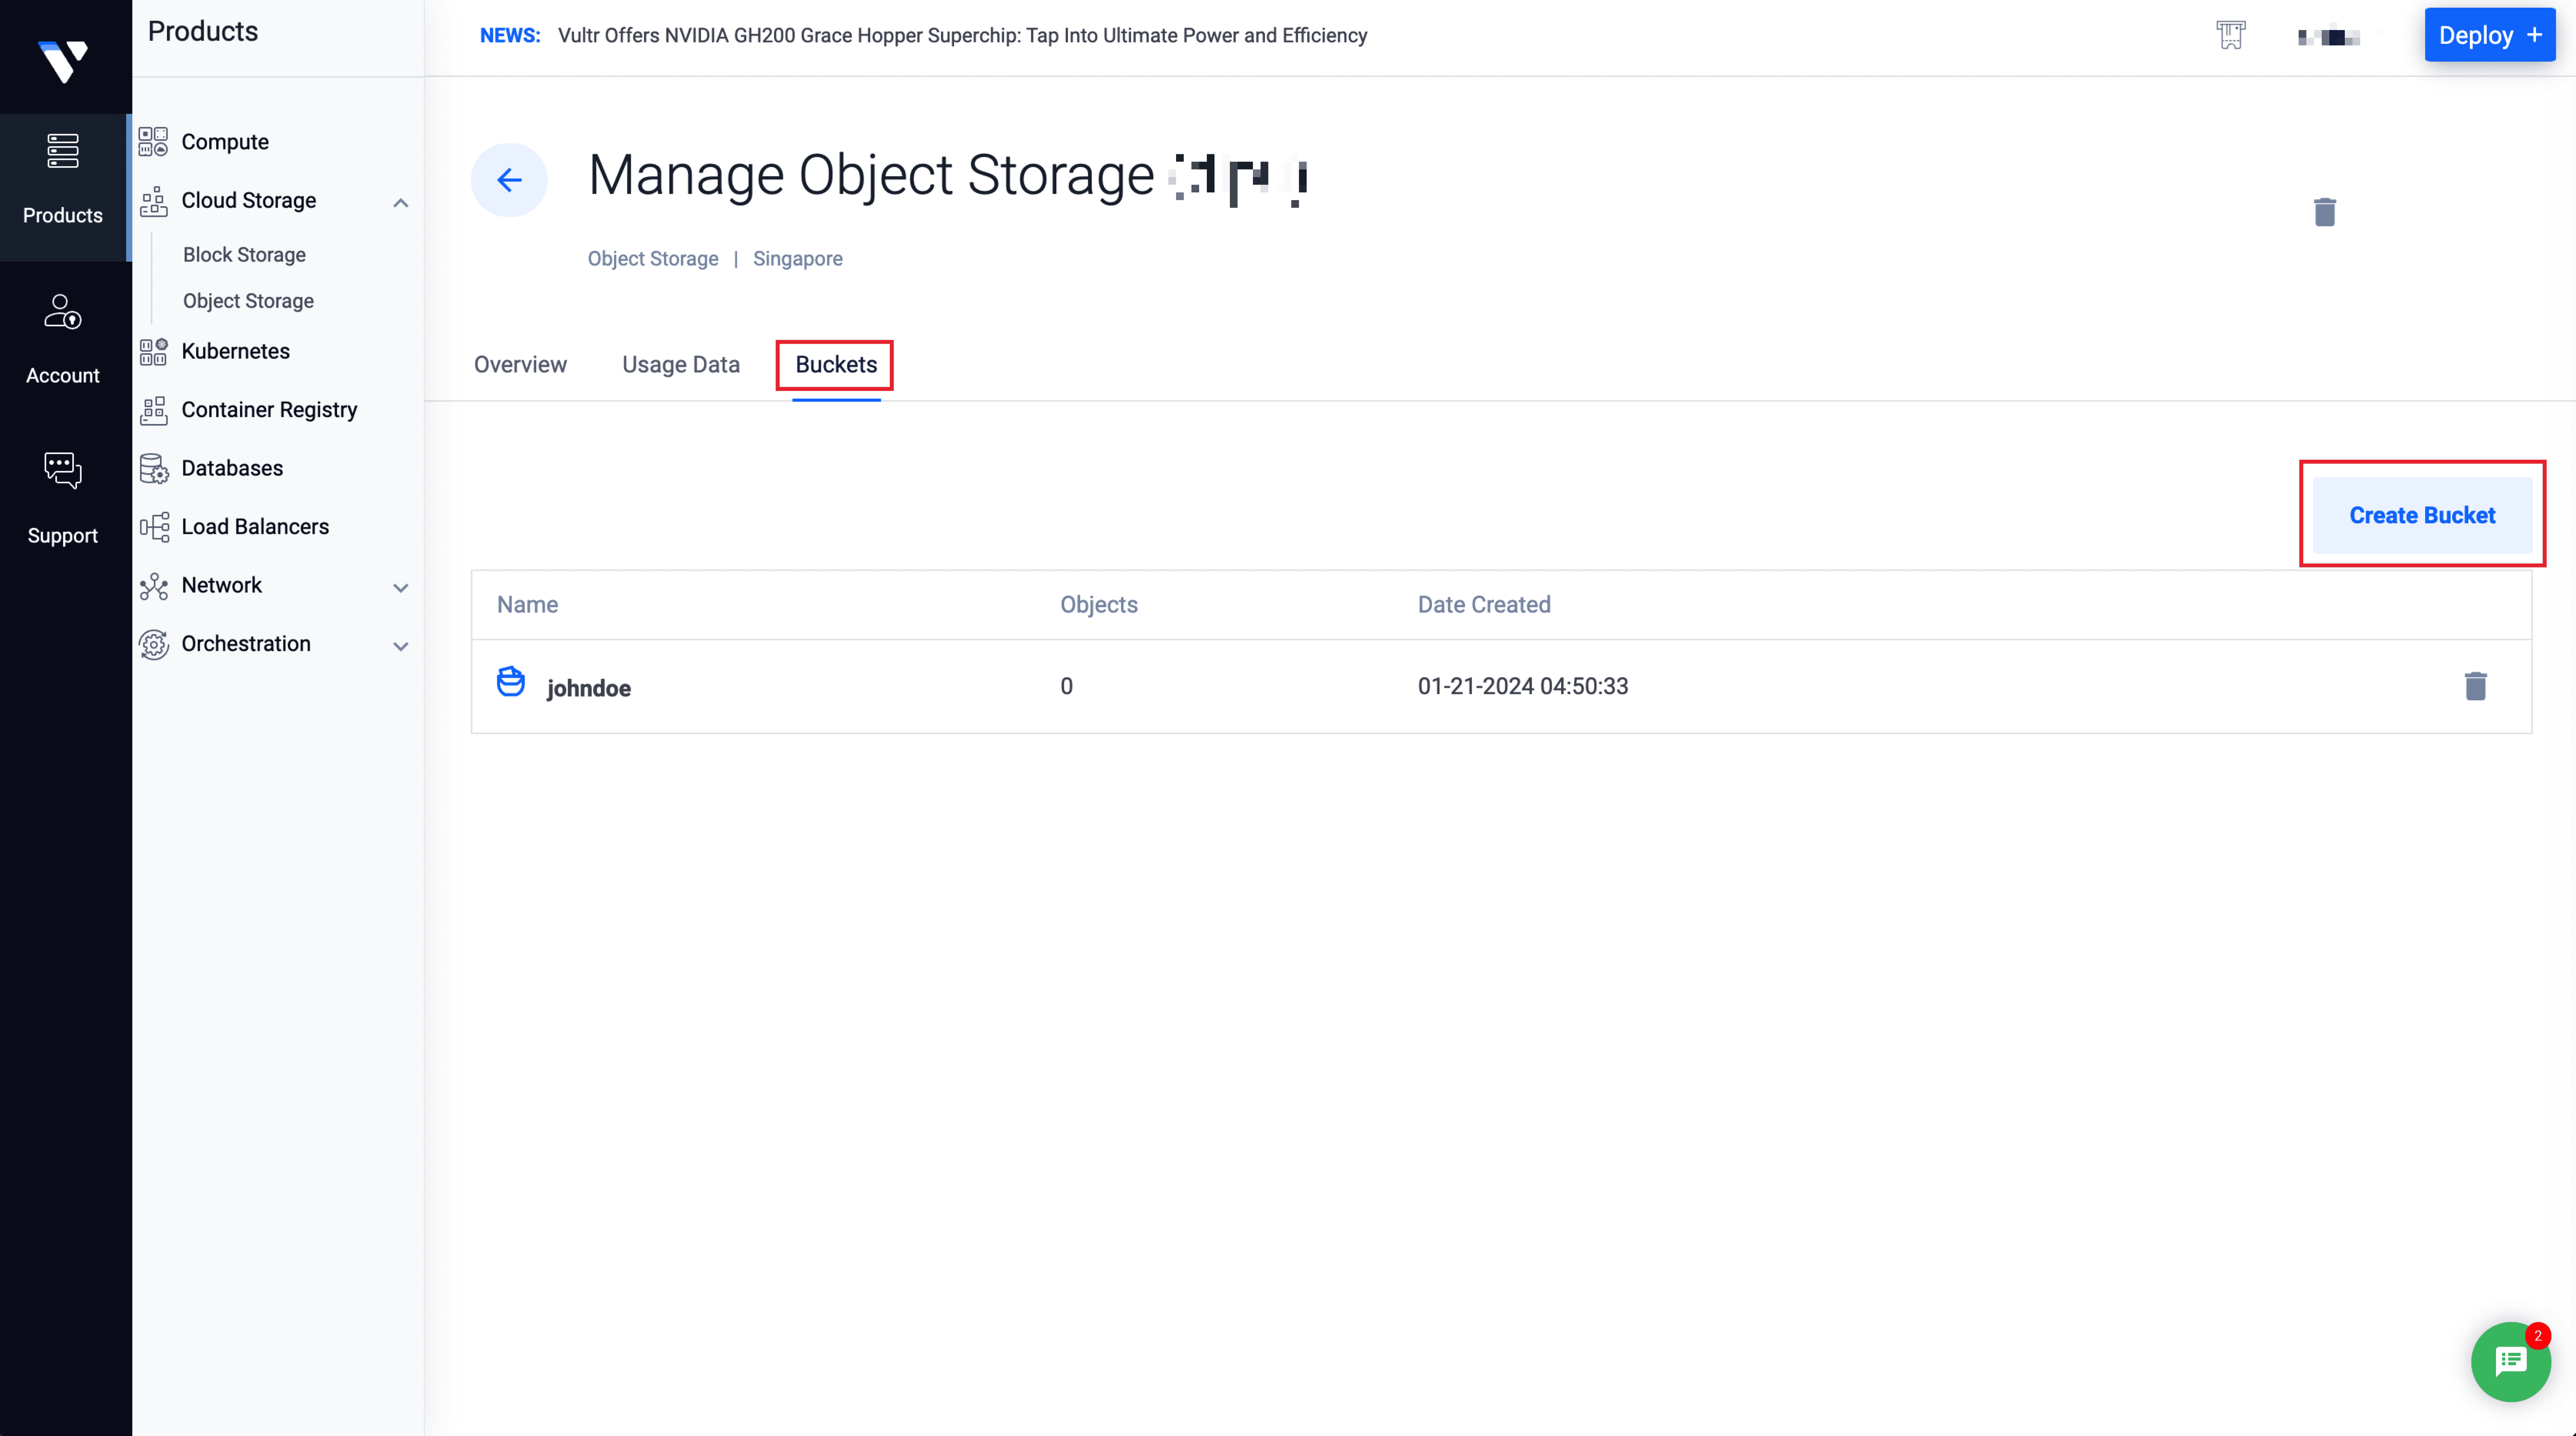
Hit the Storage Name to manage the Object Storage. Here, you will need to open the Buckets tab and create a new bucket.
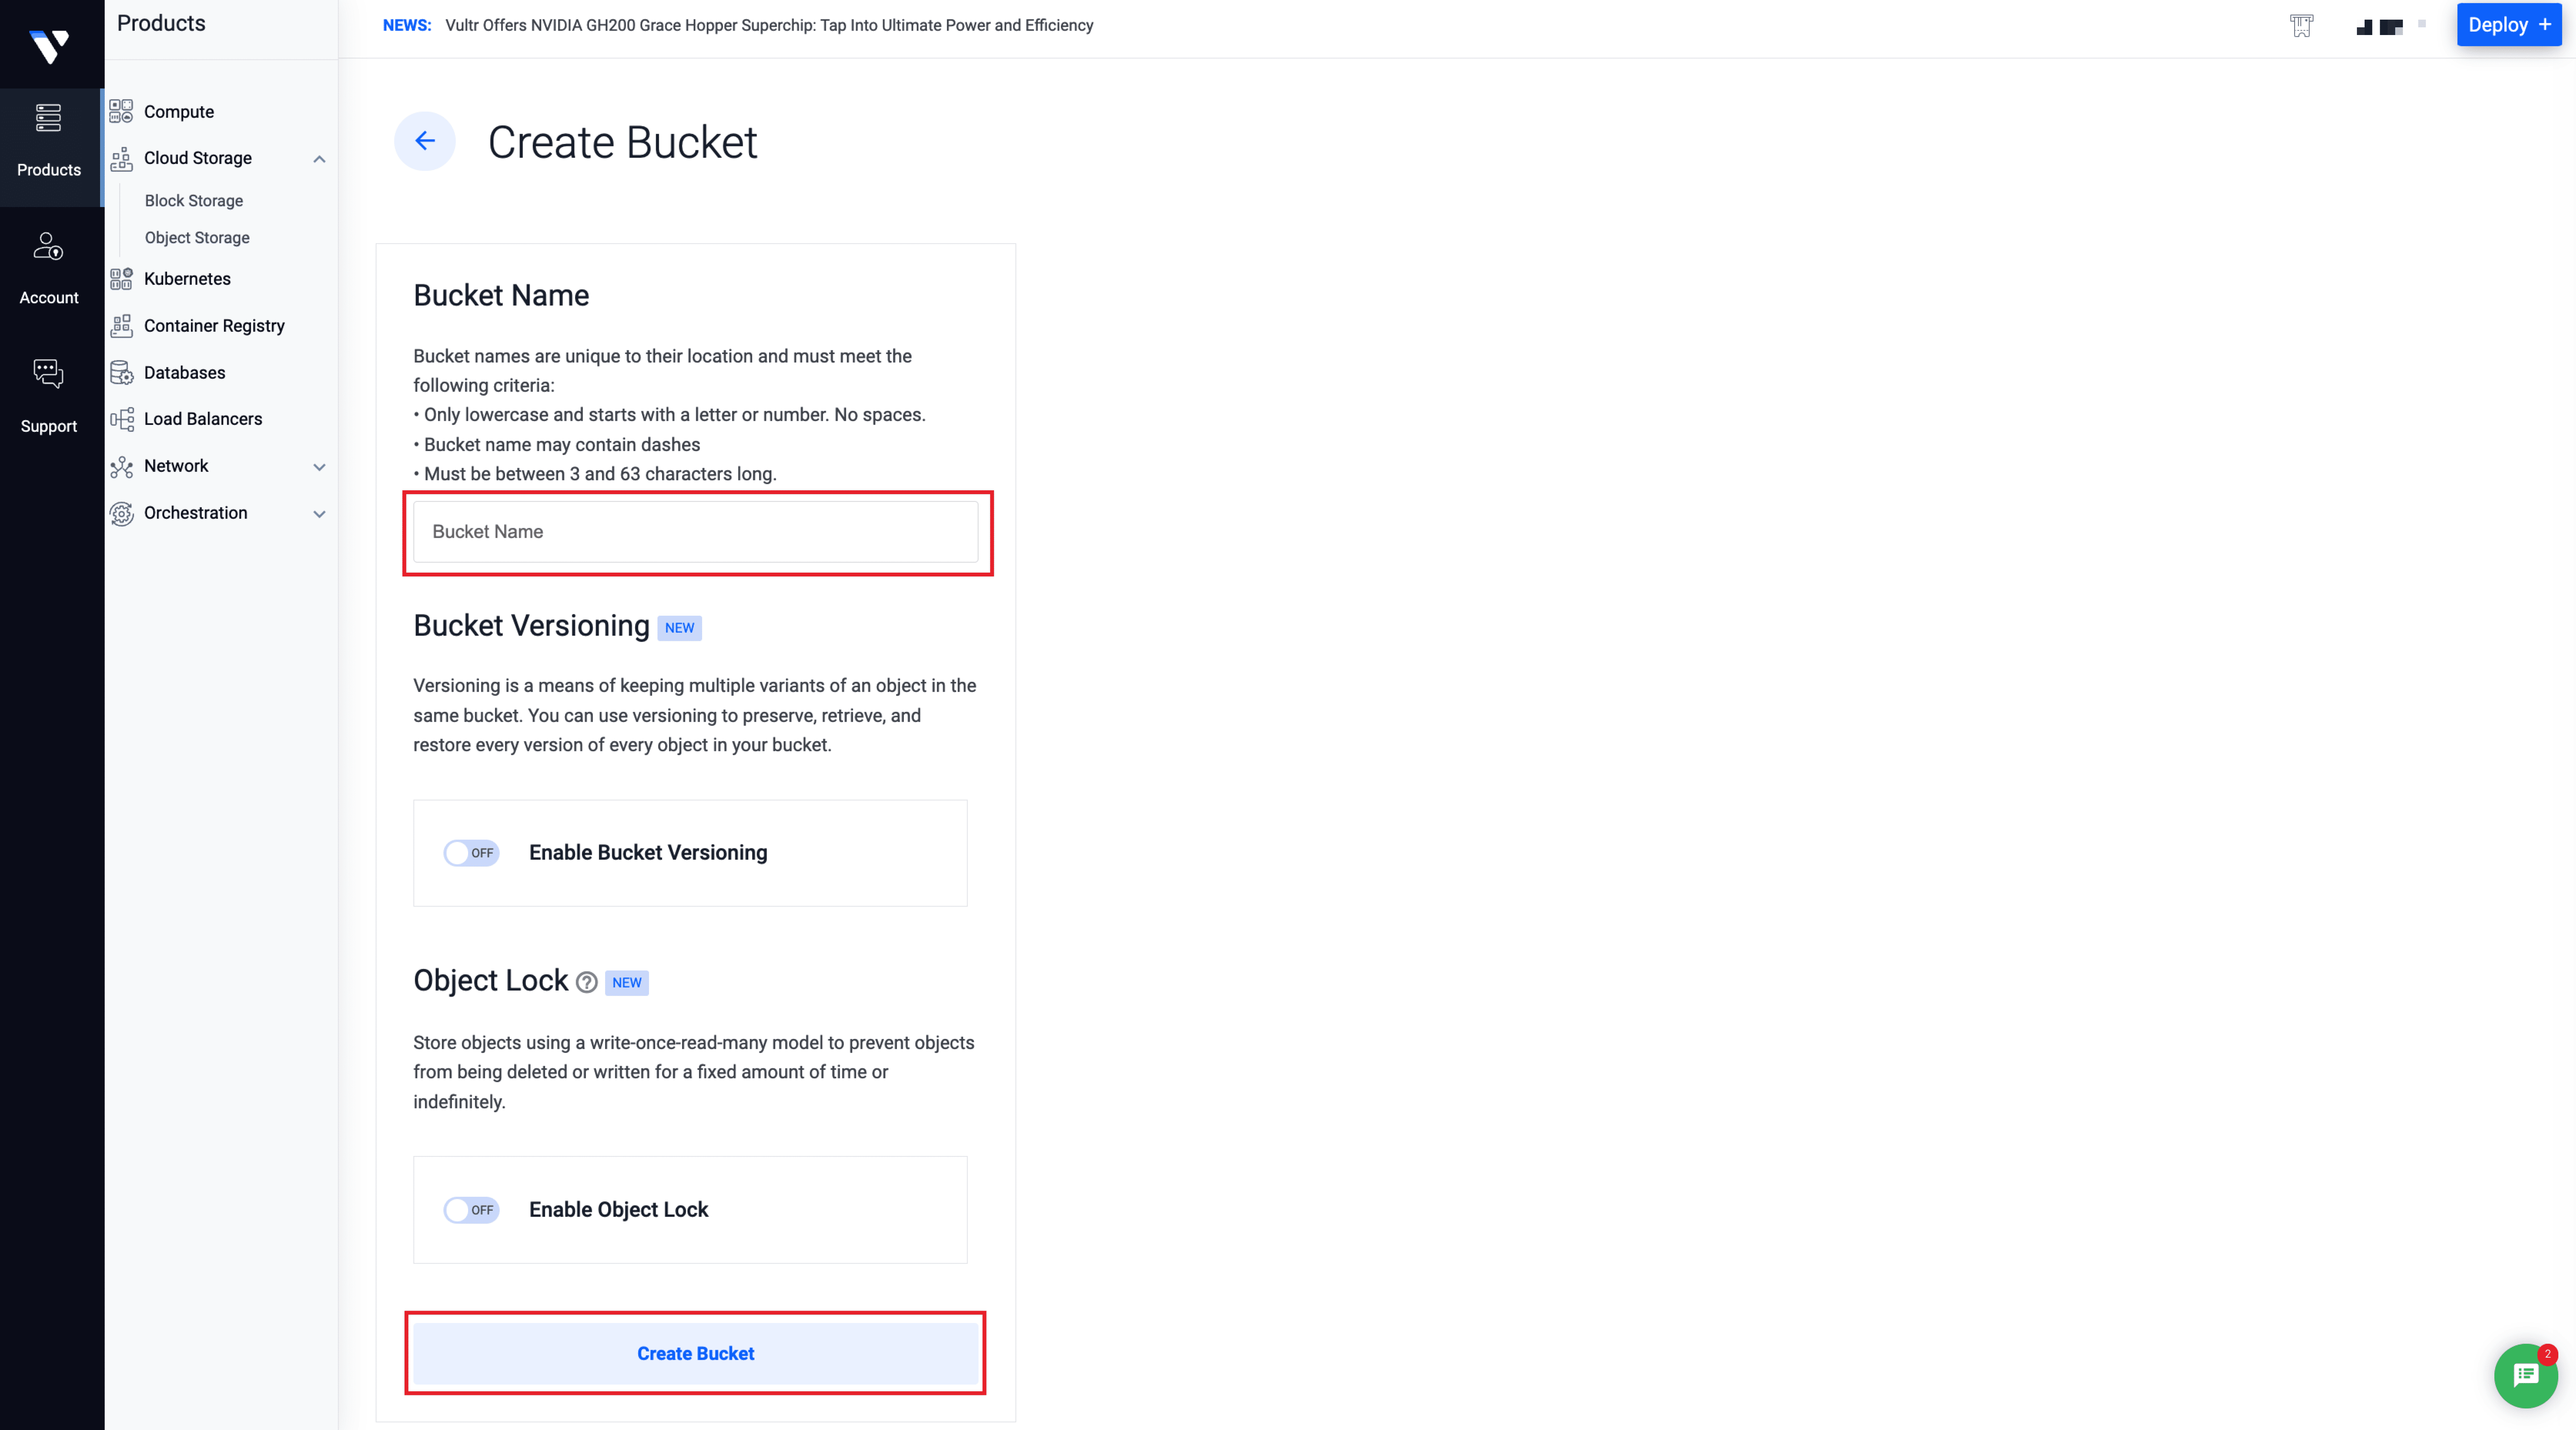
To create a new bucket, set a ‘Bucket Name‘ and hit the ‘Create Bucket‘ button at the bottom of the page.
After creating the bucket, you will find the Hostname, Secret Key, and Access key on the ‘Overview‘ tab.
After providing the necessary information, hit the ‘Submit’ button, the Vultr Object Storage will be integrated into xCloud.
[Note: Please make sure you have a bucket created before trying to integrate it into xCloud.]
Step 3: Configure Site Backup Setting #
Once the integration process is done, you can start backing up your site. As you can integrate more than one storage provider, choose one if you have multiple. For the Remote Backup Settings, choose your Bucket.
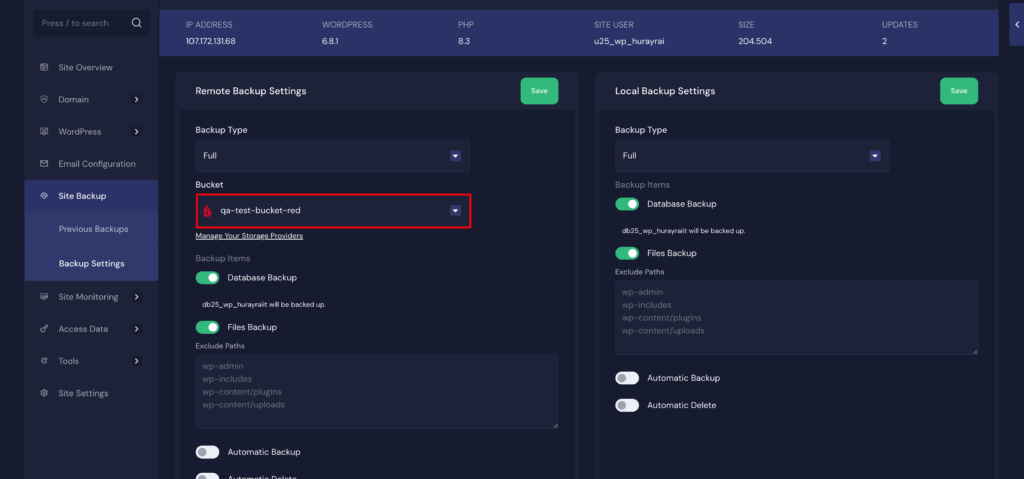
Next you will get two options, ‘Database Backup’ and ‘Files Backup’. Enable the any one of keep the both enabled to take the backup of the database and files as your preferences.
Now, there may be files or folders that you do not want to include in your file backups. You can exclude those files from backing up. You will find the box below the ‘File Backup’ field, as shown below.
For example, if you’re using any media plugin to offload your Media Library to Amazon S3 and have versioning enabled on your bucket, there’s really no reason to include those files in your daily backups. In this case, excluding your uploads folder could be a good choice. To add just write the path into the ‘Exclude Paths’ section:
/files/wp-content/uploads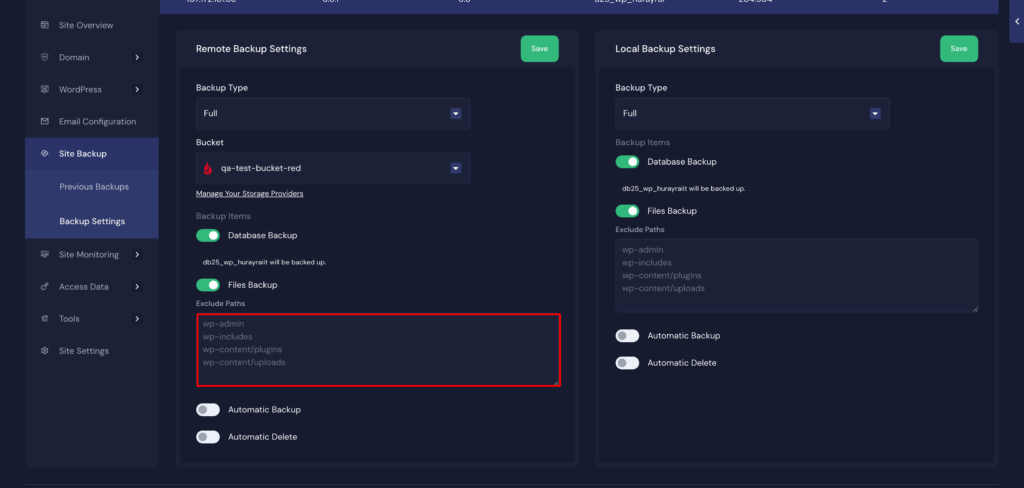
Similarly, if you’re using Composer to manage PHP dependencies, it’s likely that you don’t want to include the root vendor directory in your backups.
/files/vendorThere are more paths like below, that you can exclude from the backup list.
wp-admin
wp-includes
wp-content/cache
wp-content/plugins
wp-content/updraft
You can just copy and paste the paths here and you are good to go with excluding specific paths that you do not want to include in the backup.
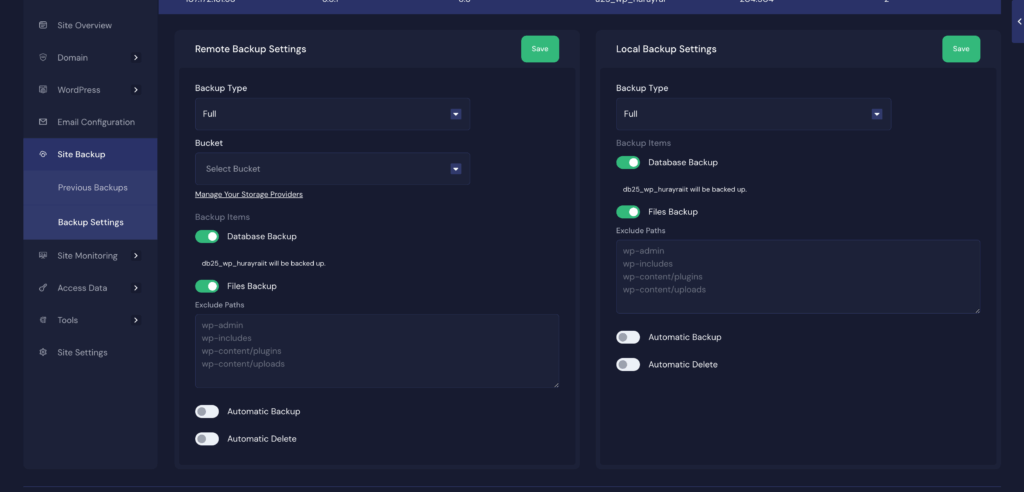
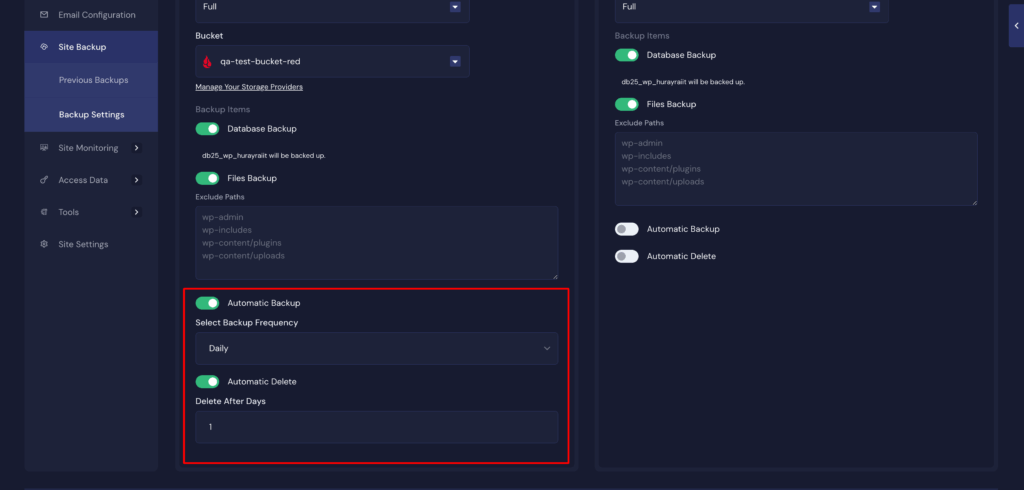
You can also choose to schedule ‘Automatic Backup’ and ‘Automatic Delete’. For automatic backup, you need to select backup frequency. On the other hand, you can set a value for how many days after a backup will be deleted automatically.
Step 4: Take Your Backup #
To take a new backup of your site or to view previous backups, go to Backup → Previous Backups. You will see two options: Local Backup and Remote Backup for your website.
You can also view an overview of the Backup Summary and Backup Status Overview for both local and remote backups. This includes details such as Total Backup Size, File Backup Size, Database Backup Size, Backup Status, Next Backup, and more.

Go to the ‘Remote Backup’ or ‘Local Backup’ tab based on your preference, and click the ‘Backup Now’ button, then choose the ‘Full Backup’ or ‘Incremental Backup’ to create an instant backup of your site.

xCloud will take a few seconds to create a backup of your site. It will export a compressed version of your current site and an SQL file in your bucket, which can be restored automatically from xCloud or downloaded from your storage provider later.
Once done, you can see your backups here with the details and options. You can use the ‘Restore’ button to restore your site with a backup version. You can also check the backup size , date of the backup and destination at a glance of each of the backup.Note: While deleting a site you will be asked whether you want to remove Local Backups too. We are not removing Remote Backups now while deleting a site.

You can also add a custom note to your site backups to help keep track of why each backup was taken or to add quick notes that make it easier to find the right version when you need it most.
Simply click on the ‘Note’ section of each backup and enter your note. The note will be saved and updated instantly.

You can also click the ‘Delete’ button to remove your backups from xCloud. To delete multiple backups, select the checkboxes beside each backup and then click Delete.
Note: The latest full backup cannot be deleted because it is required to create a new incremental backup.

That is how easily you can create site backups with xCloud.Site Backup and restore both now support optional file-only, database-only, or full backups instead of always backing up both.

Connect Any S3-Compatible Storage Provider #
In addition to the built-in providers, xCloud supports integration with any S3-compatible storage service. Easily connect:
- Amazon S3
- MinIO
- Wasabi
- Backblaze B2
- Any other S3-compatible object storage
Download S3 Storage Backup #
With xCloud, you can now download S3 storage backups directly from your dashboard. Easily access and save your remote S3 storage backups hassle-free.

Learn how to access all site files via SFTP with the root user here:
👉 Accessing All Site Files via SFTP with Root User in xCloud
Frequently Asked Questions #
How to Download Local Site Backup? #
Local backups are stored on the server in the following directory:
/root/.backupThese backups cannot be accessed through HTTP requests, so they are not available for direct download from the xCloud app.
To download a local site backup, you must manually access the server using SFTP and retrieve the backup files from the directory above.
Still stuck? Contact our support team for any of your queries


