


Have you ever dreamed of launching your WordPress website but found the prospect of dealing with setting up your first server a daunting task to do? Well, with xCloud, that dream is now a reality. You can effortlessly set up your first server in xCloud– no coding skills are needed!
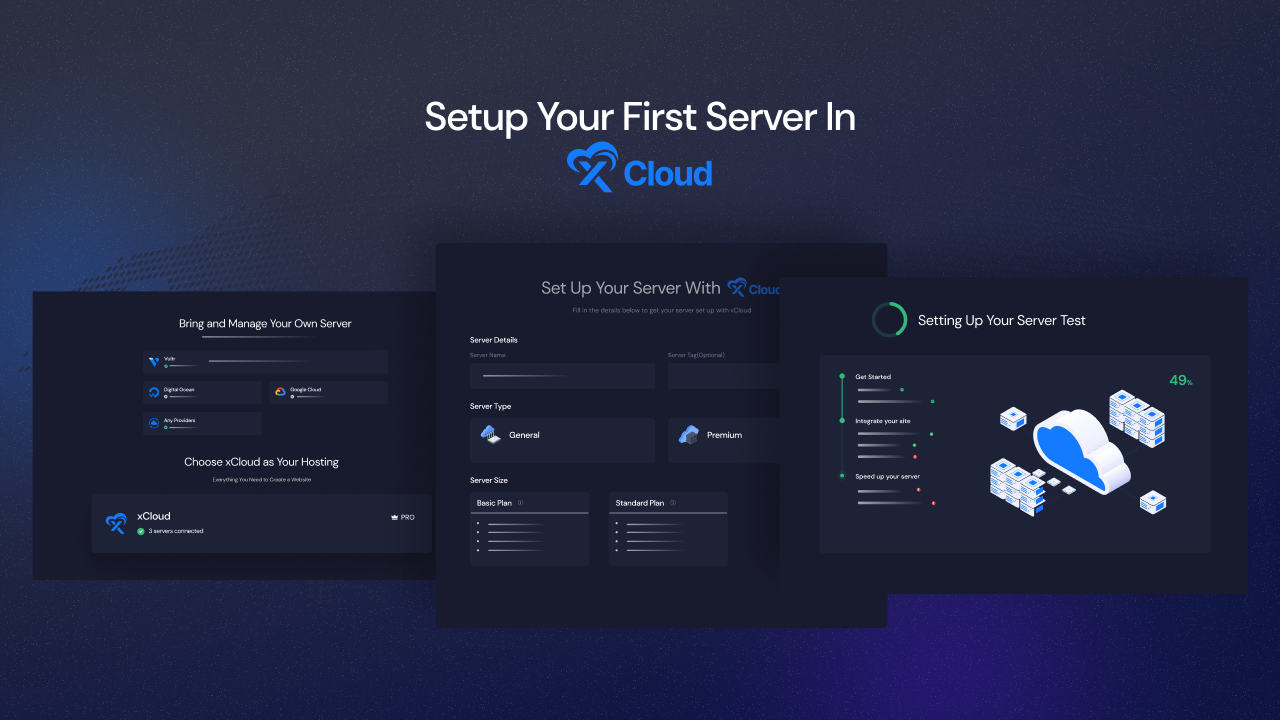
xCloud is here to take the hassle out of hosting and managing WordPress sites, giving developers and agencies the freedom to focus on creating outstanding websites. Let us break it down into easy steps and get you started on setting up your first server in xCloud.
Why Do You Need to Go with xCloud for Your Server Management?
Who does not want to get full control over their site hosting and server management? We think everyone does. The good news is that xCloud offers it all (total control power) for you so that you do not have to deal with all the hosting hassles or server management errors.
xCloud is not your average hosting tool; it is the ultimate hosting and server management solution for WordPress, packed with unique features at an unbeatable price. Whether it is server management, site deployment, migration, or plugin updates, xCloud has you covered. With easy user and role management, it is your all-in-one solution.
Here are some compelling reasons to choose xCloud for your site hosting and server management.
🌐 Seamless Integration with Leading Cloud Providers & Full Server Control
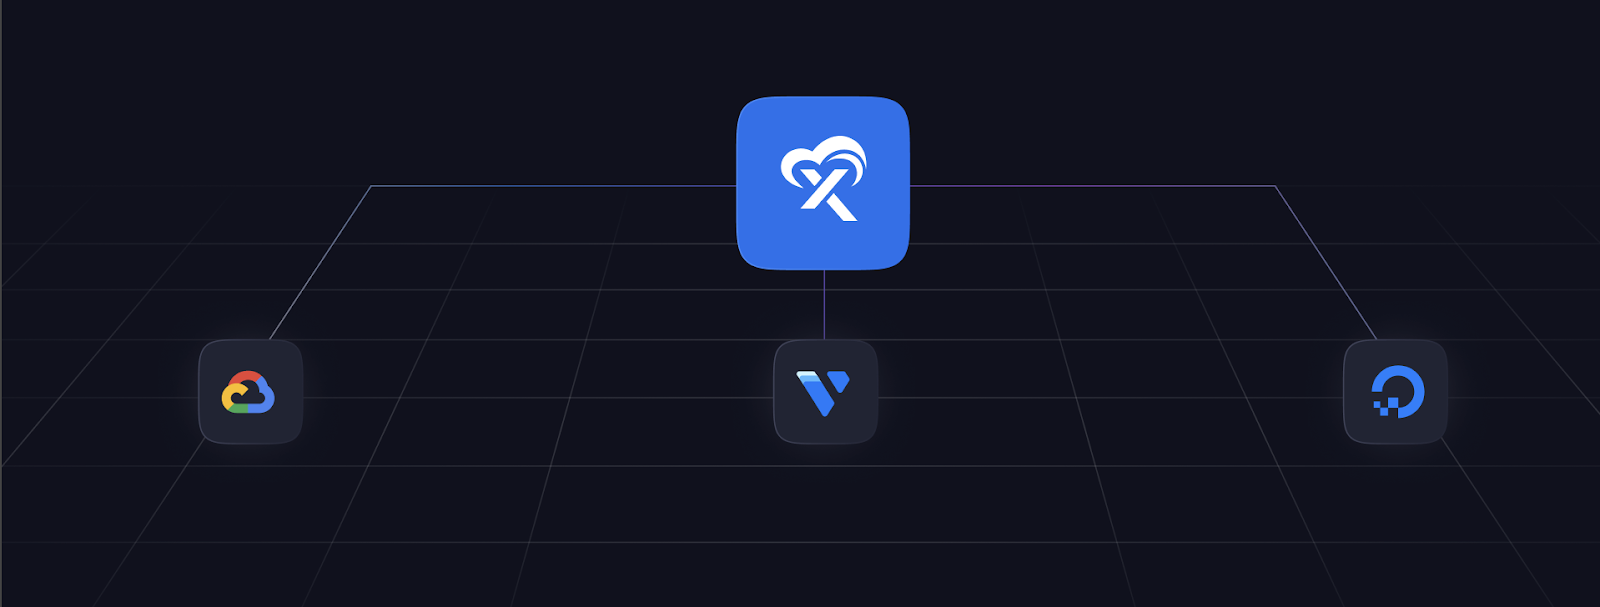
xCloud is your gateway to seamless integration with cloud providers of your choice. Whether it is Vultr, DigitalOcean, Google Cloud Platform (GCP), or any other preferred server provider, xCloud ensures effortless integration and management.

You will gain full server access with root privileges, empowering you to make necessary changes at your convenience. Our dedicated support team is ready to assist you, ensuring a smooth journey with expert guidance.
🌐 Global Server Presence & Effortless Automated Management
You can enjoy global server coverage with xCloud, providing an optimal experience for your website visitors. You can choose your server location freely to enhance performance tailored to your target audience.
With xCloud, experience automated server management, eliminating the need for manual configuration of Nginx, SSL, PHP, or MySQL. So it is time to bid farewell to shared hosting hassles and embrace hassle-free website management.
🌐 Free Migration for Server & Website
Highlighting a standout feature, xCloud offers free server and website migration. Using the platform, you can effortlessly transfer your data between servers without any complications. Our commitment to a hassle-free migration experience sets xCloud apart from others.
🌐 More Exciting Features Await
But that is not all. xCloud, the ultimate hosting and server management solution for WordPress, has even more to offer. Get onboard with us & leave behind the hosting hassles. Simply put, experience the difference with xCloud.
Now, let us move to how you can set up your first server in xCloud after getting onboard.
How to Bring Any Provider to xCloud & Set Up Without Any Hassle
With xCloud, you can connect seamlessly with various cloud services such as DigitalOcean, Google Cloud Platform, Vultr, or conventional Ubuntu servers. All you have to do is simply choose the cloud service that aligns with your preferences and smoothly integrate it into your system. This streamlined process is tailored to meet your requirements without hassle or complexities.
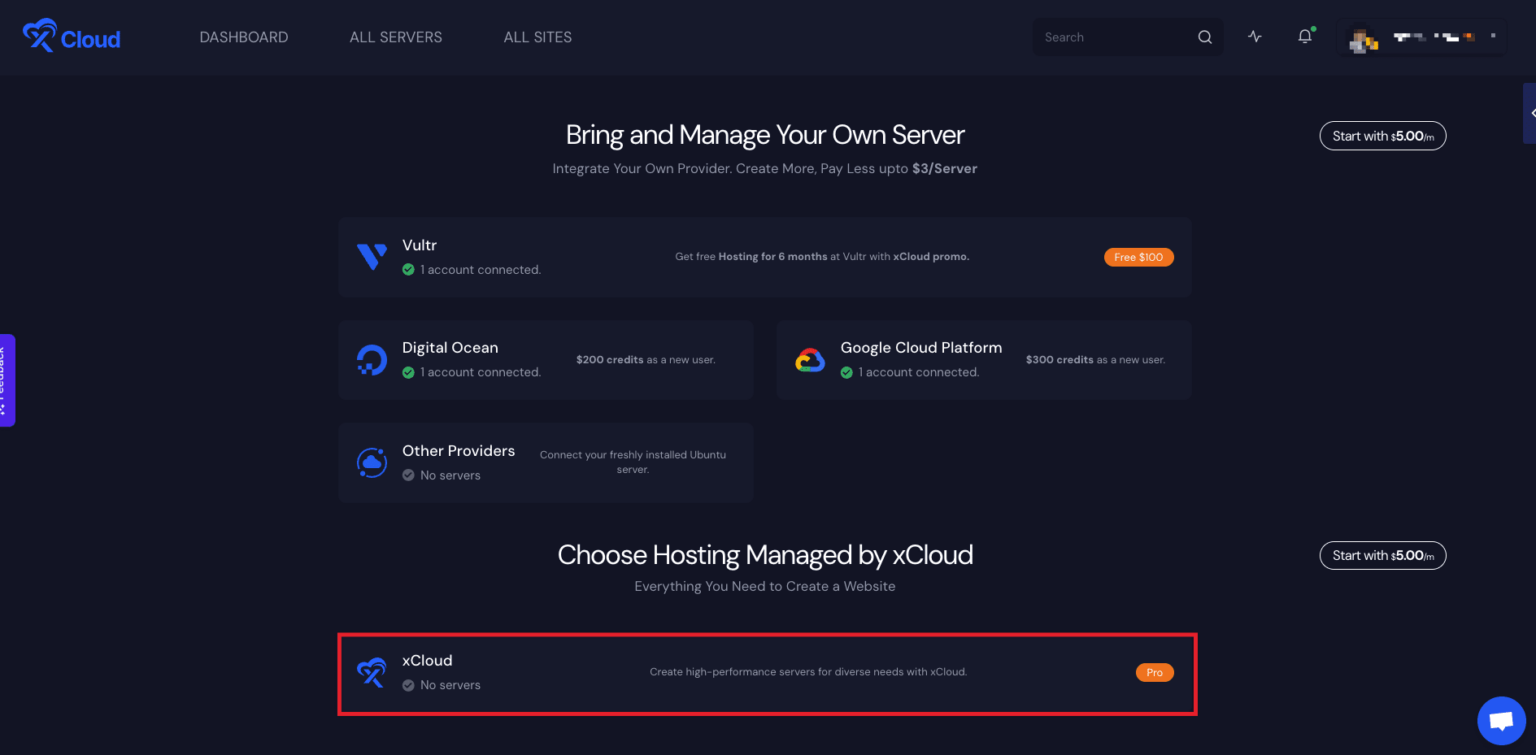
Not only just you can bring your providers to xCloud but also you will get unbeatable offers. By selecting xCloud and registering with Vultr, you’ll receive $100 in credits for top-notch Vultr cloud servers.
Additionally, as a fresh xCloud user, you’ll gain access to $200 in credits from Digital Ocean or $300 in credits from Google Cloud Platform, all while benefiting from xCloud’s efficient and feature-packed hosting solutions.
Let’s see how you can set up a Vultr server in xCloud & get $100 credits.
Guide to Set Up a Vultr Server in xCloud & Enjoy $100 Free Credits
xCloud is your one-stop hosting solution for WordPress, offering easy automation, advanced server management, and free hosting for six months on Vultr servers when you sign up with the code “XCLOUD.” Plus, new xCloud users can create one server and ten sites for free using the Bring Your Own Server service.
Let’s proceed with easy steps to access the complimentary hosting and management offer, initiating your xCloud journey completely free of charge.
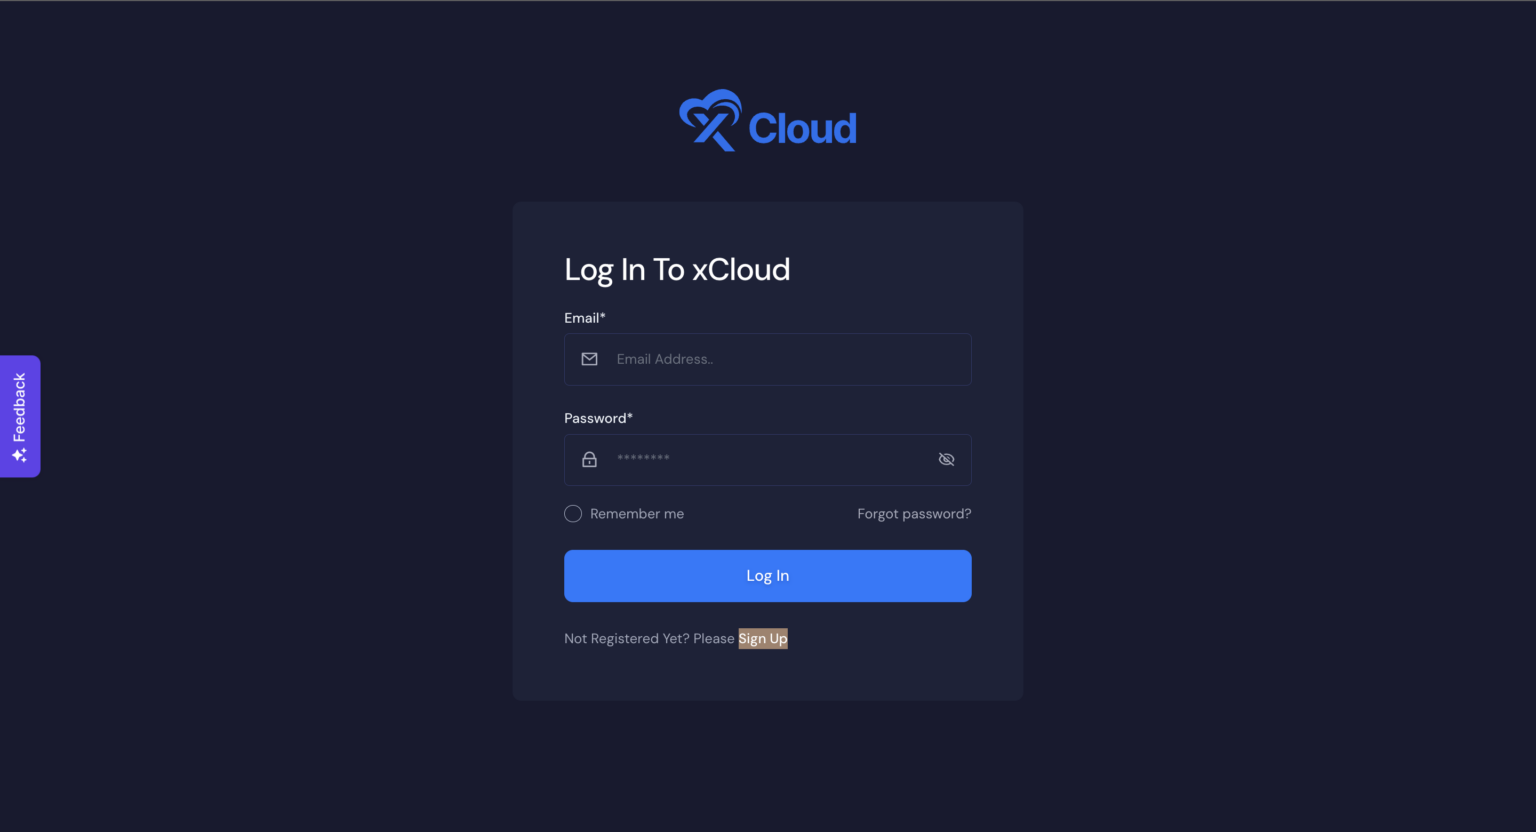
Step 1: Sign Up for xCloud
To get started, first, you have to sign up for xCloud. Simply, put your credentials and get started.
Step 2: Integrate Vultr Account in xCloud
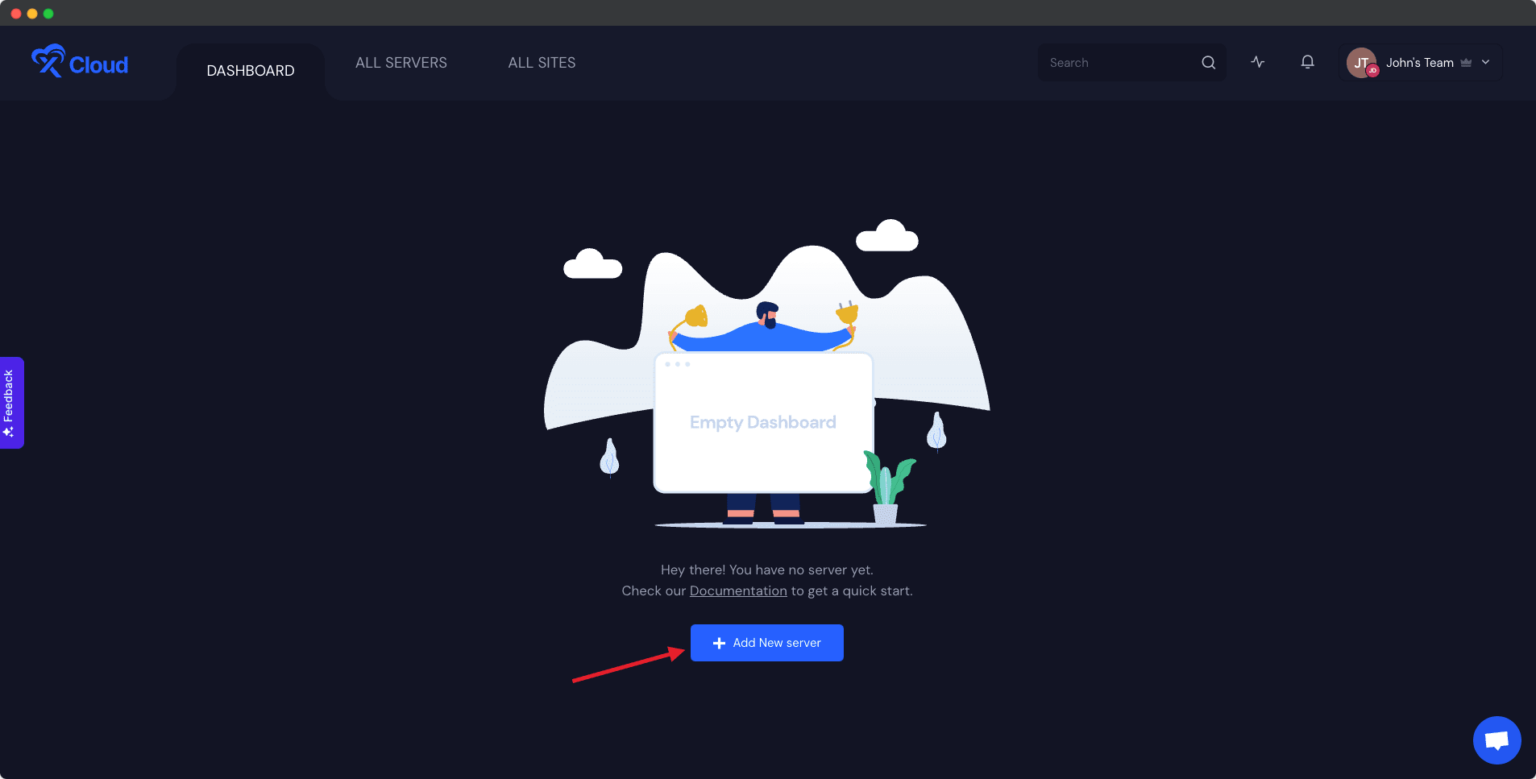
After logging in to your xCloud account, start by adding a new server by clicking on the “Create New Server” button from your dashboard.
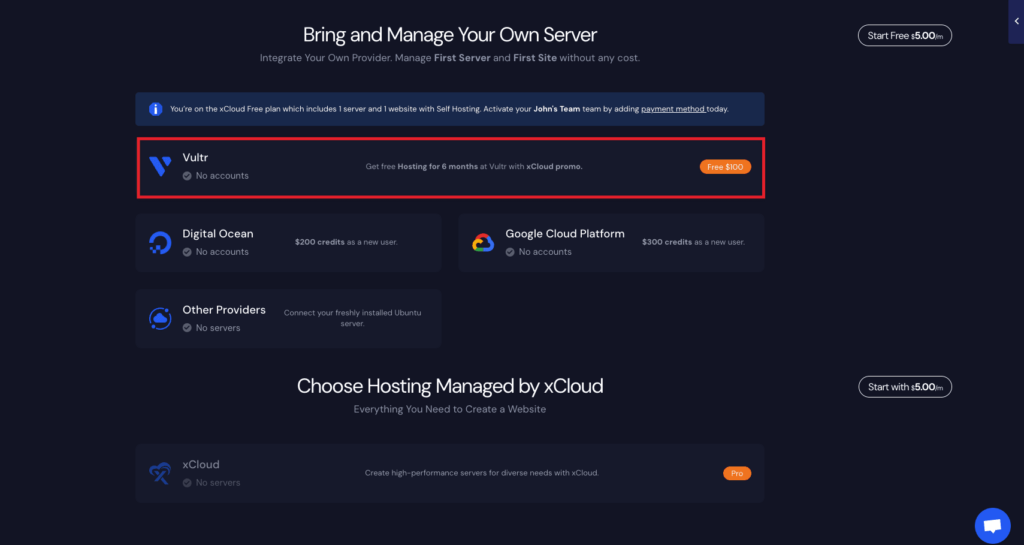
The next screen will provide the list of our available services. For this tutorial, we will create a Vultr server and for that select the Vultr option under “Bring your own server service”. The billing of the server will be handled on your Vultr account and in xCloud we won’t charge for this first server.
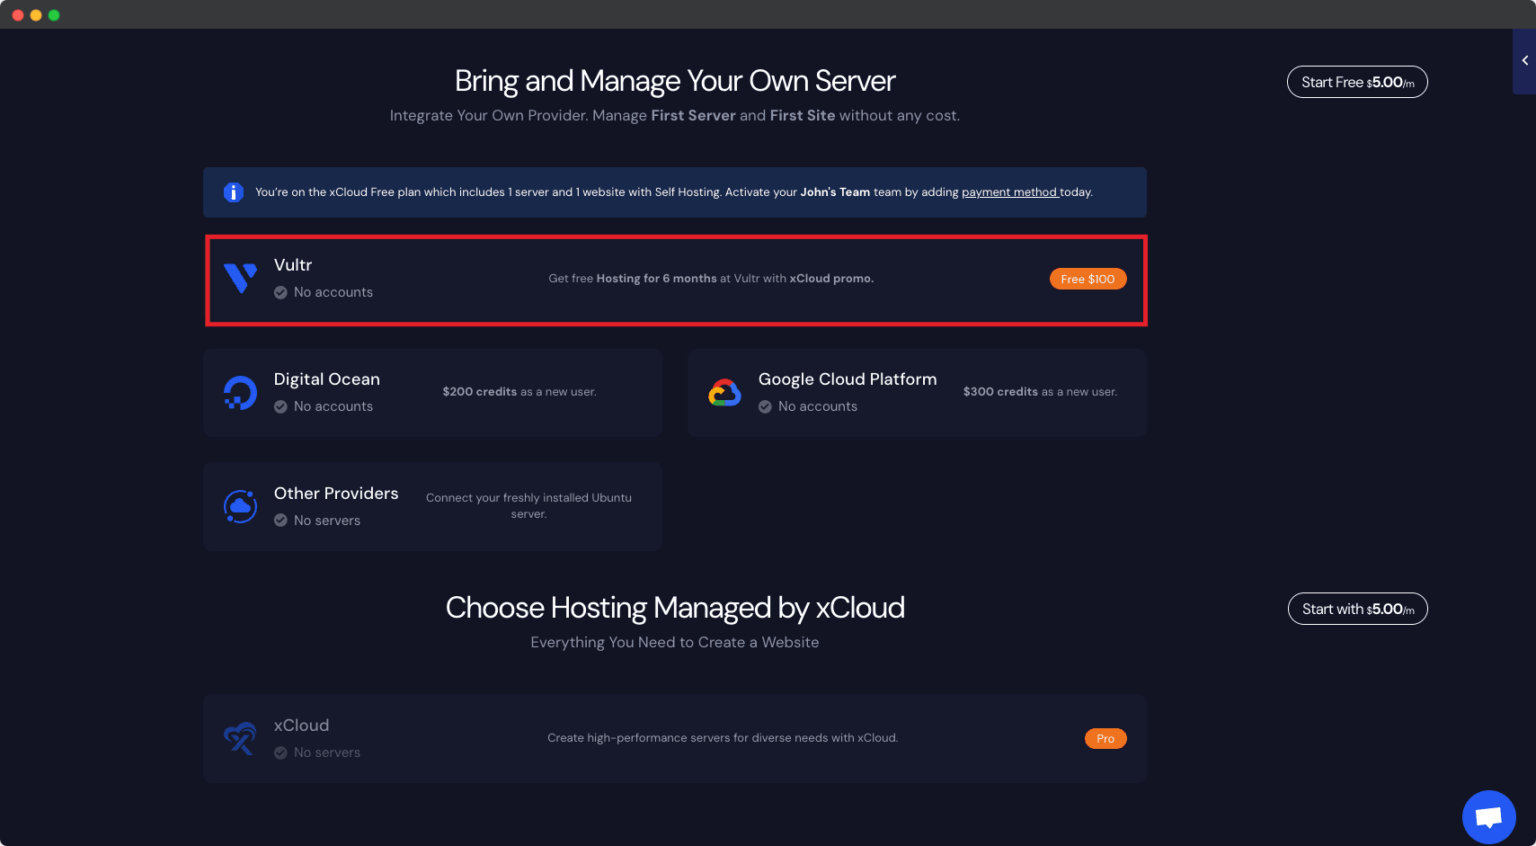
Note: Check out the documentation below to find out how to set up the server with other major providers (e.g., Digital Ocean, Google Cloud Platform) in xCloud.
- How To Set Up a Server with Digital Ocean in xCloud?
- How To Setup a Server With Google Cloud Platform in xCloud?
- How To Connect a Server From Any Provider in xCloud?
Signup in Vultr with xCloud Promo
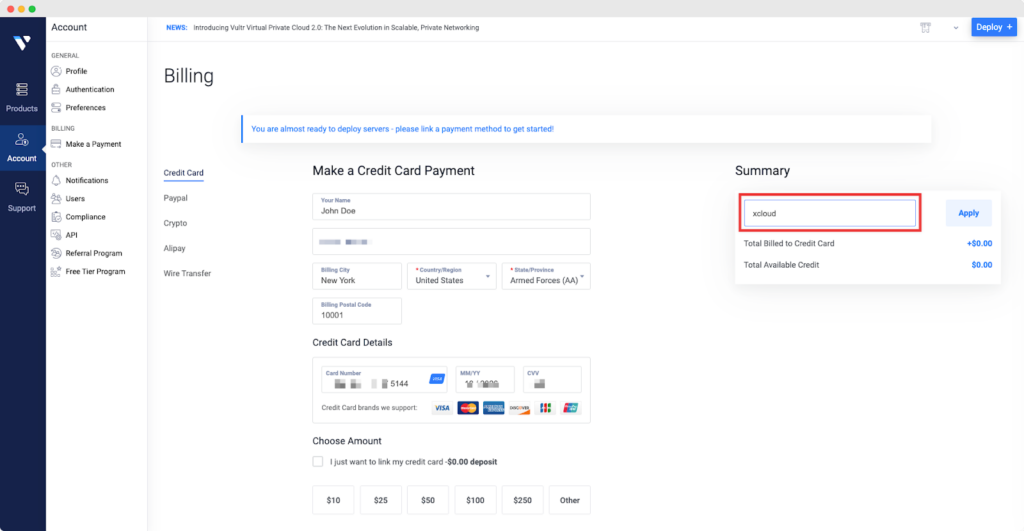
Sign up on Vultr and add the payment method along with the ‘XCLOUD25‘ coupon to claim the $100 for 6 months. Now is the time to avail yourself of the free 6-month offer with the ‘XCLOUD25‘ coupon.
Note: If you already have a Vultr account then please skip this step and check how to collect API from Vultr.
Collect API key from Vultr
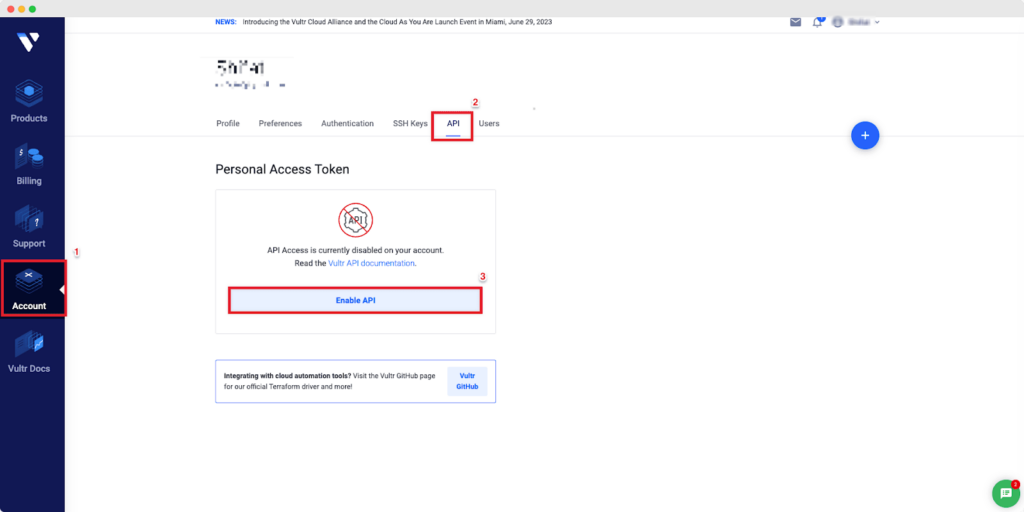
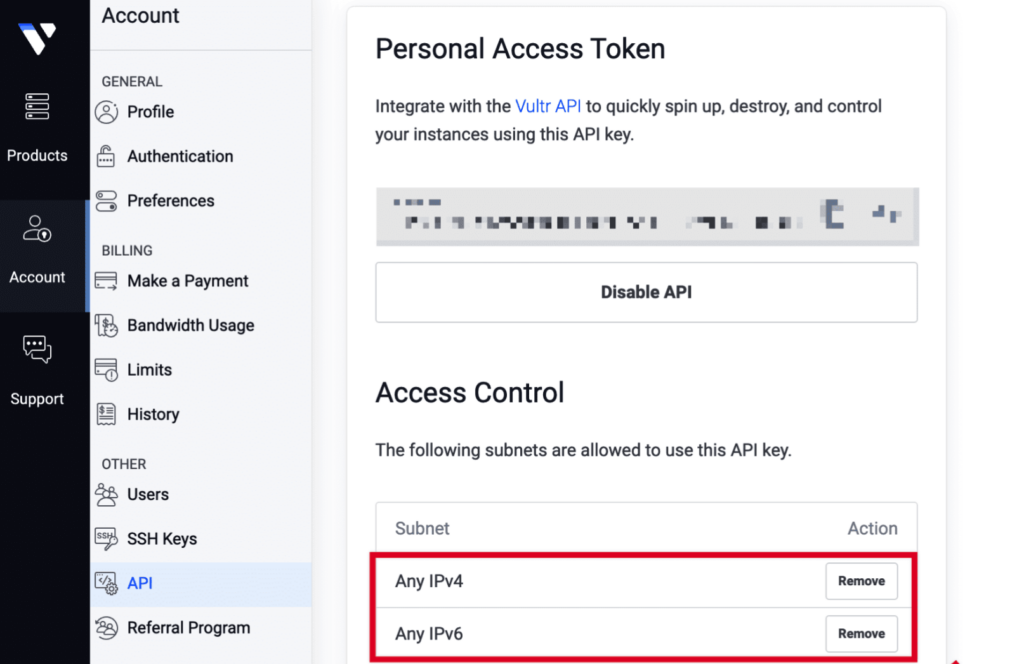
After you have successfully completed setting up your billing method, you will need to get the Vultr API key to add it to xCloud to create and manage 1 server and 1 site for free. Navigate to the Account → API tab from your Vultr dashboard. After that click on the ‘Enable API’ button.
Now, your ‘Personal Access Token’ will be auto-generated. Copy the API Key/Token.
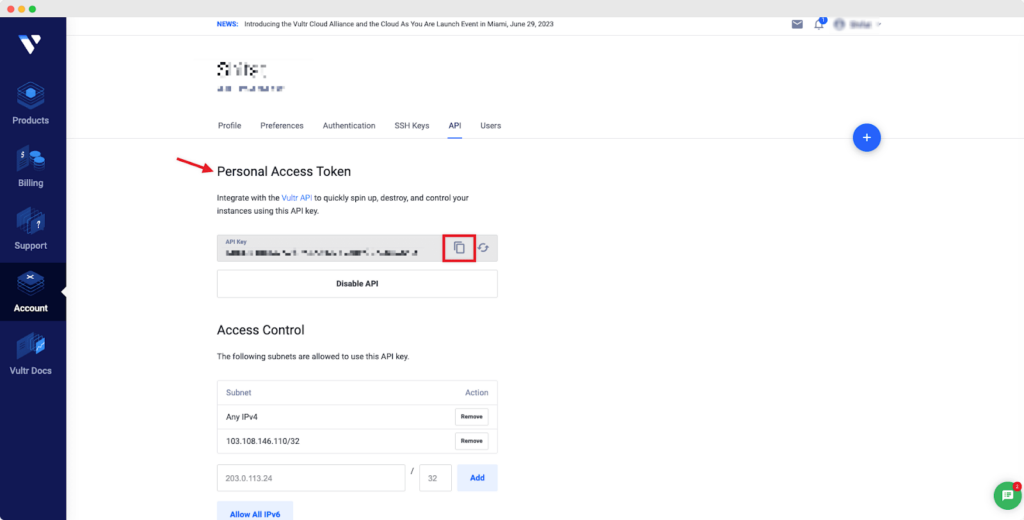
Please make sure you have added Any IPv4 and Any IPv6 both under Access Control.
Now, you need to go back to the xCloud dashboard and add your Vultr Label & API Key.
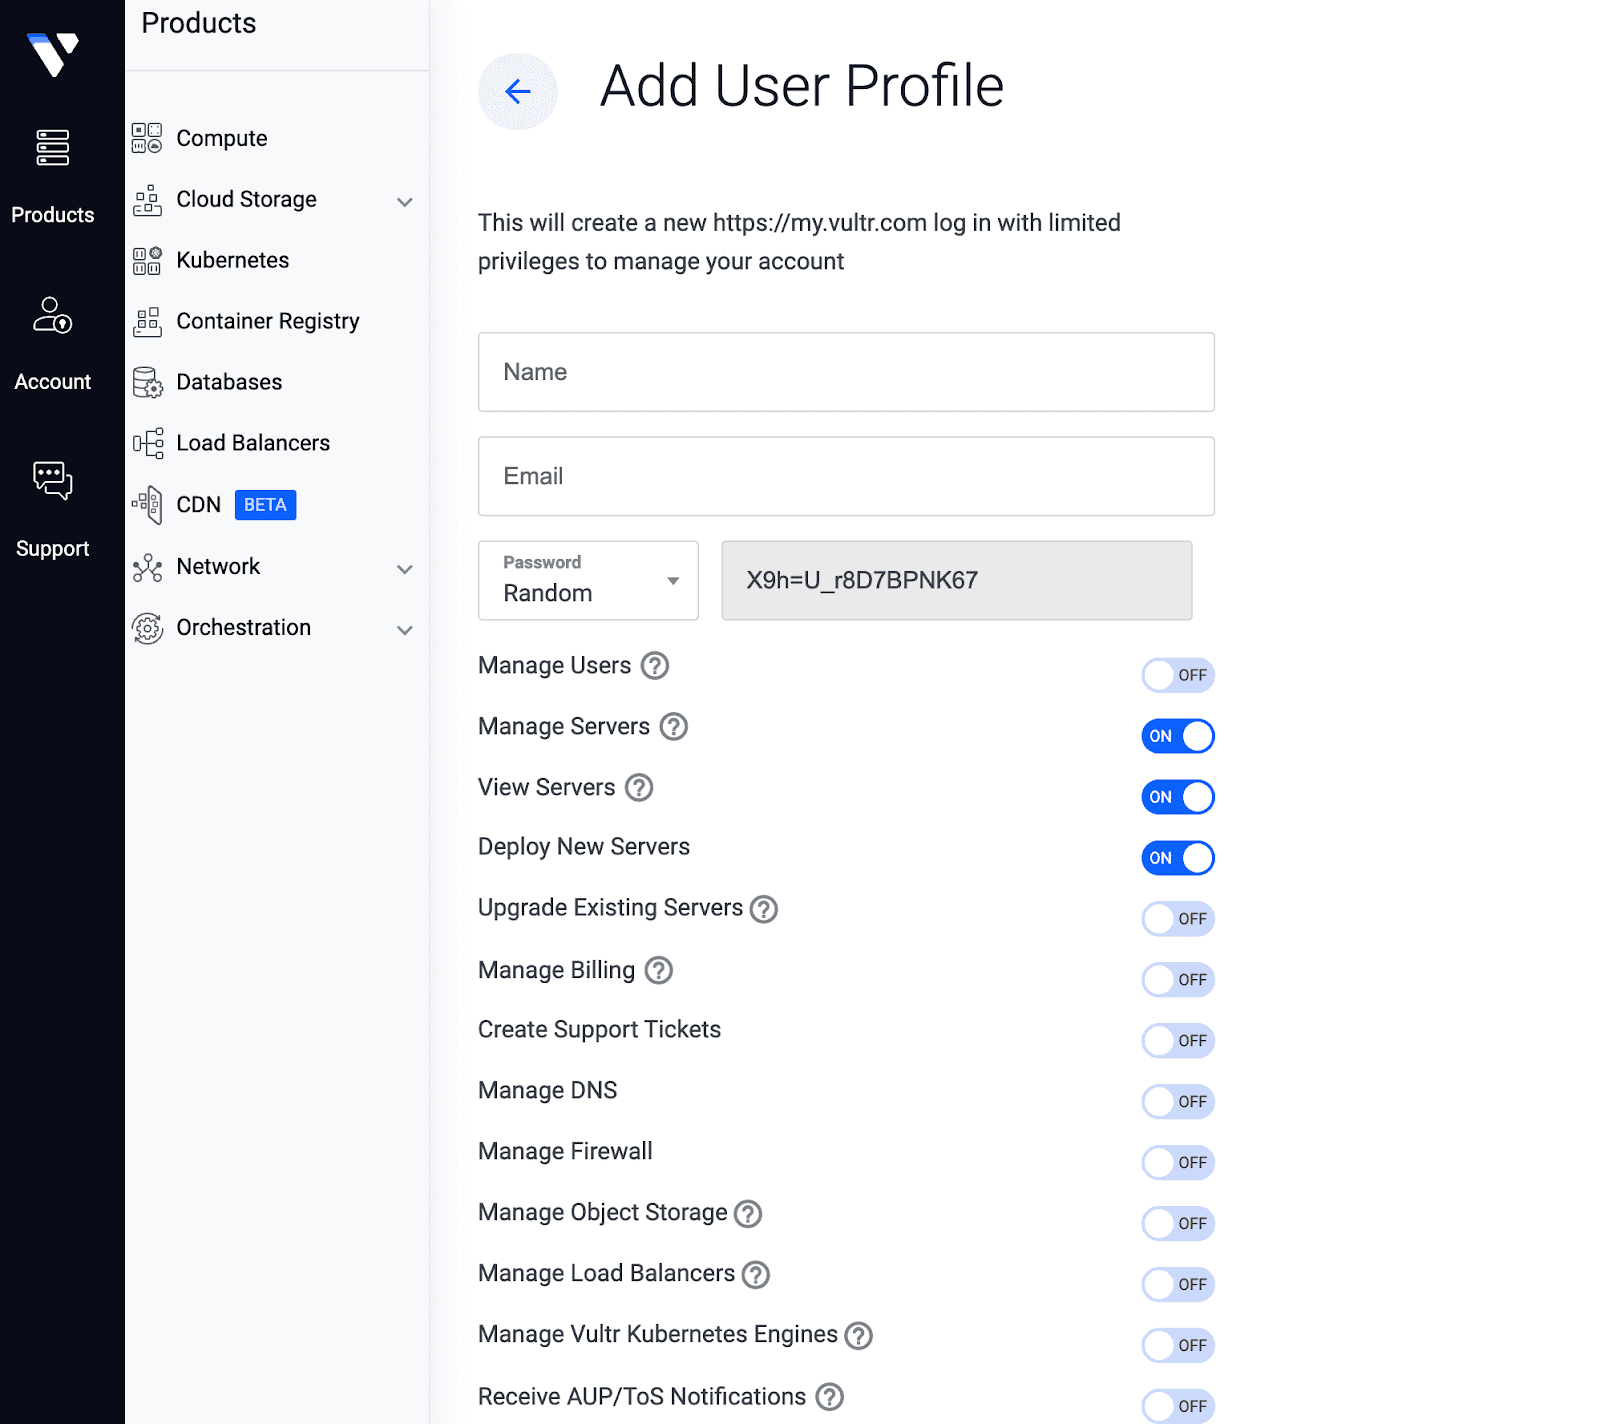
Add Team Members In Vultr
If you want your team members to use xCloud with Vultr, then make sure these permissions are given.
Add Vultr API key in xCloud
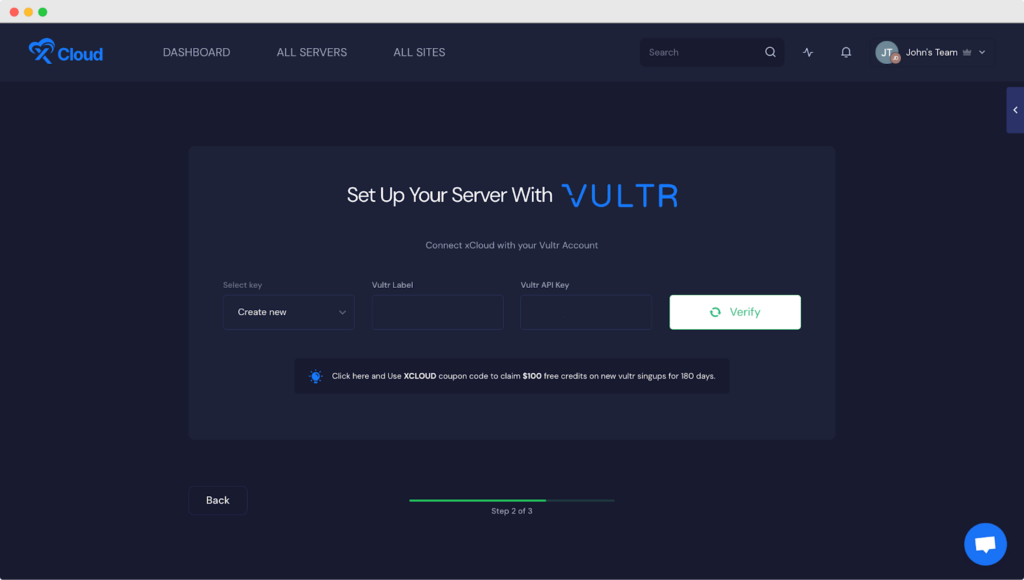
Thanks to xCloud, you can create your first server without spending any money. Now, click on ‘Add New Server’ from the xCloud dashboard, and you will be redirected to the server selection screen. Then click on ‘Vultr’ to proceed further.
After selecting ‘Vultr’, set your ‘Key’, ‘Vultr Label’, and ‘Vultr API Key’. Then click on ‘Verify’.
Step 3: Create a Vultr Server in xCloud
Now you have successfully verified your Vultr account, you will need to add other details to create a server in Vultr using xCloud. Choose your Region, Database Server, Server Size, and much more from one easy dashboard.
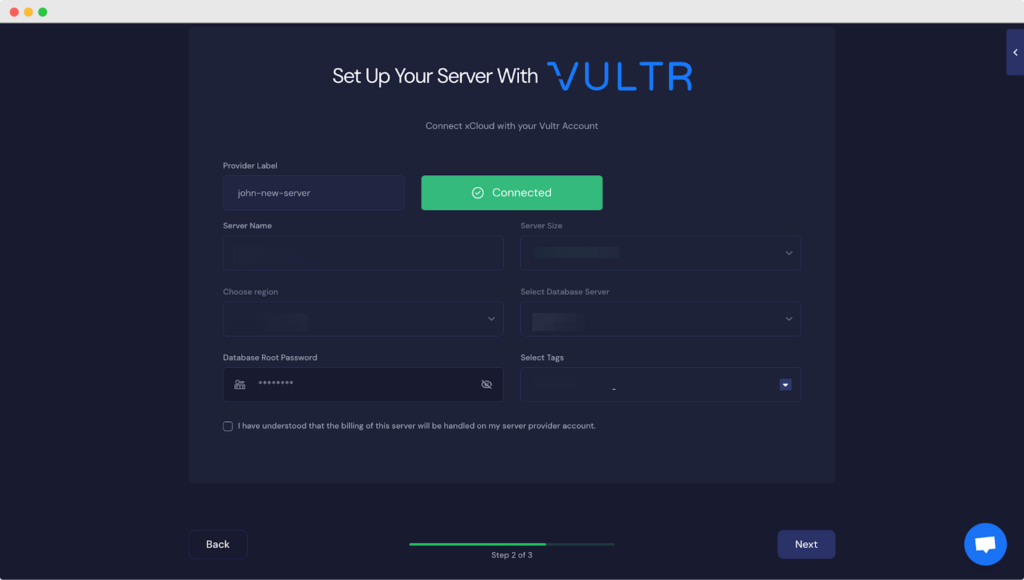
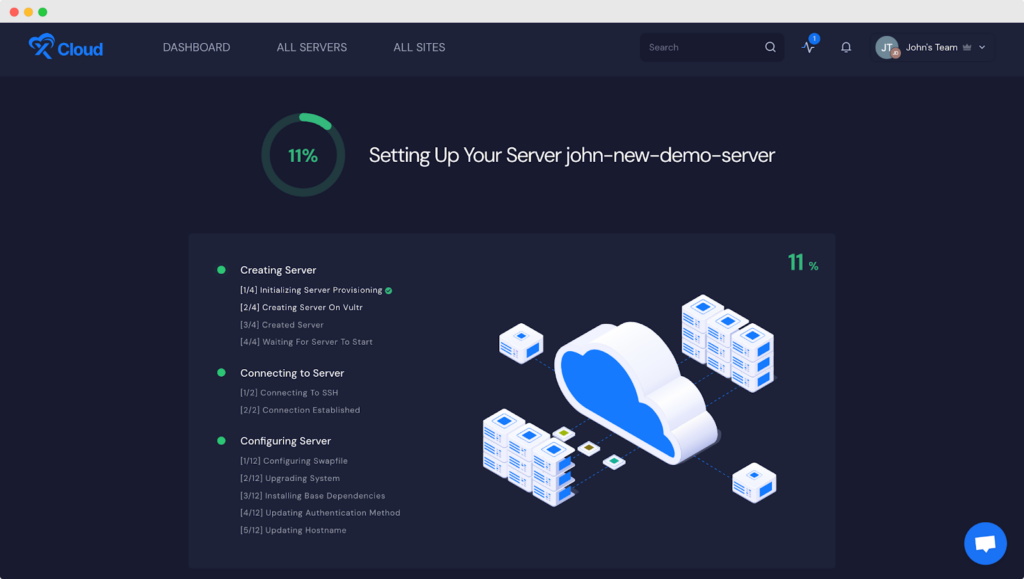
After putting all the information, click on ‘Next’ and xCloud will automatically install and set up everything for you in a few minutes.
Guide to Set Up Your First Server (Self-Managed) in xCloud: 3 Steps Guide
The process of setting up your first is straightforward. All you need to do is follow the below three simple steps to experience the ultimate WordPress server management journey. Let us dive in.
Step 1: Sign Up for xCloud
To set up your first server in xCloud, the first step is signing up for xCloud. Just hit ‘Sign Up,’ fill in the information and you are set.
On the sign-up screen, fill in all the required details and remember to create a strong, secure password. It is as easy as that to get started with xCloud.
Step 2: Create & Set Up Your First Server in xCloud
Upon accessing your xCloud account, initiate adding a new server by selecting the ‘Create New Server’ button on your dashboard.

The resulting screen will present a list of major providers for server creation. To set up a server using xCloud, input your billing details at this stage. The billing for your xCloud server will be managed within your existing xCloud team account.
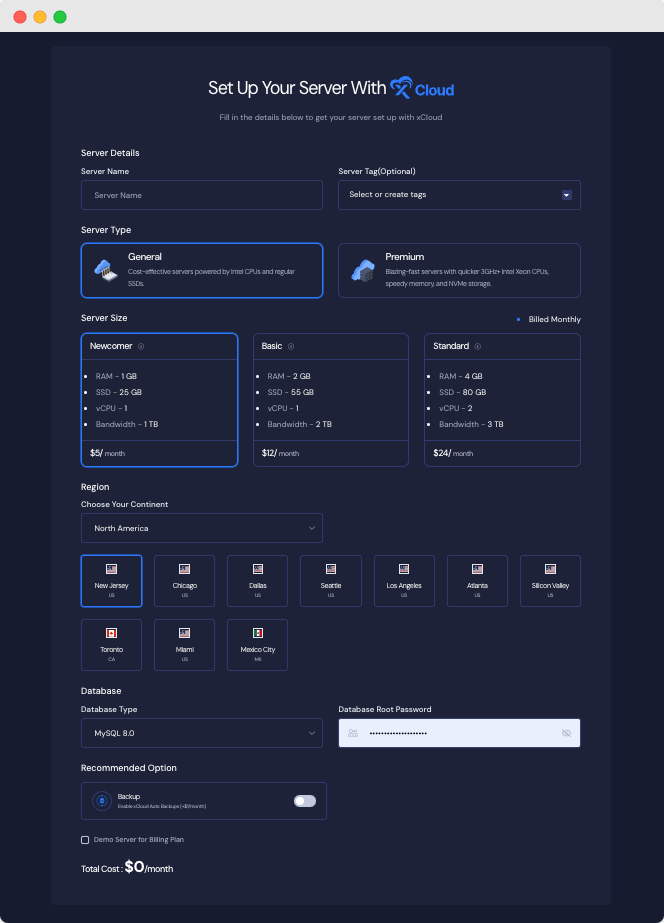
Proceed by entering the server name, selecting a preferred plan based on your specifications for CPU, RAM, and storage, and choosing the region closest to you and your visitors. Currently, only the MySQL 8.0 database server is available. The Database Root Password is pre-filled by default, but you have the option to modify it and securely store the new password.
Furthermore, xCloud offers seamless integration with DigitalOcean, Vultr, and Google Cloud Platform. This integration enables you to create and manage servers directly with these integrated providers through the xCloud platform.
Step 3: Add All the Necessary Information
In this step, you need to provide the Server name, and your preferred Server Specifications (CPU, RAM, storage), and choose the Region closest to you and your visitors. Only MySQL 8.0 is available for the database server.
The default Root Password is filled in, but you can change it and save it securely. After submitting the form, it’ll take about 5-7 minutes to set up the server for an easy WordPress Site installation.
Set Up and Manage Your Servers Seamlessly with xCloud
With xCloud, the task of setting up your server becomes a walk in the park since no coding skills are needed. The entire process is simple and easy, allowing developers and agencies to redirect their efforts toward crafting exceptional websites rather than getting bogged down by technical complexities.
And guess what? xCloud has just launched to streamline your hosting and server management for WordPress with an EXCLUSIVE lifetime deal. Visit the deal page to know more and join our Facebook community, if you do not want to miss any updates.