


With xCloud, you can easily setup your Digital Ocean server in xCloud. xCloud aims to simplify the process of hosting and managing WordPress sites, allowing developers and agencies to focus on building great websites without worrying about the underlying infrastructure. Now let’s follow these steps to get you started.
Step 1: Sign Up/Login With xCloud #
First, you will need to visit the xCloud website and you have to sign up for xCloud with your credentials.

If you have already an account please visit our app URL below. Now you are ready to set up your server with Digital Ocean in xCloud.
Step 2: Create Your New Digital Ocean Server In xCloud #
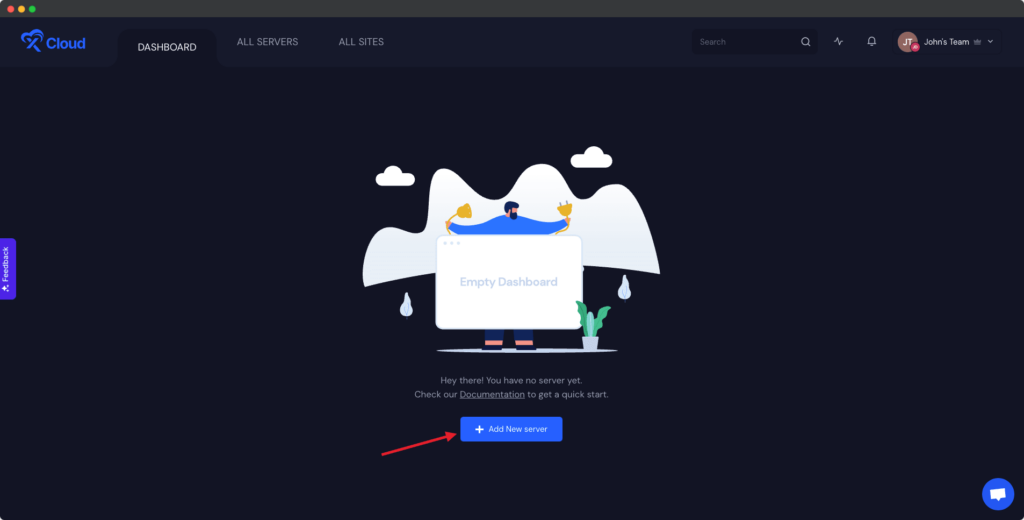
After logging in to your xCloud account, start by adding a new server by clicking on the “Add New Server” button from your dashboard.
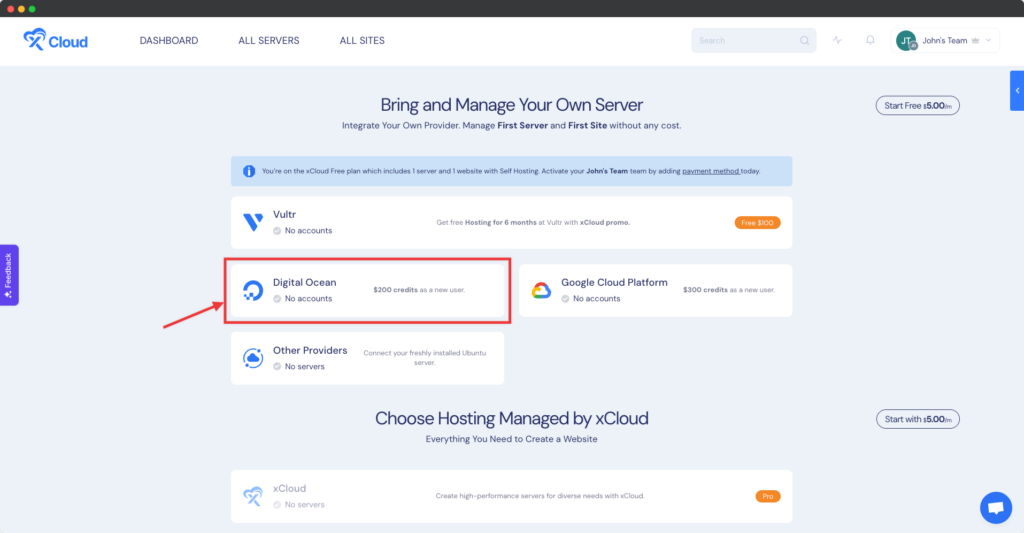
The next screen will provide the list of our available server providers. For tutorial purposes, we will create a Digital Ocean server and for that select the Digital Ocean option. The billing of the server will be handled on your Digital Ocean account.
Note: Don’t have a DigitalOcean account? Check out the documentation below to find out how to provision a server with any providers:
- How To Setup First Server With Vultr?
- How To Setup Your First Server With Google Cloud Platform Provider?
- How To Setup Server With Other Providers?
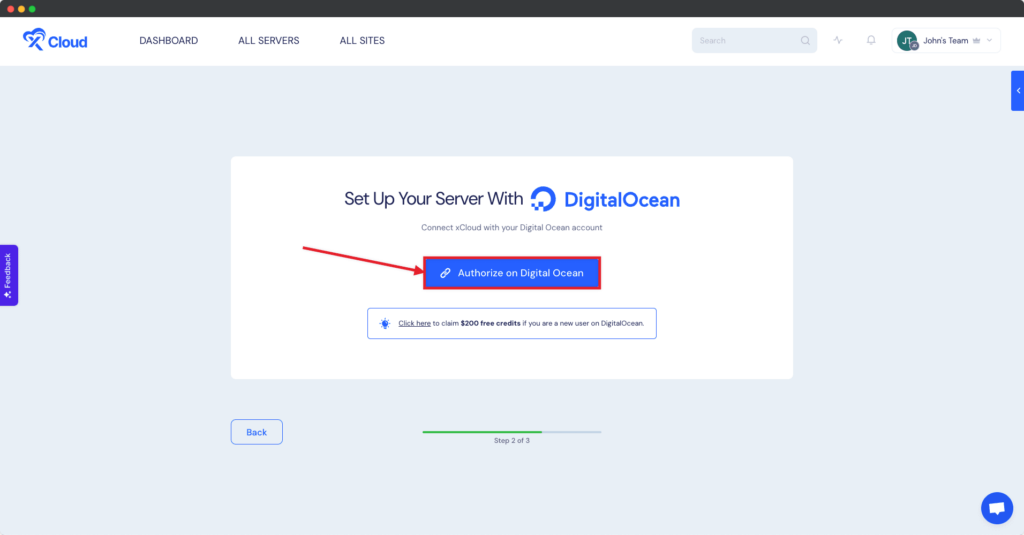
We’ve made it easier and safer for you to connect xCloud with your DigitalOcean account. You no longer have to go through the hassle of generating and copying access tokens. Now, xCloud will guide you through an OAuth flow, where you simply authorize xCloud to use your DigitalOcean account. All you have to do is provision a new DigitalOcean server, click “Authorize” during the setup, and you’ll be redirected to DigitalOcean to grant permission to your account. It’s a straightforward and hassle-free process to set up your server with Digital Ocean.
Step 3: Add Necessary Information #
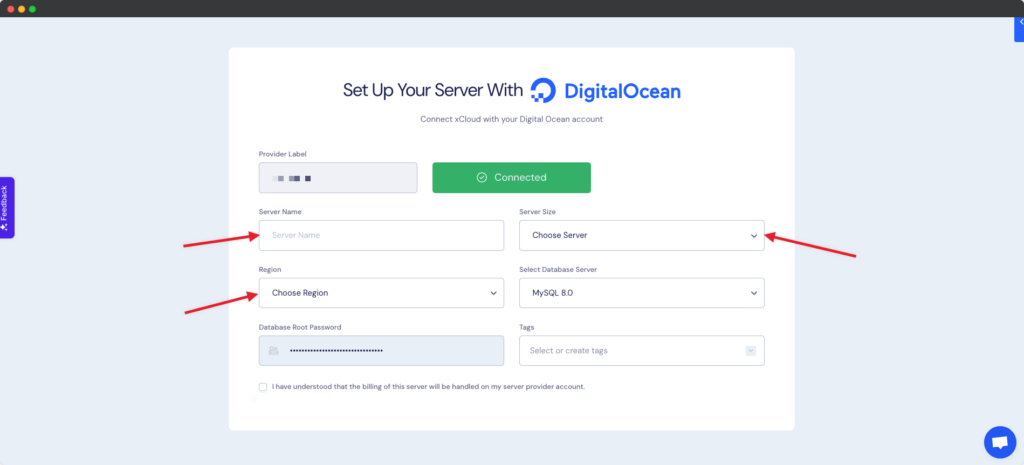
You will be taken to the server creation page after successfully integrating your DO account. Now you need to provide the Server name, your preferred Server Size (CPU, RAM, storage), and the Region nearest to you and your visitors. Only, MySQL 8.0 database server is now available. By default Database, the Root Password is auto-filed but you can change this and save it in a safe place.
We recommend at least a 2GB/ 1 shared CPU server for 10-20 sites with cache enabled. And for a site whose pages cannot be cached (e.g. WooCommerce site) we recommend a 4 GB / 2 dedicated CPUs server.
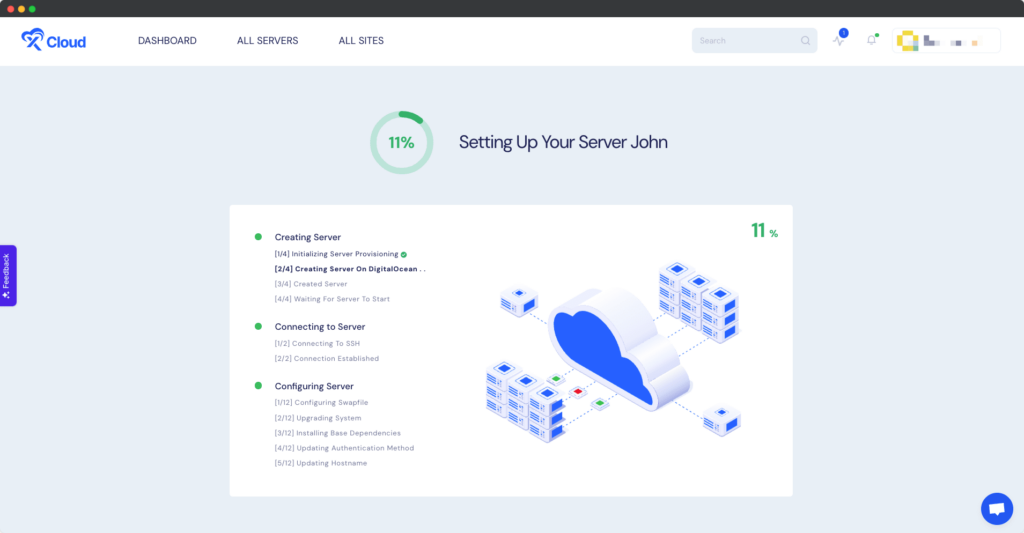
We are almost done with our server creation of Digital Ocean in xCloud. After submitting the form, this might take up to 12-15 minutes to make the Digital Ocean server live and ready to install a lightning-fast WordPress Site.
How To Create A Site With xCloud #
After you have completed the previous steps of creating Digital Ocean server, you are now ready to create your site. Simply follow our step-by-step guide below.
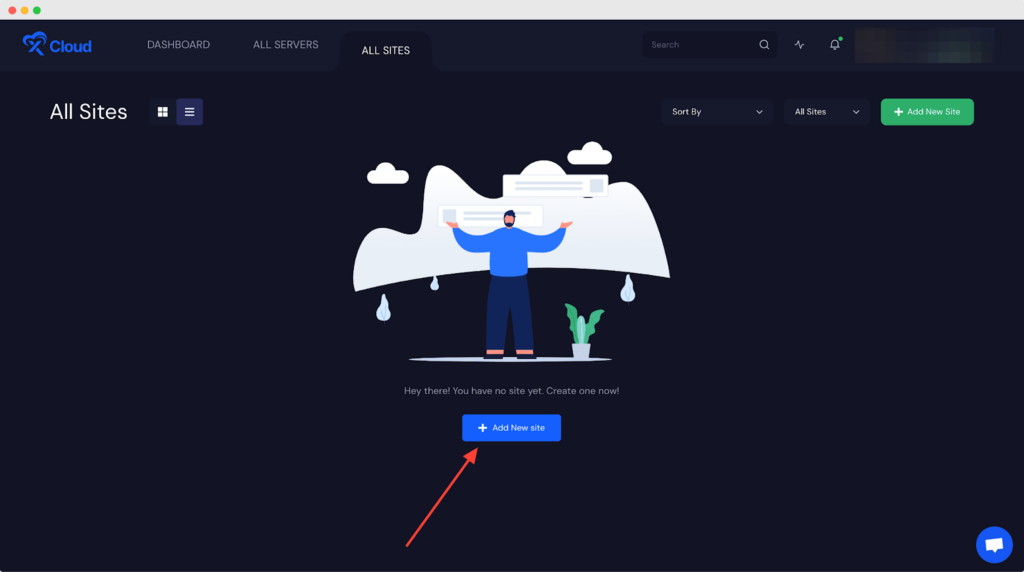
Step 1: Create A Site From The Dashboard #
Once your server is connected, you can create a site from the Dashboard or Site List by clicking on the button “Create New Site”
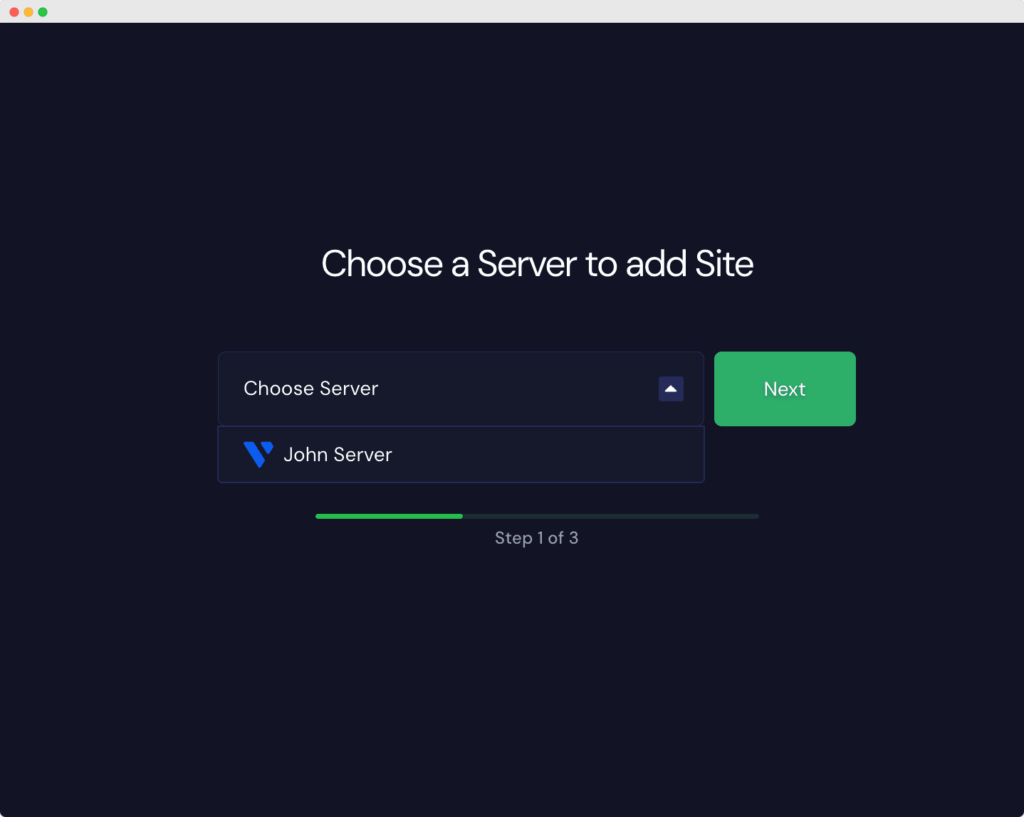
Then you will need to select the server on which you want to install your WordPress website.
Step 2: Choose Your Site & Add Information #
As we will be creating a fresh WordPress site choose the “Install New WordPress Website” options as shown below.

Now all you have to do is install and Go Live with your WordPress Site. You can do the next process with 3 simple and easy steps.
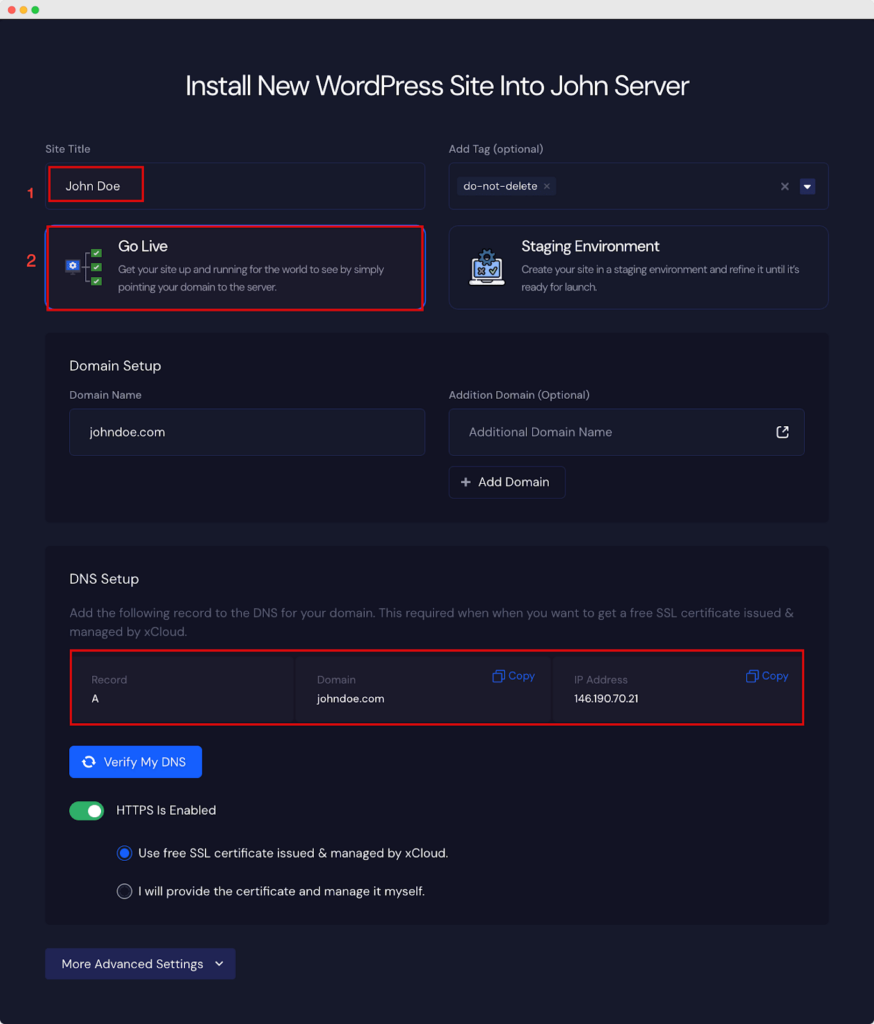
- Add a Site Title
- Add Tags if you want
- Choose to Go Live
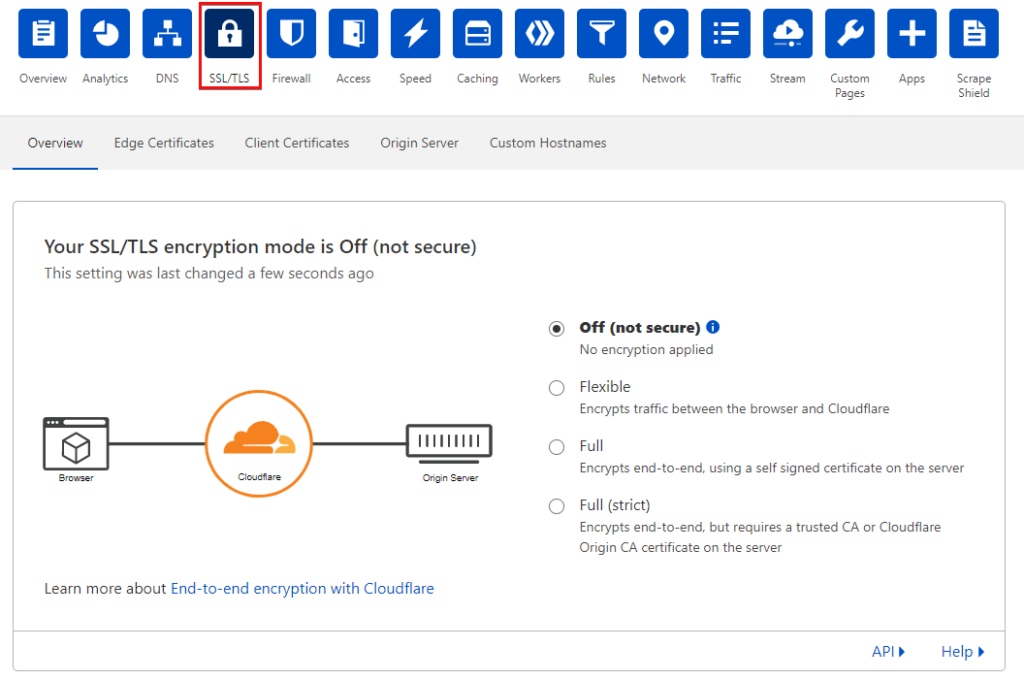
- DNS Configuration: If you add the domain and want to visit the live site you need to configure your DNS. xCloud does not handle your DNS but all you need to do is remove any existing A records and add the A record as shown above. For example, if your domain is on Cloudflare then all you need to do is add an A record with the domain name, and your server IP address.
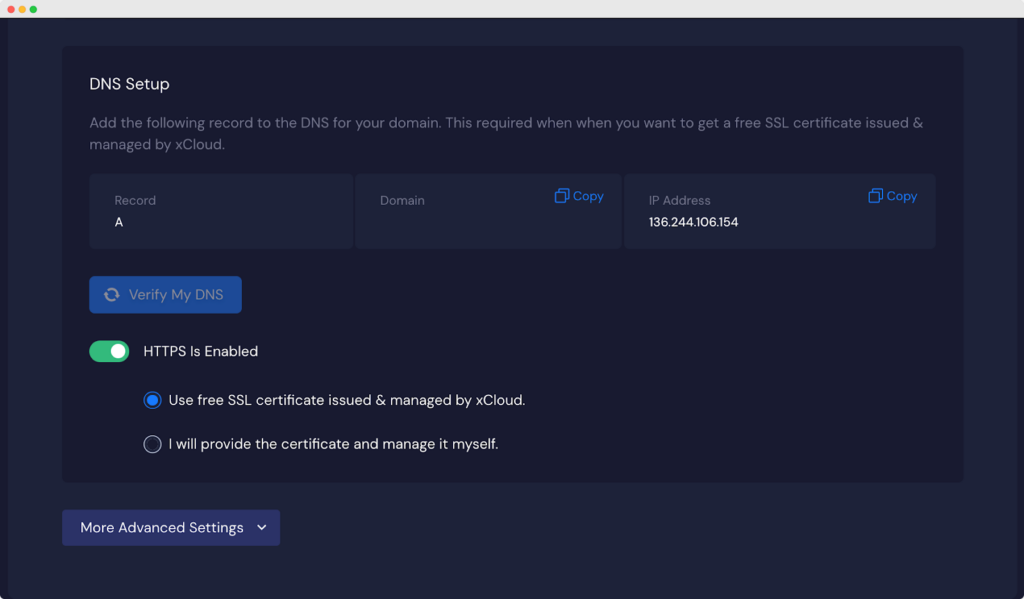
Note: Make sure to turn off the proxy status as shown in the above image and also turn off the SSL/TLS. Otherwise, you might face conflicts and redirect loops if you enable this and also xCLoud’s Free SSL service.
To use a Free SSL certificate by Let’s Encrypt simply turn on the HTTPS enable button and xCloud will automatically set everything for you.
Facing issues with adding A records in your DNS provider? Read our documentation on DNS management for various domain providers from the FAQ section.
You can then simply hit the Next Button to create your site and Go Live instantly.
Configure Additional Settings #
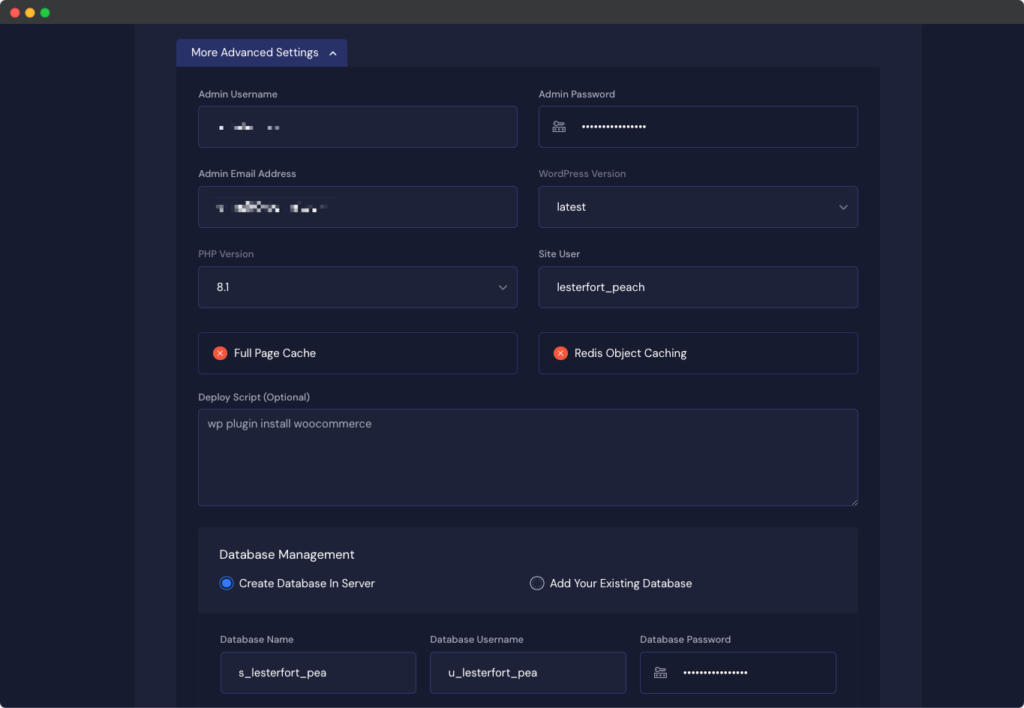
By default, the WordPress admin credentials are autogenerated to speed up the site creation process. As soon as your site is deployed you will receive your Site credentials on your email address. Later on, you can update your password if needed. From “More Advanced Settings” you can update the default Admin Username, Admin Password, Admin Email Address, etc along with other additional settings from here.
After the previous step, click on the ‘Next’ button. It might take only 1-2 minutes to create your WordPress site.
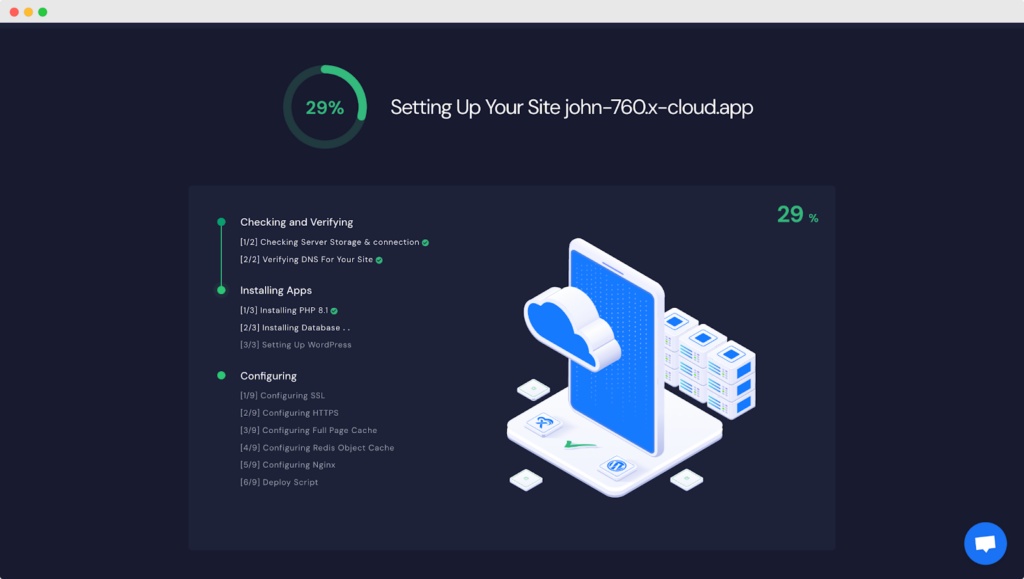
That’s it! You’ve successfully created a site in xCloud. Now you can start working on your website, customize it, install themes/plugins (if applicable), and take advantage of xCloud’s optimized server environment for seamless site management.
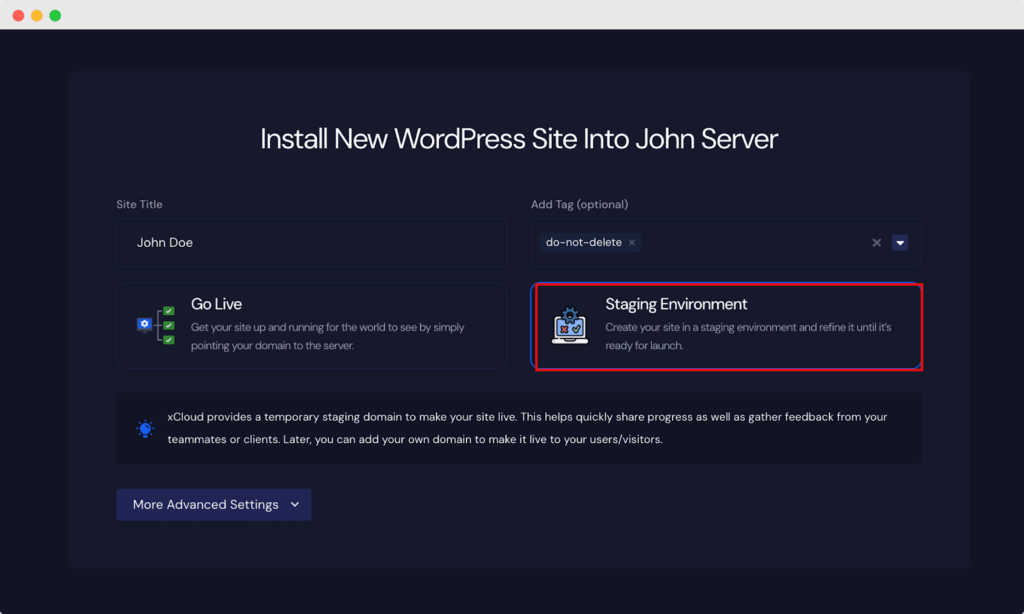
Not Ready Yet? Try Staging Environment #
Also, If you do not want to point your domain yet then xCloud offers temporary domains to make your site live with every Site creation method available in xCloud. For that select the Staging Environment option. Later, after developing your site you can then easily make it Live by adding your domain in xCloud.
Configure Your Email Server #
For users on managed hosting services like Kinsta, WPEngine, Runcloud, and Cloudways, email providers like Office 365, GSuite, and MXroute are commonly used. If you are migrating from cPanel/Plesk, new email hosting is needed. xCloud doesn’t automatically include email setup for your sites. WordPress often requires reliable transactional email delivery, but default systems can fail, causing spam or delivery issues. Using services like Mailgun for efficient email delivery is recommended. The process of setting up and configuring Mailgun for WordPress can be found here.
Still stuck? Contact our support team for any of your queries.


