


With xCloud, you can easily set up the first server with Google Cloud Platform without any coding at all. xCloud aims to simplify the process of hosting and managing WordPress sites, allowing developers and agencies to focus on building great websites without worrying about the underlying infrastructure. Now let’s follow these steps to get you started.
Step 1: Sign Up/Login With xCloud #
First, you will need to visit the xCloud website and you have to sign up for xCloud with your credentials. If you have already an account please visit our app URL below:
Step 2: Create Your New Google Cloud Platform Server #
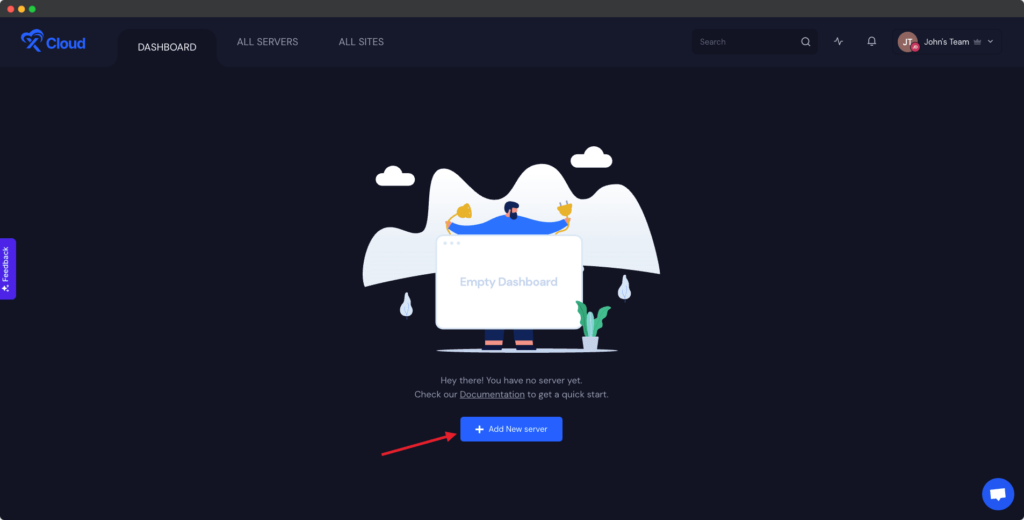
After logging in to your xCloud account, start by adding a new server by clicking on the “Create New Server” button from your dashboard.
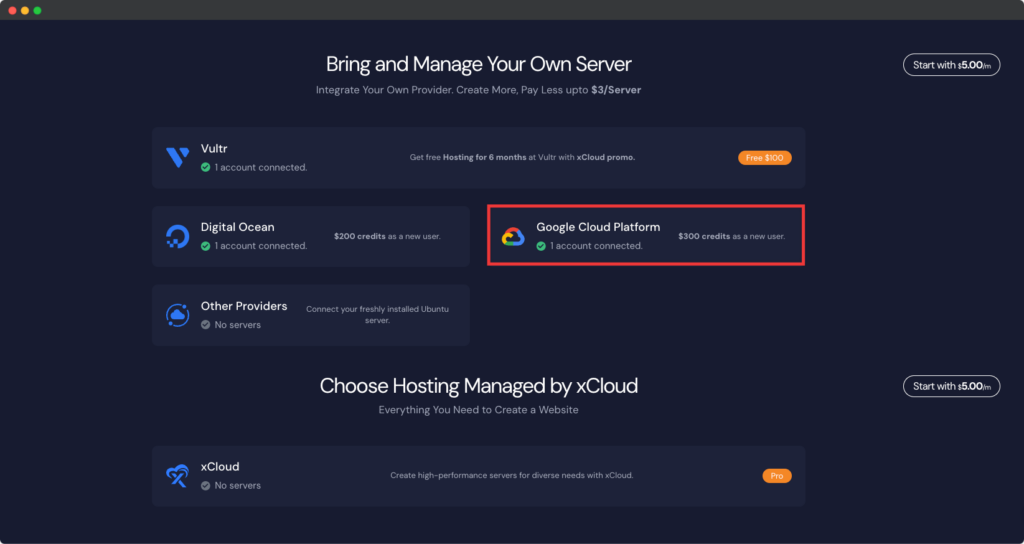
The next screen will provide the list of our available server providers. For tutorial purposes, we will create a Google Cloud Platform server and for that select the Google Cloud Platform option. The billing of the server will be handled on your Google Cloud Platform account.
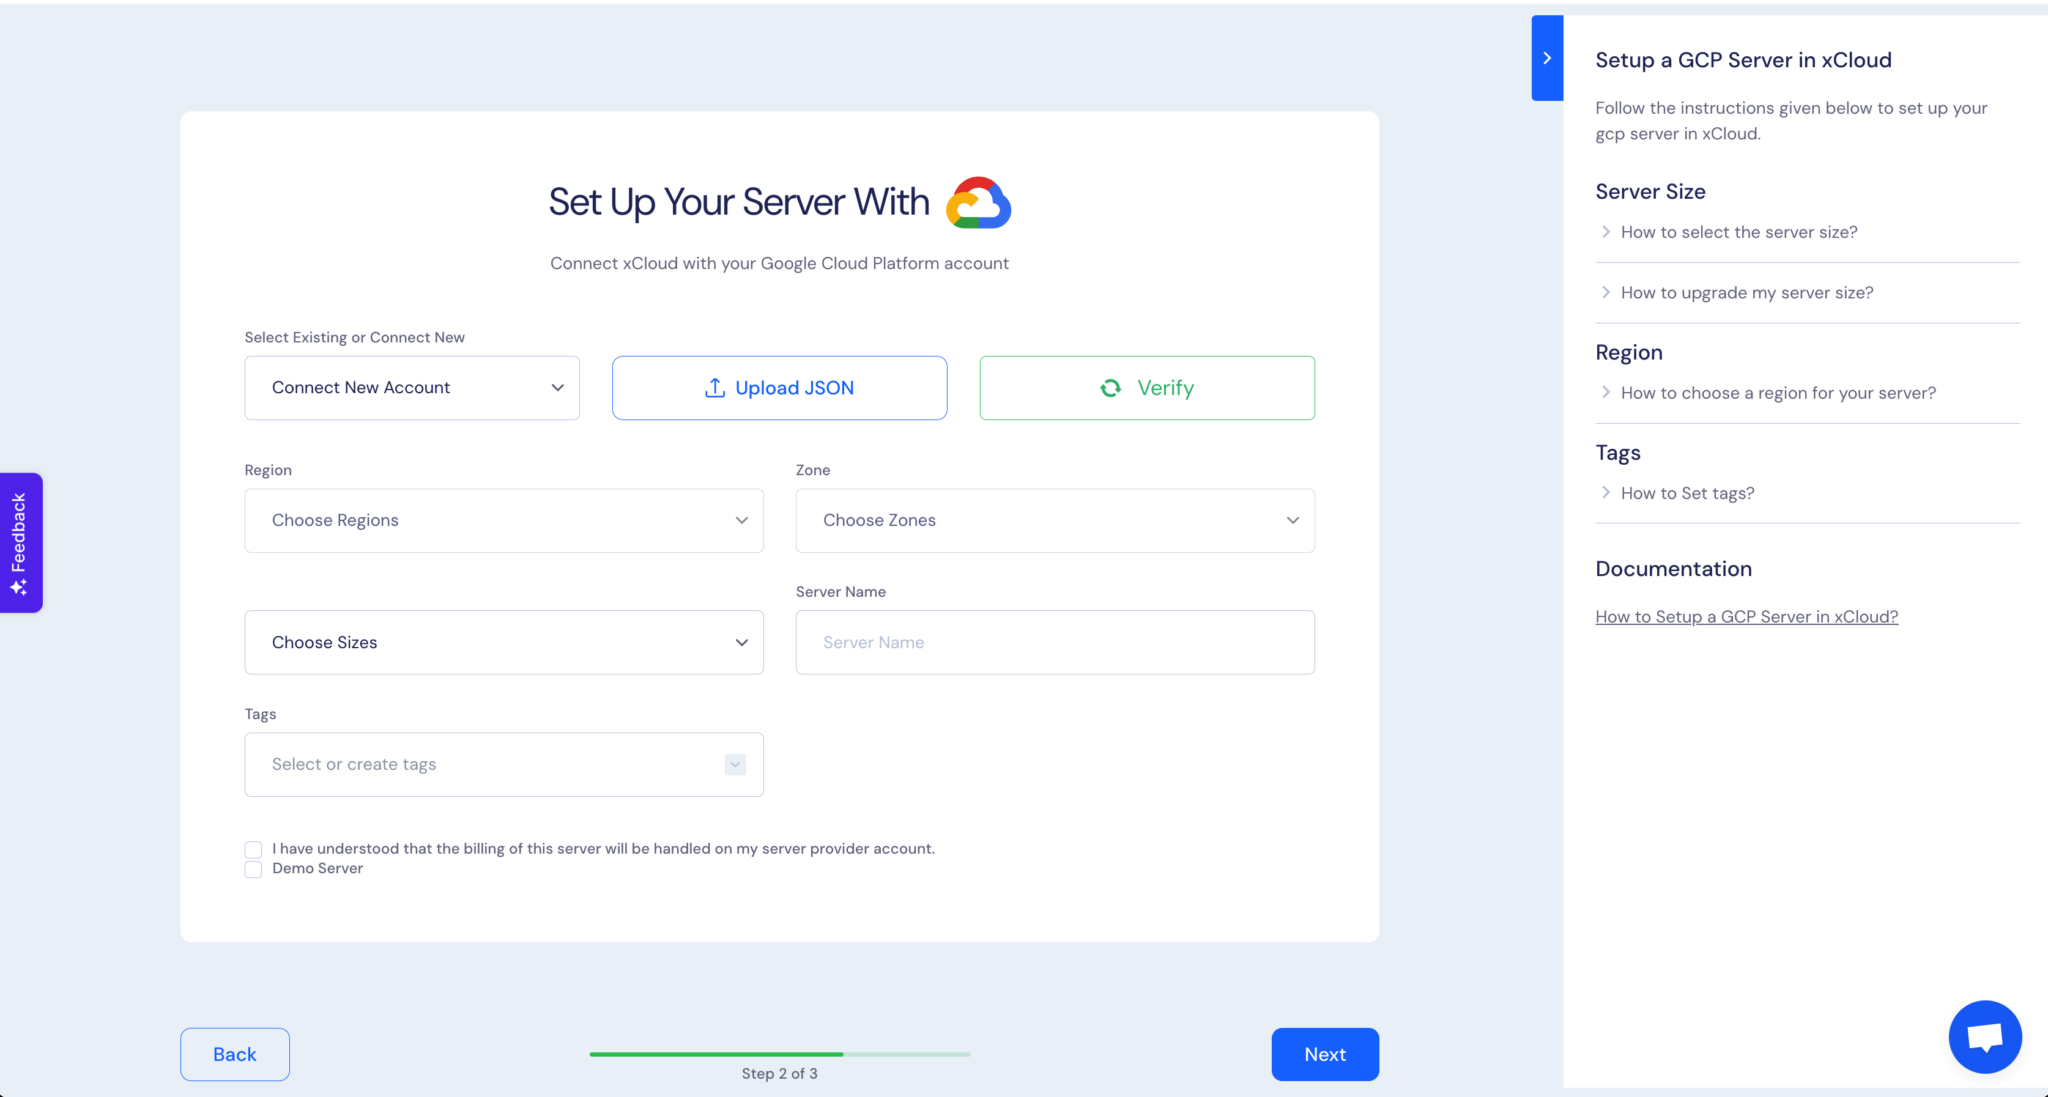
All You have to do is upload the json file and create GCP servers instantly from xCloud.
Now the question is where & how to get the json file to upload it in the below-resulting image.
Step 3: Get The JSON File From Google Platform #
To get the JSON file you need to follow a few simple steps.
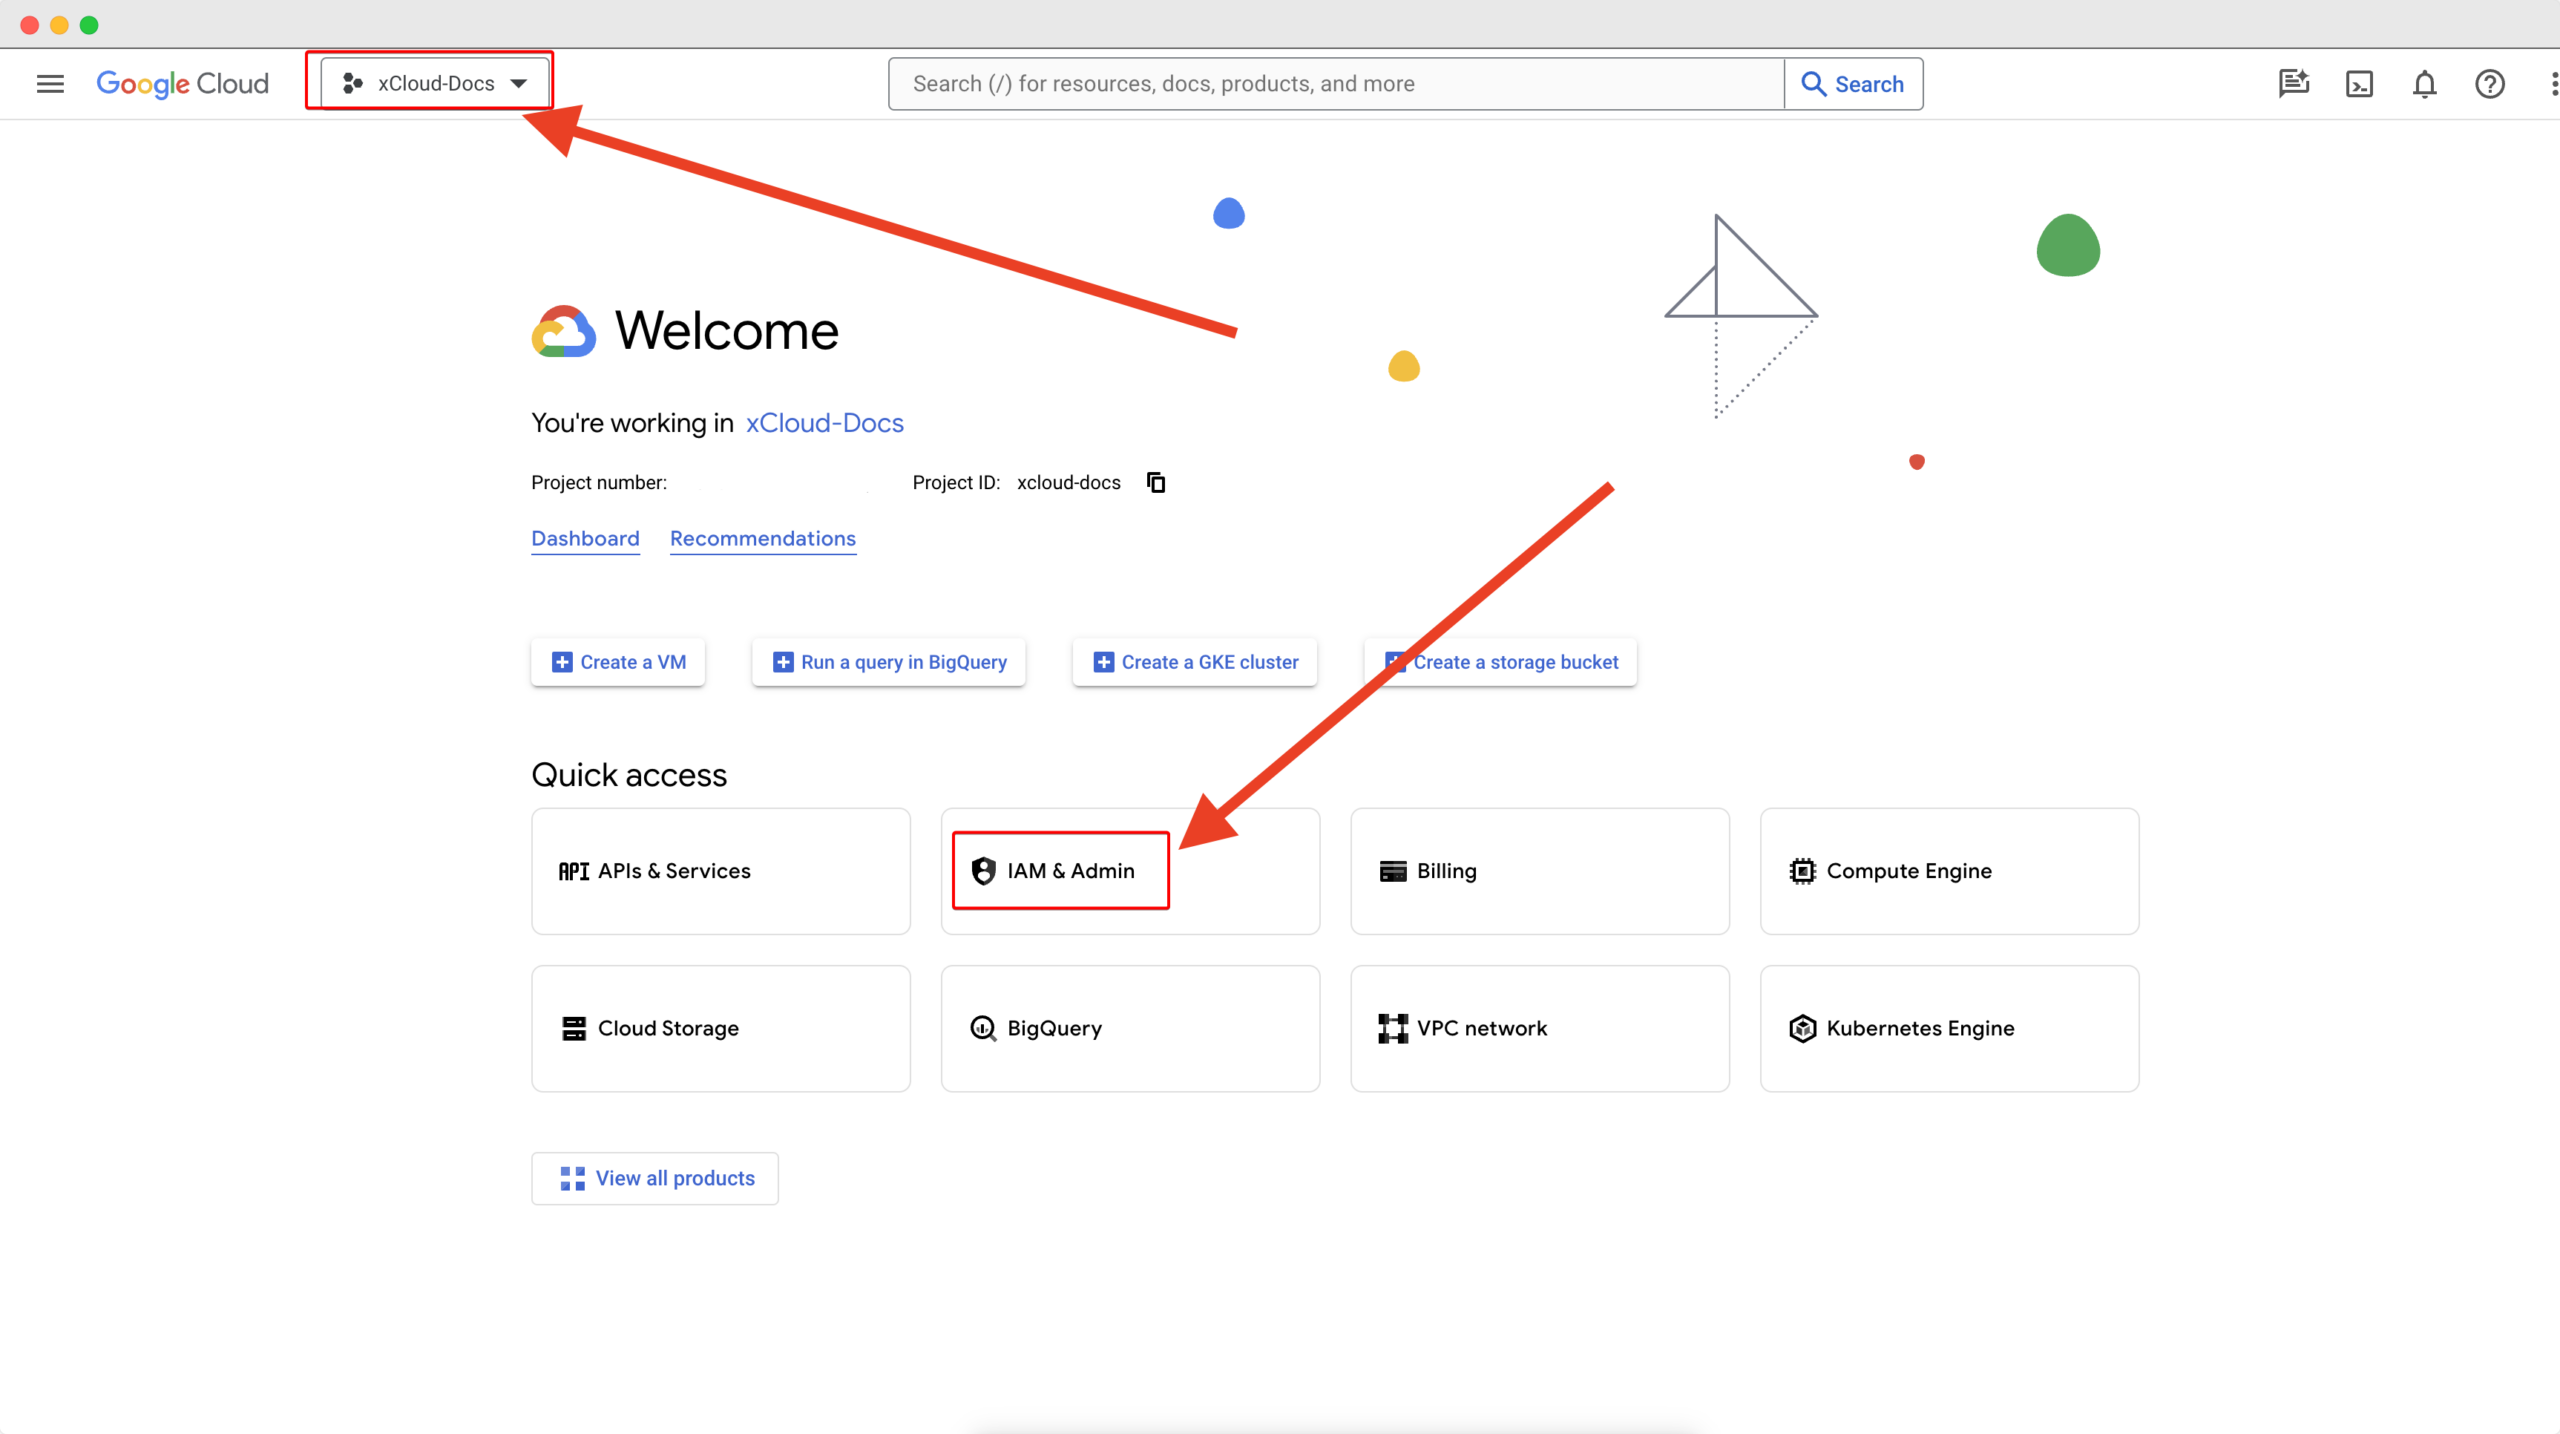
- Sign in to your Google Cloud Platform with the correct credentials. Once you signed in, switch to your project where you want to create your server and navigate to ‘IAM & Admin’ and click on it.
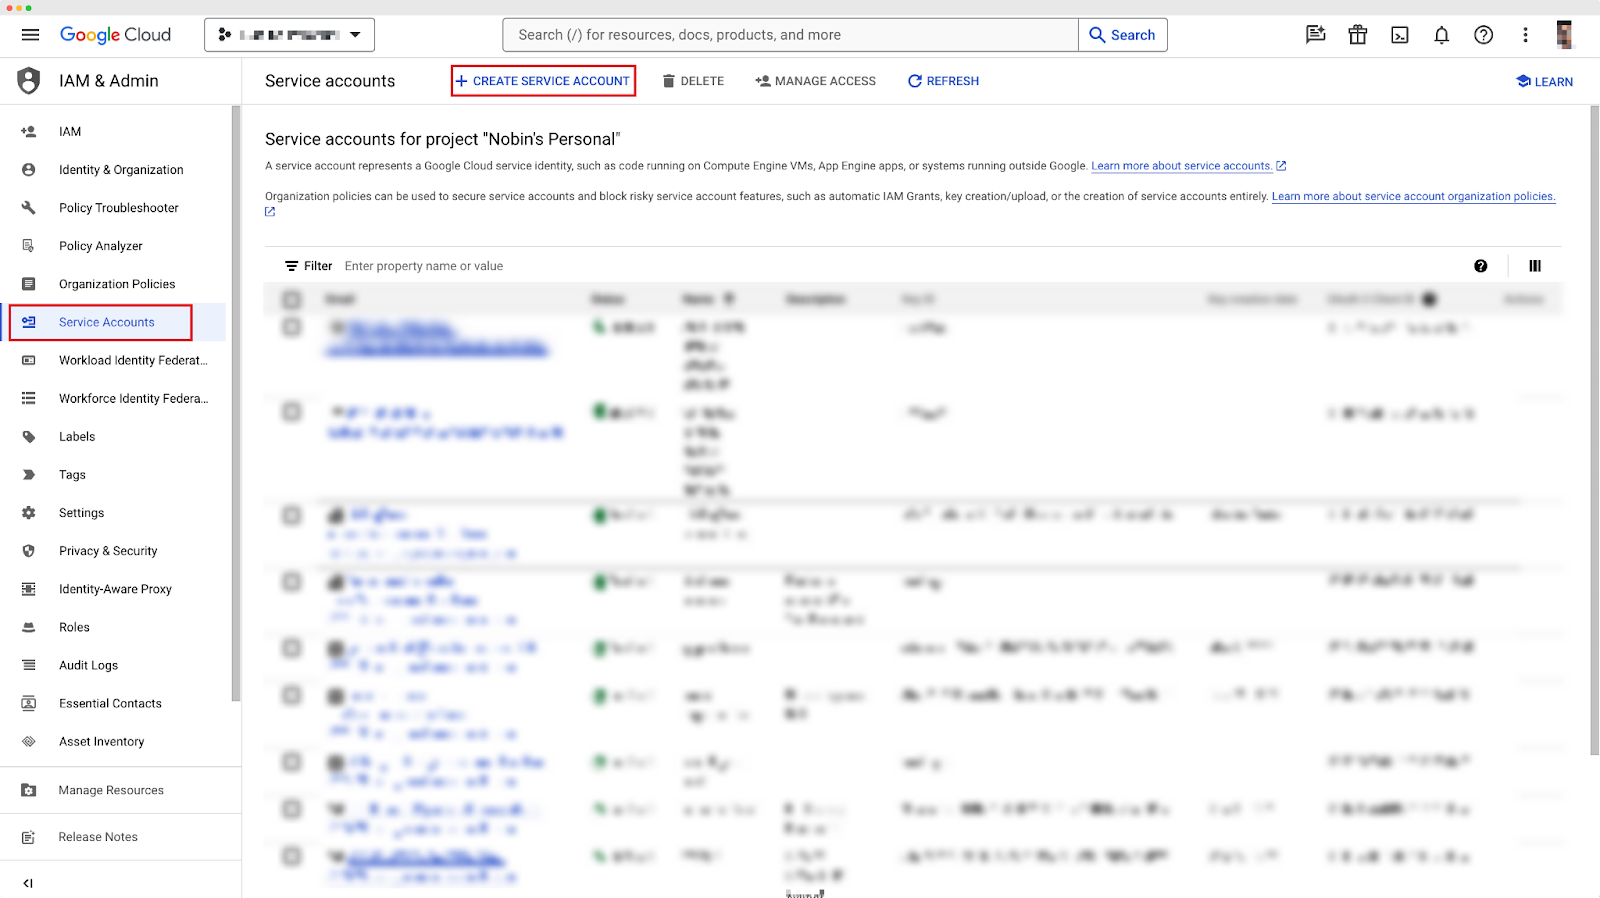
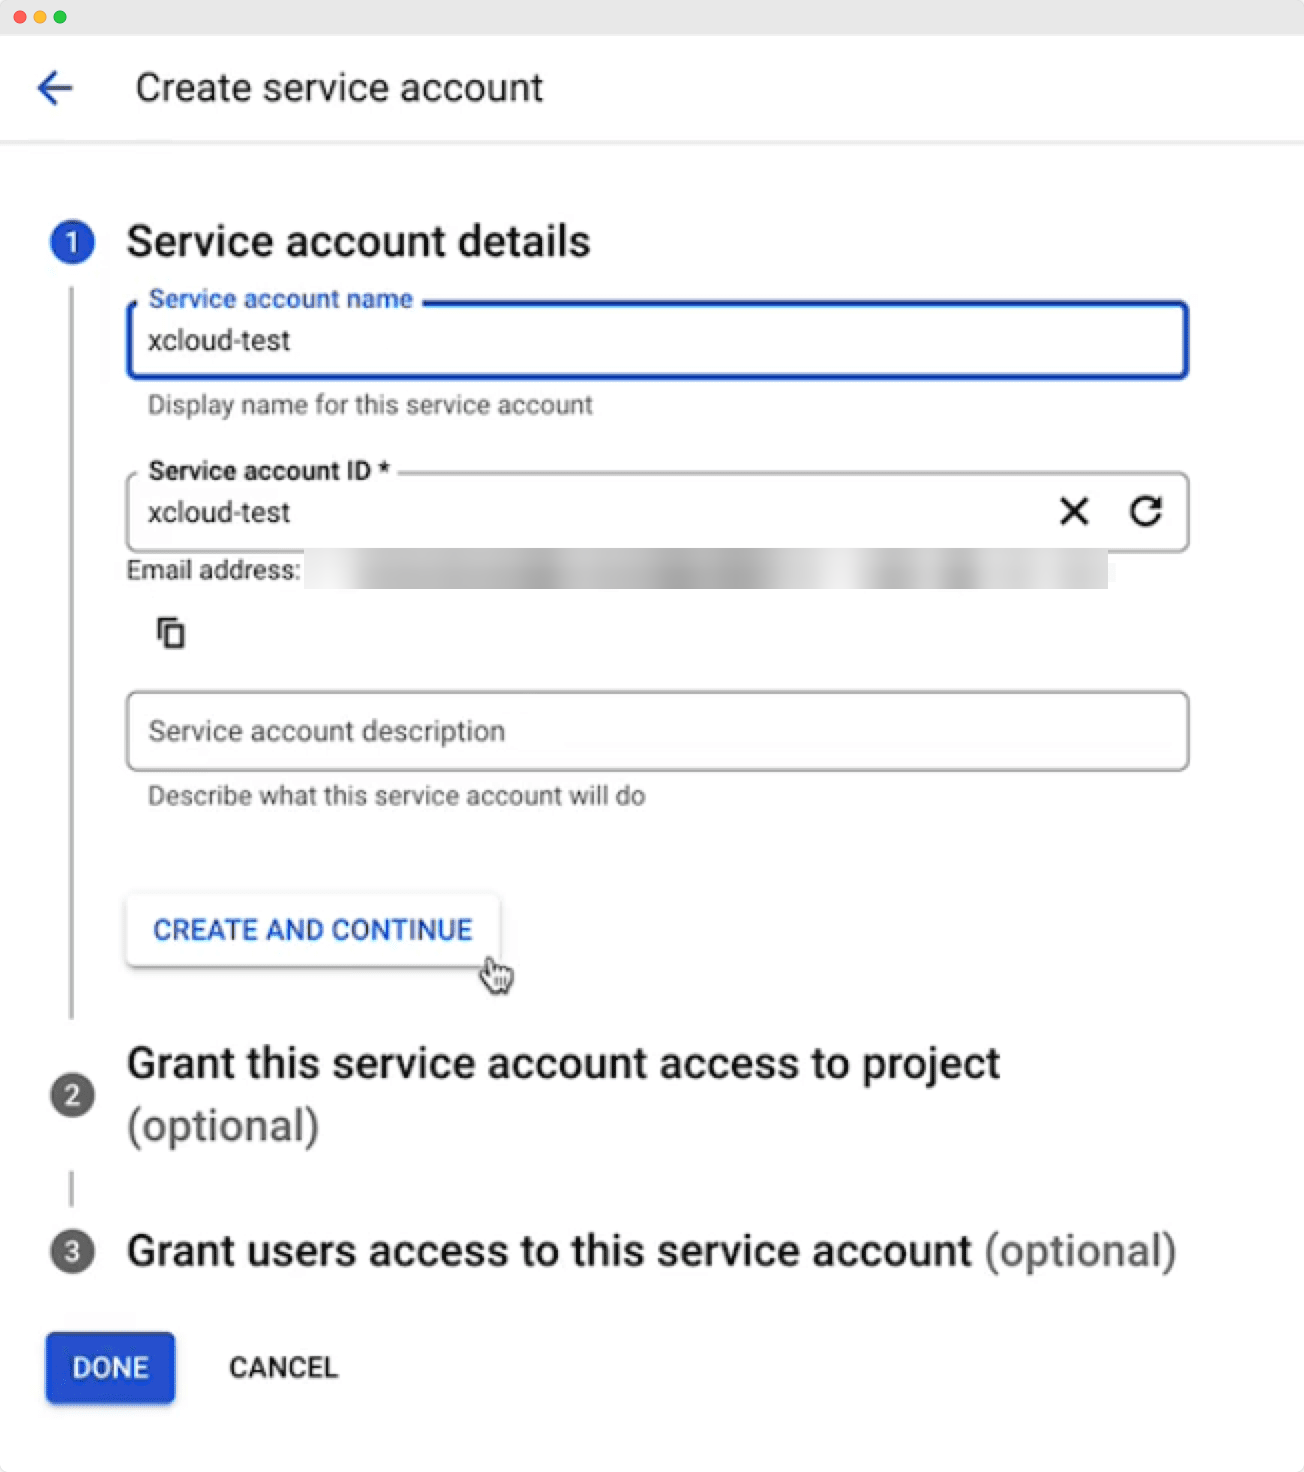
On the resulting page, navigate to ‘Service Accounts’ → ‘Create Service Account‘ to go to the next step.
Fill up your service account name, and account ID & click on ‘Create & Continue.’
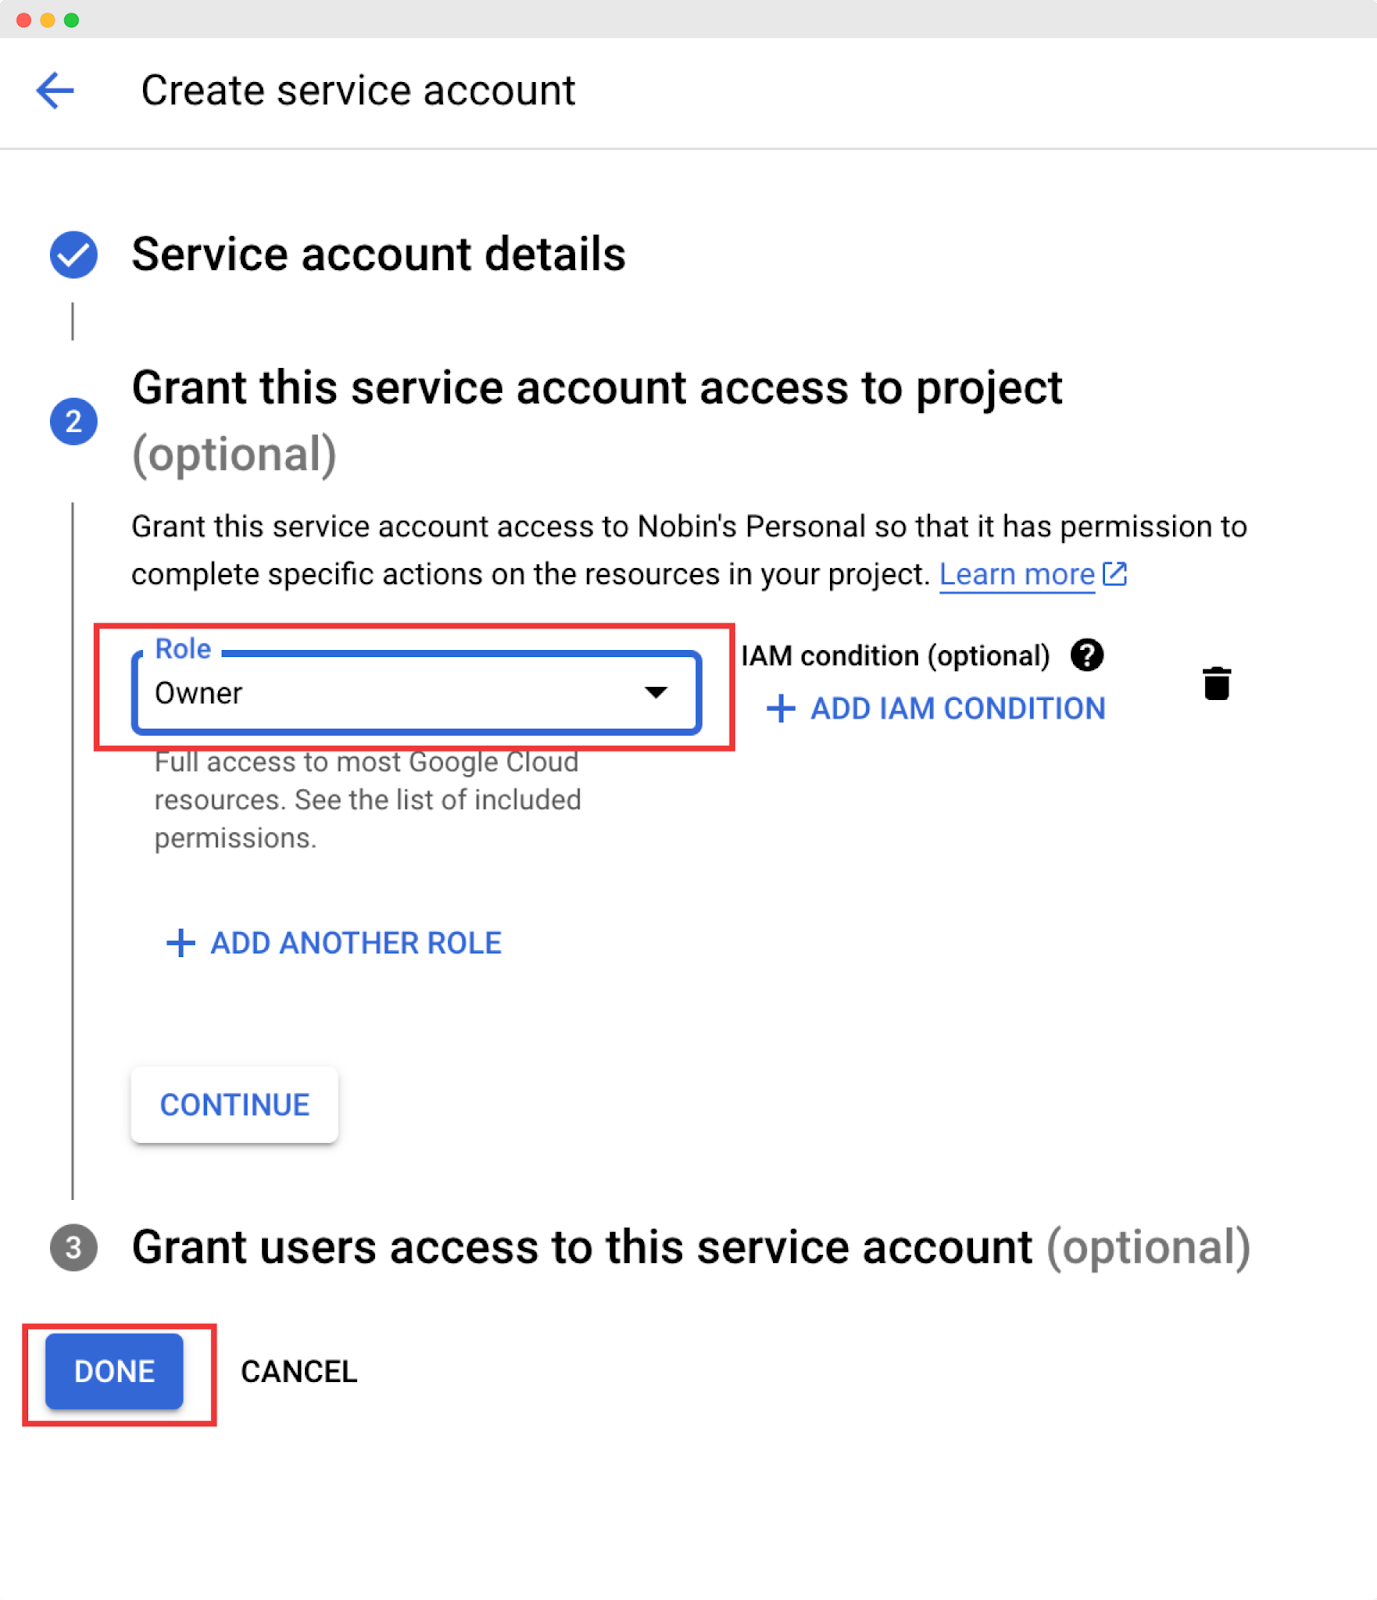
Now, select the role as ‘Owner’ & click on ‘Done’ from below.
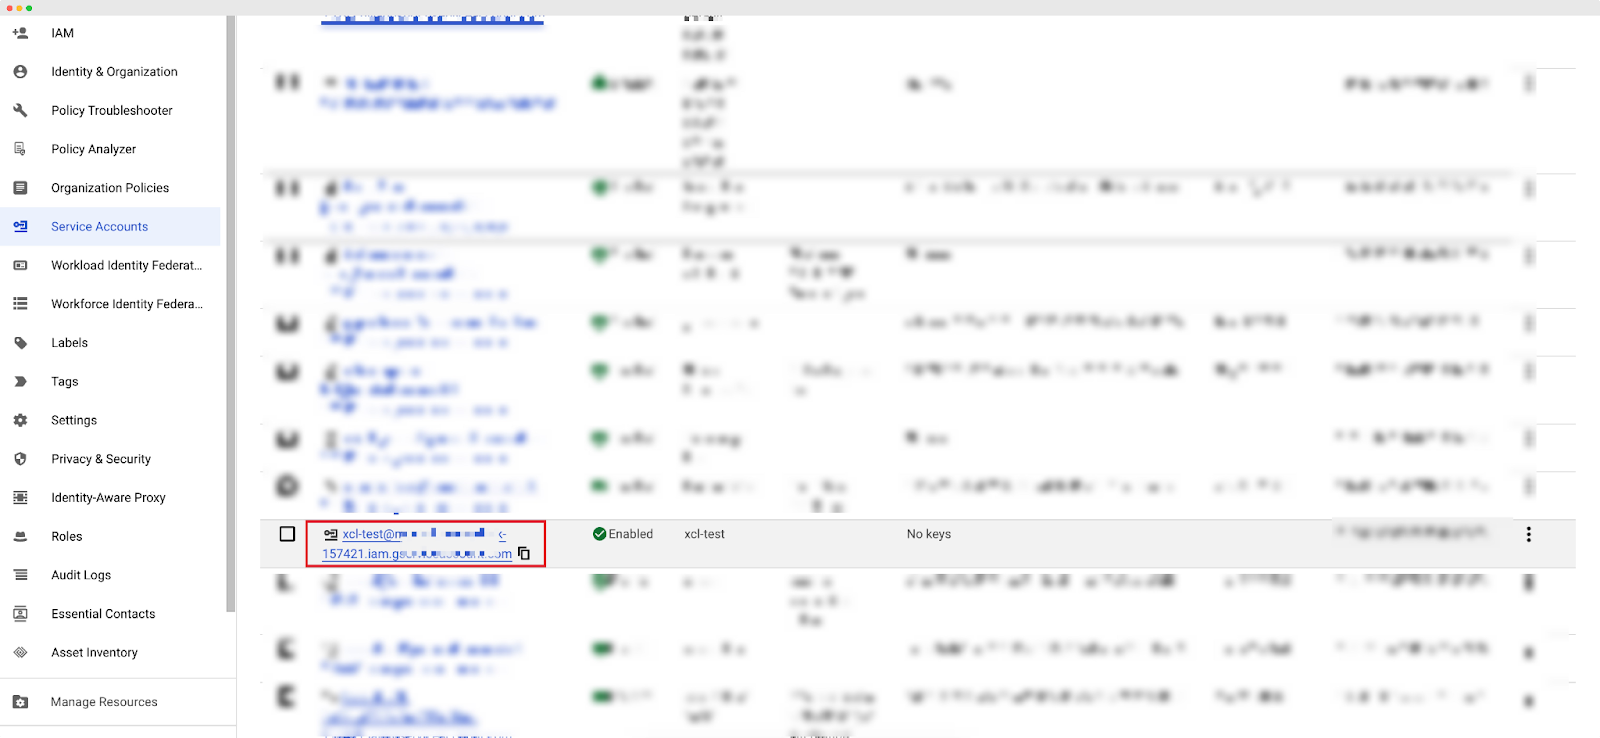
Now, locate your account service from the below-resulting page & click on it.
In this step, navigate to ‘Keys’ → ‘Add Key.’
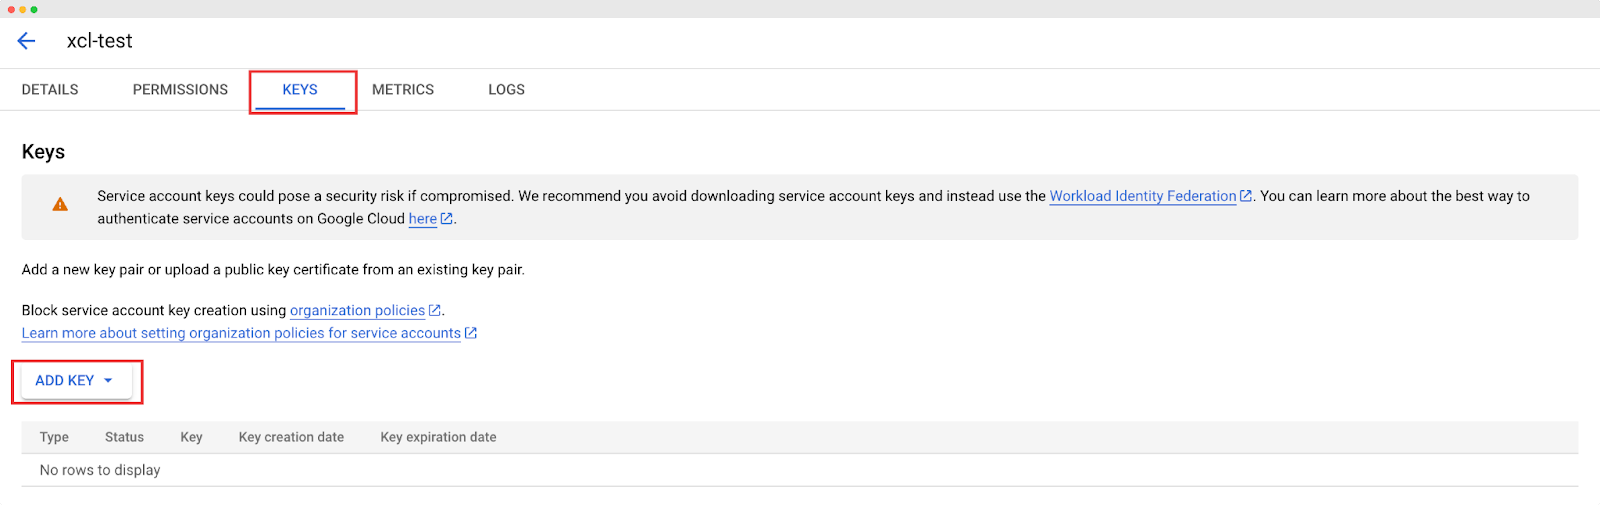
And here you are finally! Click on JSON as the Key type as shown below & press the Create button from below right. And you will have your JSON file downloaded on your device.

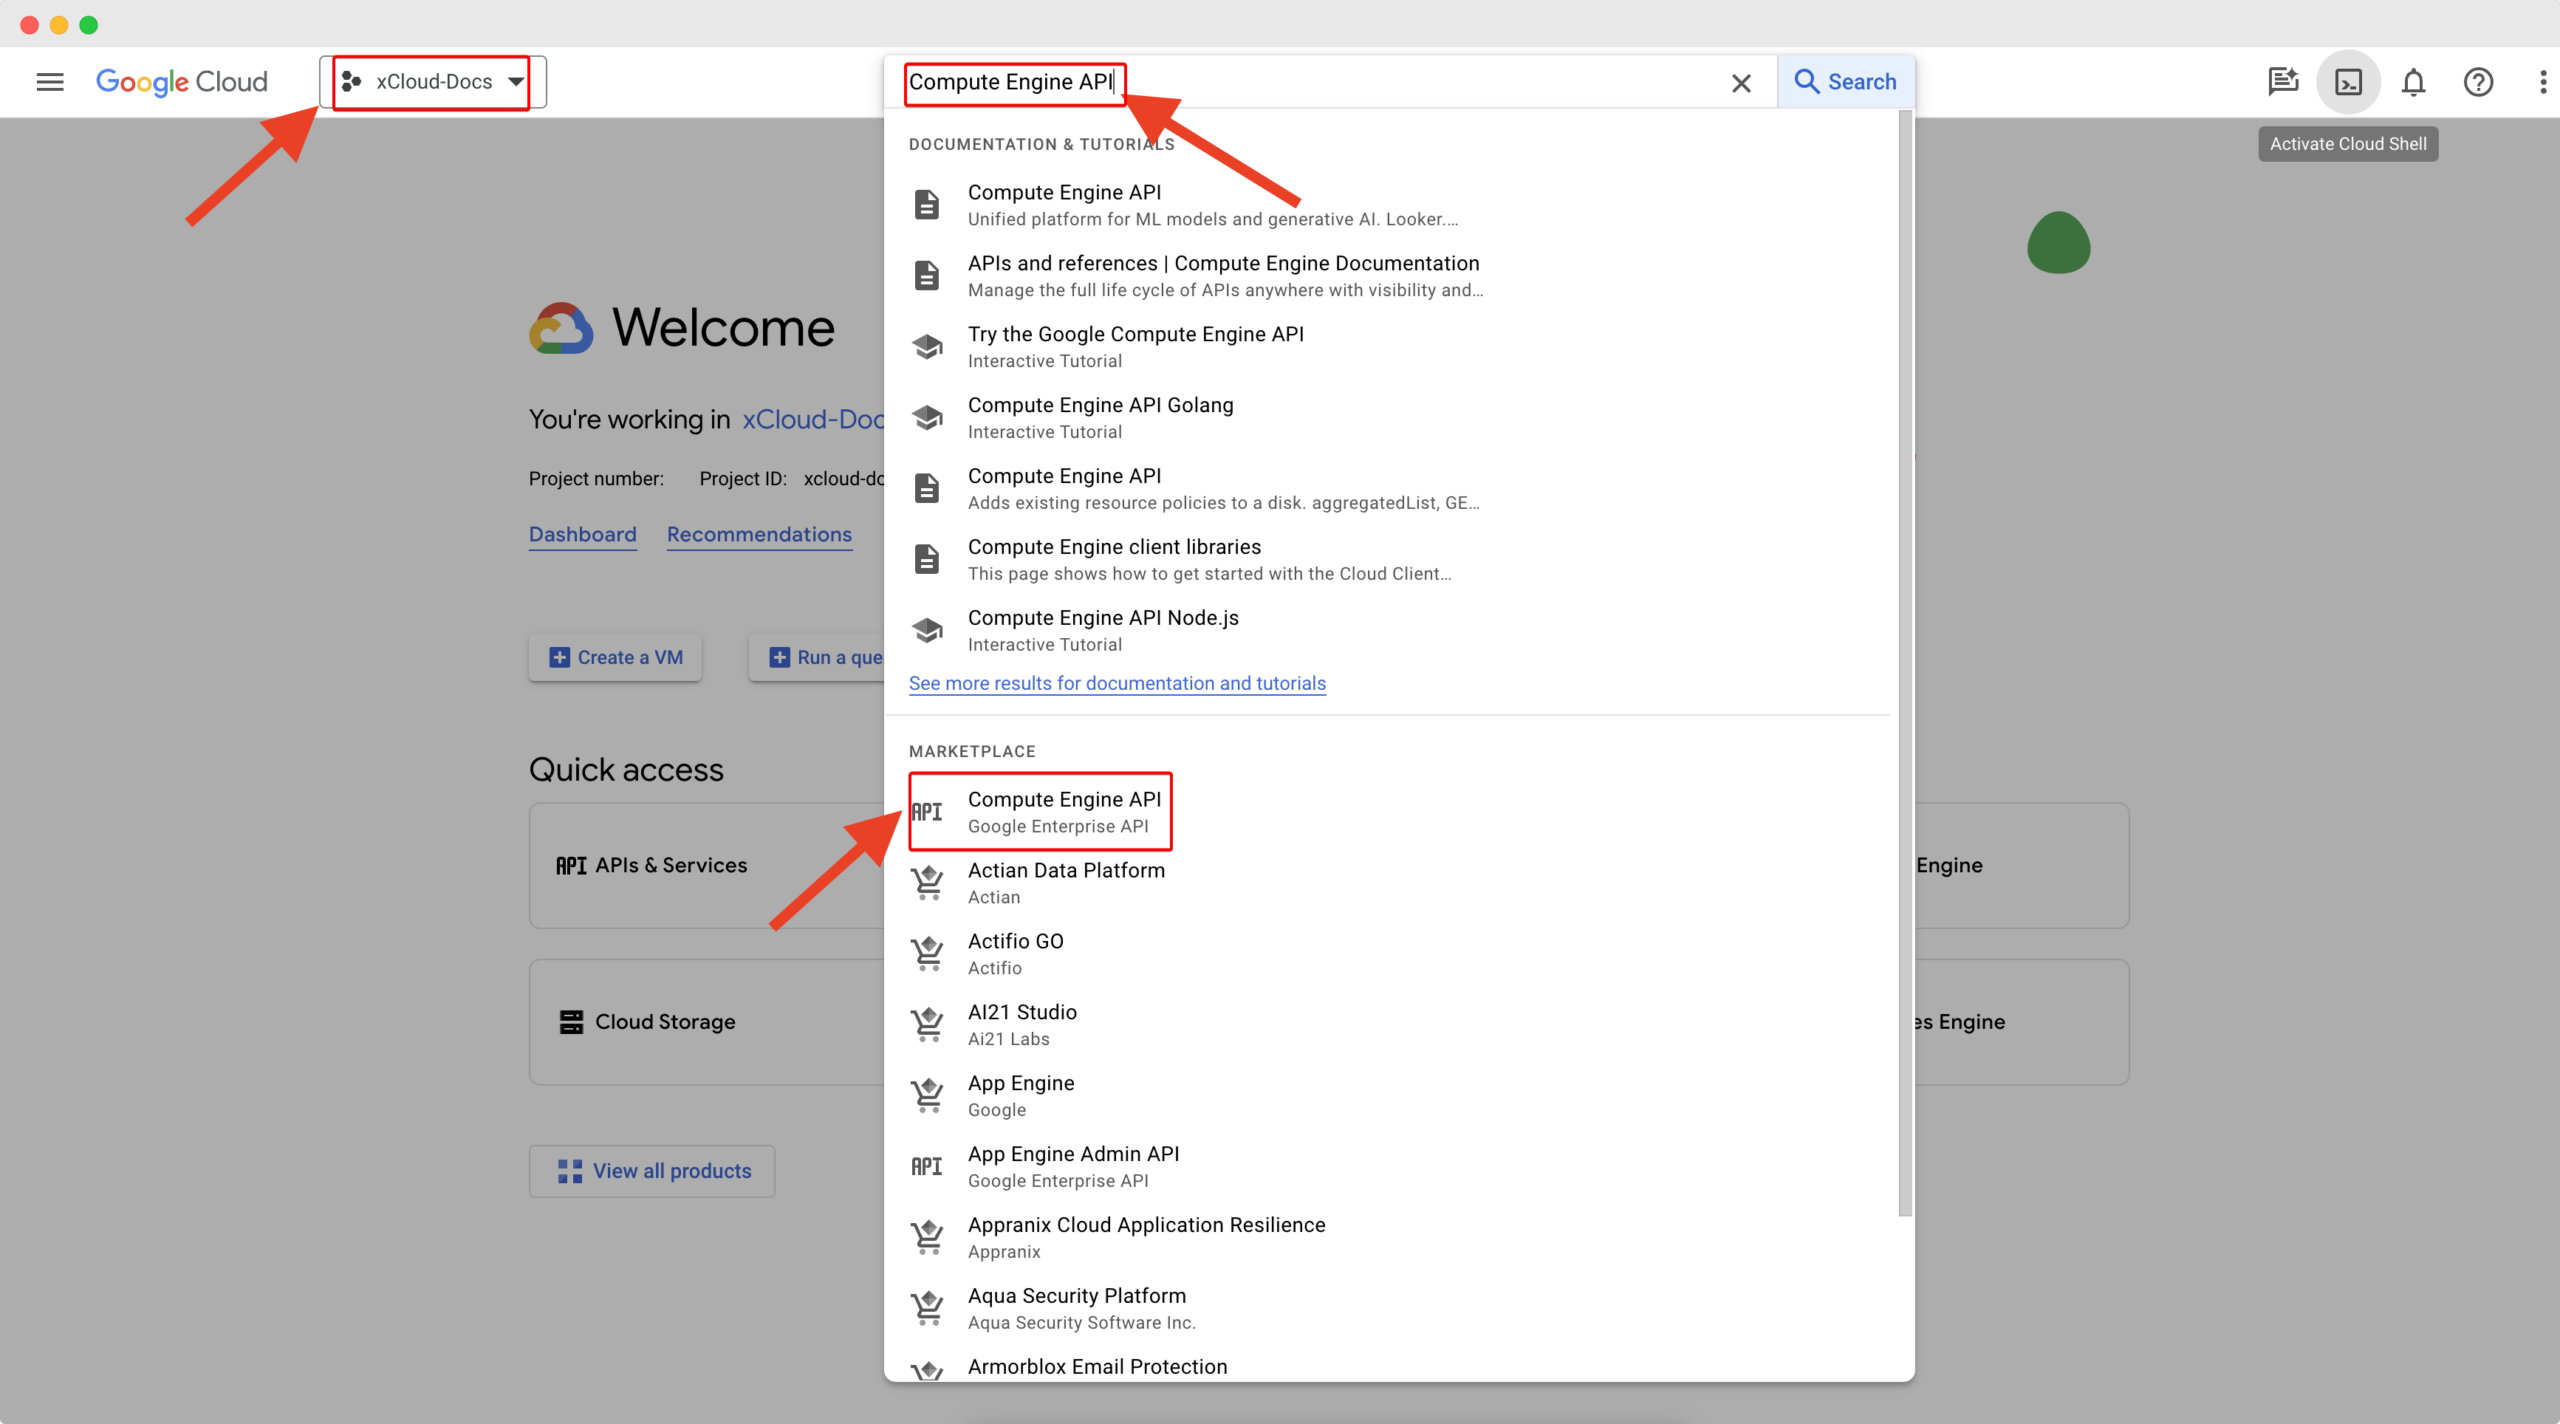
Step 4: Enable Google API #
To enable Google API, you will find a search bar at the top, search for “Compute Engine API” there.
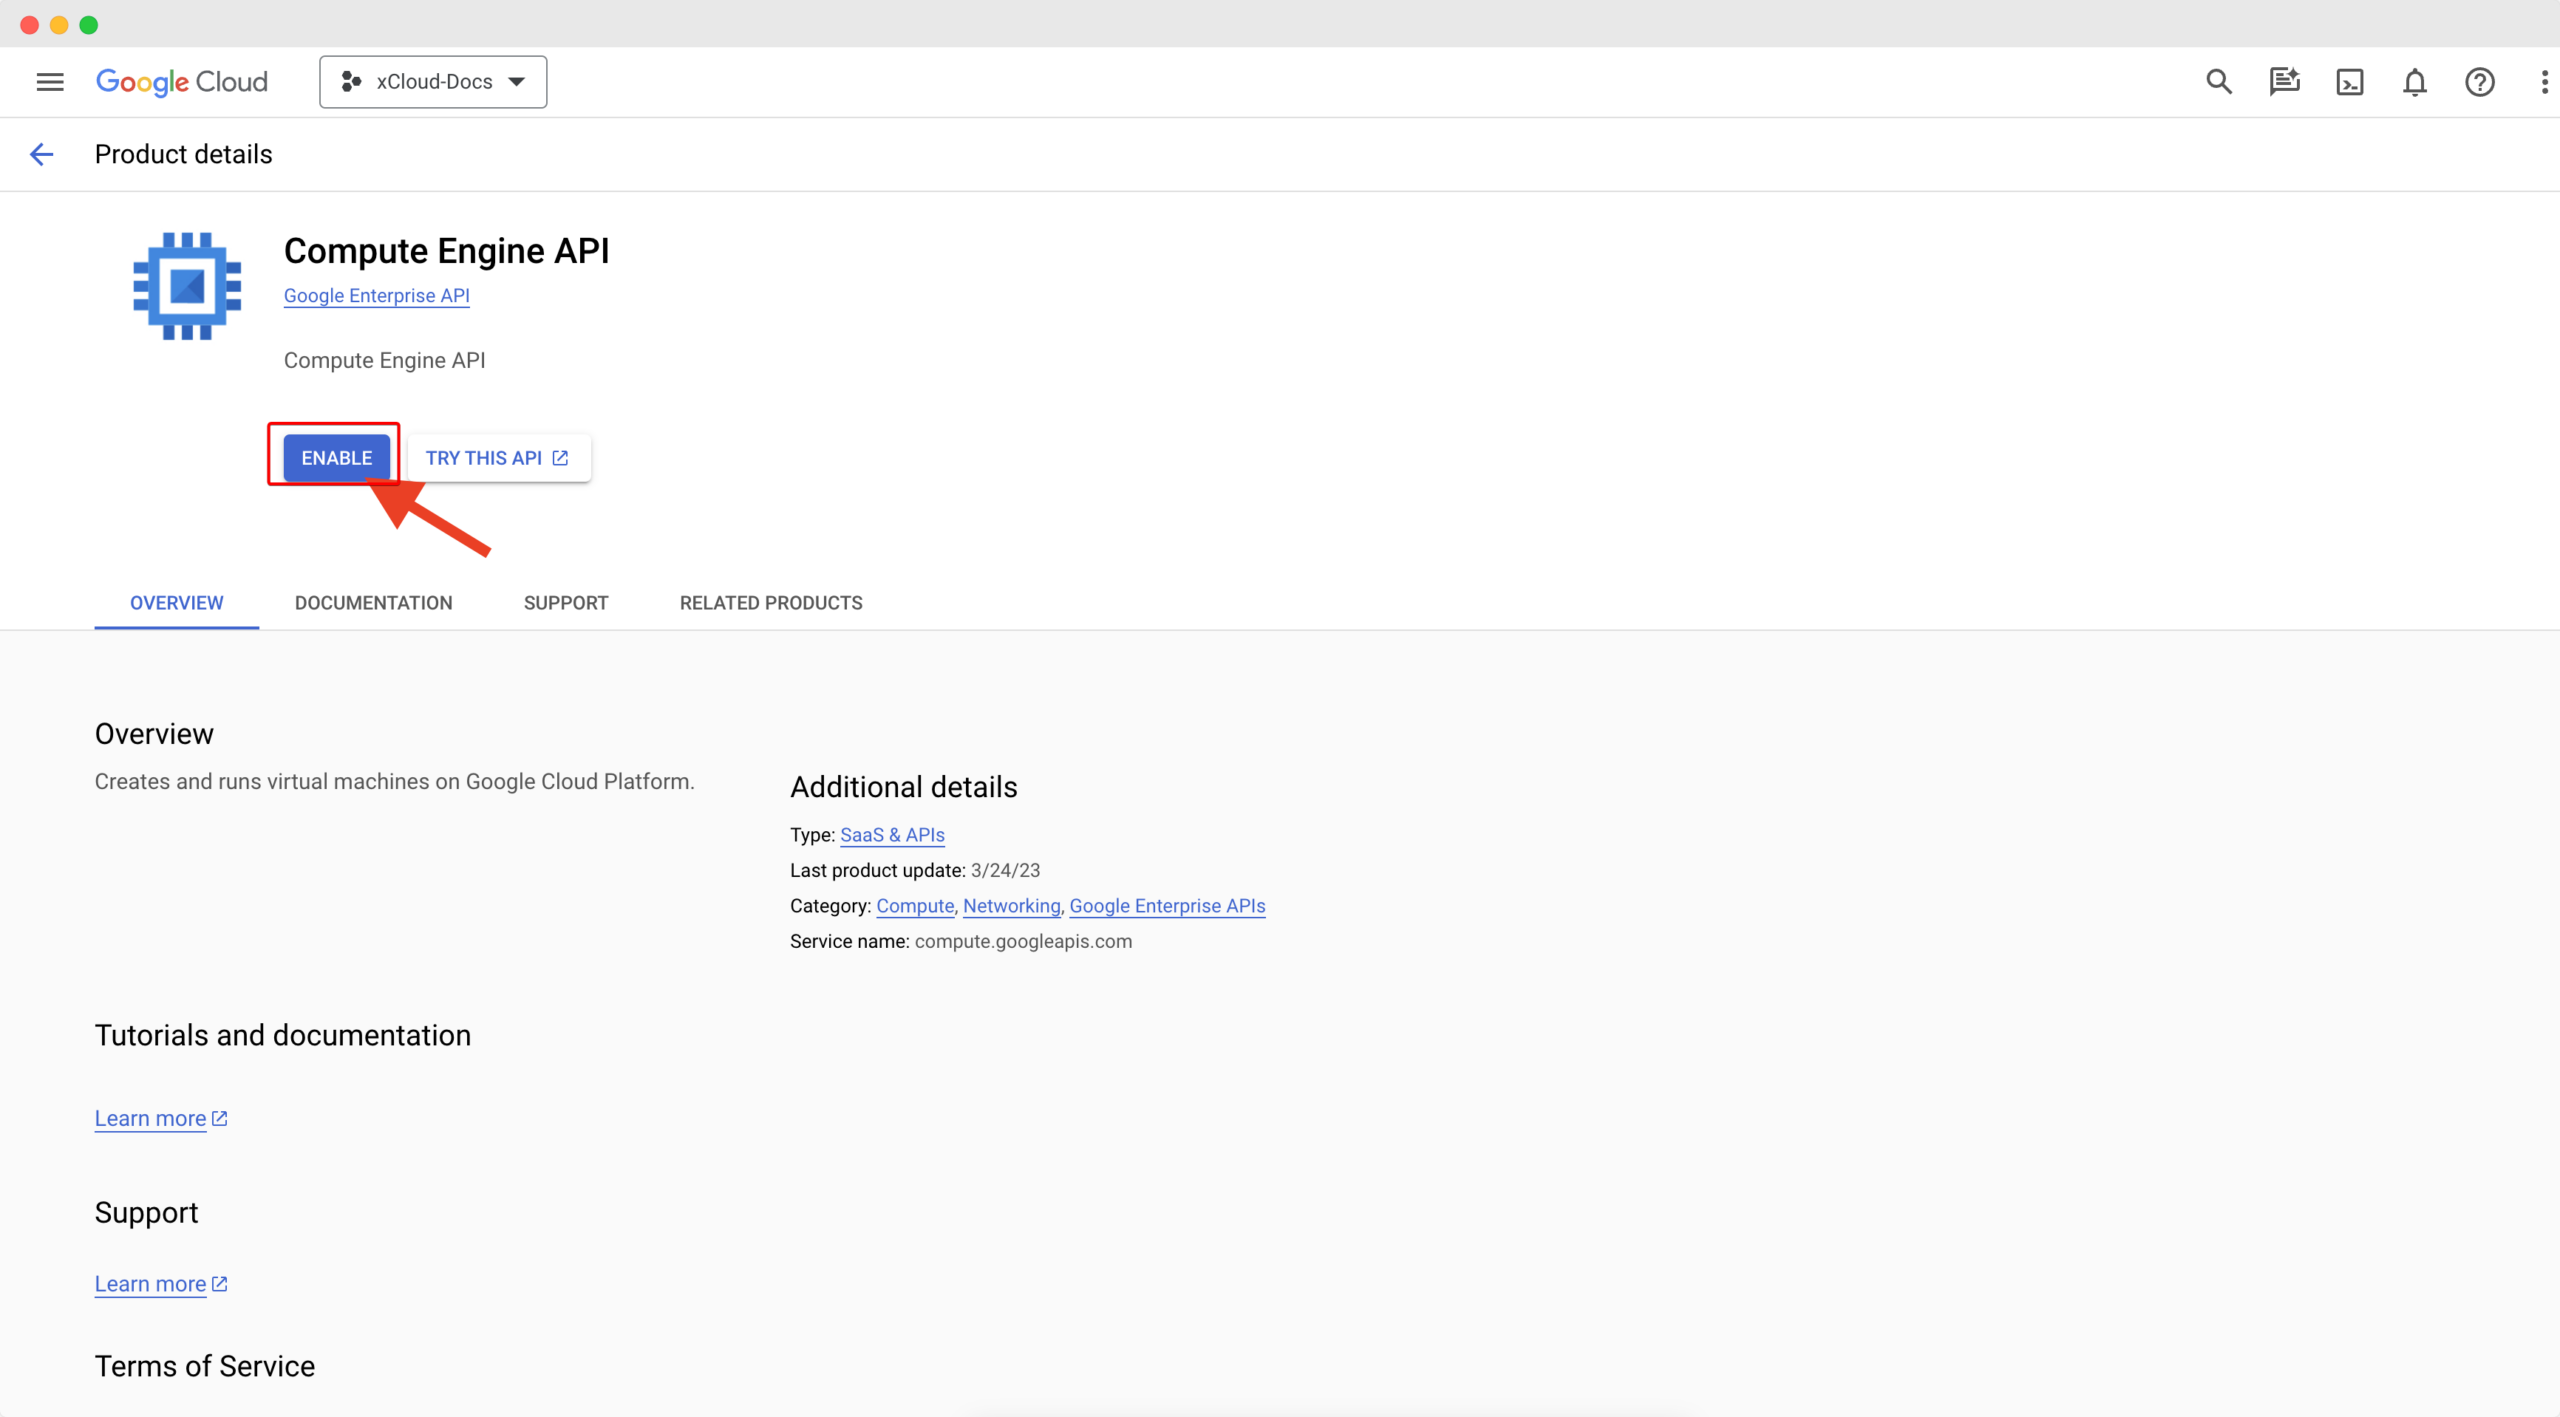
Click ENABLE as shown below:
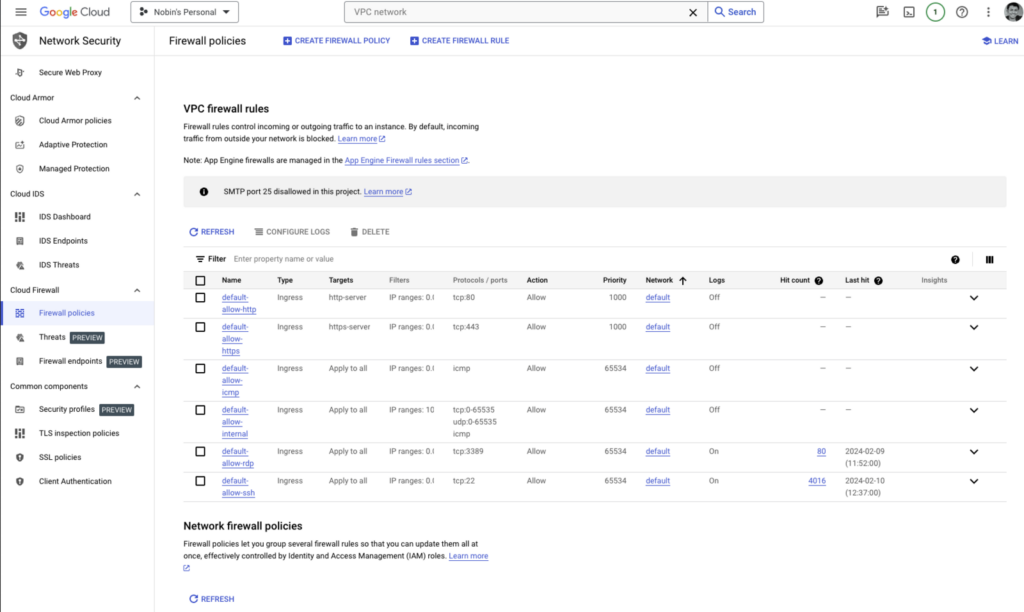
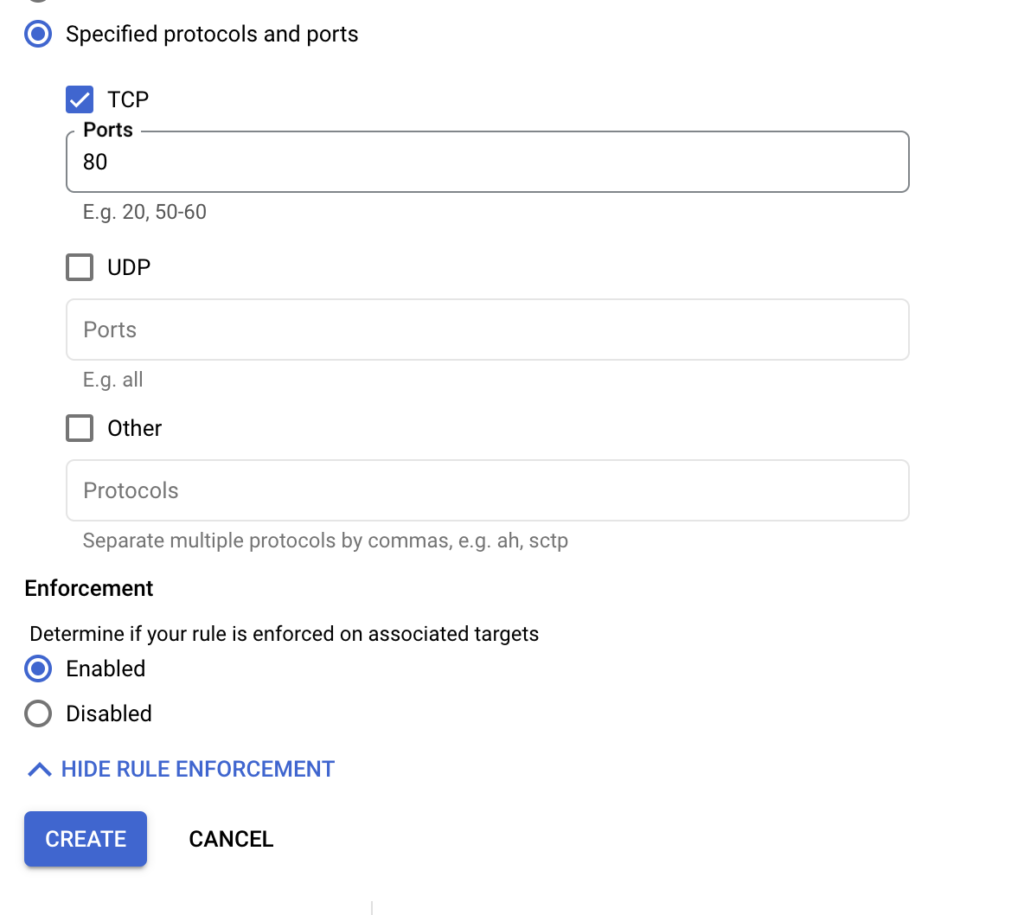
Step 5: Create Firewall Policies #
You need to configure “default-allow-http” & “default-allow-https” firewall on your GCP account.
Visit Firewall Policies
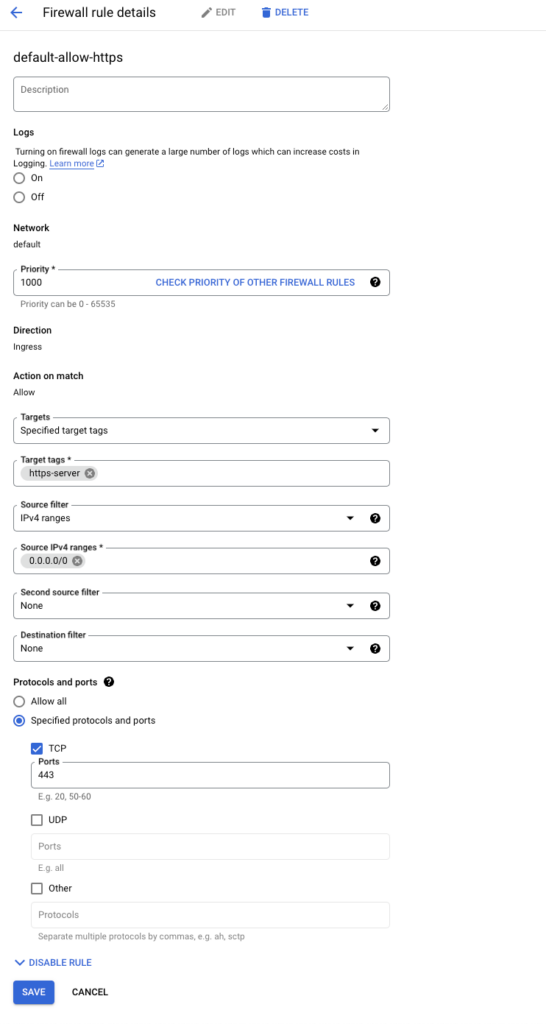
Create the rules: “default-allow-https” rule.
Create the rules: “default-allow-http” rule.

Make sure to Enable both
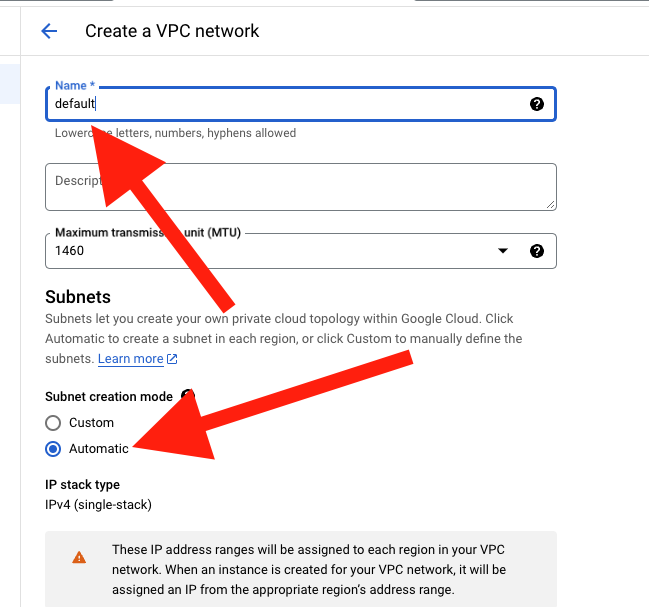
Step 6: Create a VPC Network #
If the project does not show any default VPC network, then you can create a new VPC network by yourself. To create a new VPC network, look for the ‘Create VPC Network’ and click on it. Now a form will pop up on the screen. Here, you need to fill up the form, give it a name set the ‘Subnet creation mode’ to automatic and forward with the ‘Create’ button so that you can create a new VPC network.
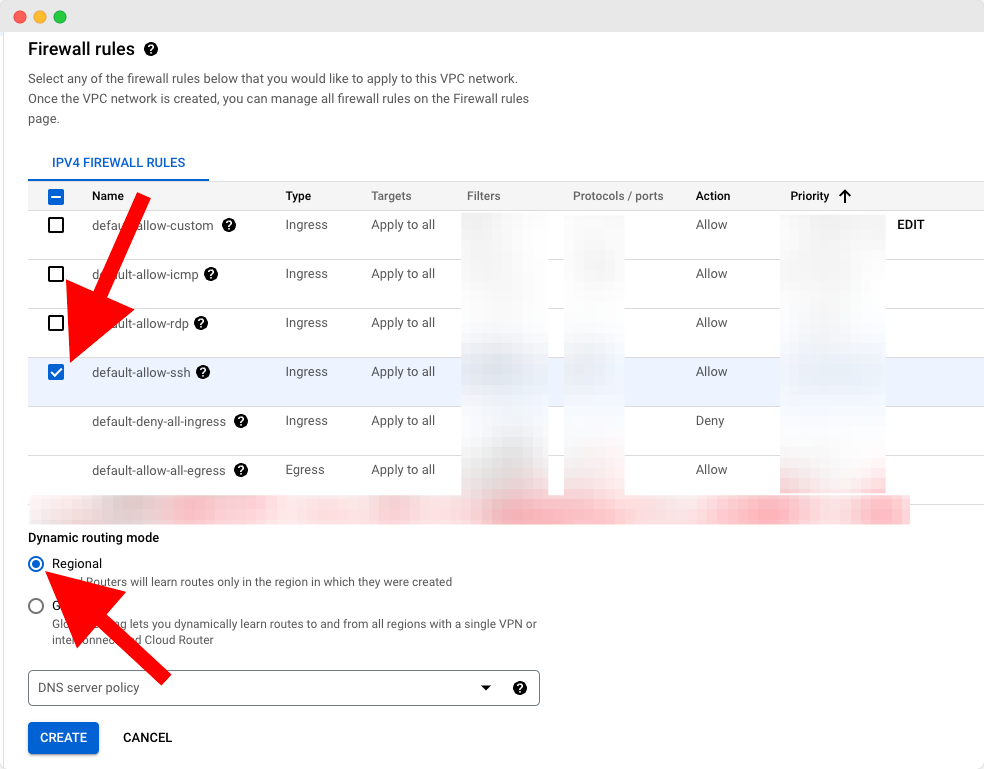
Once the VPC network is created, you can manage all firewall rules on the Firewall rules page. Select any firewall rules below that you would like to apply to this VPC network from the below menu. Then roll down to the next section where you will set the Dynamic routing mode to ‘Regional’ and press on the ‘Create’ button.
Step 7: Add Necessary Information #
After uploading the correct json file now you need to provide the Server name, your preferred Server Specifications (CPU, RAM, storage), and the Region nearest to you and your visitors.
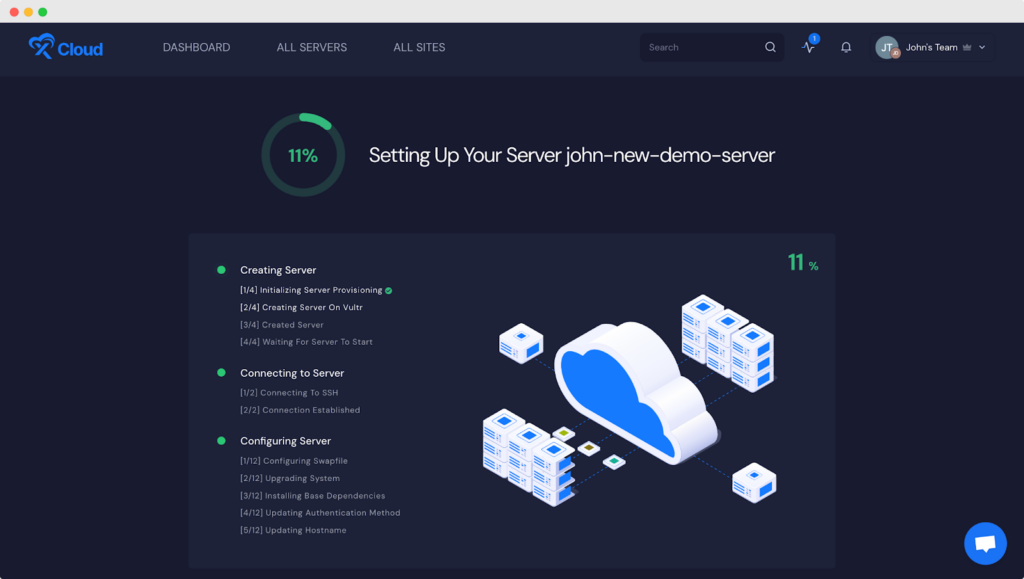
Then submit the form and this might take up to 12-15 minutes to make the server live and ready to install a lightning-fast WordPress Site.
How To Create A Site With xCloud #
After you have completed the previous steps, you are now ready to create your site. Simply follow our step-by-step guide below.
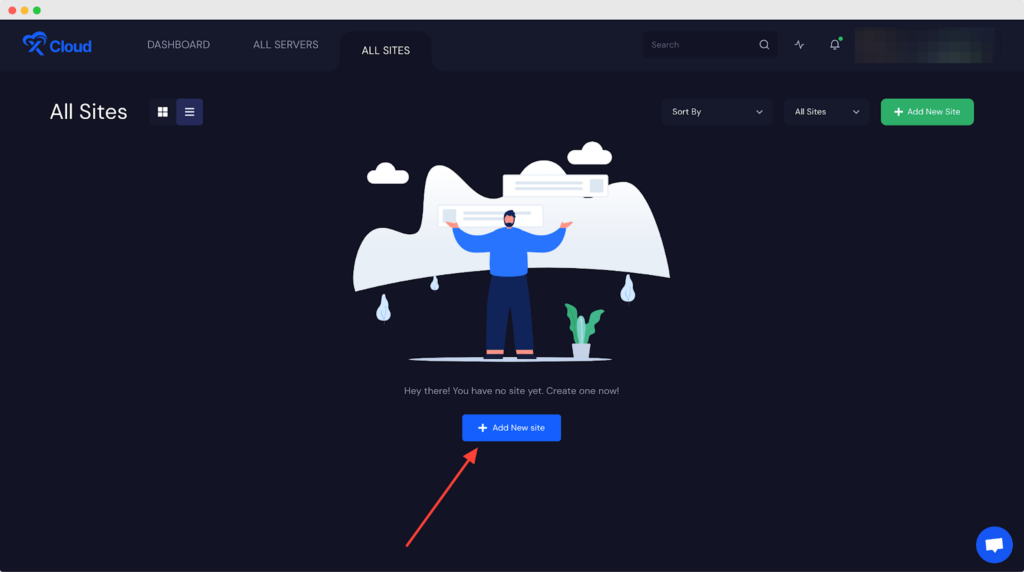
Step 1: Create A Site From The Dashboard #
Once your server is connected, you can create a site from the Dashboard or Site List by clicking on the button “Create New Site”
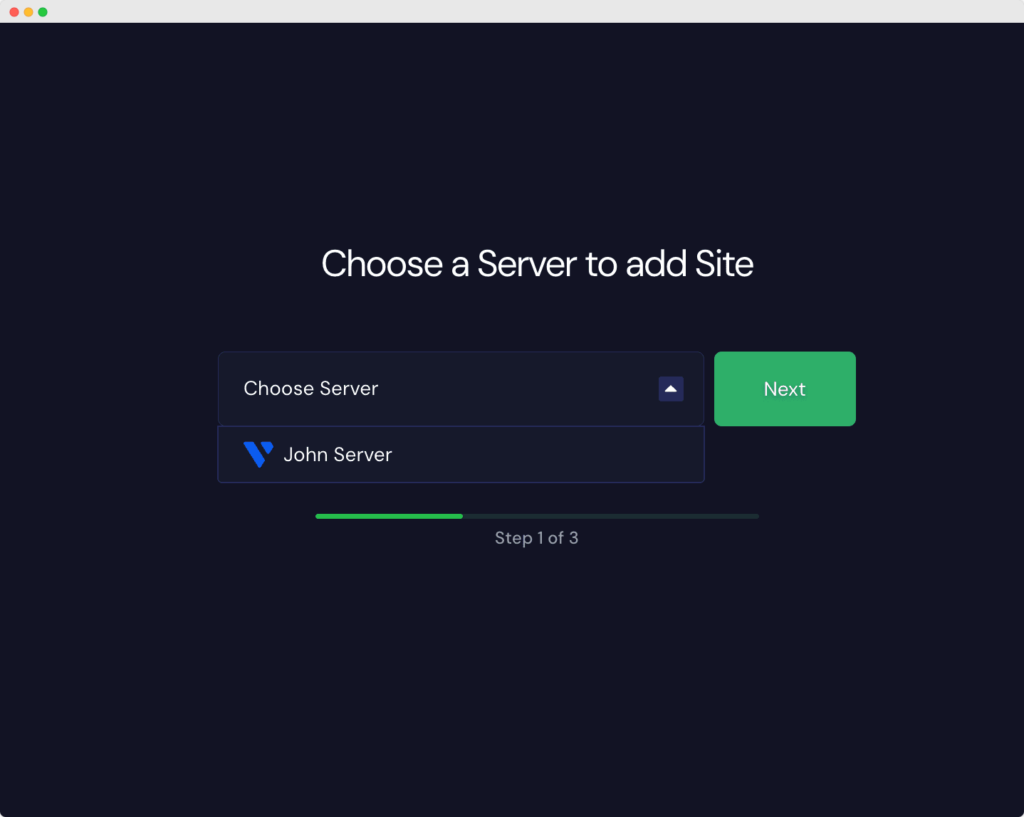
Then you will need to select the server on which you want to install your WordPress website.
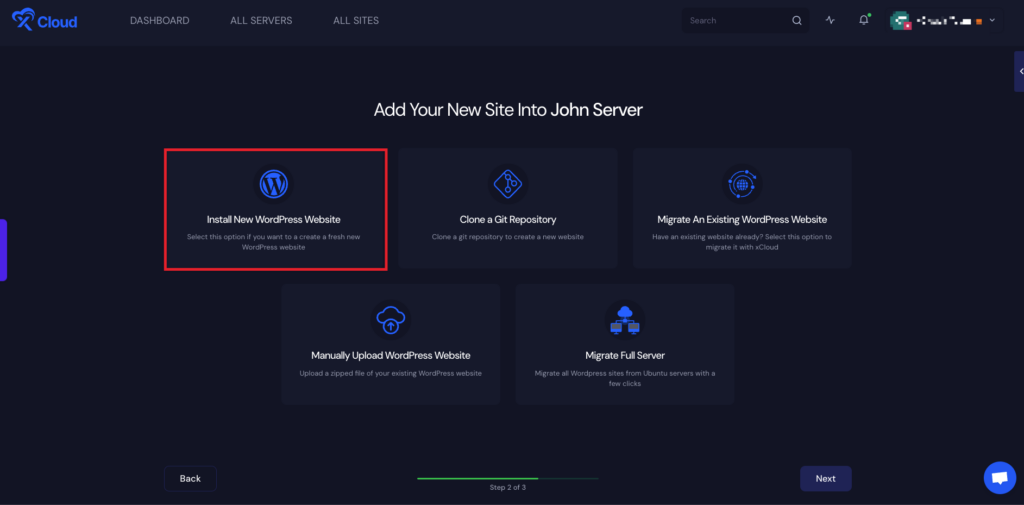
Step 2: Choose Your Site & Add Information #
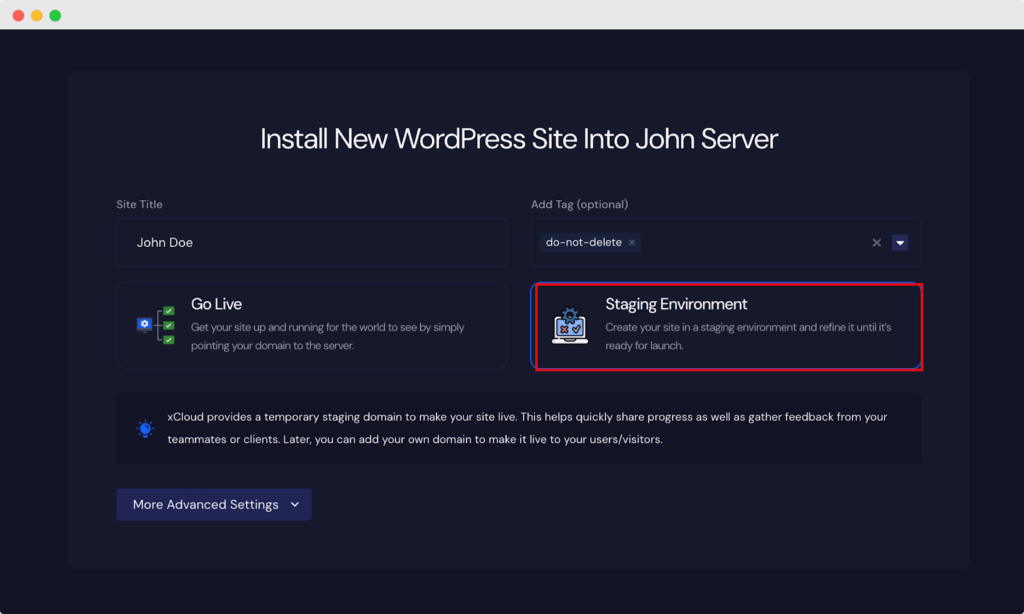
As we will be creating a fresh WordPress site choose the “Install New WordPress Website” options as shown below.
Now all you have to do is install and Go Live with your WordPress Site. You can do the next process with 3 simple and easy steps.
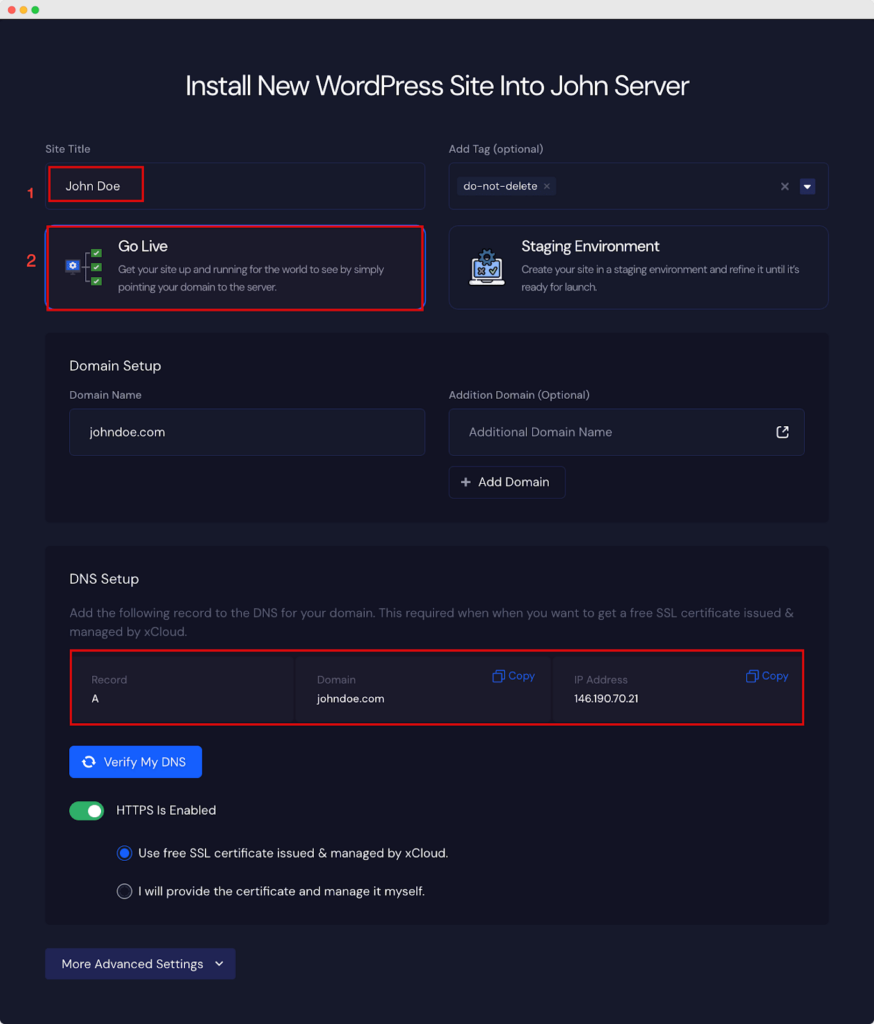
- Add a Site Title
- Add Tags if you want
- Choose to Go Live
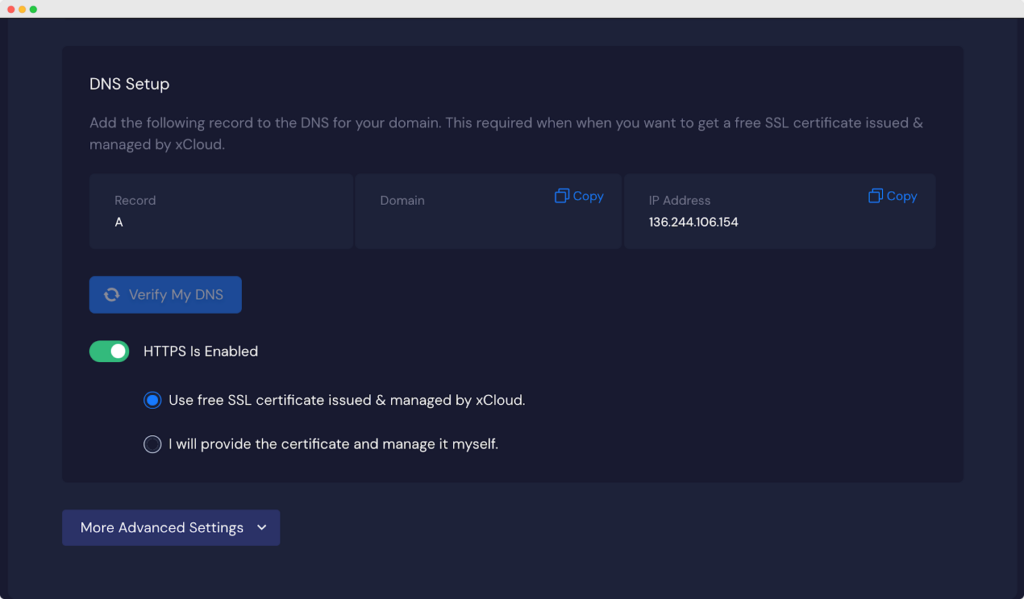
- Add your own Domain. Make sure to add the A record as shown above in your DNS panel.
To use a Free SSL certificate by Let’s Encrypt simply turn on the HTTPS enable button and xCloud will automatically set everything for you.
You can then simply hit the Next Button to create your site and Go Live instantly.
Step 3: Go For The Staging Environment #
Also, If you do not want to point your domain yet then xCloud offers temporary domains to make your site live with every Site creation method available in xCloud. For that select the Staging Environment option.
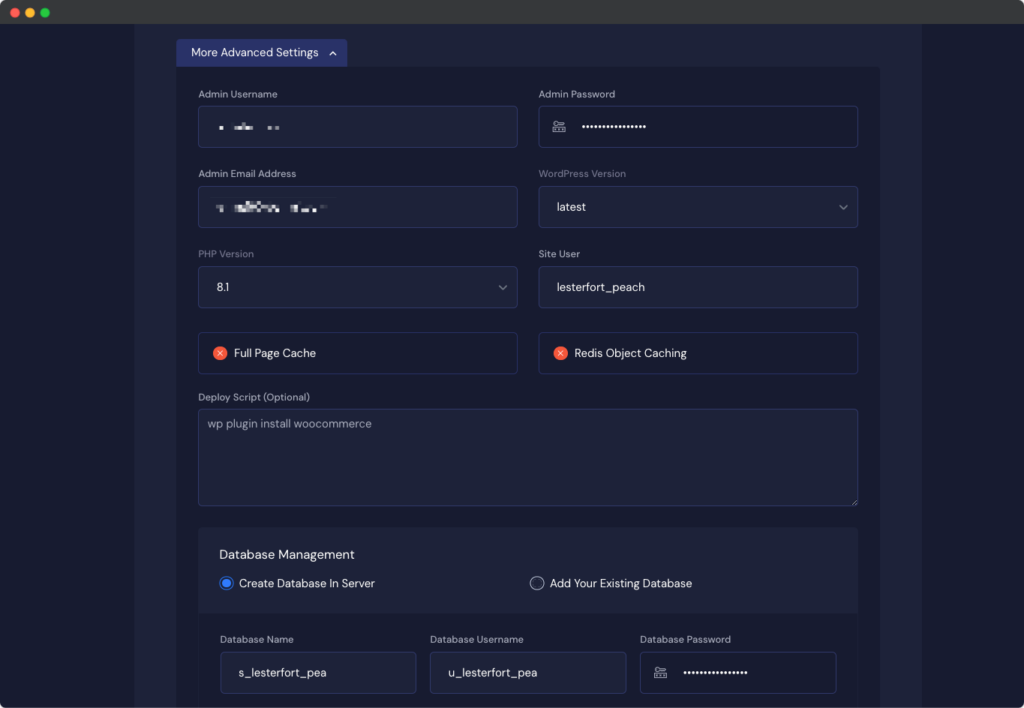
Step 4: Configure Advanced Settings #
By default, the WordPress admin credentials are autogenerated to speed up the site creation process. As soon as your site is deployed you will receive your Site credentials on your email address. Later on, you can update your password if needed. From “More Advanced Settings” you can update the default Admin Username, Admin Password, Admin Email Address, etc along with other additional settings from here.
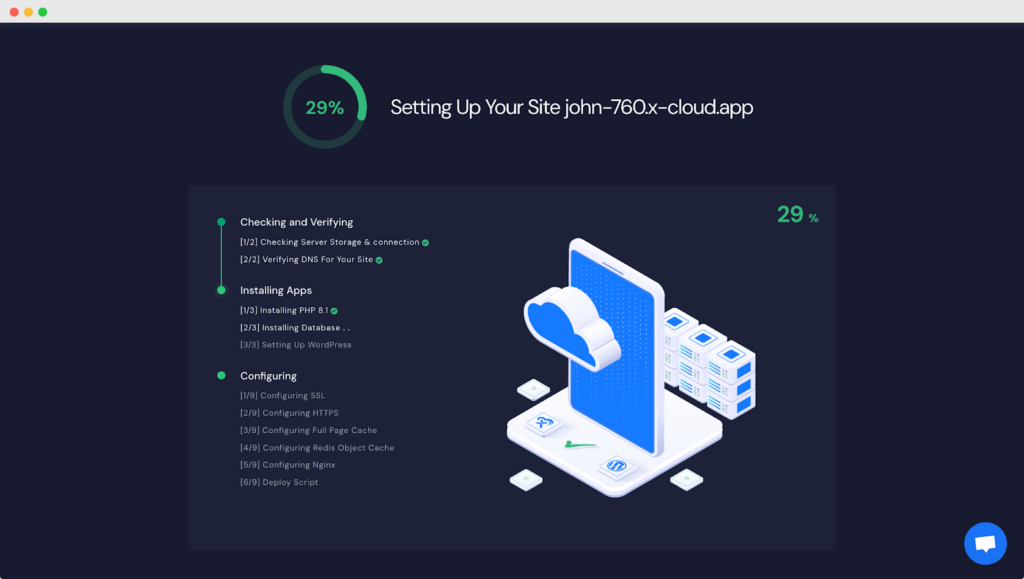
Step 5: Review Your WordPress Settings #
After all the information, you can review your settings. Here you will get an overall report of your Domain Name, HTTPS Settings, WordPress Version, PHP Version, and much more.
After the previous step, click on the ‘Next’ button. It might take only 1-2 minutes to create your WordPress site. You are done with your creation of the first server with Google Cloud Platform.
That’s it! You’ve successfully setup the first server with Google Cloud Platform in xCloud. Now you can start working on your website, customize it, install themes/plugins (if applicable), and take advantage of xCloud’s optimized server environment for seamless site management.
Don’t have xCloud Pro access? You can integrate any server provider in xCloud to provision a server and install a site in it. Check out this documentation to find out how to provision a server with DO
How To Set Up Server With Other Providers?
Still stuck? Contact our support team for any of your queries.


