


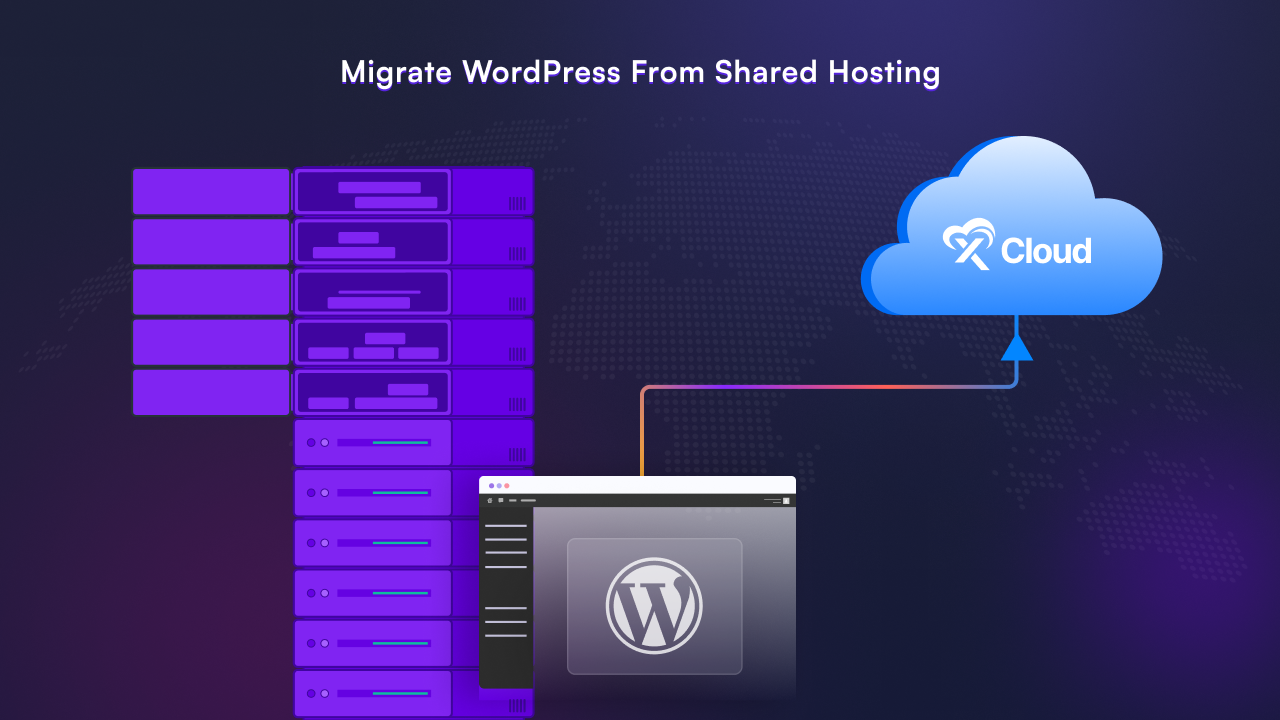
Are you ready to migrate WordPress from shared hosting to cloud servers? We understand the importance of dependable, adaptable, and secure hosting solutions to support your business growth. With a cloud server, you will have better performance that is required for your website. In this blog, we will discuss how to migrate your WordPress website at no cost. Without further ado, let’s begin.
💡 How To Migrate WordPress From Shared Hosting To Cloud Server Without Any Coding?
When it comes to choosing your cloud server, you must keep performance, scalability, security, and several other factors in mind. However, how do you ensure that you have all of these things in the right place without any coding?
That’s where you need a cloud control panel. Using a cloud control panel like xCloud, you can migrate your website from shared hosting to a cloud environment without any hassle.
Besides, xCloud offers integrations with popular cloud servers like Vulr, Digital Ocean, and Google Cloud Platform. You can even connect with any other cloud provider like Amazon Web Service and more easily.
Moreover, xCloud has a managed cloud server that you can use and forget about managing your cloud server. In this blog, we are going to show you how you can migrate your WordPress website to a cloud server in xCloud.
📋 Prerequisites To Migrate WordPress Websites To Cloud Server With xCloud
Before migrating your WordPress website, you must ensure that you have all the necessary prerequisites. These prerequisites can help you for a smooth migration. And, you should take a backup of your website so that if anything goes wrong you will be able to revert to the previous version of your site. Here are the key prerequisites to consider before starting the migration process:
- Disable 2-Factor Authentication: First of all you need to disable any 2-factor authentication from your website if there are any. It will make your migration process smooth.
- Disable Additional Security: If you have additional security options on your hosting end like Cloudways Bot protection, OR Site Grounds Security optimizer you need to disable that as well.
- Uninstall Must-Use Plugins Of Hosts: If your website has a must-have hosting plugin installed, then you have to uninstall that before starting the migration.
- Disable Any Security Plugins: If your website has a security plugin like Wordfence or any other security plugin, you need to uninstall it from your site as well.
⭐ Free 3 Ways To Migrate WordPress Website
Once you have followed the previous steps, now it’s time to migrate your WordPress website. We are showing 3 ways to migrate your website, you can follow whichever feels easier for you.
1. WordPress Migration With Migrate Guru Plugin
Migrate Guru Plugin can help you bring your WordPress website from shared hosting to a cloud server. It has an easy process of migrating or transferring hosting providers. Follow the step-by-step guidelines to migrate your website with the Migrate Guru plugin.
Step 1: Create Your Destination Website In xCloud
First of all, log in to your xCloud account and create a destination website or staging website. Once you have a destination or staging website ready now you can go to the next step.
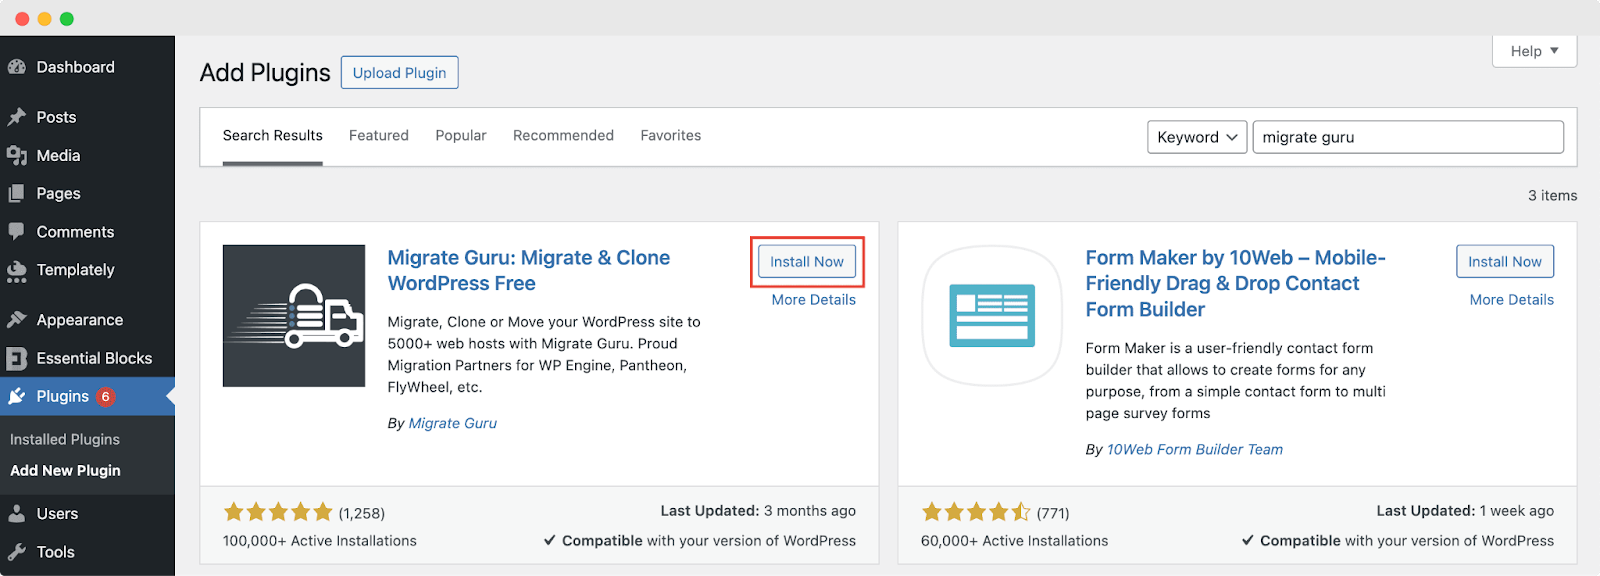
Step 2: Install The Migrate Guru Plugin
Afterward, you need to install the Migrate Guru plugin on your Source site and the Destination site.
So, from your WordPress dashboard go to the ‘Plugins’ option and search for ‘Migrate Guru’ to install and activate it.
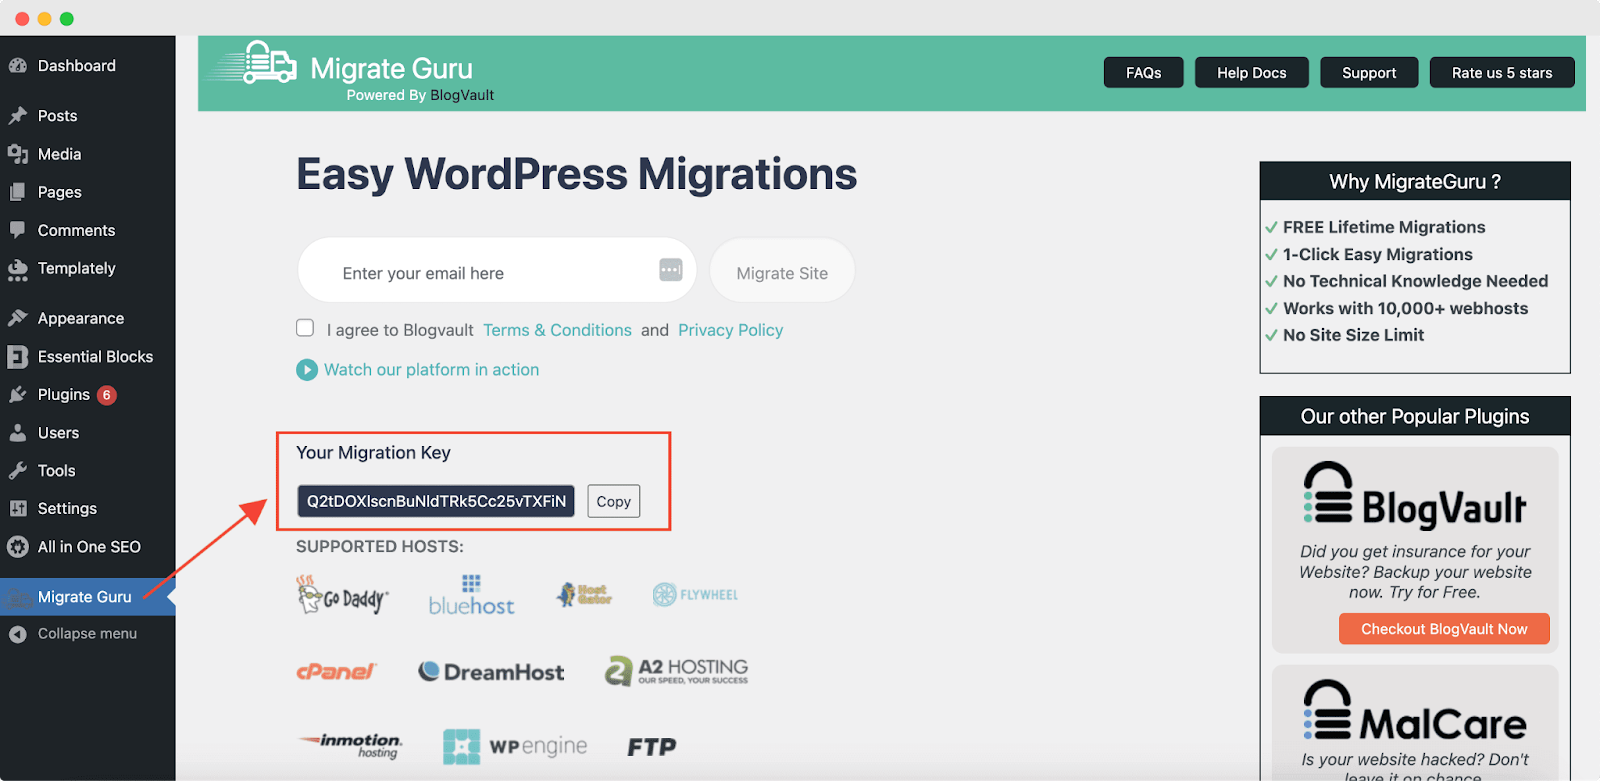
Step 3: Collect the Migration Key From the Destination Site
Afterward, retrieve your migration key from the destination website. So, go to your destination website in xCloud and navigate to the Migrate Guru plugin tab. Click on the ‘Migration Key’ text and copy it from there.
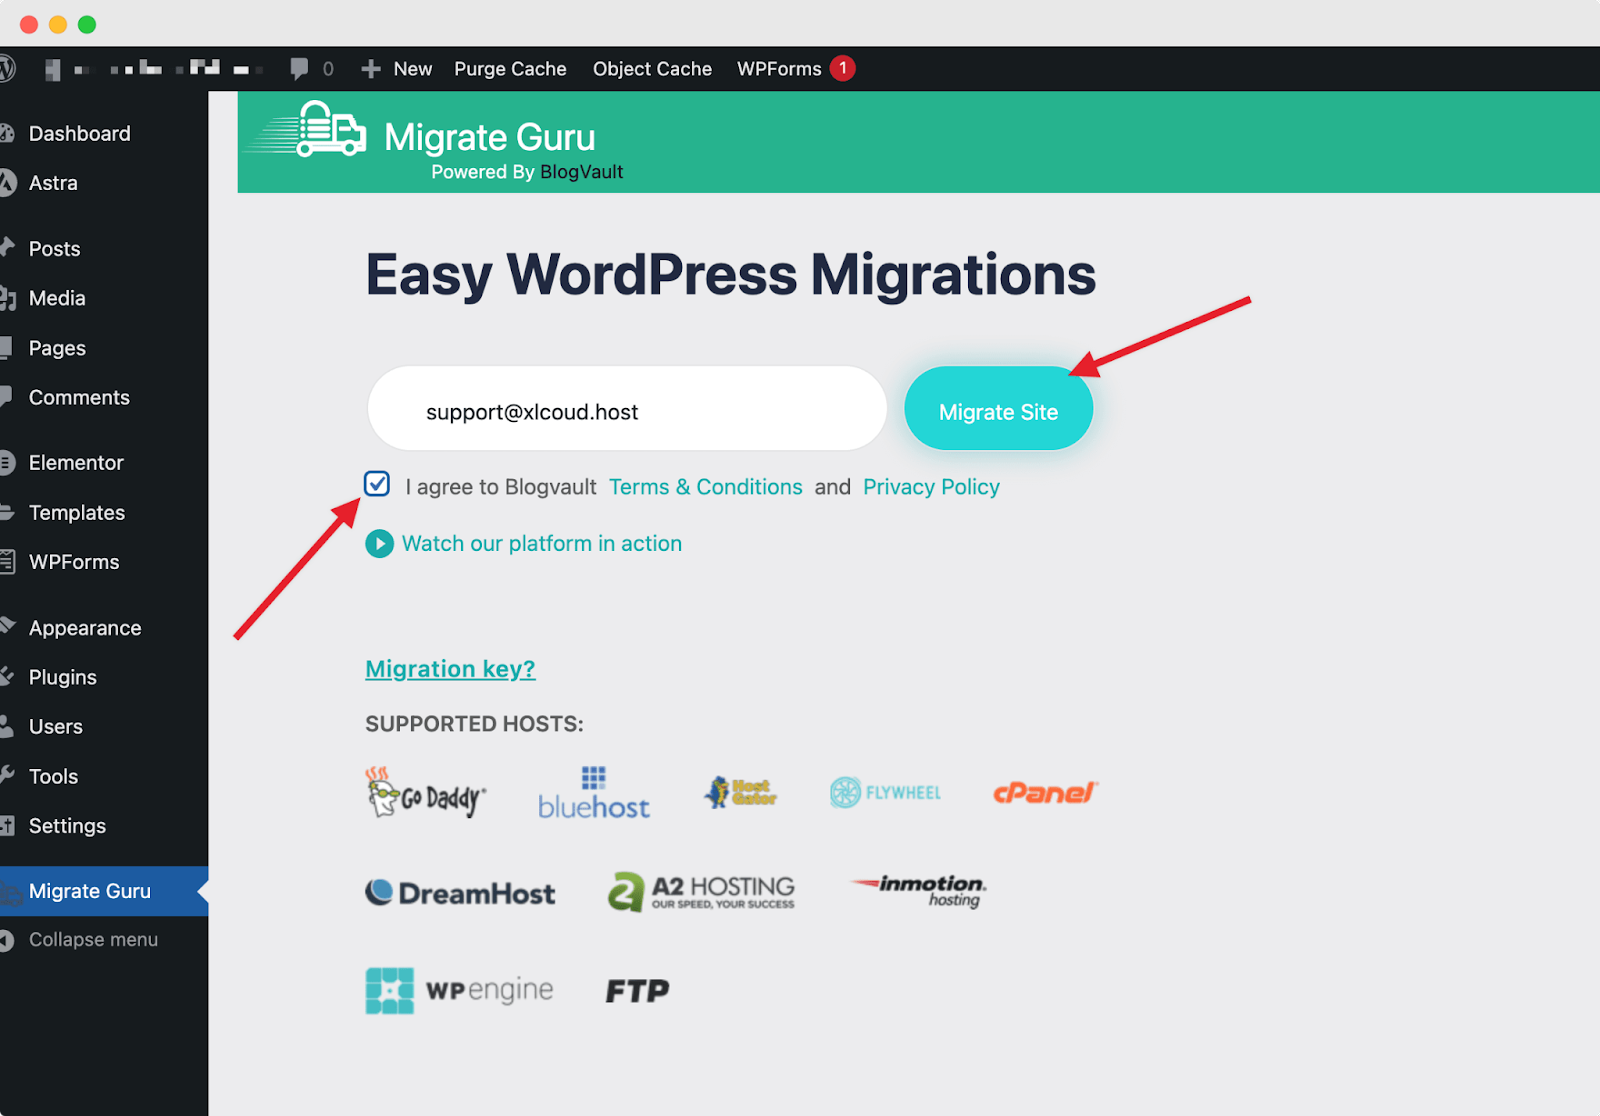
Step 4: Migrate Your Source Website
On your source website click on the ‘Migrate Site’ button after entering your email address. Also, you need to agree with Blogvault’s terms and conditions and privacy policy.
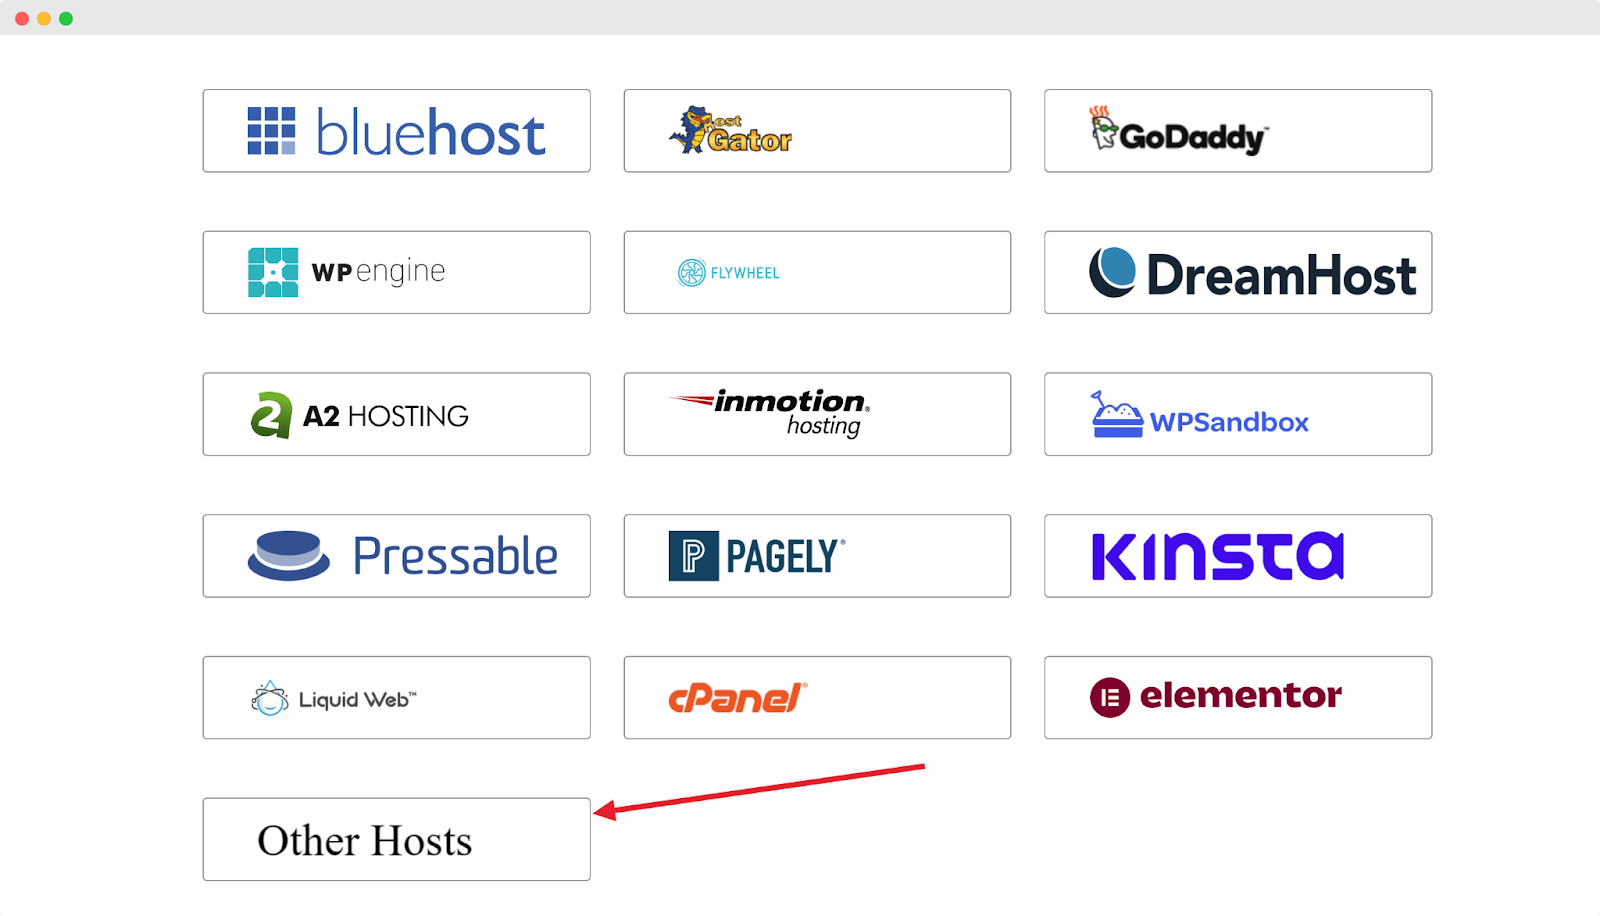
Step 5: Select The Host You Are Migrating To
Now select your destination hosting source from the next page. Scroll to the bottom and click on the ‘Other Hosts’ option.
Step 6: Enter The Migration Key To Your Source Site
Afterward, enter the migration key that you collected before, and click on the ‘Migrate’ button.
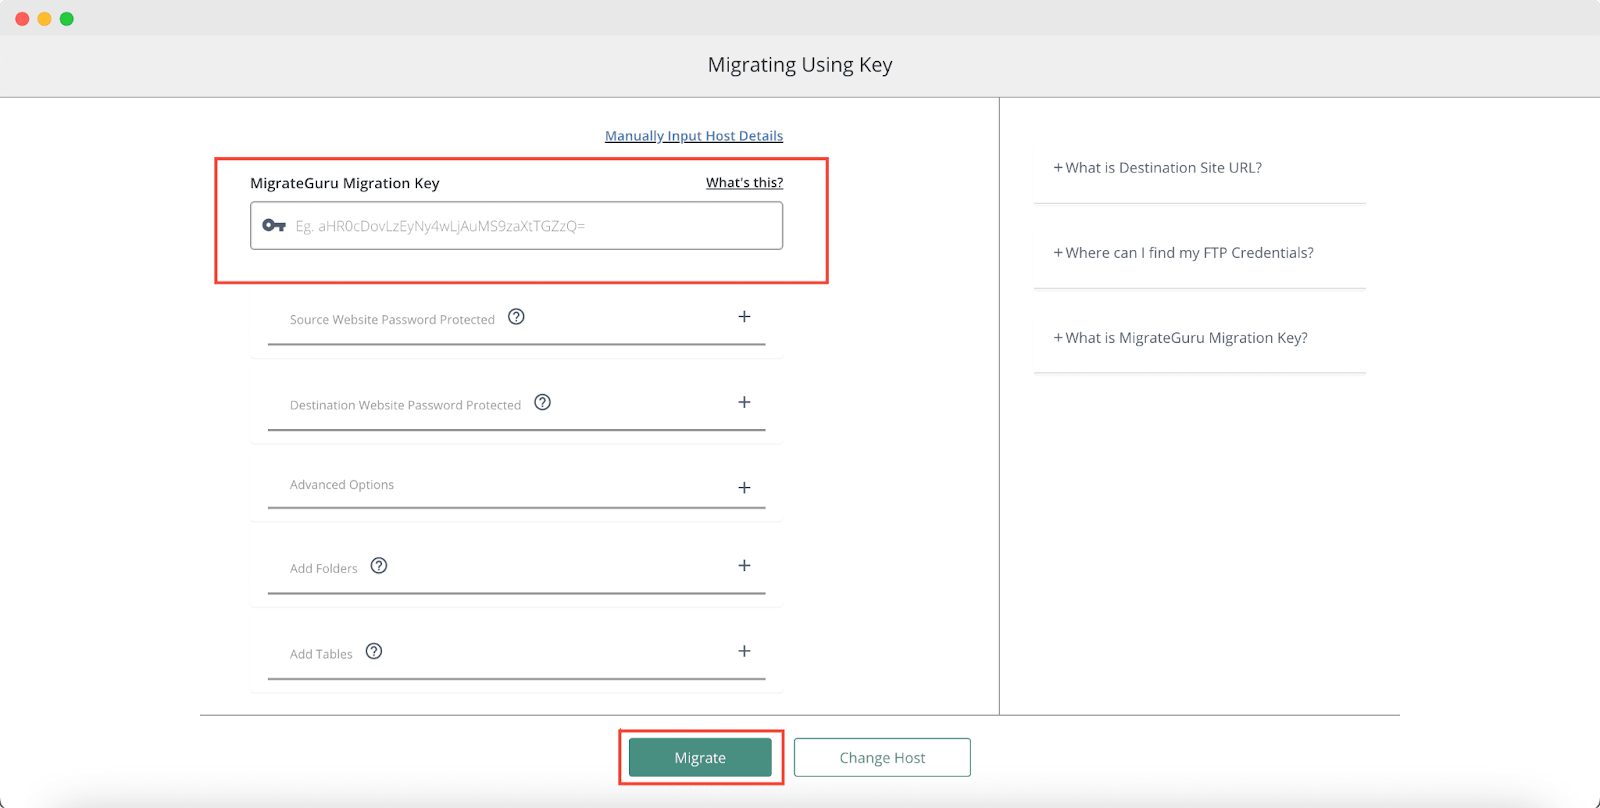
This will instantly start migrating your development website to your destination website on xCloud.
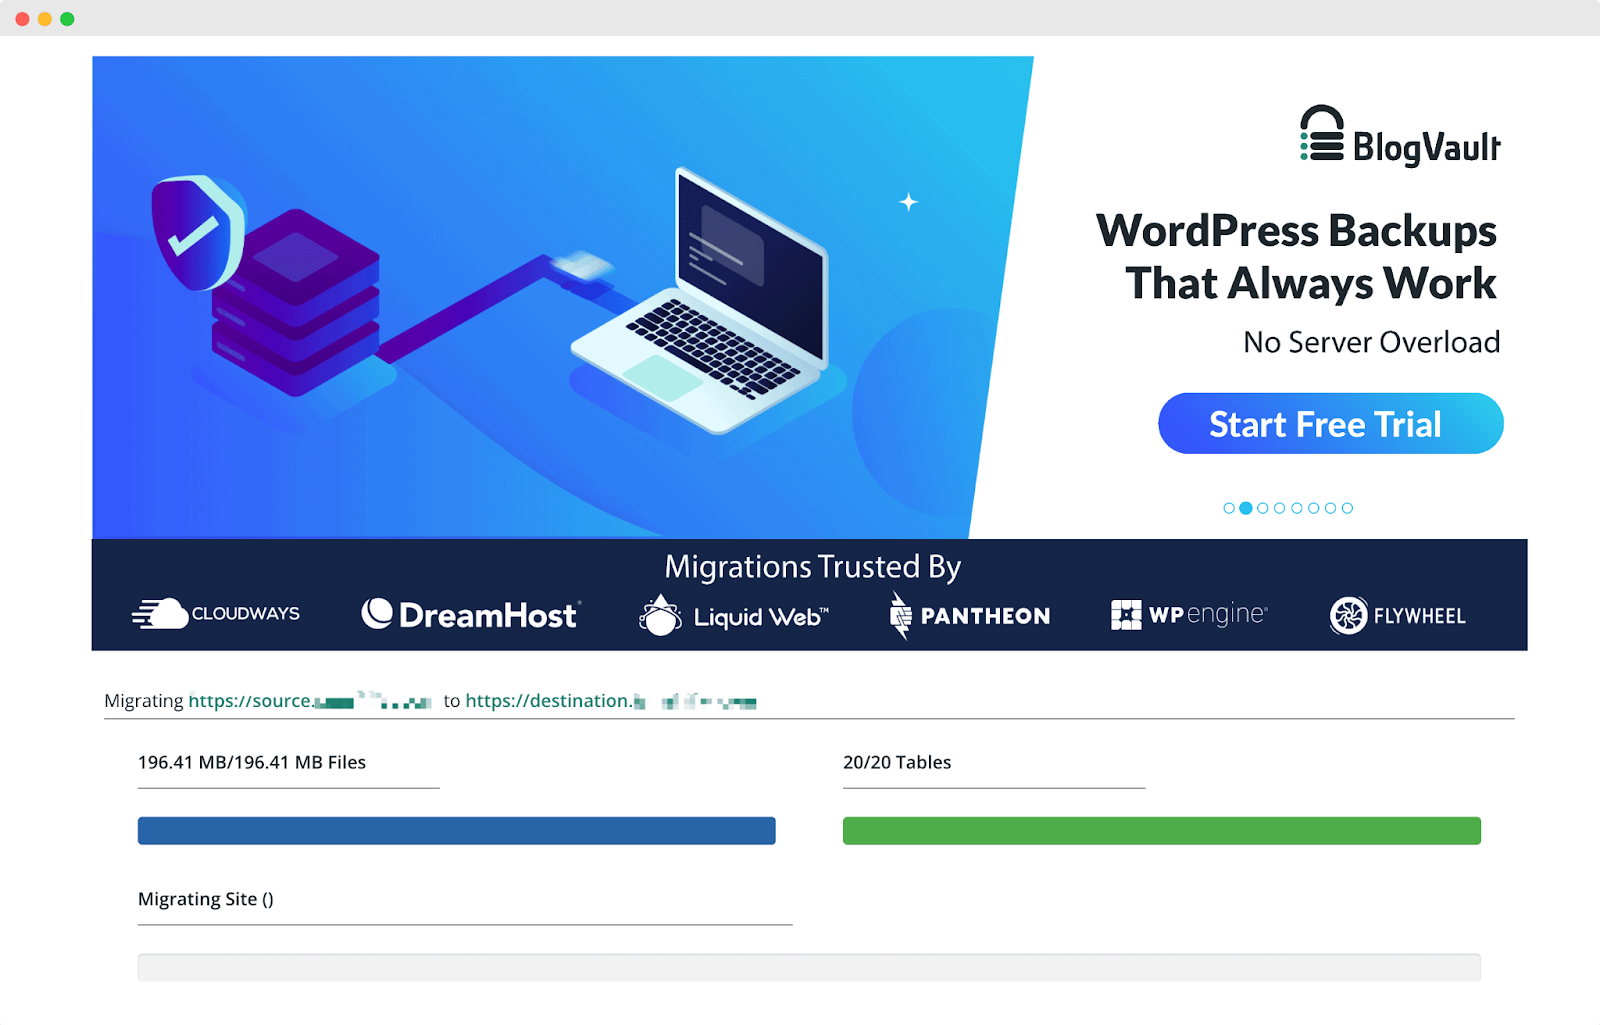
Step 7: Log In With Your Source Website’s Credentials
Once the migration is complete, you will need the source website login credentials to enter the admin panel of your migrated website. This is how you can easily migrate a website with Migrate Guru in xCloud. For more information, you can check out this documentation.
2. Manually Uploading WordPress Websites
You can manually upload your WordPress websites on xCloud without any hassle. To do that, you need to export your WordPress website and its SQL File first. In this way, you can easily migrate any of your WordPress websites from any hosting platform to the xCloud at ease. Follow the steps below to manually upload your WordPress website.
Step 1: Create A New Site On xCloud
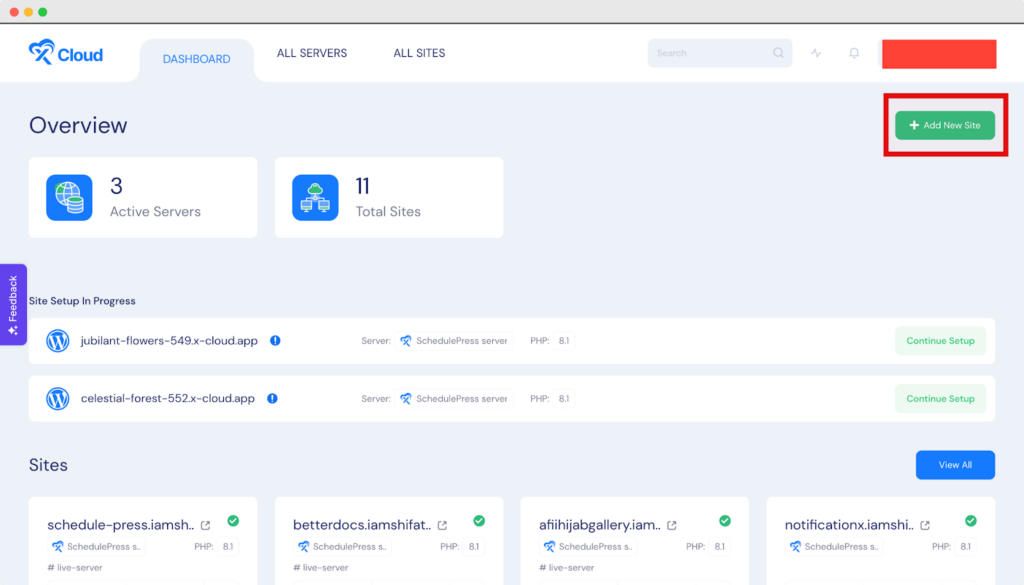
First of all, log in to xCloud and then click on ‘New Site’ from the xCloud dashboard. Then choose the cloud server where you want to upload your website. Afterward, you will be redirected to the xCloud site creation dashboard.
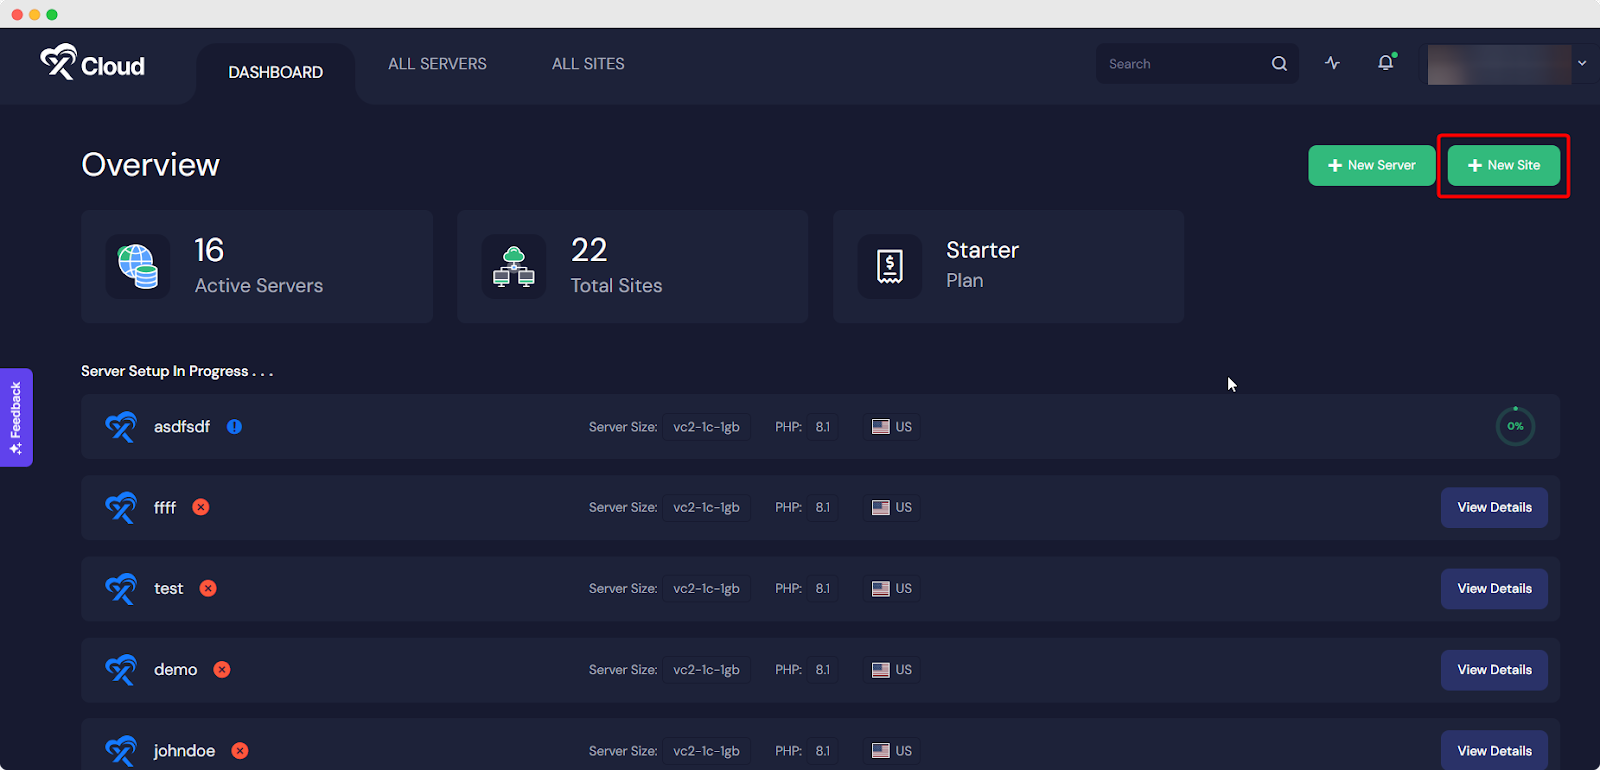
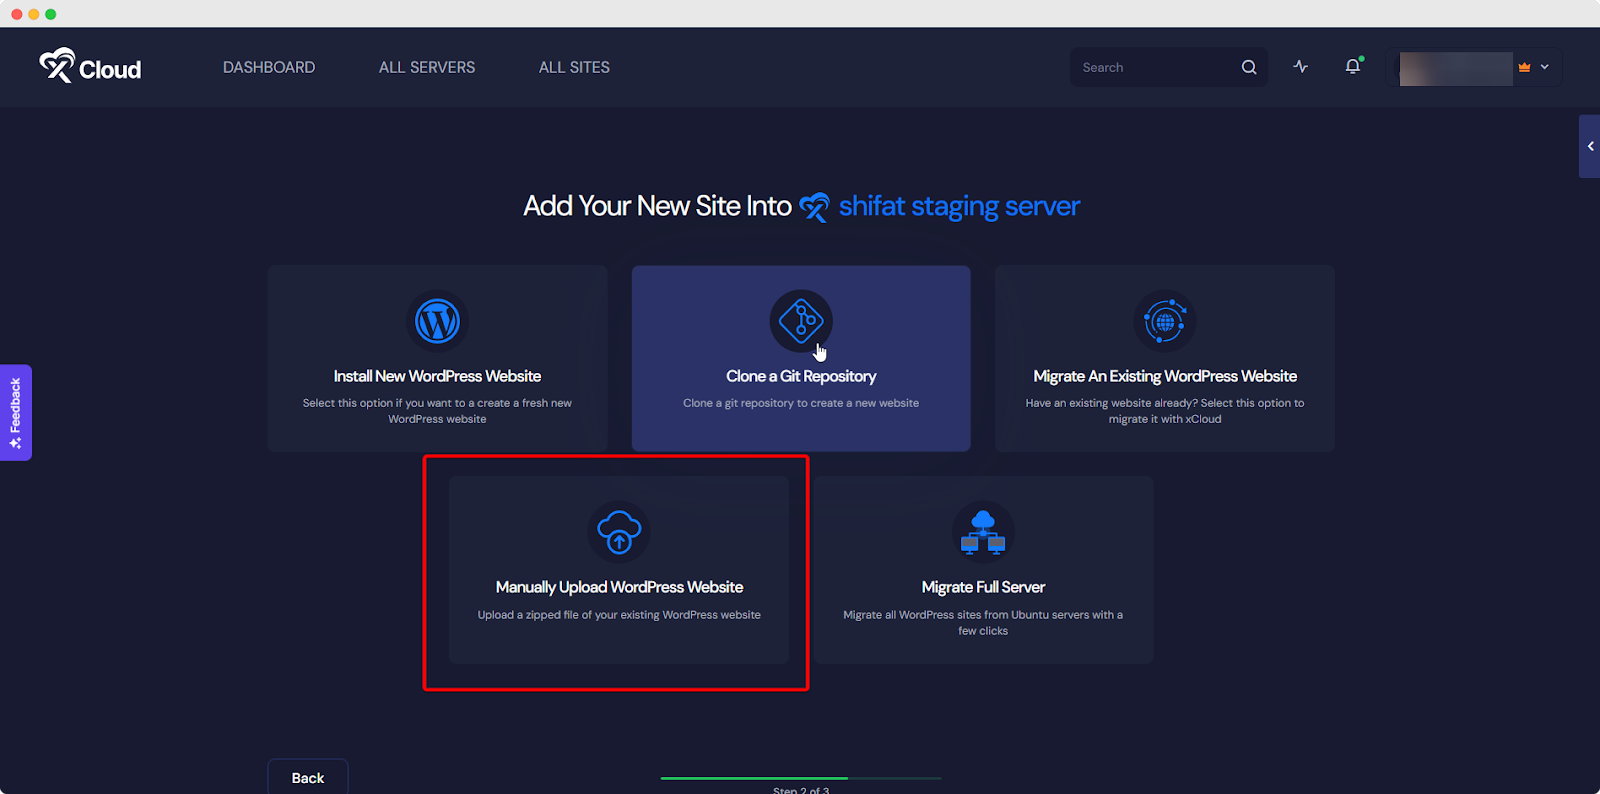
Now, choose the ‘Manually Upload WordPress Website’ option. This option will allow you to upload your website on xCloud and migrate to a cloud server.
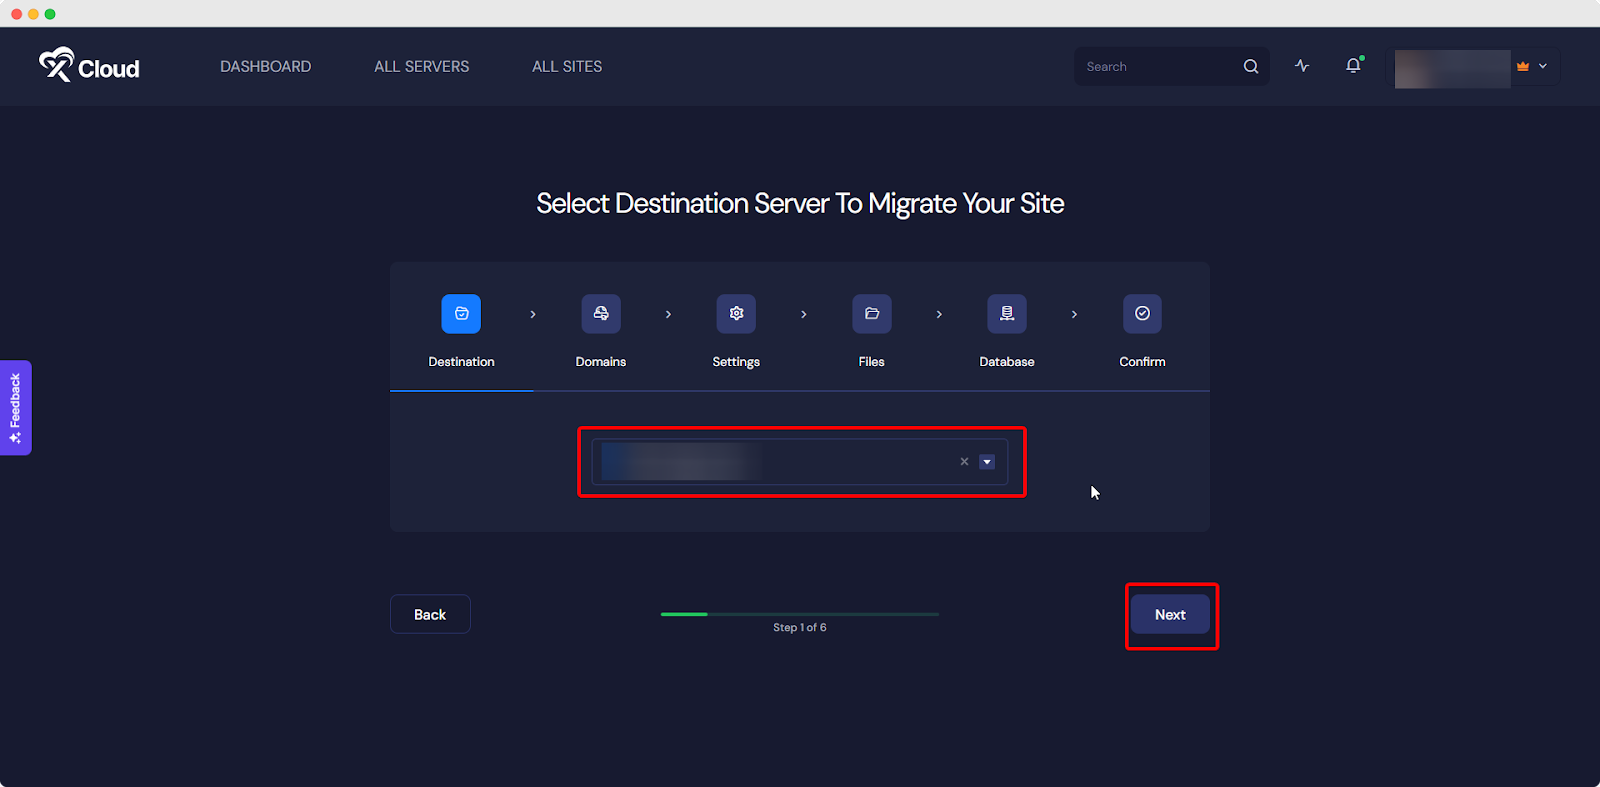
Step 2: Select The Destination Server
Now, you need to select the destination server to where you want to migrate your WordPress website.
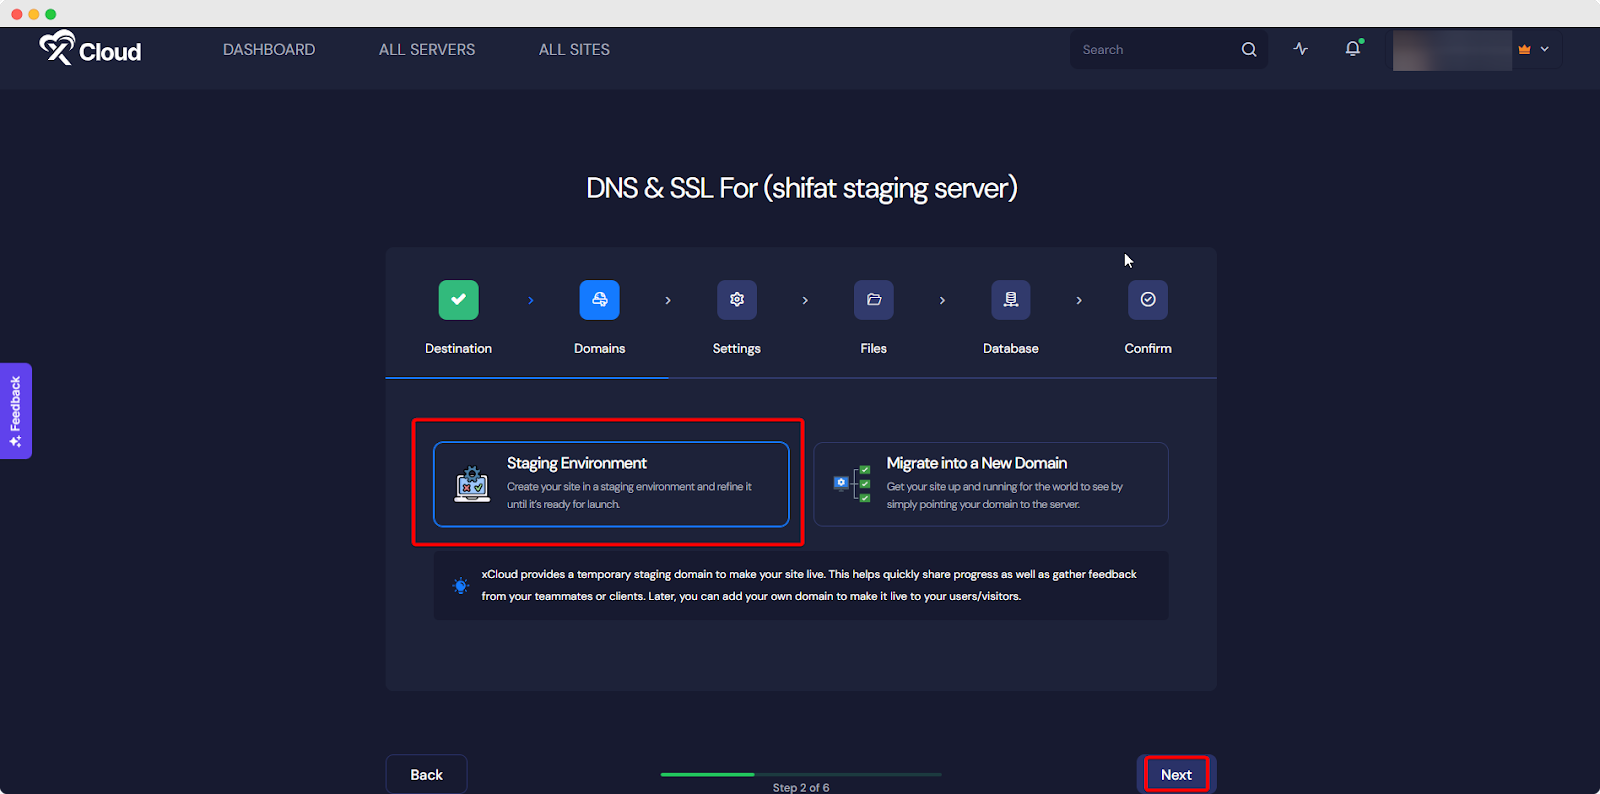
Add your source site URL and Select ‘Staging Environment’ before clicking on the ‘Next’ button.
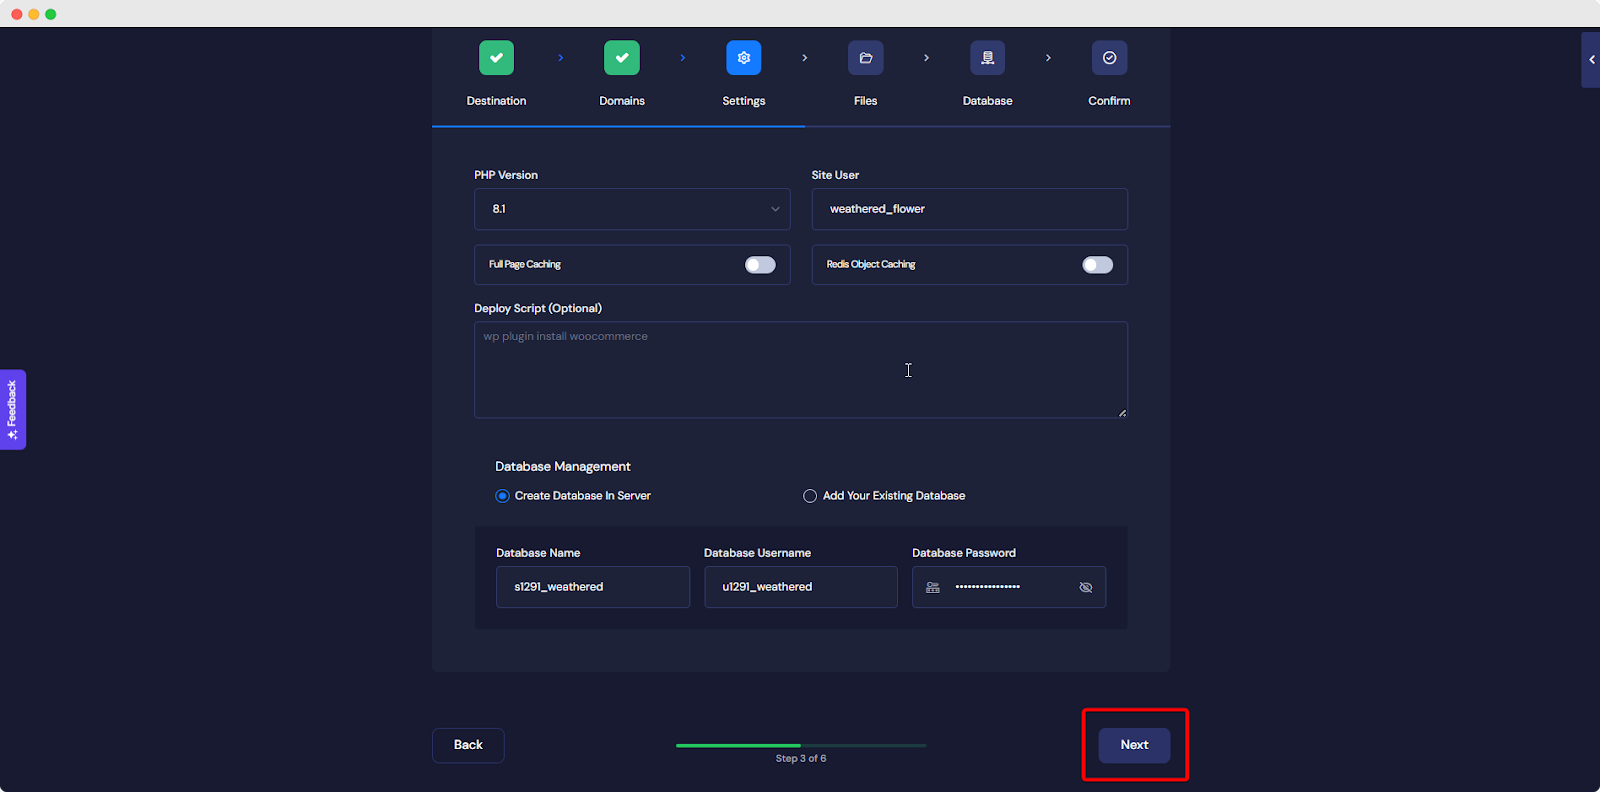
Now, add your PHP Version, Prefix, Site Users, and other details. Once you are done click on the ‘Next’ button.
Step 3: Upload The Exported Zip File & SQL File
Now, you need to upload your exported WordPress file and click on the ‘Next’ button. In the next step, you have to upload your SQL file.
So, upload your SQL file in the next step. Then click on the ‘Next’ button then you will be redirected to the final step.
Step 4: Complete Database Settings & Finalize
Now, configure your preferred database setup, and click on the ‘Start’ button. It will start the process of uploading your WordPress website.
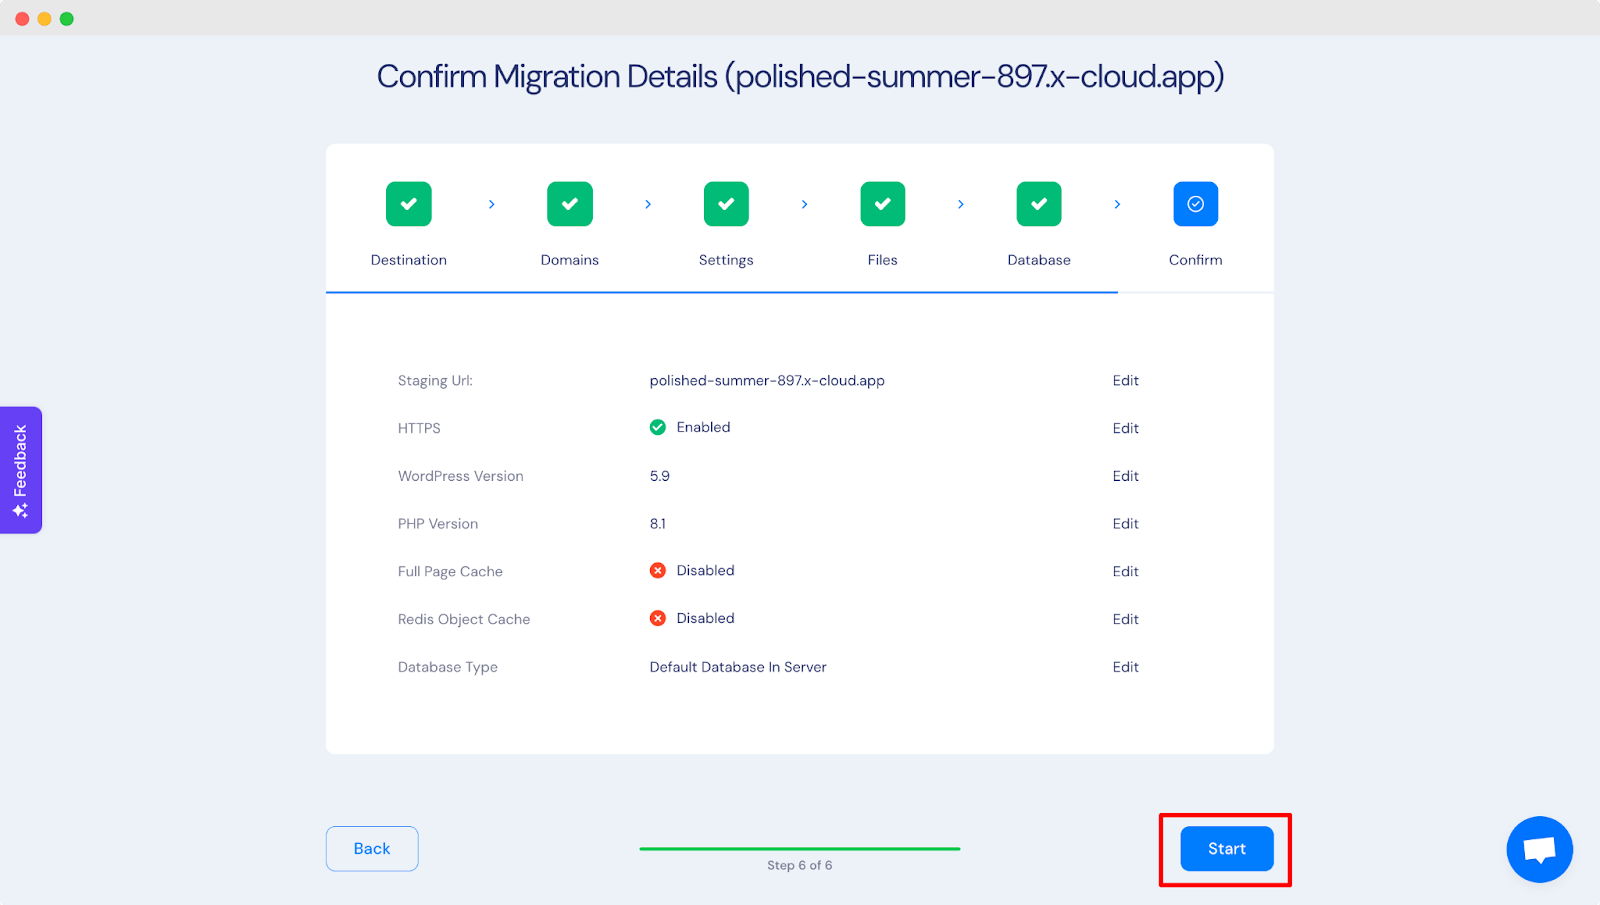
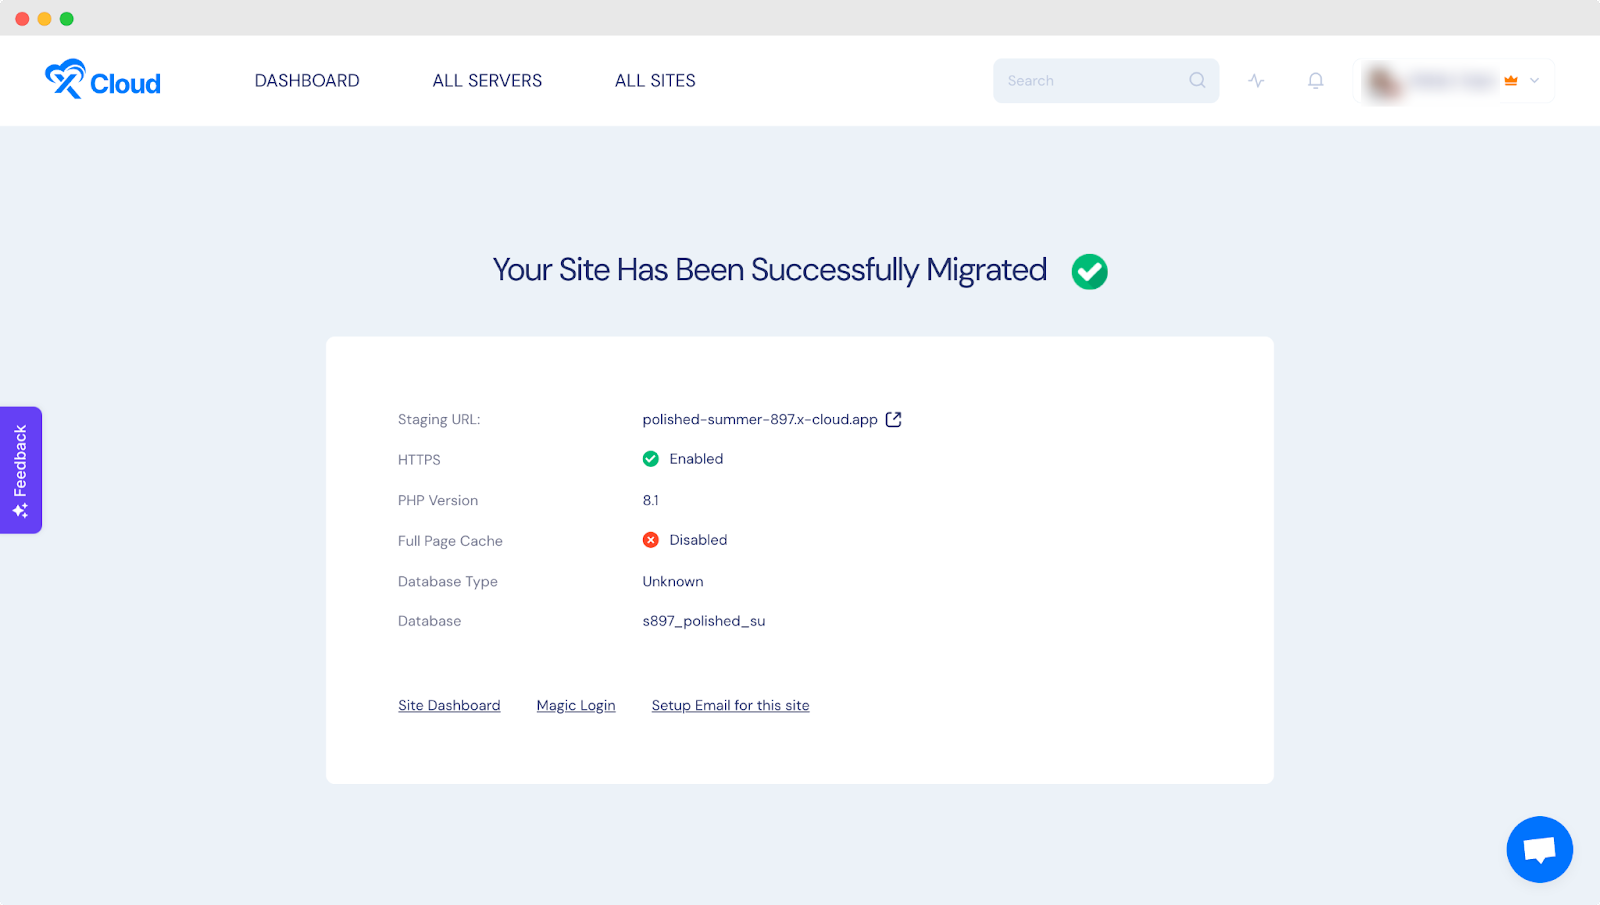
Once the migration is complete you can go to your site dashboard from the next screen.
This is how you can manually upload WordPress Websites On xCloud with ease. You can check out this documentation for more details.
3. WordPress Migration With xCloud Plugin
xCloud has a migration plugin that you can use to migrate your WordPress website to a cloud server. In this step, we will show you how you can migrate your WordPress site with the xCloud migration plugin.
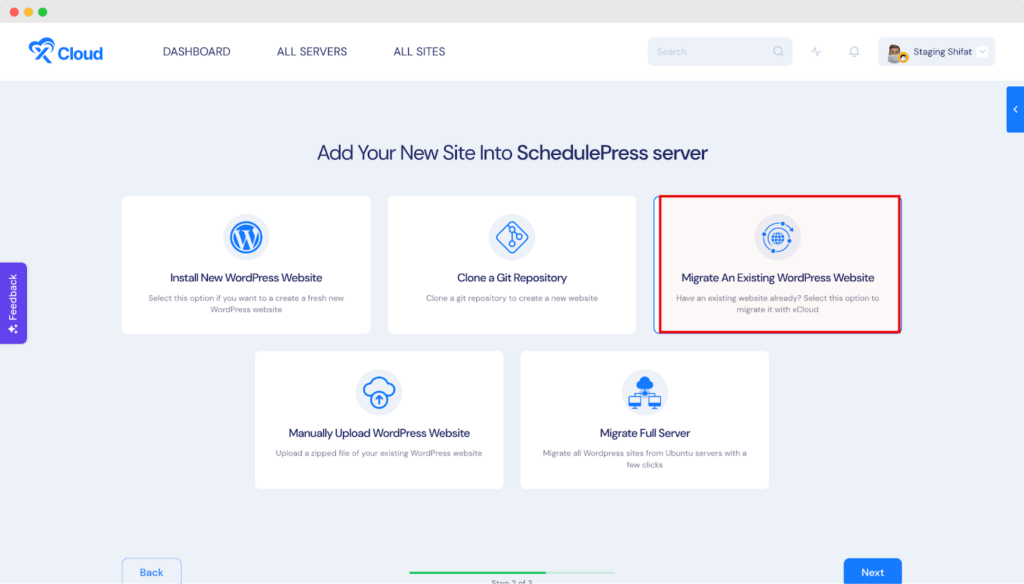
Step 1: Create A New Site
First of all, log in to xCloud and click on ‘Add New Site’ from the xCloud dashboard. Then choose the server where you want to migrate your website.
Now, Click on ‘Migrate An Existing WordPress Website’ to migrate your WordPress website with the xCloud migration plugin.
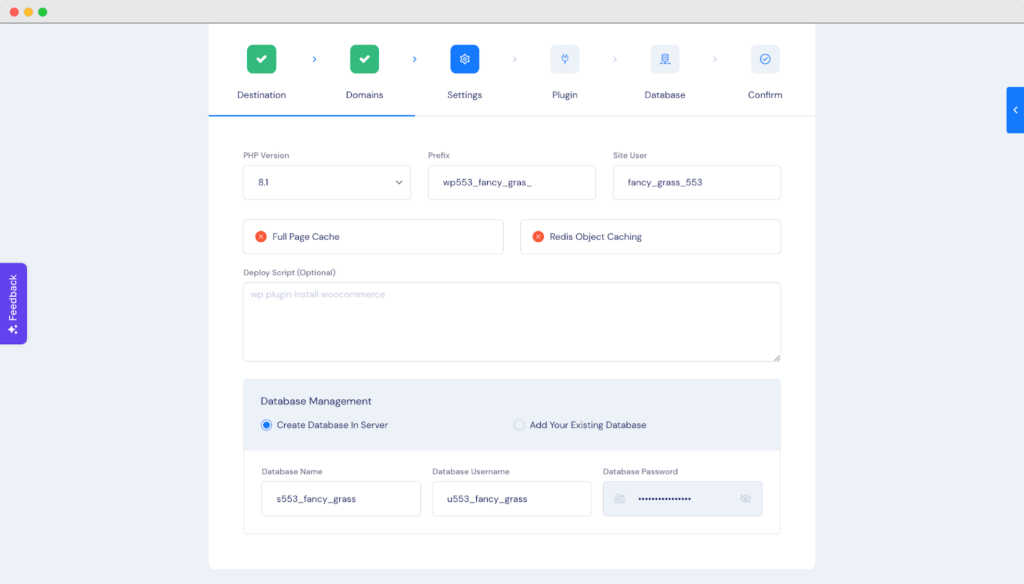
Step 2: Add Information To Migrate An Existing WordPress Website
Now, choose the destination server to migrate your site and add your source site URL. Then select ‘Staging Environment’ before clicking on the ‘Next’ button.

From the ‘Settings’ page add your PHP Version, Prefix, Site Users, and others. Make sure you are providing the correct information here.
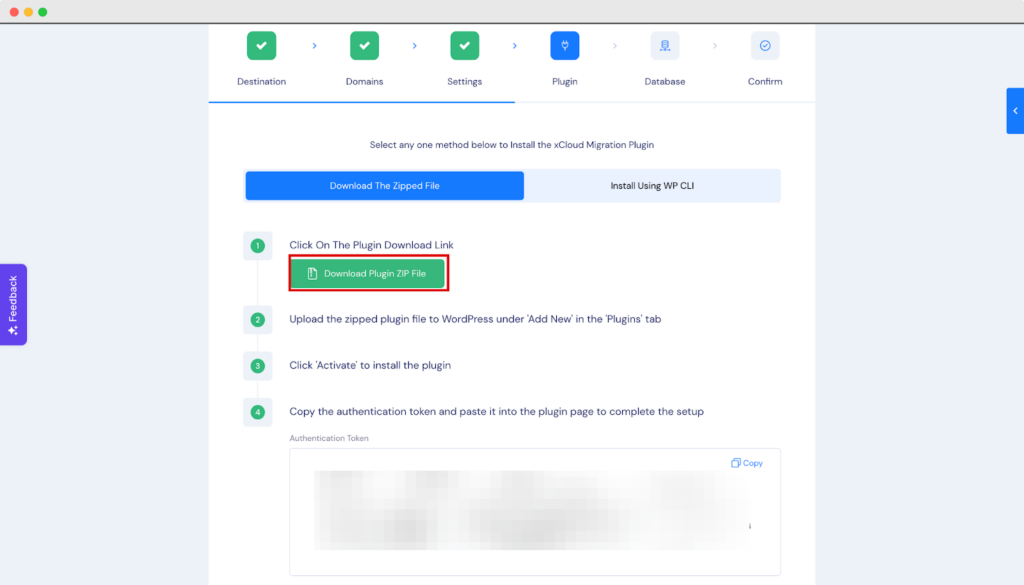
Step 3: Add Plugin File & Authentication Token To WordPress Site
Now, download the plugin file, and copy the authentication token from there. You will have to paste it later to your WordPress site.
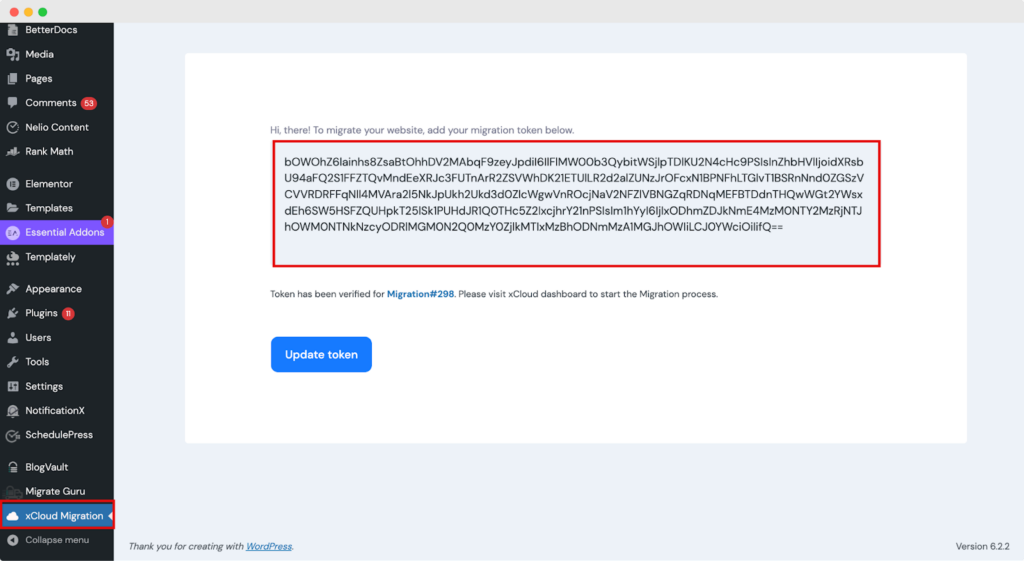
Now, install and activate the xCloud migration plugin on your WordPress website. Go to the migration plugin and paste the access token you have copied. Then click on ‘Update Token’ to save all your progress.
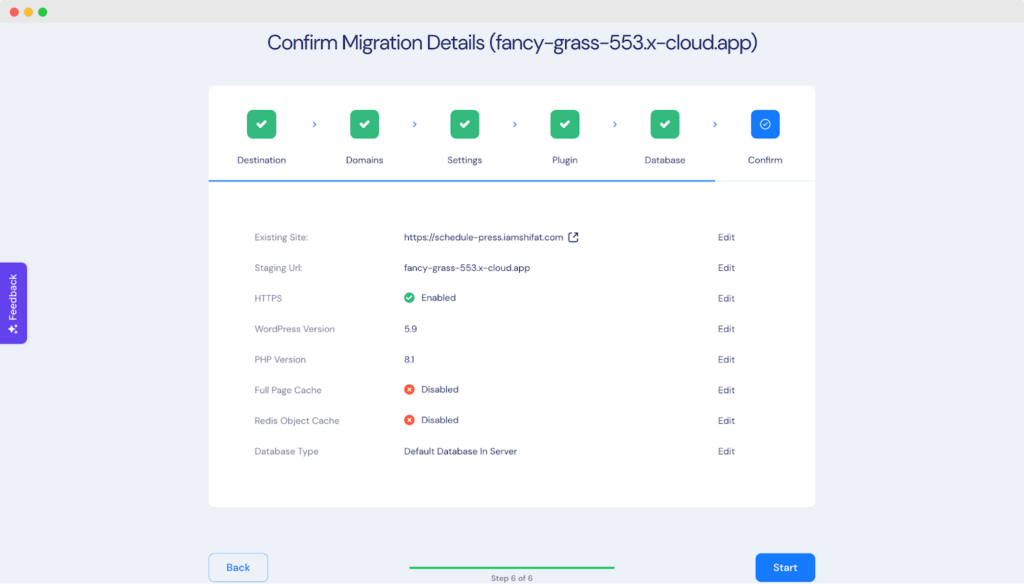
Step 4: Complete Database Settings & Finalize
Configure your preferred database setup as you need. After that, click on the ‘Next’ button to start the migration process.
This is how you can migrate an existing WordPress website with the xCloud migration plugin. You can check out this documentation for more information.
Enjoy The Experience Of Cloud Servers & Scale Up Your Business
We hope this detailed guideline helped you migrate WordPress from shared hosting to cloud servers. If you need any help migrating your WordPress website to xCloud, you can reach out to the support team. So, don’t wait anymore. Enjoy the seamless experience of cloud servers and scale up your business.
Did you find this blog helpful? If you do, please subscribe to our blog, and don’t forget to join our Facebook Community to engage with our cloud server enthusiasts.