


With xCloud, you can manually upload WordPress Websites On xCloud without any hassle. Follow the step-by-step guide below to get started.
Prerequisites To Manually Upload WordPress Websites On xCloud: #
- Disable 2FA if there are any.
- Disable additional security like Cloudways Bot protection, OR Site Grounds Security optimizer from your hosting end.
- Uninstall Must use plugins of hosts.
- Clear Cache and disable cache plugins like Object Cache PRO
- Disable Wordfence or any other security plugins.
Step 1: Create A New Site #
First, you have to log in to xCloud with your credentials. Then click on ‘New Site’ from the xCloud dashboard.
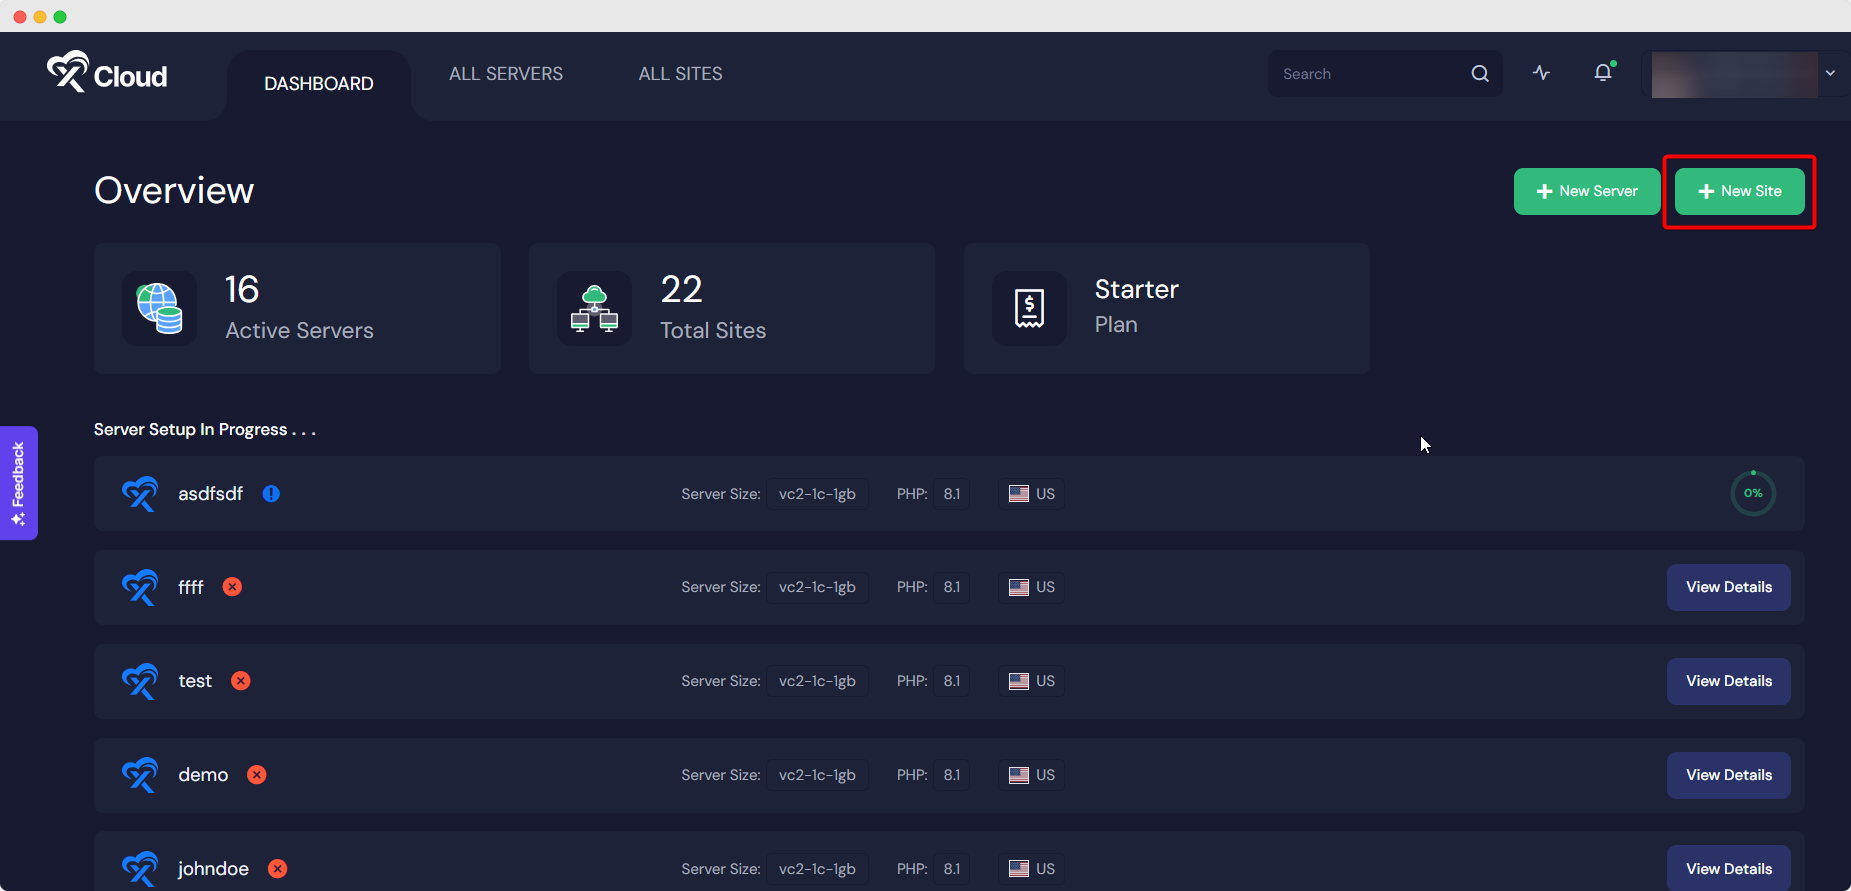
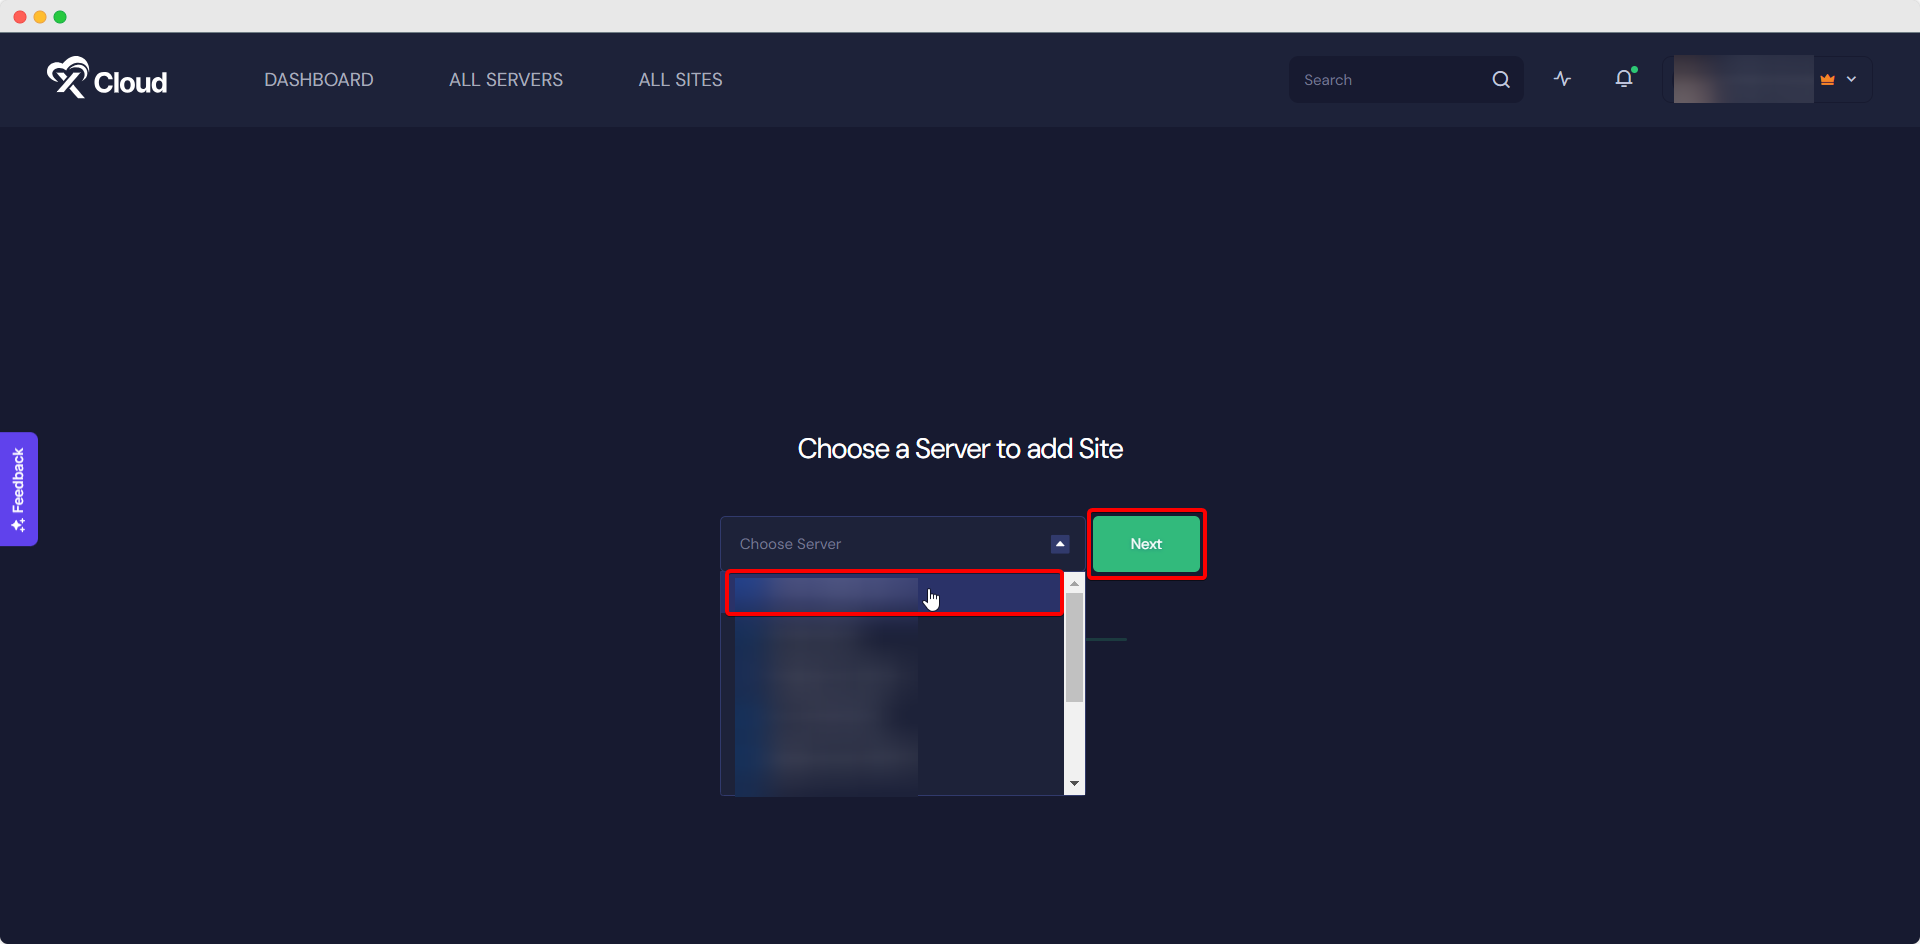
After that, you have to choose your server to upload your site. Click on the ‘Choose Server’ field and select your server from the drop-down and before clicking on the ‘Next’ button.
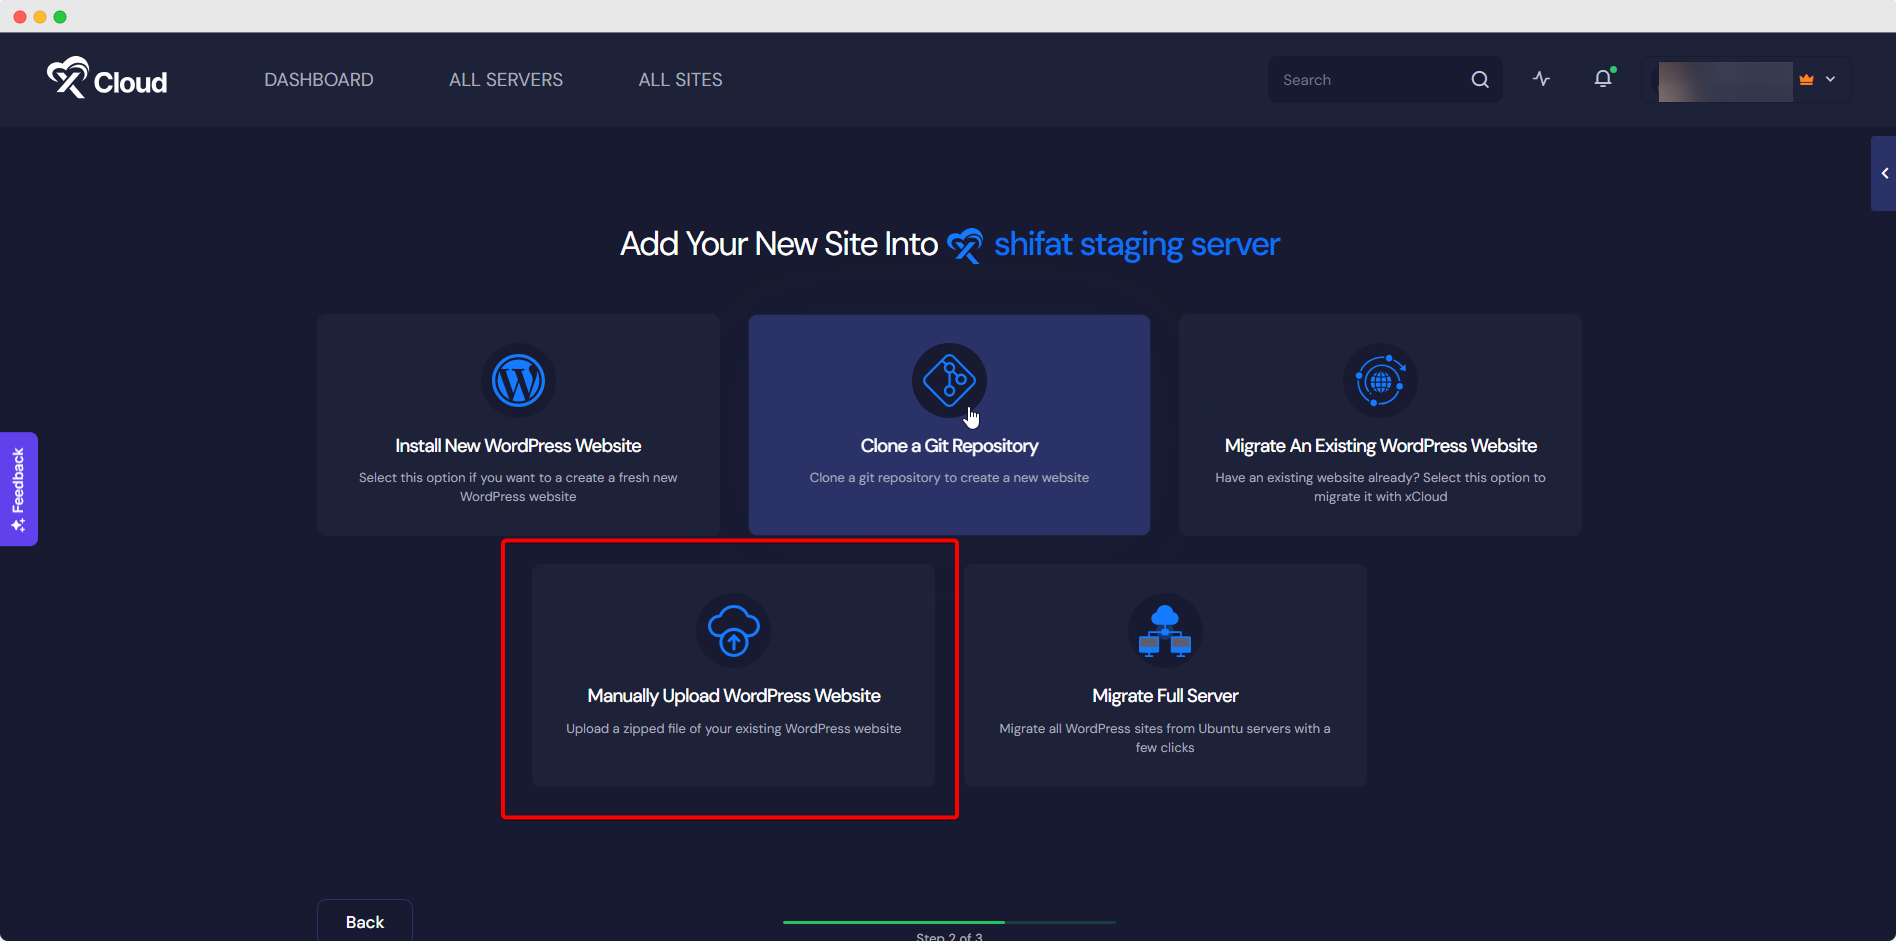
Now, you will be redirected site creation dashboard. Click on the ‘Manually Upload WordPress Website’ option.
Step 2: Add Information To Manually Upload WordPress Website #
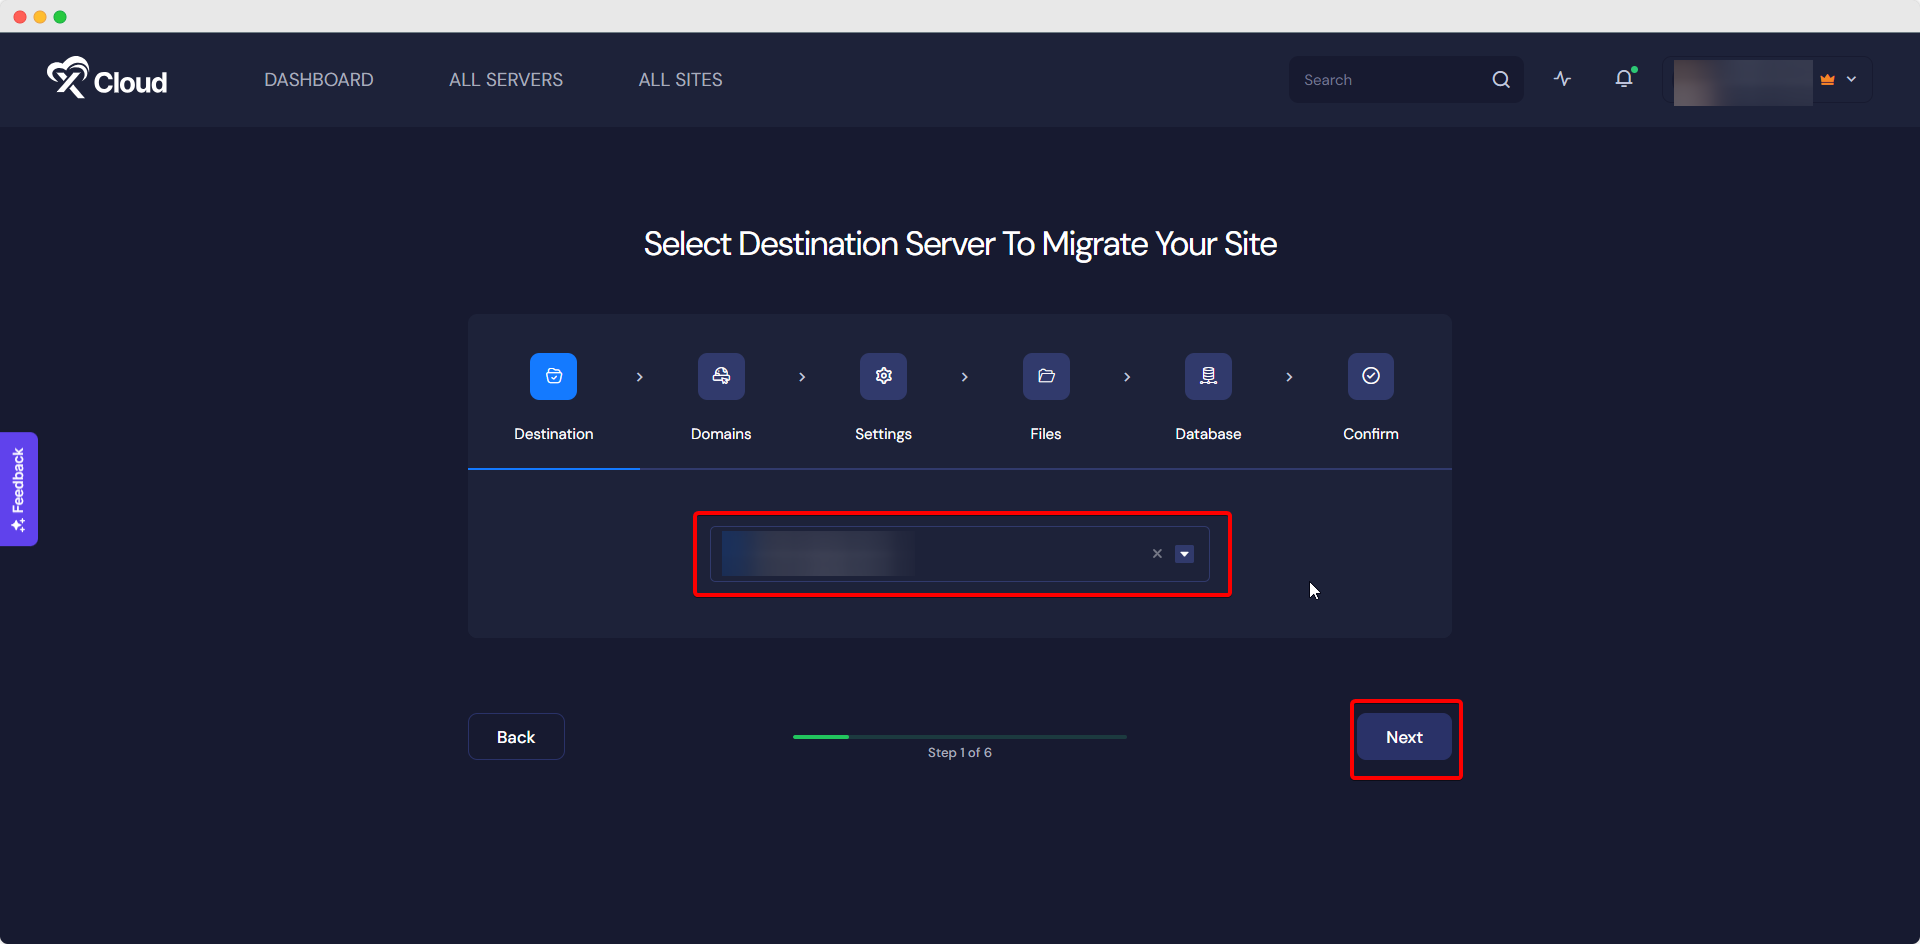
Now, select the destination server to migrate your site. Afterward, click on the ‘Next’ button.
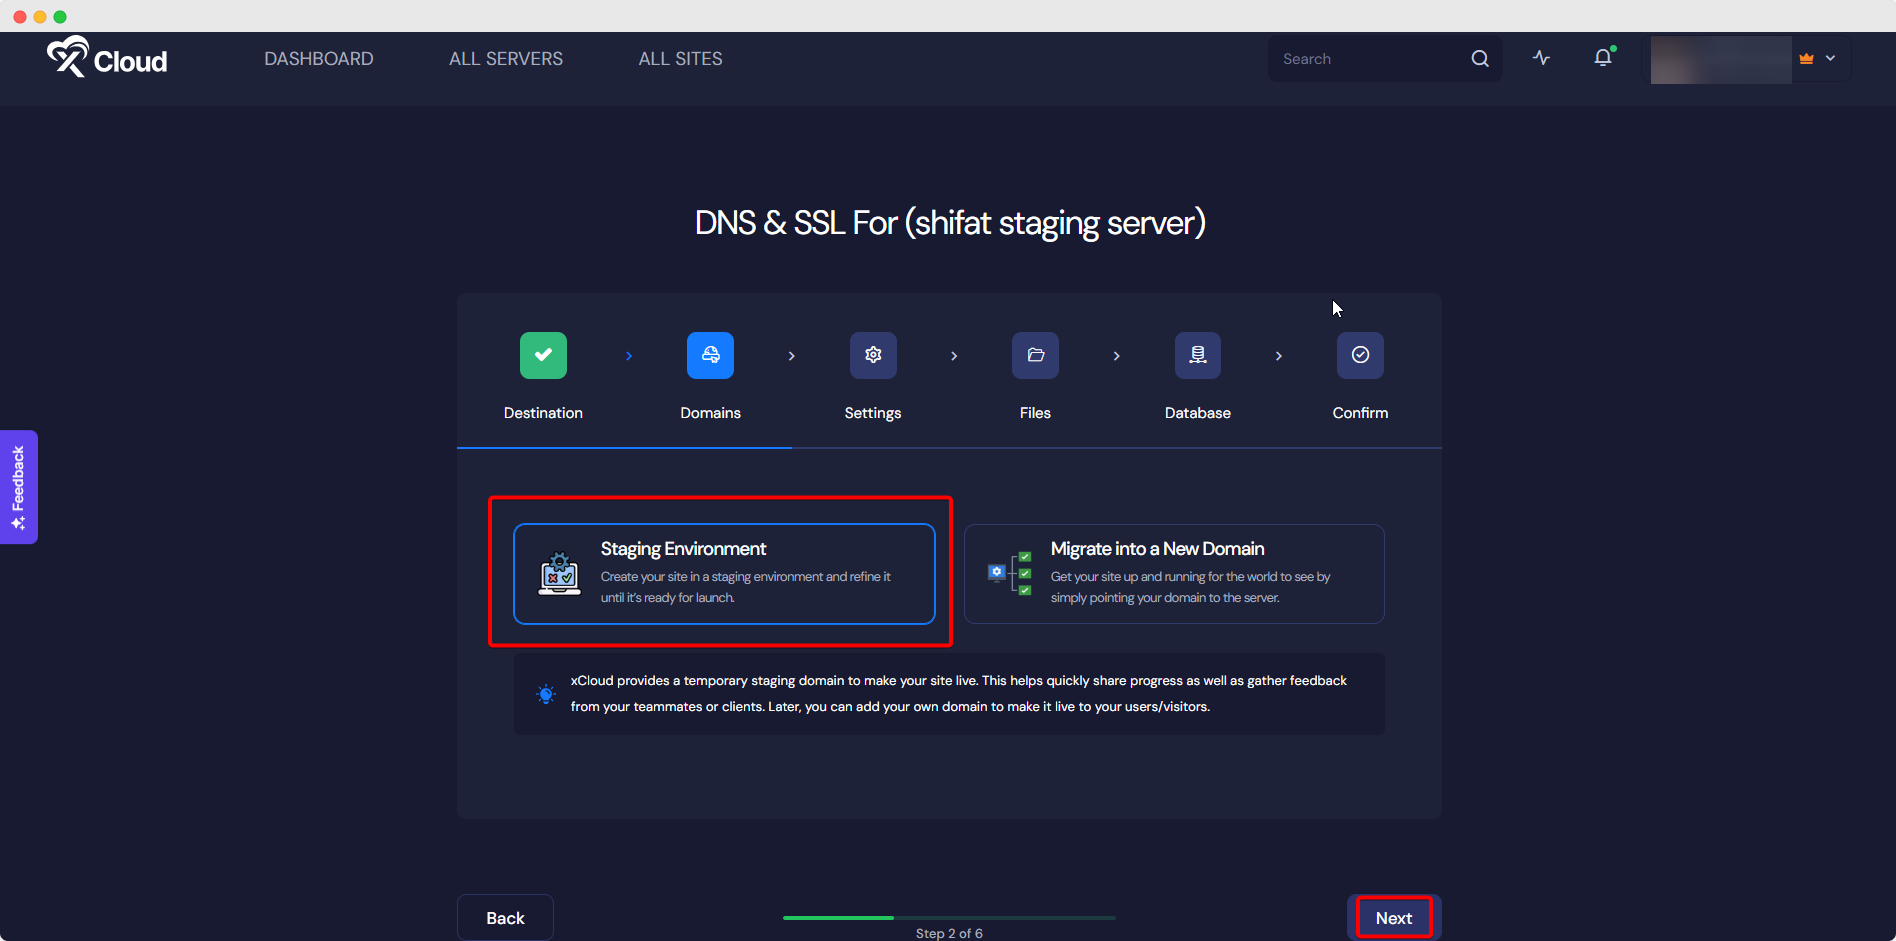
In the next step, you need to add your source site URL. And if you choose to migrate to a new domain you can include your custom domain. xCloud offers a staging environment and with it, you can upload your site and visit it live with a temporary domain. After successfully uploading your site, you may update the site with your custom domain later.
In this tutorial, we will be working on a staging site. Select ‘Staging Environment’ and then click on the ‘Next’ button.
Now, you will be sent to the ‘Settings’ step. Make sure to correctly add your PHP Version, Prefix, Site Users, and other details before clicking the ‘Next’ button.

Step 3: Upload The Exported Zip File & SQL File #
You will be now directed to the ‘Settings’ step. Just upload your exported WordPress file as shown and click on the ‘Next’ button.
Now from the ‘Files’ step, upload your SQL file similarly. Afterward, click on the ‘Next’ button.
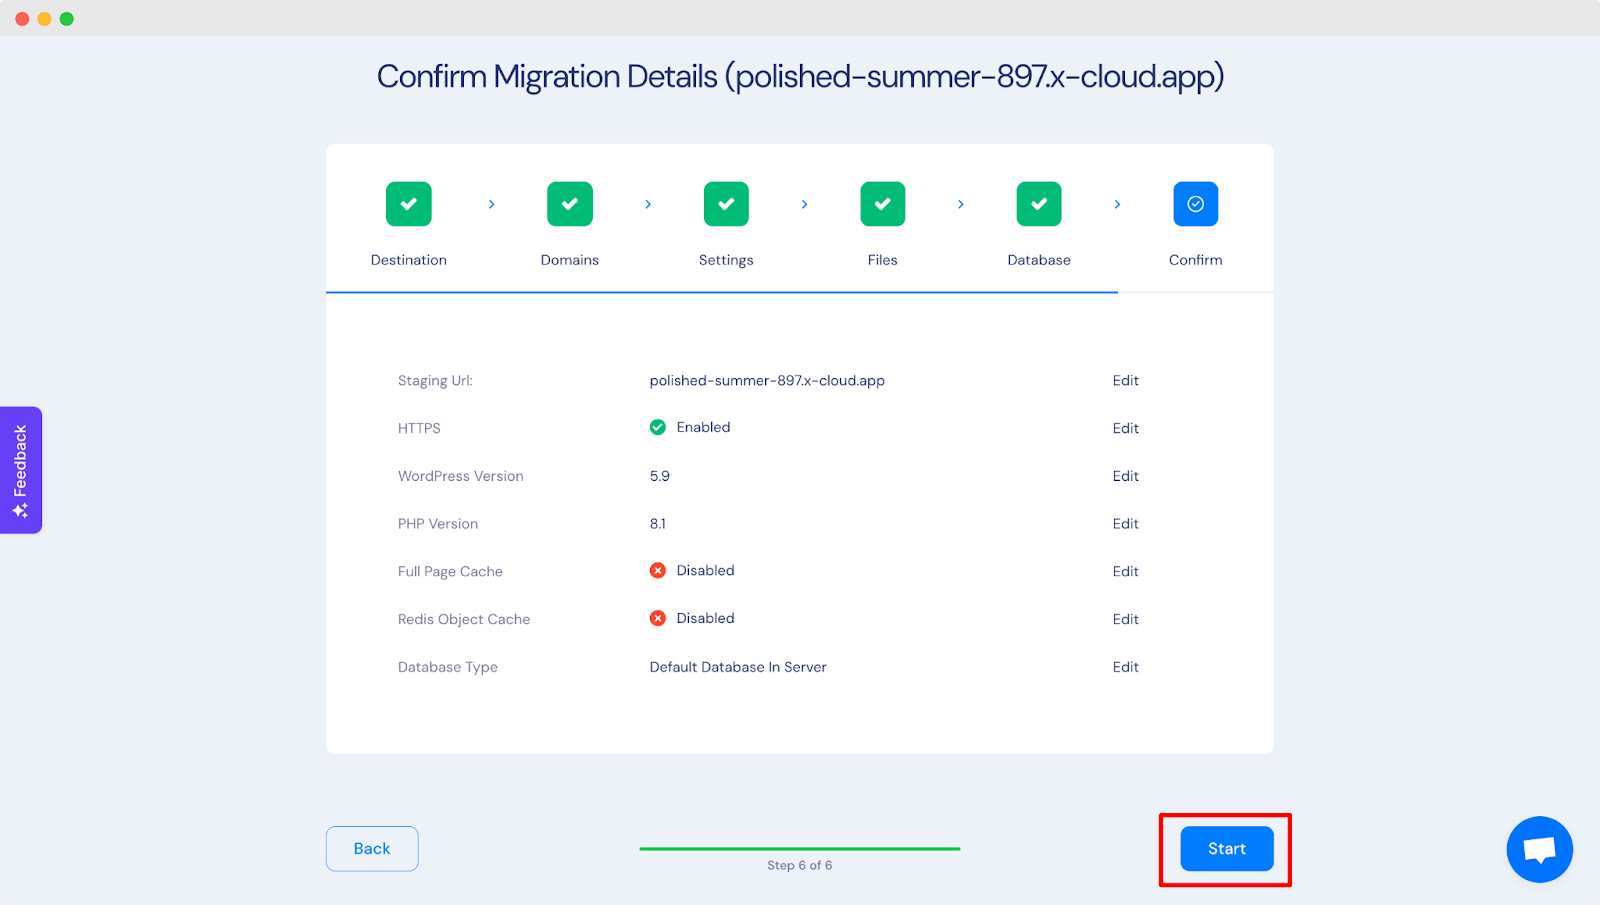
Step 4: Complete Database Settings & Finalize #
In the ‘Database’ tab you can configure your preferred database setup. If you are good to go for uploading an existing WordPress website with xCloud, click on the ‘Start’ button.
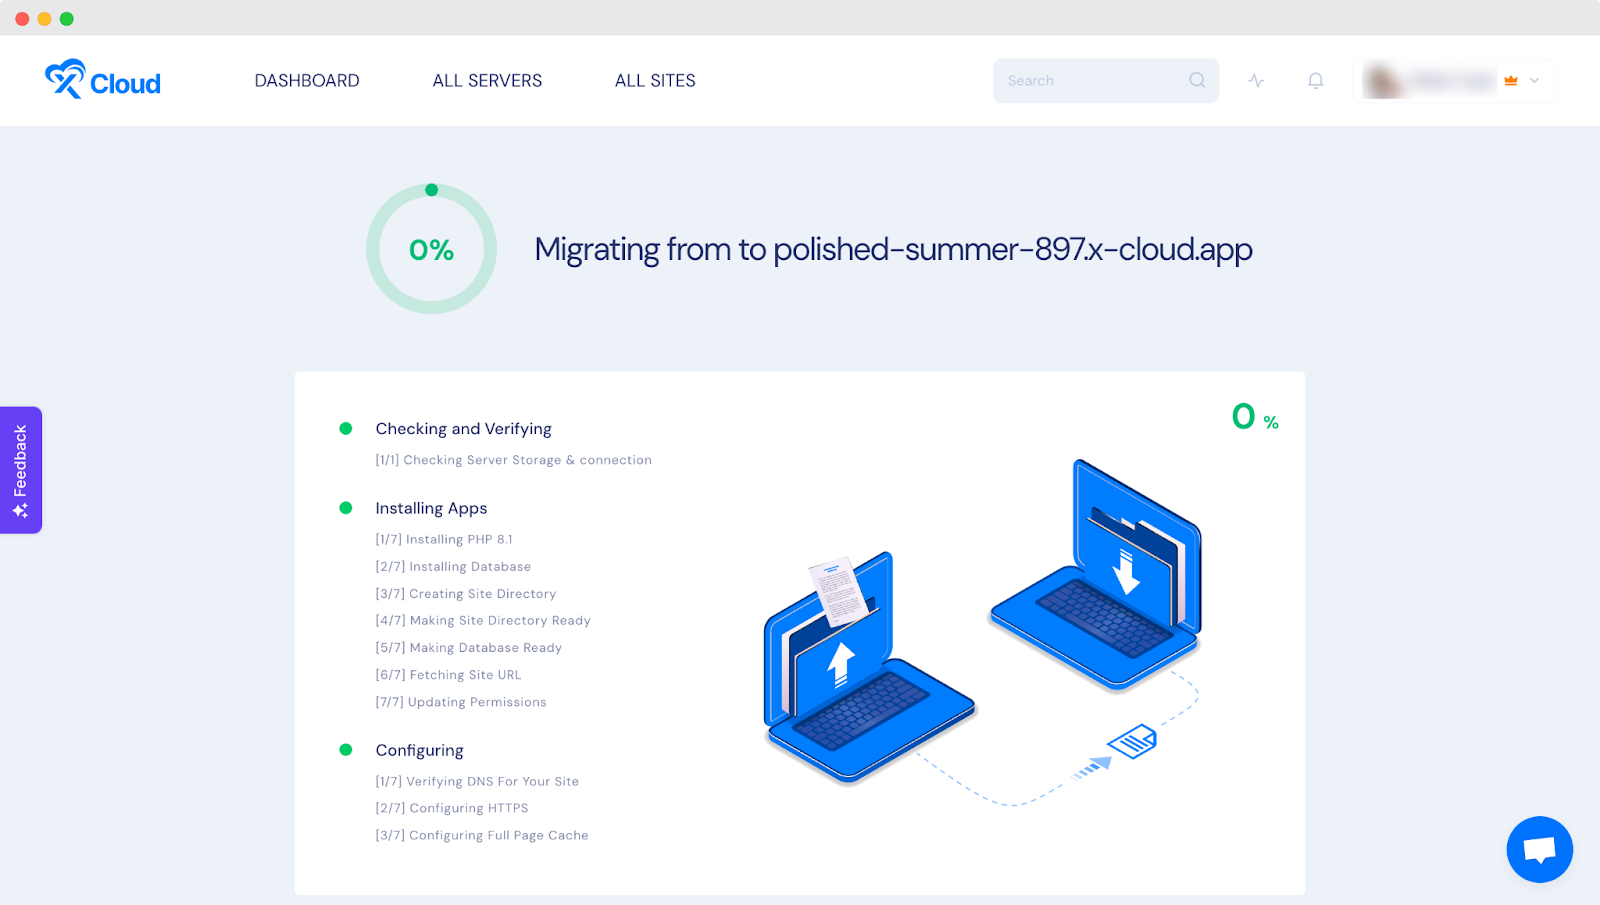
Within a few moments, your WordPress website will be uploaded on xCloud automatically. You will see the following screen while uploading.
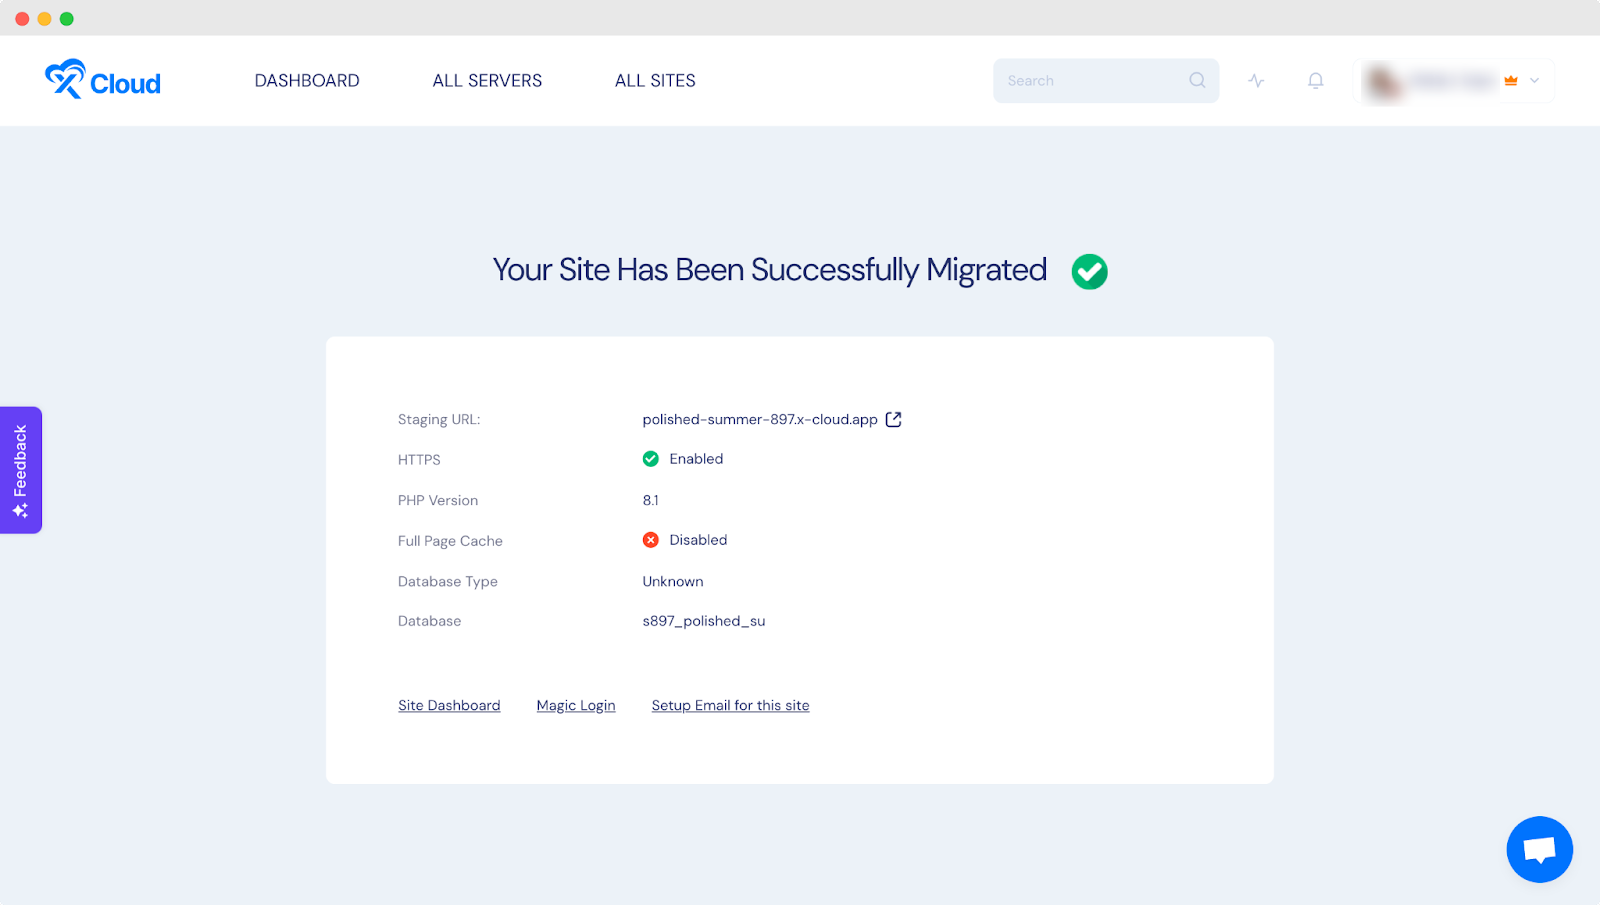
Once the migration is successfully complete will see the following screen. You go to the site dashboard from there.
This is how you can manually upload WordPress Websites On xCloud with ease.
Still stuck? Contact our support team for any of your queries.


