










Deploy your AI Agent in 1-Click – Managed  Hermes Agent Hosting  starts from $9.99

Introducing One Click Git Deploy: Ship Any Project the Fastest Way

Getting a project from a repository to a live URL is rarely one step. You pick a stack before anyone has looked at your code. You guess at a build command. You write a deploy script, watch it fail, read the logs, and try again. Then you wire up a domain, hunt down environment variable names, and repeat the whole thing the next time you ship something.

None of it is difficult. It is just slow, and it is slow every single time.

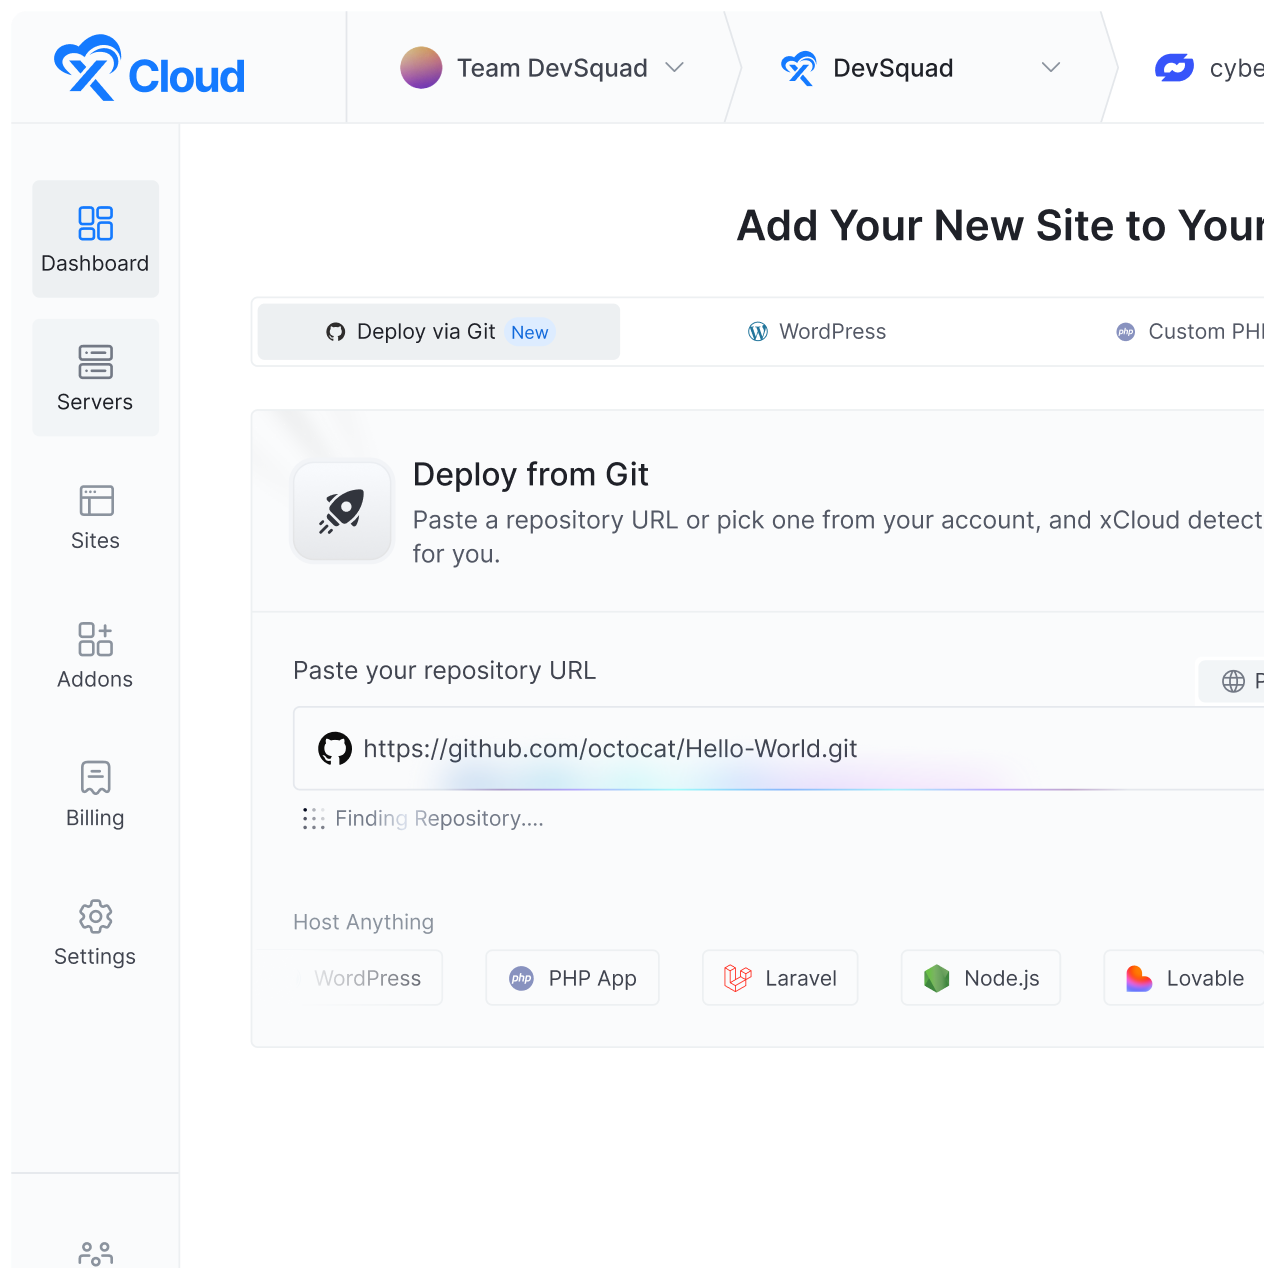
The new Deploy via Git flow in xCloud collapses that into one guided setup. You create a site from a Git repository, and before anything is provisioned, xCloud analyzes the repository and suggests a full application setup you can review and change. Paste a URL, check what it found, deploy.

The rest of this guide covers what you can deploy, how the flow works step by step, and what to do about private repositories and automatic deployments.

How xCloud Made The Git Deployment Faster

Most deploy tools ask what you are building before they will look at your code. That is backwards. Your repository already contains the answer.

Deploy via Git starts with the repository instead. You paste a URL or search for a name, and xCloud reads the repo and pre-selects the app type using AI. Detection fills in the form; it does not lock you in. If it guesses wrong, you change it before deploying.

Everything downstream follows from that first read. Here is what it covers.

Public repository search

You do not need a URL to get started, and you do not need to connect GitHub first. Type a repository name into the field and public GitHub search returns matching results. Want Chatwoot running? Type “Chatwoot,” pick it from the suggestions, and create a site from it. Any public GitHub, GitLab, or Bitbucket repository can be added the same way.

Automatic app detection

After you select a repository, xCloud analyzes it and pre-selects the detected app type. Supported types are WordPress, Laravel, custom PHP, Node.js apps including static, SSR, and hybrid, Lovable projects, and frontend frameworks such as React, Next.js, Nuxt, and Astro.

Worth knowing before you start: xCloud may recognize repositories that use Python, Ruby, Go, or Rust, but those app types are not supported by this flow yet. If detection cannot determine the type at all, pick the closest supported one manually.

AI-generated environment files

Guessing which environment variables an unfamiliar codebase expects is one of the more thankless parts of a deploy. xCloud uses a repository sample file first, and when no sample exists, it can suggest an env file drafted from your repo.

AI generated deploy scripts

The same applies to the script itself. For Laravel and PHP apps, xCloud prefills framework-aware commands such as Composer install, migrations, and config cache. Generate with AI drafts a script from repository context whenever you want one written for you. If AI is unavailable or rate-limited, deterministic templates take over, so you are never blocked waiting on it.

Docker Compose support

If your repository has a compose file, the flow handles it, including compose discovery, multi-service domain mapping, port ownership, and env sample seeding. A frontend and an API in the same repo become separate services with their own domains, with no reverse proxy configuration by hand.

Auto-deploy on push

For repositories connected through a provider account, you can enable auto-deploy on push so new commits go out automatically. If the connected account has enough repository permission, xCloud creates the webhook for you.

How to Deploy Git Projects in One Click with xCloud

The Deploy via Git flow lets you create a new xCloud site from a Git repository in one guided setup. You can search public GitHub repositories, use repositories from a connected GitHub account, or authorize a private repository with an SSH deploy key.

Before provisioning begins, xCloud analyzes the repository and suggests an application setup. You can review and change the suggested settings before deployment.

Step 1: Create a New Site

To begin deployment, click on the ‘Add New Site’ button from your xCloud dashboard. You will then be asked to choose the server where you want to deploy your Git project.

Step 2: Go to the Deploy Via Git Tab 

Next, head over to the ‘Deploy Via Git’ tab. This is where you can deploy your Git projects in just a click.

Step 3: Start from the Deploy Any App From Git panel

The Deploy via Git panel is your unified entry point to deploy any projects from your Git repo. You can deploy any public repository, private repository, and your own integrated GitHub repository projects in just a few clicks. Use it to paste a repository URL, search public repositories, pick from a connected provider, or choose an SSH / private-repository path.

Step 4: Search for a public GitHub repository

Type a repository name or URL into the repository field. Public GitHub search returns matching repositories without forcing the user to manually choose a site type first. Any public GitHub, GitLab, or Bitbucket etc. repository can be added here. 

Say, for example, you want to install Chatwoot. You don’t even need to paste a full repository url. You just search Chatwoot. This will automatically search the Chatwoot actual repository and recommend it to you. From that, you can actually create a Chatwoot site.

Step 5: Review the detected app configuration

Now, enter the URL or search for the project that you want to deploy. After selecting a repository, xCloud analyzes the repository and pre-selects the detected app type using AI. The user can still change the app type if the detection is not correct.

Step 6: Set Up Your Domain 

Next, you can proceed with a staging domain from xCloud, or proceed with your own custom domain.

If you are using your own domain, enter the domain and verify the DNS.

– Verify DNS with Cloudflare 

If you have Cloudflare integrated with xCloud and your domain is on Cloudflare, you can verify the DNS with a single toggle. Just enable the ‘Manage DNS with Cloudflare’ toggle button.

– Verify DNS Manually

Alternatively, you can add the DNS records manually at your own DNS provider and verify from there.

Step 7: Review The Branch

xCloud detects the branch automatically using AI. Confirm the branch to deploy. If the repository exposes a default branch, xCloud pre-fills it.

Step 8: Configure Node.js build and serving settings

For Node.js apps, choose the serving mode and confirm the related fields:

  • Static build uses a web root such as dist or another detected build output.
  • SSR (Node process) uses a start command and port.
  • Hybrid supports static output plus a Node/API process.

Review the auto-selected ‘Serving Mode’ and ‘Web Root’. If any changes needed, you can adjust according to your preferences. 

Step 9: Configure Advanced Environment & Deploy Script Options

Go to the ‘Advanced’ section and head over to the ‘Database Management’ section. You can choose to ‘Create Database in Server’, ‘Add Your Existing Database’, or proceed with ‘No Database’ for this project.

Step 10: Review or Edit Environment Variables

Open Advanced to review environment-file settings. Next, you will see that our AI generated the env file directly from your repo. xCloud can use a repository sample first, then fall back to an AI draft when no sample exists.

Next, go to the ‘Build & deploy script’ and you will see that a deploy script is generated using AI for the project. For Laravel/PHP apps, xCloud can prefill framework-aware commands such as Composer install, migrations, and config cache. Use Generate with AI when you want xCloud to draft a script from repository context.

Step 11. Review the information & Deploy

After that, review the information and click on the deploy button, and it will instantly start creating the repository.

And once the deployment is completed, your project will be live on the xCloud dashboard.

Key Advantages of Deploy via Git

Every step that used to take a terminal, a DNS panel, and a deploy script now happens on one screen. Here is what that saves you in practice.

  • Environment variables identified for you. xCloud reads the repository sample file first and drafts one from repository context when no sample exists. You supply values rather than discovering which keys the application expects.
  • Deploy scripts generated from your codebase. Laravel and PHP applications receive framework-aware commands such as Composer install, migrations, and config cache, prefilled and editable. Deterministic templates take over when AI generation is unavailable, so the flow never blocks.
  • A single configuration surface. Repository selection, domain, DNS, database, environment, deploy script, and webhook settings all live in one guided setup. No switching between a DNS provider, a server terminal, and the dashboard to bring one project online.
  • Simplified DNS verification. Domains on Cloudflare with an active xCloud integration verify through a single toggle. Manual DNS record configuration remains available for every other provider.
  • Multi-service deployments without manual proxy configuration. Docker Compose support covers compose discovery, service-to-domain port mapping, and port ownership, so a frontend and an API in the same repository deploy as separate services with their own domains.


  • Continuous deployment after the first push. Auto-deploy on push makes the initial deployment the only manual one. With sufficient repository permission, xCloud creates the webhook automatically.
  • No stack decision required up front. Public repository search accepts a name rather than a URL and returns results without requiring you to select a site type first.
  • Detection informs, it does not constrain. Every pre-selected field remains editable, and failure conditions surface as deployment errors such as occupied ports, missing compose files, and failed builds, rather than failing silently.
  • Two supported paths for private repositories: Connect a GitHub account for the most direct route, or generate an SSH deploy key if you prefer not to link a provider account.

Ship your next project from Git today

The gap between a repository and a live site should be one screen, not an afternoon. Deploy via Git closes it by reading your project first and asking you to confirm rather than configure.

The best way to see it is to try it on something small. Add a new site, point it at a repository you already have, and look at what xCloud detects before you change anything. Most of the time, the defaults are already right, and the deploy is one click from there. When you are ready for the full walkthrough, the documentation covers every step in detail.

If you found this guide helpful, feel free to subscribe to our blog for more tutorials, guides, and tips on web hosting and server management. You can also join our Facebook community to share ideas and connect with other xCloud users.

If you have found this blog helpful, feel free to subscribe to our blogs for valuable tutorials, guides, knowledge, and tips on web hosting and server management. You can also join our Facebook community to share insights and take part in discussions. 


Join The Waitlist

To Get Early Access to Lifetime Deals

LTD WaitList Access