


Effective communication is vital for seamless collaboration and productivity. With that in mind, xCloud Hosting brings an innovative solution through Slack integration, empowering users to streamline communication effortlessly within their team hosting environment. With this integration, you can get server notifications, site notifications, and more on your Slack.
Follow the step-by-step guide to learn how to configure Slack integration in xCloud hosting to enhance team coordination and efficiency.
Note: Before getting started, you will need to visit the xCloud website and you have to sign up or log in to xCloud with your credentials.
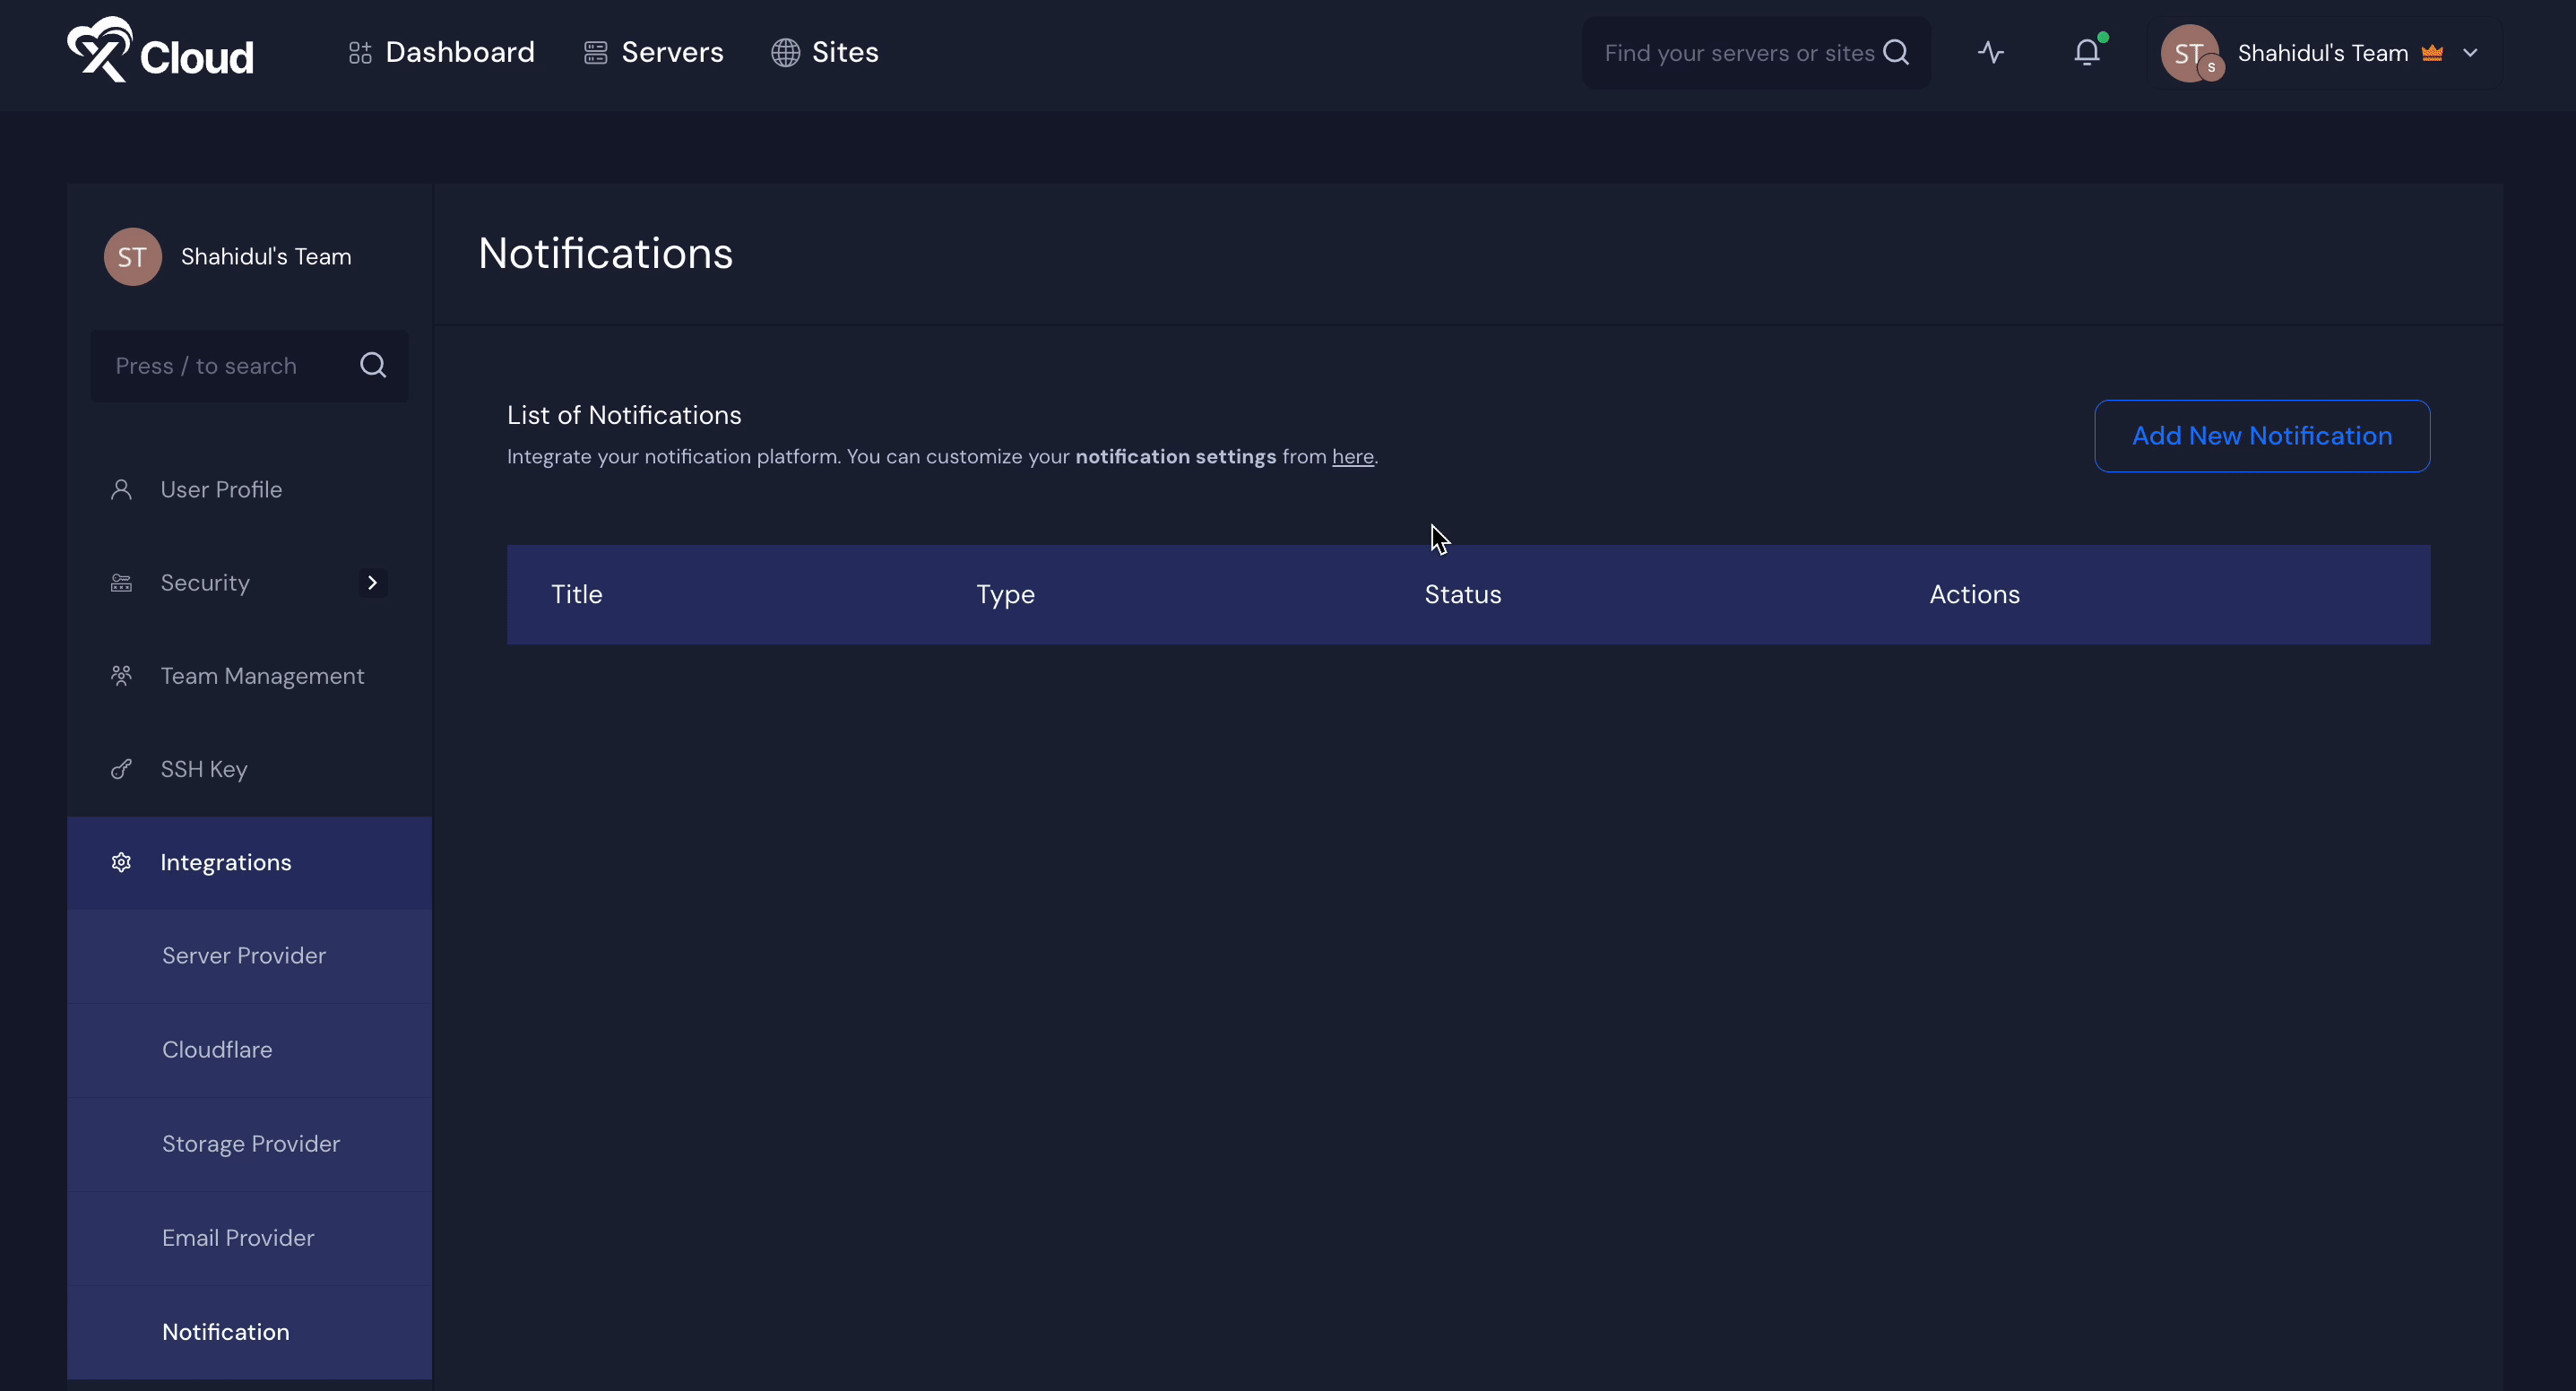
Step 1: Add New Slack Notification #
After logging in to your xCloud account, navigate to Team Settings → Integrations → Notification. Once you’re in, click on ‘Add New Notification’, select your provider as ‘Slack’ from the dropdown, and click on ‘Authorize on Slack.’
Step 2: Give Permission Access & Select Slack Channel #
On the resulting page, xCloud requires a channel to post to as an app. Since xCloud is requesting permission to access here, you need to select a channel from the dropdown “Share for a Channel”, and click on ‘Allow’ for the further step.

Wait for a few seconds & your Slack channel will be connected with your xCloud hosting. This is how easy it is to configure Slack integration in xCloud hosting.
Step 3: Select Notifications You Want in Your Prefered Slack Channel #
After connecting your Slack channel to xCloud hosting, you’ll get options to choose which notifications (e.g., Server Notifications, Site Notifications, Other Notifications) you want to get in your selected Slack channel as shown below. To do so, navigate to Team Settings → Notifications.
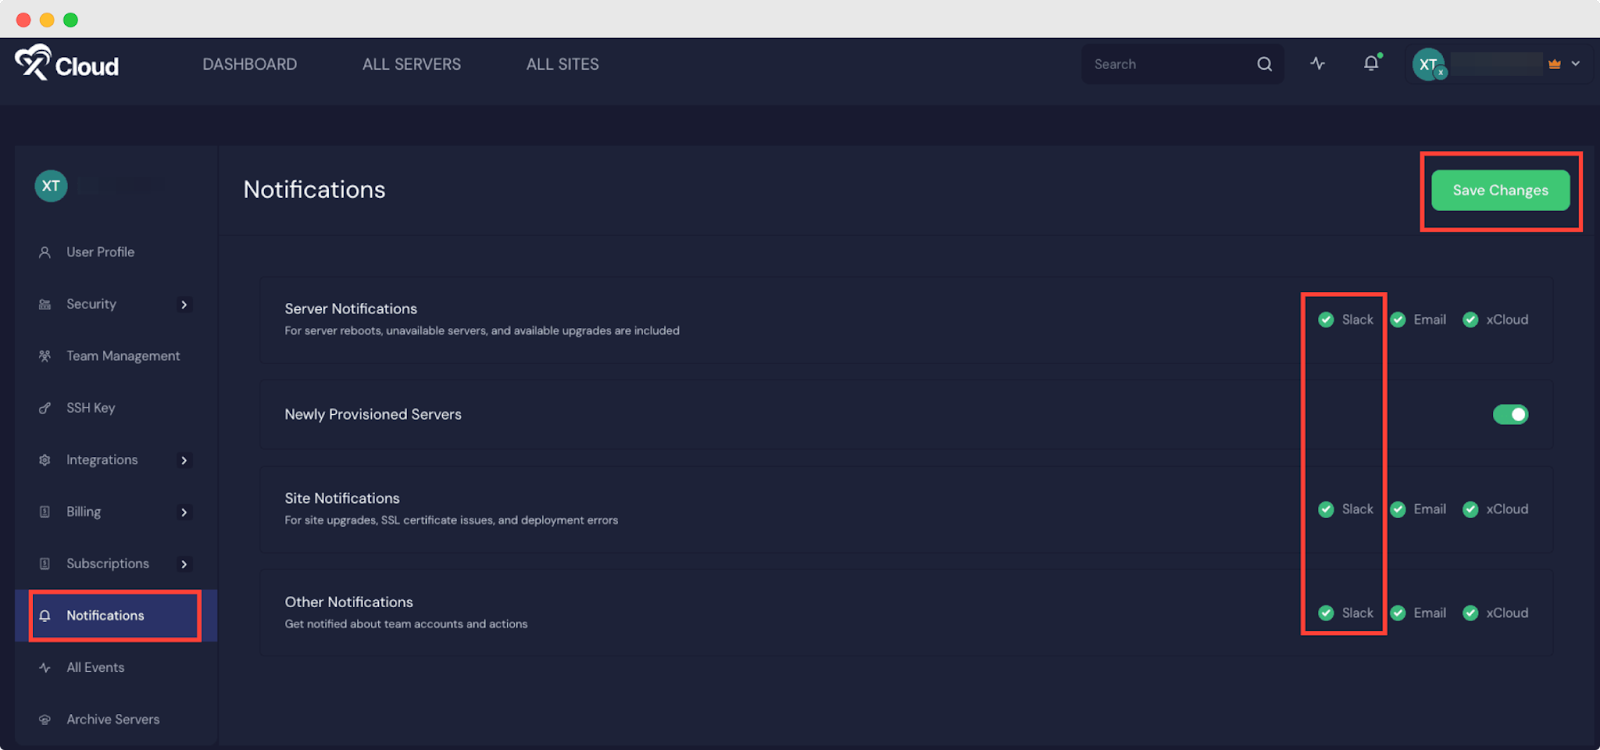
Just click the ‘Slack’ option beside each notification to enable and disable the option. Once you’re done with the selection, don’t forget to click the ‘Save Changes’ to save all the changes you made.
Note: The role permission of integrations & notifications can only be managed by the Team Admin role user in xCloud.
This is how you can easily configure Slack integration in xCloud hosting & communicate with your team with the Slack conversations that you choose.
Still stuck? Contact our support team for any of your queries.


