


With xCloud, you can easily integrate Cloudflare for DNS management to enhance the performance and security of your WordPress site. xCloud streamlines the hosting and administration of WordPress websites. It allows developers and agencies to focus on website development without worrying about the underlying infrastructure.
We are using only Cloudflare’s DNS management service with xCloud. DNS (Domain Name System) serves as the backbone of the internet, translating user-friendly domain names into IP addresses to identify each other. Cloudflare’s DNS (Domain Name System) management allows for efficient control and optimization of your website’s domain settings.
What API Access Do We Require? #
To manage DNS using Cloudflare, xCloud requires the following access:
- API Token
- Global API Key
Note: We only require limited API access for DNS management. If your setup needs extra features like edge caching, origin certificate for Cloudflare SSL management, we will ask for that access.
Important: If you want xCloud to create Cloudflare Managed SSL / Origin CA certificates, the API token must also include Zone → SSL and Certificates → Edit permission, in addition to Zone → DNS → Edit.
Here, you can create an API token for all zones. But if you don’t want to provide full access, select ‘Specific Zone’ and only choose the zones you want to use.
How To Integrate Cloudflare For DNS Management #
With Cloudflare’s DNS management integrated into xCloud, you gain the advantage of a globally distributed network, ensuring fast and secure access to your WordPress site. By leveraging Cloudflare’s robust DNS infrastructure, you can enhance the speed, reliability, and security of your website. Now let’s follow the simple steps to configure Cloudflare integration.
Step 1. Bring Domain In Cloudflare Account #
To integrate Cloudflare with xCloud, first, you need to add the domain to Cloudflare. If you are new to Cloudflare, watch the video below to learn how to get started.
Once you have added your domain to your Cloudflare account, Cloudflare will give you a set of nameservers. They will look something like this:
one.ns.cloudflare.com
two.ns.cloudflare.com
These nameservers need to be entered inside your domain registrar account. If you are a beginner, you can check out the most popular domain registrars like Bluehost, GoDaddy, Namecheap, Namesilo, etc.
When you enter your nameservers, you may need to wait for a few hours to see the effect. Cloudflare will send you an email when this domain becomes active in your account.
Step 2. Get Your Cloudflare API Credentials #
Now, you need to collect the Cloudflare API Credentials below.
- API Tokens
- Global API Key
Create API Tokens #
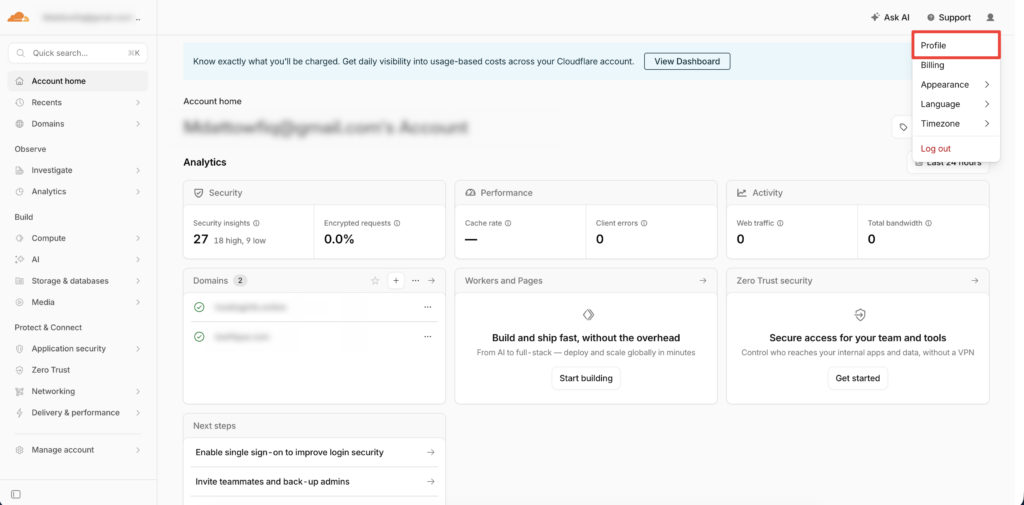
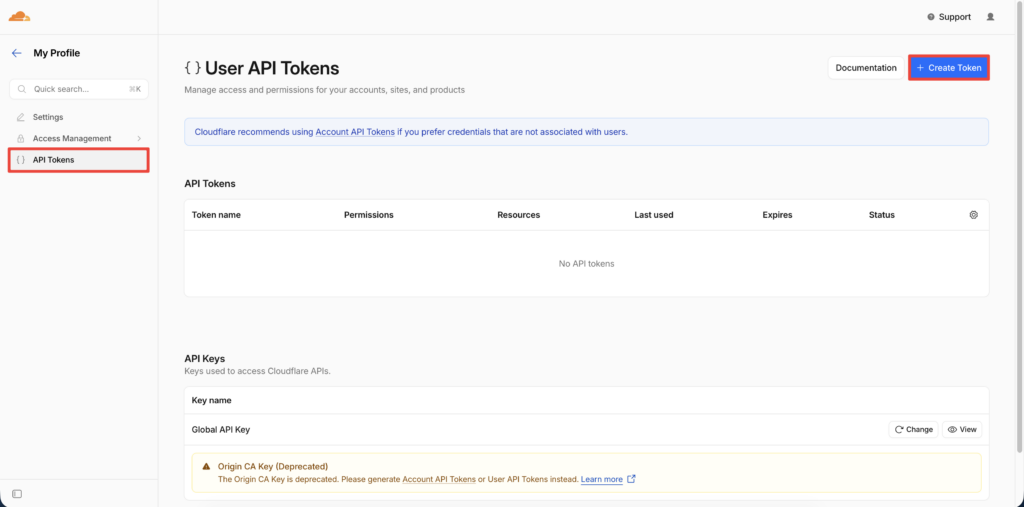
Log in to your Cloudflare account. From the Cloudflare dashboard, go to ‘My Profile’ option from the top right menu.
Then, click on the ‘API Tokens’ option from the left sidebar and click on the ‘Create Token’ button from the ‘User API Tokens’ dashboard.
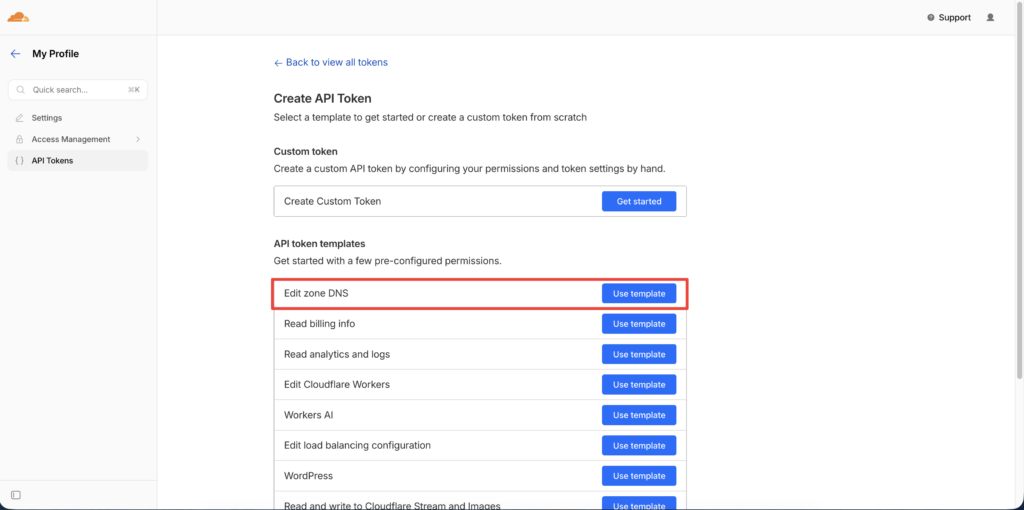
Now, go to the ‘API Token Templates’ section and choose ‘Edit Zone DNS’ template and click on the ‘Use Template’ button.
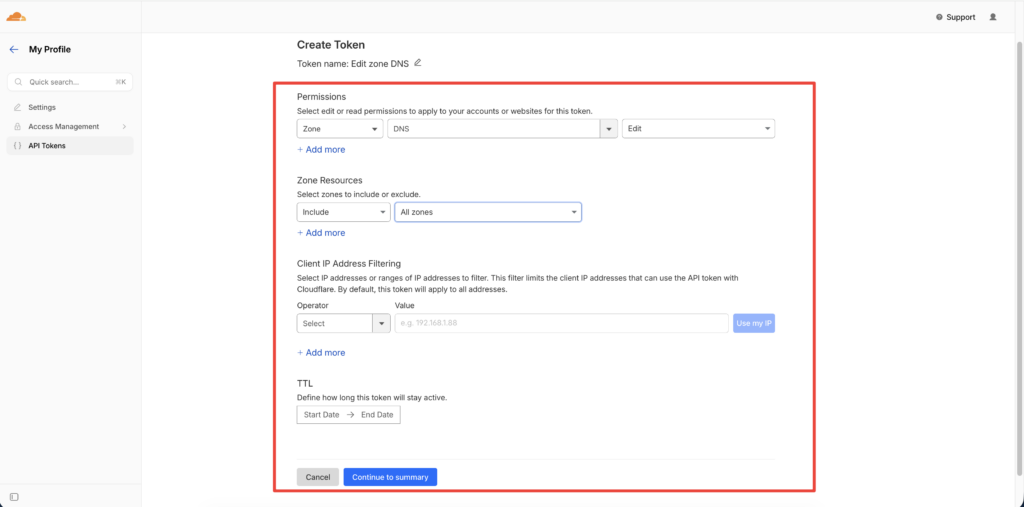
If you will use xCloud for Cloudflare Managed SSL / Origin CA certificate creation, add one more token permission before creating the token: Zone → SSL and Certificates → Edit. Keep Zone → DNS → Edit enabled for DNS management.
Now, select Zone resources. Here, you can create an API token for all zones. But if you don’t want to provide full access, select ‘Specific Zone’ and only choose the zones you want to use. After selecting zones, click on ‘Continue To Summary’.
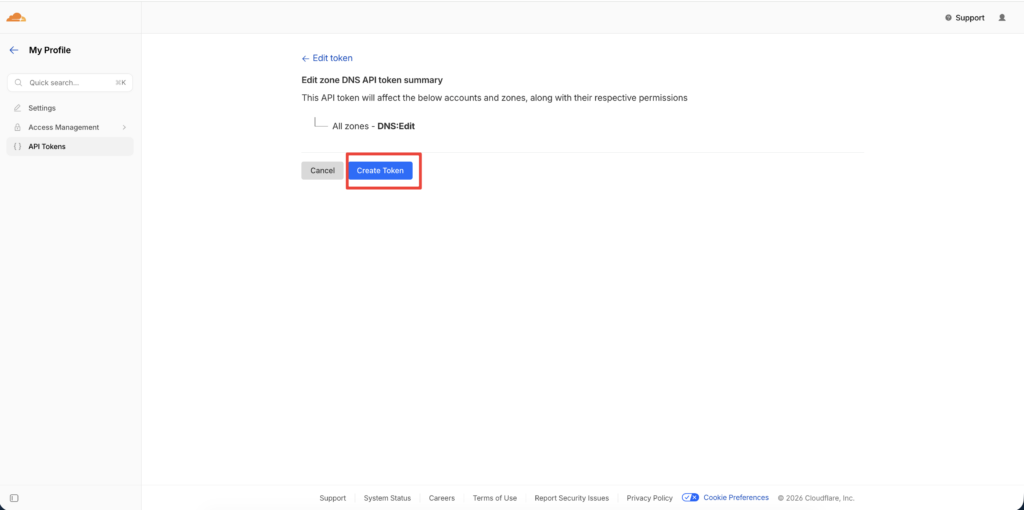
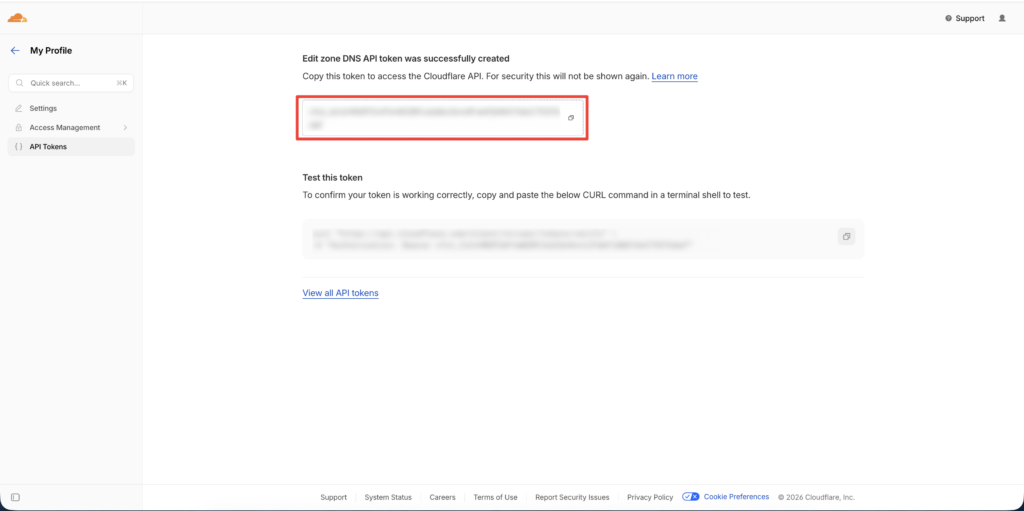
Then click on ‘Create Token’. The token will be successfully created.
Collect API Token
Now, copy the API tokens you just created. Right below, there is a section called ‘View all API Keys’; click on it.
Collect Global API Key
You need another API Key: ‘Global API Key’. Click on the ‘View’ button and copy the API key and collect them so that you can add it to your xCloud account.
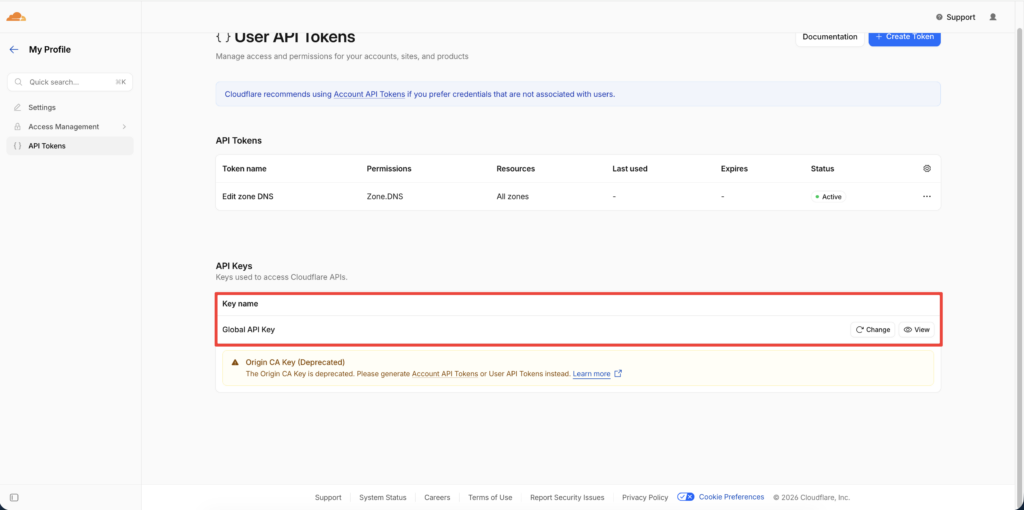
Note: The Origin CA Key is deprecated and is no longer required for integration with xCloud.
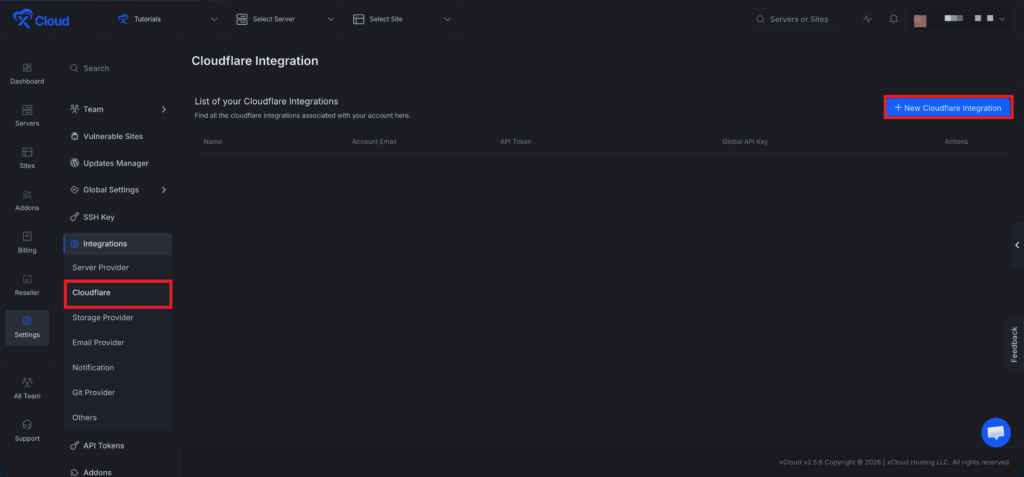
Step 3: Add Your API Keys to xCloud for Cloudflare Integration #
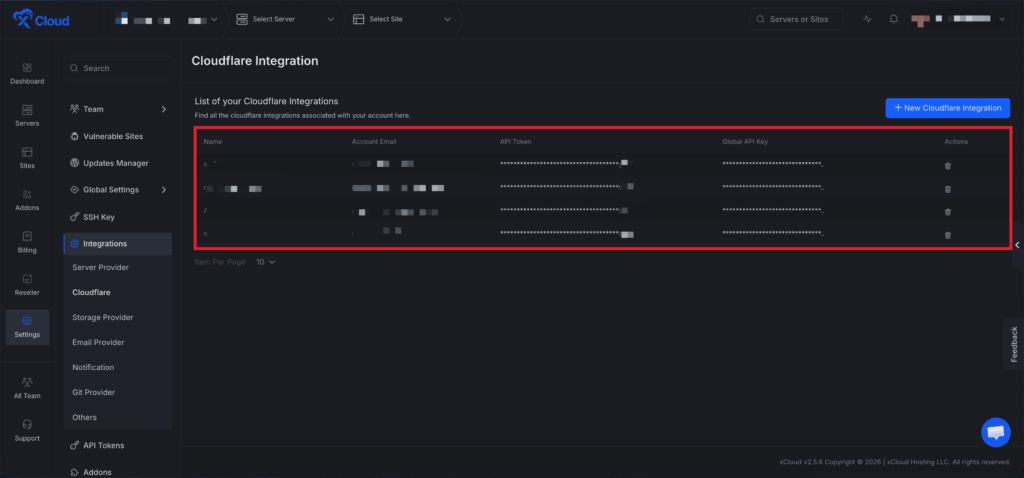
From the xCloud dashboard, go to your profile. Click on ‘Integrations’, then click on ‘Cloudflare’. Now, click on the ‘New Cloudflare Integration’ button.
A new window will pop up. Enter your name, the email address that you use for your Cloudflare account, and the collected Cloudflare credentials into the allocated field and save it.
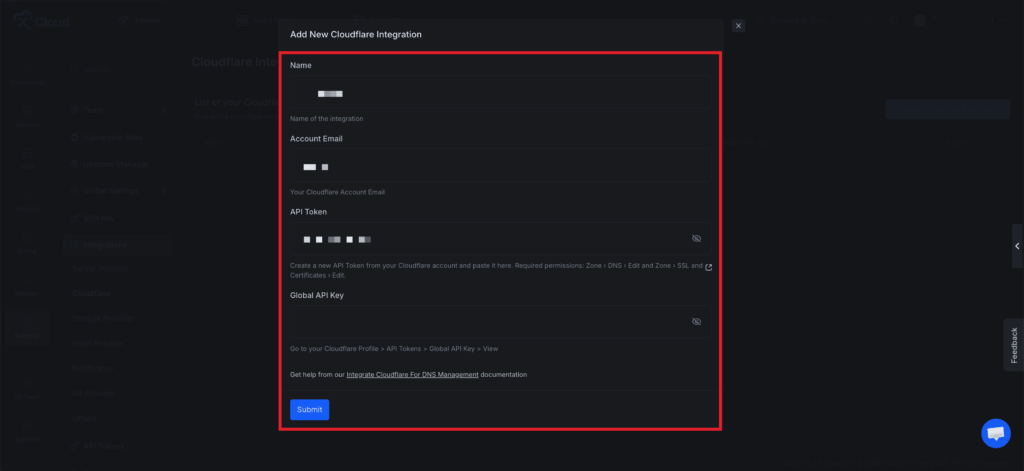
You have now integrated Cloudflare with your xCloud account successfully. Your Cloudflare API Credentials will be saved and displayed in the Cloudflare Integration panel as shown below.
Automatic SSL/TLS Configuration (No Manual Intervention Required) #
Once your API keys are added, xCloud will automatically configure the SSL/TLS encryption mode in Cloudflare to ‘Full Strict’.
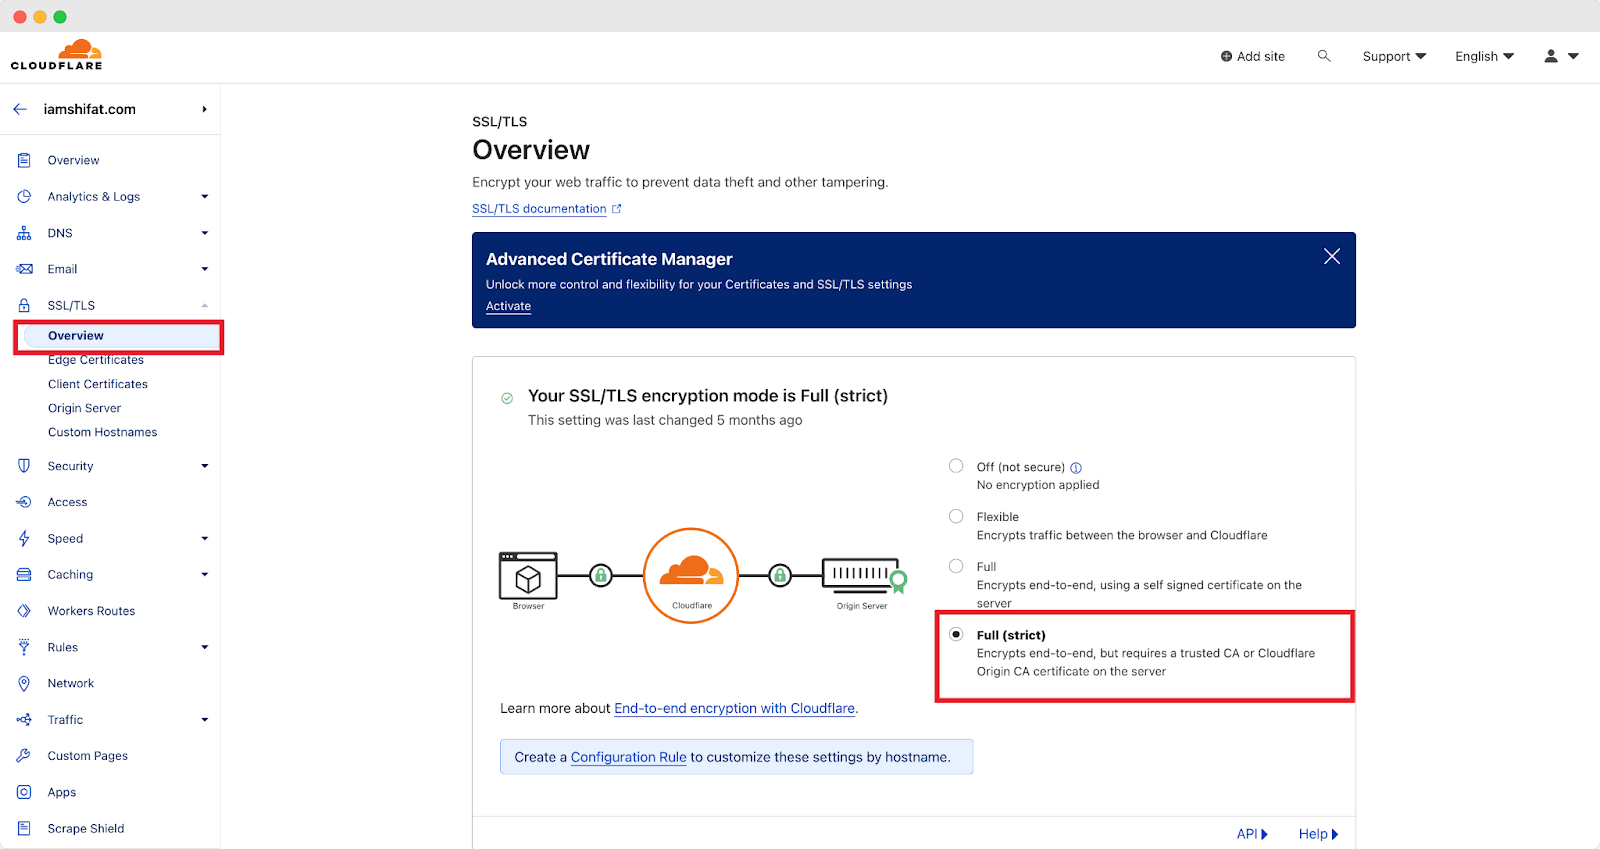
Note: Ensure that the encryption mode is set to ‘Full Strict’ for enhanced security, and please do not change it if not required.
Step 4: Provision xCloud Site Using Cloudflare to Update DNS #
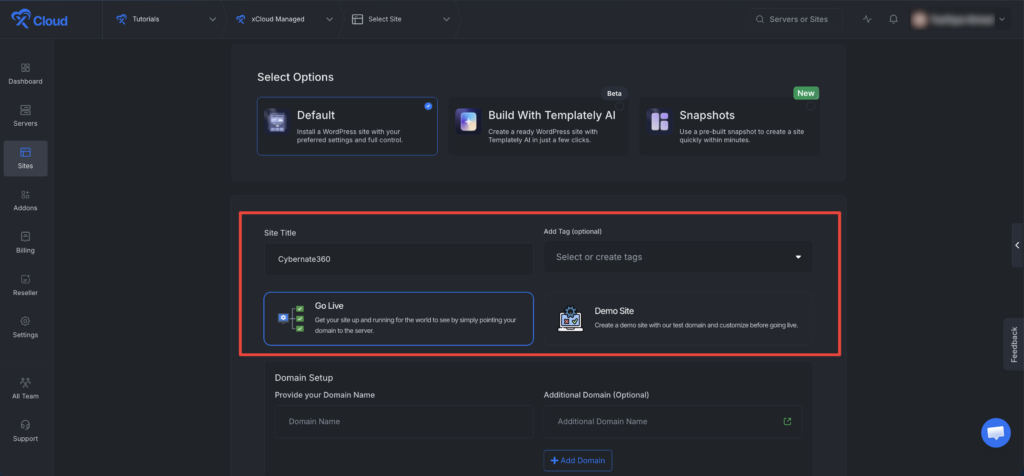
Now, go to the xCloud dashboard and click on ‘+New Site’. From the ‘Choose a Server to add Site’ dropdown, select a server and click on ‘Next’. Then, click on ‘Install New WordPress Website’. Now fill up all the required fields.
Step 5: Multi-Domain Support for Cloudflare Managed Sites #
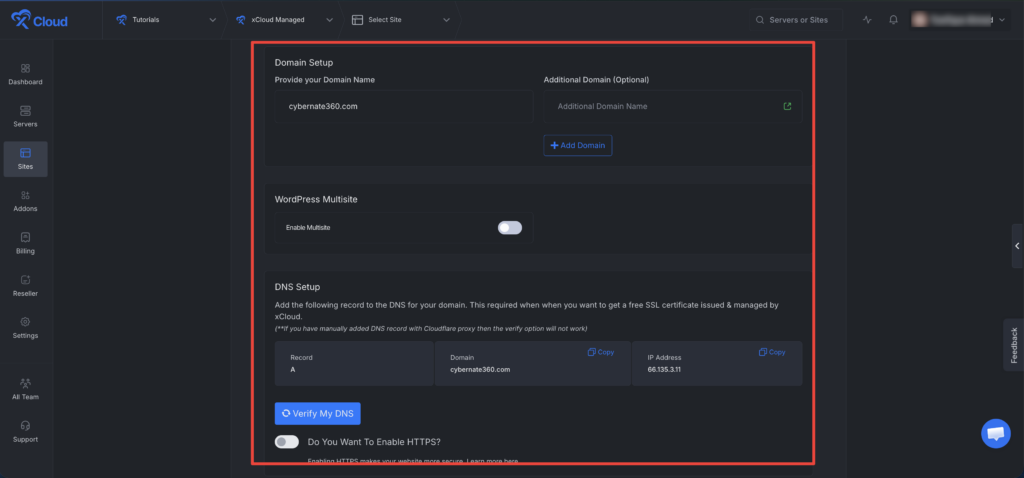
Now enter your ‘Primary Domain’ of your site in the blank field. Then add the ‘Additional Domain’ in the dedicated field. You can add multiple additional domains by clicking on the ‘Add Domain’ button.
With xCloud, you can now connect multiple domains to a single site through Cloudflare Managed Sites. This means you can set up a primary domain (for example, example.com) and then add ‘Additional domains’ (such as sample.com or demo.net) to point to the same site. Next, click the check mark button of ‘Add DNS and SSL certificate on Cloudflare’ to verify the DNS setup in 1 click.
Note: You can add multiple domains during the site creation, site cloning and from the site overview dashboard later
You can also add additional domains from your site dashboard. Just go to the ‘Domain from the site dashboard and add your domains in the ‘Additional Domain’ under the ‘Domain’ section. Once you check the box beside the Cloudflare DNS, you will be able to see that the domains are activated.
👉For more details about the step-by-step process of site creation, read this documentation
That’s it! You have successfully integrated the Cloudflare account in xCloud. Note that Cloudflare integration is available with all site installation features in xCloud, no matter whether you are creating a new site, cloning an existing one, or migrating it. Now you can start working on your website, customize it, install themes/plugins (if applicable), and take advantage of xCloud’s optimized server environment for seamless site management.
Security Reminder #
Your API keys are important credentials. They give access to key infrastructure services. You must keep them private. Do not share them with anyone you do not fully trust.
If your keys are exposed, they can lead to security issues, unwanted changes, or service problems.
xCloud uses your API keys only for specific tasks related to DNS and SSL management:
- API Token helps manage your DNS records. This lets xCloud update and sync your DNS settings automatically. For Cloudflare Managed SSL / Origin CA certificate creation, the token also needs Zone → SSL and Certificates → Edit permission.
- Global API Key are used to create and manage Origin SSL certificates. They are also needed to set up and manage Edge Caching. These tools help protect data between your server and the end user. They also improve how fast your content loads.
xCloud will only use your keys for these specific purposes. We will never share them with anyone else. Please keep your API keys safe. Your security is our top concern.
Still stuck? Contact our dedicated support team for any of your queries.


