

How to Deploy Git Projects in One Click with xCloud
Updated September 27, 2026 · 8 min read
The Deploy via Git flow lets you create a new xCloud site from a Git repository in one guided setup. You can search public GitHub repositories, use repositories from a connected GitHub account, or authorize a private repository with an SSH deploy key.
Before provisioning begins, xCloud analyzes the repository and suggests an application setup. You can review and change the suggested settings before deployment.
What you can deploy
xCloud can detect or guide setup for these supported application types:
- WordPress repositories
- Laravel applications
- Custom PHP applications
- Node.js applications, including static, SSR, and hybrid apps
- Lovable projects
- Frontend apps such as React, Next.js, Nuxt, and Astro when supported by the selected app type
xCloud may identify repositories that use Python, Ruby, Go, or Rust, but those application types are not currently supported by this Git deployment flow. If xCloud cannot determine the application type, choose the closest supported type manually before deploying.
Before you begin
Prepare the following:
- An xCloud server with enough resources for your application.
- A public repository URL, a connected GitHub account, or an SSH URL for a private repository.
- A custom domain name if you do not want to use an xCloud staging domain.
- Your application’s required environment variables, database details, and build or deployment commands.
Security note: Do not place production passwords, API keys, or other secrets in a public repository. Add sensitive runtime values through the deployment environment configuration, and never paste a private SSH key or personal access token into this flow.
Prerequisites / required permissions
- Server access: You must have access to an xCloud server where new sites can be created.
- Repository access: Public repositories can be searched or pasted. Private repositories need a connected GitHub account or an SSH deploy key.
- Git provider integration: Required when selecting private repositories from a provider account or enabling automatic webhook creation.
- Domain choice: You can use a generated staging domain or configure a live/custom domain with DNS/HTTPS settings.
- Runtime readiness: Node.js, PHP, database, Redis, and Docker choices depend on the detected app type and server stack.
Step 1: Create a New Site
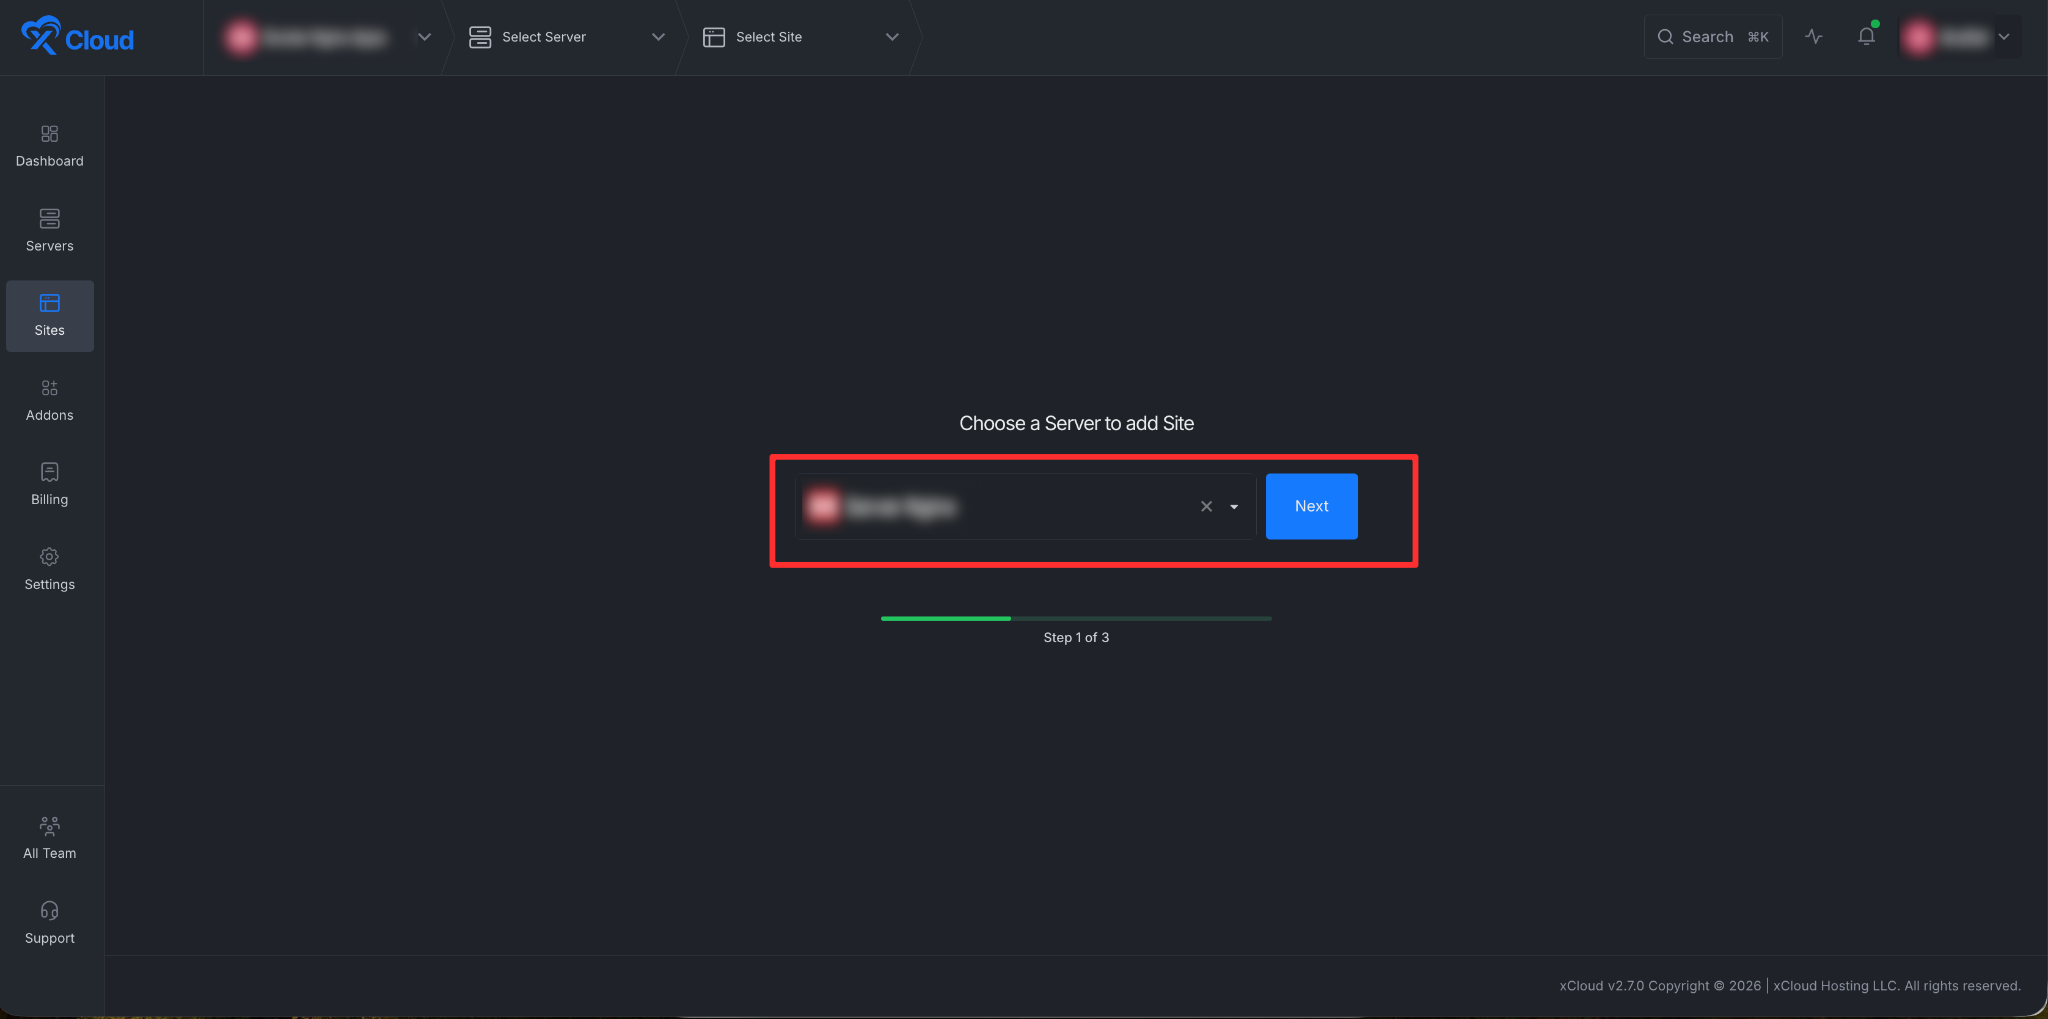
To begin deployment, click on the ‘Add New Site’ button from your xCloud dashboard. You will then be asked to choose the server where you want to deploy your Git project.
Step 2: Go to the Deploy Via Git Tab
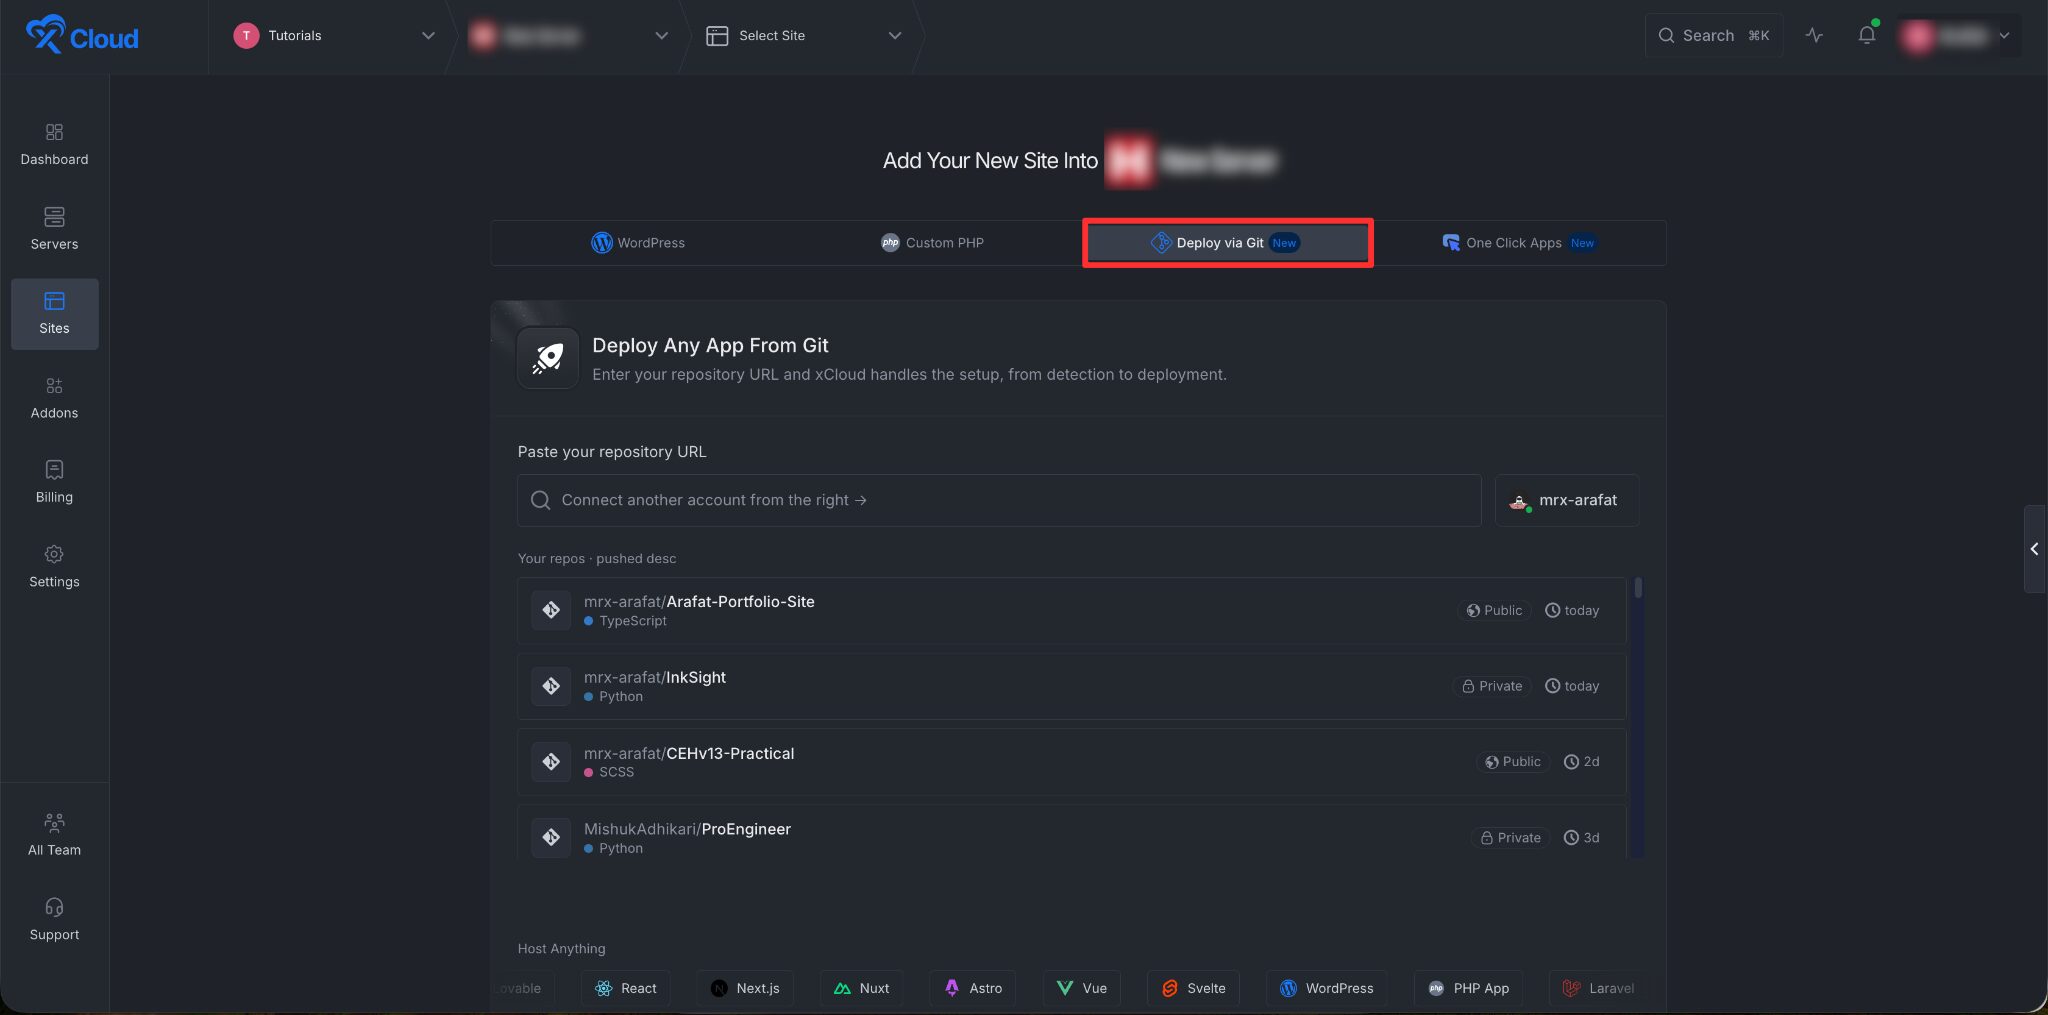
Next, head over to the ‘Deploy Via Git’ tab. This is where you can deploy your Git projects in just a click.
Step 3: Start from the Deploy Any App From Git panel
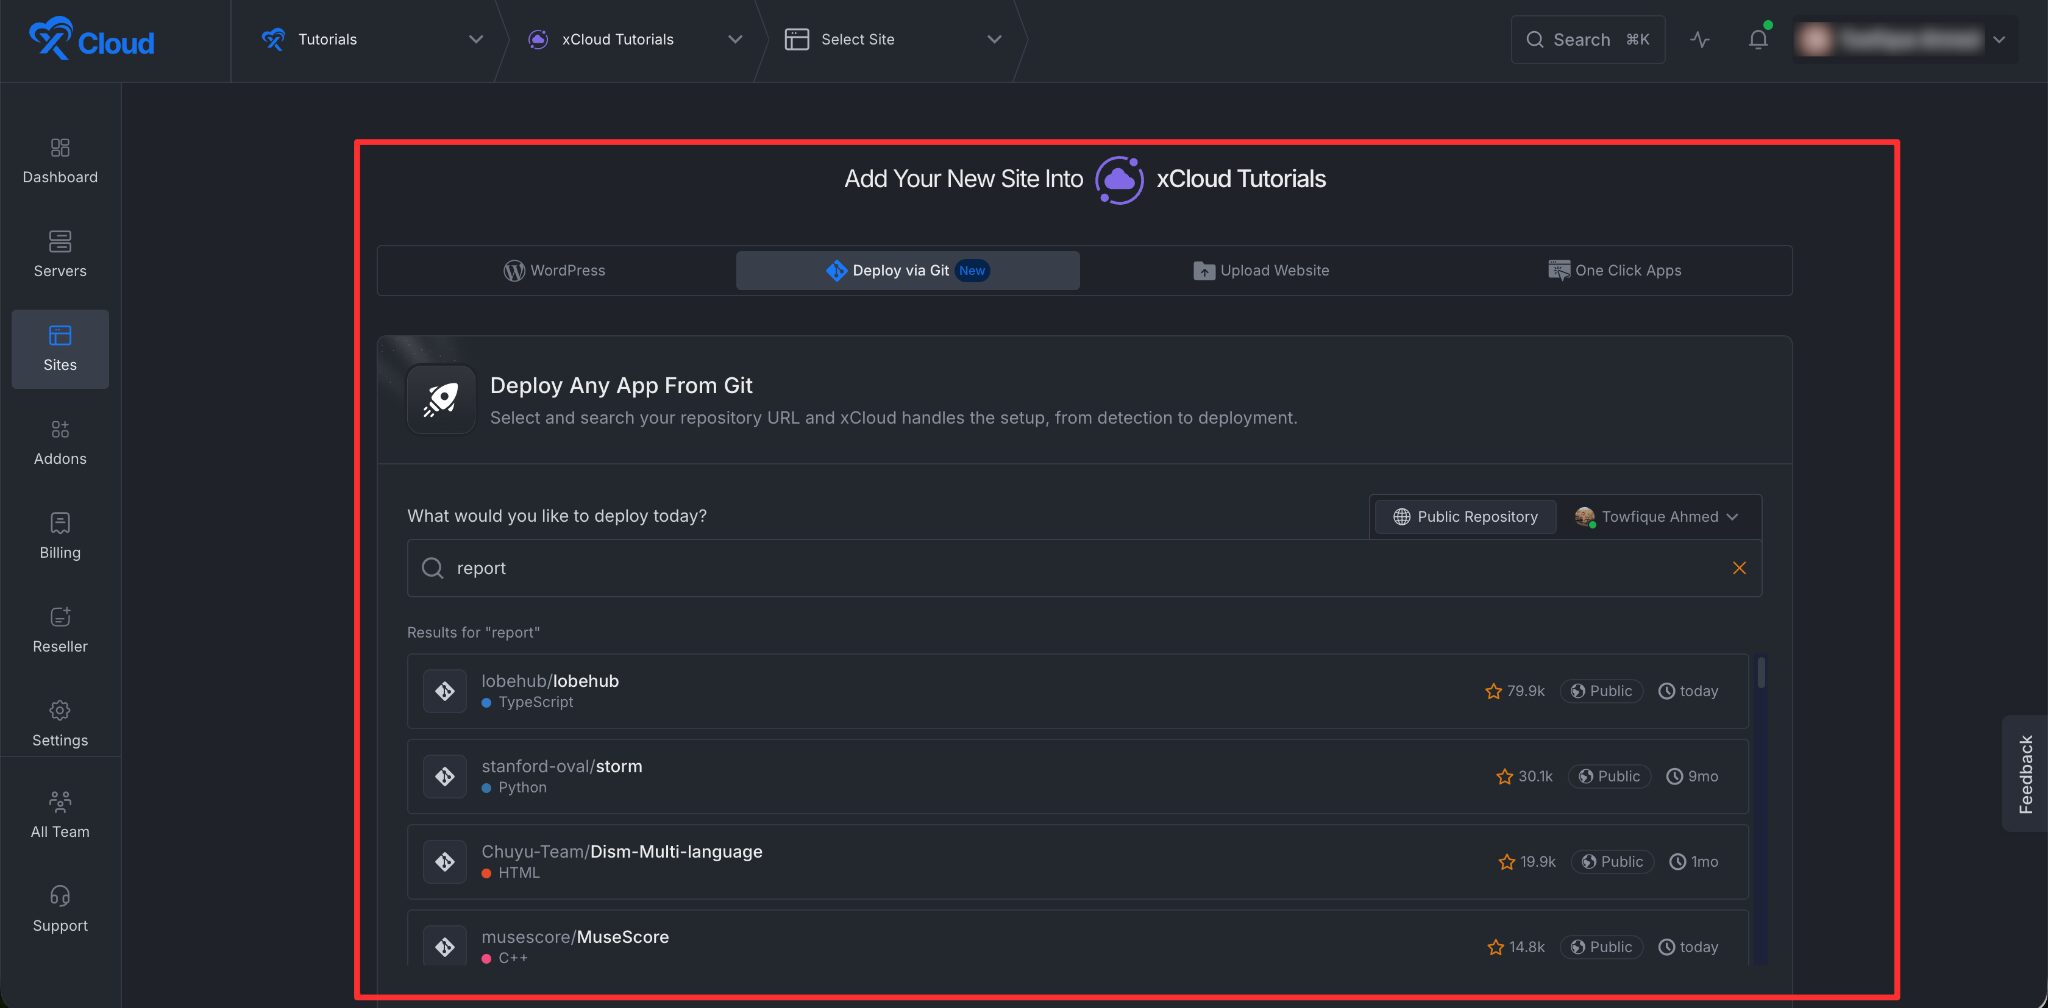
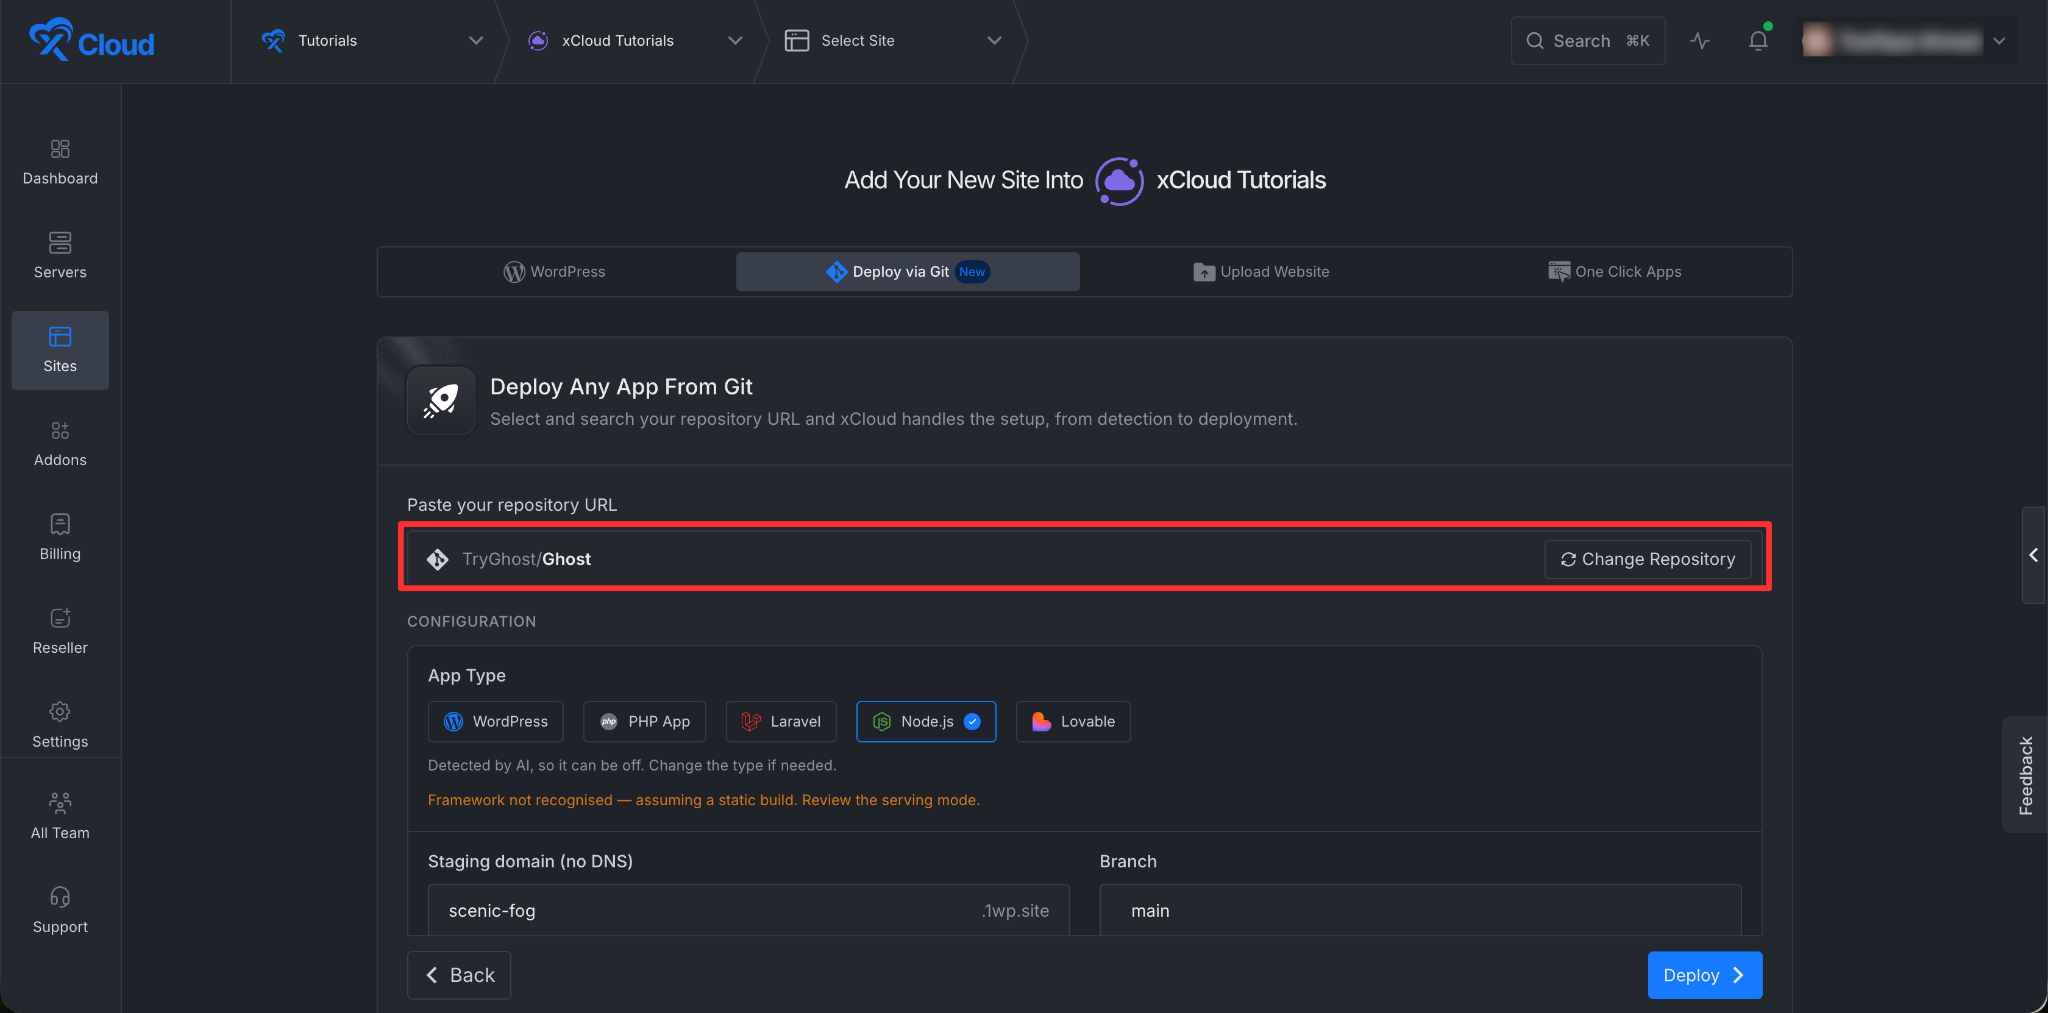
The Deploy via Git panel is your unified entry point to deploy any projects from your Git repo. You can deploy any public repository, private repository, and your own integrated GitHub repository projects in just a few clicks. Use it to paste a repository URL, search public repositories, pick from a connected provider, or choose an SSH / private-repository path.
Step 4: Search for a public GitHub repository
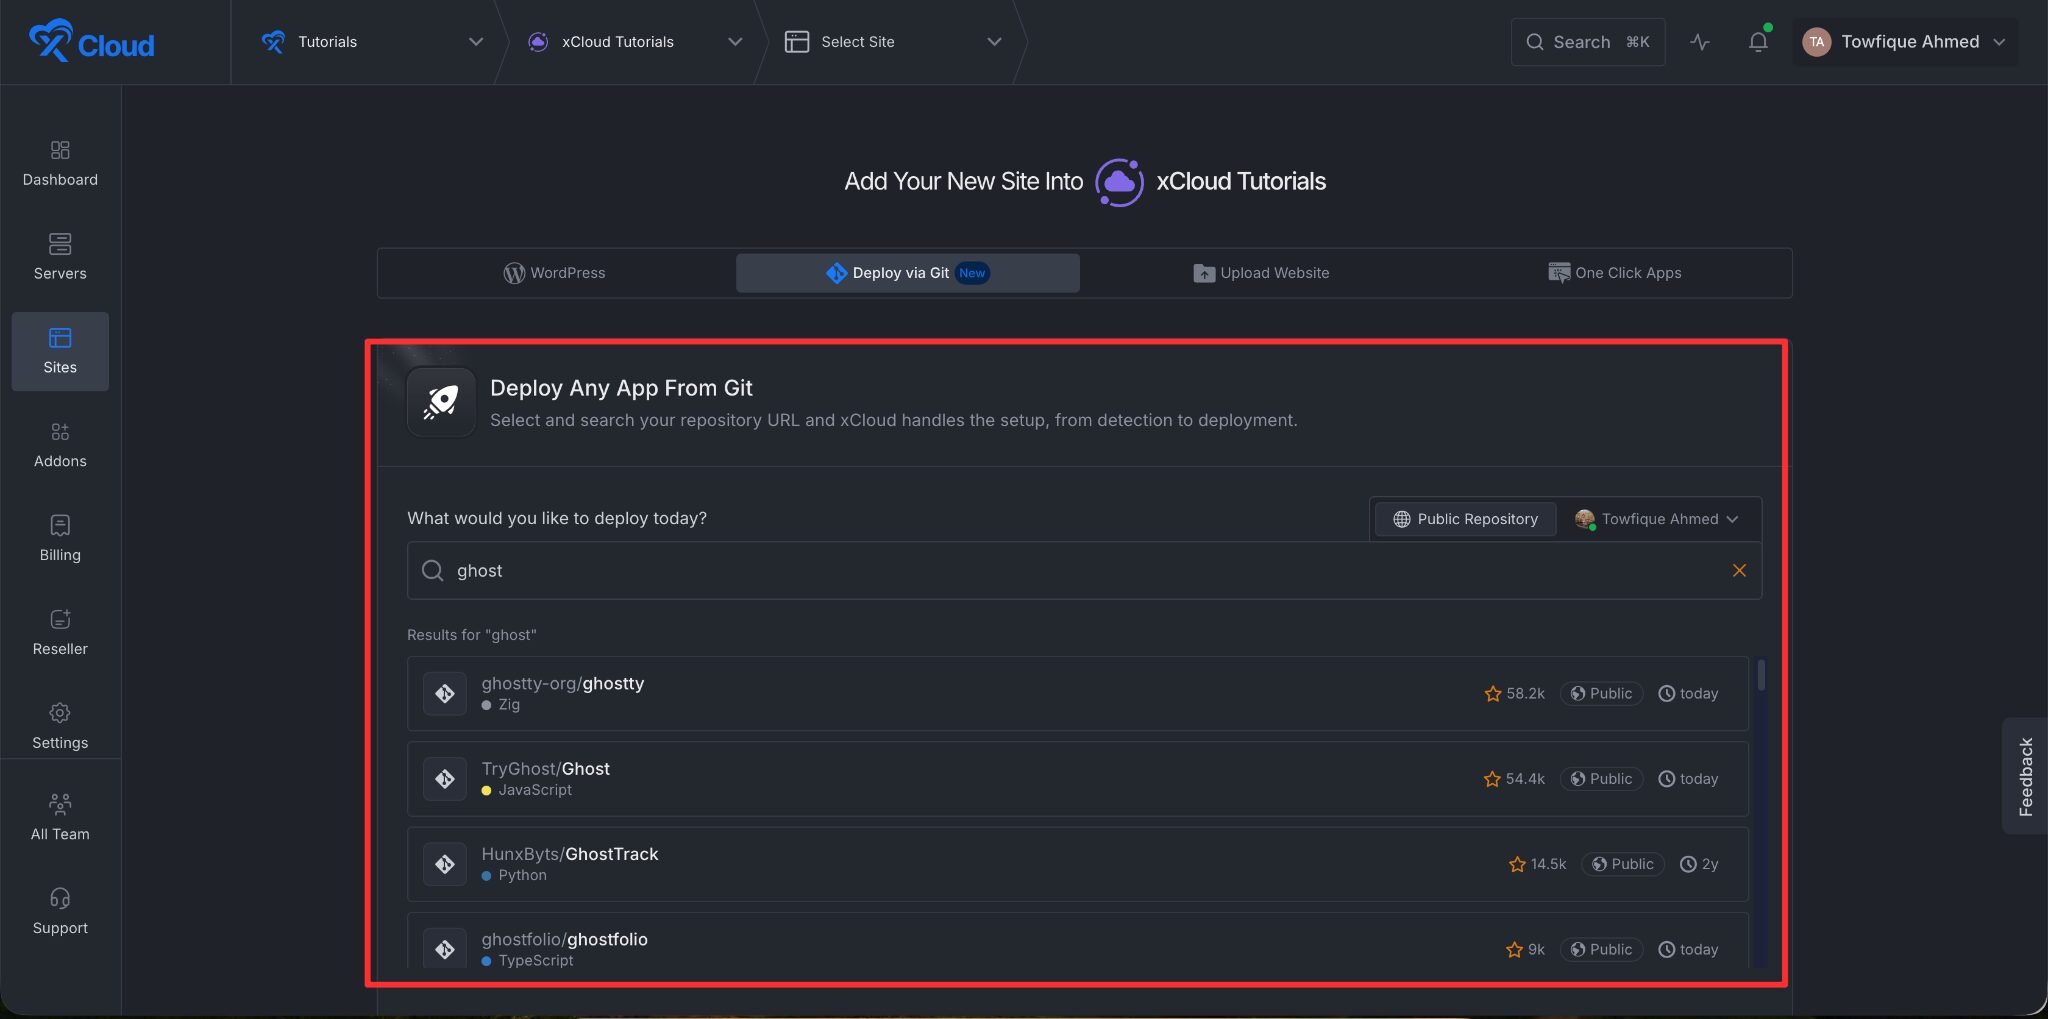
Type a repository name or URL into the repository field. Public GitHub search returns matching repositories without forcing the user to manually choose a site type first. Any public GitHub, GitLab, or Bitbucket etc. repository can be added here.
Say, for example, you want to install Chatwoot. You don’t even need to paste a full repository url. You just search Chatwoot. This will automatically search the Chatwoot actual repository and recommend it to you. From that, you can actually create a Chatwoot site.
Step 5: Review the detected app configuration
Now, enter the URL or search for the project that you want to deploy. After selecting a repository, xCloud analyzes the repository and pre-selects the detected app type using AI. The user can still change the app type if the detection is not correct.
Step 6: Set Up Your Domain
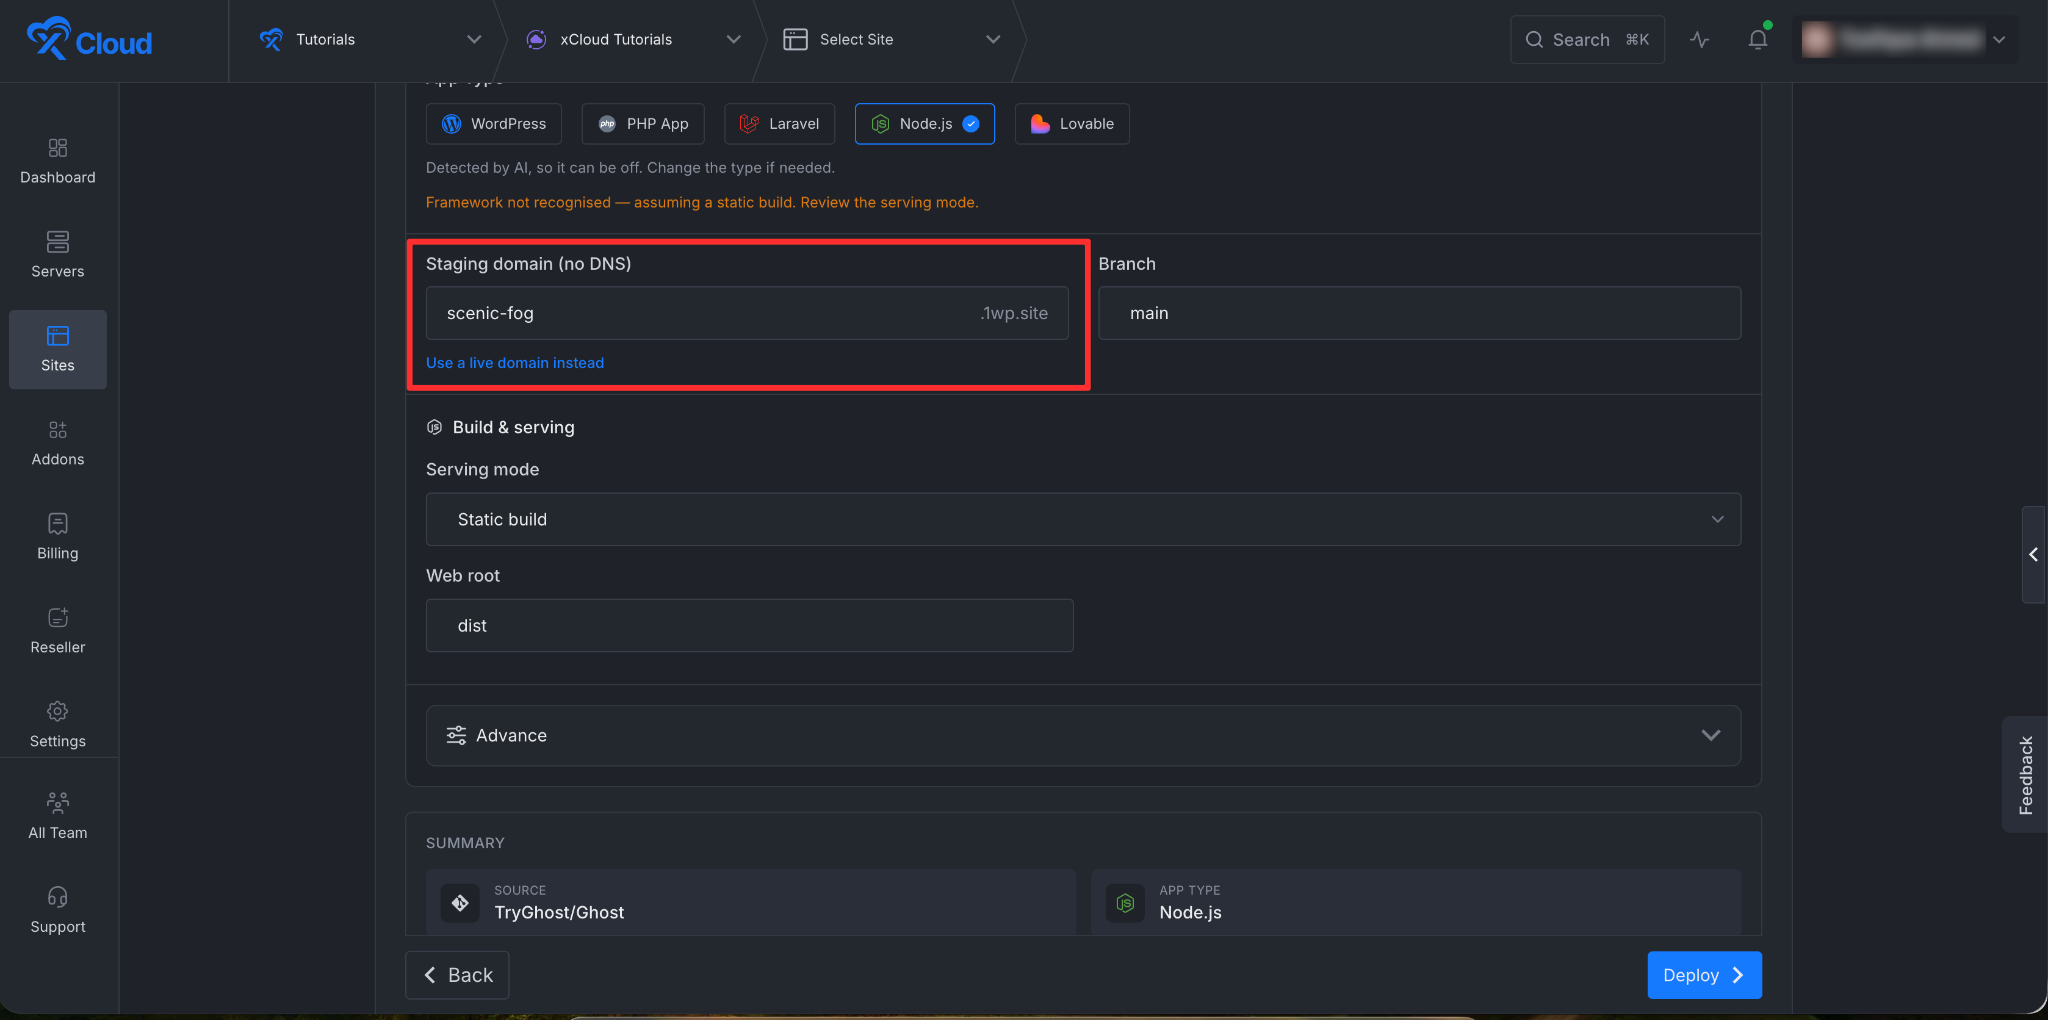
Next, you can proceed with a staging domain from xCloud, or proceed with your own custom domain.
If you are using your own domain, enter the domain and verify the DNS.
– Verify DNS with Cloudflare
If you have Cloudflare integrated with xCloud and your domain is on Cloudflare, you can verify the DNS with a single toggle. Just enable the ‘Manage DNS with Cloudflare’ toggle button.
– Verify DNS Manually
Alternatively, you can add the DNS records manually at your own DNS provider and verify from there.
Step 7: Review The Branch
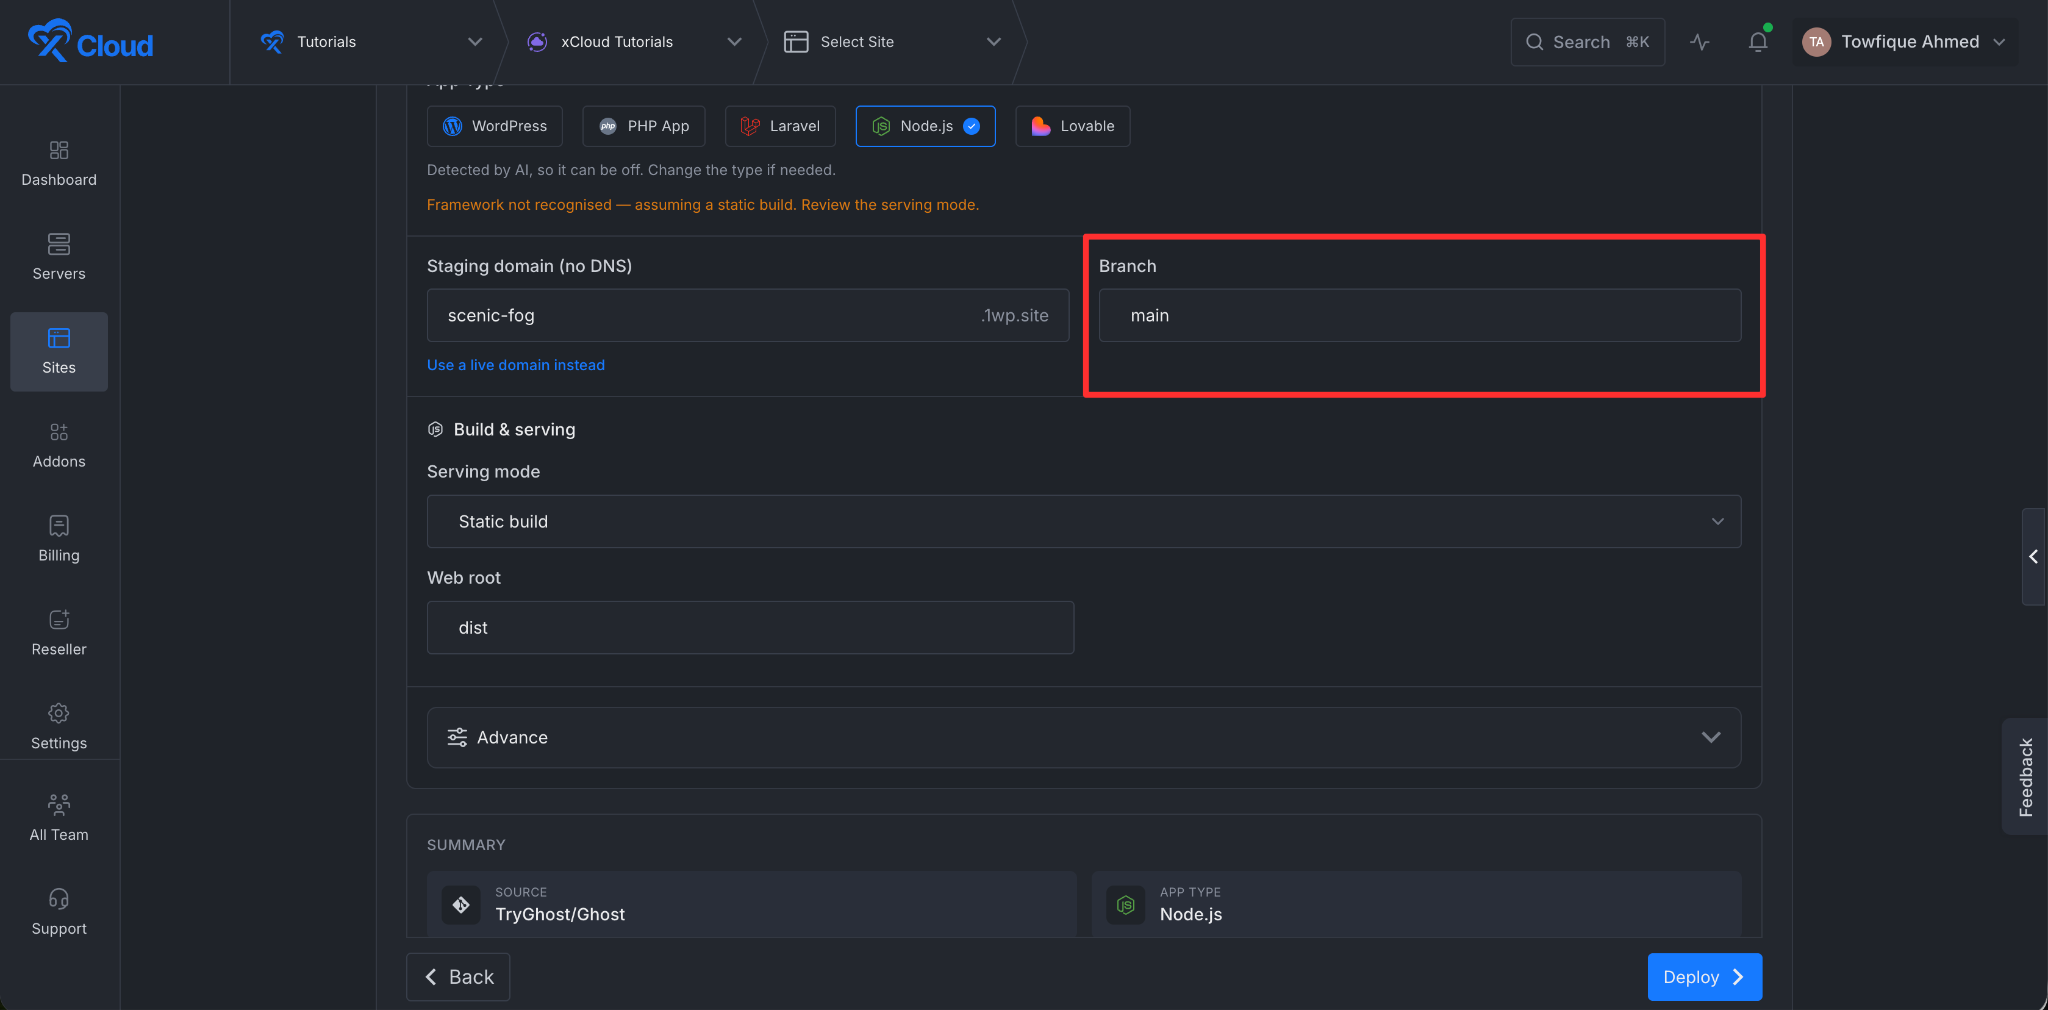
xCloud detects the branch automatically using AI. Confirm the branch to deploy. If the repository exposes a default branch, xCloud pre-fills it.
Step 8: Configure Node.js build and serving settings
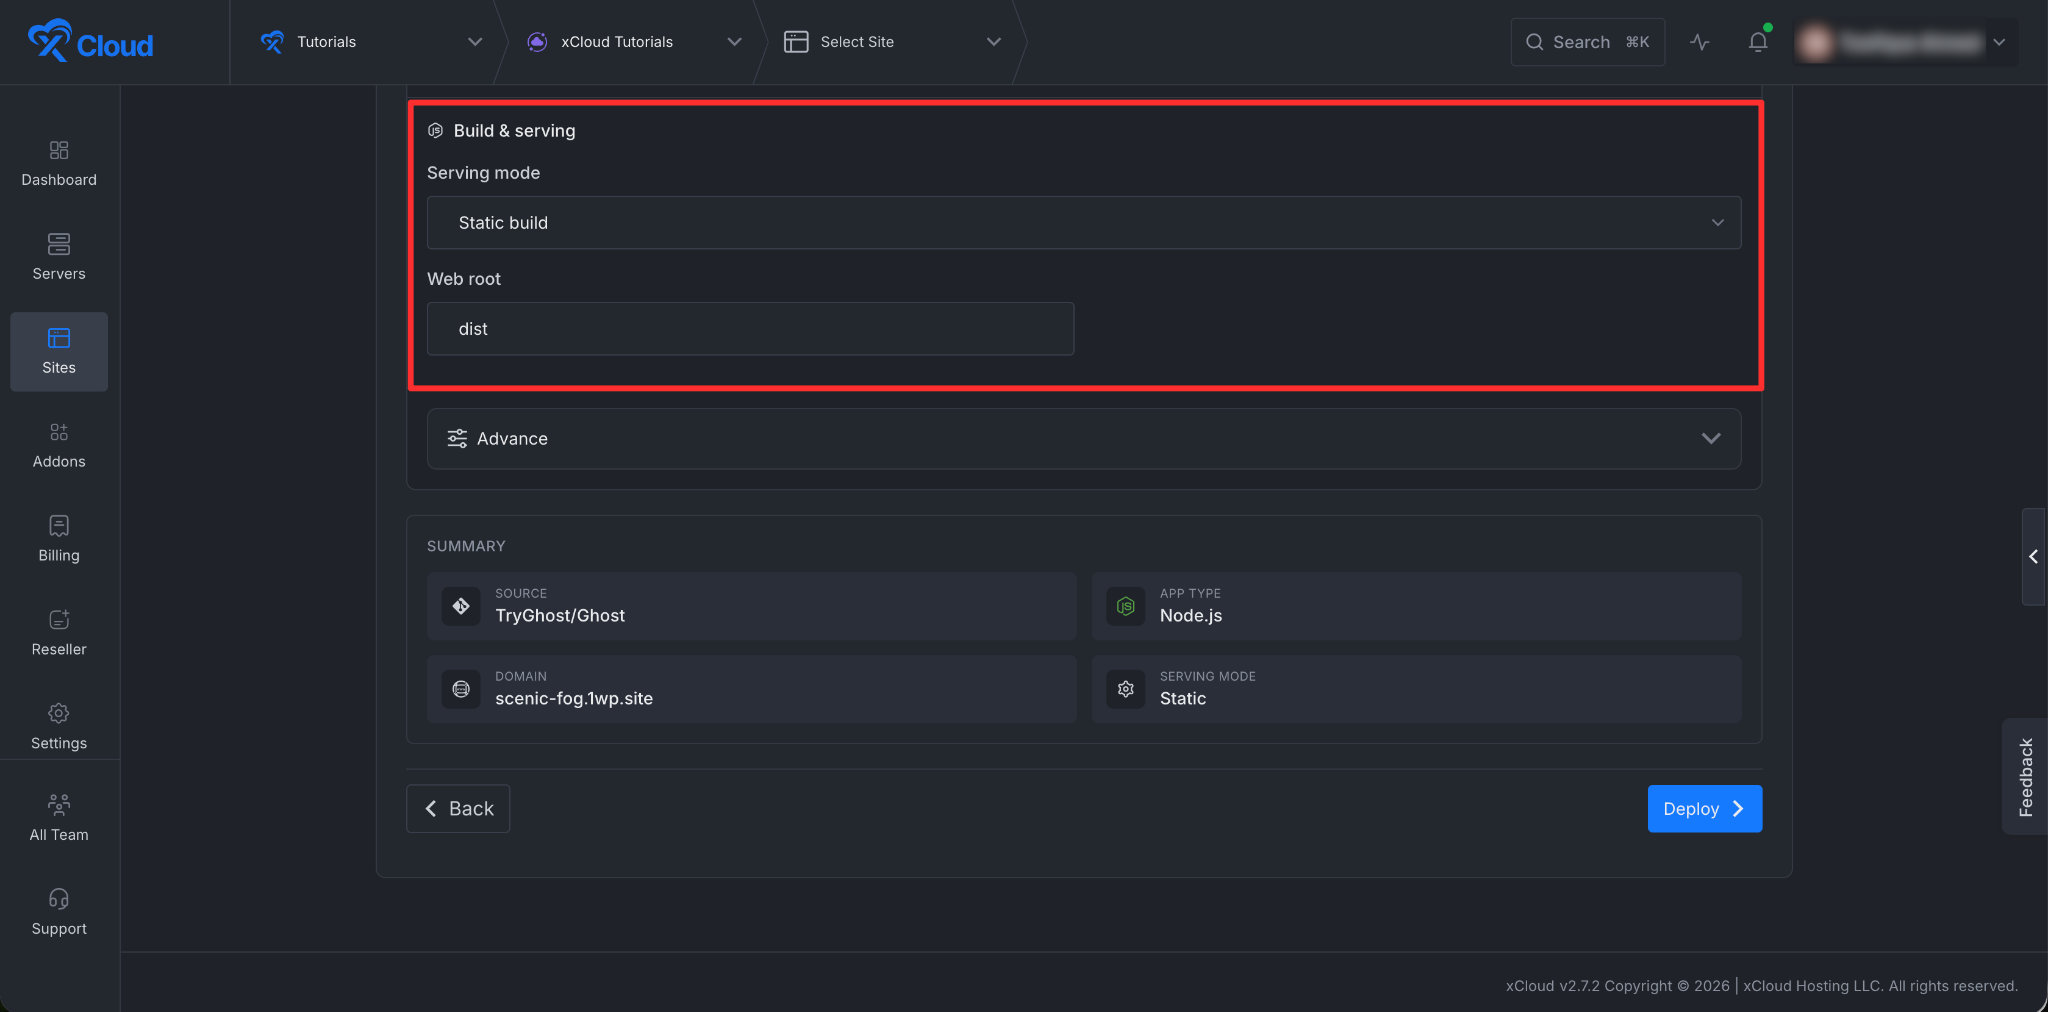
For Node.js apps, choose the serving mode and confirm the related fields:
- Static build uses a web root such as dist or another detected build output.
- SSR (Node process) uses a start command and port.
- Hybrid supports static output plus a Node/API process.
Review the auto-selected ‘Serving Mode’ and ‘Web Root’. If any changes needed, you can adjust according to your preferences.
Step 9: Configure Advanced Environment & Deploy Script Options
Go to the ‘Advanced’ section and head over to the ‘Database Management’ section. You can choose to ‘Create Database in Server’, ‘Add Your Existing Database’, or proceed with ‘No Database’ for this project.
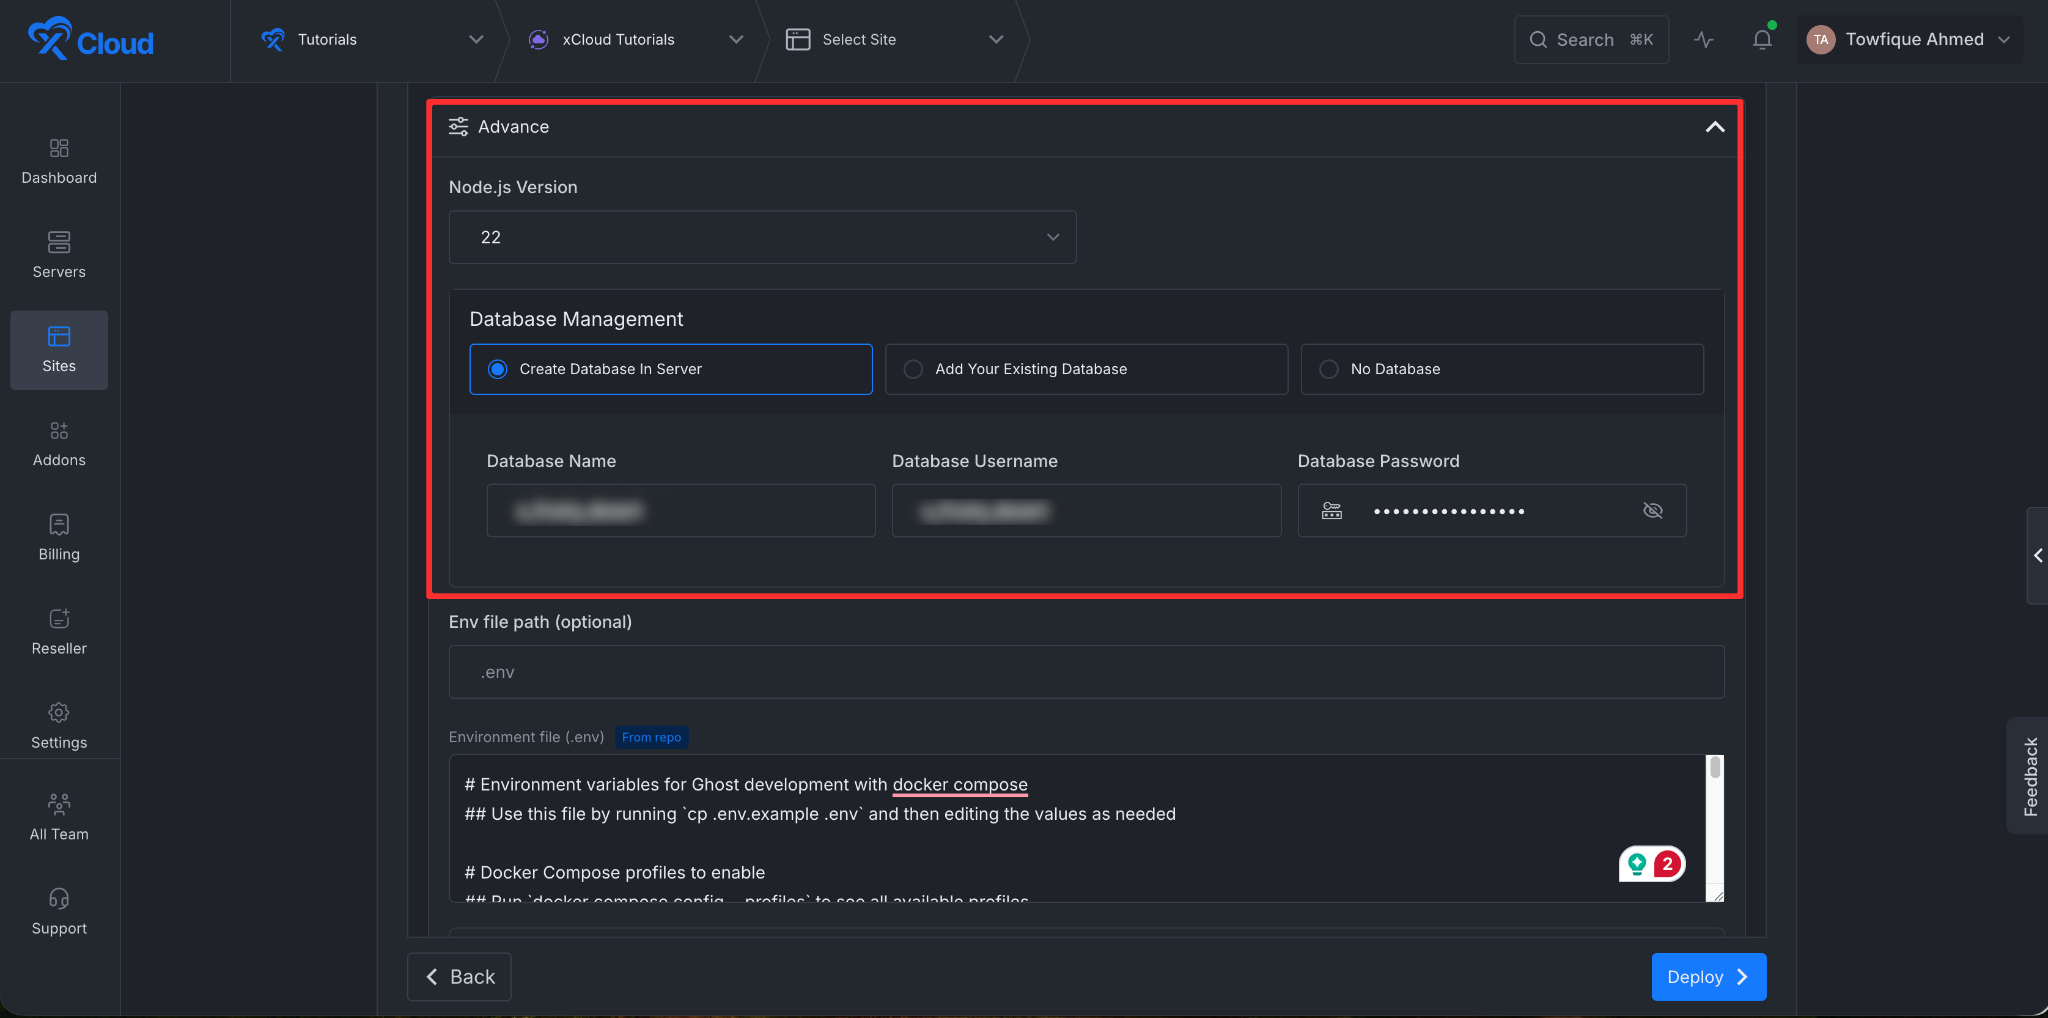
Step 10: Review or Edit Environment Variables
Open Advanced to review environment-file settings. Next, you will see that our AI generated the env file directly from your repo. xCloud can use a repository sample first, then fall back to an AI draft when no sample exists.
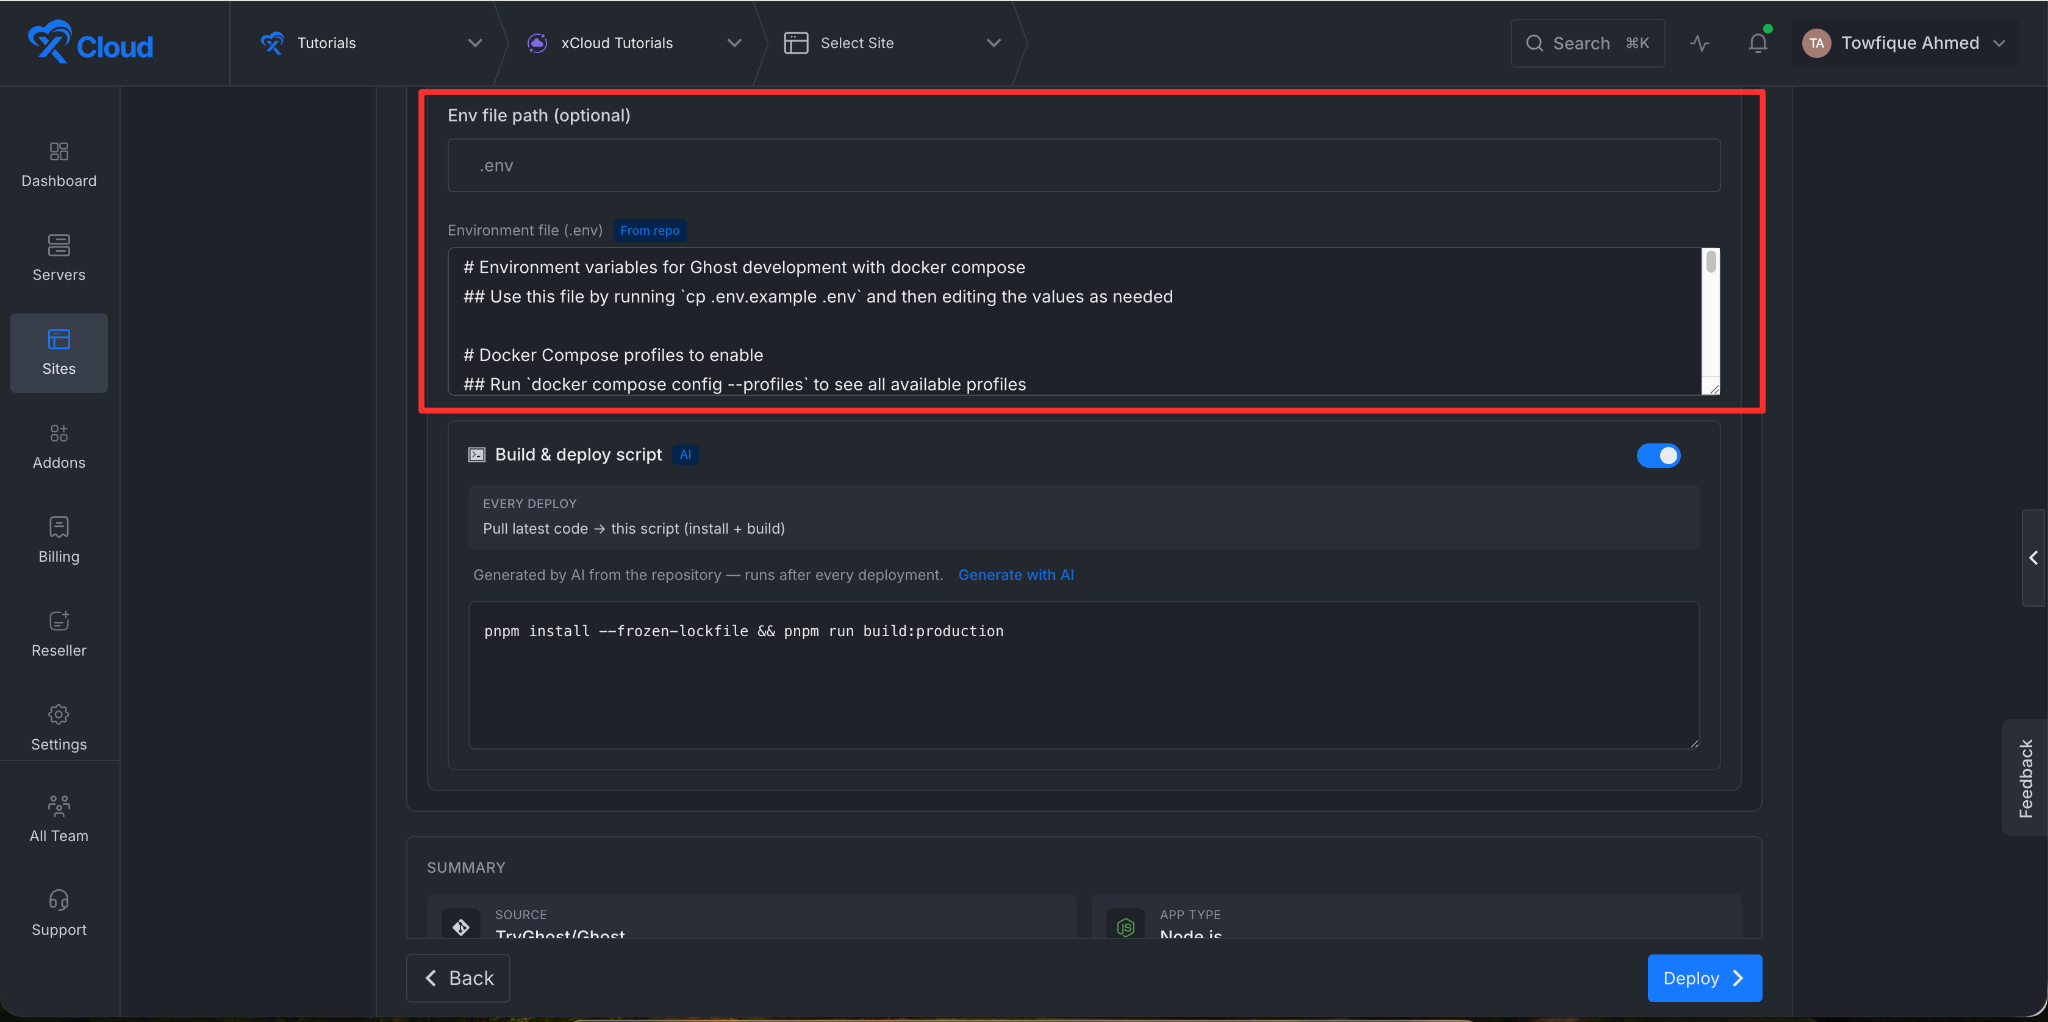
Next, go to the ‘Build & deploy script’ and you will see that a deploy script is generated using AI for the project. For Laravel/PHP apps, xCloud can prefill framework-aware commands such as Composer install, migrations, and config cache. Use Generate with AI when you want xCloud to draft a script from repository context.
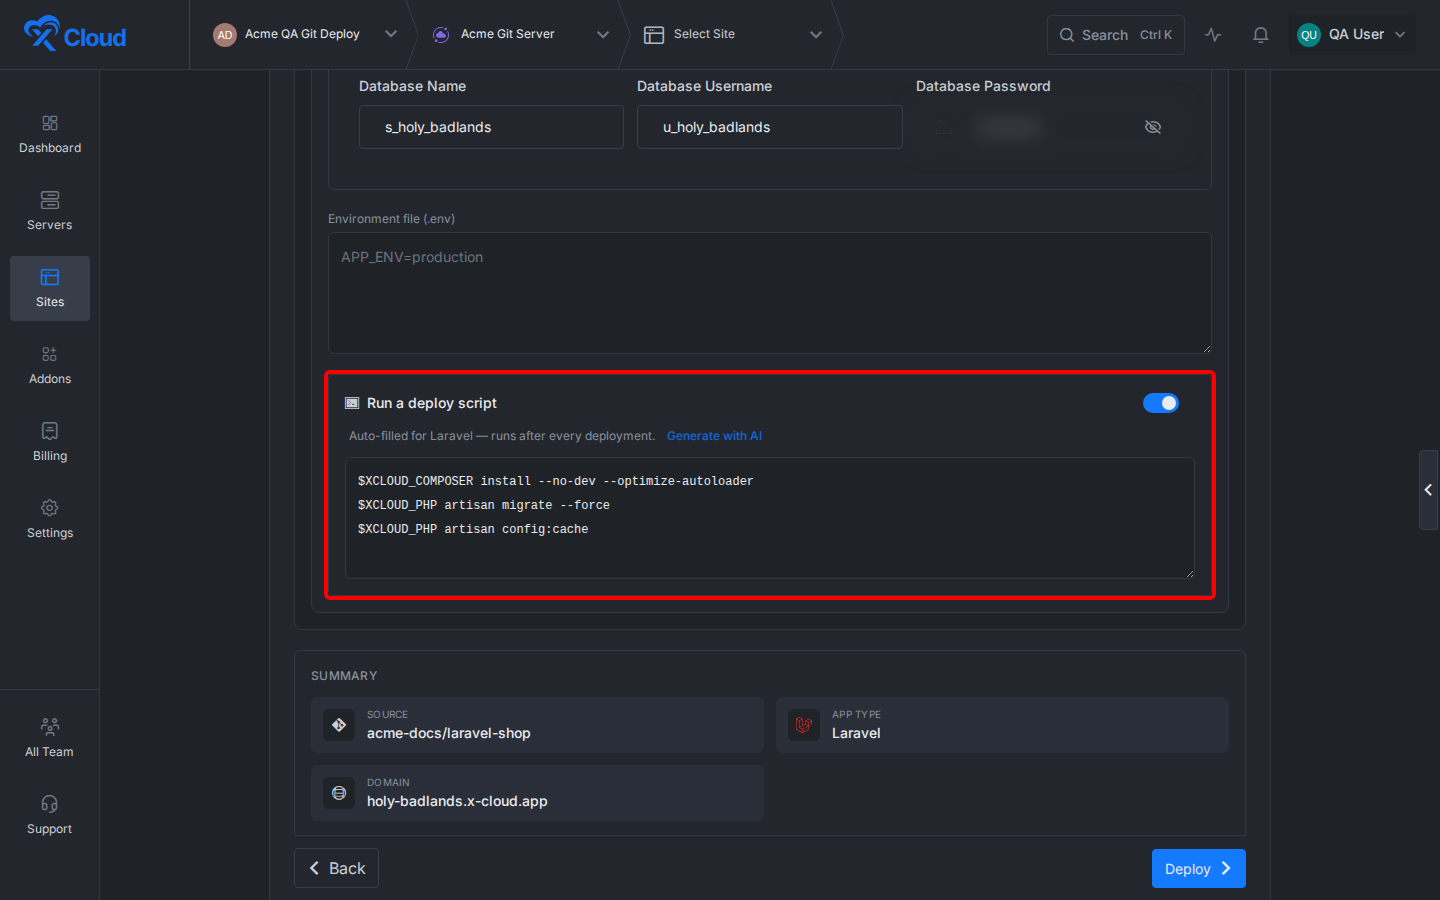
Step 11. Review the information & Deploy
After that, review the information and click on the deploy button, and it will instantly start creating the repository.
And once the deployment is completed, your project will be live on the xCloud dashboard.
Select from a connected GitHub account
When a GitHub account is connected, xCloud can show repositories from that Git account, including private repositories the account can access. So, to deploy your own private repositories with the most simple way, connect your account with xCloud.
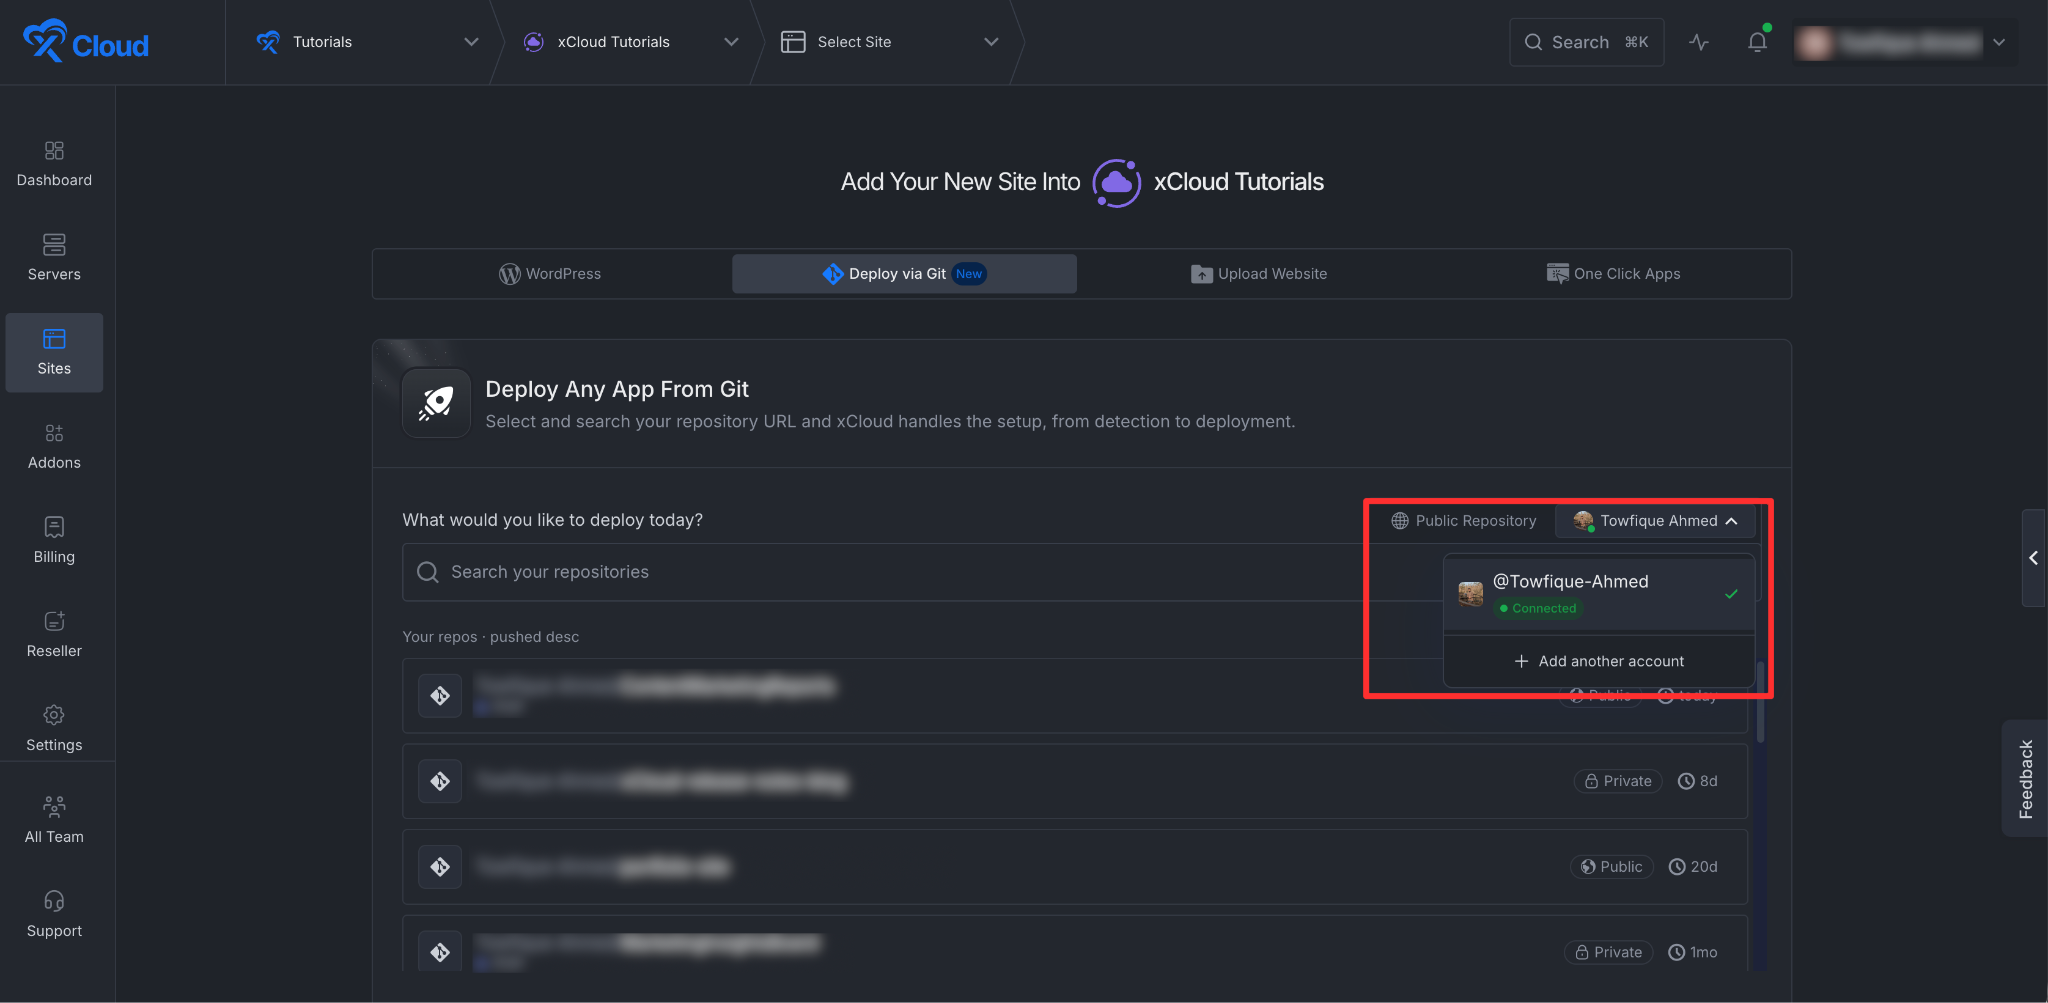
Connect private repositories through GitHub or SSH
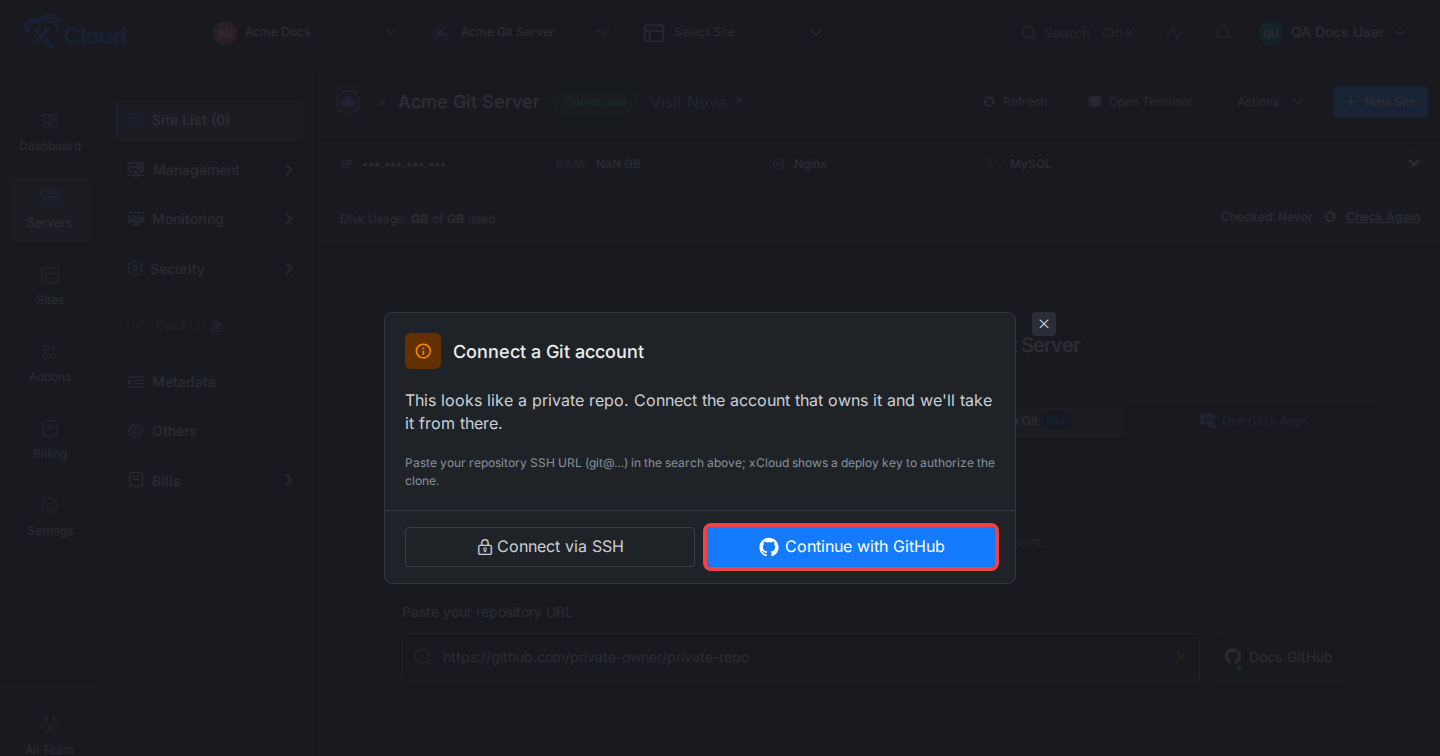
If a private repository cannot be analyzed anonymously, xCloud shows connection options. Use Continue with GitHub to connect a provider account, or Connect via SSH to use a deploy key.
Enable auto-deploy on push for connected repositories
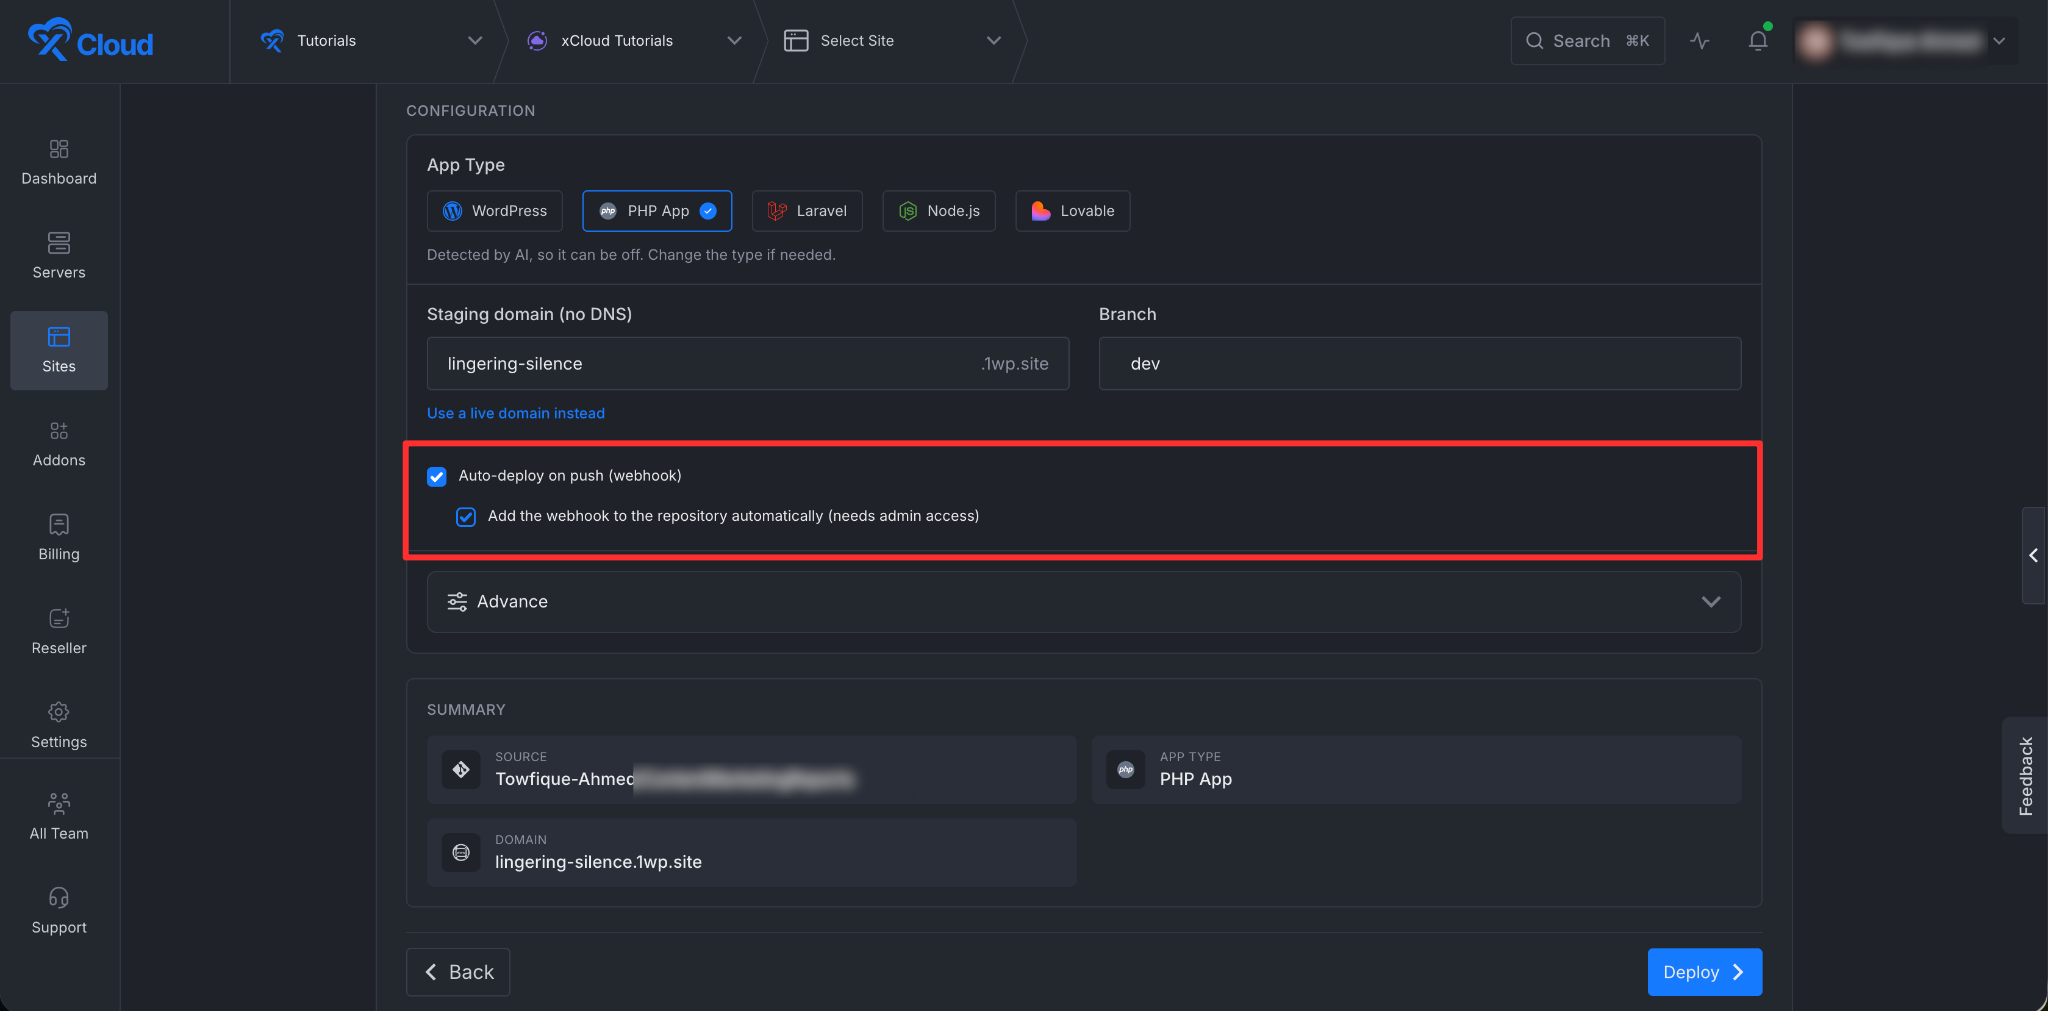
For connected provider repositories, enable Auto-deploy on push (webhook) when you want xCloud to deploy new commits automatically. If the connected account has enough repository permission, xCloud can also add the webhook automatically.
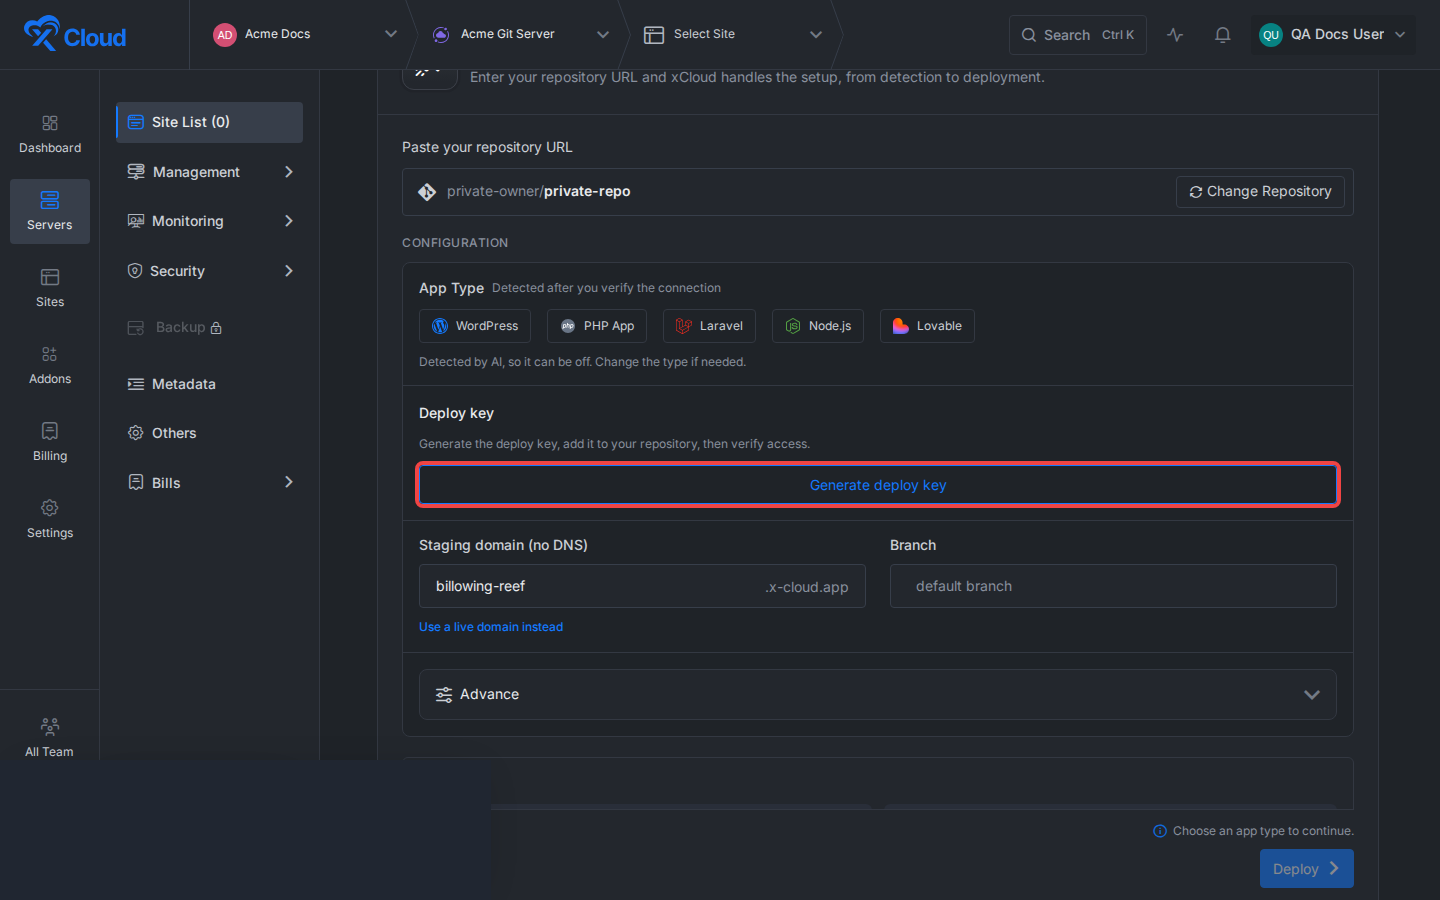
Generate & Add an SSH Deploy Key
For private SSH repositories, generate a deploy key, add it to the repository’s deploy keys, then verify access from xCloud.
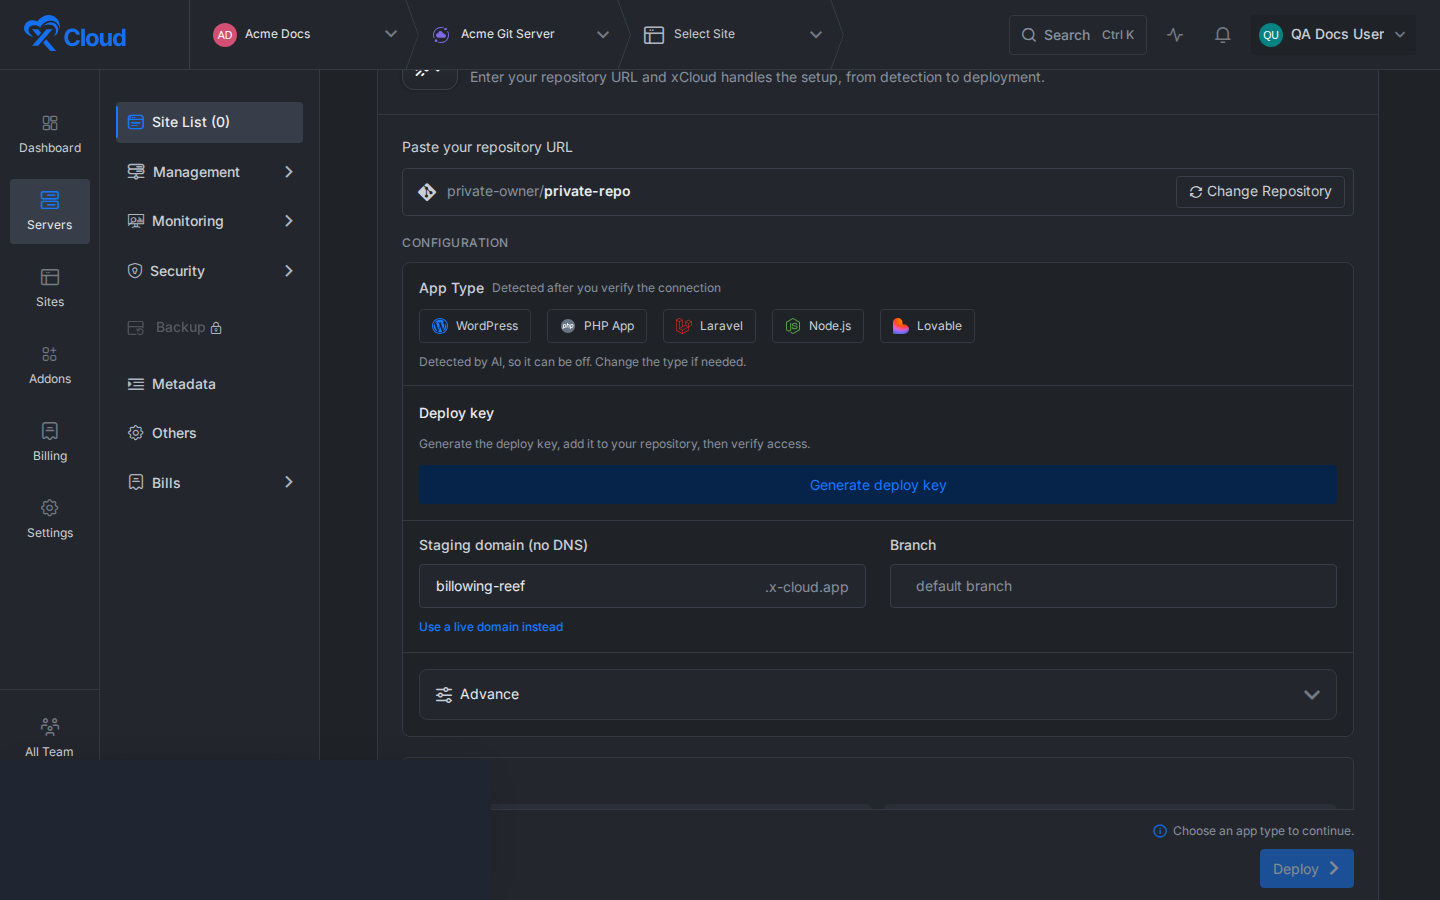
After the key is added to the repository, use the verification step before deploying. Verification allows xCloud to confirm clone access and continue with detection/configuration.
And that’s it! This streamlined process makes deploying your Git projects to xCloud effortless, allowing you to manage your deployments, configurations, and environment settings from a single, intuitive interface.
Limits / edge cases
- App-type detection is helpful but editable; always review it before deployment.
- Private repositories require either a connected GitHub account or an SSH deploy key.
- Auto-add webhook requires repository admin permission from the connected provider account.
- AI deploy scripts can fall back to deterministic templates if AI is unavailable or rate-limited.
- For Node SSR/hybrid apps, the selected port must be free before start and listening after start.
- For Docker Compose repositories, missing tags, missing compose files, build failures, and zero-container results should surface as deployment errors.
- Domain and DNS behavior depends on whether the user chooses staging, live/custom DNS, or Cloudflare-managed validation.
Frequently Asked Questions
Can I deploy a public repository without connecting GitHub?
Yes. You can paste or search a public GitHub repository. If the app needs provider-backed behavior such as webhook creation, connect GitHub first.
Can I deploy a private repository?
Yes. Use a connected GitHub account, or choose the SSH path and add the generated deploy key to the repository.
What happens if xCloud detects the wrong app type?
Change the app type manually before clicking Deploy. Detection pre-fills the form but does not lock the choice.
Who owns the build step for Node.js apps?
The deploy script owns install + build for new Node Git deployments. The Start command remains separate for SSR or hybrid runtime processes.
How are environment variables handled?
xCloud can use a repository sample file first. If no sample exists and AI deploy features are enabled, xCloud can suggest an env file. Runtime Node processes source the live .env on restart.
Can xCloud deploy on every Git push?
Yes, when the repository is connected through a provider and webhook settings are enabled. Automatic webhook creation requires sufficient repository permission.
Does this flow support Docker Compose?
Yes. The flow supports Docker Compose Git deployments, including compose discovery, multi-service domain mapping, port ownership handling, and env sample seeding.
After reviewing the repository, domain, runtime, environment, script, database/Redis, and webhook settings, click Deploy to create the site. For private repositories, finish the GitHub connection or SSH deploy-key verification first. For Docker Compose apps, review service-to-domain port mapping carefully before deployment.
Once your project is live, you can update it by pushing changes to your Git repository and redeploying from the xCloud dashboard.
For deployments that are stuck, failing, or not triggering at all, see Troubleshooting Git Deployments.
Still stuck? Contact our support team for any of your queries.