

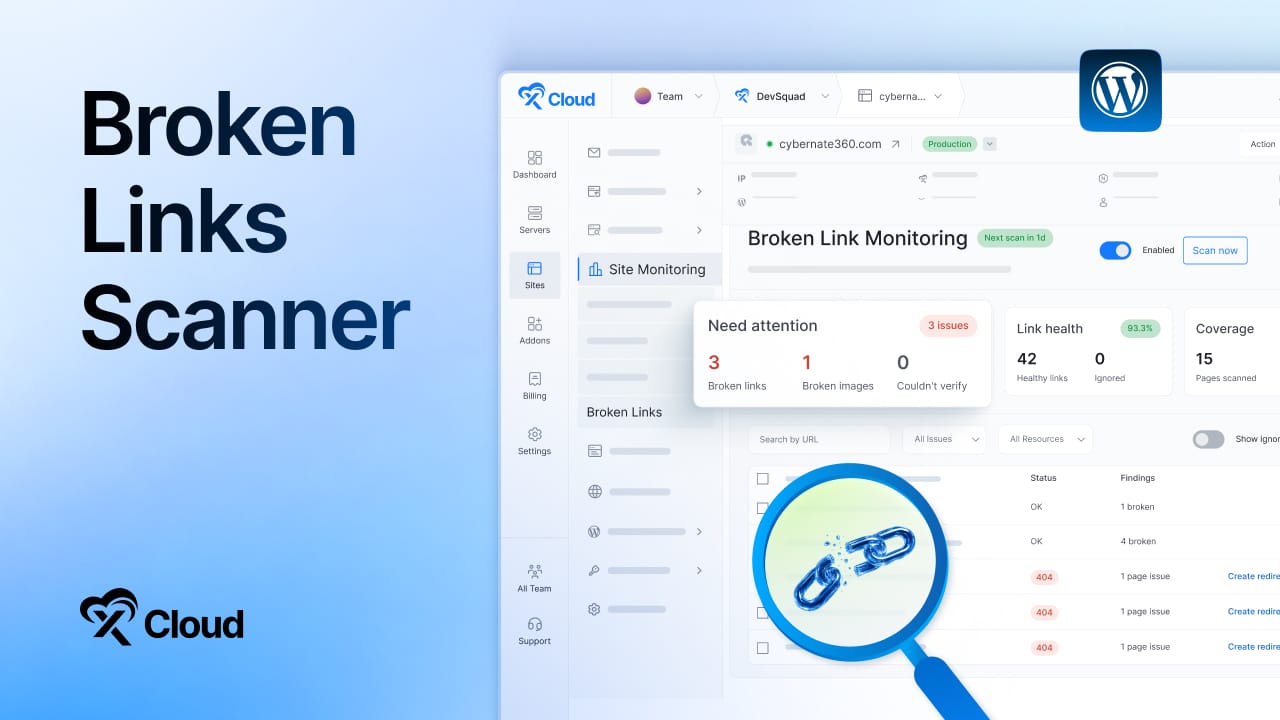
Finding a 404 error on your website is frustrating, both for you and for your visitors. Someone clicks expecting content and lands on an error page instead. Most won’t try again; they leave, and many never come back.
Broken links are usually the cause. These are hyperlinks that lead to pages or resources that no longer exist, whether on your own site or on external websites you’ve linked to. Deleted pages, changed URLs, expired domains, and server issues all produce them.
Picture a customer trying to buy from your store. They click “Buy Now” and land on an error page instead of checkout. That’s a sale lost to a problem you didn’t know existed.
In this guide, we’ll break down what broken links are, the error types behind them, why every WordPress site needs a broken link checker, and how to find and fix broken links using xCloud’s built-in Broken Link Monitoring, without installing a single plugin.
Understanding Broken Links and Their Types
What Is a Broken Link?
A broken link is a hyperlink that points to a page or resource that doesn’t exist or can’t be reached. This happens when a page is deleted, a slug is misspelled, content is moved without a redirect, a domain changes, or the destination server is temporarily unavailable. When someone clicks a broken link, they get an error instead of content, and those errors hurt both user experience and SEO.
Broken links come in three main types:
- Broken internal links. Links within your website that don’t work. These connect your own pages to each other, and when they break, they interrupt visitor journeys and search engine crawl paths.
- Broken outbound links. Links from your website to other websites that fail. You linked to a resource, and that resource has since moved or disappeared.
- Broken backlinks. Links from other websites pointing to your site that no longer resolve, usually because you deleted or moved the target page without a redirect. These waste referral traffic and the link equity those pages earned.
Broken resources go beyond hyperlinks, too. Missing images, stylesheets, scripts, and media files break how pages render even when the page itself loads fine.
Common Error Types Behind Broken Links
Not every broken link fails the same way. When a link stops working, the server (or the lack of a response) tells you why. These are the error types you’ll encounter, and the ones xCloud’s scanner detects and lets you filter by:
- 404 Not Found. The page doesn’t exist at that URL. The most common broken link error.
- Soft 404. The page returns a success status but shows error or empty content. These are sneaky because standard checks miss them.
- DNS error. The domain name can’t be resolved. Common with expired domains or dead external sites.
- Timeout. The server took too long to respond, so the request gave up.
- Server error (5xx). The destination server failed to process the request.
- Redirect. The URL forwards somewhere else. Not broken, but worth reviewing, since redirects add load time and can mask deleted content.
- Redirect chain. The URL passes through multiple redirects before resolving. Chains slow visitors down and dilute SEO signals.
- Blocked request. The destination refused the request, so the resource couldn’t be verified.
Why You Need a Broken Link Checker for WordPress
Checking links by hand means opening every page and clicking every link, then repeating the whole exercise regularly, because links keep breaking as content changes and external sites move. On a site with hundreds of pages, manual checking isn’t just slow; it reliably misses things like soft 404s, broken images, and failing scripts that look fine at a glance.
A broken link checker for WordPress automates this. It crawls your pages, tests every link and resource, and reports exactly what’s broken and where.
If your site runs on xCloud, you already have one built in. Broken Link Monitoring lives inside the site dashboard and runs as a managed, server-side scan, so there’s no plugin to install, no external crawler to configure, and no load added to your WordPress application. Here’s what it gives you:
- Managed scans – run a scan on demand or on a daily or weekly schedule.
- Live scan progress – watch pages scanned, links checked, healthy links, and findings update in real time.
- Large crawl coverage – scan up to 5,000 pages in a single run, with a safety limit for very large sites.
- Broken link and broken image grouping – see at a glance how many issues need attention.
- Unverified issue visibility – review resources xCloud couldn’t verify, such as timeouts, DNS errors, blocked requests, or redirect chains.
- Filters and search – narrow findings by issue type, resource type, or ignored status, or search by URL and source page.
- Cancelable scans – stop an active scan without losing findings already received.
- CSV export – download findings for reporting or external cleanup workflows.
- Redirect-ready findings – use broken-link findings as the starting point for fixing links through xCloud redirects.
Find and Fix Broken Links on Your WordPress Site with xCloud
Before you start, make sure the site is a WordPress site managed in xCloud, your team has access to the Broken Links feature, you have permission to manage broken links for the site, and the site is reachable from the server so xCloud can crawl its pages.
Then follow these steps.
Step 1: Access Broken Link Monitoring
From your xCloud dashboard, open the WordPress site, then go to Site Monitoring → Broken Links.
The Broken Link Monitoring page shows everything in one place: the scan status, schedule, summary counters, filters, and the findings table.
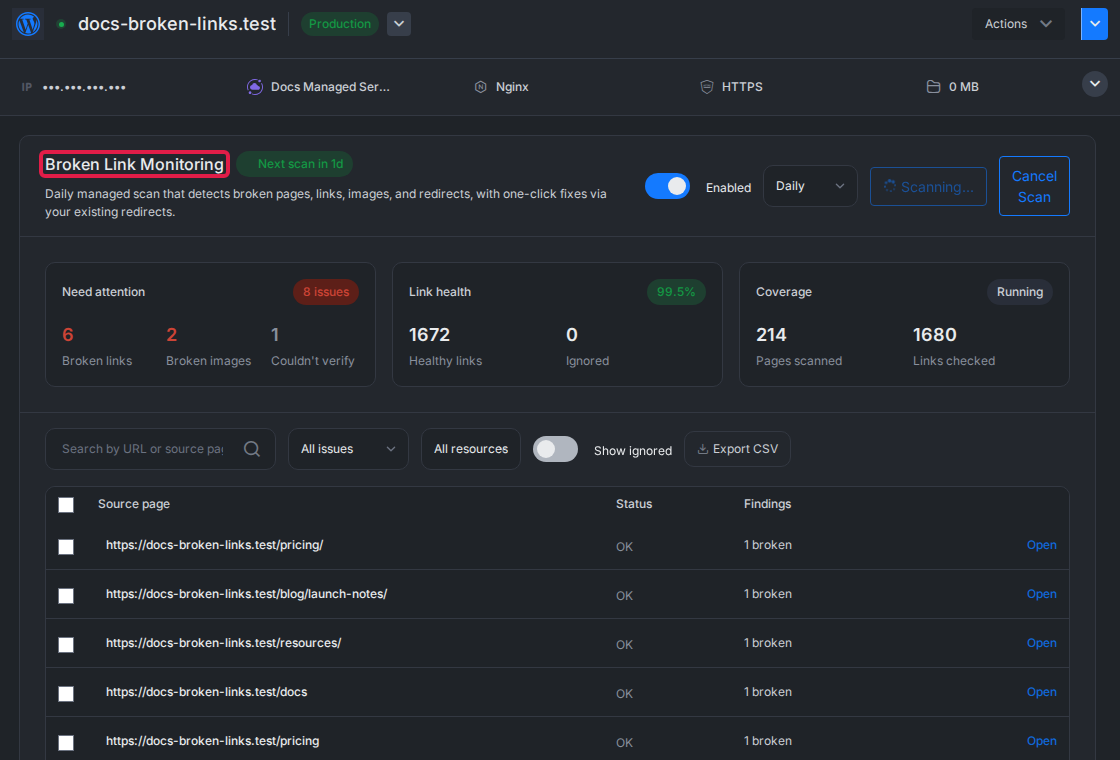
You’ll immediately see whether monitoring is enabled, when the next scan will run, the latest scan status, and the current issue summary.
Step 2: Review the Scan Summary
The summary cards at the top give you a quick read on the health of the site:
- Need attention shows broken links, broken images, and resources xCloud could not verify.
- Link health shows healthy links and ignored findings.
- Coverage shows pages scanned, links checked, and whether the latest scan completed or is still running.
A zero count under “Need attention” means the site is healthy. Otherwise, the following steps show exactly where the problems are.
Step 3: Run an On-Demand Scan
Click Scan now to start a scan immediately.
While the scan is running, xCloud updates the counters live. You can watch how many pages have been scanned, how many links have been checked, and how many findings have been detected so far.
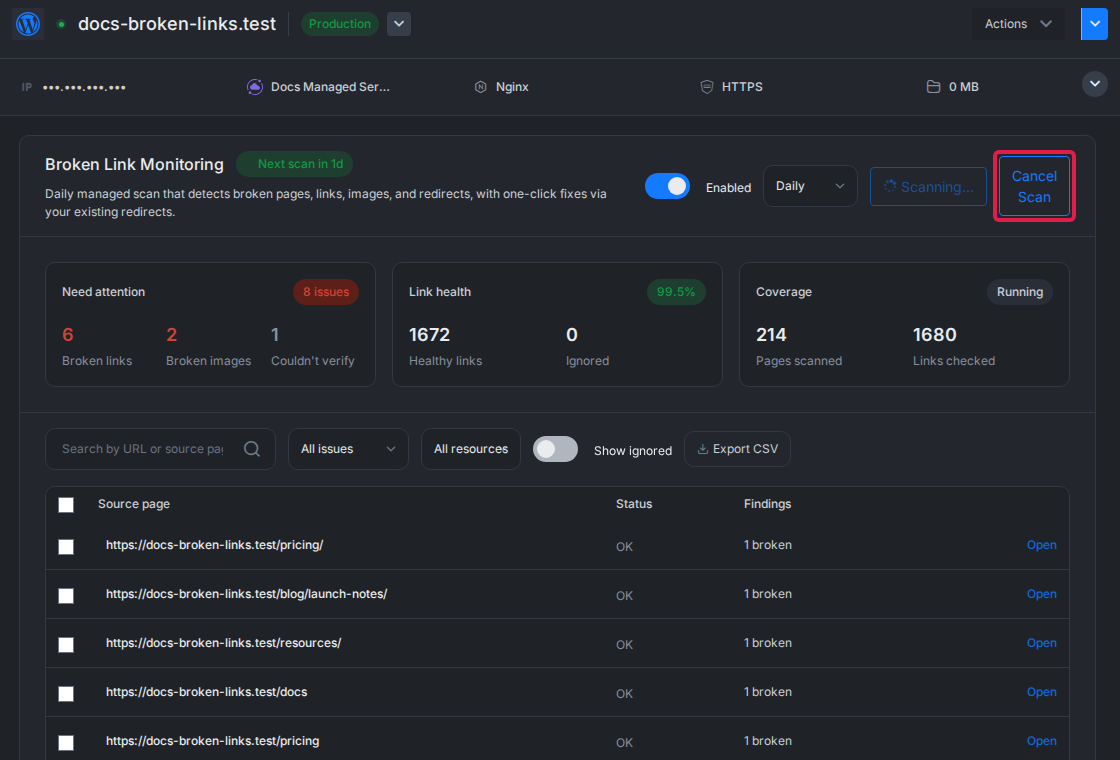
You don’t need to keep the page open. The scan runs server-side and continues in the background even if you close the tab or move on to something else.
Step 4: Cancel a Running Scan (Optional)
If a scan was started unintentionally or no longer needs to run, click Cancel Scan.
xCloud stops the active run cleanly. Anything discovered before cancellation stays in the findings list, so you don’t lose partial results.
Step 5: Analyze and Filter Scan Findings
Once a scan has results, the findings table lists each affected source page along with its status and issue counts. To work through them efficiently, you can:
- Search by URL or source page.
- Filter by issue type: 404, DNS error, timeout, redirect, redirect chain, soft 404, or server error.
- Filter by resource type: pages, links, images, stylesheets, scripts, or media.
- Toggle Show ignored to include findings you’ve previously ignored.
- Open a finding row to inspect the details.
- Click Export CSV to download the full list.
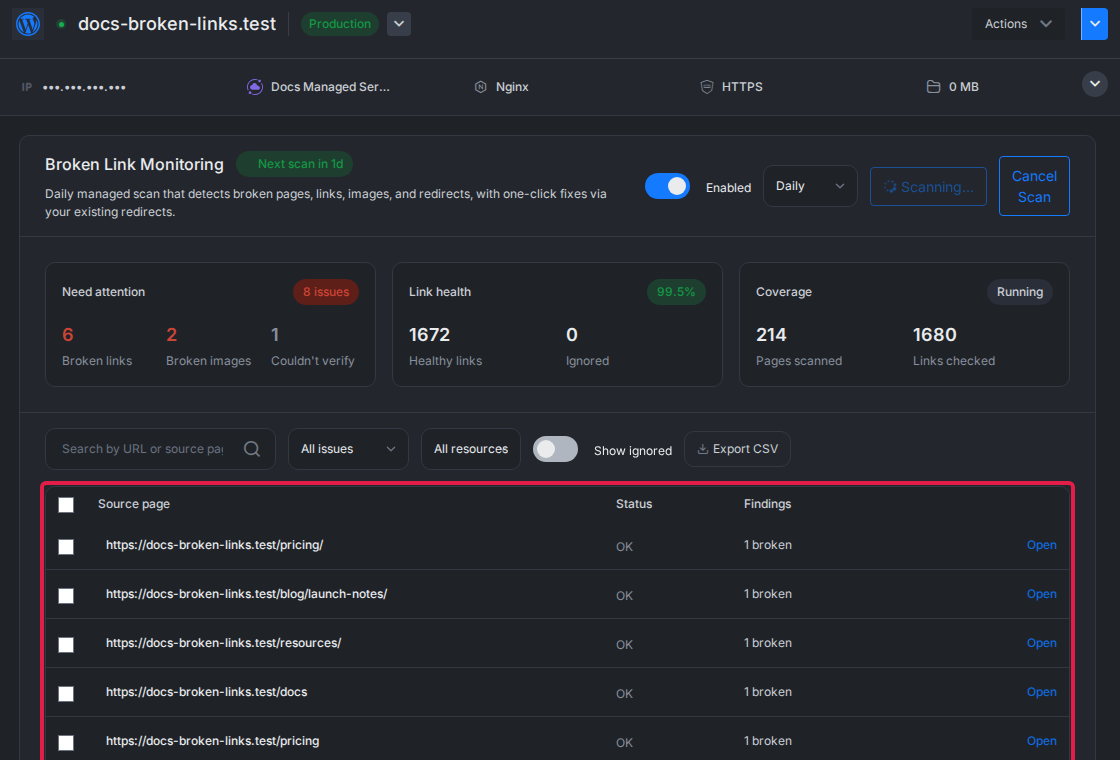
A practical way to triage: filter for 404s on pages first, since those hurt visitors and SEO the most, then move on to broken images and external links.
Step 6: Fix the Broken Links
With the findings in hand, work through them based on what each issue is:
- Update the URL where the target content still exists at a new address, correcting the link at its source page.
- Set up a redirect in xCloud where a page was moved or deleted, so the old URL forwards visitors and link equity to the right destination.
- Remove the link where the destination is permanently gone and has no replacement.
- Ignore the finding where it’s a false positive or intentionally unreachable, so it stops appearing in your active list.
Step 7: Configure Automated Scan Scheduling
Use the schedule dropdown to choose how often xCloud should scan the site: daily, weekly, or manual only.
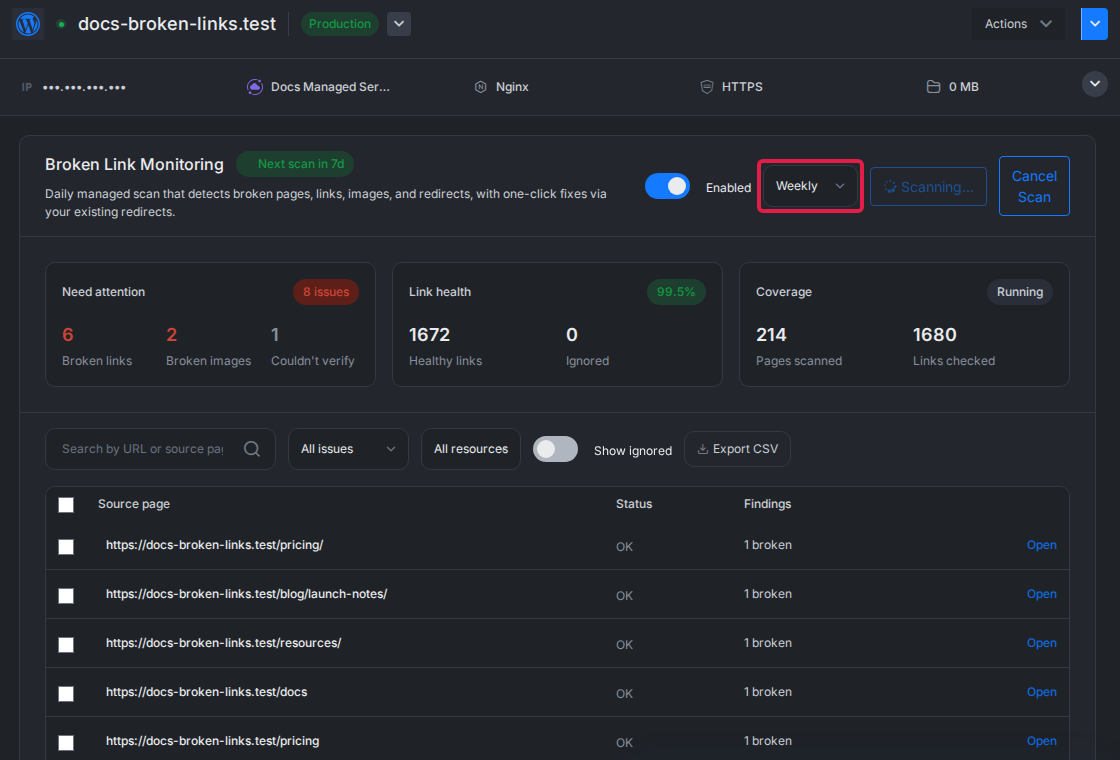
The selected schedule controls when the next managed scan runs. For content-heavy sites that publish often, daily scans catch new broken links quickly. For smaller or slower-moving sites, weekly is usually enough.
Broken Link Monitoring Settings Overview
| Option | What it does |
|---|---|
| Enabled | Turns Broken Link Monitoring on or off for the site. |
| Daily | Runs a managed scan every day. |
| Weekly | Runs a managed scan once per week. |
| Manual only | Disables scheduled scans; you can still run scans manually. |
| Scan now | Starts a new scan immediately. |
| Cancel Scan | Stops the active scan run. |
| Search | Finds results by URL or source page. |
| Issue filter | Narrows findings by error type, such as 404, DNS error, timeout, redirect, or soft 404. |
| Resource filter | Narrows findings by resource type, such as pages, links, images, stylesheets, scripts, or media. |
| Show ignored | Includes ignored findings in the table. |
| Export CSV | Downloads the findings list for offline review or reporting. |
Scan Limits and Edge Case Handling
Broken Link Monitoring is designed to handle large sites and imperfect network conditions predictably. These are the operational limits and how xCloud behaves when a scan can’t complete normally:
- Broken Link Monitoring is available for WordPress sites.
- A single scan can crawl up to 5,000 pages.
- xCloud also applies a links-checked safety ceiling so oversized scans can’t run indefinitely.
- If a site exceeds the scan budget, xCloud marks the scan as truncated rather than treating it as failed. You still get the findings it collected.
- If a scan stops sending progress, xCloud marks the run as failed so a new scan can start later.
- A cancelled scan keeps the findings discovered before cancellation.
Find and Fix Broken Backlinks
Broken backlinks work in the other direction: another website links to a page on your site that no longer exists. The visitor clicking that link, and the SEO value the link carries, both hit a 404 on your end.
The fix is entirely on your side, and it doesn’t require contacting anyone. Set up a redirect in xCloud from the dead URL to the most relevant live page. The old backlink starts working again, visitors land on real content, and the link equity that external site was passing to you is preserved instead of lost.
As a habit, whenever you delete or move a page that has been live for a while, add a redirect at the same time. That single step prevents both broken backlinks and the internal 404s your next scan would otherwise catch.
Benefits of Fixing Broken Links
Staying on top of broken links pays off in several ways:
- Better user experience. Visitors reach the content they clicked for instead of error pages. Fewer dead ends means lower bounce rates and more completed journeys, whether that’s reading an article or finishing a purchase.
- Better crawlability. Search engines discover and index your site by following links. Working links keep crawl paths open and stop crawl budget being wasted on URLs that lead nowhere.
- Preserved link equity. Internal links and backlinks pass authority between pages. Fixing broken links and redirecting removed pages keeps that equity flowing to your live content instead of dead-ending.
- Stronger SEO performance. A well-maintained link structure, clean crawl paths, and preserved equity all feed into better search rankings over time.
- A more professional reputation. Sites full of dead links look abandoned. Working links signal that the site, and the business behind it, is actively maintained and trustworthy.
- Early warning for bigger problems. A cluster of new broken links often points to something larger: a botched migration, a misconfigured plugin, an expired external service. Regular scans surface these issues before they spread.
Best Practices for Preventing Broken Links
Fixing existing broken links is only half the work. Links decay constantly: you restructure content, external sites move or shut down, media files get replaced, and plugins or themes change how assets are loaded. Without a prevention routine, the findings list you just cleared will refill within months. The practices below turn broken-link management from a periodic cleanup project into a low-effort background process:
- Turn on scheduled scans. Set Broken Link Monitoring to daily or weekly so new issues surface automatically instead of accumulating unnoticed. Daily suits sites that publish frequently or link out heavily; weekly is usually enough for smaller or slower-moving sites. With team notifications enabled, new findings reach you without anyone remembering to check.
- Set up redirects for moved or deleted pages. Deleting or relocating a page without a redirect breaks every internal link, bookmark, and backlink pointing at it. Use your broken-link findings as the starting point and add redirects in xCloud so old URLs land on the correct content instead of a 404, preserving both visitors and the link equity those URLs have earned.
- Keep your URL structure stable. Every URL change is a potential broken link somewhere you can’t see, including on other people’s sites. Plan permalink structures before publishing, avoid renaming slugs on established content, and when a change is unavoidable, redirect the old URL immediately.
- Review external links periodically. You can’t control when other sites remove pages, change domains, or shut down, and external rot is invisible until someone clicks. A scheduled scan flags dead external resources as they appear, so you can update, replace, or remove the link before it affects readers.
- Audit findings after major site changes. Redesigns, migrations, theme switches, and large content reorganizations are when broken links appear in bulk. Run a manual scan right after any structural change instead of waiting for the next scheduled run.
Wrapping Up
Broken links quietly cost you visitors, rankings, and sales until someone notices, and by then the damage is done. Finding and fixing them promptly makes your site more dependable and easier for users to navigate, and keeping a scanner running means new issues get caught before your visitors find them.
With Broken Link Monitoring built into xCloud, that whole routine lives in one place: open Site Monitoring → Broken Links, run a scan, work through the findings, set a schedule, and let it run in the background. If you manage client sites, the CSV export also gives you a clean list to include in maintenance reports or hand off for cleanup.
Happy fixing!
Frequently Asked Questions
Does the page need to stay open while a scan runs?
No. The scan runs server-side on xCloud’s infrastructure. The page shows live progress while it’s open, but the scan continues in the background if you close it.
How many pages can one scan cover?
A single scan can crawl up to 5,000 pages. xCloud also applies a links-checked safety ceiling, and if a site exceeds the scan budget, the run is marked as truncated with all collected findings kept.
Does xCloud create a separate task for every page it scans?
No. The streaming scanner uses one background scan run and streams progress back to xCloud in batches, so there’s no queue of thousands of small jobs.
What happens when xCloud finds new broken links?
New findings appear in the Broken Links table, and team notifications can be sent when new issues are discovered.
Can I export the findings?
Yes. Click Export CSV on the Broken Links page to download the full findings list for reporting or external cleanup.
Can I stop a scan after it starts?
Yes. Click Cancel Scan while the scan is running. xCloud stops the run cleanly and keeps every finding received up to that point.
Last updated August 11, 2026
← All articles