

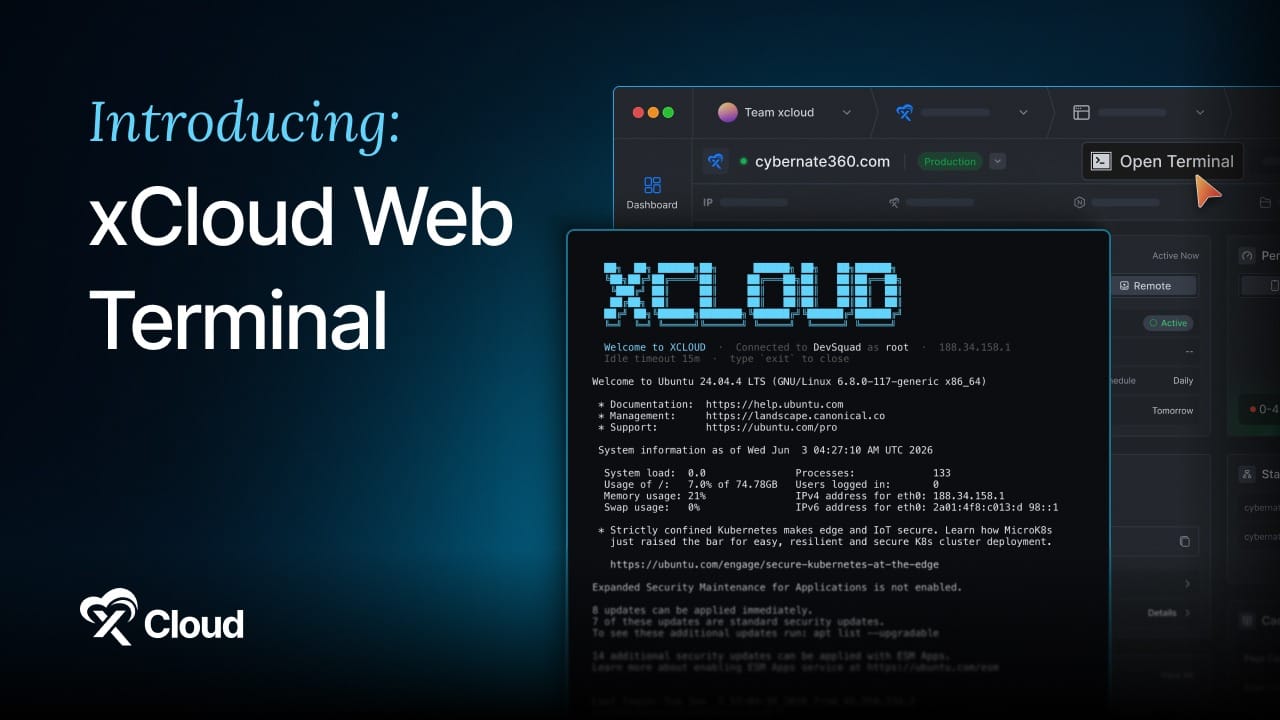
If you have ever needed to run a single command on a server, you know the small detour it takes to get there. You open a terminal application, dig up the right key, type out the host and username, and wait to connect, all before you can do the thing you actually logged in for. For a quick task, the setup can take longer than the task itself.
A web terminal removes that detour. It puts a working command line inside your browser, connected to your server, so you can start typing commands the moment a page loads. No client to install, no keys to shuffle between machines, no host details to memorize.
This guide explains what a web terminal is, how it works, and when it beats a traditional setup. It also covers access levels, security & real use cases and finishes with a hands-on walkthrough of opening one in xCloud so you can see the idea in practice.
What Is a Web Terminal?
A web terminal is a command-line interface that runs inside a web browser instead of a desktop application. It behaves like the terminal you already know, accepting commands, returning output, and giving you an interactive shell on a remote machine but the connection happens through a web page rather than a locally installed SSH client.
Put simply, it is the same shell experience delivered through a different door. Instead of opening a separate program and authenticating yourself each time, you reach a live session straight from a dashboard or control panel. The server still runs your commands exactly as it would over SSH. What changes is everything that normally sits between you and the prompt.
You may also see web terminals described by other names, including:
- Browser-based terminal or online terminal
- Web-based SSH or web SSH
- In-dashboard terminal or cloud terminal
They all point to the same core idea: a real shell session, reachable from a browser tab.
How a Web Terminal Works
Behind the friendly interface, a web terminal is doing something fairly elegant. When you open a session, your browser establishes a live, two-way connection to the server, usually over a secure protocol. The server starts a shell process and streams its output back to the page, while your keystrokes travel the other way in real time. The result feels indistinguishable from a local terminal, because functionally it is one.
A few pieces make this possible:
- A Live Connection: A persistent channel keeps the browser and server in constant conversation, so output appears as it happens rather than after a page refresh.
- A Shell on the Server: The session is tied to a real user account and shell, which is why your permissions, environment, and file access all behave normally.
- A Rendering Layer in the Browser: A terminal emulator drawn on the page interprets the stream and displays it as the familiar black-and-text interface, including colors, cursor movement and scrollback.
Why Use a Web Terminal? Key Benefits
The appeal of a web terminal comes down to removing friction without giving up control. Here is where that pays off.
Zero Setup, Instant Access
There is no client to install and no key to copy onto a new machine. You open a page, and the session is ready. That matters most in unplanned moments, like a site acting up or a log you need to read right now, when the last thing you want is a setup process standing in your way.
Access from Anywhere on Any Device
Because everything lives in the browser, you are no longer tied to the one computer that has your keys installed. You can connect from a laptop, a colleague’s machine, or a phone in a pinch, which is a quiet lifesaver for anyone who supports systems away from their desk.
Easier And Safer Team Access
Sharing private keys around a team is awkward and risky. A web terminal lets a platform govern who can connect and at what level, so access can be granted, scoped, or revoked centrally instead of through a pile of key files scattered across people’s laptops.
Faster Troubleshooting
Some problems are easiest to fix while they are still unfolding. With a terminal one click away, you can tail a log live, restart a service, or test a fix the instant an issue appears, rather than losing momentum to a connection routine first.
A Gentler Learning Curve
For team members who are comfortable with a dashboard but wary of the command line, a built-in terminal lowers the entry barrier. There is no client to understand and no key management to learn, just a prompt waiting in a familiar interface.
Web Terminal vs. Traditional SSH: What’s the Difference?
Both web terminals and traditional SSH clients provide access to a remote server command line. The main difference lies in how you connect and manage that access.
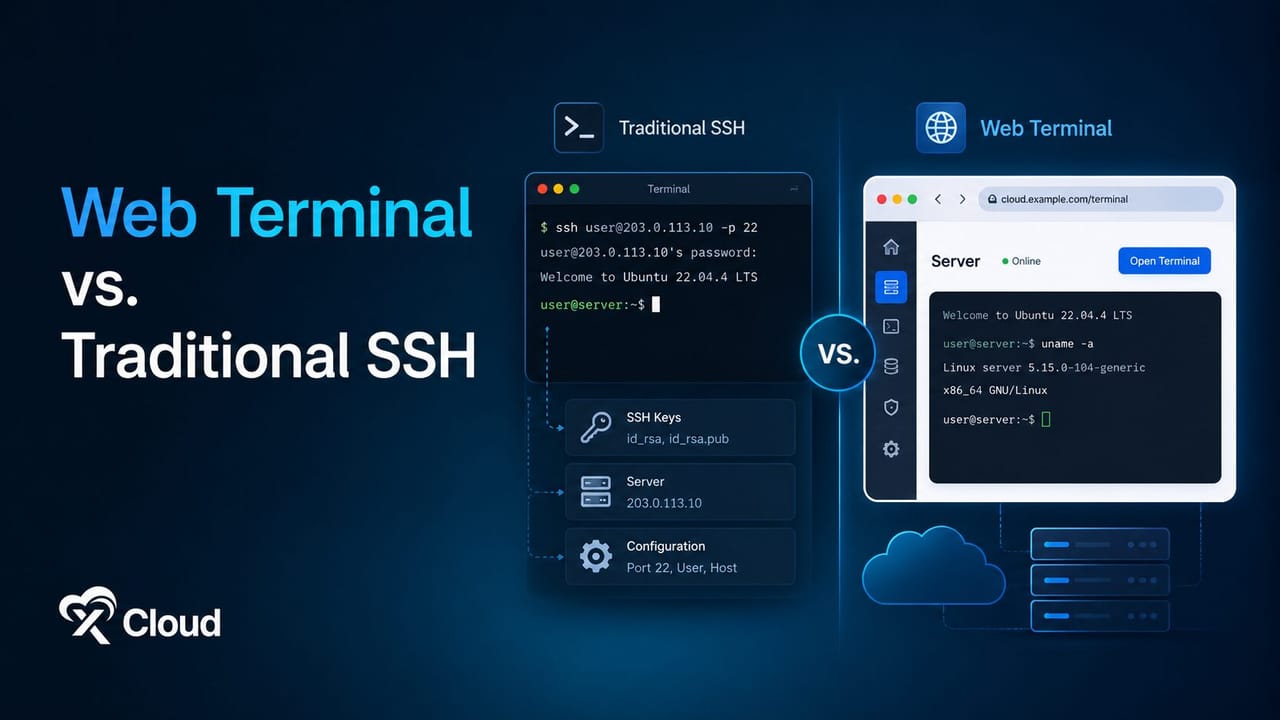
While traditional SSH offers greater control and customization, web terminals focus on convenience, accessibility and ease of use.
| Traditional SSH Client | Web Terminal |
| Requires a dedicated SSH client | Works directly in a web browser |
| SSH keys and credentials are managed separately | Authentication can be integrated with your hosting platform |
| Connection details often need manual configuration | Connection details are managed behind the scenes |
| Access settings may need to be replicated across devices | Available from any device with a browser |
| Offers extensive customization and advanced workflows | Prioritizes simplicity and accessibility |
| Well suited for long and intensive terminal sessions | Ideal for quick access and everyday server management |
How to Open A Web Terminal in xCloud
The xCloud Web Terminal helps you access your servers and websites directly from your browser without setting up SSH clients or managing SSH keys. You can open terminal sessions as a root user, Sudo user, or within a specific site environment.
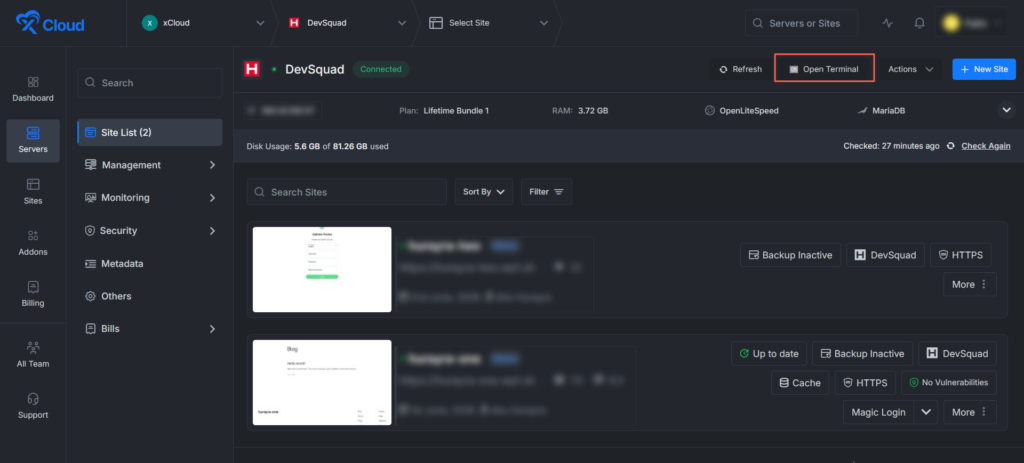
Step 1: Launch a Root Terminal Session
Open Servers from the sidebar and select the server you want to manage. Click Open Terminal from the top-right corner.
Use root access for server-wide administration, software installation, service management and system-level troubleshooting.
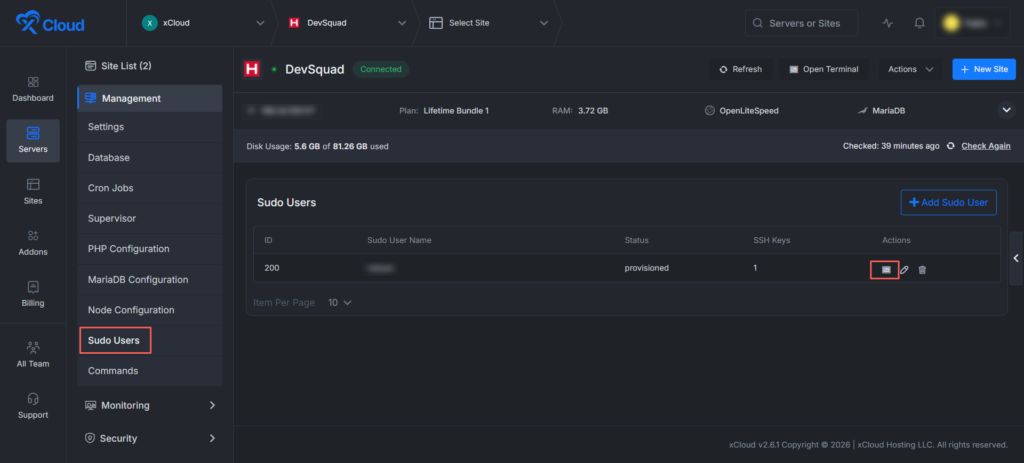
Step 2: Open the Web Terminal as a Sudo User
Select your server, open Management and click Sudo Users. Find the desired Sudo user and click the terminal icon.
This opens a terminal session with that user’s permissions, making it ideal for delegated server access without sharing root credentials.
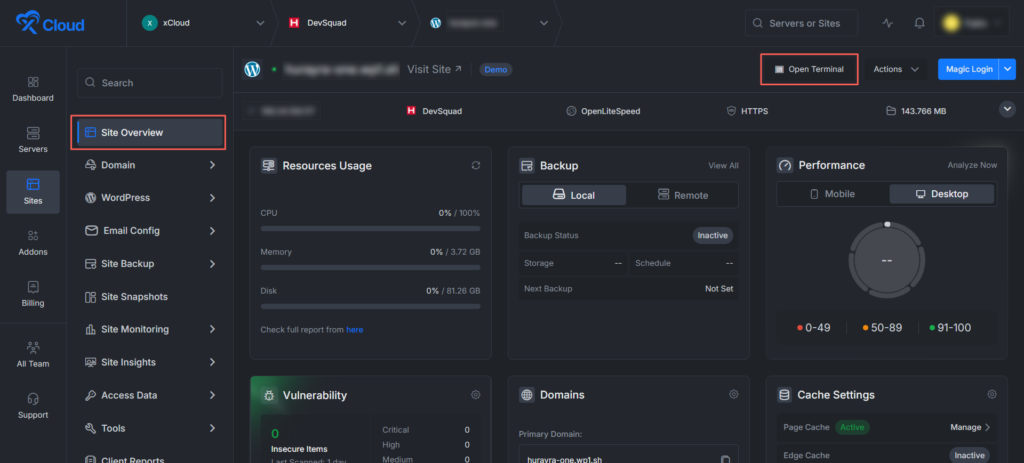
Step 3: Open the Site Web Terminal
Open Sites and select the website you want to manage. Click Open Terminal from the Site Overview page.
The terminal session is limited to that site’s environment, making it suitable for WP-CLI commands, file management, and site-specific maintenance.
Step 4: Start Working in Your Terminal
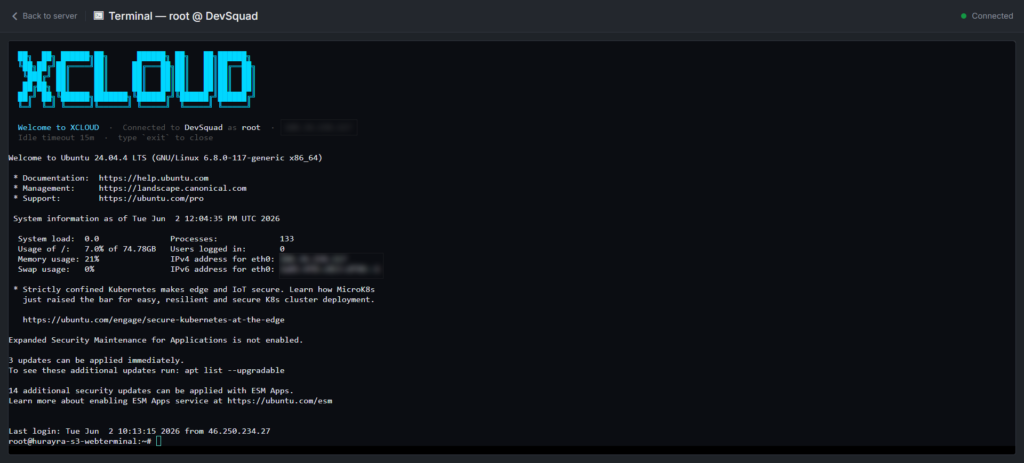
Once connected, xCloud displays a secure terminal session with server information and a command prompt. You can run commands just as you would through SSH.
When you’re finished, type exit to close the session. Idle sessions automatically close after 15 minutes for security.
That’s it. You can now access and manage your servers and sites directly from the xCloud dashboard without leaving your browser. For more information check the documentation.
Common Use Cases for a Web Terminal
If a task would normally send you reaching for SSH, it is almost certainly something a web terminal can handle. A web terminal is a general-purpose tool, but a handful of jobs come up again and again:
- Routine maintenance, such as restarting services, clearing caches, or applying updates.
- Reading logs and diagnosing issues in real time when something breaks.
- Running CLI tools like WP-CLI for WordPress, Composer for PHP, or framework-specific commands.
- Managing files and permissions directly on the server.
- Quick checks, including disk usage, running processes, and system load.
- One-off scripts that are easier to run by hand than to schedule.
Web Terminal Security Best Practices And Productivity Tips
Security and efficiency go hand in hand when working with a web terminal. These best practices and tips can help you maintain both.
Security Best Practices
- Apply least privilege. Grant root access only when necessary and use sudo or scoped sessions for routine tasks.
- Use individual accounts for every team member instead of shared credentials. This keeps activity traceable and makes access management easier.
- Enable idle timeouts so inactive sessions close automatically and reduce security risks.
- Close terminal sessions when your work is complete rather than leaving them running in the background.
- Protect your platform account with a strong password and multi-factor authentication since terminal access depends on it.
Workflow Tips
- Match the access level to the task and use the lowest permissions required to complete the job.
- Keep a terminal open in a separate tab during longer troubleshooting sessions so you can move through the dashboard without losing your place.
- Use a one-off command runner for simple and repeatable tasks when opening a full terminal session is unnecessary.
- Maintain a personal or team cheat sheet for frequently used commands to save time and reduce mistakes.
Run Servers Faster with Browser-Based Terminal Access
Traditional SSH access was built for a world of a few servers and a couple of trusted administrators. In a world of distributed teams, dozens of sites and credential-driven attacks, the clients, keys and host inventories that surround it have become a source of friction and risk rather than control.
xCloud Web Terminal offers a cleaner model. Secure, browser-based access. Three access levels matched to the task. Role-based permissions that make least privilege the default. Sessions that expire on their own. And all of it inside the dashboard you already use to run your infrastructure.
If you have found this blog helpful, feel free to subscribe to our blogs for valuable tutorials, guides, knowledge and tips on web hosting and server management. You can also join our Facebook community to share insights and take part in discussions.
Last updated July 25, 2026
← All articles