


The cleanest Syncthing Docker setup is one container from the official syncthing/syncthing image, a folder mounted at /var/syncthing, and host networking so devices can reach it on port 22000. Lock the dashboard on port 8384 behind a password and HTTPS, and your server becomes an always-on sync peer.
Why a server at all? Syncthing is peer-to-peer, so two devices only sync while both are online. A small server that never sleeps gives your laptop, desktop and phone a peer that is always there, with one copy of your folders on a disk you control.
This guide covers both paths. First the Docker Compose way on any Ubuntu server, step by step, then the one-click way on xCloud, with what each leaves on your plate. If containers are new to you, start with what Docker Compose is.
TL;DR
- Syncthing is free, open-source (MPL-2.0) file sync between your own devices, with encrypted transport, device IDs and per-folder file versioning. There is no central cloud drive.
- Docker path: use the official image, mount a data folder at
/var/syncthing, use host networking, then set a dashboard password before anything else. - Ports are the real decision. Opening 22000/TCP and UDP gives fast direct connections. Opening nothing sends traffic through Syncthing’s relays: safer to expose, slower to sync.
- One-click path: pick Syncthing in xCloud’s One Click Apps, set a username, and xCloud generates the password and serves the dashboard over HTTPS.
- Either way, you still own device pairing, version history and testing a restore.
- Back up the whole data folder as one set. It holds the device’s identity keys, so a restored copy must never run next to the original.
The Port Decision Most Syncthing Tutorials Skip
Most guides paste a Compose file and move on. The file you pick decides how your devices connect, and the official example and xCloud’s template make opposite choices. We read xCloud’s Syncthing template (template version 1.0.0, as of November 2026) next to Syncthing’s own Docker README:
| Official Docker example | xCloud one-click template | |
|---|---|---|
| Image | syncthing/syncthing (latest) |
syncthing/syncthing:2.1.5, pinned by digest |
| Network | Host networking | Its own Docker network |
| Sync ports 22000/TCP and UDP | Open on the server | Not published |
| Local discovery 21027/UDP | Open on the server | Not published |
| Dashboard (8384) | Localhost only, until you change it | Only reachable through your domain over HTTPS, not by server IP and port |
| Dashboard login | None until you set one | Your chosen username and a generated 24-character password, set before first start |
| How devices connect | Directly when ports are reachable, relays otherwise | Through Syncthing’s relays, or directly when your other device accepts incoming connections |
| Automatic upgrades | Follows the image tag you pull | Turned off; stays on 2.1.5 until you change it |
| Data | A host folder at /var/syncthing |
The syncthing_data volume at /var/syncthing |
If you only remember one line: open ports buy speed, closed ports buy a smaller attack surface. Syncthing’s relaying page says relayed traffic stays end-to-end encrypted, but the transfer rate is much lower than a direct connection. For documents and notes that rarely matters. For a 200 GB photo folder it does.
What You Need to Self-Host Syncthing
Syncthing itself is light. The disk is what you size for.
| Item | What to plan for |
|---|---|
| Server | A 64-bit Linux server (Ubuntu here) with Docker Engine and the docker compose command |
| RAM and CPU | xCloud’s template asks for at least 1 GB of RAM and 1 CPU core |
| Disk | xCloud’s template asks for 10 GB, plus every file you sync and every old version you keep |
| Ports (Docker path) | 22000/TCP and 22000/UDP for sync, 21027/UDP for local discovery, per Syncthing’s firewall page |
| A domain (optional) | Only if you want the dashboard on HTTPS instead of an SSH tunnel |
Rule of thumb: plan disk as your largest synced folder plus its version history. Syncthing’s file versioning is off by default and keeps old copies in a .stversions folder when you turn it on (Trash Can, Simple, Staggered or External), so history can grow faster than the folder itself.
Option 1: Self-Host Syncthing With Docker Compose
This path follows Syncthing’s Docker README on a fresh Ubuntu server. Lock the server down first: SSH keys, a firewall, and nothing open you don’t need. Our VPS security guide covers the basics.
Step 1: Create the folder and the Compose file
mkdir -p ~/syncthing/data
cd ~/syncthing
nano docker-compose.yml
Paste this file. It is Syncthing’s official example, with two changes: a version tag instead of “latest”, and a data path you choose.
services:
  syncthing:
    image: syncthing/syncthing:2.1.7
    container_name: syncthing
    hostname: my-syncthing
    environment:
      - PUID=1000
      - PGID=1000
      - STGUIADDRESS=
    volumes:
      - ./data:/var/syncthing
    network_mode: host
    restart: unless-stopped
    healthcheck:
      test: curl -fkLsS -m 2 127.0.0.1:8384/rest/noauth/health | grep -o --color=never OK || exit 1
      interval: 1m
      timeout: 10s
      retries: 3
Version 2.1.7 was the latest release on Syncthing’s GitHub releases page as of November 2026; check it for a newer one. The empty STGUIADDRESS= keeps the dashboard on 127.0.0.1:8384, so nobody on the internet can reach it yet.
Step 2: Start Syncthing
docker compose up -d
docker compose ps
The command is docker compose, with a space. Wait until the container shows as healthy. Your synced folders will live in ~/syncthing/data, owned by user and group 1000, the defaults the README documents.
Step 3: Open the sync ports (or decide not to)
For direct connections, allow the sync ports in the server firewall:
sudo ufw allow 22000/tcp
sudo ufw allow 22000/udp
Skip 21027/UDP on a cloud server: local discovery only finds devices on the same network. Skip both rules if you would rather keep the server closed and let devices meet through relays, the same choice xCloud’s template makes.
Step 4: Reach the dashboard and set a password
The dashboard only listens on localhost, so open an SSH tunnel from your own computer:
ssh -L 8384:127.0.0.1:8384 YOUR_SUDO_USER@SERVER_IPThen open http://localhost:8384 in your browser. Syncthing shows a warning that no GUI login is set. Open Actions → Settings, go to the GUI tab, set a GUI username and a long password, and save. Do this before you change anything else.
Step 5 (optional): Put NGINX and HTTPS in front
An SSH tunnel is enough for one person. If you want the dashboard on a domain, point an A record at SERVER_IP and add an NGINX server block. The proxy lines come from Syncthing’s reverse proxy example:
server {
    listen 80;
    server_name sync.example.com;

    location / {
        proxy_set_header Host $host;
        proxy_set_header X-Real-IP $remote_addr;
        proxy_set_header X-Forwarded-For $proxy_add_x_forwarded_for;
        proxy_set_header X-Forwarded-Proto $scheme;
        proxy_pass http://localhost:8384/;
        proxy_read_timeout 600s;
        proxy_send_timeout 600s;
    }
}
Run sudo certbot --nginx -d sync.example.com to add the certificate. Never put the dashboard on a public address without the login from Step 4.
Step 6: Pair a device and share a folder
On the server dashboard, open Actions → Show ID and copy the device ID. On your laptop, click Add Remote Device, paste it and accept the request on the server. Only add IDs you have checked through a channel you trust, because a paired device can be given your folders.
Then click Add Folder, keep its path inside /var/syncthing, and share it. Drop a small test file on one side and wait for Up to Date on the other before you sync anything large.
These steps follow Syncthing’s documentation as of November 2026. Check them against the pages for the version you install.
Option 2: One-Click Syncthing on xCloud
The one-click path gives you the right-hand column of the table above without writing any of it. The full walkthrough with every screenshot is in 👉 How to Deploy Syncthing with xCloud One Click Apps.
Step 1: Pick an NGINX server
You need an xCloud server running NGINX with at least 1 GB of RAM, 1 CPU core and 10 GB of free disk, plus room for your files. Docker apps run on NGINX servers, and xCloud installs Docker with the first container app, as described in enabling Docker on an NGINX server.
Step 2: Choose Syncthing in One Click Apps
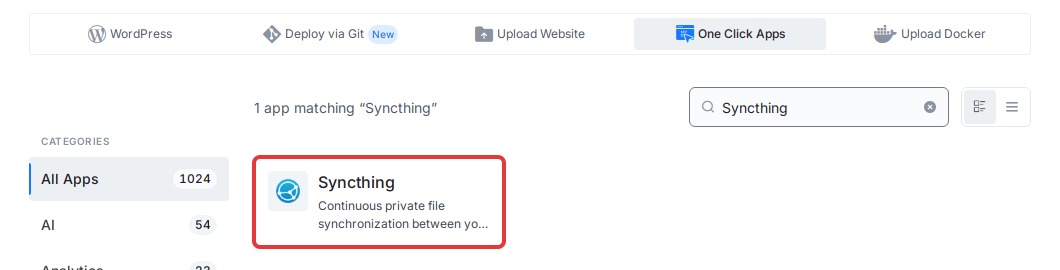
Open Servers, open the menu for your server and click Add New Site. Click the One Click Apps tab, search for Syncthing and click its card.
Step 3: Set the domain and username, then click Next
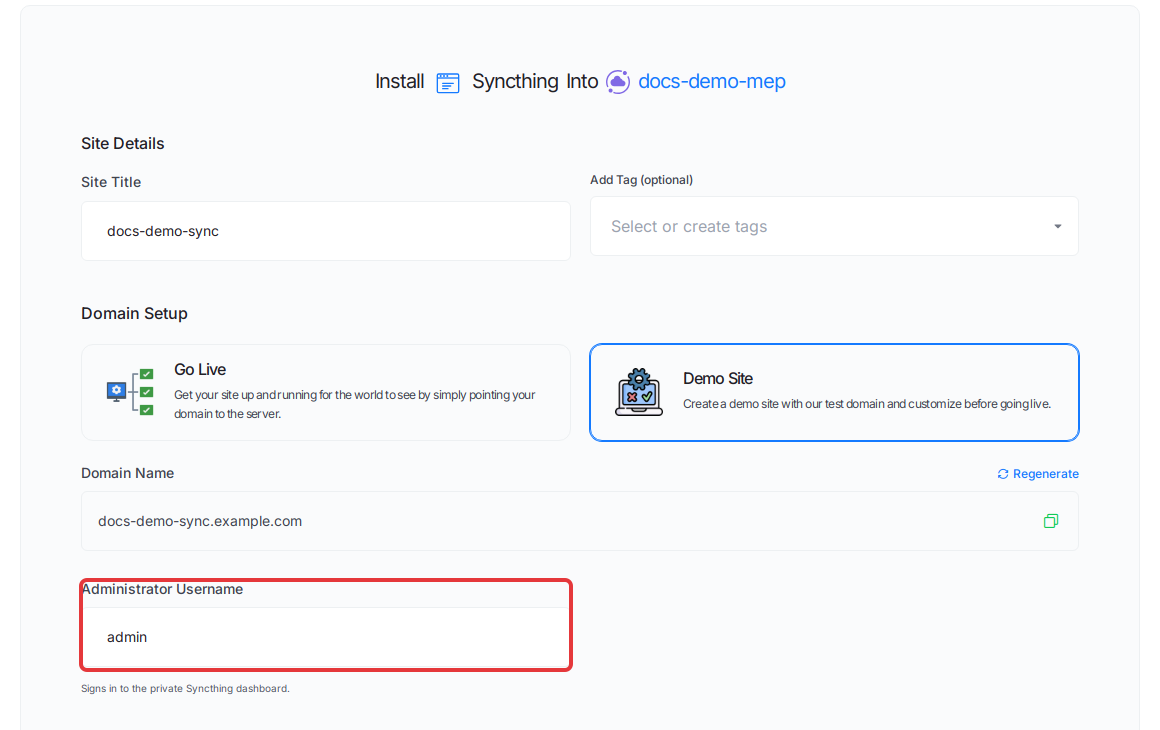
Enter a Site Title. Choose Demo Site to test on a generated address, or Go Live with your own domain. Set the Administrator Username (the default is admin) and click Next. You can move a demo site to your own domain later, and your paired devices stay paired because Syncthing knows the server by its device ID, not its domain.
Step 4: Sign in and pair your devices
Open the site and go to Access Data → Credentials. The Syncthing Credentials card shows the Application URL, Administrator Username and the generated Administrator Password.
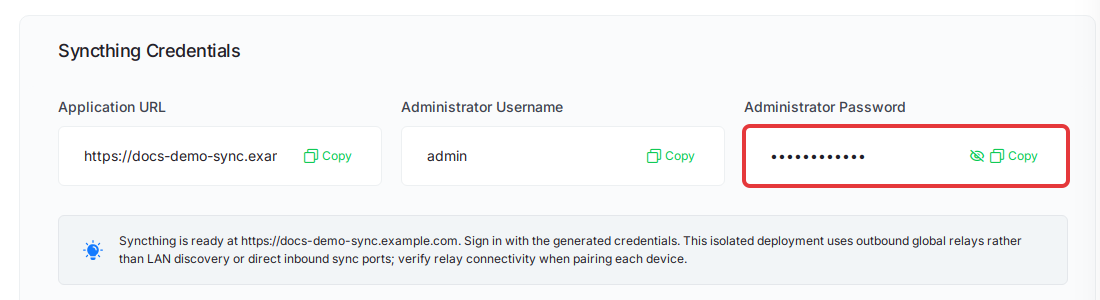
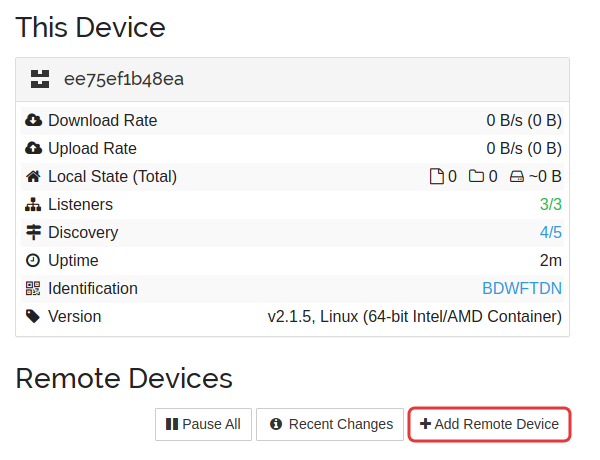
Sign in, then click Add Remote Device and pair your devices the same way as in Option 1. Connection Type will often show a relay, such as Relay WAN. That is expected with this template.
After Install: Updates, Backups and Security
These three jobs decide whether a sync server keeps working. They apply on either path.
Backups
Syncthing is sync, not backup. A file you delete on your laptop is deleted on the server too, unless file versioning is on for that folder. Turn versioning on for anything you care about, and keep a real backup as well.
On a manual install, stop the container with docker compose stop, copy the whole data folder somewhere else, then start it again. That folder holds the files, the index, the settings and the private key that identifies the device.
On xCloud, open the site and go to Backup → Previous Backups and click Backup Now, or schedule backups in Backup → Backup Settings. xCloud stops the app while it saves the syncthing_data volume, then starts it again. 👉 See how to back up and restore Docker apps.
Restore the volume as one set. Never run the original and a restored copy at the same time, because both would use the same device ID.
Updates
On a manual install, change the image tag in docker-compose.yml, then run docker compose pull and docker compose up -d. Read the release notes between your version and the new one first.
On xCloud, your app stays on Syncthing 2.1.5. App Actions → Update alone reinstalls that same version. To move to a newer one, back up, then open the Compose page and change both the version and the sha256 value on the image line, because that value fixes the exact image. See updating a One Click App and editing its Compose file.
Security
Set the dashboard login before you expose anything, keep the dashboard behind HTTPS or an SSH tunnel, and pair only devices you have verified. On a manual install, open only the ports you chose in Step 3.
What the One-Click Install Does Not Do
Here is the honest list, read from xCloud’s template and docs:
- No direct sync ports or local discovery. Devices often connect through relays, which can be much slower for large folders.
- No automatic Syncthing upgrades. The version stays pinned until you change it on the Compose page.
- No web file browser. Syncthing’s dashboard manages devices and folders; you open files with apps on each device. If you want files in a browser, Nextcloud hosting is a separate one-click app.
- Disk is still yours to plan. The 10 GB check is a floor, not your folder size.
- It needs an NGINX server. OpenLiteSpeed servers cannot run Docker apps.
To undo the install, delete the site from xCloud. Take a backup first if the server holds the only copy of any folder.
Docker Compose vs One-Click: Which to Choose
Syncthing is free either way. What you choose is where it runs and who looks after it.
| Docker Compose by hand | One-click on xCloud | |
|---|---|---|
| Software cost | Free (MPL-2.0) | Free (MPL-2.0) |
| Setup | Compose file, firewall, SSH tunnel or NGINX and Certbot | A short form: domain and username |
| Dashboard login | You set it after first start | Generated before first start |
| Connections | Direct, if you open 22000 | Mostly relays |
| Backups | Your own script, with Syncthing stopped | Backup Now or a schedule, with the app stopped for you |
| Upgrades | Change the tag, pull, restart | Change the version and digest on the Compose page |
✅ Choose Docker Compose if you sync large folders and want direct connections, or you want Syncthing on a home server on your own network.
✅ Choose one-click if you want the login, HTTPS and backups set up for you and mostly sync documents, notes and project folders, where relay speed is fine. Your time is the hidden cost; our guide to self-managed vs managed hosting goes deeper on that choice.
Set Up Your Always-On Sync Peer This Week
If you like owning every layer, the Compose steps above are a solid start: pin the version, set the dashboard login first, decide on port 22000 on purpose, and restore a backup once before you trust it with your only copy.
If you would rather skip the plumbing, deploy from Syncthing hosting on xCloud and spend that hour pairing devices instead. Compare server sizes on the pricing page, or browse more apps in One Click Apps and on Docker hosting. For more apps set up the same way, see our guides to self-hosting Nextcloud and self-hosting Immich.
If you have found this blog helpful, feel free to subscribe to our blogs for valuable tutorials, guides, knowledge, and tips on web hosting and server management. You can also join our Facebook community to share insights and engage in discussions.
Frequently Asked Questions
Which ports does Syncthing need in Docker?
Syncthing’s firewall page lists 22000/TCP and 22000/UDP for sync traffic and 21027/UDP for local discovery. The dashboard uses 8384 and listens on localhost only by default. If you open no sync ports at all, devices can still connect through Syncthing’s relays, just more slowly.
Why does the official Syncthing Docker example use host networking?
Syncthing’s Docker README says that in Docker’s default network mode Syncthing only sees the container’s internal address, which can break connections on your local network. Host networking avoids that. On a cloud server with no local network to discover, it matters less.
Can relays read my Syncthing files?
No. Syncthing’s relaying page says the connection stays end-to-end encrypted and the relay only passes the encrypted data along. The relay can see your IP address, your device ID and how much traffic flows, and transfers are much slower than a direct connection.
Does xCloud update Syncthing for me?
No. The template pins Syncthing 2.1.5 by digest and starts it with automatic upgrades turned off. App Actions → Update reinstalls that same version. To move to a newer one, back up first, then change the version and the sha256 value on the image line of the Compose page.
How do I back up a Syncthing server?
Back up the whole data folder or volume while Syncthing is stopped. It holds your synced files, the index, the settings and the keys that identify the device. Restore it as one set to one instance, and never run the original and the copy at the same time.