

How to Deploy Syncthing with xCloud One Click Apps
Updated November 2, 2026 · 5 min read
Syncthing keeps folders in step between your devices, using encrypted connections and no central cloud drive. Installed on an xCloud server, it stays online when your laptop is closed, so devices that are online at different times can still sync through it. You install it from One Click Apps. xCloud generates the password and puts the dashboard on a domain with HTTPS.
Syncthing has one domain and no public sync ports. Your domain opens the dashboard. Your devices often reach each other through Syncthing’s global discovery and relay services, and can connect directly if your other device accepts incoming connections. The Credentials card lists no extra port and there’s no firewall rule to add.
Before you start
You need an xCloud server that uses Nginx, with at least 1 GB of RAM, 1 CPU core and 10 GB of free disk. Add enough disk for your synced files and their older versions.
If you don’t have your domain ready, start with a Demo Site and move to your own domain later.
Step 1: Choose Syncthing
Open Servers, open the menu for your server and click Add New Site. Click the One Click Apps tab, type Syncthing in the search box and click its card.
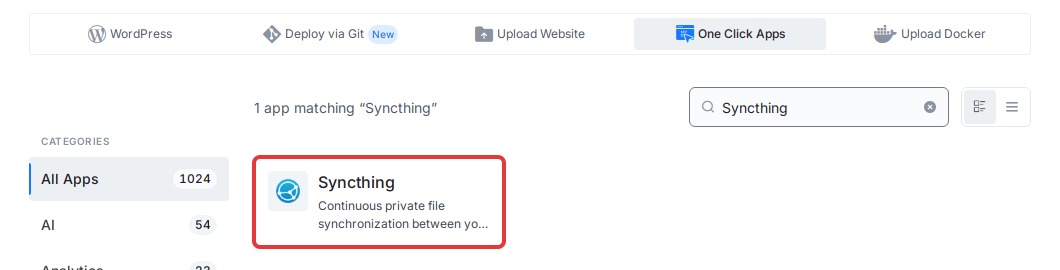
Expected result: The Install Syncthing page opens for your server.
Step 2: Set the site and dashboard username
Enter a Site Title. Under Domain Setup, choose Demo Site to use a generated test domain, or Go Live to use your own. Then set the Administrator Username you’ll sign in with. The default is admin.
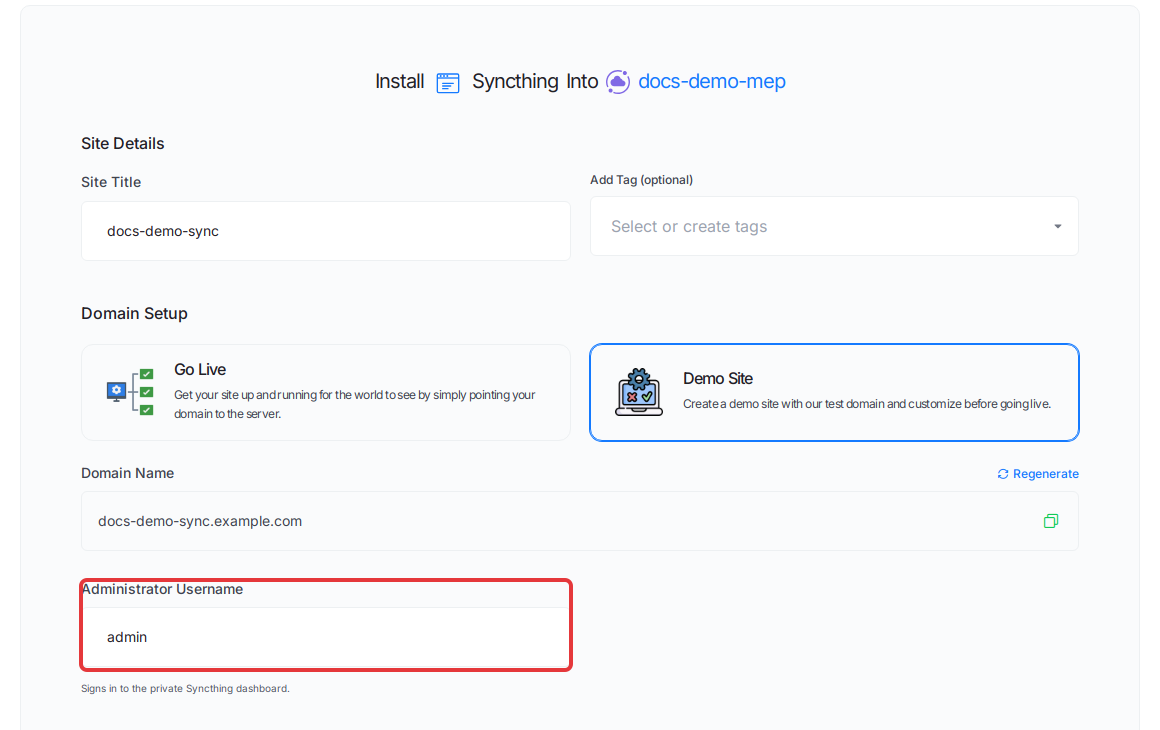
Click Next.
Expected result: xCloud shows the install progress. When it finishes, the site is ready to open.
Step 3: Find your login
Open the site and go to Access Data → Credentials. The Syncthing Credentials card lists the Application URL, Administrator Username and Administrator Password. The note below them says this install uses outbound relays rather than local discovery or direct incoming sync ports.
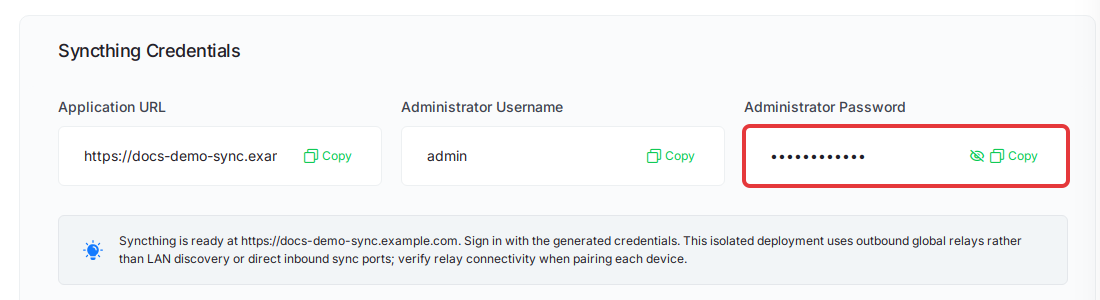
Expected result: The Syncthing Credentials card shows your login details.
Step 4: Sign in and pair a device
Open the Application URL and sign in. Syncthing first asks Allow Anonymous Usage Reporting?. Choose Yes or No.
To pair a device:
- On your other device, open Syncthing and copy its device ID.
- In the xCloud-hosted dashboard, click Add Remote Device and paste the ID.
- Accept the request on the other device. To get this server’s own ID, open Actions → Show ID.
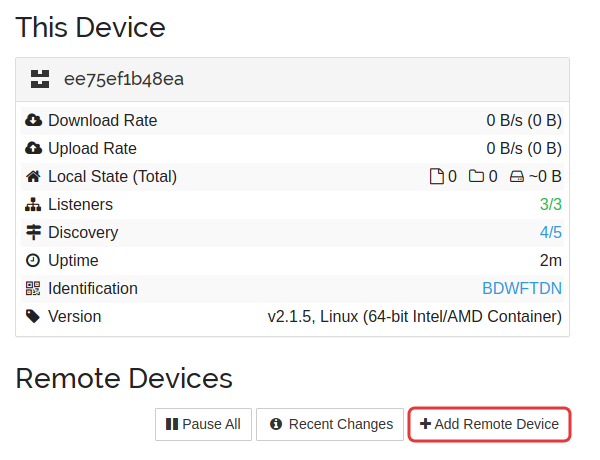
Only add device IDs you’ve checked through a channel you trust. A device you add can be given access to your folders.
Expected result: The device should appear under Remote Devices. Once both sides connect, it no longer shows Disconnected. Connection Type often shows a relay, such as Relay WAN, and can show a direct connection if your other device accepts incoming connections. This can take a little time.
Step 5: Share a folder and check the connection
Click Add Folder, share it with the device you paired, and keep the Folder Path inside /var/syncthing. Then accept the folder on the other device. Files outside that path aren’t kept in the app’s stored data.
Add a small test file on one device and confirm that it reaches the other. Do this before you rely on the setup, especially for a large folder. Relayed connections can be slower than direct ones, and this install doesn’t offer direct sync ports, so a relayed transfer’s speed depends on the relay services.
Expected result: The test file should appear on the other device, and the folder should show Up to Date.
Move from a demo domain to your own
Only the dashboard address changes. Your devices should stay paired, because Syncthing identifies this server by its device ID and not by its domain.
- Open the site and go to Domain → Domain.
- On the Demo Site Domain card, click Go Live.
- Enter your domain and point an A record for it to your server.
- Click Verify My DNS, then click Go Live.
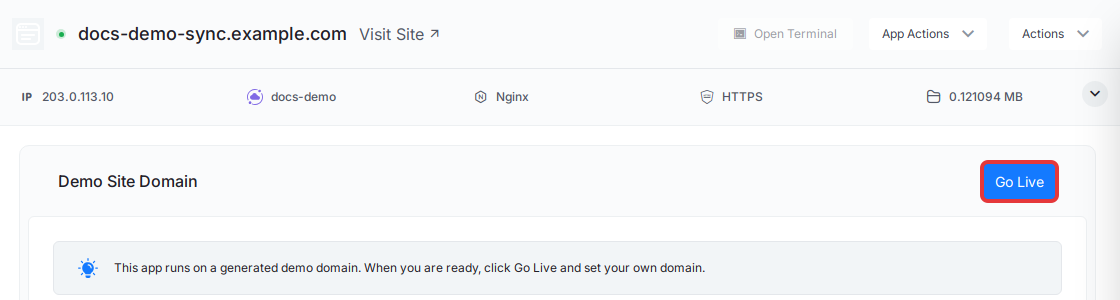
Expected result: xCloud shows Domain update request is sent for processing. When the move finishes, open Access Data → Credentials and check that Application URL shows your domain. Open that address, sign in and confirm that your paired devices are still listed under Remote Devices.
For more detail, see how to manage One Click App domains and public endpoints.
Backups and updates
- Backups: the
syncthing_datavolume holds your files, the index, the settings and the keys that identify this device. xCloud stops the app while it takes the backup and starts it again afterwards. See how to back up and restore Docker apps. - Restores: restore the whole volume as one set. Never run the original and a restored copy at the same time, because both would use the same device ID.
- Updates: Your app stays on its current version. App Actions → Update alone reinstalls that same version. To move to a newer one, change the version in the Compose page first. On the
imageline, change both the version and thesha256value after it, because that value fixes the exact image. Back up first. See how to update a One Click App.
Frequently asked questions
Why are there no sync ports on the Credentials card?
This install opens only the dashboard. It does not open Syncthing’s direct sync ports or local discovery, so your devices often connect through Syncthing’s global discovery and relay services. A direct connection can still happen if your other device accepts incoming connections.
Can I open files in the browser?
No. Syncthing’s dashboard manages devices and folders. It has no web file browser or document editor.
Where are my synced files stored?
In the syncthing_data volume on your server, mounted at /var/syncthing. It also holds the settings and the keys that identify this device, so back it up and restore it as one complete set.
If you run into any issues with Syncthing, feel free to reach out to our support team.