

How To Generate Custom Invoices in xCloud?
Updated February 8, 2024 · 1 min read
In xCloud you can easily generate custom invoices for all payments. If you require the inclusion of specific contact or tax details on your receipts, such as your VAT identification number, or registered address on the invoice you can add any of this information on your invoice with ease, Follow the step-by-step guideline below to generate custom invoices.
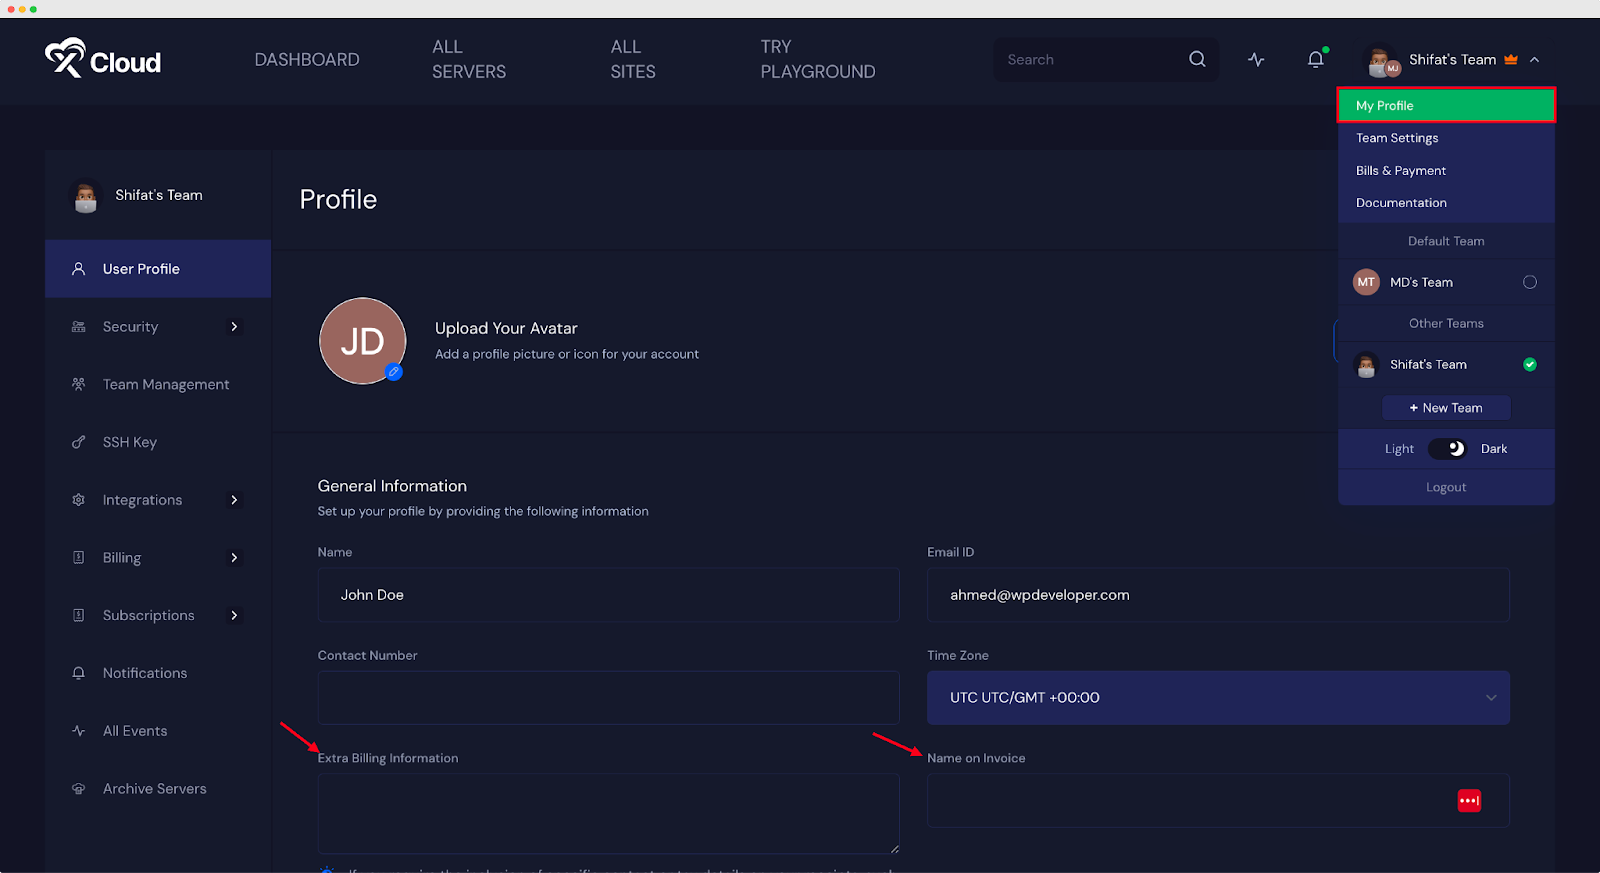
Step 1: Add Extra Billing Information
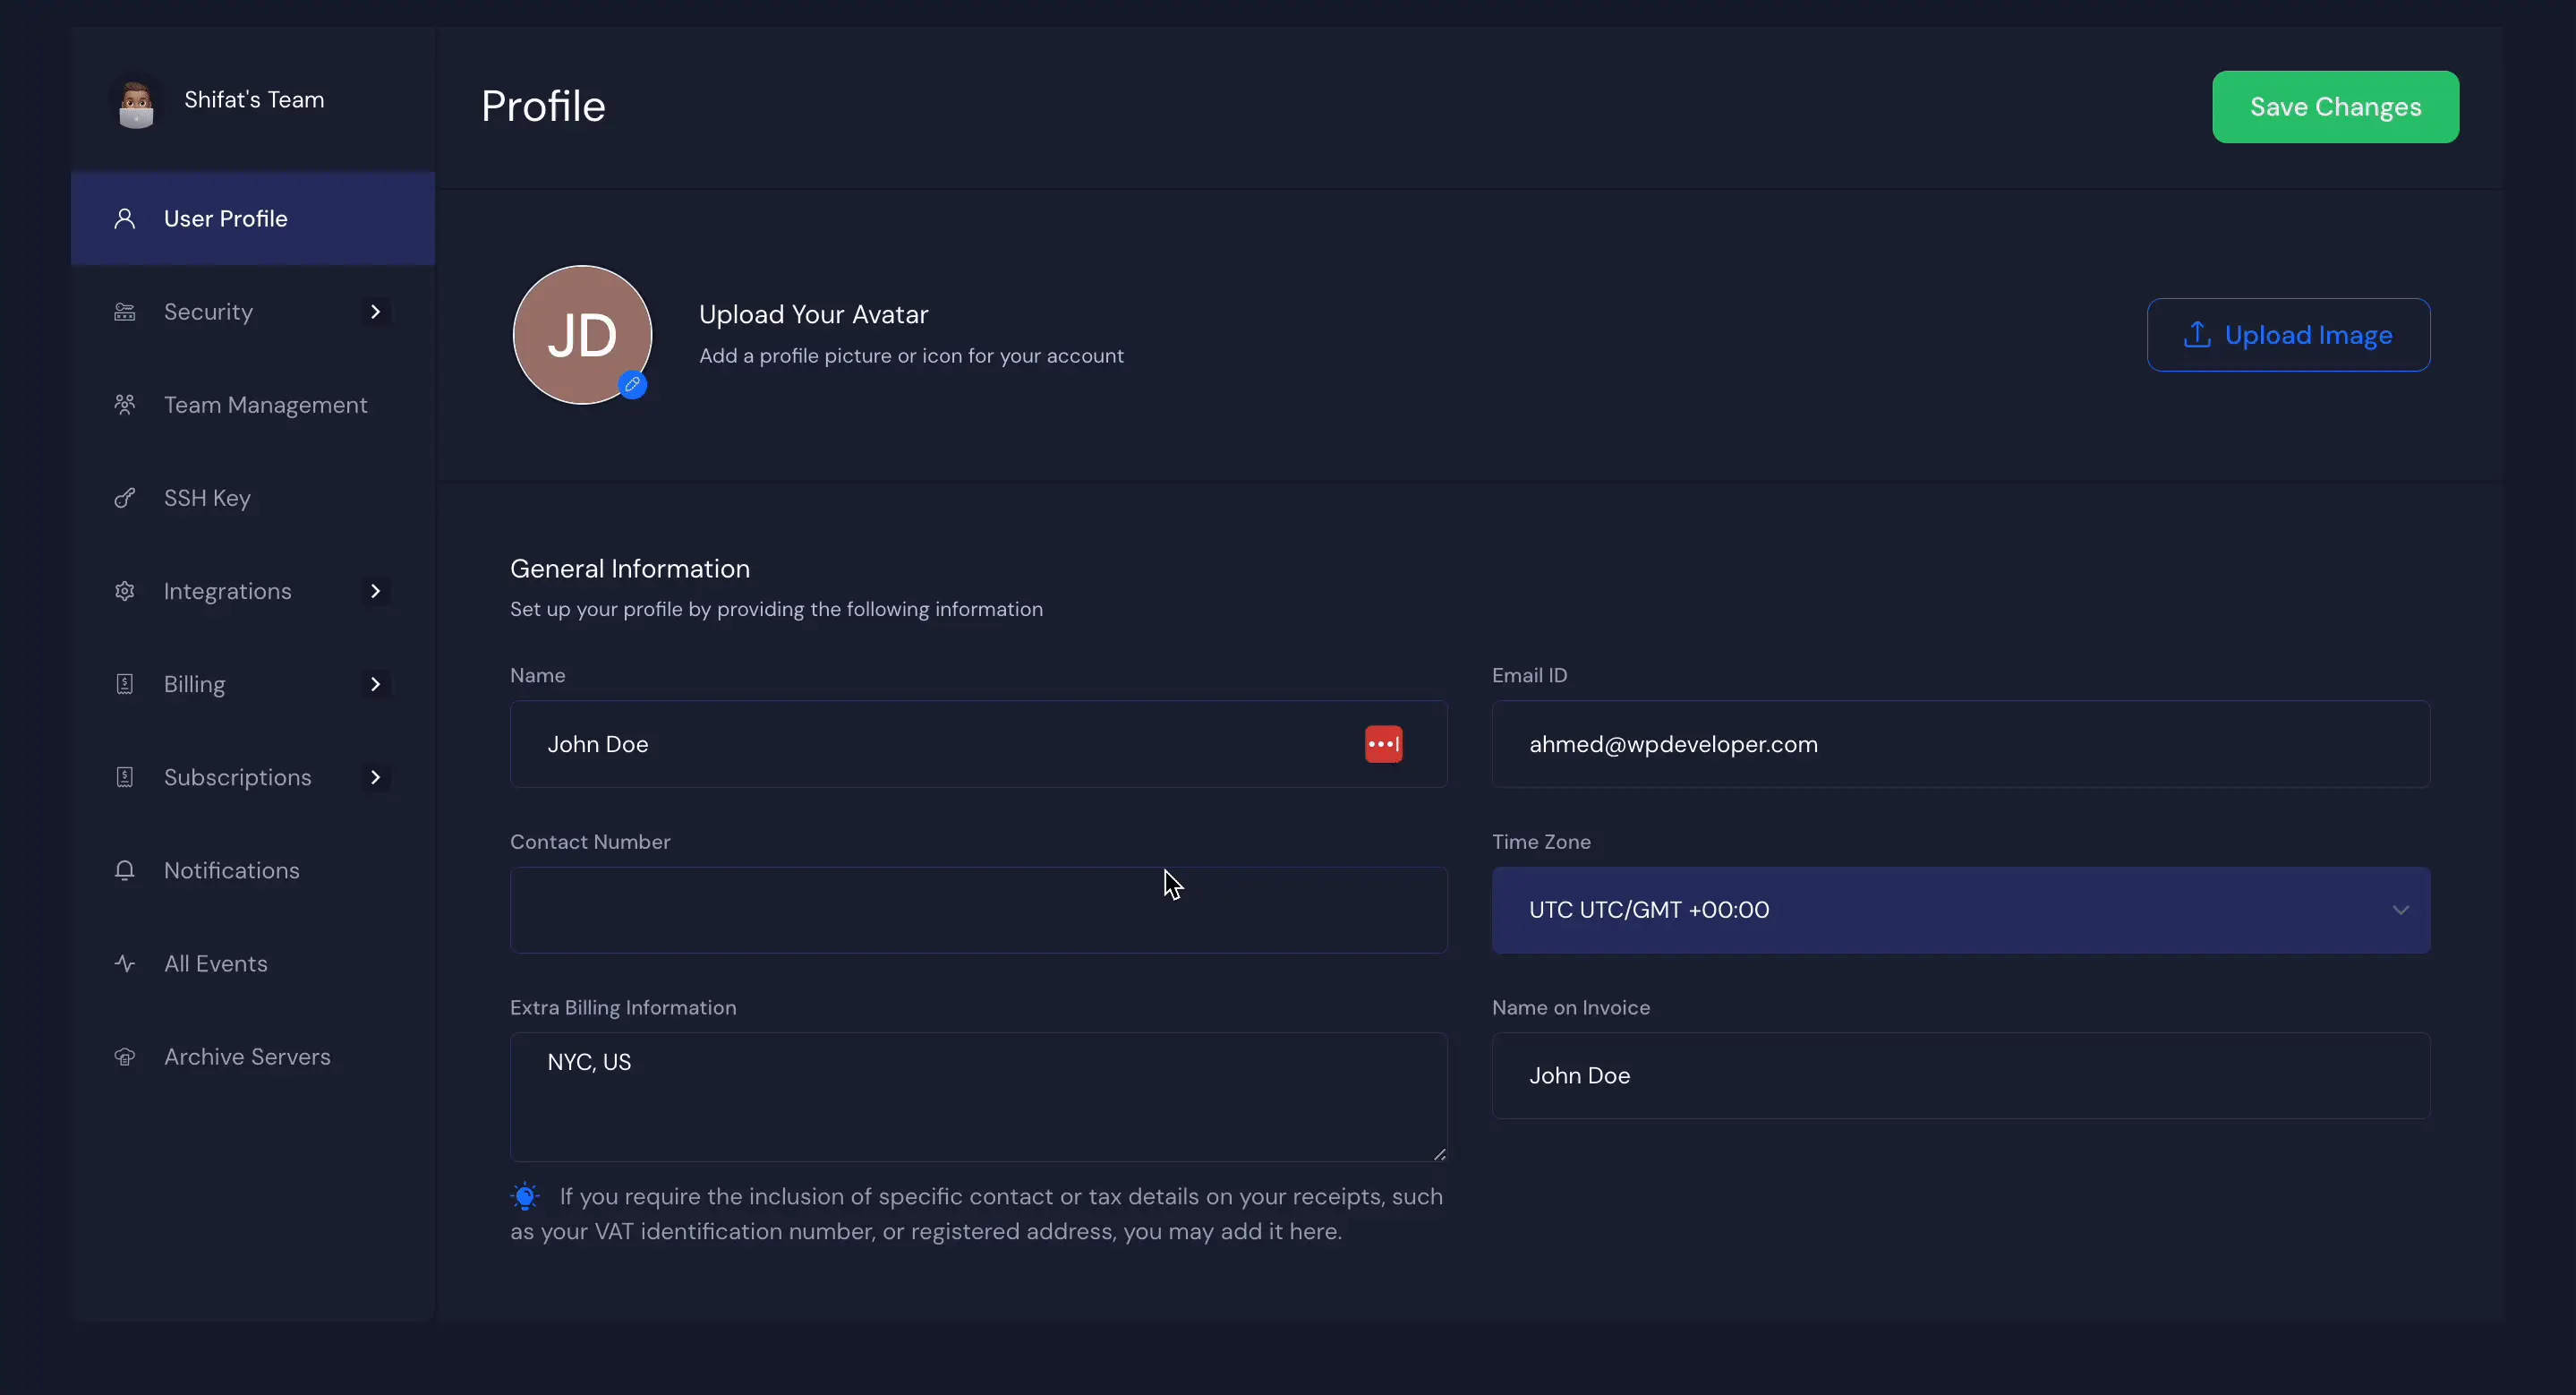
First of all, from your dashboard click on the ‘Profile’ button. Then add ‘Name on Invoice’ and ‘Extra Billing Information’ as you need. Add your contact, and tax details like VAT identification number, or registered address there.
Step 2: Download Your Invoice
Now, go to the ‘Invoices’ tab and click on the ‘Download’ button on the invoice that you need. Your invoice will be downloaded with the added extra billing information.
That’s it. This is how you can generate custom invoices in xCloud.
Still stuck? Contact our support team for any of your queries.