


WordPress frequently requires sending site emails to you or your users, known as transactional emails. These may include admin notifications, new user signups, password resets, and form submissions. Sometimes, WordPress’s default email delivery system may fail, leading to potential issues like emails being flagged as spam or failing to reach their intended recipients.
Web hosting servers are not optimized for sending emails, and you may also want to avoid running your own mail server. To solve this issue, xCloud provides a Mail Delivery Addon that allows you to send transactional emails through a reliable managed email service. Each team receives 100 free emails per month, and you can purchase additional plans if you need a higher email limit.
Available xCloud Mail Delivery plans are:
- 1000 emails/month – $1
- 3000 emails/month – $3
- 5000 emails/month – $5
- 8000 emails/month – $8
Follow the steps below to set up xCloud Mail Delivery for your website.
Step 1: Add xCloud Mail Delivery Email Service Provider #
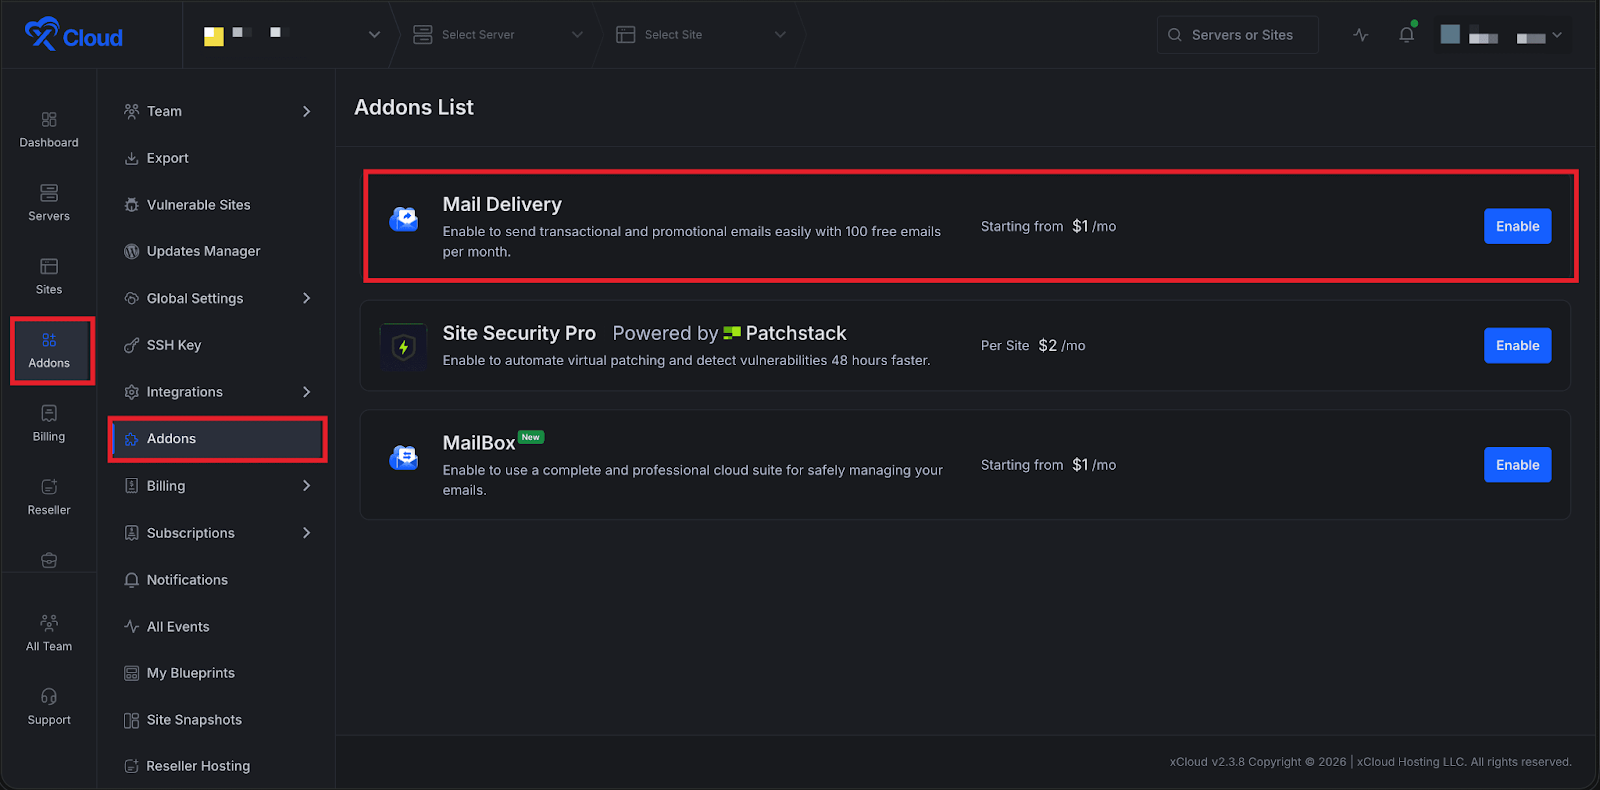
First, log in to your xCloud dashboard and navigate to Addons → Mail Delivery from the sidebar. Click the Enable button to activate the Mail Delivery addon.
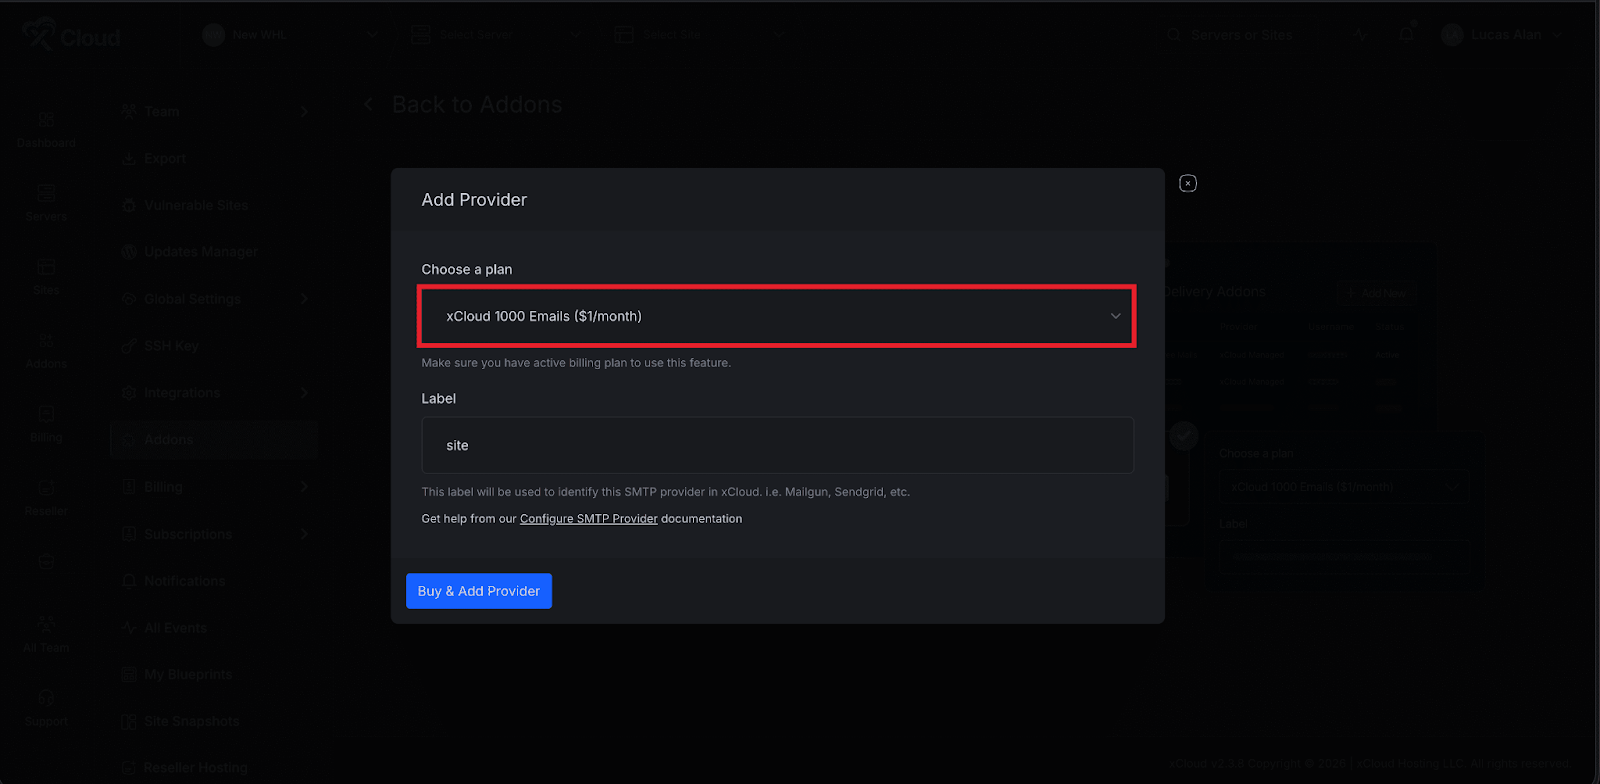
Next, select xCloud Email Provider, choose your preferred email plan, and add a Label to identify the provider. After selecting the plan, click the Buy & Add Email Provider button to proceed.
Each team can claim 100 free emails per month directly from the Mail Delivery addon page. From the Email Provider section, click the Claim Free Plan option to activate the free email allowance. Once claimed, the free email plan will appear in the provider list.
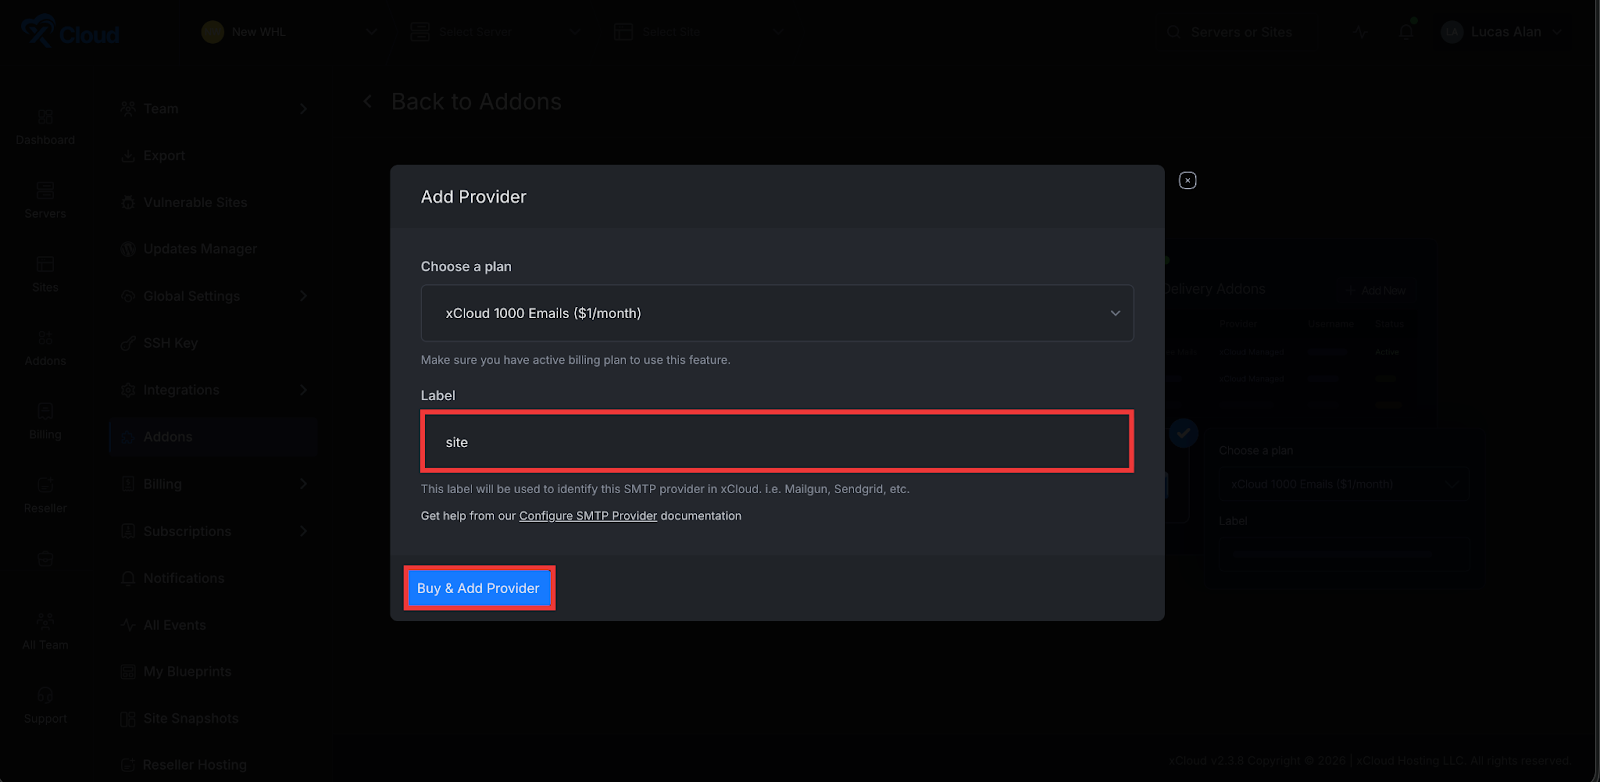
After claiming the free plan or selecting a paid plan, enter a Label in the provided field to identify the provider. Then click the Buy & Add New Provider button. A payment gateway will appear where you can complete the purchase using a valid payment method.
Once the payment is completed, the selected email plan will be added to your Email Provider list, where you can manage or set it as the default provider for your team.
Once the payment is completed, the purchased email plan will appear in the Email Provider list. You can set this plan as the default email provider for your team by clicking the Set as Default icon on the right side of the row. If you want to cancel the subscription later, click the Cancel Subscription icon.
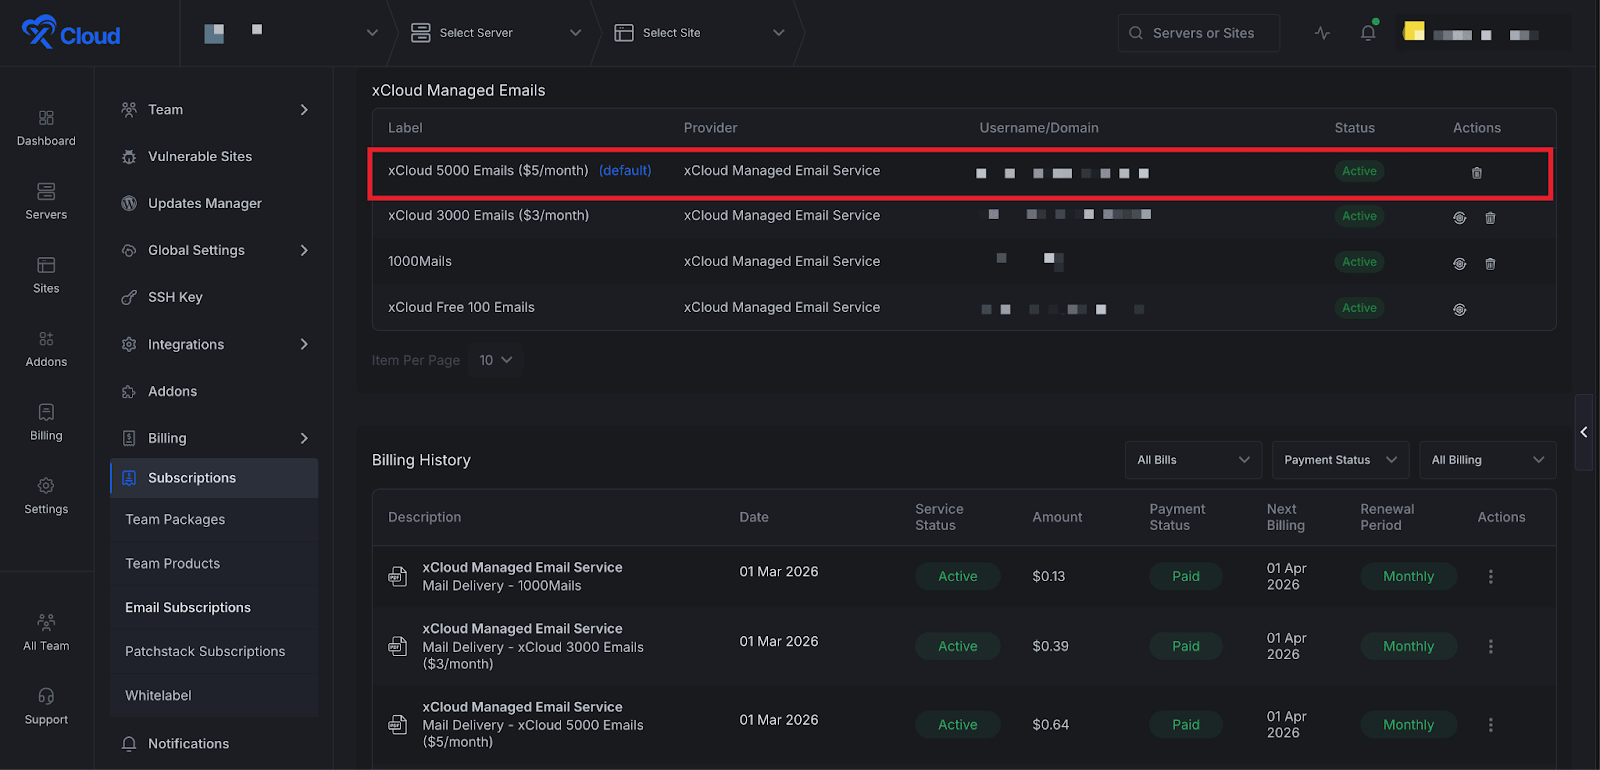
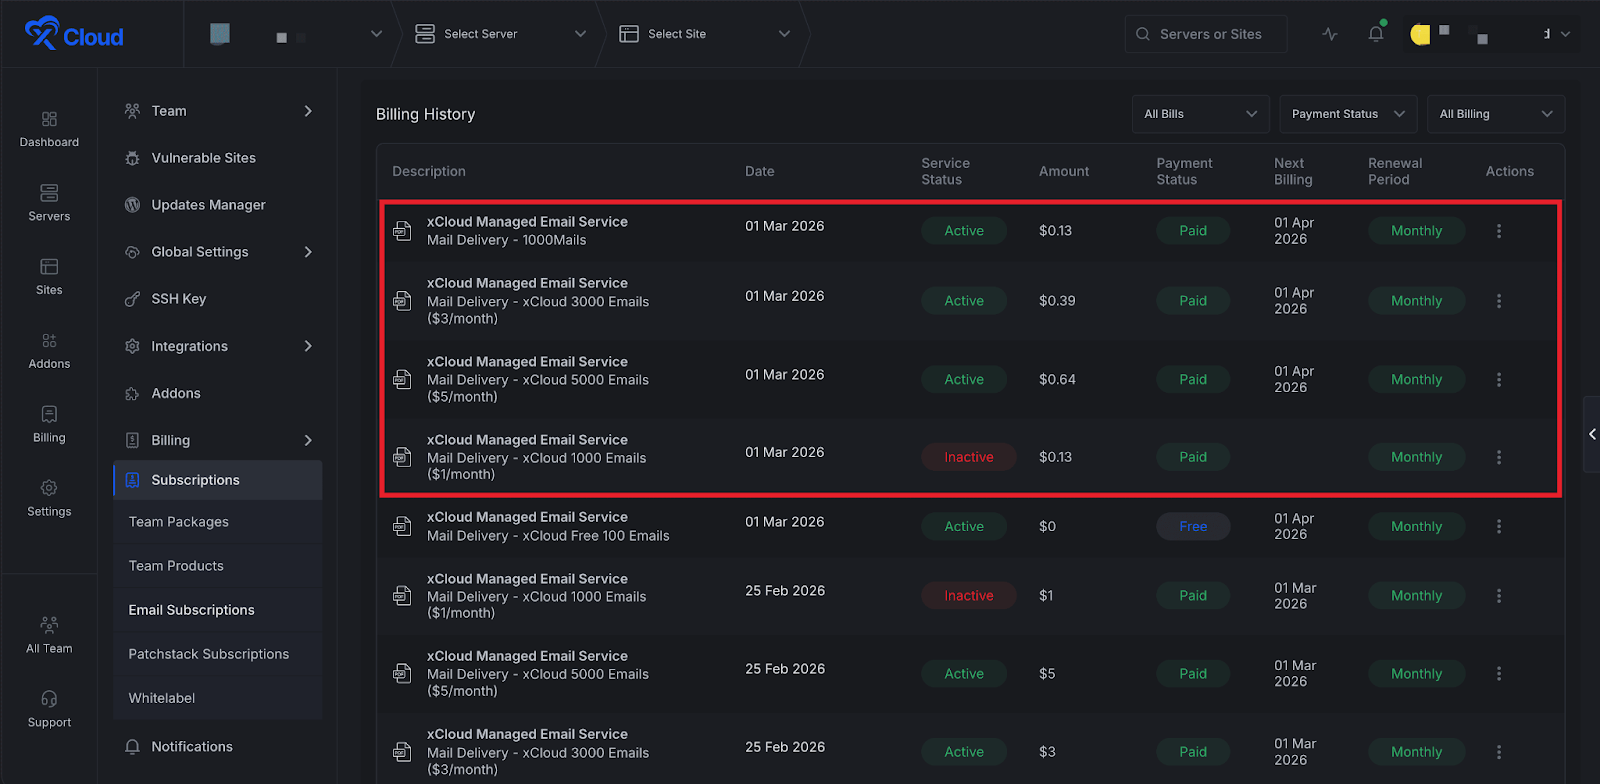
To review billing information, go to Subscriptions → Email Subscriptions and head over to the Billing History from the dashboard. This section shows all billing records related to your Mail Delivery subscriptions. You can also click the Action button to view more details about each plan.
Step 2: Add Email Service To Site #
After adding the xCloud Email Provider, you need to connect it to your website. Go to your website inside the xCloud dashboard and navigate to Email Config → Mail Delivery. From the Email Provider dropdown menu, select the xCloud Mail Delivery plan you purchased.
Next, configure the sender details. Choose the Domain, enter the sender name in the From Name field, and provide the sender email address in the From Email field. After completing these settings, click the Save Changes button.
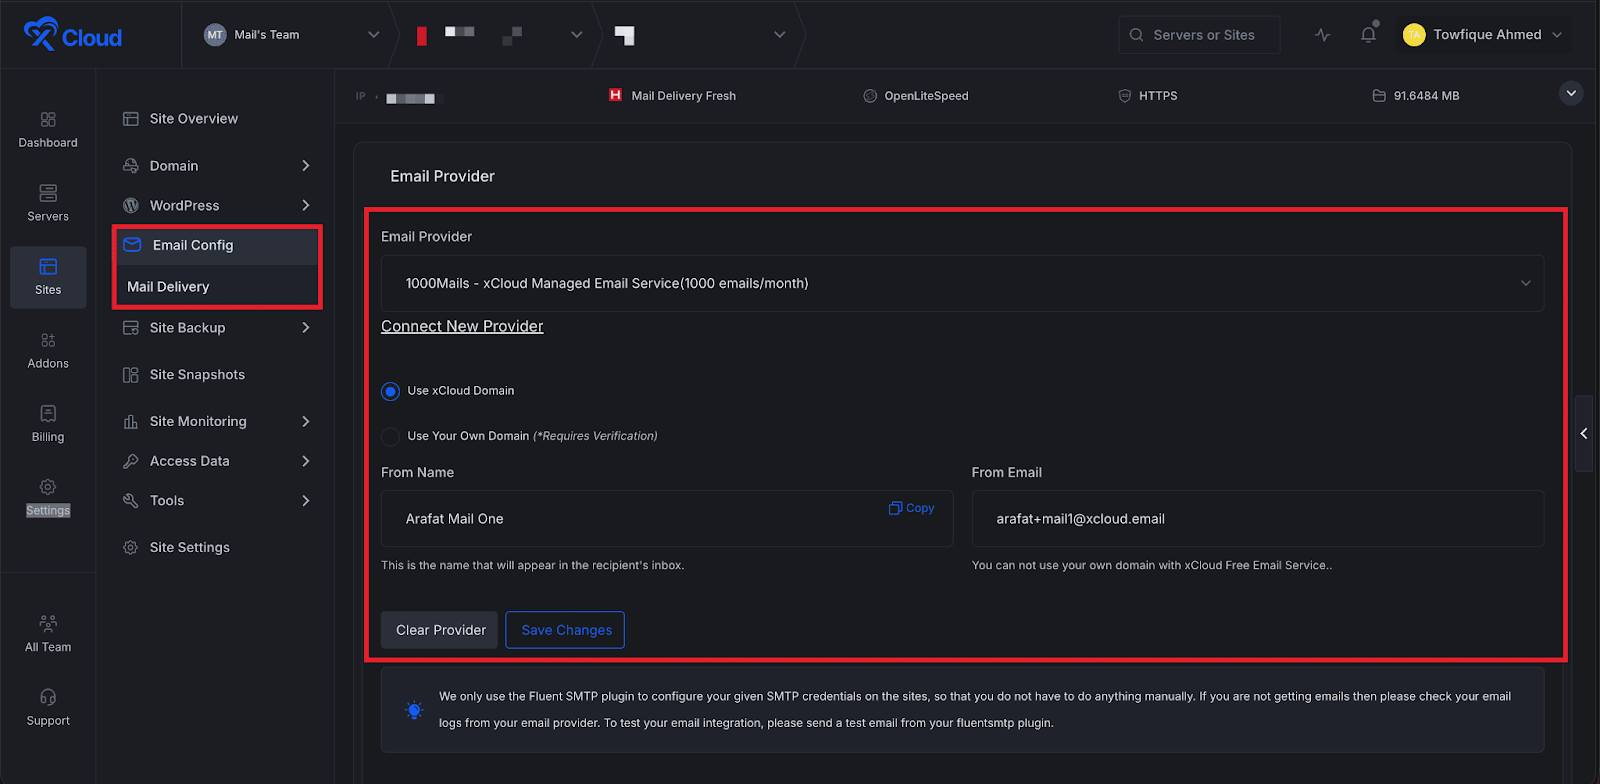
You can also choose whether to use the xCloud domain or your own domain for sending emails. If you select Use Own Domain, enter your domain name in the domain field.
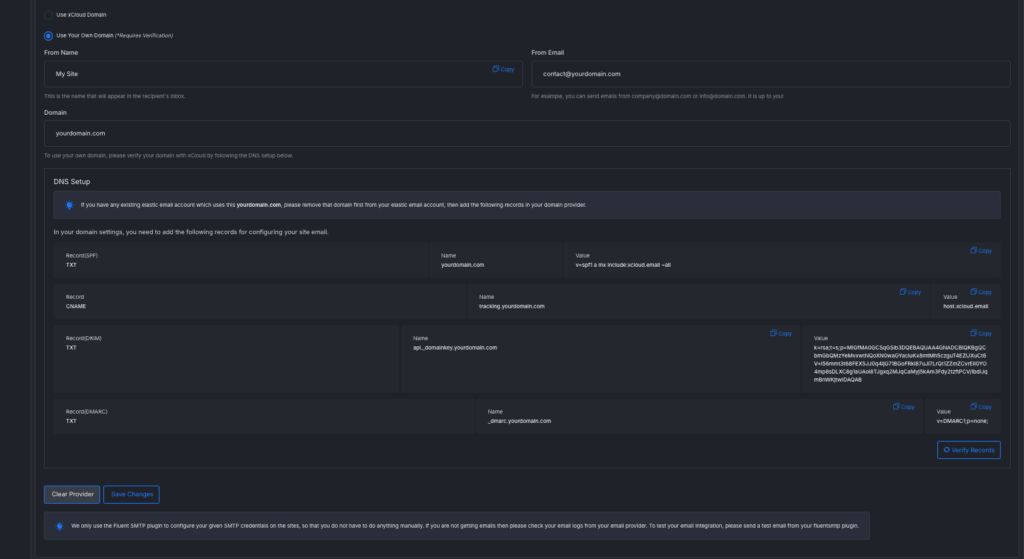
Enter your ‘From Name’, ‘From Email’, and ‘Domain’ in the dedicated fields. After entering the domain, you will need to verify it by adding the following required DNS records in your DNS provider.
| # | Record Type | Name | Value |
|---|---|---|---|
| 1 | TXT (SPF) | yourdomain.com | v=spf1 a mx include:xcloud.email ~all |
| 2 | CNAME | tracking.yourdomain.com | host.xcloud.email |
| 3 | TXT (DKIM) | api._domainkey.yourdomain.com | k=rsa; t=s; p=MIGfMA0GCSqGSIb3DQEBAQUAA4GNADCBiQKBgQC bmGbDM2YeMvcwtNQoXN0waGYaciuKx8mtMh5czguT4EZLlXuCf6 V=l56mmt3t68FEX5JJOq4li27lBGoFRkl87uJl7LrQtTZZmZCvrEll0YO 4mp8sDLXC8g1aUAol8TJgxq2MJqCaMyJ5kAm3Fdy2tztPCVlbdLlq mBnWKjtwIDAQAB |
| 4 | TXT (DMARC) | _dmarc.yourdomain.com | v=DMARC1;p=none; |
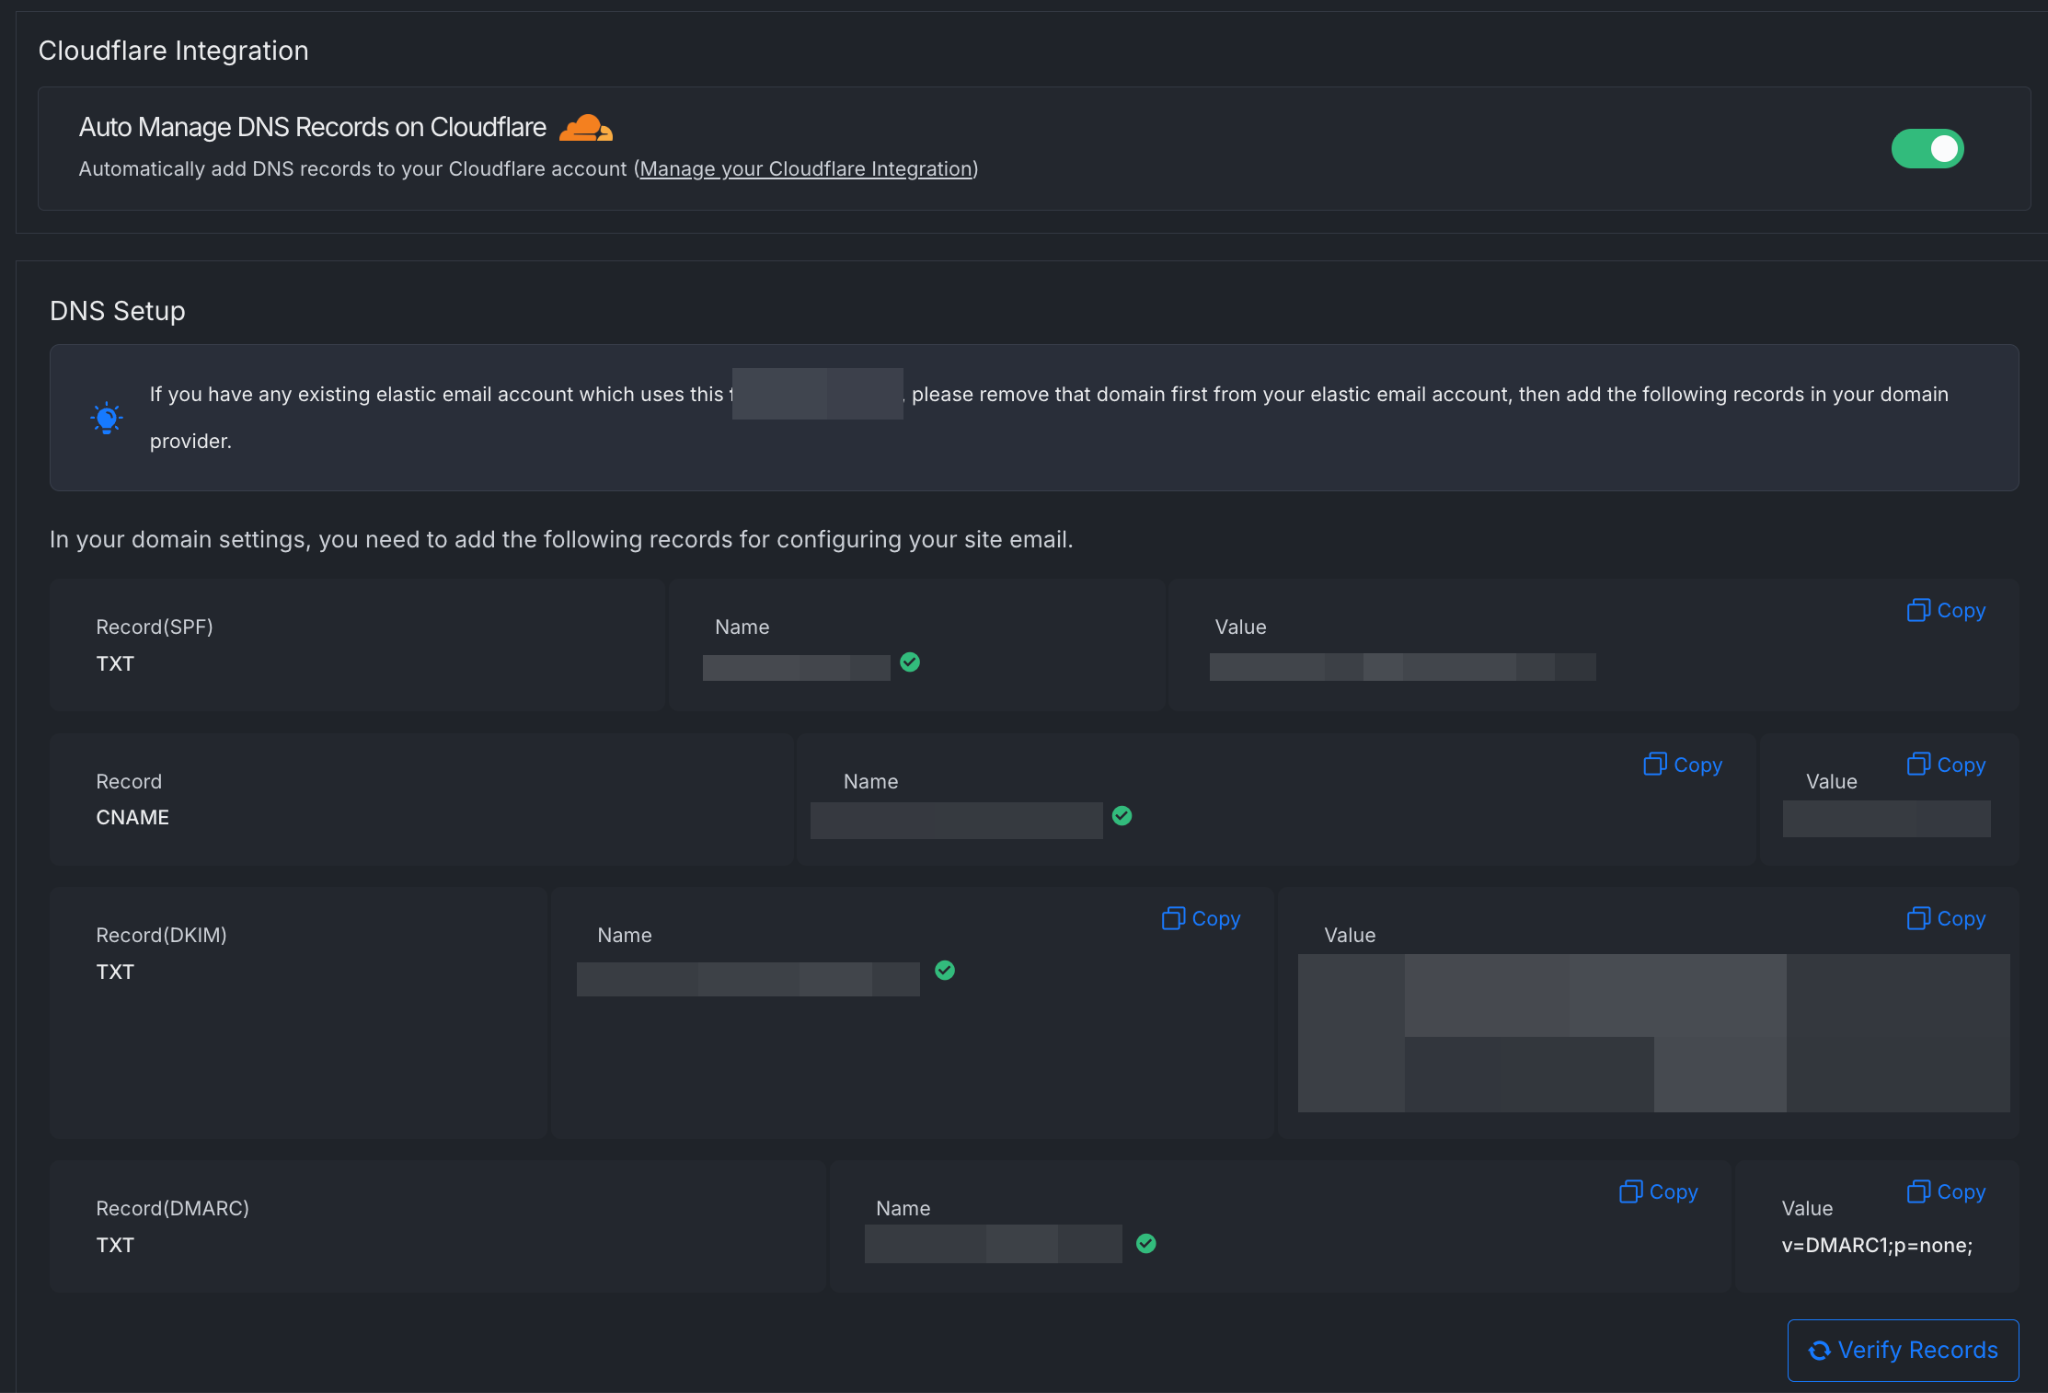
If you have Cloudflare integrated, you can verify DNS in just 1 click. Once the DNS records are added and verified, click Save Changes again to complete the setup.
You can also enable Mail Delivery during WordPress site creation. When creating a new WordPress website, simply toggle the Mail Delivery option.
If you have already set an email provider as the Default Provider from the Mail Delivery addon settings, xCloud will automatically select that provider during site creation. This allows you to skip manual provider selection for every new site.
After enabling Mail Delivery, confirm the From Name and From Email details, then continue with the site creation process.

How To Manage xCloud Mail Delivery Subscriptions #
Manage your Mail Delivery plans, monitor email usage, and configure SMTP or API access from one place. xCloud also allows you to automate plan upgrades to keep your transactional emails running without interruption.
Step 1: Go to The Subscriptions #
To manage your email subscriptions, open the xCloud dashboard and navigate to Settings → Subscriptions → Email Subscriptions.
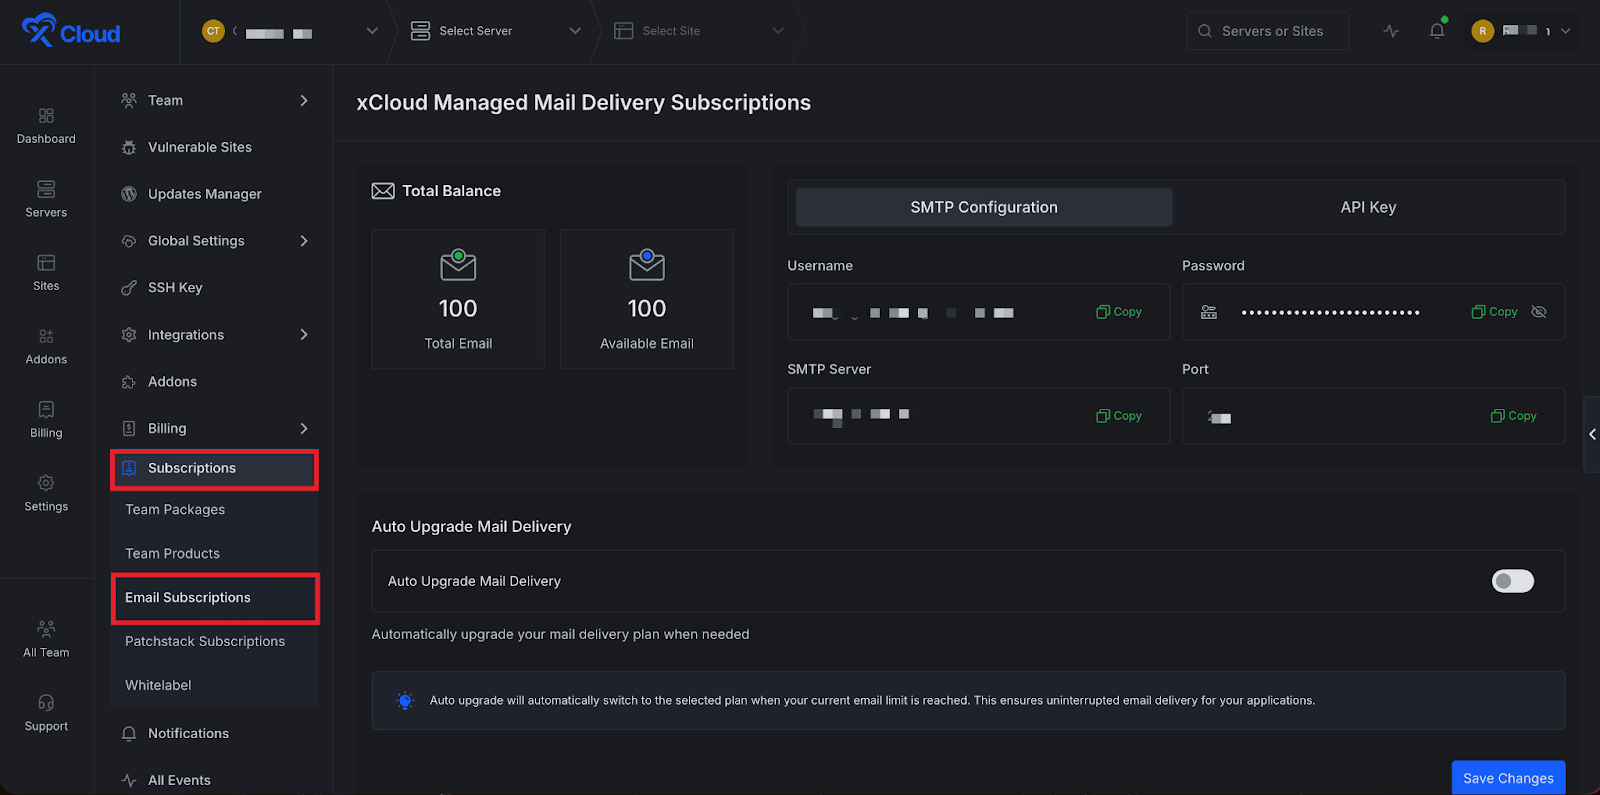
From this section, you will see an overview of your email usage, including the Total Emails and Available Emails. This overview helps you monitor how many emails remain in your current plan. You will also find options for SMTP Configuration and API Key in this section.
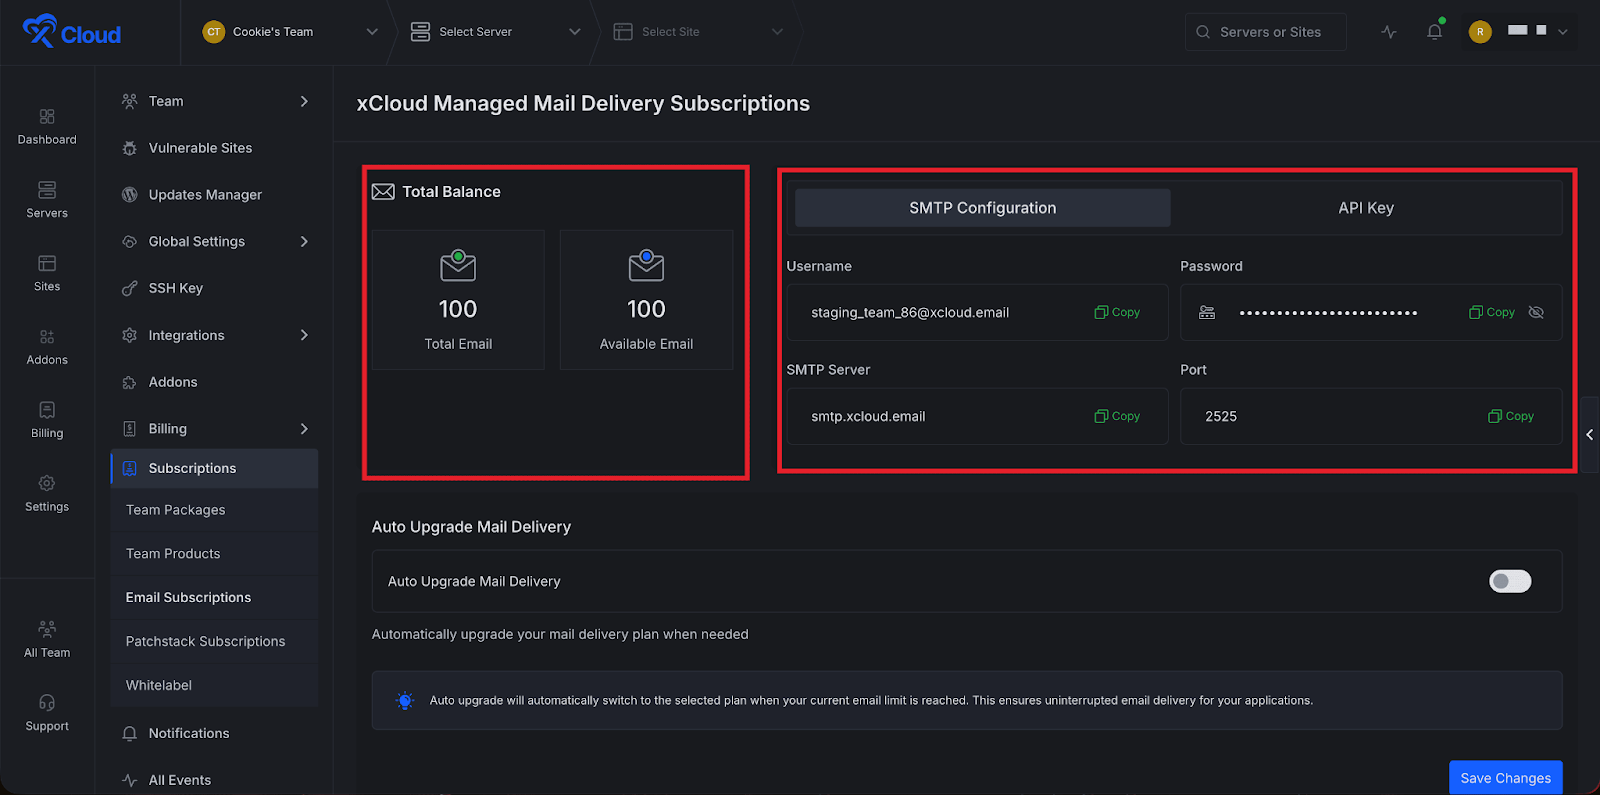
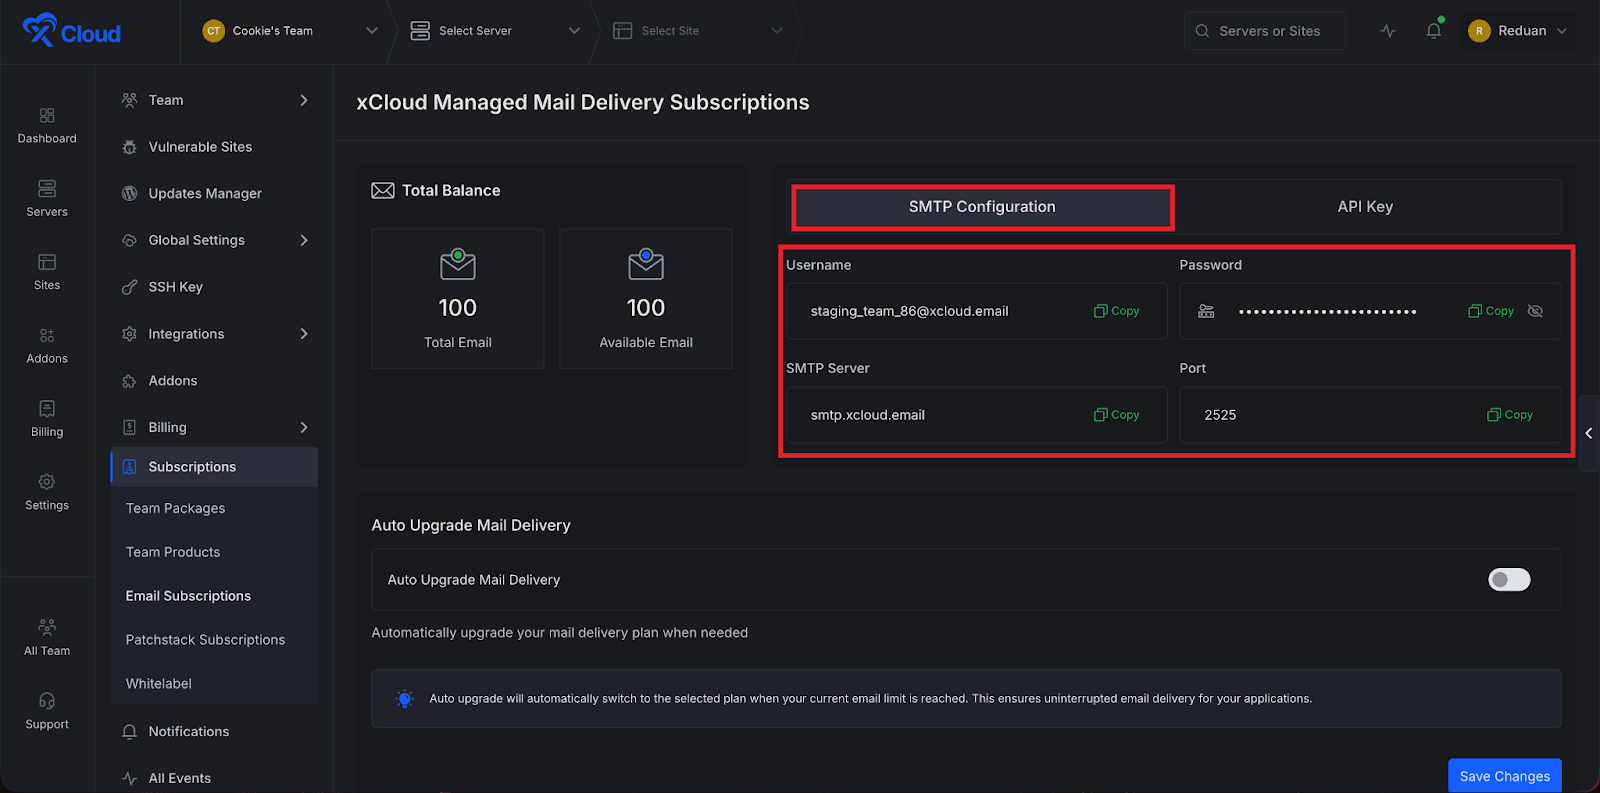
Under the SMTP Configuration section, you will find details such as Username, Password, SMTP Server, and Port. These credentials allow you to connect the xCloud Mail Delivery service with your website or external applications that require SMTP authentication.
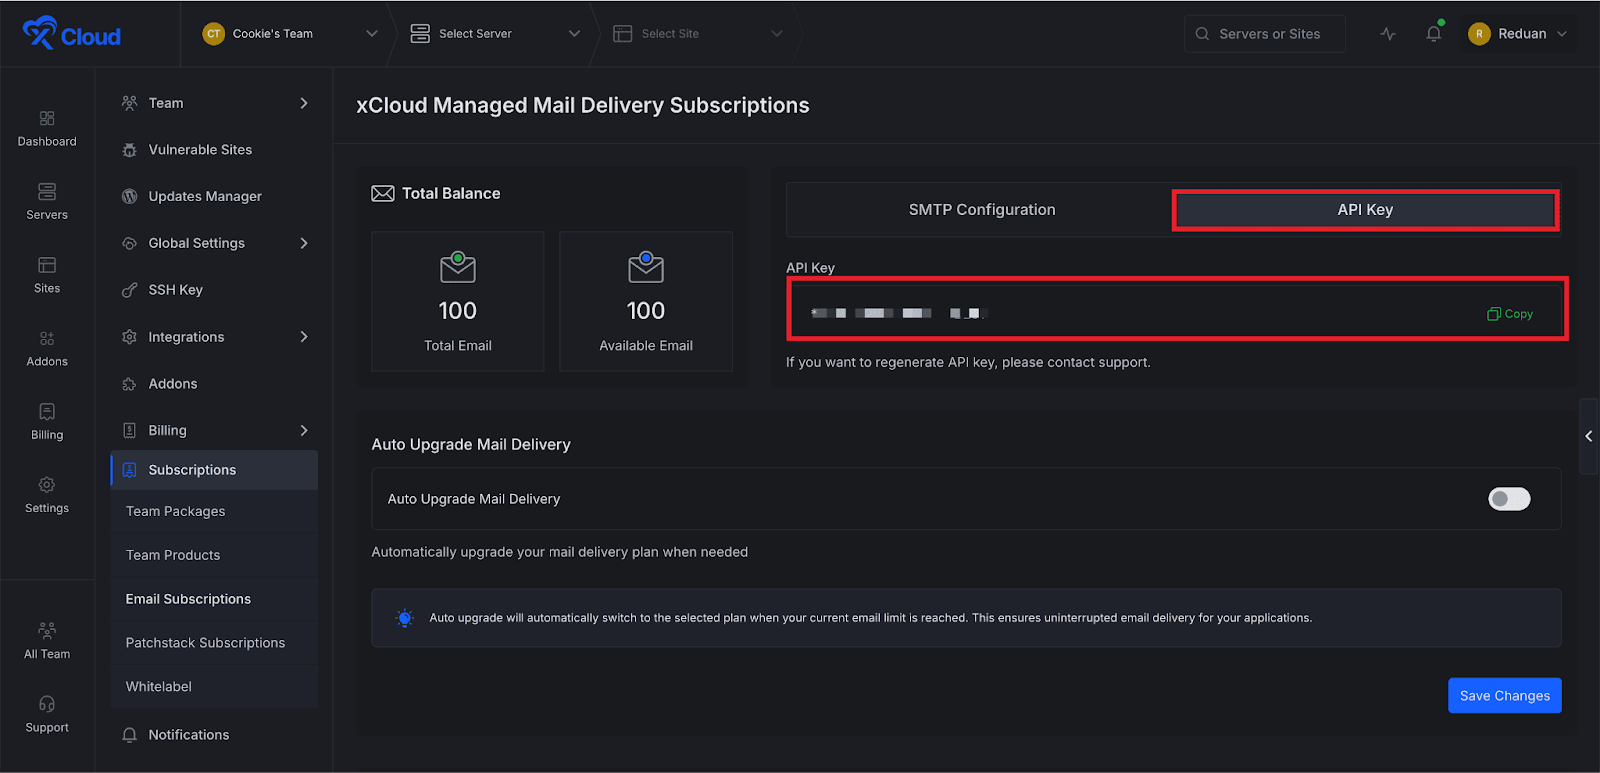
The API Key section provides a key that developers can use to integrate the xCloud Mail Delivery service with custom applications or services.
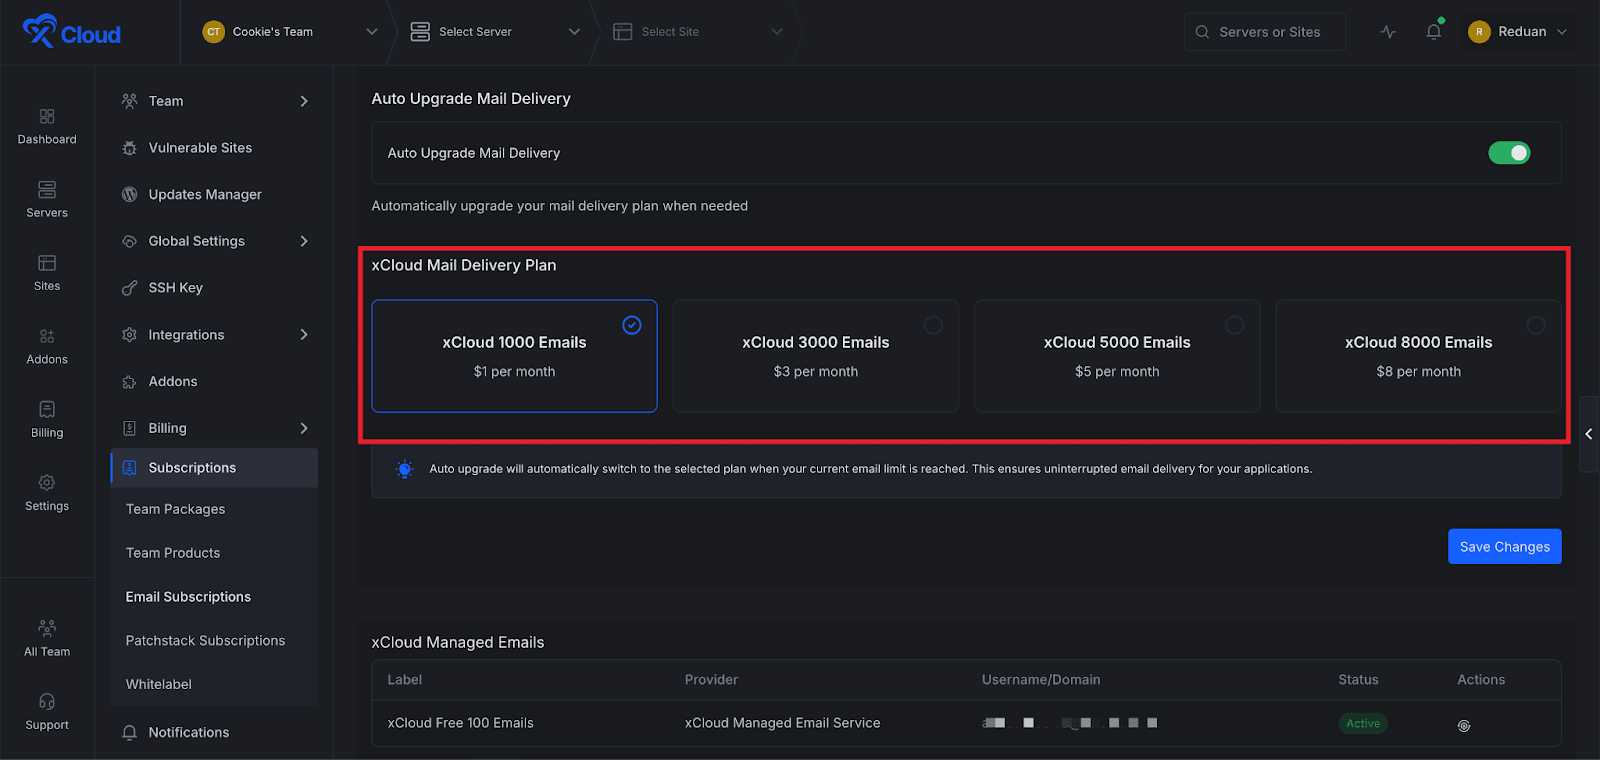
Enable Auto Upgrade Mail Delivery Plan #
Email delivery is a critical service for any business. Transactional emails such as password resets, order confirmations, and form notifications must reach users without interruption. To prevent your email limit from blocking these important messages, you can enable the Auto Upgrade Mail Delivery Plan option.
xCloud will notify you when your email usage reaches 90% of your available quota, giving you time to take action before the limit is reached. If you enable Auto Upgrade, xCloud will automatically add credits to your current plan once the limit is reached. This ensures that your transactional emails continue sending without disruption and removes the need for manual plan upgrades.

Enable the toggle for this feature. After enabling it, a dropdown menu will appear where you can select the plan you want xCloud to upgrade to automatically. Choose your preferred plan and click the Save button.
Once this feature is enabled, xCloud will automatically upgrade your email plan. When the threshold is reached (90% limit). This ensures that your website emails continue sending without interruption
Below the configuration section, you will see all the subscribed email plans for your team. From here, you can click the Actions button beside each plan to manage or cancel subscriptions. You can also check the Billing History to review all transactions related to your Mail Delivery subscriptions.

How Does xCloud Managed Emails Usage Limits Work? #
xCloud Managed Email limits are applied at the team level, not per individual site. This means the total number of emails you have purchased, whether it’s the free 100 monthly emails or additional purchased email plans, is available for use across all sites within the same team.
For example, if you have 10 sites under a single team and you purchase a plan of 1000 emails, those 1000 emails become part of a shared email pool. Any of your sites in that team can send transactional emails using this shared quota. You are not required to buy separate email packages for each website.
💡Troubleshooting Tip #
If you cannot connect to your email provider because the domain is already linked with another email service, you need to check if the domain is still registered with your previous hosting provider.
For example, if your domain was registered or managed by Cloudways, their system may still have it linked. In this case, contact the Cloudways support team and request that they manually remove the domain from their email service.
Once it is removed, you can connect your domain with xCloud without any issues.
That’s how easily you can add the xCloud Managed Email Service provider for site emails for the xCloud environment to streamline the email delivery process of transactional emails.
You can check this documentation if you want to connect any SMTP provider to your xCloud environment for site emails. Still stuck? Contact our support team for any of your queries.


