

How To Increase The PHP Maximum Input Variables In xCloud?
Updated February 29, 2024 · 2 min read
Input variables play a vital role in processing functions and supporting a variety of tasks and activities on your WordPress website. PHP maximum input variables, or simply Max Input Vars, are crucial variables among these. It represents the most variables your server can provide for a particular function.
Put more simply, the smoother the general operation of your website, the greater the maximum input variables option. This configuration directly impacts WordPress’s speed and functionality by increasing its capacity to process data.
In xCloud, you can simply increase the maximum input variables for your website. Follow the steps below to learn how you can do that.
Step 1: Access To Your Site In xCloud
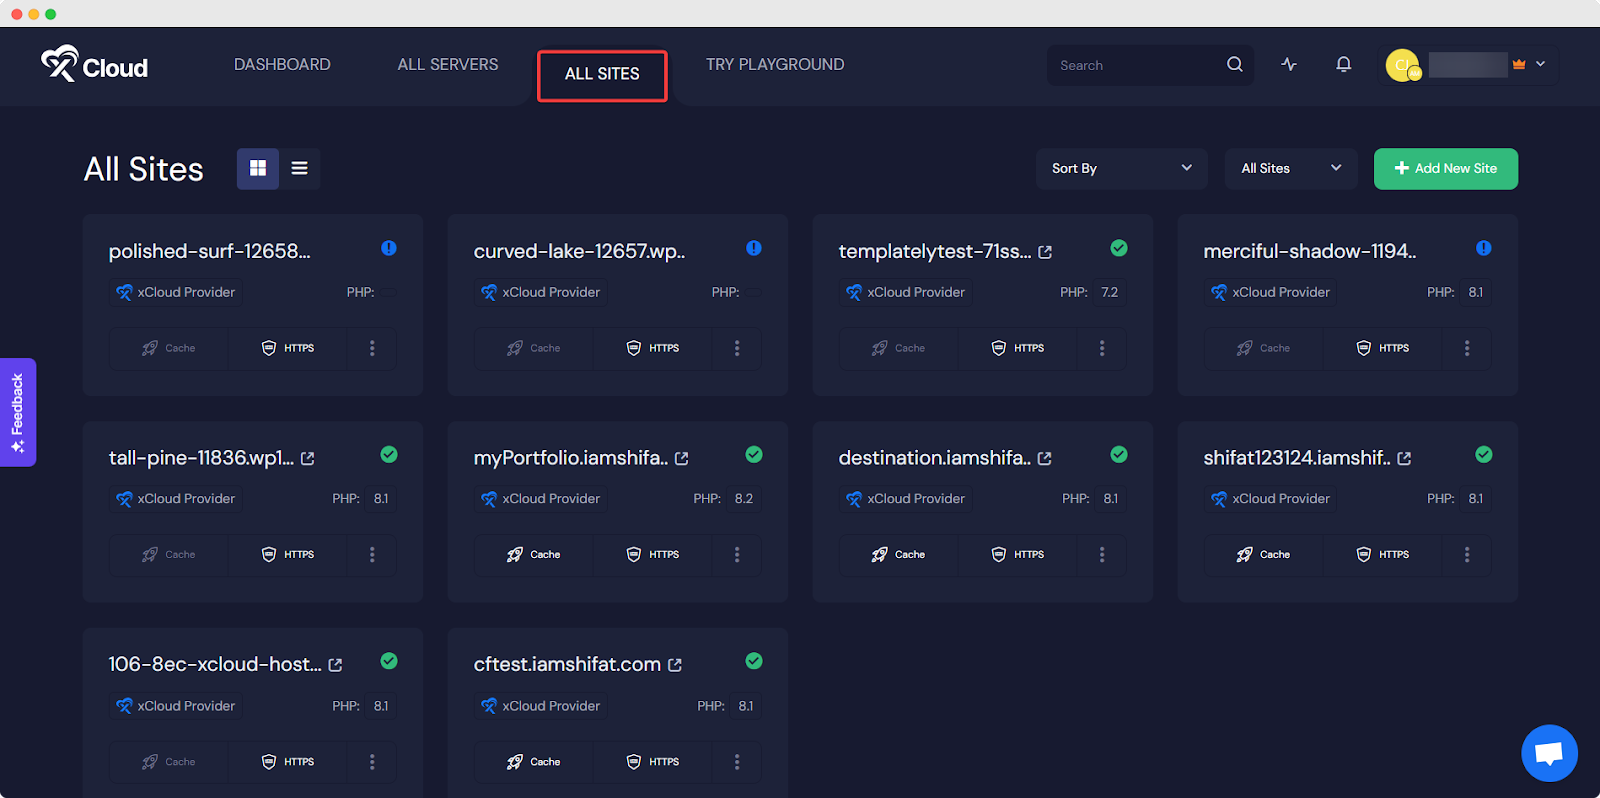
Log in to the xCloud dashboard, go to the ‘All Sites’ tab, and select your preferred site for which you want to increase the PHP maximum input variables.
Step 2: Check The PHP Version For Your Site
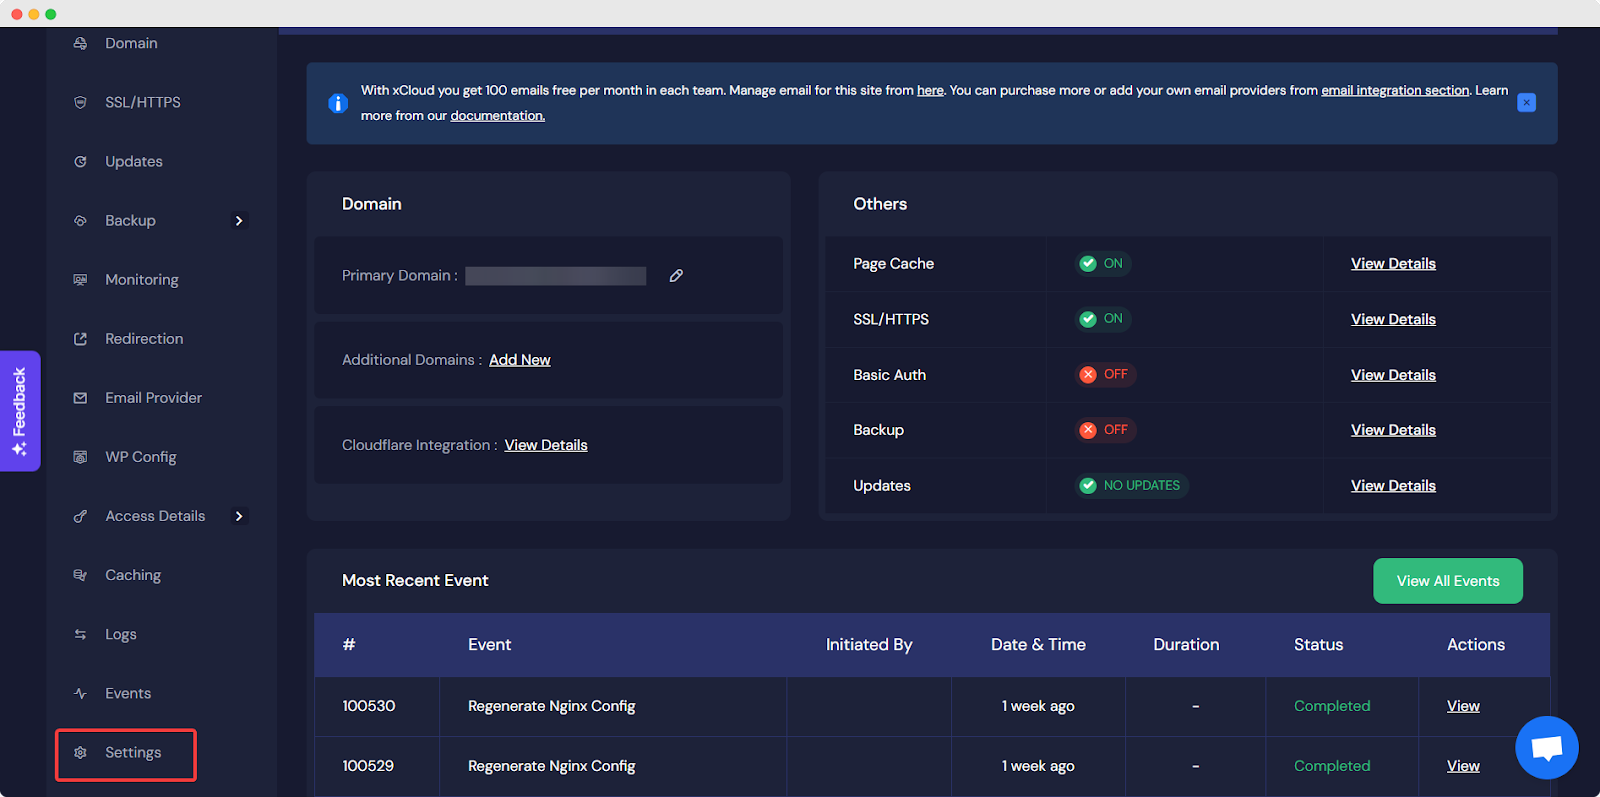
From the site’s ‘Overview’ page, click on the ‘Settings’ tab from the left panel.
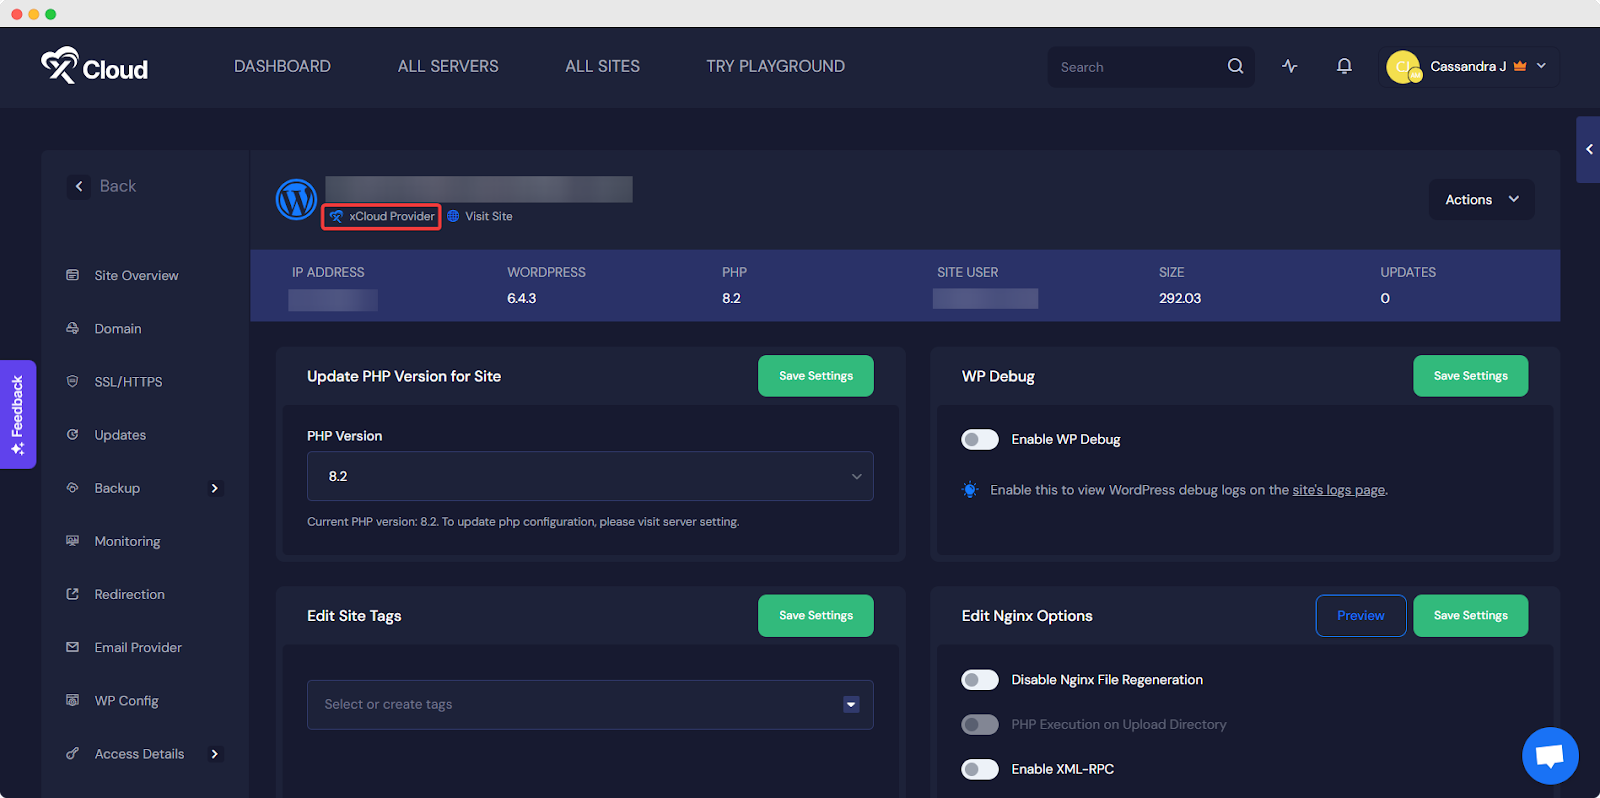
Now, check your site’s PHP version. You can also change your site’s PHP version. If you want to do that, select the PHP version you want and tap the ‘Save Settings’ button.

Step 3: Access Server PHP Settings
Now, click on your server’s name (found below your site domain) to access your site’s server. There, you can increase the PHP maximum input variables for the site’s PHP version.
Step 4: Increase PHP Maximum Input Variables
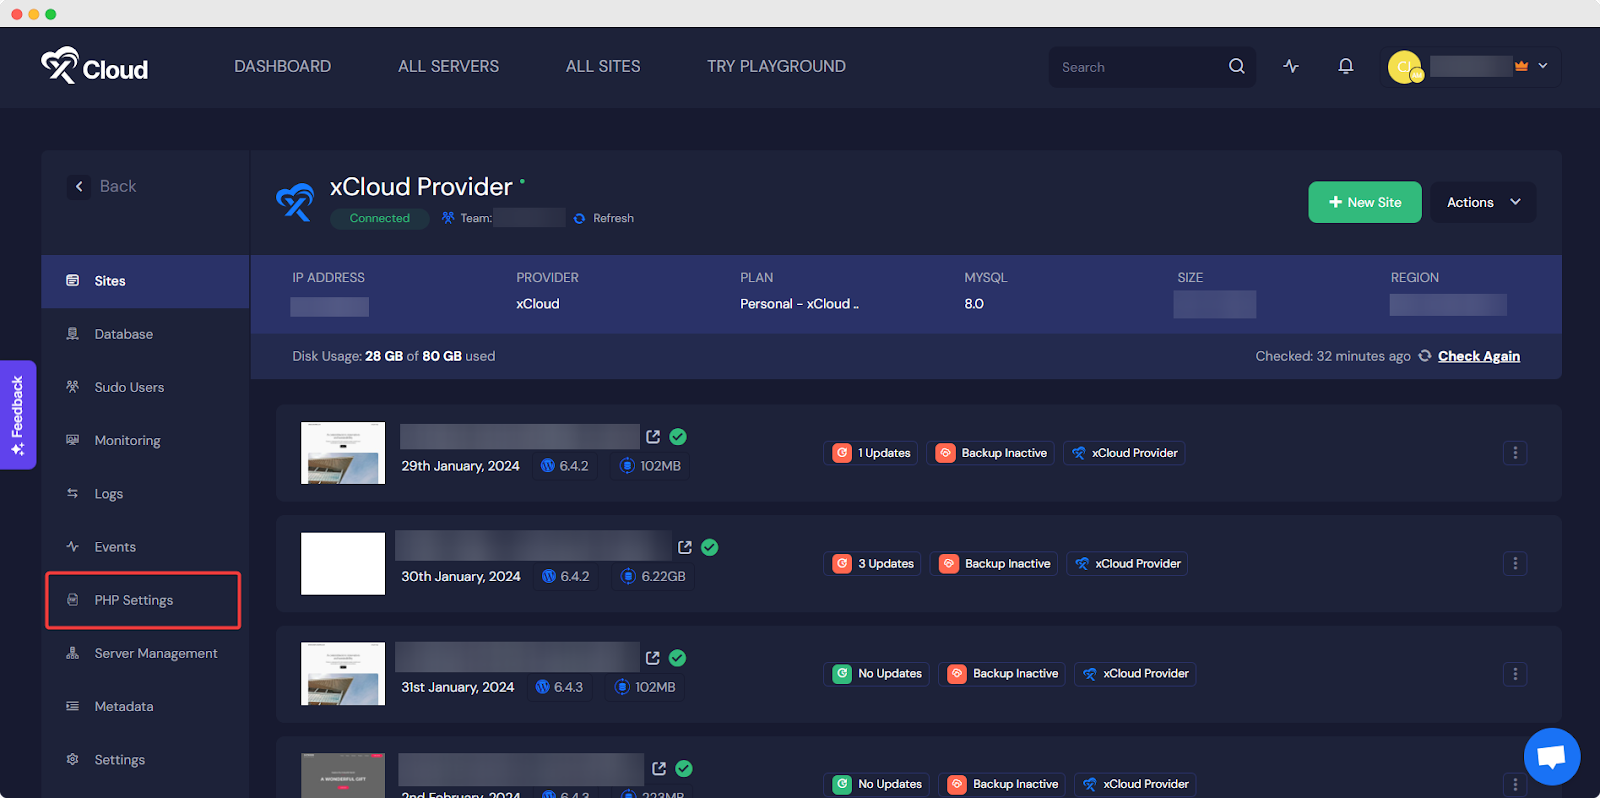
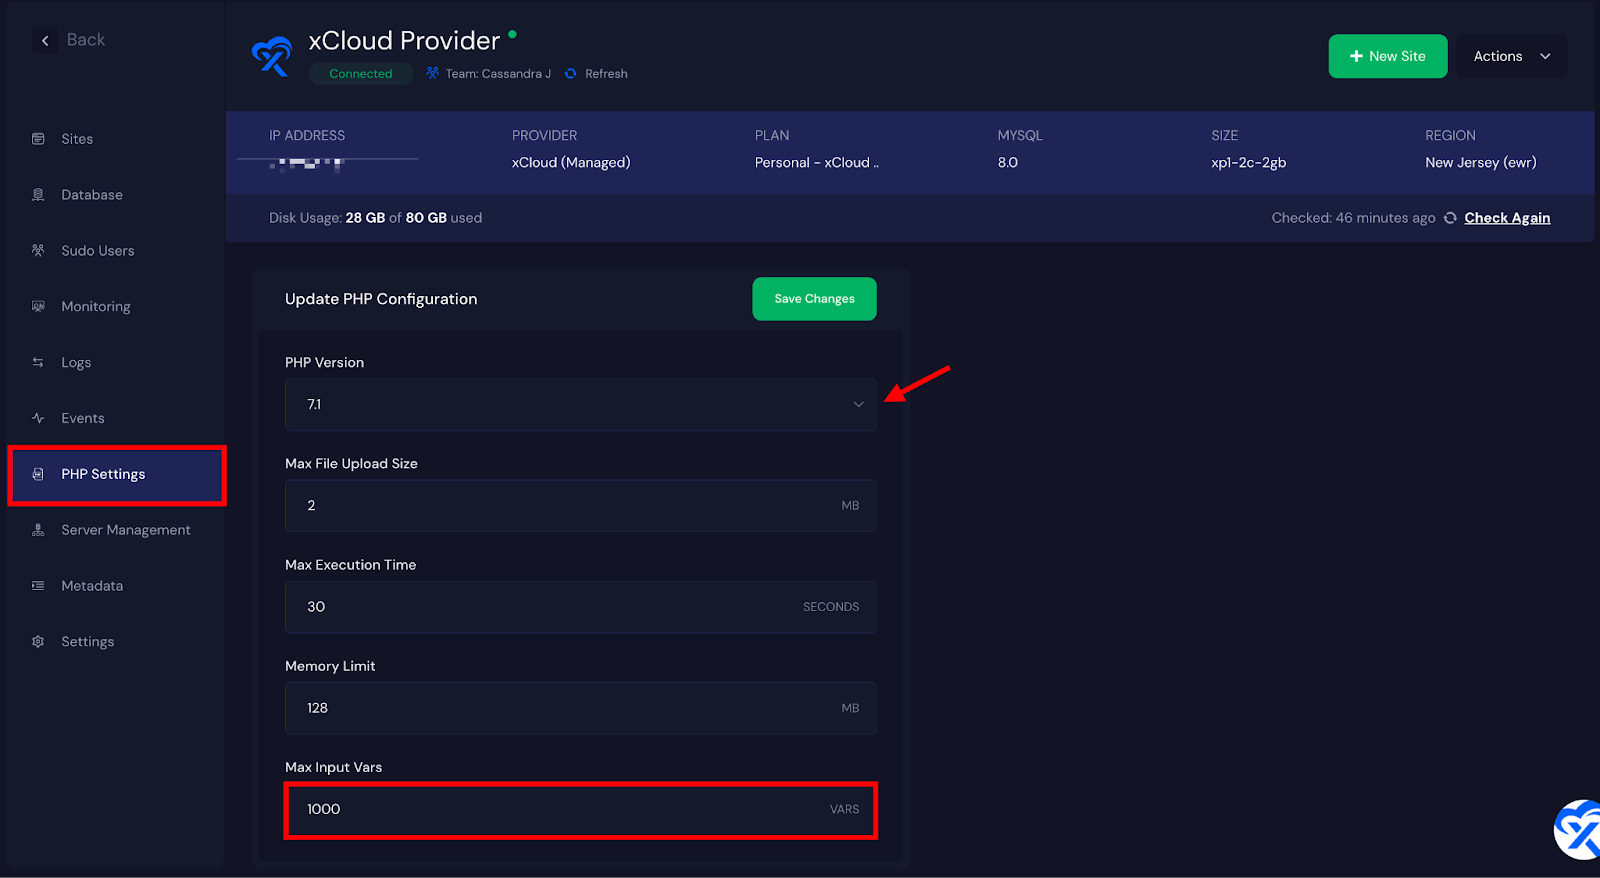
Once you click the server, you will see the ‘PHP Settings’ tab on the left panel. Go to the tab to increase the input variables.
There, you will see your current ‘Max Input Vars’ value. Select your site’s PHP version. You can change the Max Input Vars value as much as you need, and it will apply to all the sites with that PHP version. Once done, hit the ‘Save Changes’ button.
That is how easily you can increase the PHP maximum input variables for websites in xCloud.
Still stuck? Contact our support team for any of your queries.