


Enabling HTTPS for a WordPress site and configuring SSL certificates is crucial for ensuring secure data transmission, safeguarding sensitive information, and building trust with visitors. In xCloud, you can easily enable or disable HTTPS for WordPress sites.
How To Enable HTTPS For WordPress Site In xCloud & Configure SSL Certificates #
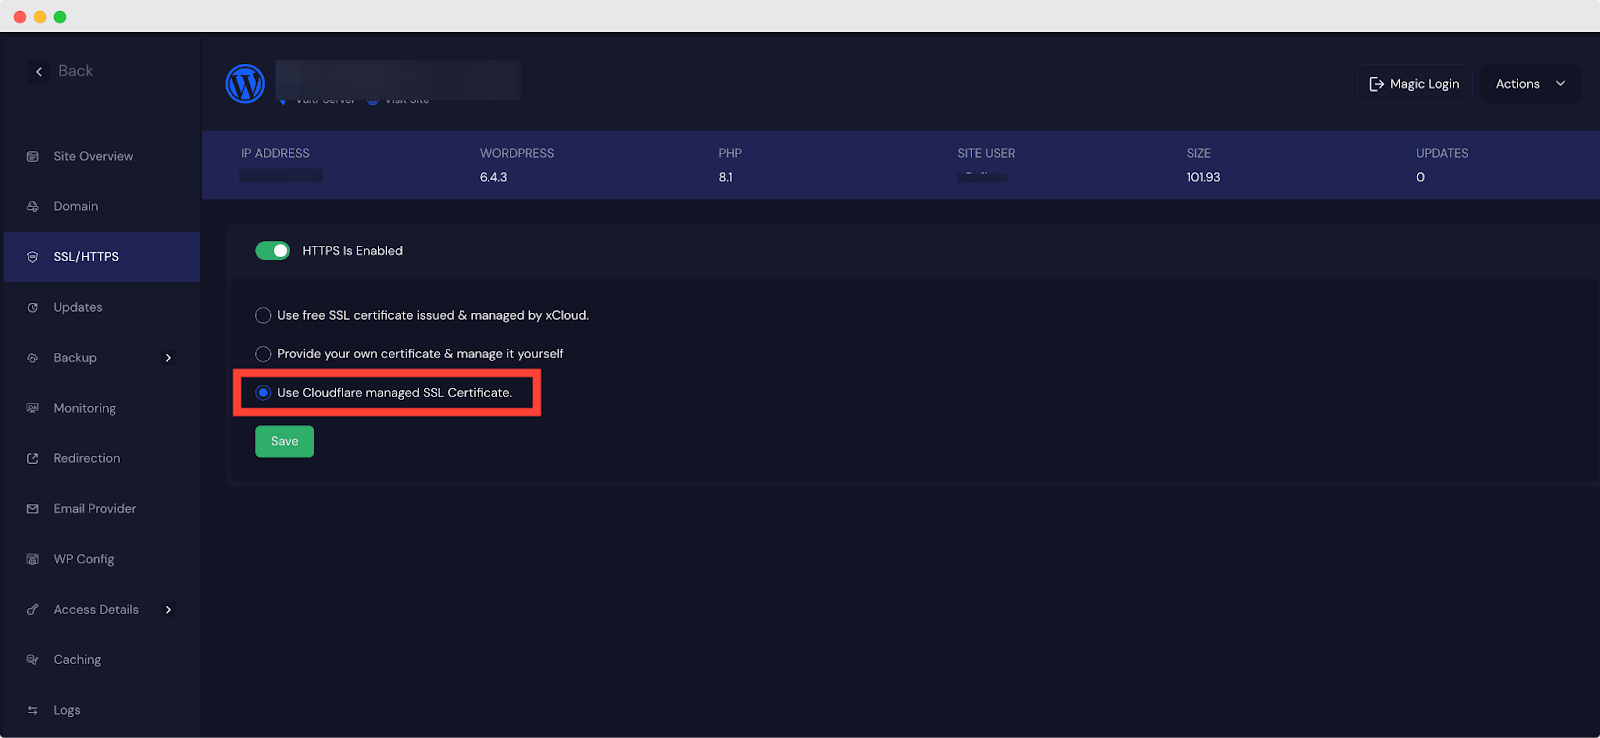
In xCloud, you can enable or disable HTTPS for WordPress sites in a few clicks. To enable HTTPS on your website, go to the SSL/HTTPS tab from the xCloud site dashboard and Toggle on the HTTPS button. You can configure SSL certificates in three ways.
- Use free SSL certificate issued & managed by xCloud
- Provide your own certificate & manage it yourself
- Use Cloudflare managed SSL Certificate
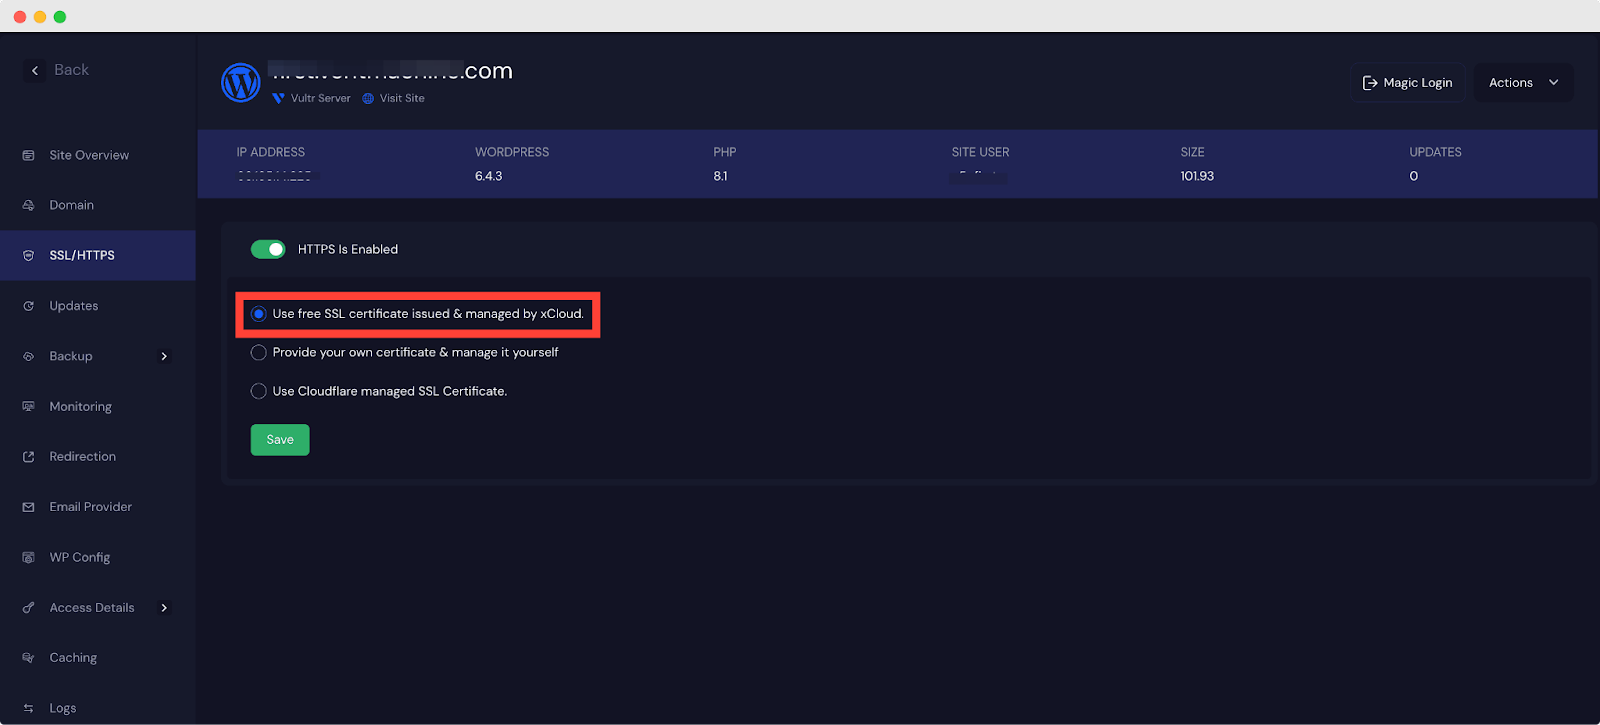
#1 Use Free SSL Certificate Issued & Managed By xCloud #
With xCloud, you can easily use free SSL certificates issued and managed by xCloud on your site without any complexity. xCloud will handle SSL automatically. To enable HTTPS on your website, go to the SSL/HTTPS tab from the xCloud site dashboard. Click on the ‘Use free SSL certificate issued & managed by xCloud’ option. For more details, read this documentation.
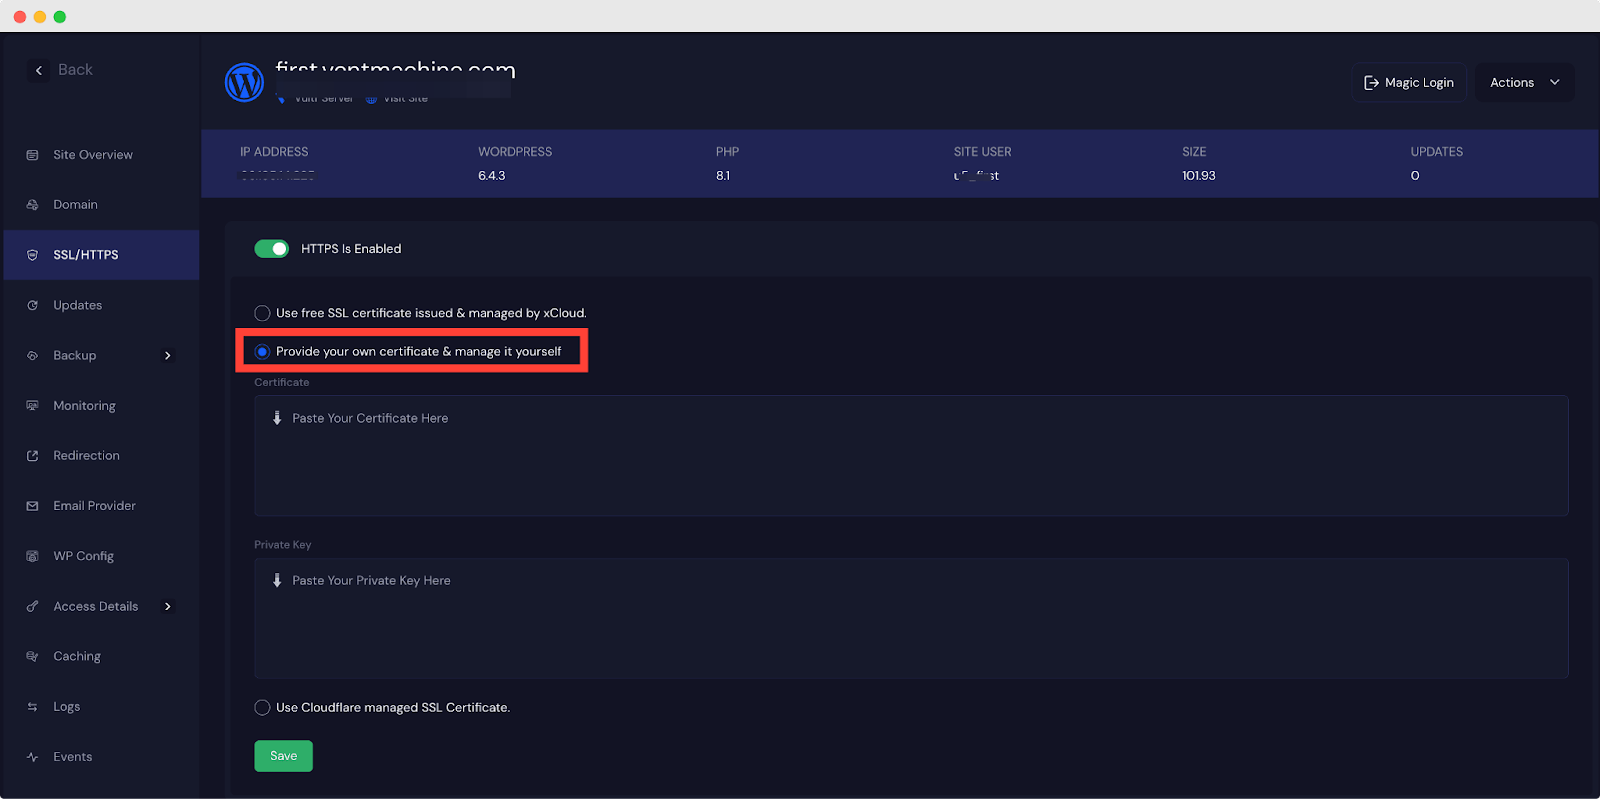
#2 Provide Your Own Certificate & Manage It Yourself #
In xCloud, you can provide your own certificate and manage SSL/HTTPS by yourself. You can use the custom certificate from any 3rd party web application for security providers. From the xCloud site dashboard, go to the SSL/HTTPS tab. Click on the ‘Provide your own certificate & manage it yourself’ option. Now provide the Certificate. For more details, read this documentation.
#3 Use Cloudflare managed SSL Certificate #
If you manage your domain with Cloudflare, the SSL will be managed by xCloud automatically. You have to integrate your Cloudflare account with xCloud and add your own certificates. For this, go to the xCloud site dashboard and click on the SSL/HTTPS tab. Click on the ‘Use Cloudflare managed SSL Certificate’ option. For more details, read this documentation.
Thus you can easily enable/disable HTTPS for the WordPress website in xCloud and configure SSL Certificates.
Still stuck? Contact our support team for any of your queries.


