


cPanel provides a user-friendly platform for managing website files and databases for many website owners. But as your website grows and traffic demands increase, you might want to consider upgrading to a managed hosting solution. Fortunately, xCloud Host is here to help you with all that, providing you with a simple and seamless way to migrate sites from cPanel to managed hosting.
Follow this step-by-step guide to learn how to migrate sites from cPanel to managed hosting at xCloud.
Step 1: Generate Backup In cPanel #
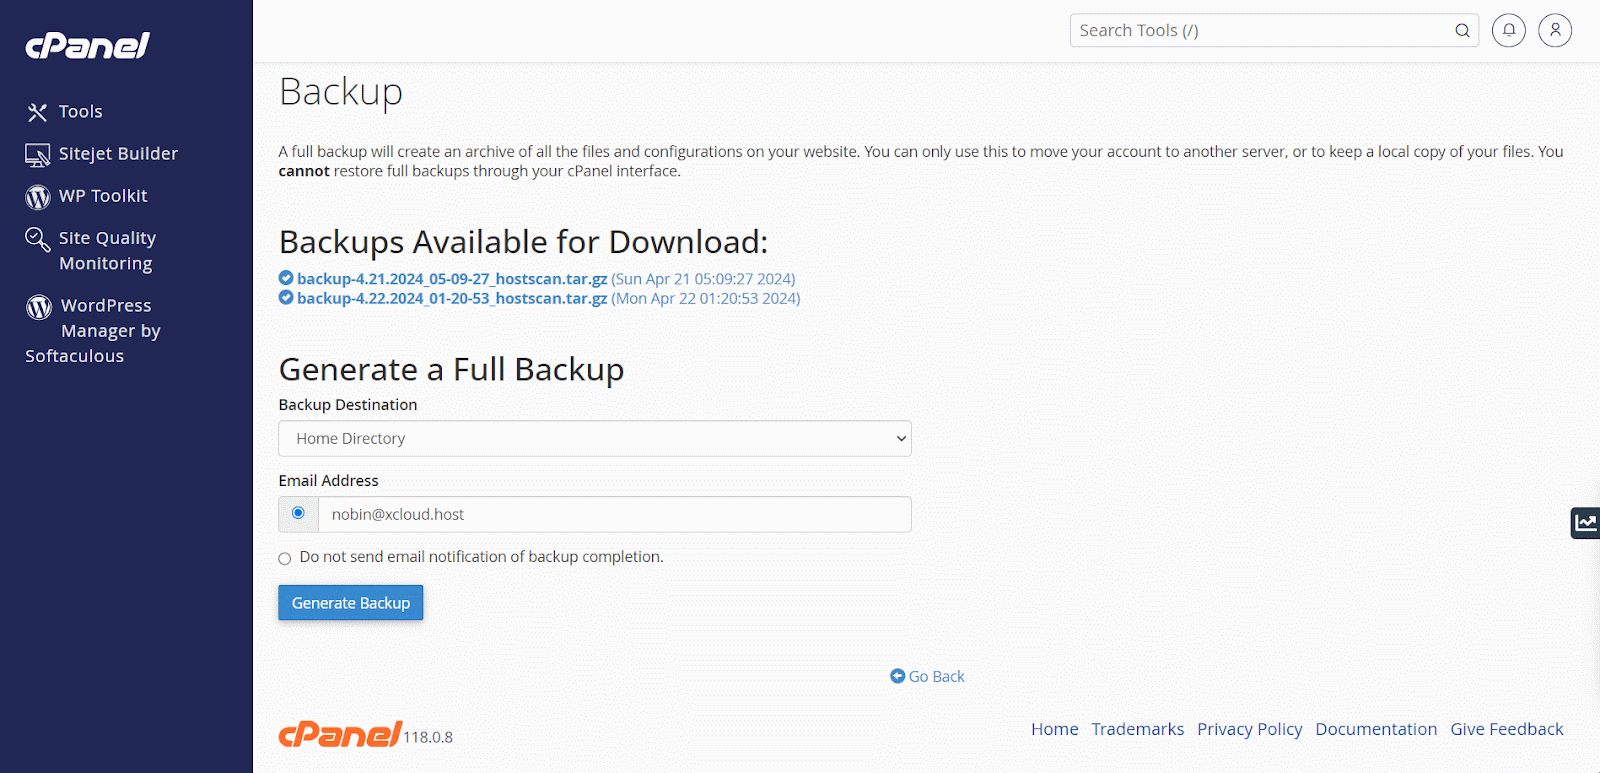
Before getting started, you need to create backups in cPanel by navigating to Files → Backup. You will need to have a full account backup. So, hit the ‘Download a Full Account Backup’ button.
Here, you will see if you have any previous backups available. Plus, you can also generate a new full backup file. Choose one of the backup destination options and provide your email address if you want a notification to your email once the backup is ready. You can also choose not to get an email notification. Once done, hit the ‘Generate Backup’ button below.
Now, you are all set to generate and collect API tokens from cPanel to start migrating.
Step 2: Collect API Tokens From cPanel #
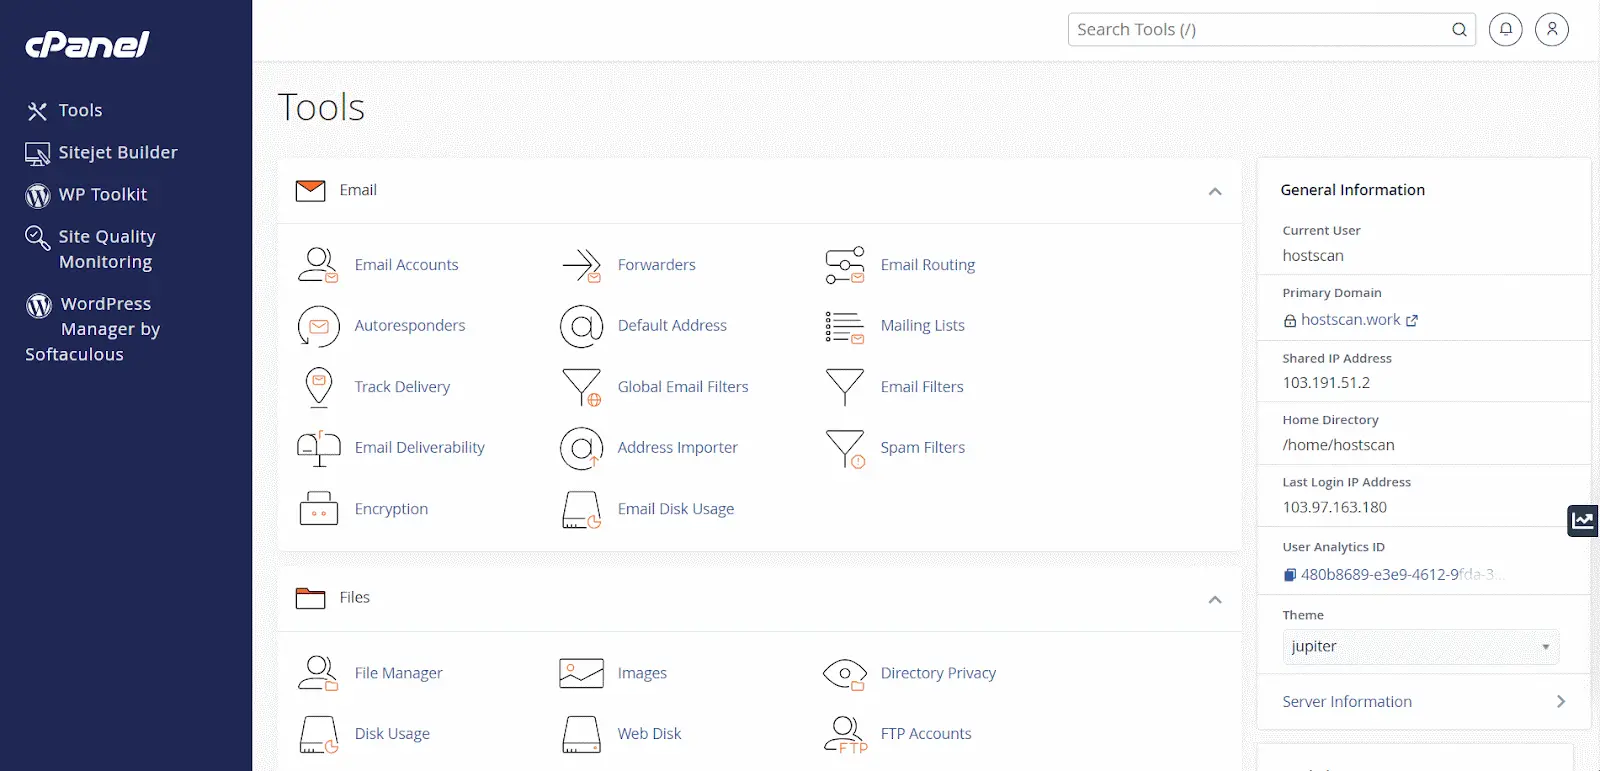
To create and collect API tokens in cPanel for performing the migration process, log in to your cPanel account dashboard and navigate to Security → Manage API Tokens.
Now, you need to create a new token by tapping the ‘Create’ button. Provide a token name, choose whether you want to set an expiry date, and tap the ‘Create’ button.

The API token will be generated instantly. Copy the API token and save it for later purposes. Once done, press the ‘Yes, I Saved My Token’ option.
Step 3: Migrate Sites From cPanel To xCloud #
Log in to your xCloud account and open your server where you want to migrate sites from cPanel. Now, hit the ‘+New Site’ to add a new site. On the next screen, select the ‘Migrate Full Server’ option.
At xCloud, you will have two options for migrating sites from cPanel:
- cPanel API
- Upload the Full Backup File
We recommend using the cPanel API method as it is the more convenient option. It offers a hassle-free migration without downloading and uploading a large backup file with multiple sites. Plus, with API, everything will be done on the server end.
We will be showing you the process of migrating with cPanel API.

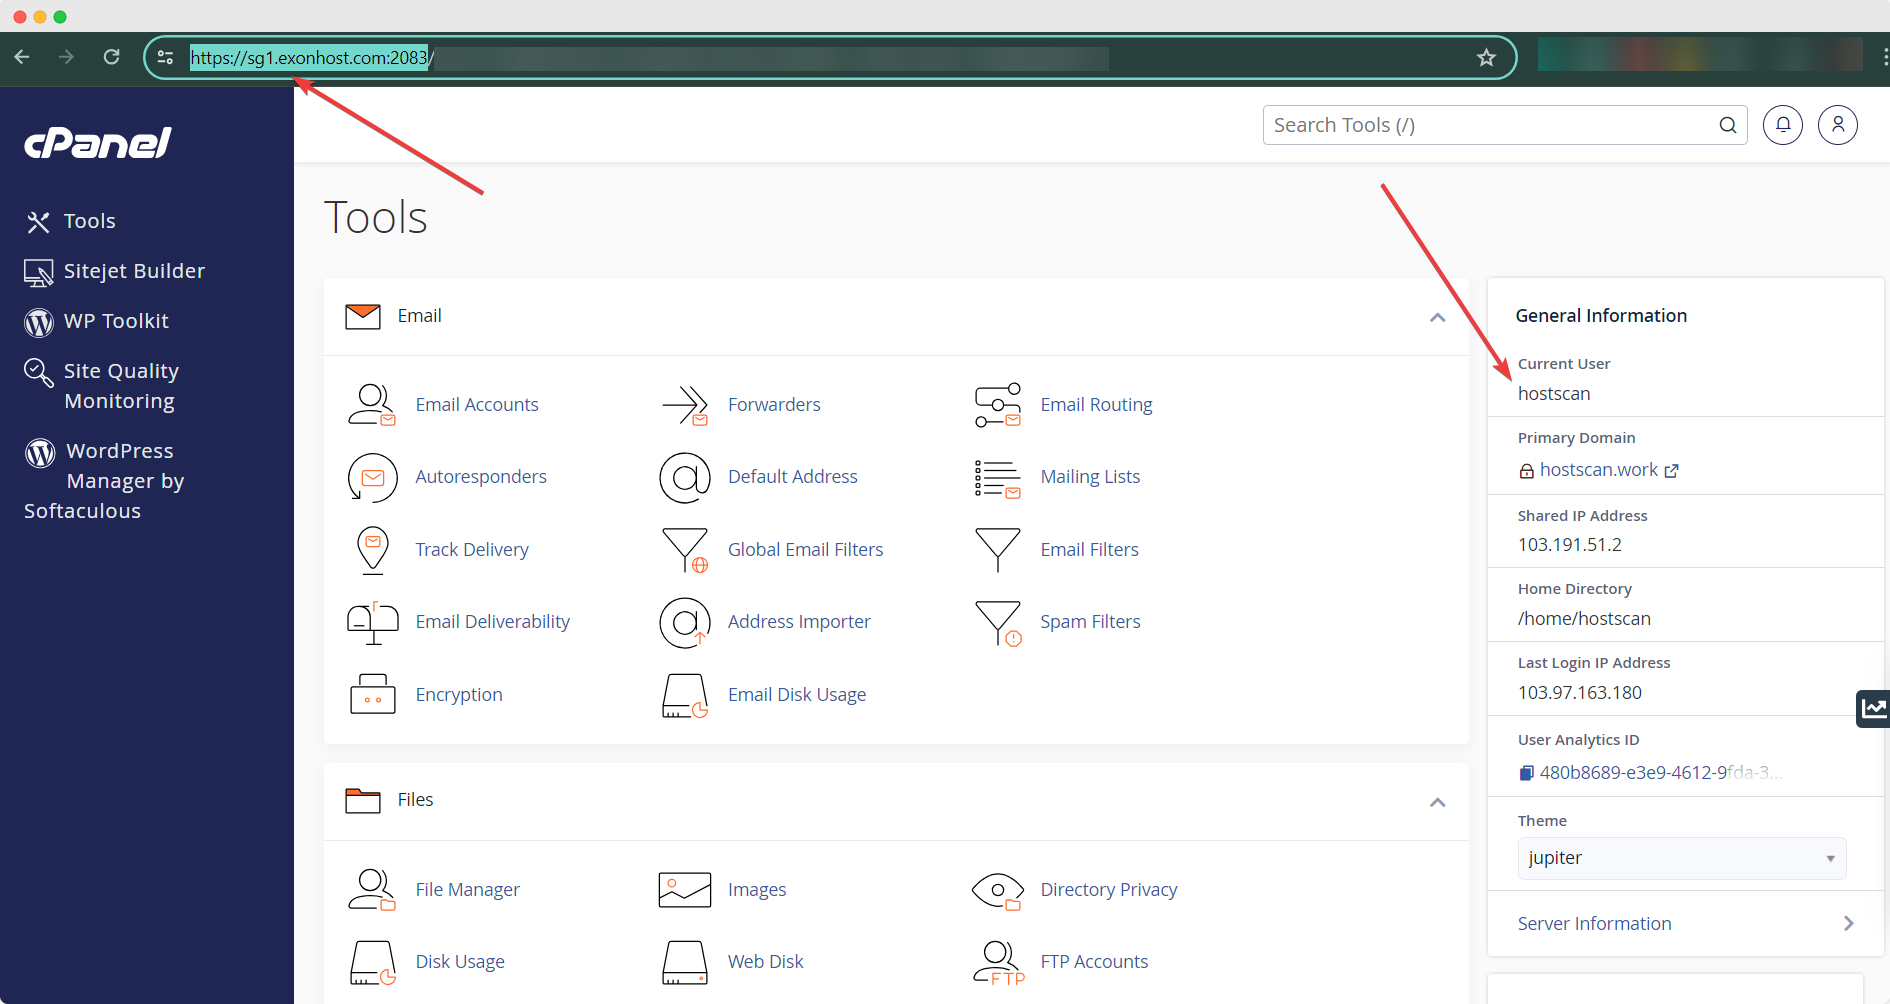
Select the ‘cPanel API’ option. Then, input cPanel username, cPanel API key you collected, and cPanel host.
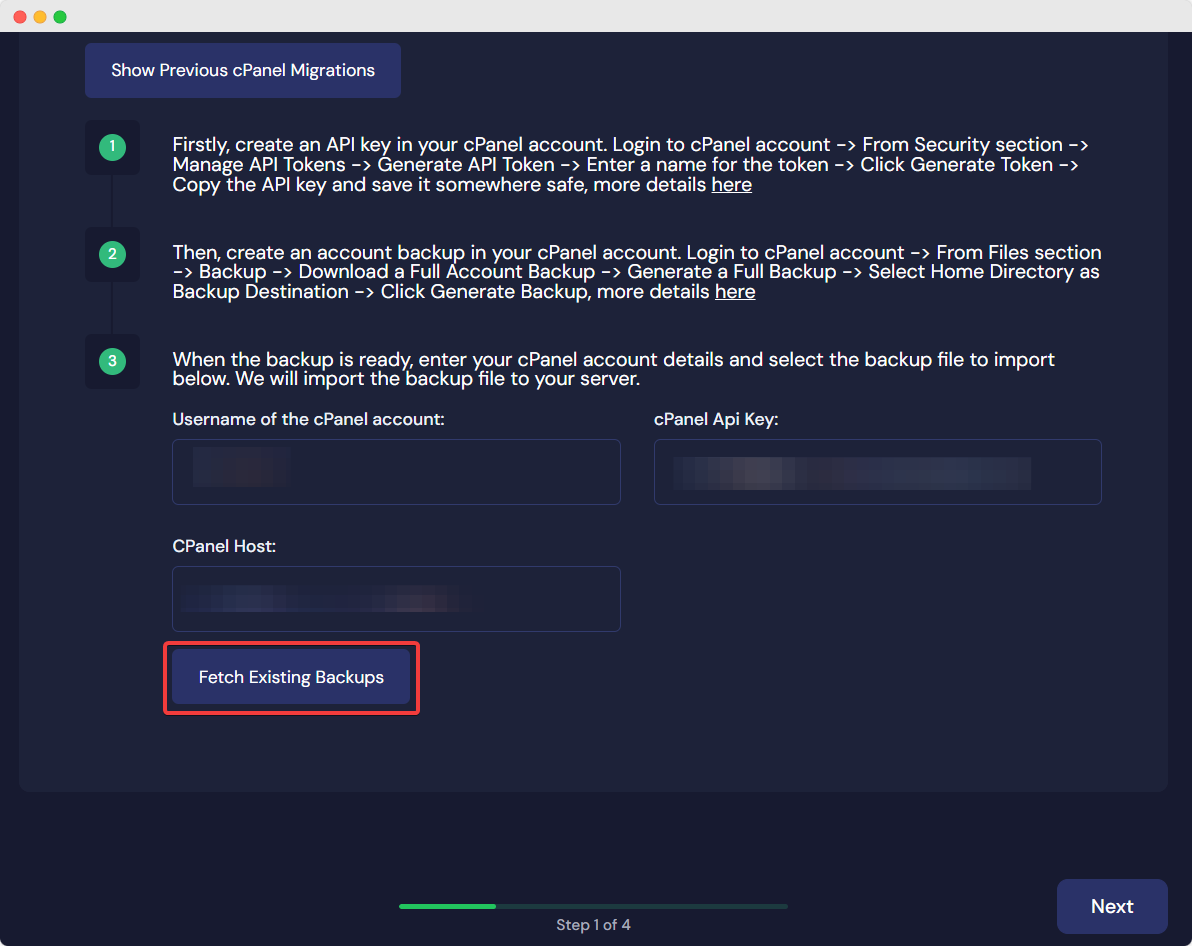
You will find the cPanel username on the cPanel dashboard, as shown below. Also, the host can be found in the web page URL along with the port.
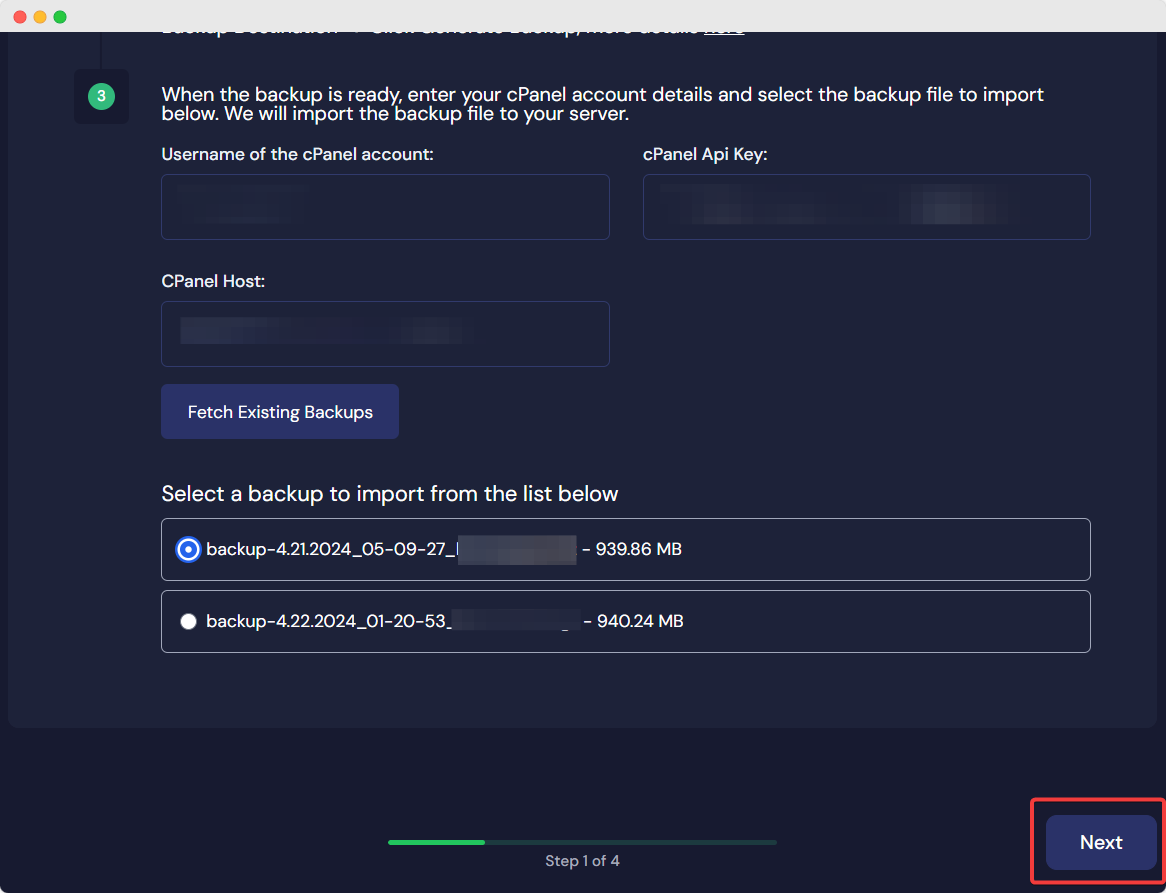
Now, after providing this data, hit the ‘Fetch Existing Backups’ button. You will now see a list of existing backups. Select the one you need, and hit the ‘Next’ button.
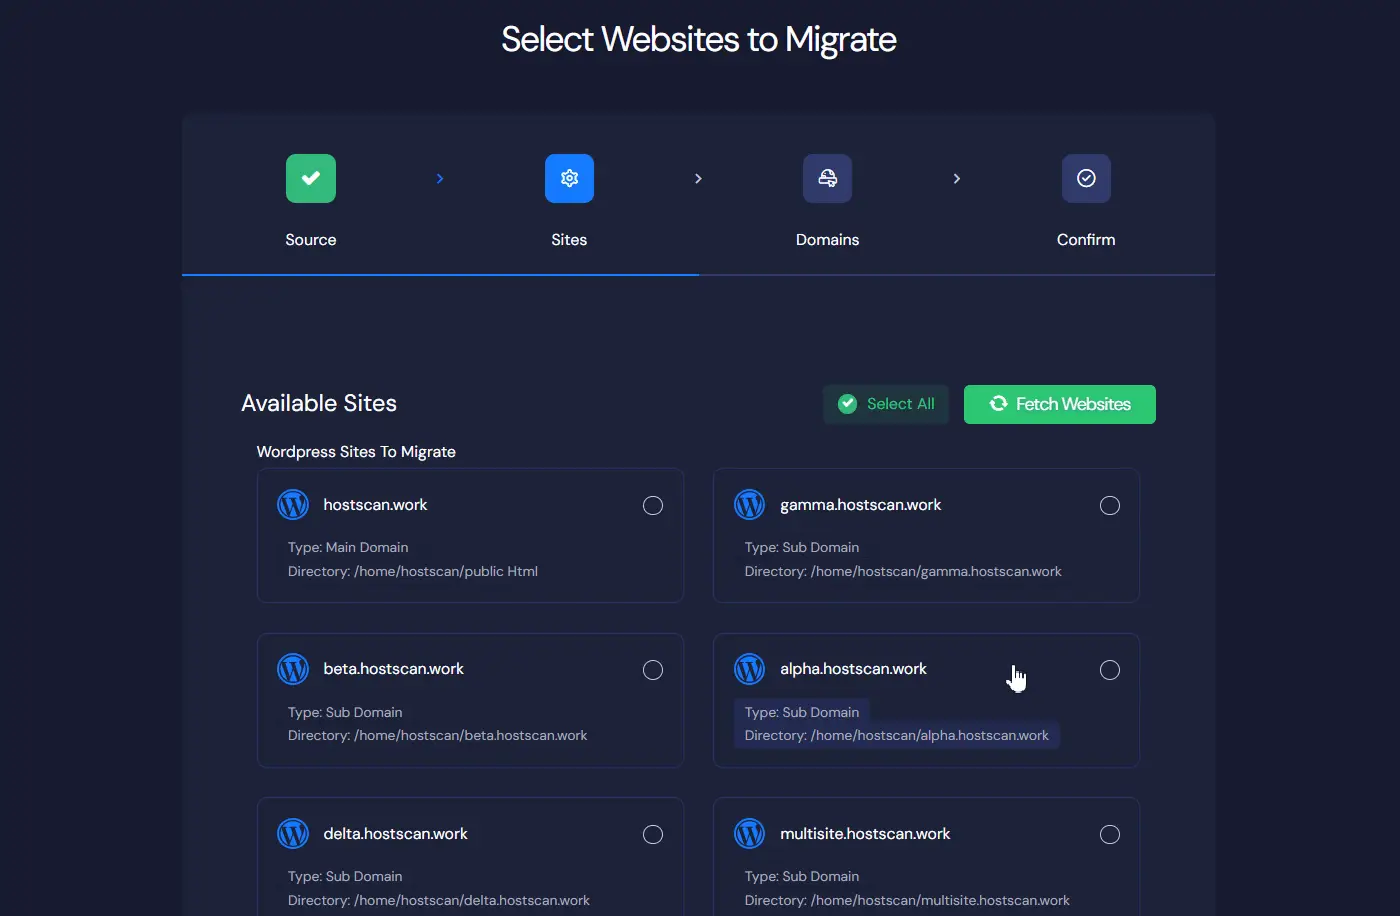
Step 4: Select Your Sites #
On the next screen, you will need to select sites from the available ones. If you select all, all your WordPress sites will be selected. You can also choose individual sites. Once done, hit the ‘Next’ button.
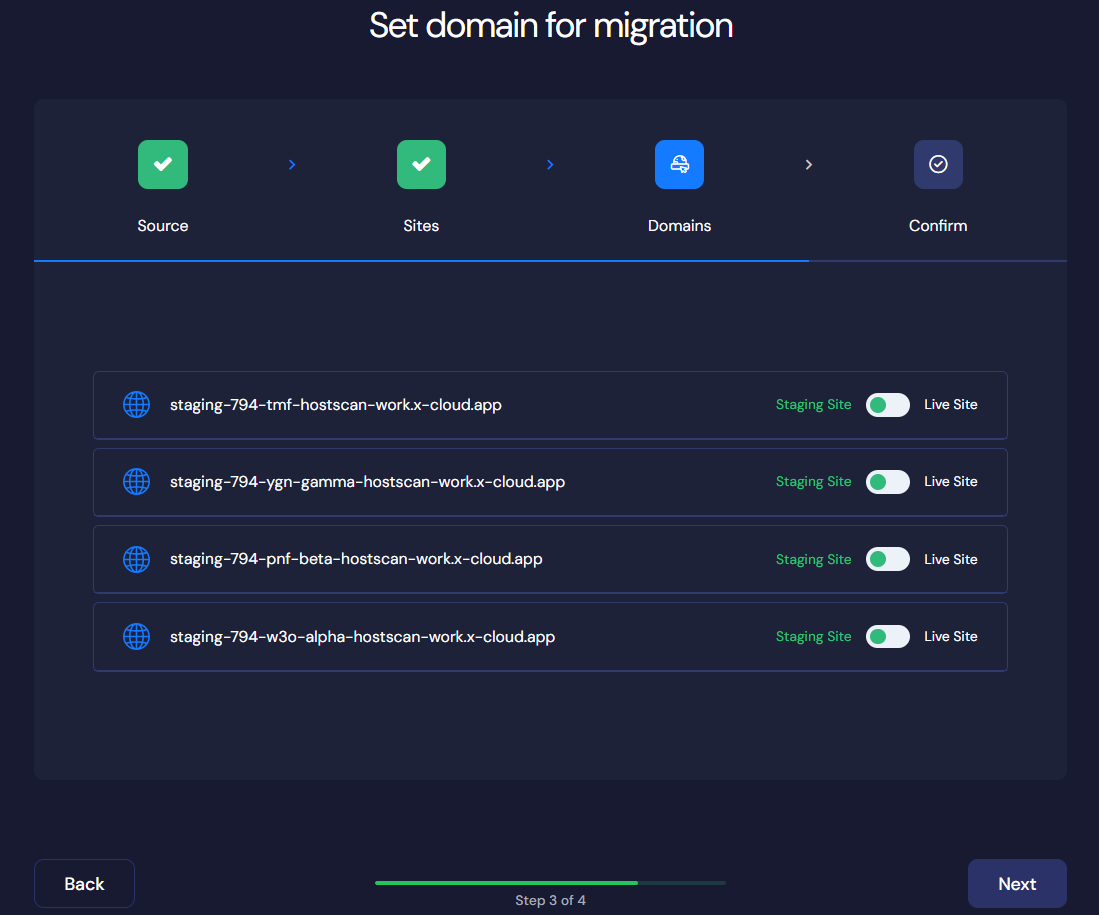
Step 5: Select Domains & Start Migration #
Here, you can choose to make domains either staging or live. However, you can change it to live sites later. So, we recommend making your sites as staging for now in this step. Now, go ‘Next’.
Now, on the next screen, you will see an overview of all the details of your actions regarding to the sites. You can edit the details for individual sites here. Once done and you are ready to migrate sites, hit the ‘Start’ button. Your migration may take a few minutes to complete, depending on your site settings and file size.
That is how easily you can migrate sites from cPanel to managed hosting at xCloud.
Still stuck? Contact our support team for any of your queries.


