


NGINX is a top choice for web servers for its adaptability and strength. Many online services and applications use NGINX and customize it to boost their system’s efficiency, secure their data, and add new features. However, you might find it challenging to configure custom NGINX settings, as it often requires manual edits in the Linux terminal.
But, with xCloud, you can simplify this process. If you add a custom NGINX in xCloud, it lets you easily modify NGINX settings right from the xCloud dashboard, without using any extra command lines.
Understanding The NGINX Config #
NGINX is an open-source web server that provides reverse proxy, load balancing, and caching capabilities. It has HTTPS server capabilities and is primarily intended for optimal performance and stability.
In xCloud, the NGINX server settings are customizable through configuration files in the /etc/NGINX/ folder. The main configuration file can be located at /etc/NGINX/xcloud-conf.
Configure Custom NGINX In xCloud: A Step-By-Step Guide #
With xCloud’s Custom NGINX Config feature, you can add a new configuration directly from the xCloud dashboard. Here, you can add custom configurations for before, after, and inside server blocks. Follow the guide to learn how you can configure custom NGINX in xCloud.
Step 1: Navigate To The NGINX Tab In xCloud #
Log in to your xCloud dashboard and choose the website for which you want to add a custom NGINX. From the left navigation menu, click on the NGINX option.

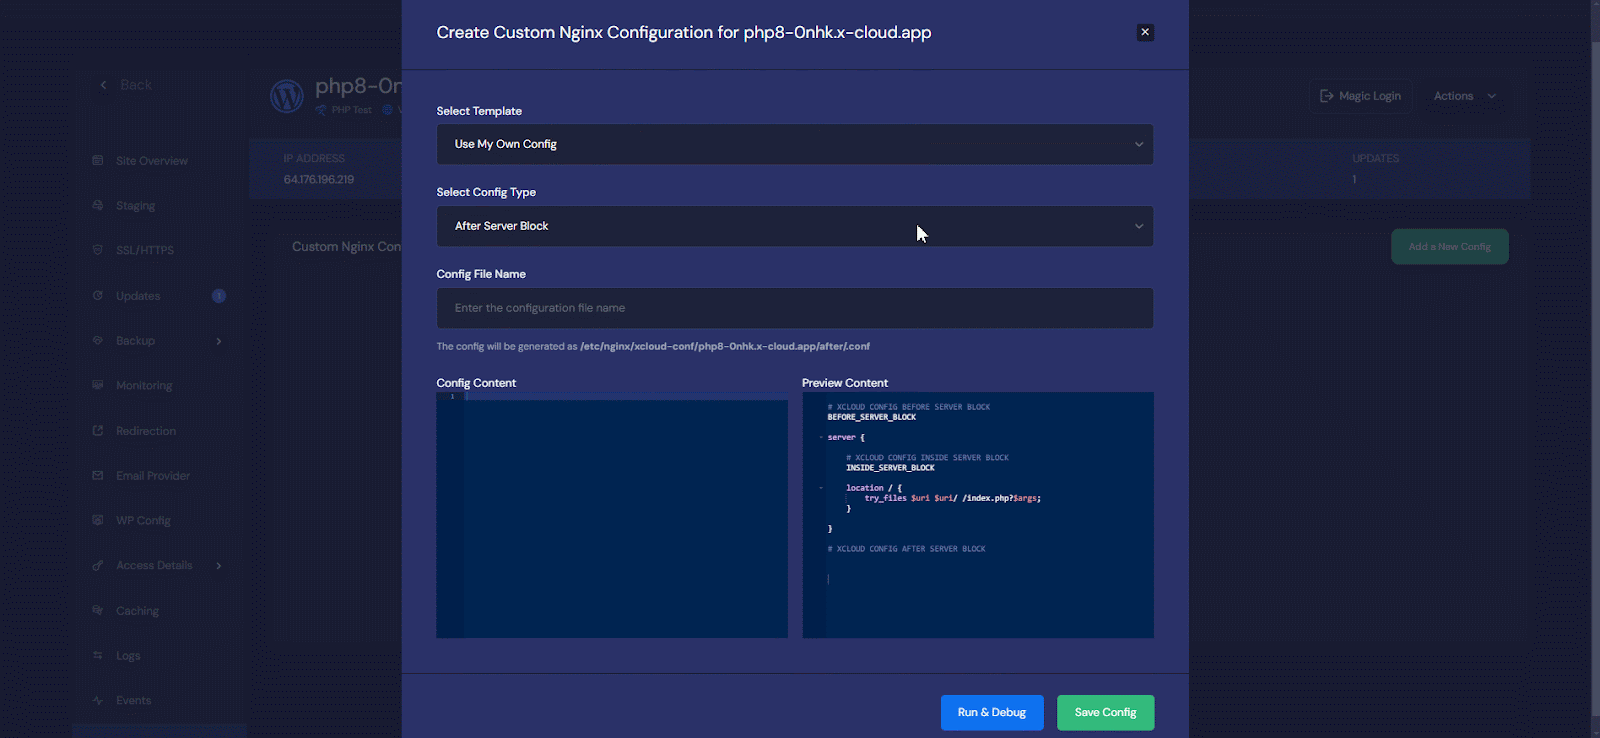
Step 2: Add A Custom NGINX #
From this tab, you need to tap the ‘Add a New Config’ button to configure a custom NGINX. You can run and debug a custom config or save this for later use purposes.
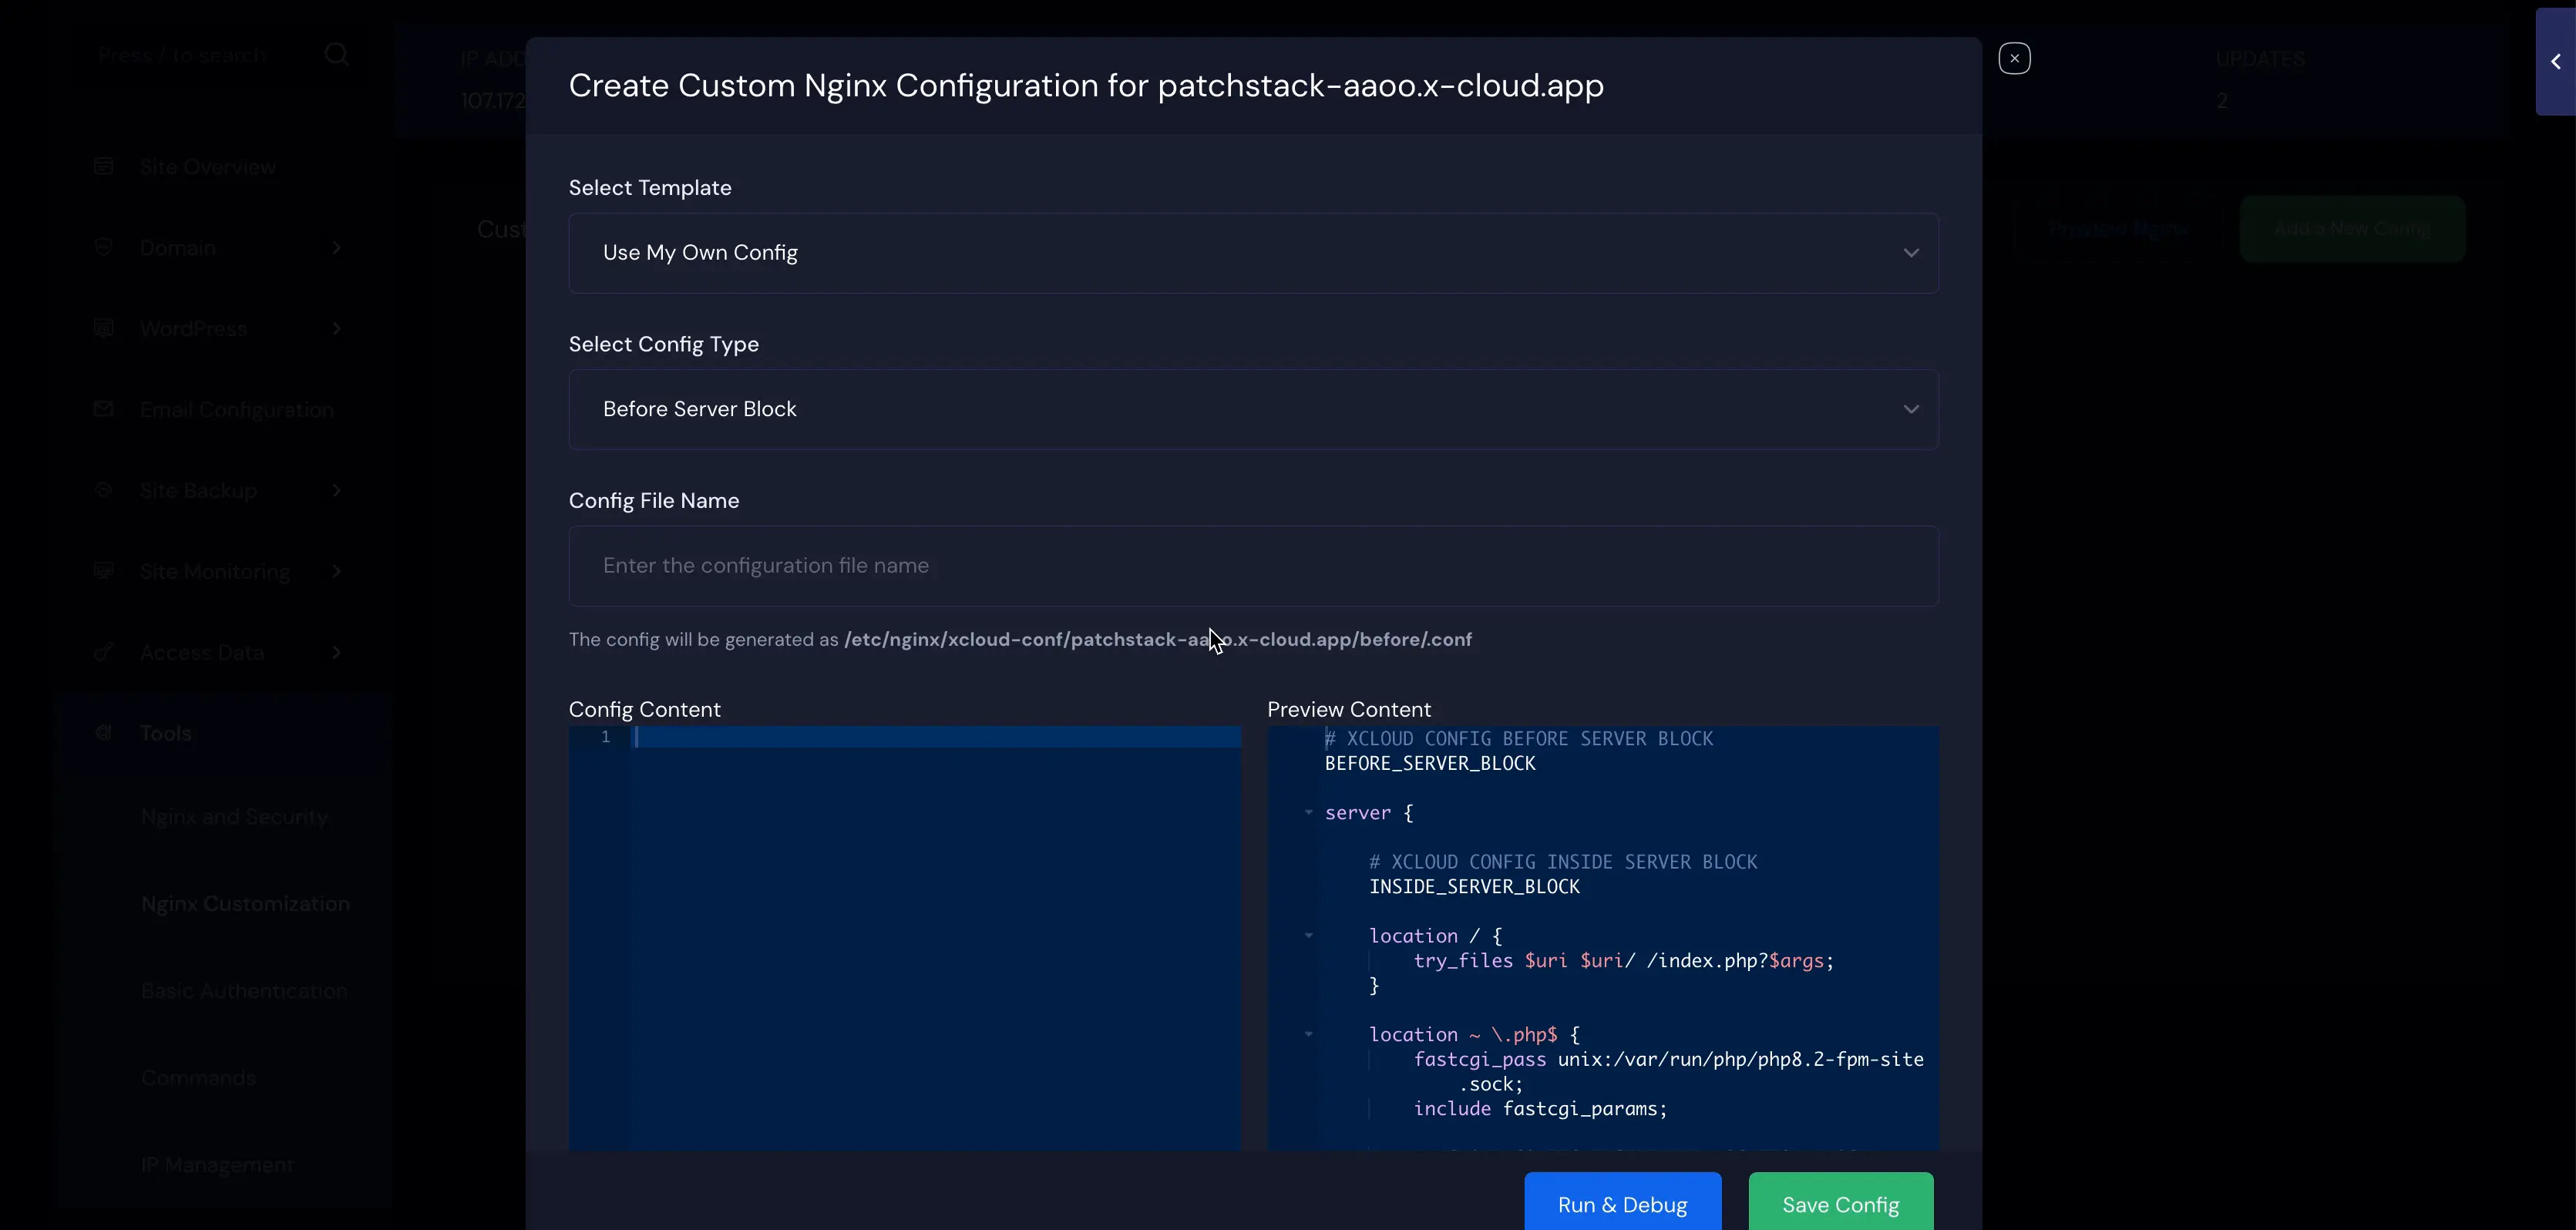
You can choose one from 4 NGINX types: Before Server Block, Inside Server Block, and After Server Block. You can then choose a file name, ‘Run & Debug’ a custom NGINX, or ‘Save Config’.
- If you choose the ‘Before Server Block’ and set a Config File Name, the Config will be generated as /etc/NGINX/xcloud-conf/(sitename)/before/(Config File Name).
- For ‘Inside Server Block’ and a Config File Name, the Config will be generated as /etc/NGINX/xcloud-conf/(sitename)/server/(Config File Name).
- For ‘After Server Block’ and a Config File Name, the Config will be generated as /etc/NGINX/xcloud-conf/(sitename)/after/(Config File Name).
- If you choose Inside PHP Location Block, it will be placed inside the PHP location block in the relevant server configuration.
- If you choose ‘Inside Proxy Location Block’, it will be placed inside the location block used for proxying non-PHP applications.
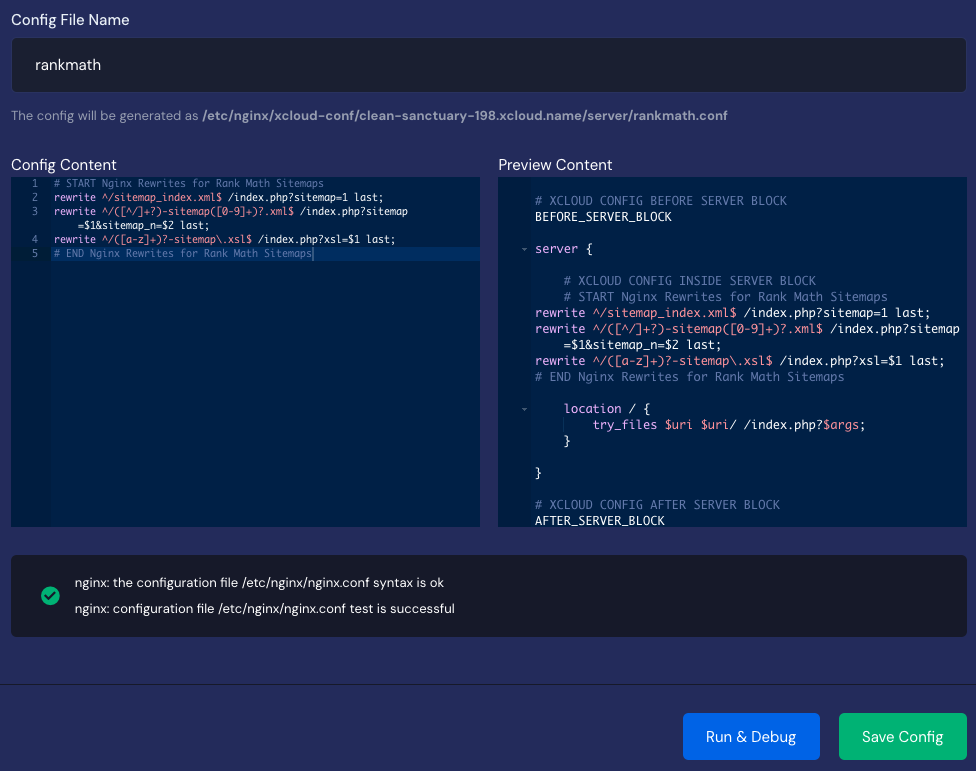
For example, if you choose the ‘Inside Server Block’ and set the Config File Name as ‘rankmath’ for the site ‘summer-star-195.xcloud.name’, the config will be generated as /etc/NGINX/xcloud-conf/summer-star-195.xcloud.name/server/rankmath.conf.
Now, using the Config Content below for example:
# START NGINX Rewrites for Rank Math Sitemaps
rewrite ^/sitemap_index.xml$ /index.php?sitemap=1 last;
rewrite ^/([^/]+?)-sitemap([0-9]+)?.xml$ /index.php?sitemap=$1&sitemap_n=$2 last;
rewrite ^/([a-z]+)?-sitemap\.xsl$ /index.php?xsl=$1 last;
# END NGINX Rewrites for Rank Math Sitemaps

You can then choose to ‘Run & Debug’ or ‘Save Config’.
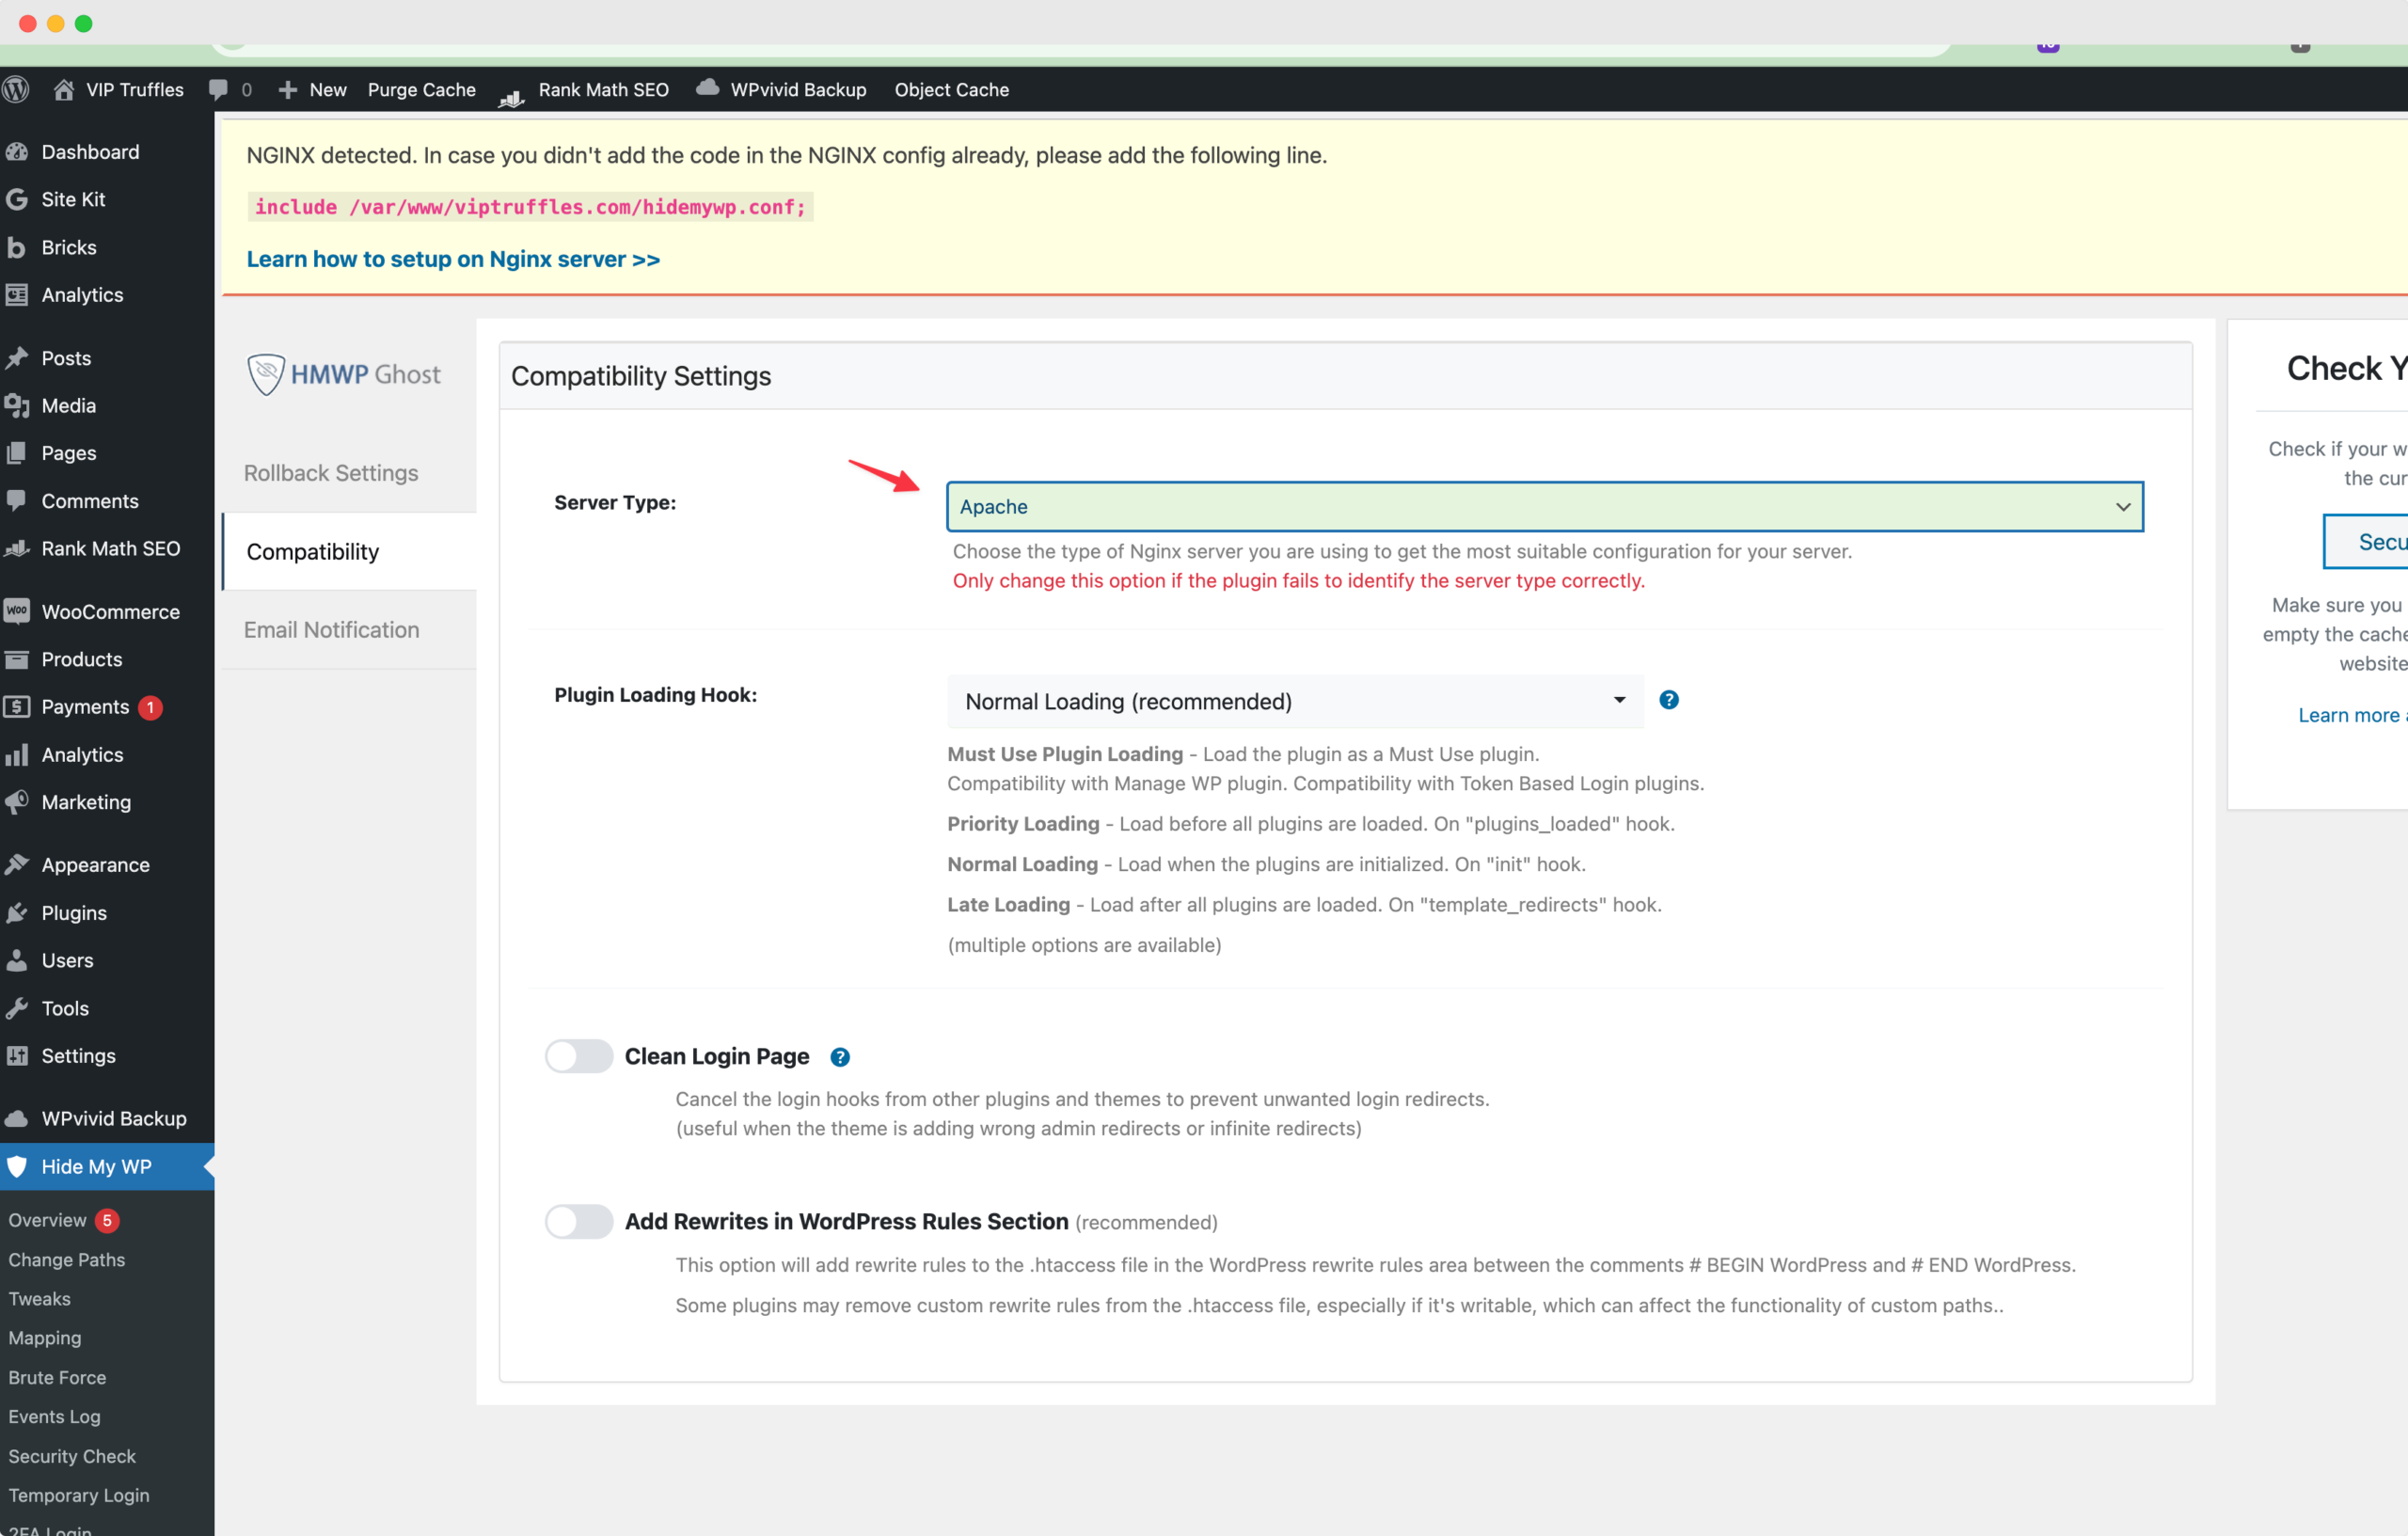
If you are using Custom NGINX for HideMyWP, make sure to change your settings in the plugin like this, as shown below.
If your custom NGINX command and configurations are okay, you will see a green message upon clicking the ‘Run & Debug’.
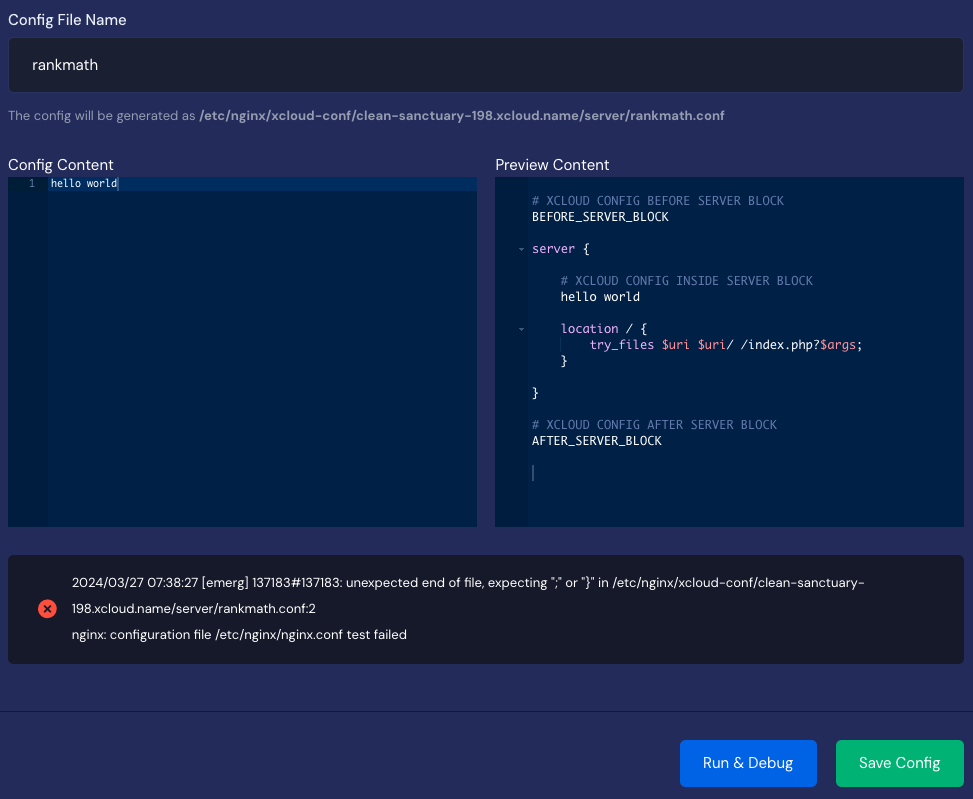
However, if there are some issues with your configuration and command, you will see a red message.
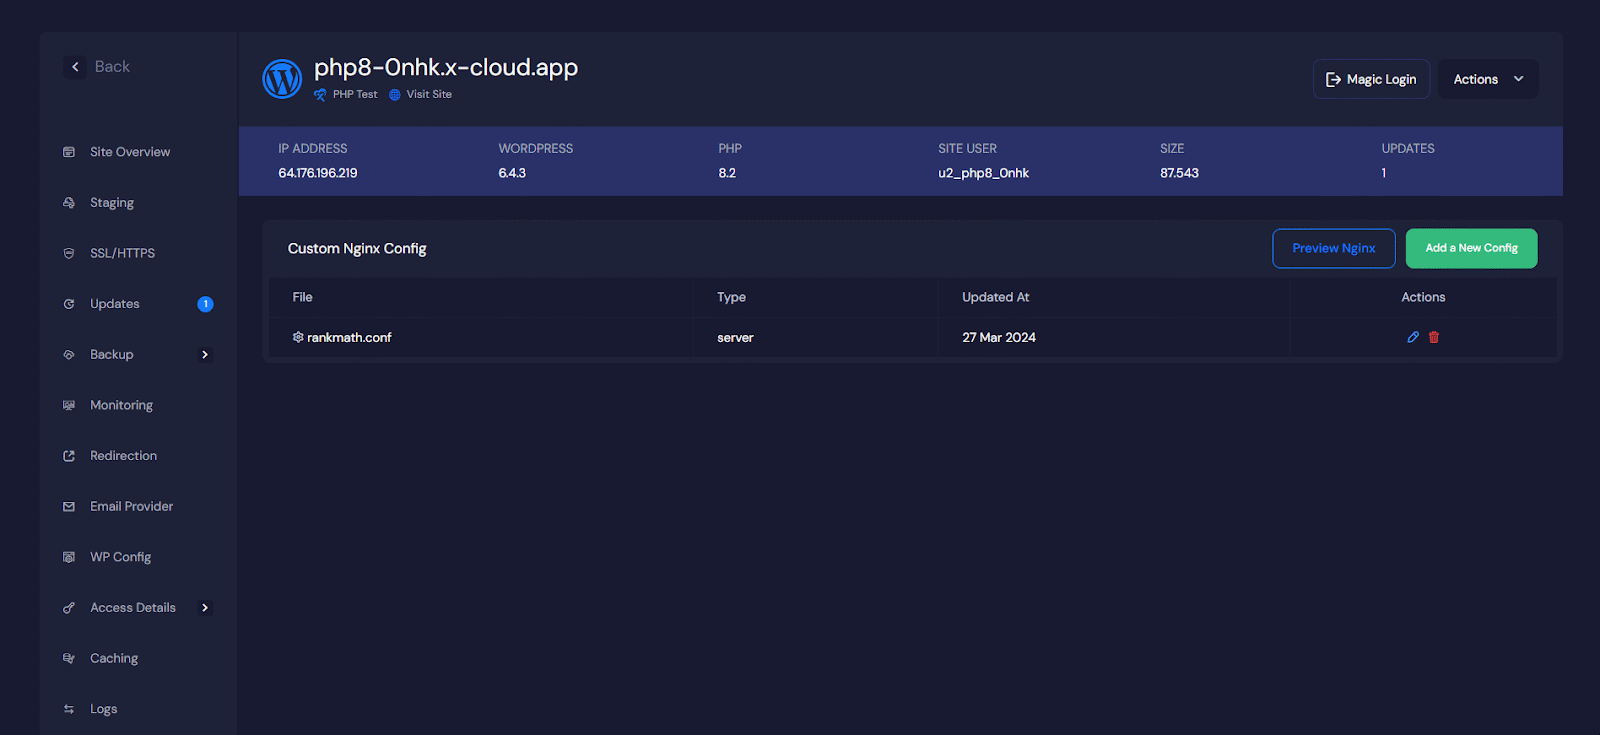
Once you add a custom NGINX config successfully, it will be listed on the ‘Custom NGINX Config’ tab. From here, you can edit or delete a config. Additionally, you can preview your configuration.
Custom NGINX Templates #
For now, we are offering built-in custom NGINX support for Rankmath and Hide My WP on the xCloud dashboard. That means, If your website has the Rankmath or Hide My WP plugins installed, you can choose from the ‘Select Template’ list and you’re all good to go. Or else, you can choose ‘Use My Own Config’ to run your config manually. However, we will be gradually adding more plugins.
That is how easily you can configure custom NGINX in xCloud.
Still stuck? Contact our dedicated support team for any of your queries.


