

How to Install, Upgrade PHP Version & Customize PHP Settings With xCloud Hosting?
Updated September 27, 2026 · 3 min read
Managing PHP versions and settings is an important part of maintaining a fast, secure, and compatible website. With xCloud Hosting, you have complete control over installing, upgrading, and customizing PHP to meet your website’s specific requirements.
Whether you need the latest PHP features, compatibility with older versions, or optimization for performance, xCloud allows a single interface to manage it all. Follow the steps to Install, Upgrade, & Customize PHP Settings with xCloud
PHP Configuration for Server
If you want to keep default settings for your server so that all sites created under it use the same configuration, you can set a default PHP configuration for that server. When a site is created under that server, it will automatically use those settings.
Step 1: Install a PHP Version
First, go to your Server from the xCloud dashboard. Then navigate to the ‘Management’ →‘PHP Configuration’ to access all the available PHP versions and manage them easily.
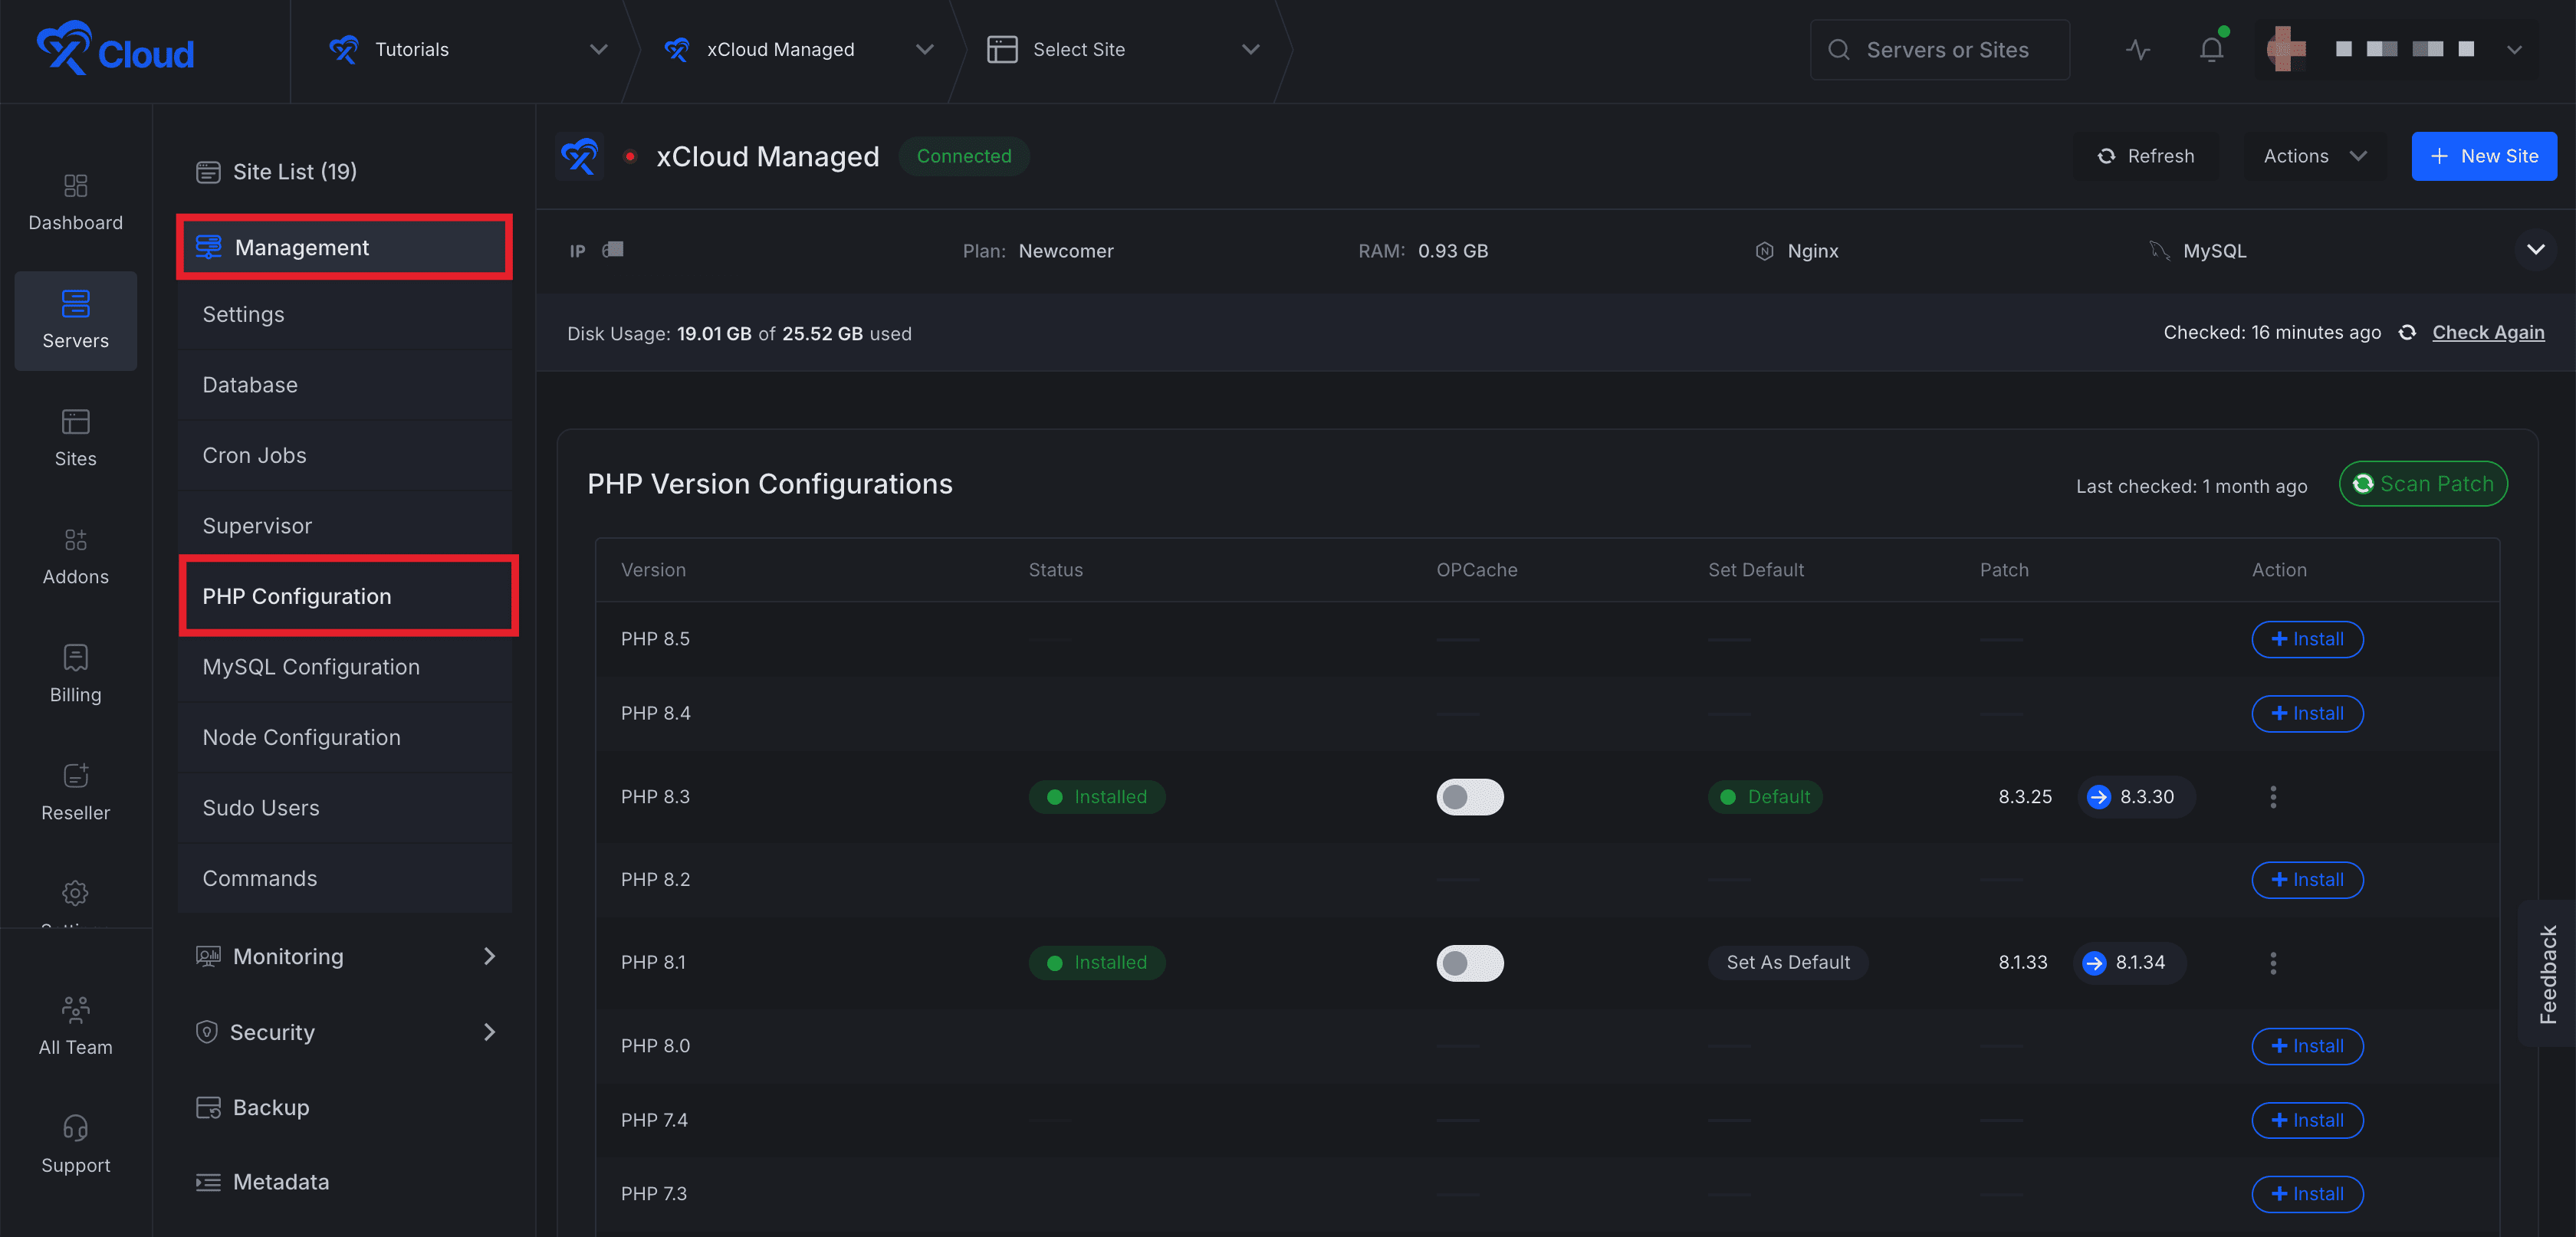
Under the ‘PHP Version Configurations’, get access to all available PHP versions. Choose the ‘PHP Version’ and click on the ‘Install’ button beside the version that you want to install.
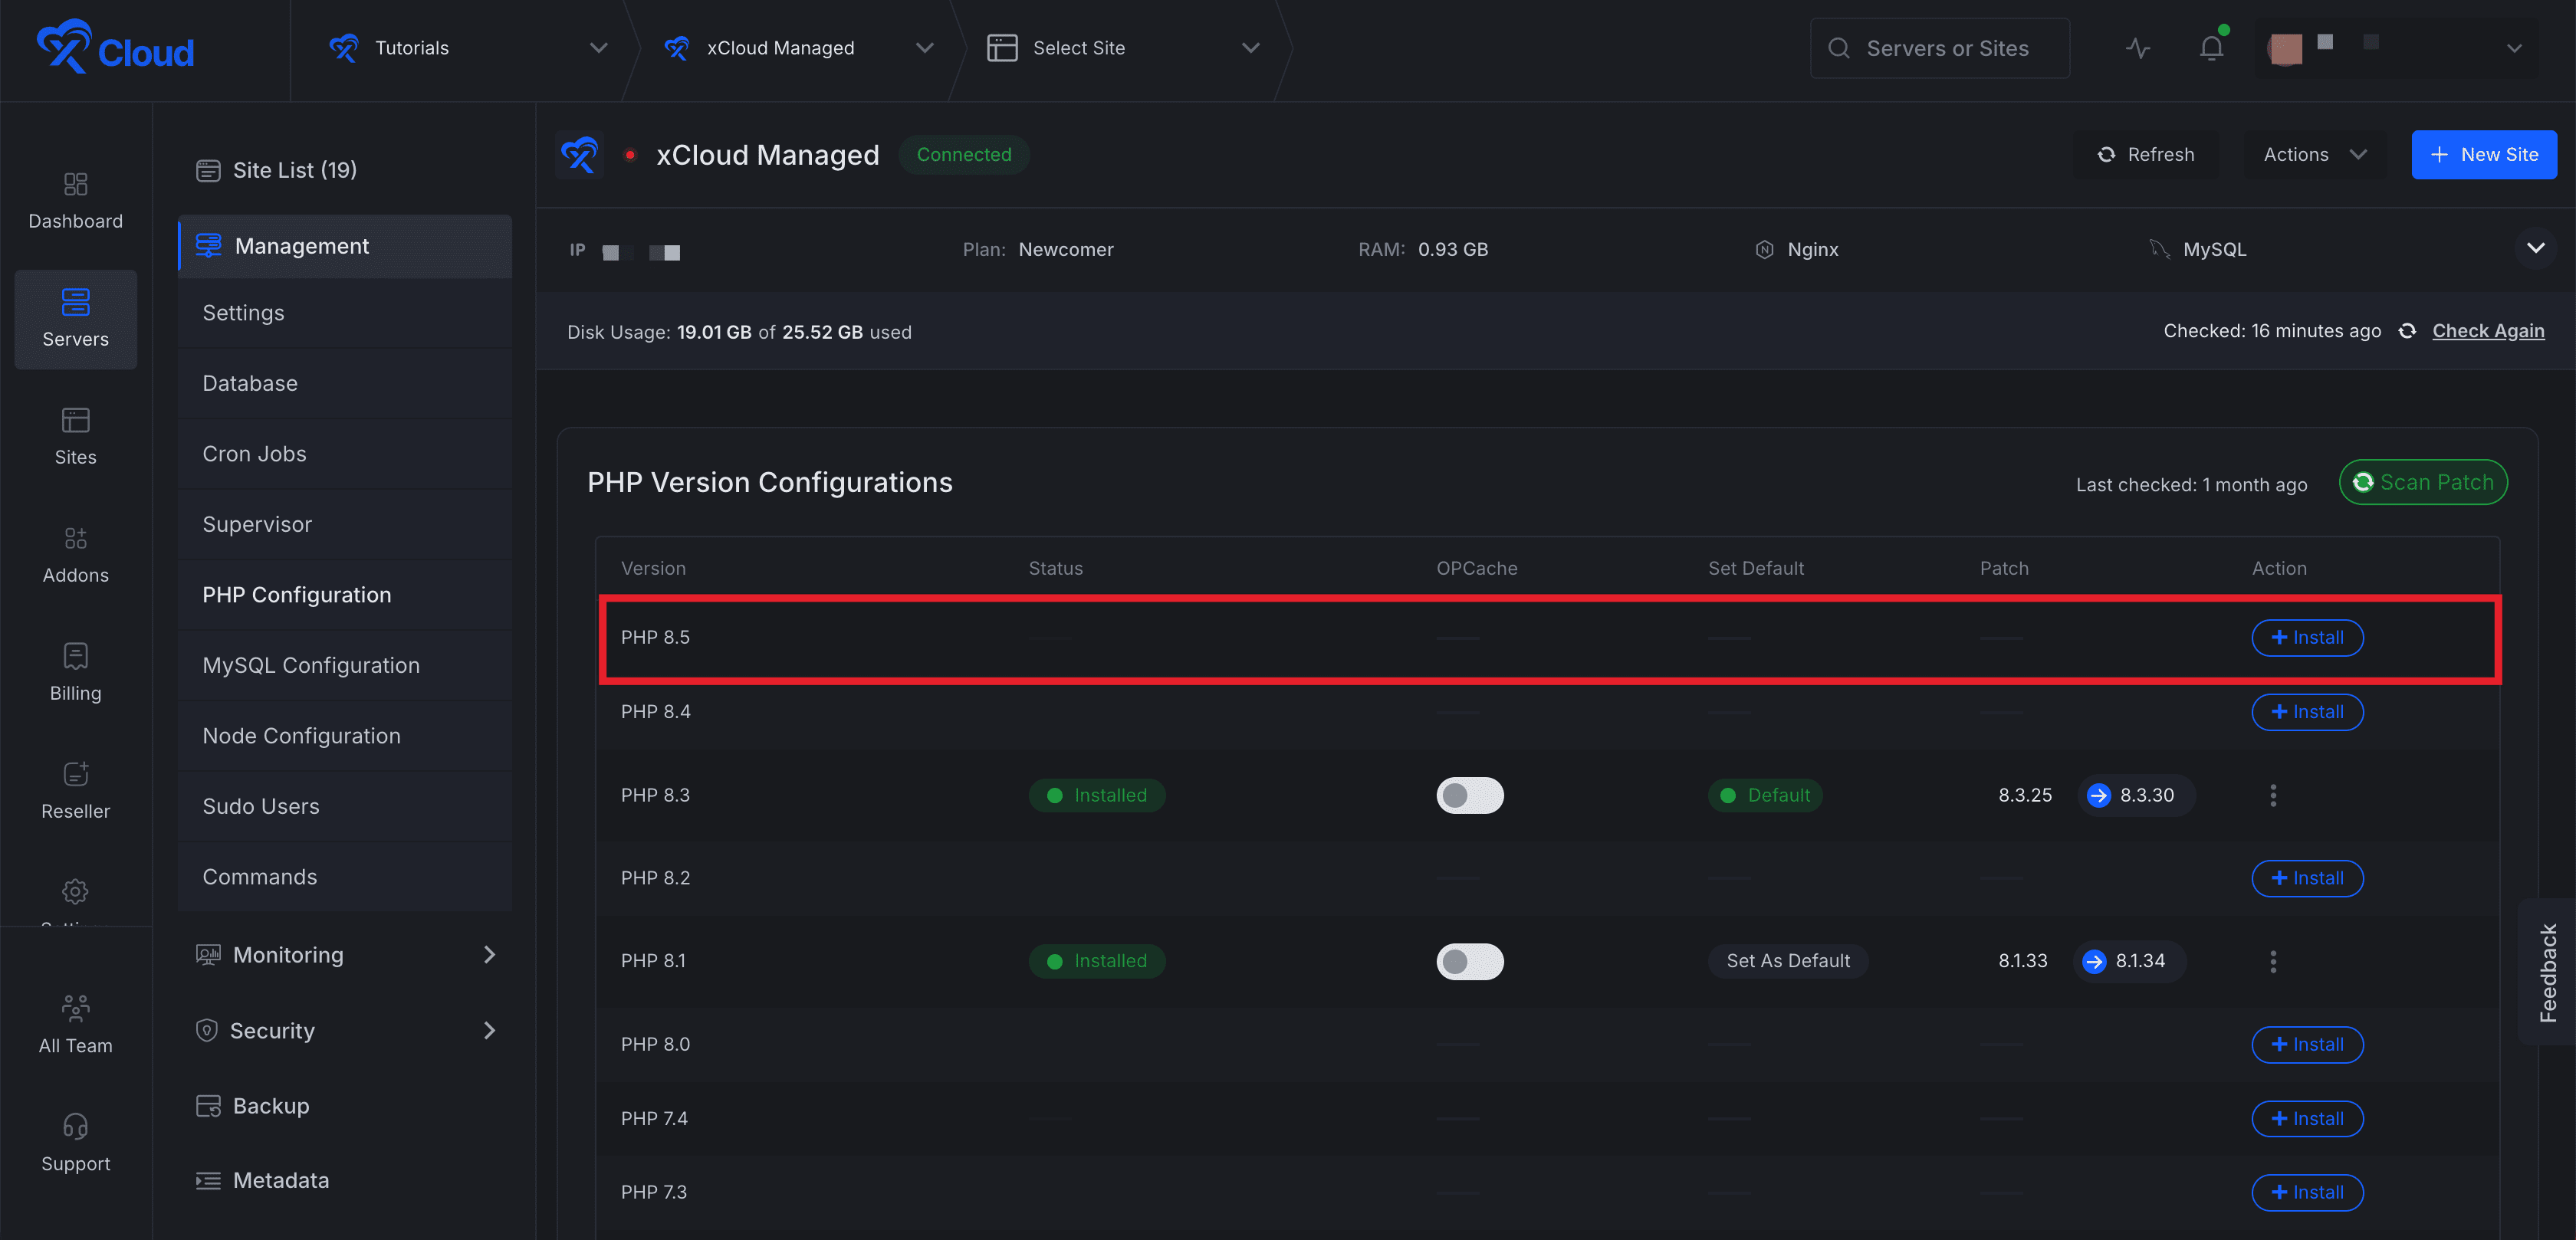
Step 2: Set a Default PHP Version
Next, to keep your installed PHP version default, simply click on the ‘Set As Default’ button and the preferred version will be set as default.
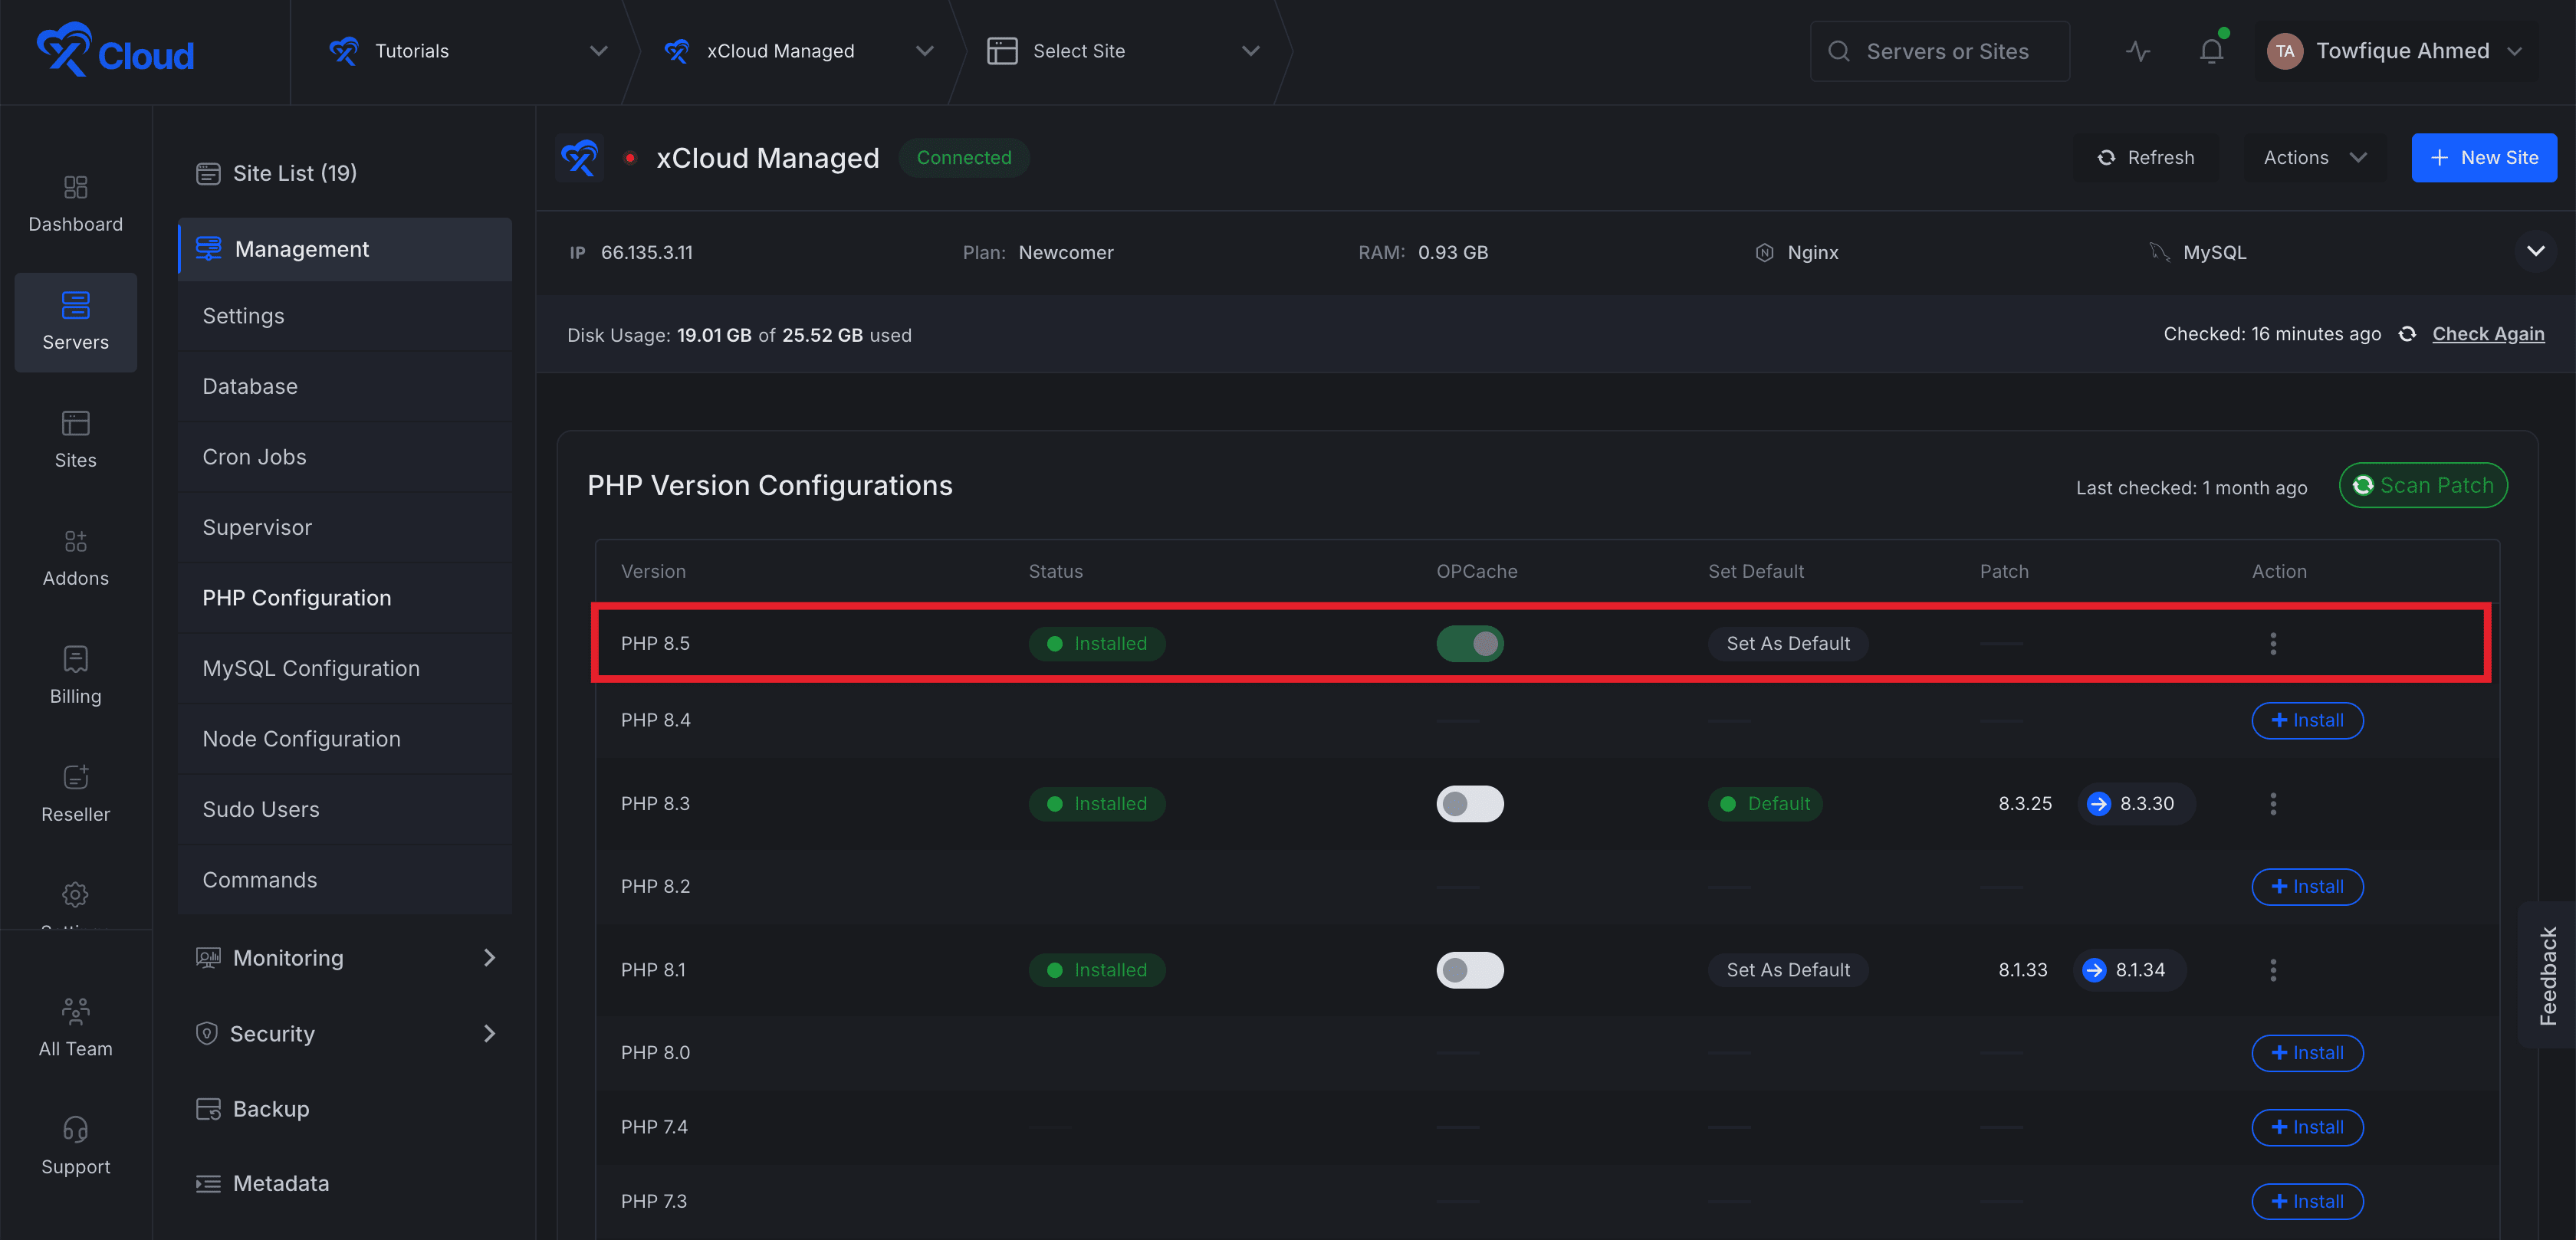
Step 3: Configure PHP Settings
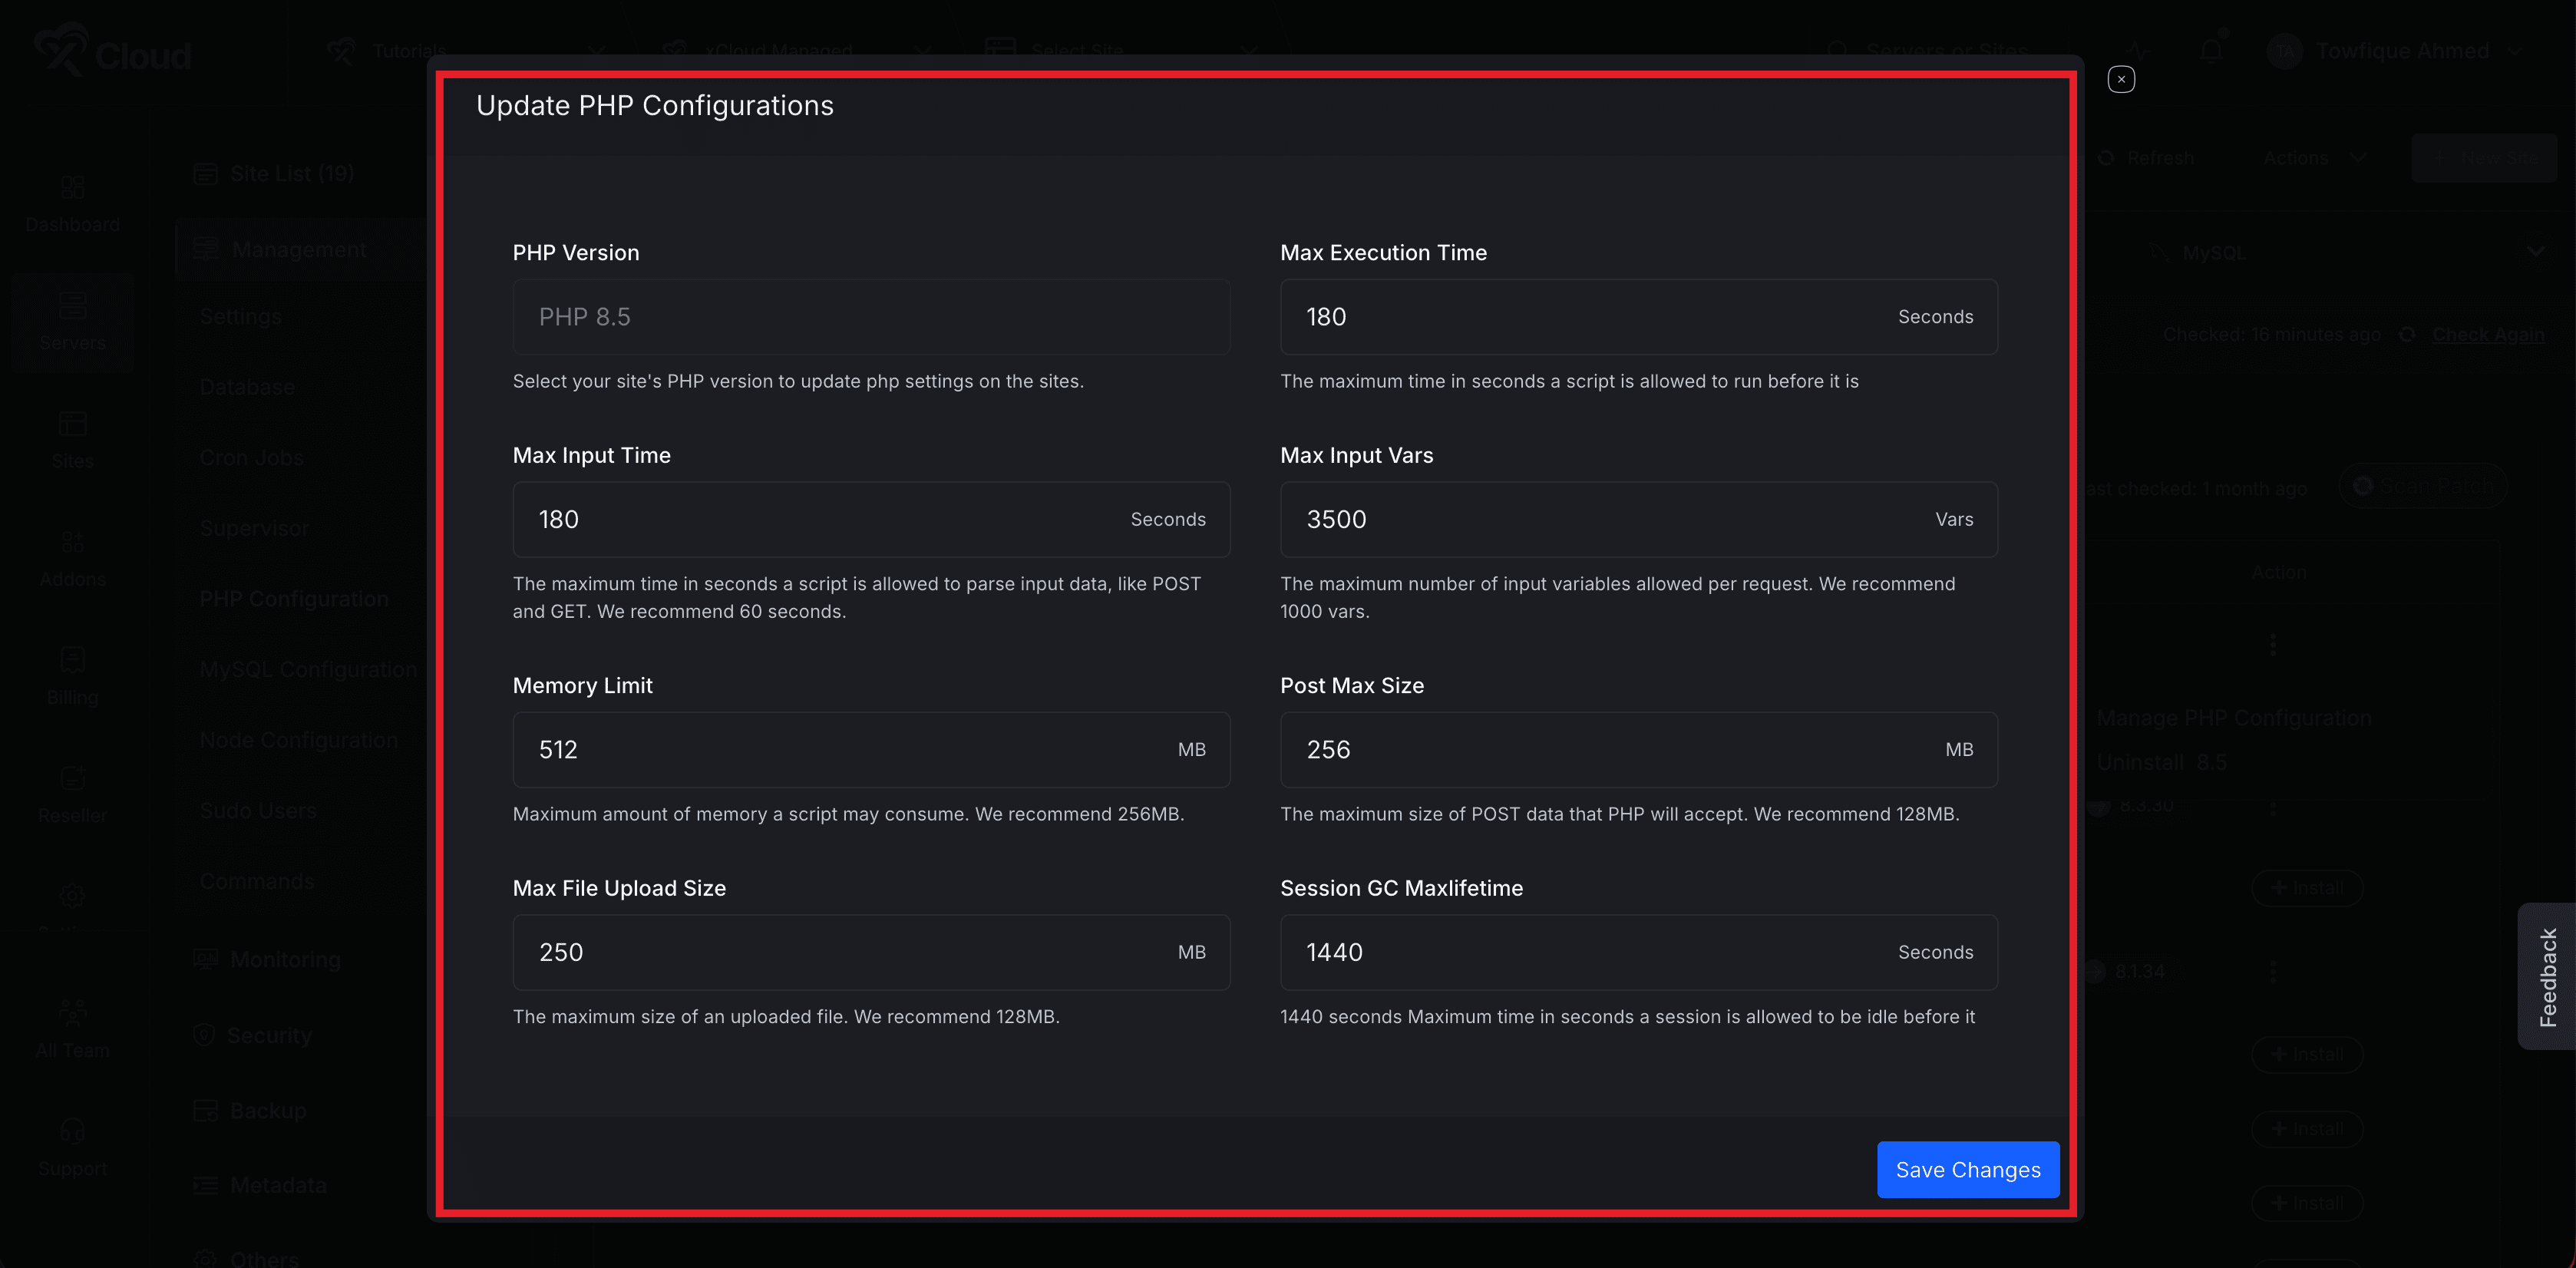
You can now easily customize your PHP as well. Just click on the three dot icon beside the version you have installed or set as default or want to configure. The following options can be modified:
- Max Execution Time
- Max Input Time
- Memory Limit
- Max File Upload Size
- Max Input Vars
- Post Max Size
- Session GC Maxlifetime
Customize the options according to your preferences and click on the ‘Save Changes’ button.
Step 4: Enable OPCache
Enabling OPcache can significantly improve the efficiency of your PHP applications. To enable OPCache, just go to the ‘OPCache’ column from the dashboard and toggle the button to enable OPCache with just one click.
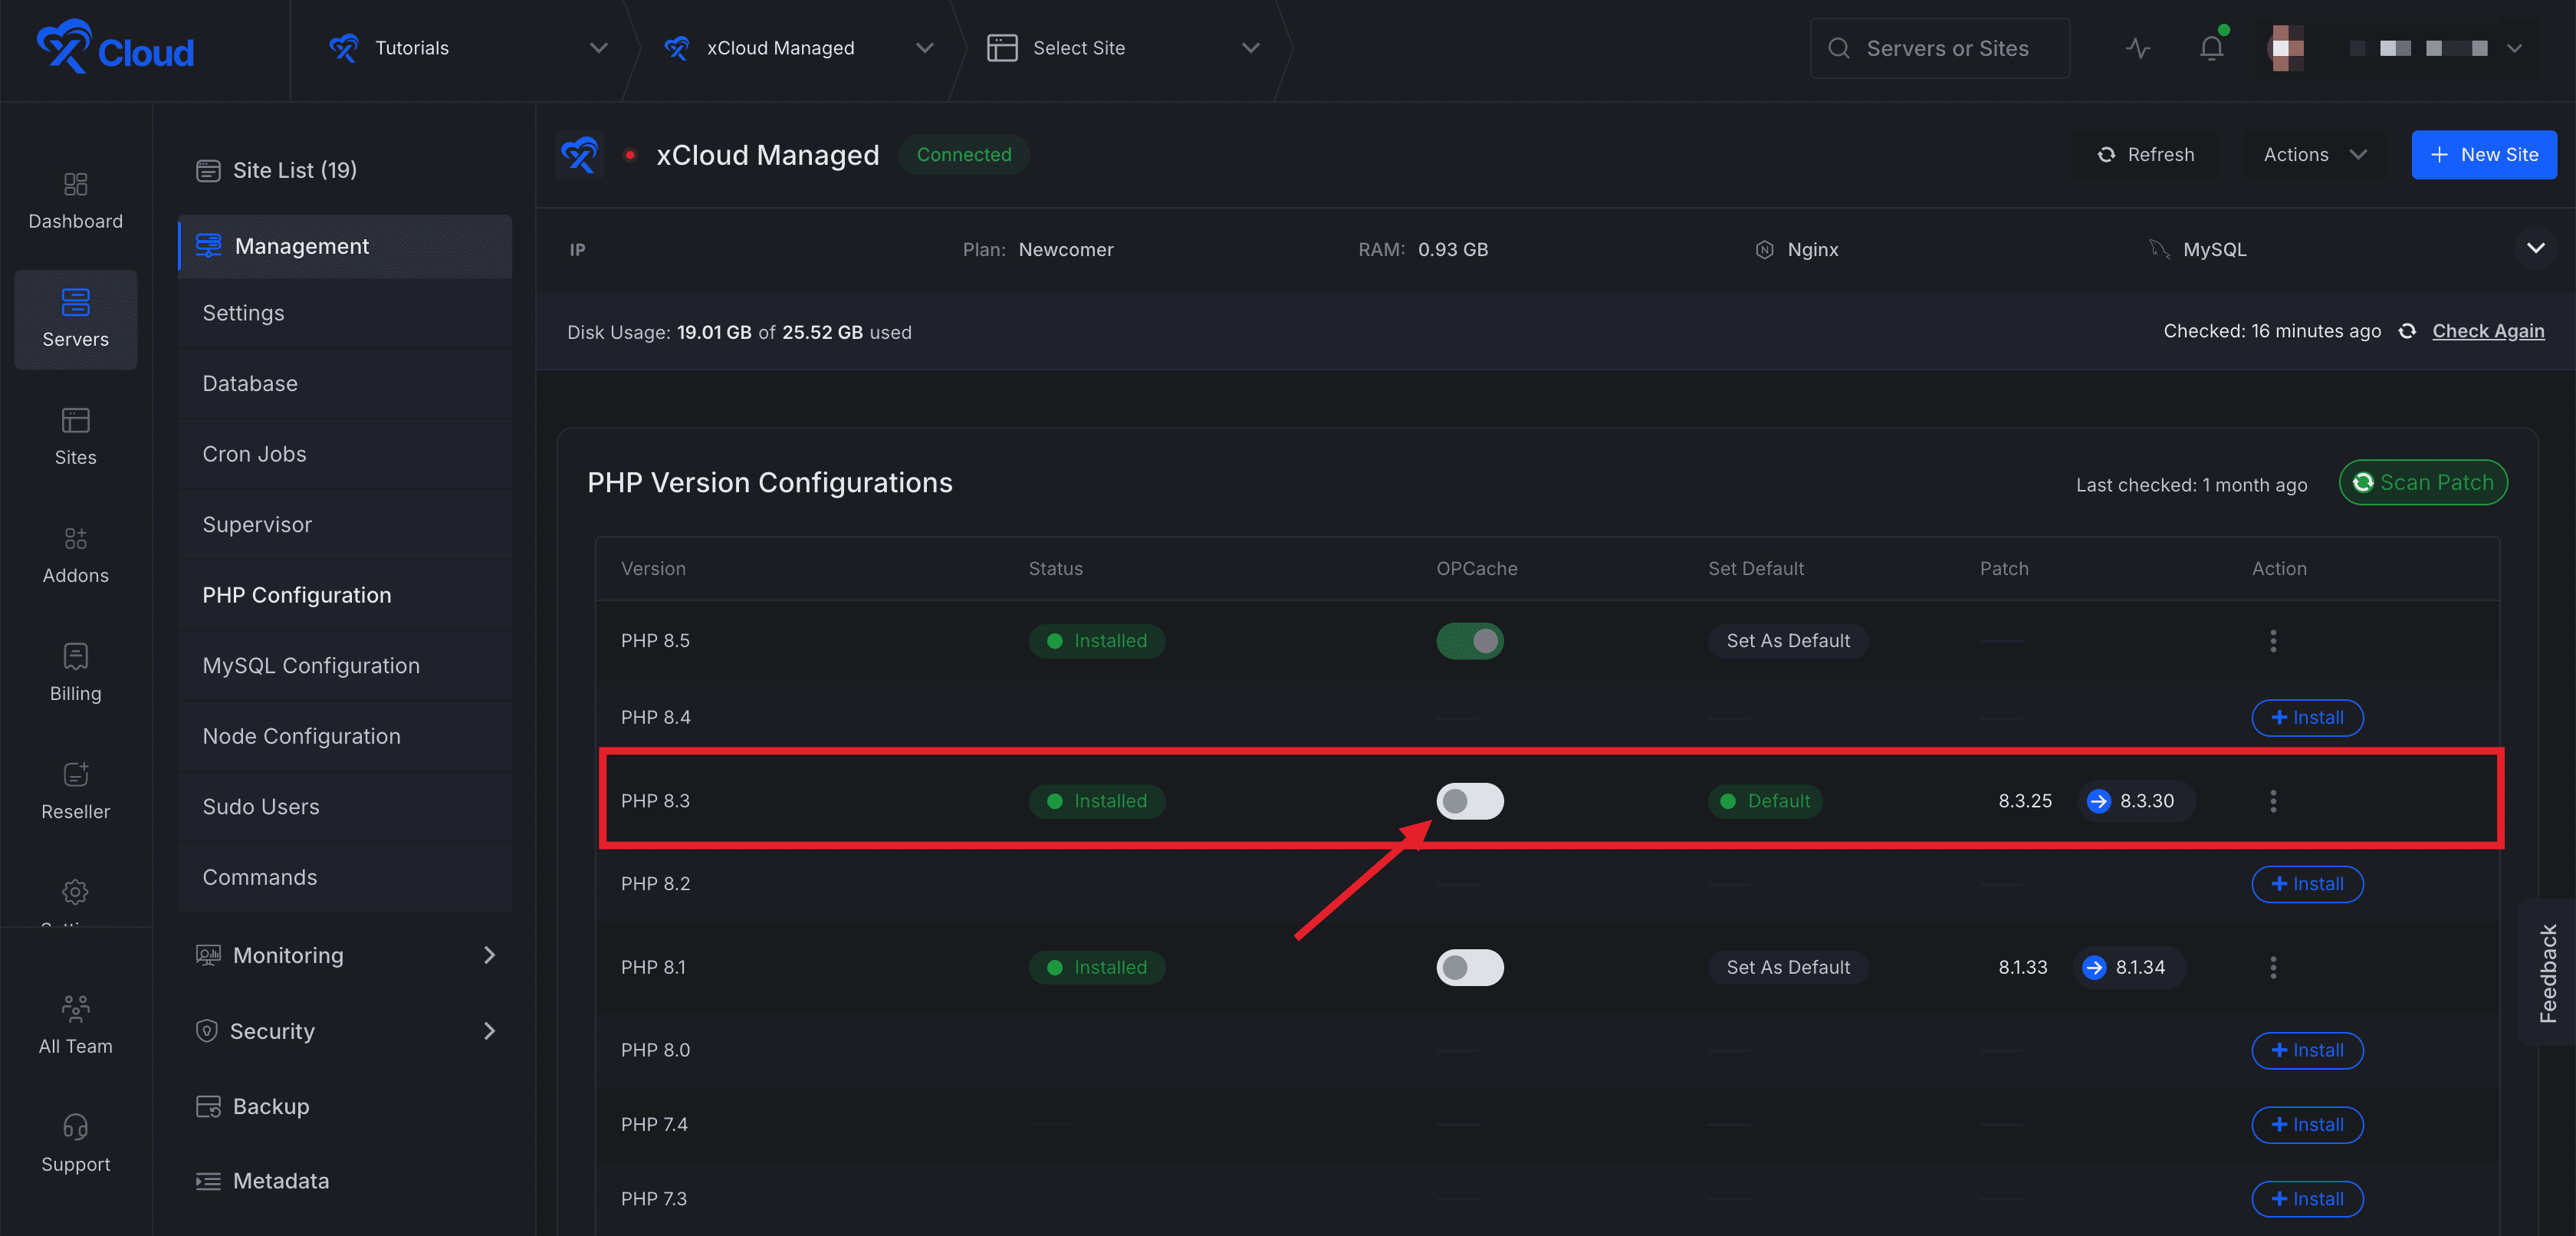
Note: In PHP 8.5, OPcache is enabled automatically and cannot be enabled or disabled from the xCloud dashboard.
PHP Configuration for Sites
With xCloud, you can also manage your site’s PHP settings separately. Just go to your site, navigate to the ‘Site Settings’ option in the sidebar. You can manage your PHP settings for these sites easily.
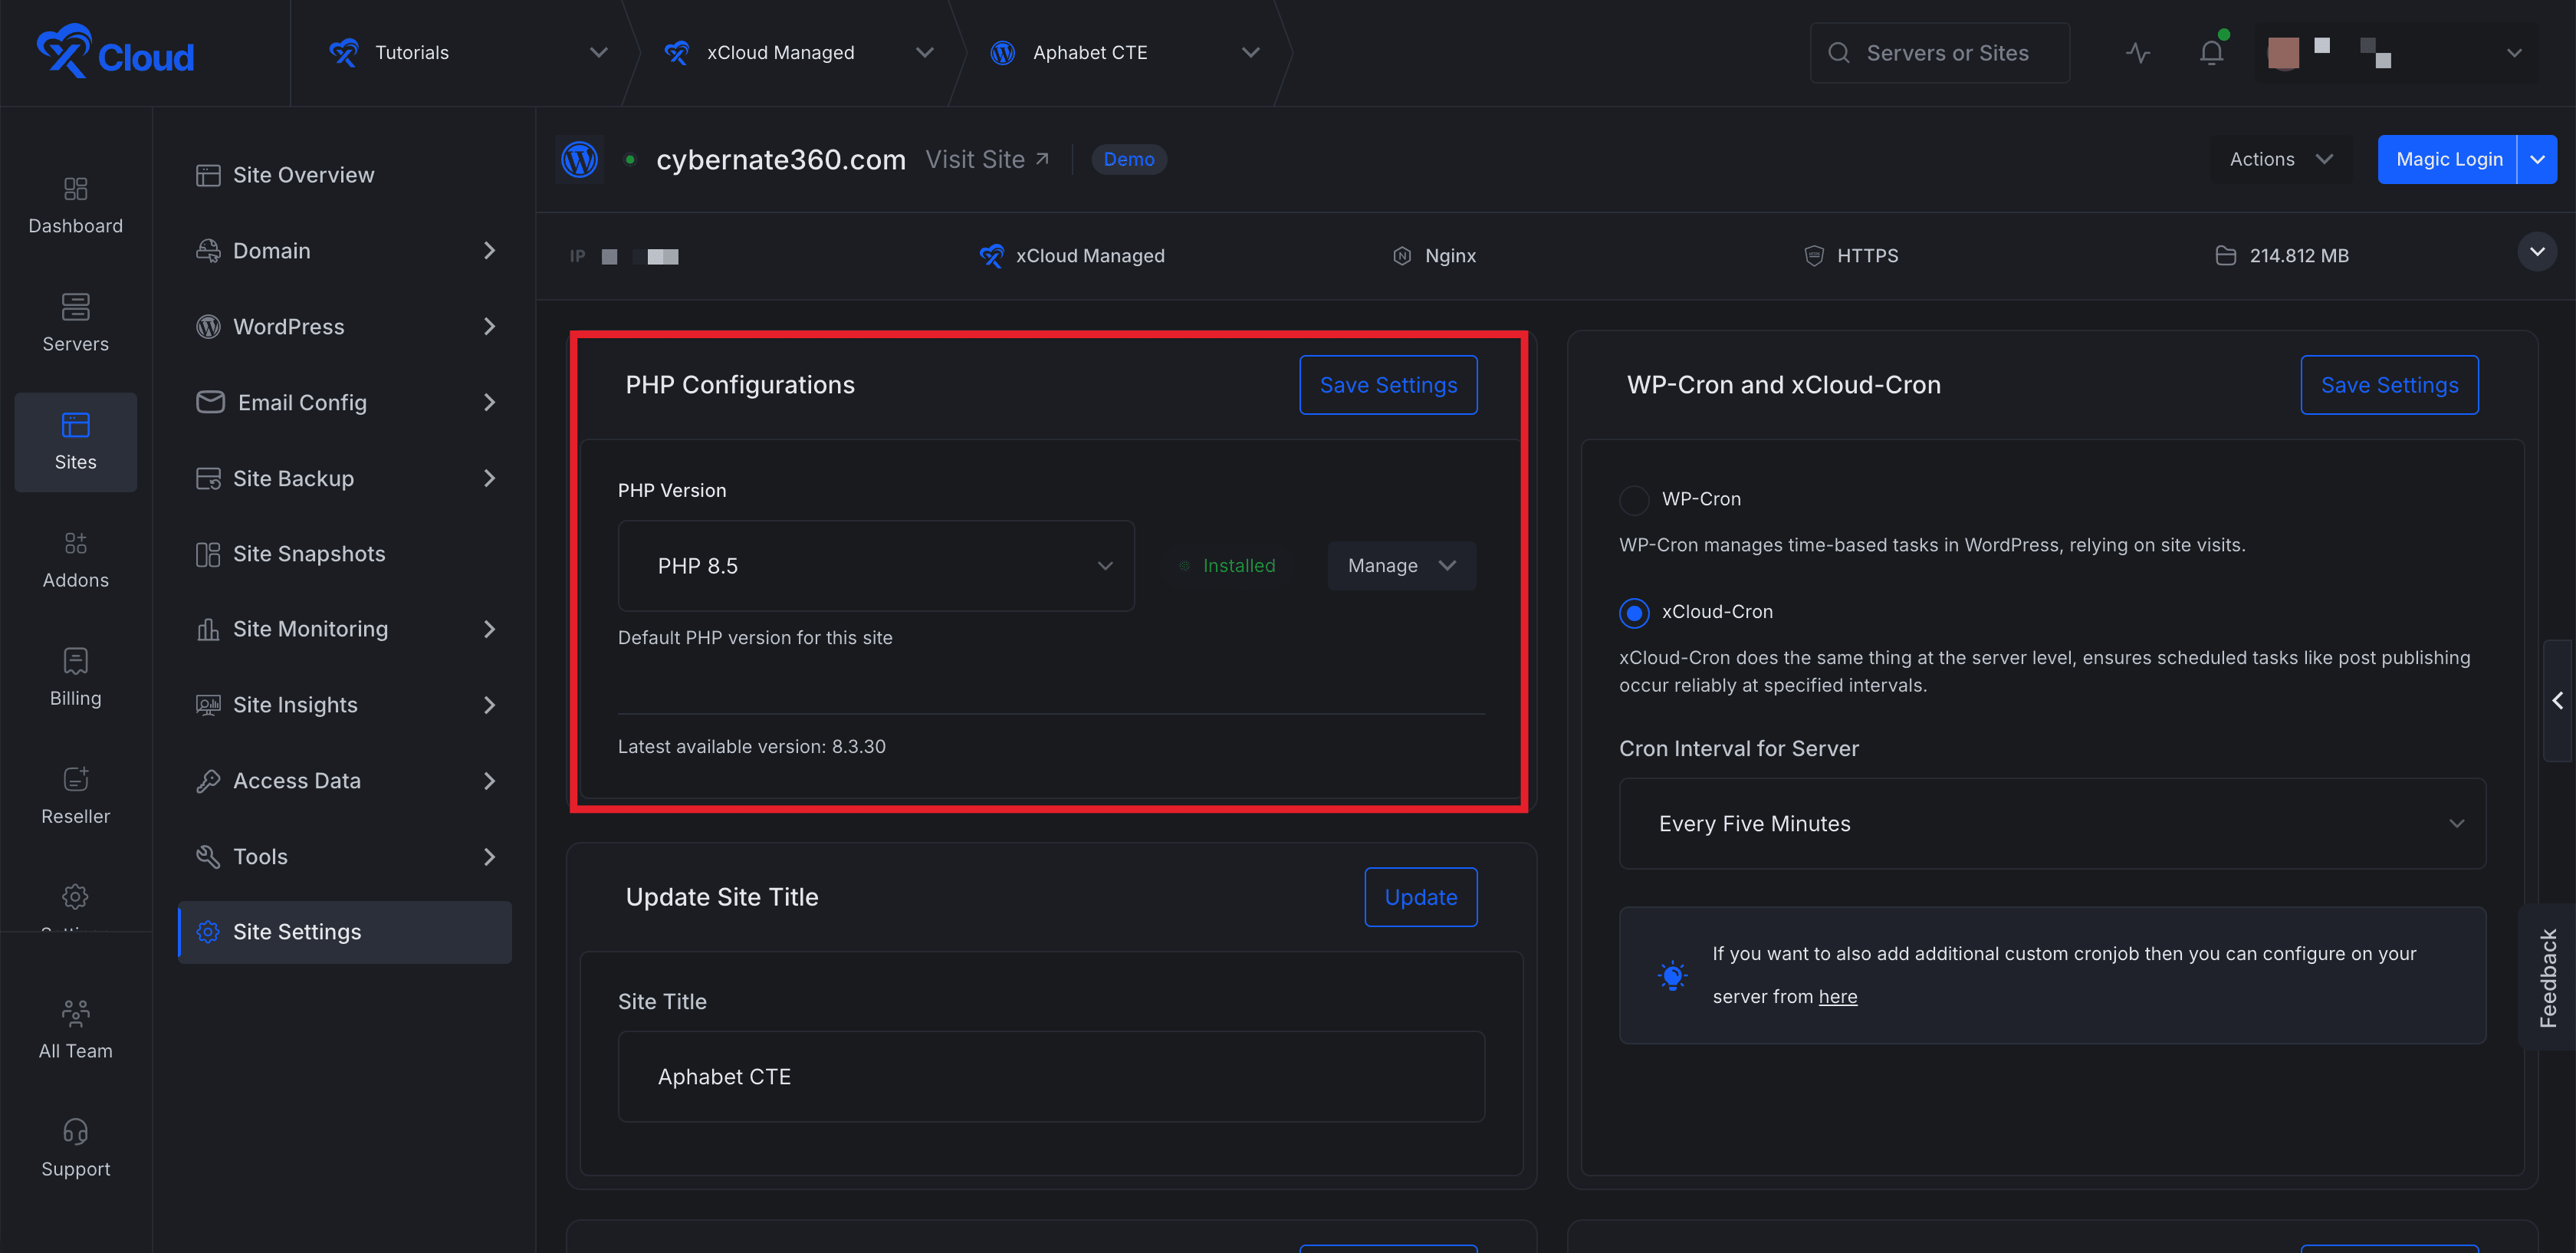
👉 To learn more about PHP settings for your site**,** read this documentation
Currently Supported PHP Version in xCloud Hosting
With xCloud Hosting, you can select from a wide range of PHP versions to match your website’s specific needs, whether you require compatibility with older versions or want to leverage the latest features.
Available PHP versions depend on your server’s stack, Ubuntu version and CPU. See the PHP version compatibility table. New sites use PHP 8.3 by default.
You can now also add and connect freshly installed Ubuntu 20.04, 22.04, 24.04 or 26.04 LTS x64 servers from any provider to xCloud, with full support for both NGINX and OLS stacks. This ensures broad compatibility and flexibility across various server setups.
If you encounter any difficulties, feel free to reach out to our support team for assistance.