

How to Access WordPress Files in xCloud By Tiny File Manager?
Updated November 6, 2026 · 1 min read
With Tiny File Manager in xCloud, you can manage app files right from the dashboard. It lets you do things like creating new files and folders, compressing, extracting, deleting, moving, copying, editing, and renaming files, just like any other file manager.
If you want to access your site’s files we recommend doing it manually by sFTP connection and using tools like FileZilla. We suggest enabling Tiny File Manager only when you find it necessary.
Let’s see how to access WordPress files through Tiny File Manager in xCloud & perform your file manager tasks.
Access WordPress Files in xCloud by Enabling Tiny File Manager in xCloud
Log in to your xCloud dashboard, open your site and go to Access Data → File Manager. The Tiny File Manager is disabled by default.
Note: Tiny File Manager does not work while the site’s 7G or 8G firewall is on. The page shows the same note: “Adminer and File Manager won’t work with 7G/8G firewall. We recommend SFTP if you’re familiar with it.” Use SFTP to keep the firewall on. Or turn the firewall off for as long as you use File Manager:
- Go to Security → Overview & Firewall.
- In the Security Settings card, turn off 7G Firewall or 8G Firewall under Firewall rules and click Save Settings. Then open File Manager again.
- When you finish, turn the same option back on and click Save Settings again. The firewall protects the site again.
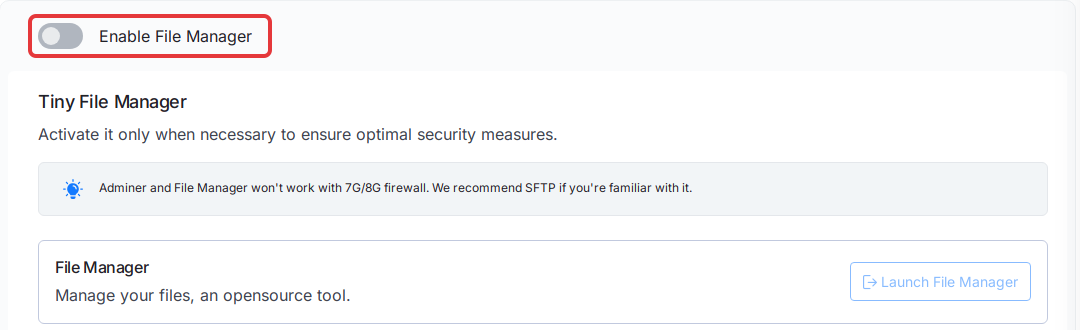
Toggle the ‘Enable File Manager’ button to enable it, and hit the ‘Launch File Manager’ button. This will open the File Manager on a new tab.
That’s how easy it is to access and manage WordPress files directly from the xCloud dashboard using Tiny File Manager.
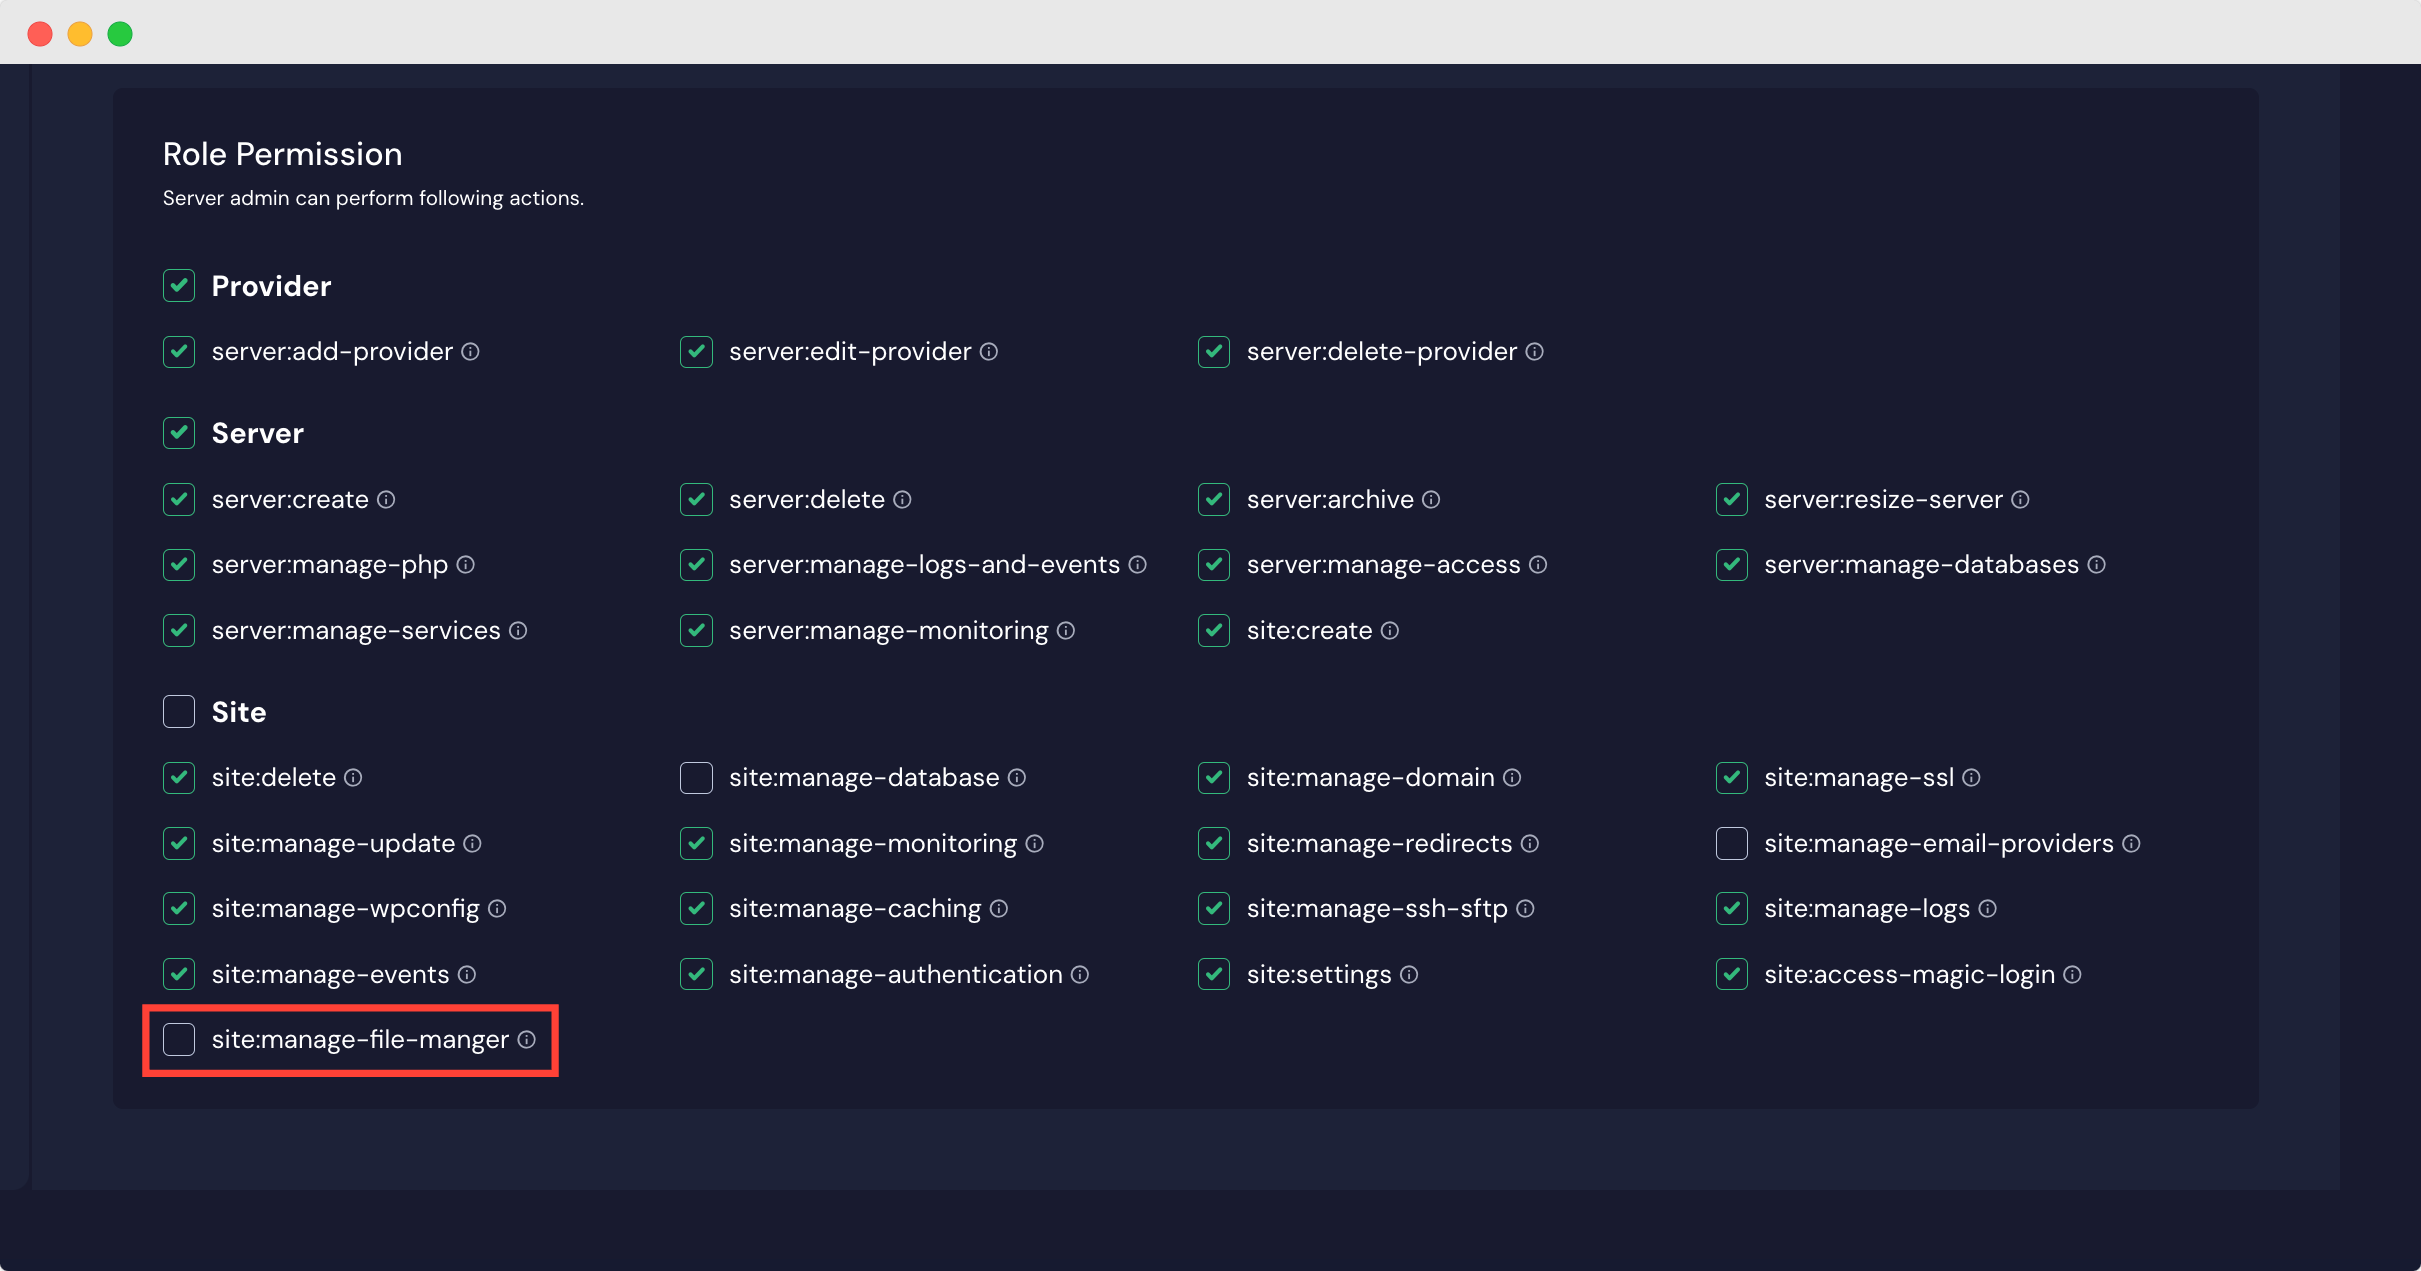
Note: You must ensure you have access to your website’s ‘manage-file- manager’ as a team member. If you do not have that, please ask your team’s administrator to enable access in the ‘Team Management’ section from your dashboard. However, if you are the Team Admin, you have this access by default.
Troubleshooting: “Root path not found” after a domain change
If File Manager opens with Root path “…” not found! right after you changed the site’s primary domain, it is still pointing at the old domain’s folder. This can happen on non-WordPress sites with a custom web root.
- Go back to ‘Access Data’ → ‘File Manager’.
- Turn ‘Enable File Manager’ off and wait for it to finish.
- Turn it on again and click ‘Launch File Manager’.
File Manager is now set up at the site’s new folder.
Frequently asked questions
Why does File Manager not work on my site?
Tiny File Manager does not work while the site’s 7G or 8G firewall is on. The File Manager page in xCloud shows this as a note: ‘Adminer and File Manager won’t work with 7G/8G firewall.’ Use SFTP instead, or turn the firewall off while you use File Manager.
Can I edit my site files without turning off the firewall?
Yes. Connect over SFTP with a tool such as FileZilla. SFTP does not go through the site’s 7G or 8G firewall, so the site stays protected while you work.
Why does File Manager show ‘Root path not found’ after a domain change?
On some non-WordPress sites with a custom web root, File Manager keeps pointing at the old domain’s folder after you change the primary domain. Turn ‘Enable File Manager’ off, then on again, to set it up at the site’s new folder.
Related docs:
Still stuck? Contact our support team for any of your queries.