

How To Upgrade Your Server in xCloud?
Updated September 27, 2026 · 4 min read
xCloud is a cloud-based server management tool that gives you control to upgrade your server over your virtual servers. While you have the power to make changes, it’s essential to understand when and how to do it wisely.
xCloud has just rolled out a handy new feature called Upgrade Server. Now, with just a single click, you can easily switch to a higher-tier server to enhance your website’s capabilities. Currently, we are providing server upgrades for only xCloud & Vultr servers.
However, upgrading your Server with xCloud is now available to expand the server’s capabilities. You have the freedom to effortlessly boost your server’s power with just a few clicks.
Our Server Resize feature allows you to easily add more computing muscle, like CPU, memory, and storage, to your existing server. You may have to resize your server when you are out of disk space but there are a few things that you must take into account.
- Downtime Warning: If you resize or upgrade your server, it can cause downtime, which means your websites will be temporarily unavailable. But usually, it does not take more than 2/3 minutes.
- Possible Issues: Making changes to your server can sometimes lead to unexpected problems, just like when you update your computer’s operating system. It may require extra troubleshooting and, in some cases, a fresh start.
- You can’t go back to a lower tier once you’ve upgraded.
- Turning on or taking a full backup of the server before resizing is recommended.
Another name for this feature is Vertical Scaling, or scale-up as it’s commonly called, which is all about beefing up your server’s performance within the same region it was created.
Billing Guide To Follow Before Upgrading Your Server
There are two categories of xCloud servers: General and Premium. When you upgrade, the size list shows every larger size available for your server, grouped by category, so you can also move from General to Premium when a Premium size is offered for your server. If the size you want is not in the list, create a new server of that type and migrate your sites to it (see the alternative strategies below).
When upgrading server plans, you only pay the price difference. We adjust for any unused portion of your previous plan, so you’re only charged for what you need. It’s easy to upgrade, all you need to do is pay the difference.
To learn more about how billing works in xCloud, dive into the below documentation.
👉 How Do Pricing Plans And Billing Work In xCloud?
Guide To Upgrade Your Server With xCloud
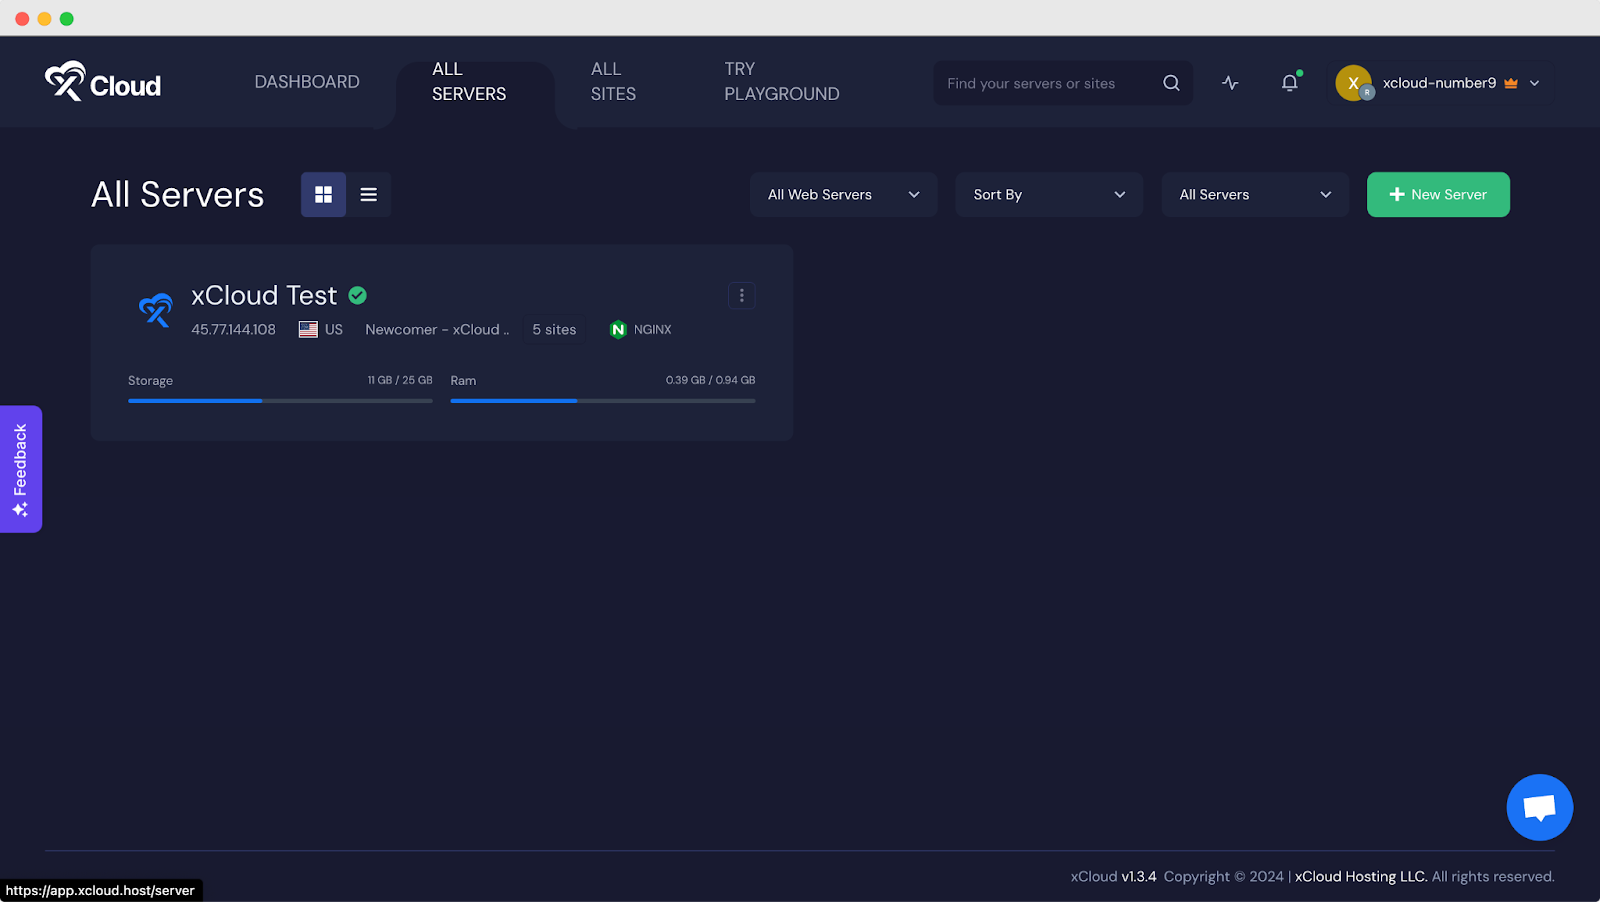
Begin by navigating to the “All Servers” page and select any of your active servers.
After you have selected it, you’ll be on the Server dashboard. From there, simply click on “Server Management” to access the options for resizing your server to suit your needs perfectly.
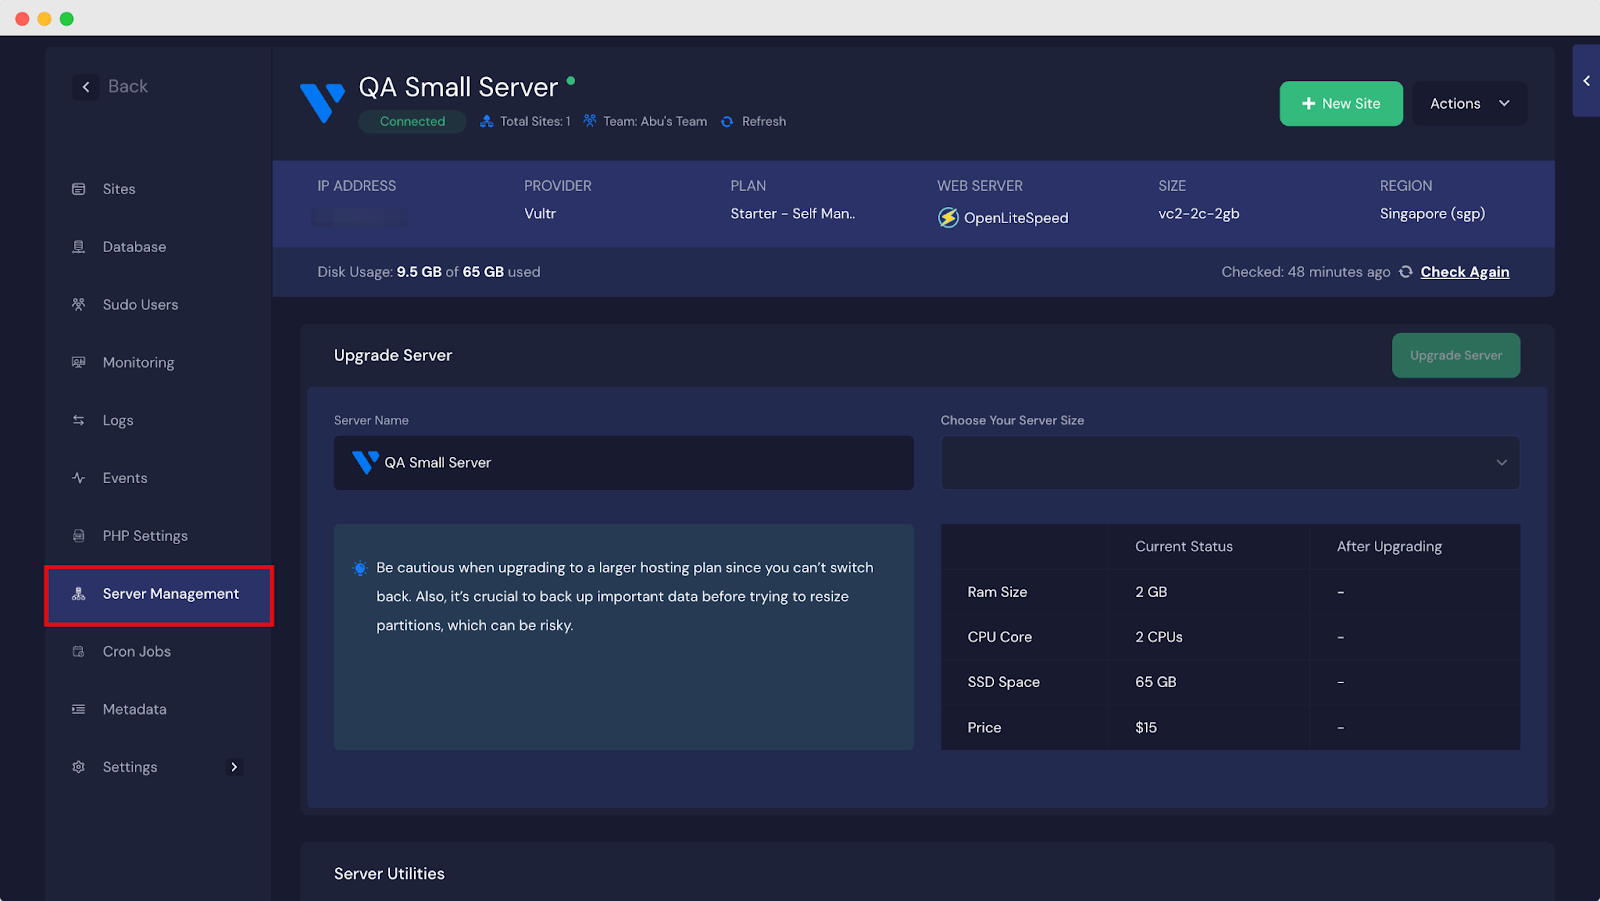
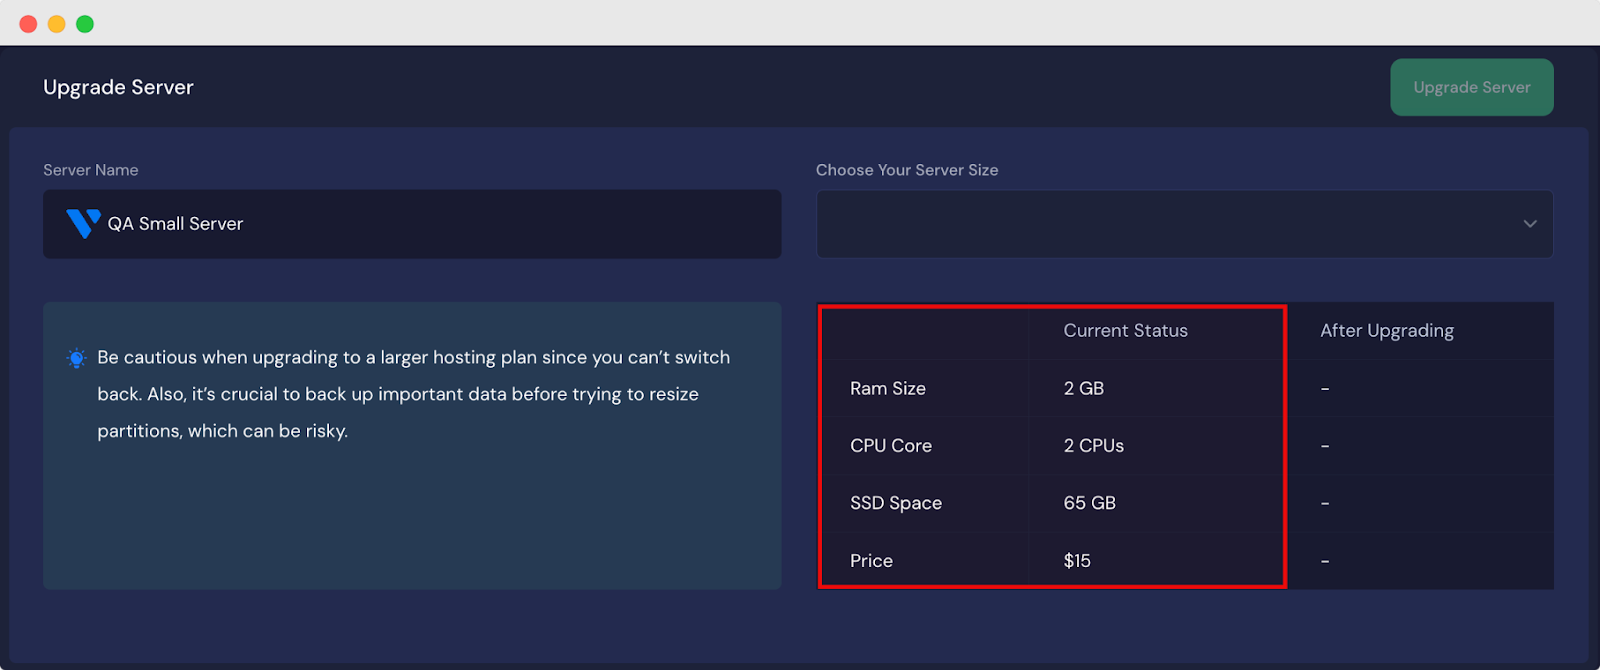
Now under the “Choose Your Server Size” dropdown, you will get your available server upgrading options, grouped by category. You can only move to a larger size, and you pay the prorated price difference before the resize starts. Select the one that suits your needs.
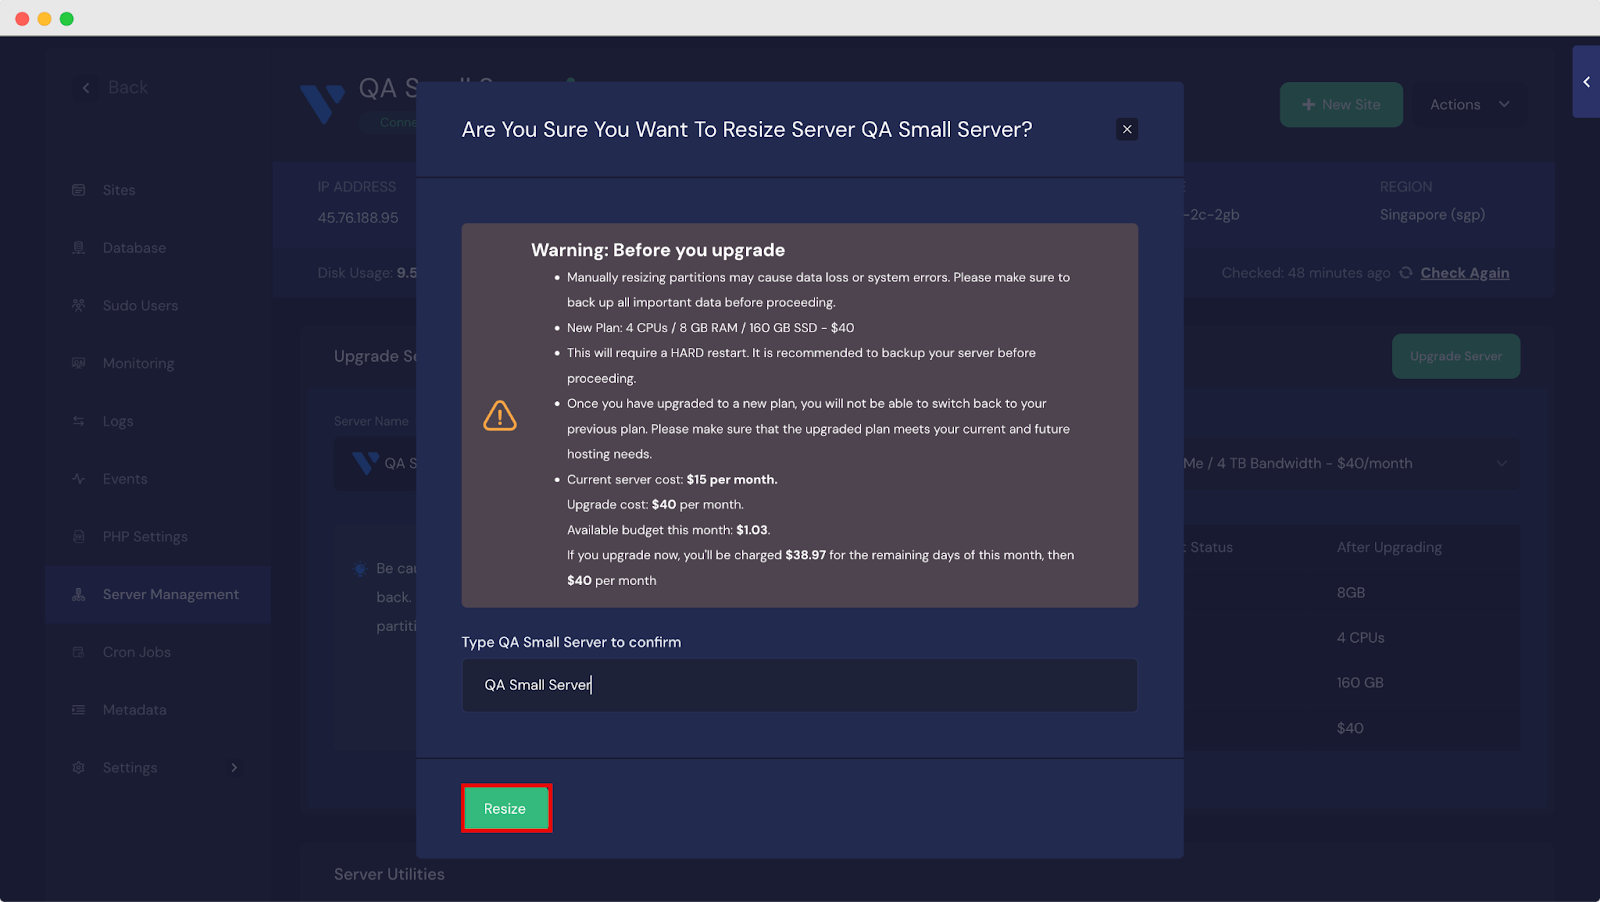
Once you’ve selected your server, click on “Upgrade Server.” This will prompt a popup where you’ll need to enter your server name for confirmation. Take a moment to review any warning messages before proceeding to ensure caution. After all that click on Resize for upgrading.
Now you will see that your server has been upgraded successfully.
Alternative Strategies for Server Resizing When Provider Options Are Limited
- Moving Some Sites to a New Server: Create a new server with the same size and move some websites from your existing server to the new one. This minimizes downtime, and you can leave important sites on the old server. You can use our Site Clone feature to clone any site to any connected servers.
- Moving All Sites to a Bigger Server: Alternatively, you can create a larger server and move all your websites to it. Once everything is transferred, you can shut down the old server. This can be cost-effective. You can use our built-in Full Server Migration Feature to do this for bulk site migration with xCloud temporary staging domains.
- Follow Resize Procedure: If none of the above options work for you, follow the resizing instructions provided by your cloud provider:
**Vultr
**https://docs.vultr.com/how-to-upgrade-your-plan-without-reinstalling)[**Digital Ocean
](https://docs.digitalocean.com/products/droplets/how-to/resize/)[**Google Cloud](https://cloud.google.com/sdk/gcloud/reference/compute/disks/resize)
Note: Check Disk Space: First, check if there are unnecessary files or folders taking up space on your server. Remove them to free up server storage. Normally server logs might take up much space, which can be solved by simply restarting the server.
Still stuck? Contact our dedicated support team for any of your queries.