


In xCloud, you can provide your own certificate and manage SSL/HTTPS. You can use the custom certificate from any 3rd party web application provider for security. Here, in this documentation, let’s explore how to use a custom certificate of Cloudflare with xCloud.
How To Use Custom Certificate Of Cloudflare With xCloud #
You can easily use a custom certificate of Cloudflare with xCloud. Here is a step-by-step guideline for your easy access. Follow the below steps to create and use a custom certificate of Cloudflare.
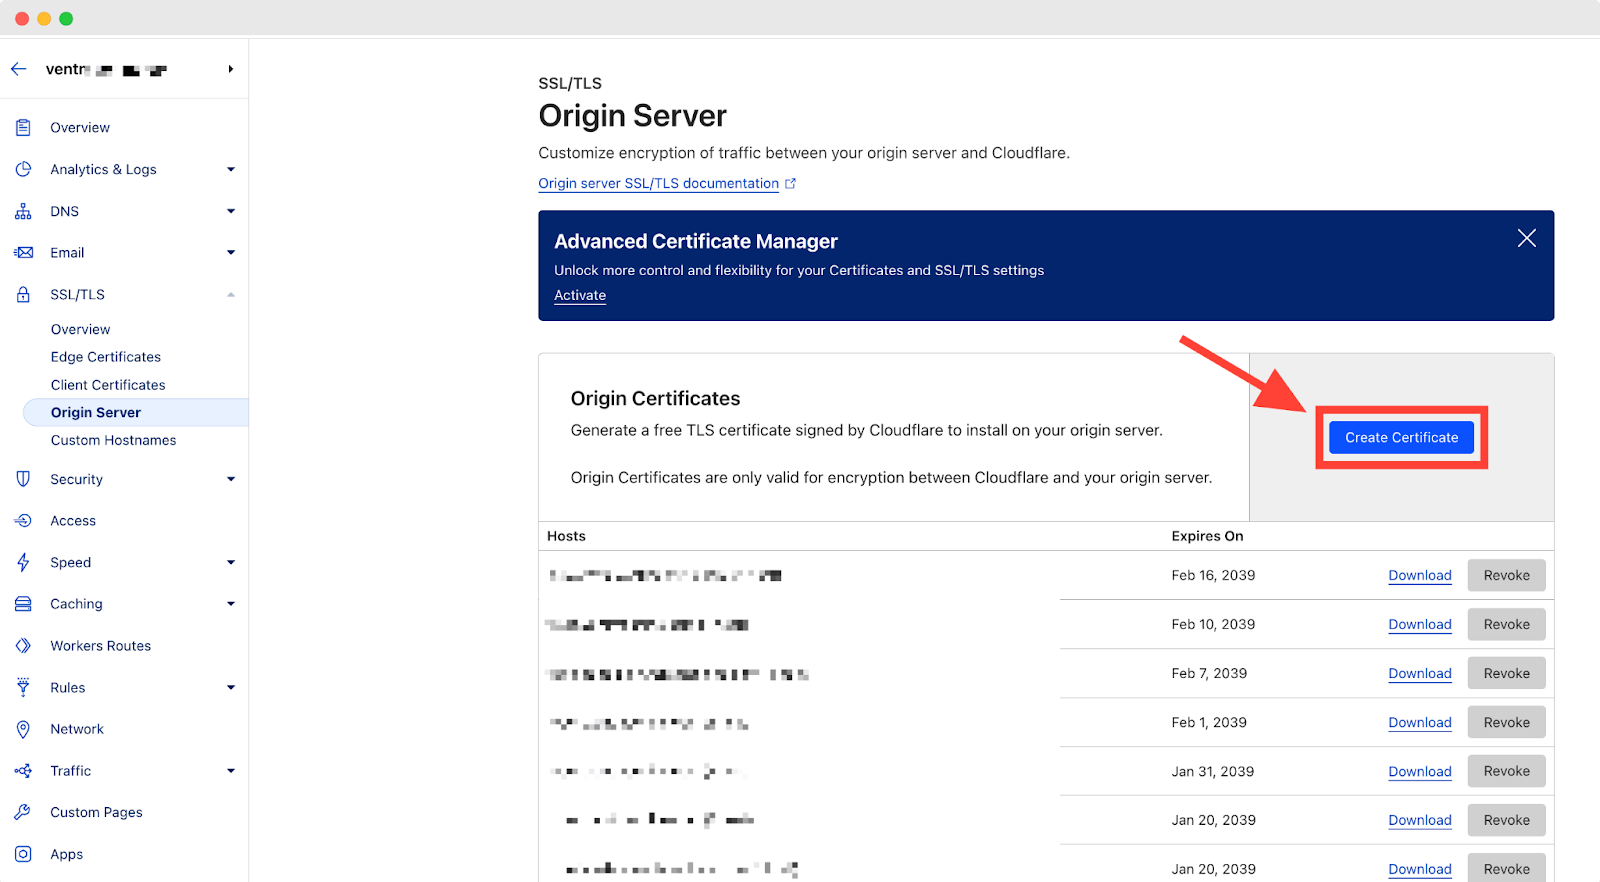
Step 1: Create A Certificate In The Cloudflare Dashboard #
Login to your Cloudflare dashboard. From the left side panel, go to the ‘Origin server’ tab from SSL/TLS dropdown. From the ‘Origin Certificates’ section, click on the ‘Create Certificate’ button.
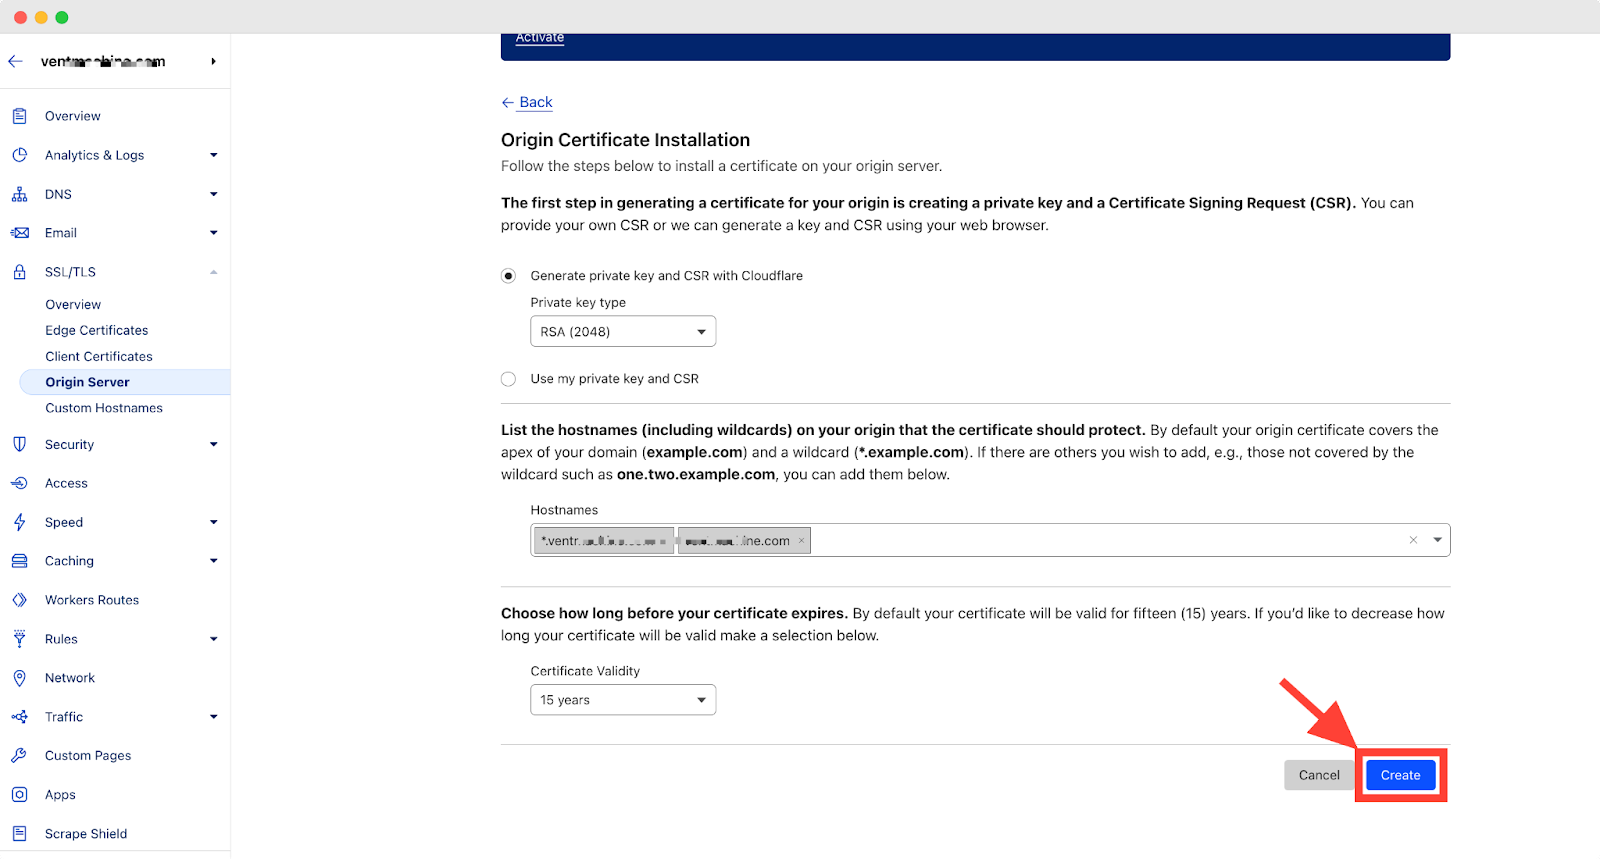
You will get another screen. Here, provide CSR, choose Certificate validity, etc, and then click on the ‘Create’ button. Your Certificate and Private Key have been created for Cloudflare.
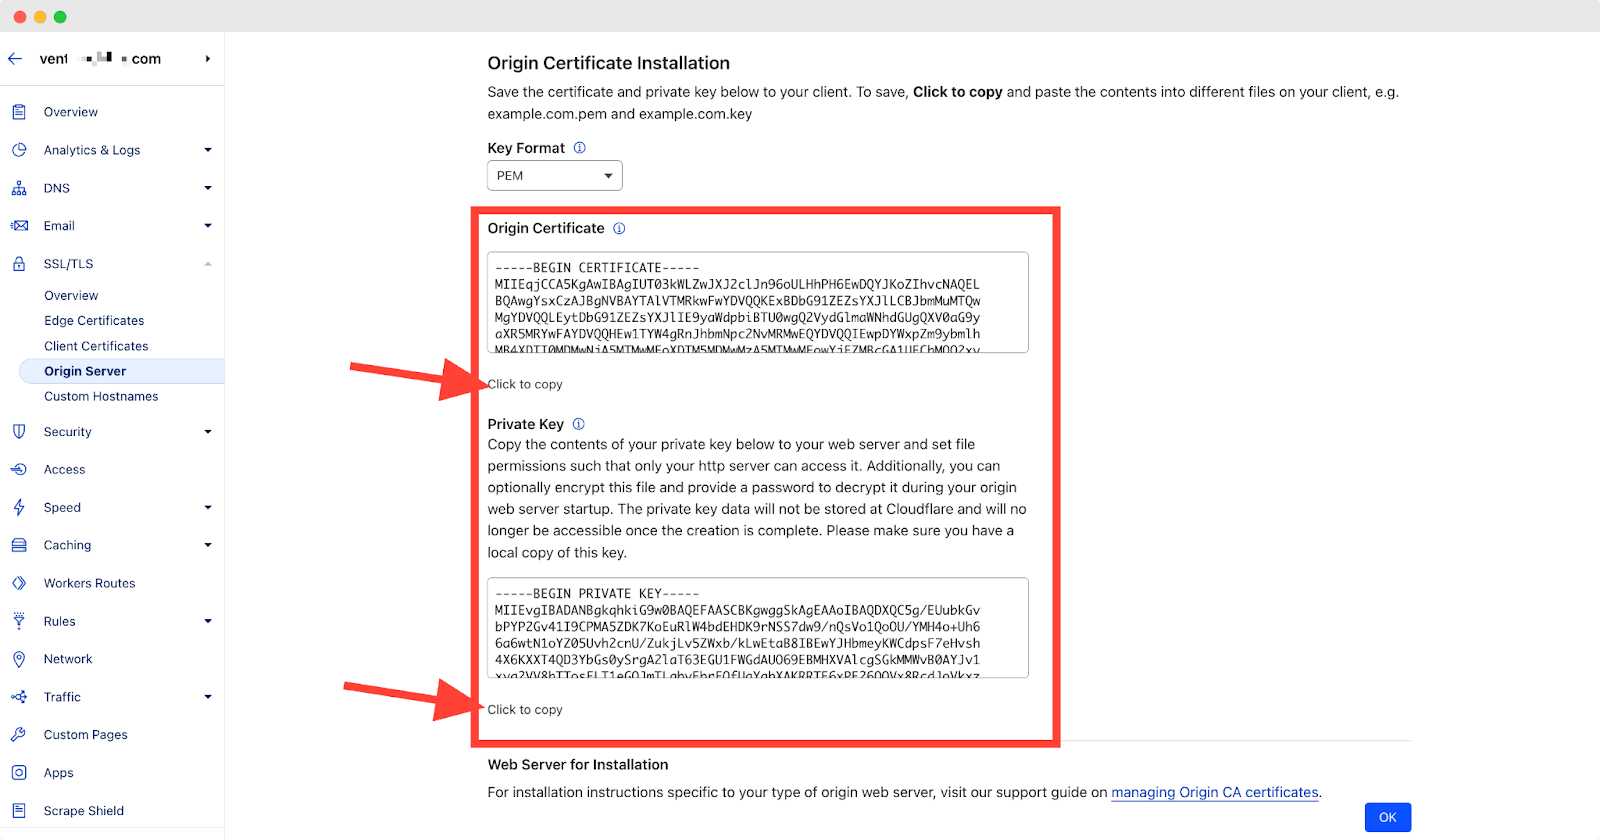
Step 2: Copy Origin Certificate And Private Key From Cloudflare #
Here, you will get the Origin Certificate And Private Key. Simply collect these by copying them one by one to provide in the xCloud dashboard.
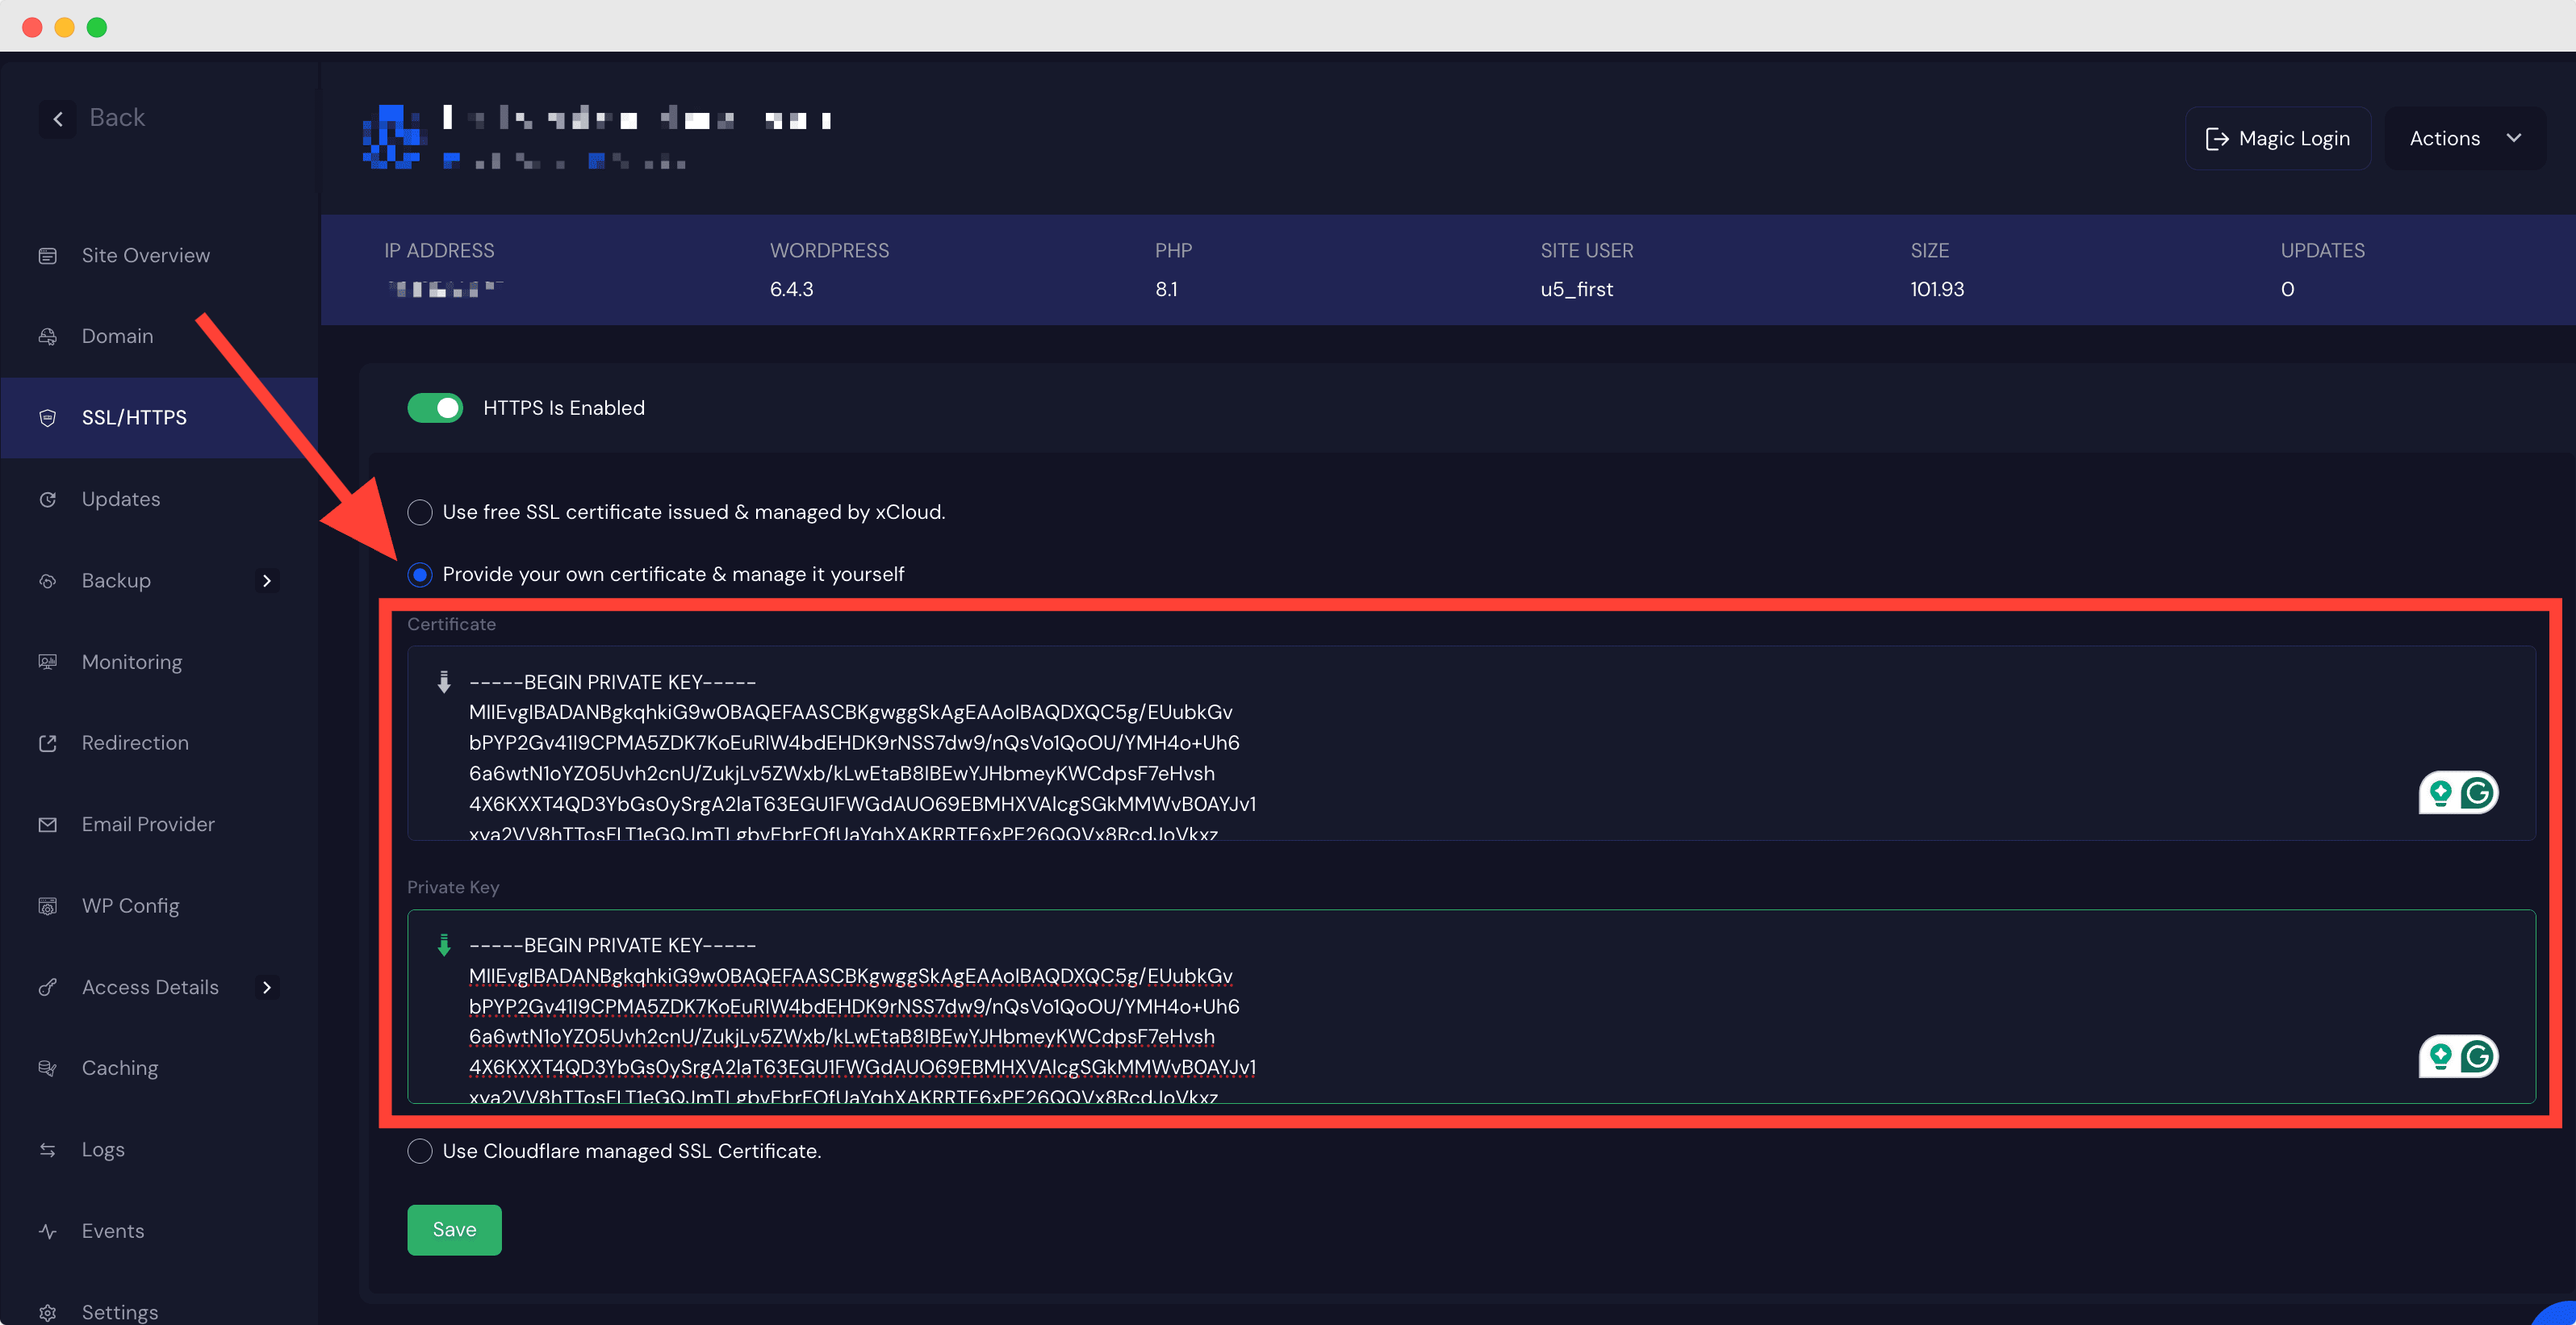
Step 3: Provide Certificate And Private Key In xCloud #
From the xCloud site dashboard, go to the SSL/HTTPS tab. Toggle on the HTTPS to enable it. Here you will get 3 options. Click on the ‘Provide your own certificate & manage it yourself’ option. Now paste the Origin Certificate and Private Key that you collected from Cloudflare in the specific two fields. And, click on ‘OK’.
Note: #
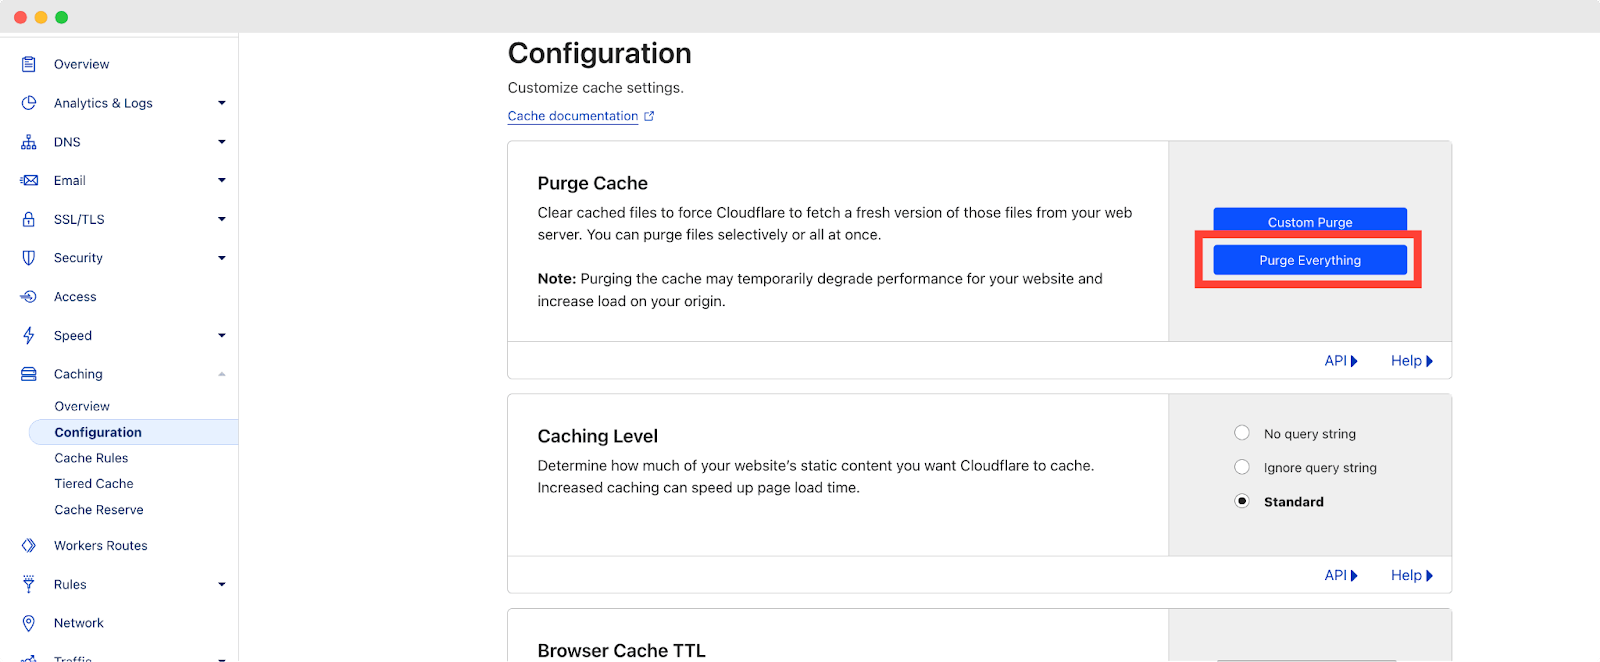
# Ensure that Cloudflare fetches a fresh version of the files from your server by clearing the cached files. For this, go to the ‘Configuration’ tab from the Cloudflare dashboard and then click on ‘Purge Everything’.
# You need to keep the Proxy on in the Cloudflare dashboard. Go to DNS and then the ‘Records’ section and toggle on the Proxy Status.

Thus you can easily use the Custom Certificate of Cloudflare with Xcloud
Still stuck? Contact our support team for any of your queries.


