


The 7G Firewall is a powerful security firewall for web servers designed to protect against a wide range of attacks, including hacking attempts, SQL injections, cross-site scripting (XSS), and other malicious activities. With xCloud, you can easily enable 7G Firewall on Nginx with a few clicks.
What Is A 7G Firewall? #
7G Firewall, an advanced web application firewall (WAF), is a set of web-server rules that filter out some common bad traffic before it hits the WordPress site. This lightweight firewall is an advanced iteration of the earlier 6G Firewall developed by Perishable Press in 2020. This type of firewall is intended to reduce the cost of traffic requesting PHP/WordPress resources.
7G Firewall: Top Features & Goals #
- Security via simplicity
- Extensive firewall protection
- Fine-tuned to minimize false positives
- Lightweight (only 12 KB!), modular, flexible, and fast
- Completely plug-&-play with no configuration required
- Improves security, reduces server load, and conserves resources
- Git/SVN friendly (does not block svn/git files et al)
- Open source, easy to use, and completely free
- 100% compatible with WordPress
- Better bad bot detection
- Built-in logging
Types Of Attacks & Threats 7G Protects #
- Directory Traversal
- HTTP Response Splitting
- (XSS) Cross-Site Scripting
- Cache Poisoning
- Dual-Header Exploits
- SQL/PHP/Code Injection
- File Injection/Inclusion
- Null Byte Injection
- WordPress exploits such as revslider, timthumb, fckeditor, et al
- Exploits such as c99shell, phpshell, remoteview, site copier, et al
- PHP information leakage
📚 Read more on 7G Firewall here.
How To Enable 7G Firewall On Website Using xCloud #
With a few clicks, you can enable a 7G Firewall On Your Website from your xCloud end. Follow the below steps to enable it.
Step 1: Go to your site. From the Dashboard, click on the ‘Settings’ tab.
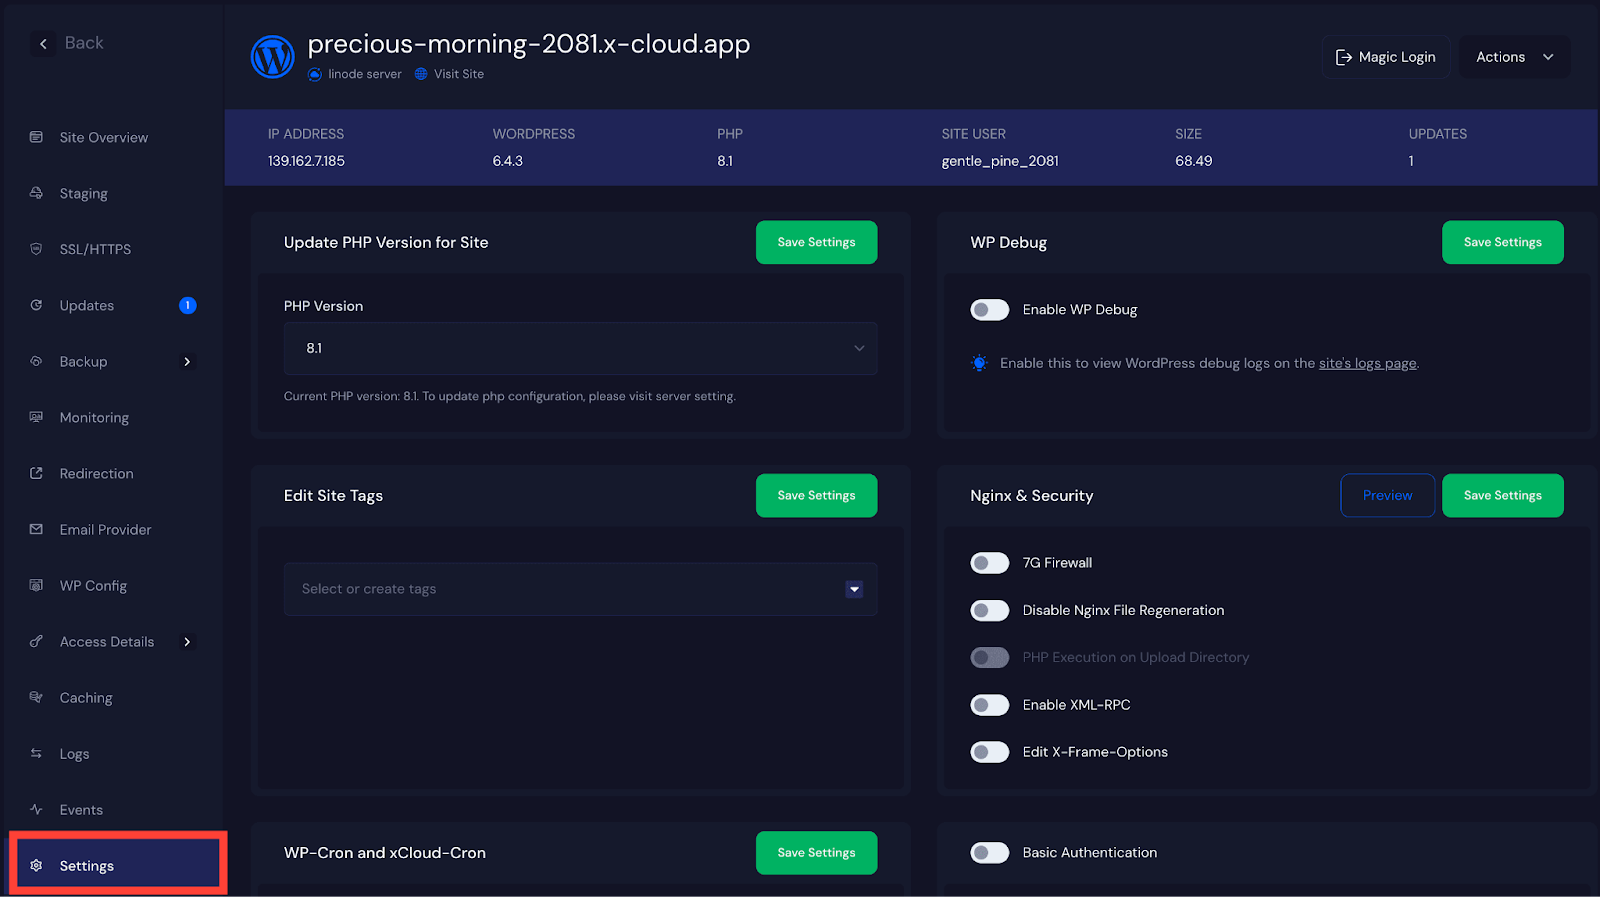
Step 2: In the settings panel, you will see the ‘Nginx & Security’ section. Toggle on the 7G Firewall option to enable it. Now, click on ‘Save Settings’.
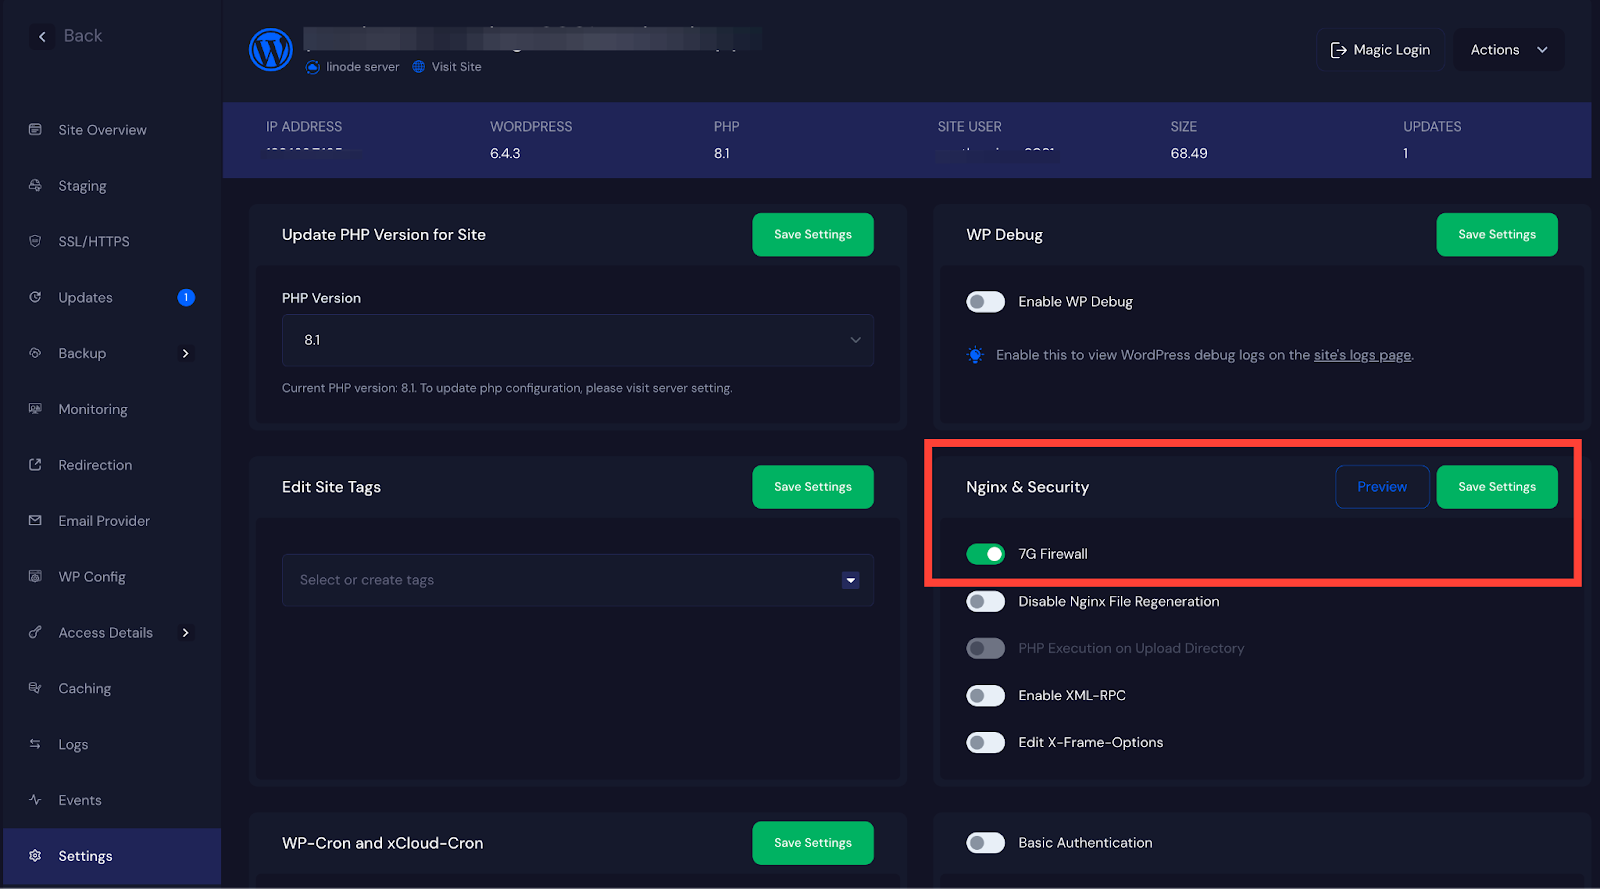
This is how you can easily enable the 7G Firewall from the xCloud dashboard.
7G Firewall location on server: #
You can view the 7G Firewall configuration location on Nginx with the below file path:
/etc/nginx/conf.d/7g-firewall.conf
& The conditional rules for each site will be found at:
/etc/nginx/xcloud-conf/7g.conf
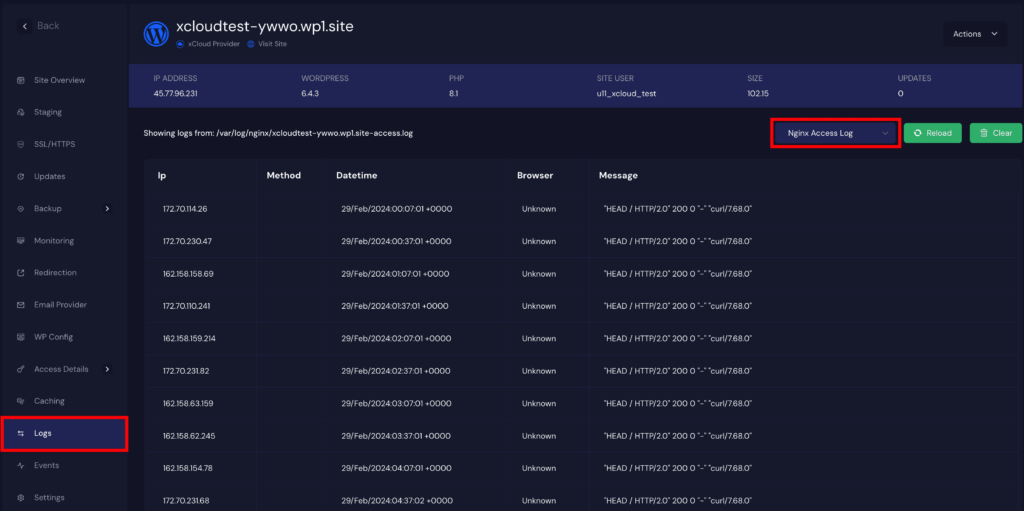
Check 7G Logs #
You can find 7G logs from Site > Logs page by selecting NGINX Log
Issues And Troubleshoots #
You may face some of the possible issues or troubleshoots that might occur with this type of firewall. One of the drawbacks is certain activities that are legitimate will get blocked. You may need to disable the 7G Firewall from the xCloud dashboard if you want to allow them.
Note: We are continually focused on enhancing security and we will bring more advanced features soon.
Still stuck? Contact our dedicated support team for any of your queries.


