xCloud White Label allows you to resell hosting and start your hosting business. This platform allows you to build and sell your own hosting services under your personal brand, using your own domain, and offering custom hosting packages to your clients. By following these steps, you’ll gain full control over your hosting services, pricing, and branding, giving you the flexibility to offer a completely white-labeled hosting solution.
Whether you are an entrepreneur looking to start a hosting business or an established company expanding your services, xCloud White Label makes the process simple and efficient. Let’s go through the step-by-step process to setup your reseller account xCloud White Label!
Step 1: Log in to Your xCloud White Label Dashboard #
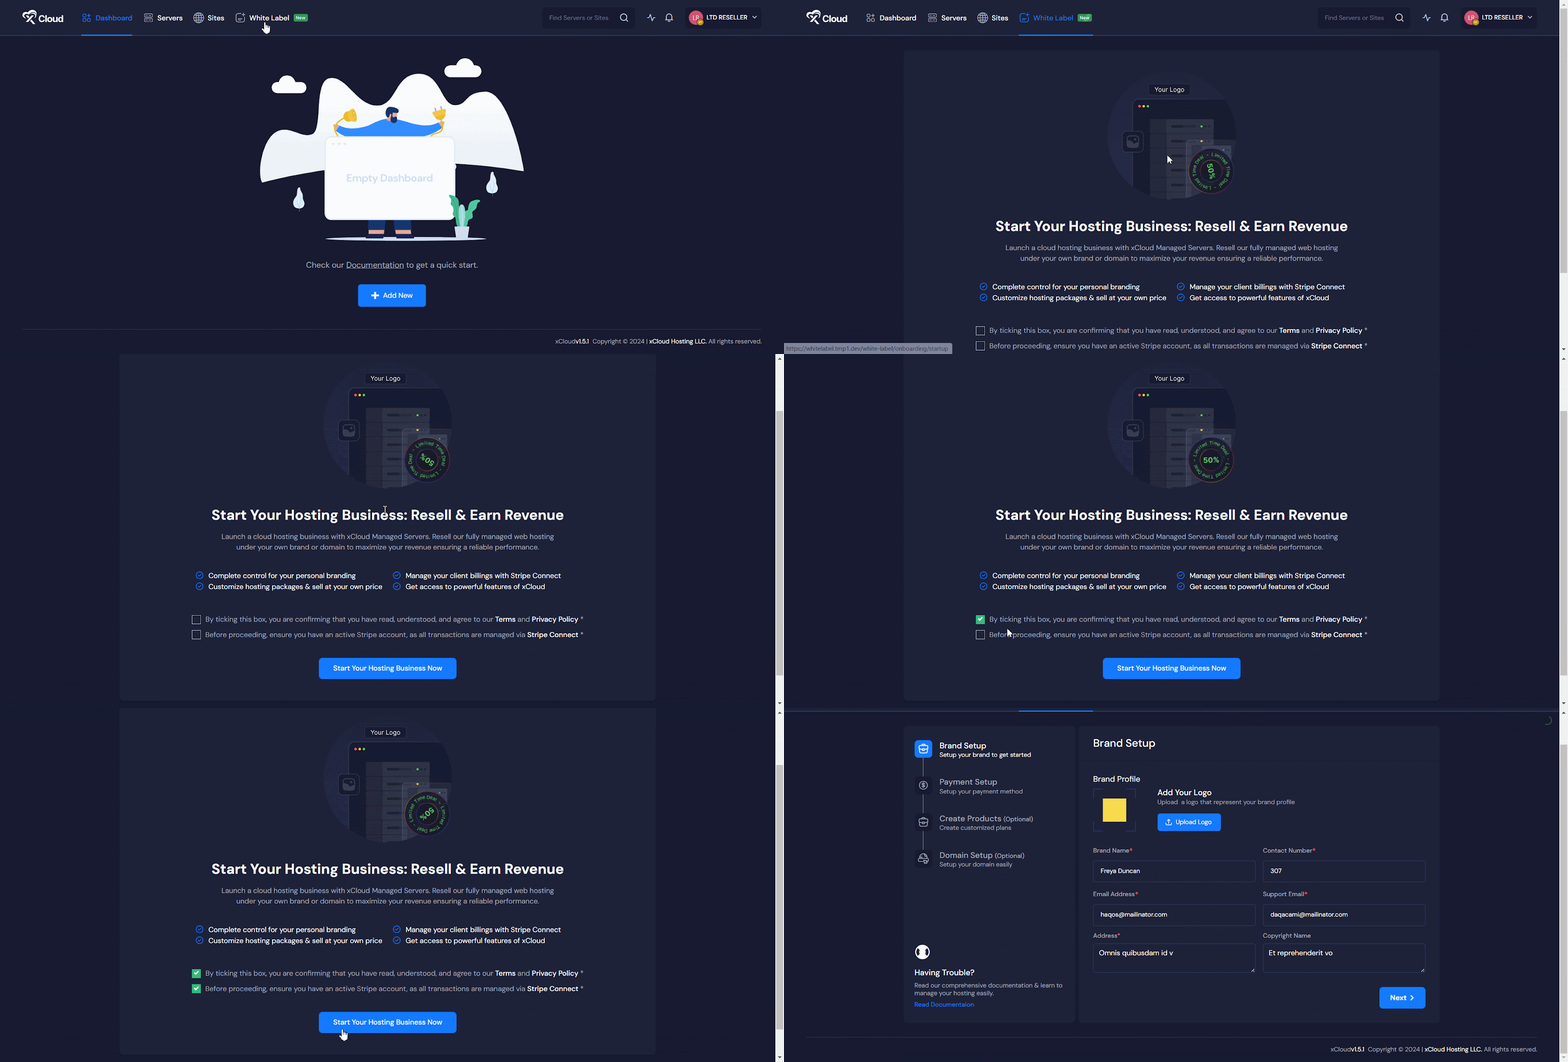
To begin, log in to your xCloud dashboard using your credentials. Once logged in, locate and click on the ‘White Label’ tab from the dashboard. This will redirect you to the xCloud White Label landing onboarding flow, where you can start setting up your reseller hosting. From here after confirming you have read the terms of service and understand that you have a Stripe account click on the ‘Start Your Hosting business now’ button.

Step 2: Subscribe to a White Label Plan #
From here, choose from four different subscription plans for xCloud White Label control panel. Check out the options, select the plan that best suits your needs, and then click on the ‘Pay Now’ button to proceed.

Note: If you have not yet set up a payment method, you will need to do so before proceeding. xCloud currently accepts payments exclusively via Stripe.
Step 3: Set up Your Brand #
After your payment method is configured, it is time to set up your brand.Start by uploading your brand’s logo or icon. To do this, click the ‘Upload Logo’ button and select the file from your device. Next, provide your brand information by entering your ‘Brand Name’, ‘Mailing Address’, and ‘Contact Number’. Once you’ve filled in all the details, click the ‘Next’ button to move on to the following step.

Step 4: Set up Your Payment Method with Stripe Connect #
Next, you will need to integrate Stripe to process payments. If you already have a Stripe account, you can simply connect it by clicking on the ‘Connect Now’ button. It will take you to the Stripe Connect dashboard to login with your Stripe account and set up with Stripe Connect.
Note: If you do not have a Stripe account yet, you need to create it first before you proceed with this step

Now from here, login with your credentials. After connecting your Stripe account to xCloud, click on the ‘Next’ button to proceed.

After setting up, it will take some time to sync and connect with xCloud. Then you can see the account gets connected. From here, click on the ‘Next’ button to proceed.

Step 5: Create Custom Hosting Packages #
Now it is time to create your custom hosting packages. Start by clicking on the ‘Create Hosting Plan’ button. A pop-up will appear with various server configurations. Choose your server plan from either the ‘General’ or ‘Premium’ options, then select your server size and review the pricing based on your selection. Once you’ve chosen your preferred configurations, click ‘Next’.

Now, give your custom hosting plan a unique name by entering it into the ‘Plan Name’ field. Set the monthly price for your package in the ‘Custom Price/Month’ field. Also, set the ‘Site Limit’, provide a ‘SKU’, and include any additional information in the provided fields if needed. If you have a coupon code, enter it in the ‘Coupon Code’ box. Once all the details are filled in, click ‘Save’ to save the plan for now or ‘Save’ and ‘Publish’ if you want to make it available immediately.

Note: Ensure the price you set for your custom plan is higher than the cost of the server. This will allow you to sell at a profit.
Step 6: Set Up Your Domain #
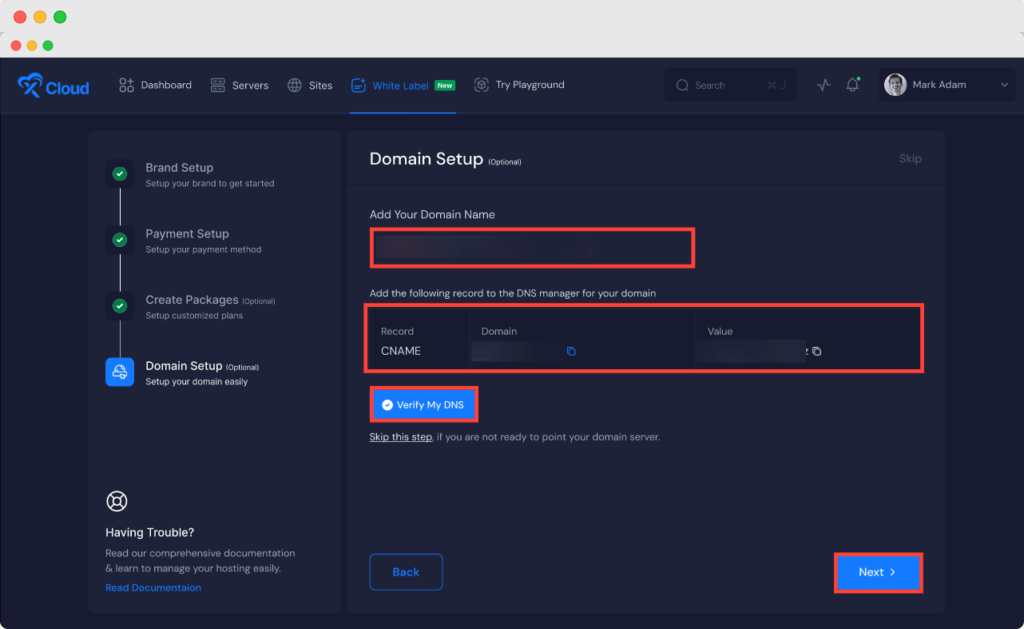
The final step is to set up your domain. Enter your domain name in the ‘Add Your Domain Name’ field. For example, the domain is: app.myhosting.com. Here you can not use our root domain. Once you have done that, head over to your domain provider to verify your DNS settings. After verifying your DNS, return to the xCloud dashboard and click the ‘Next’ button to complete the setup process.
Note: xCloud provides a temporary URL for your Dashboard and landing page. Later you can customize that with their own domains. Read this detailed documentation to learn the step by step process to set up the DNS setup: How to Set Up DNS Records in xCloud Server.

Final Outcome #
After setting up your dashboard will look like this. You can check out the servers, sites andbillings of your clients and manage them from one place efficiently.

Customize Brand And Details #
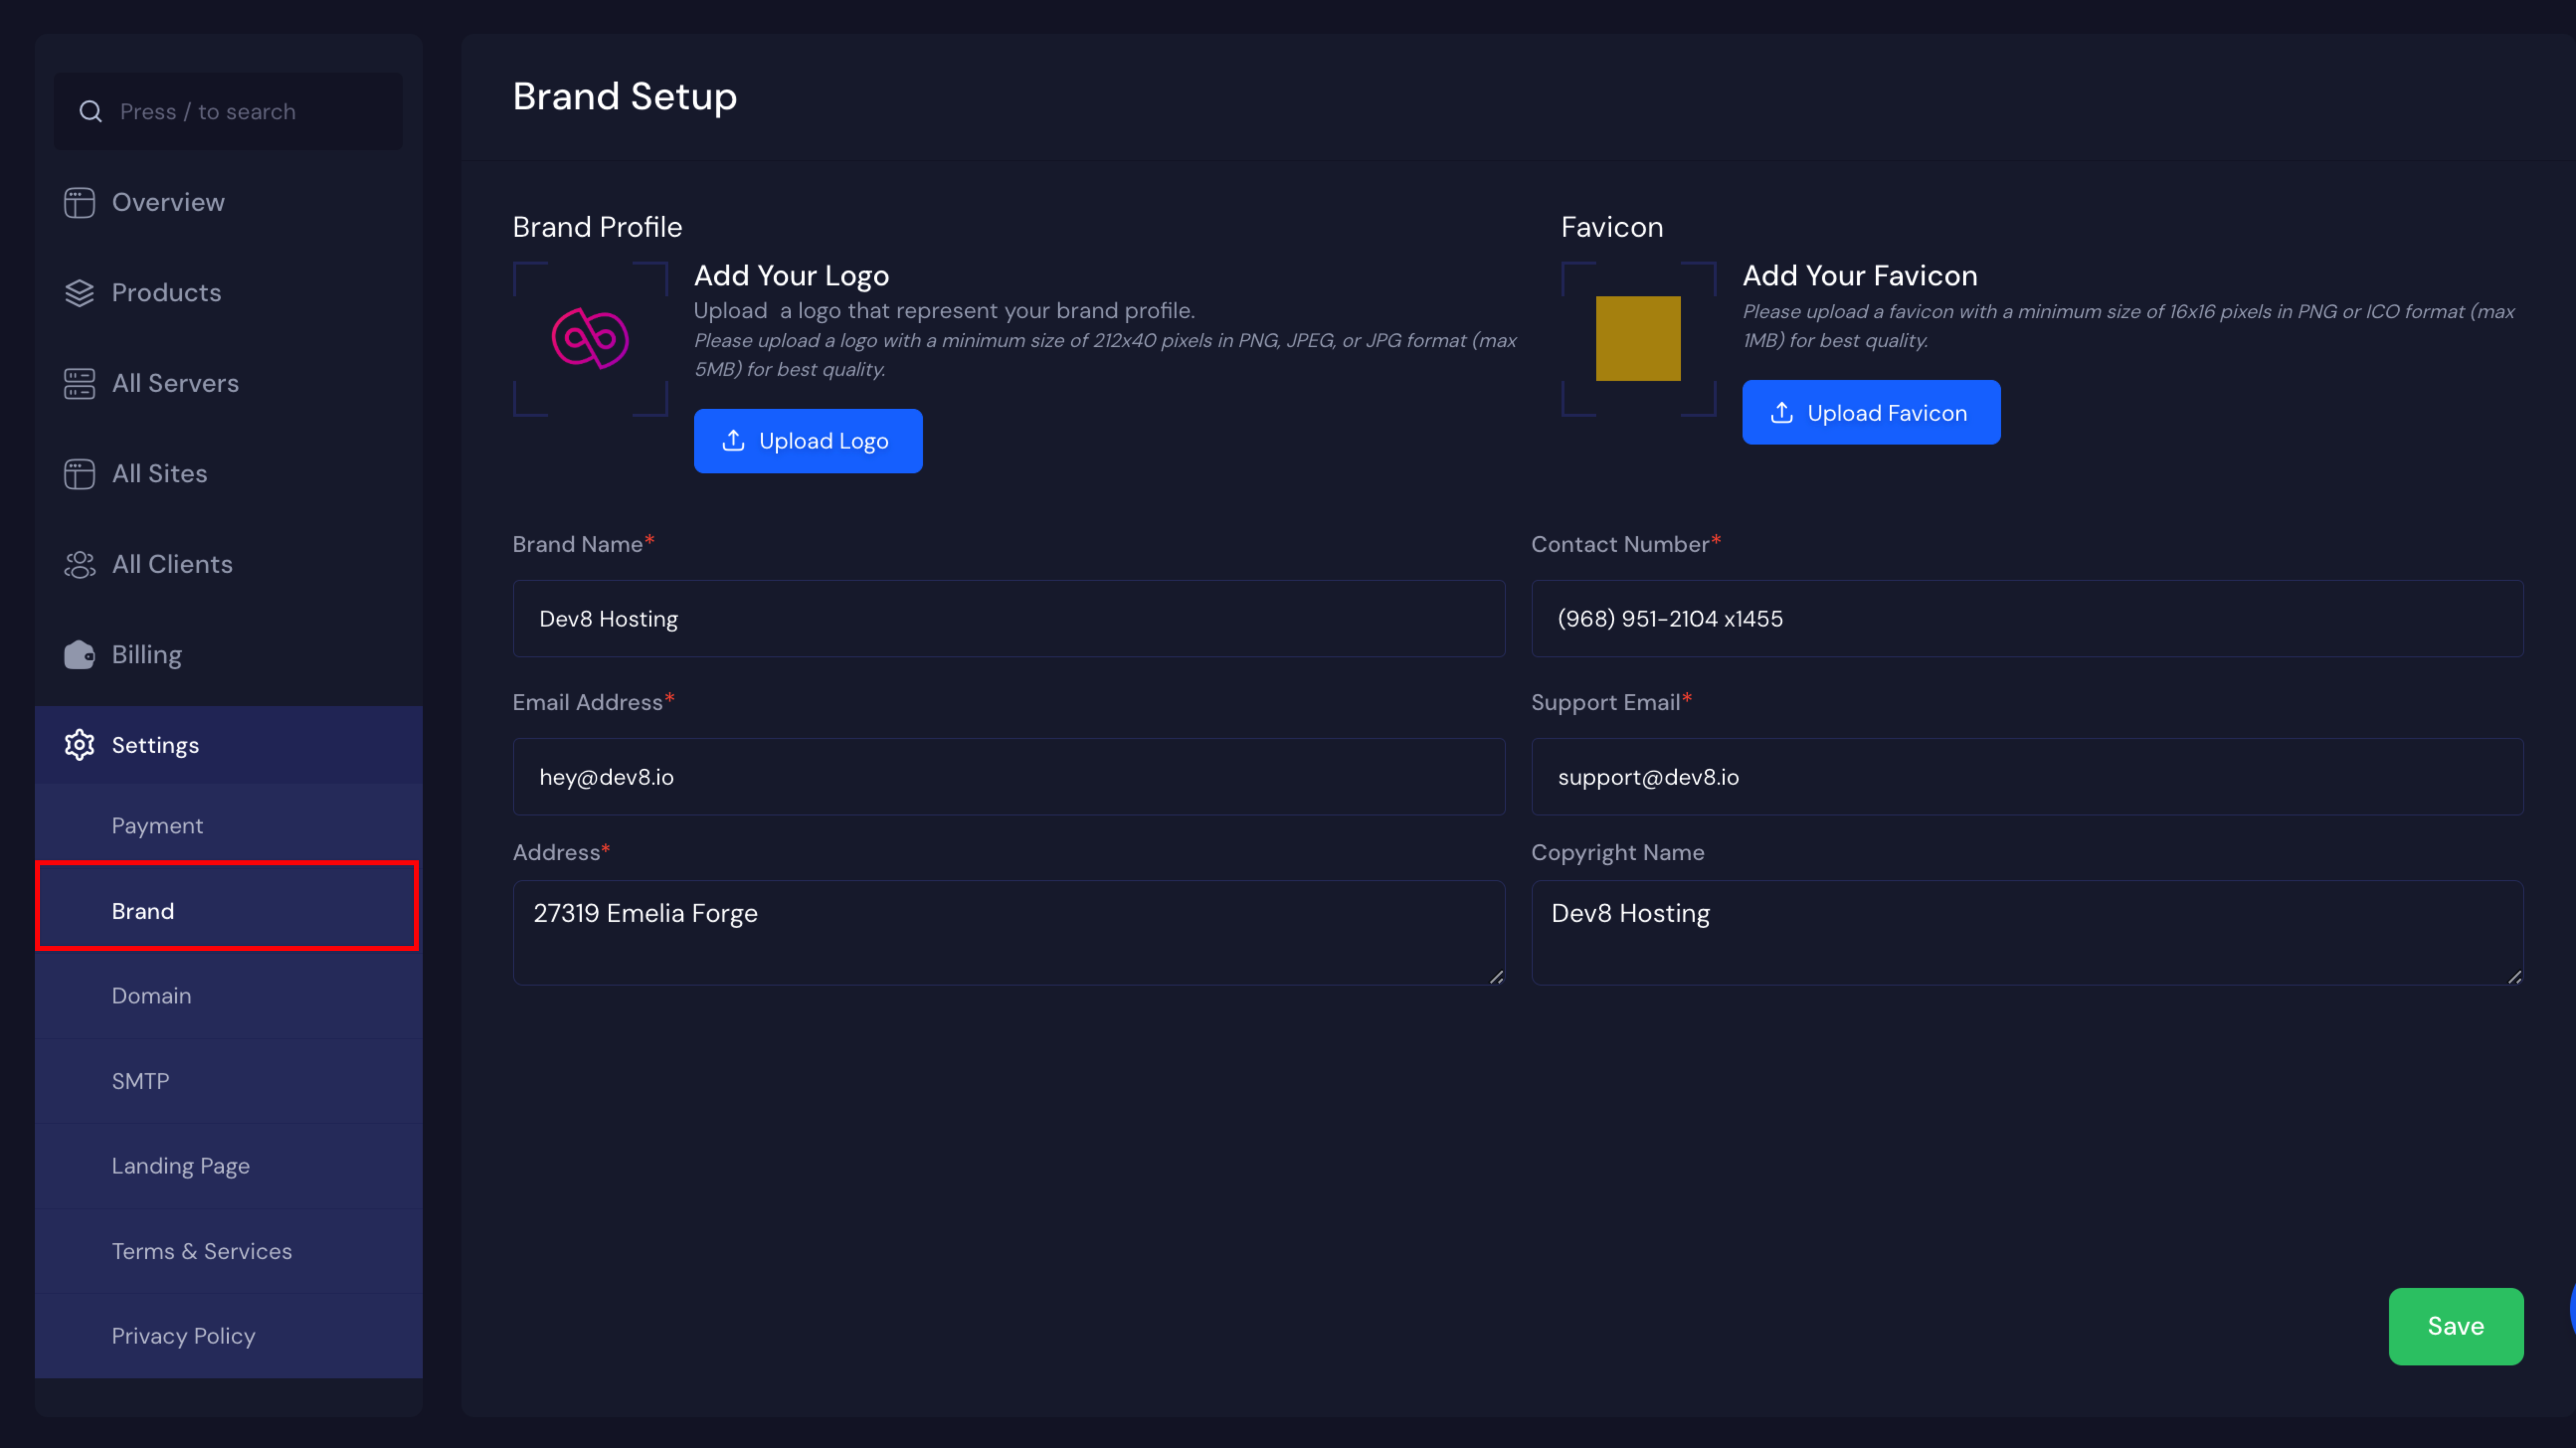
You can set up the brand logo, and favicon and also customize brand details from Brand Settings.

Manage White Label Subscription #
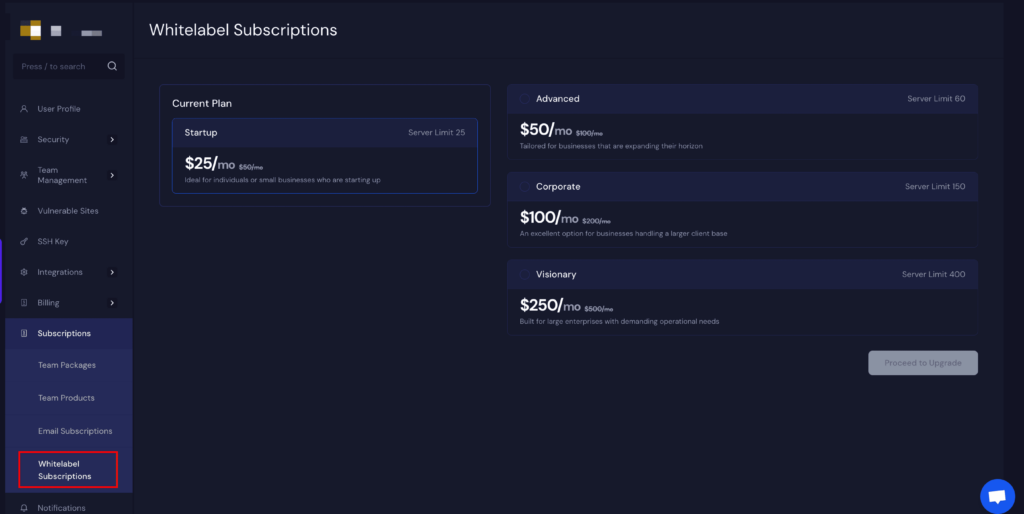
You can manage your white-label subscription from your subscription page.

That is it! You have successfully completed the setup of your reseller account with xCloud White Label. Now you can start selling hosting services under your own brand with fully customized packages.
Still stuck? Contact our support team for any of your queries.


