

How to Collect Stripe Publishable Key for 3D Secure Card Payments?
Updated November 12, 2024 · 2 min read
Keeping online payments safe is essential for any business & xCloud always ensures its fullness. When you use Stripe, your Stripe Publishable Key is the way to connect your website or app to Stripe’s payment system. Combined with 3D Secure, this key helps you process payments safely and boosts customer confidence.
Why do we need the Publishable Key from your (Reseller) account? 3D Secure adds an extra layer of protection to your credit card transactions, helping to prevent fraud and build trust. To enable it, you will need to get your Stripe publishable key and set it up correctly.
In this guide, we’ll show you the simple steps to access your Stripe publishable key so you can start accepting 3D Secure payments from your clients.
Note: Before heading to the process, make sure that you connect your Stripe account with xCloud.
Collecting Stripe Publishable Key
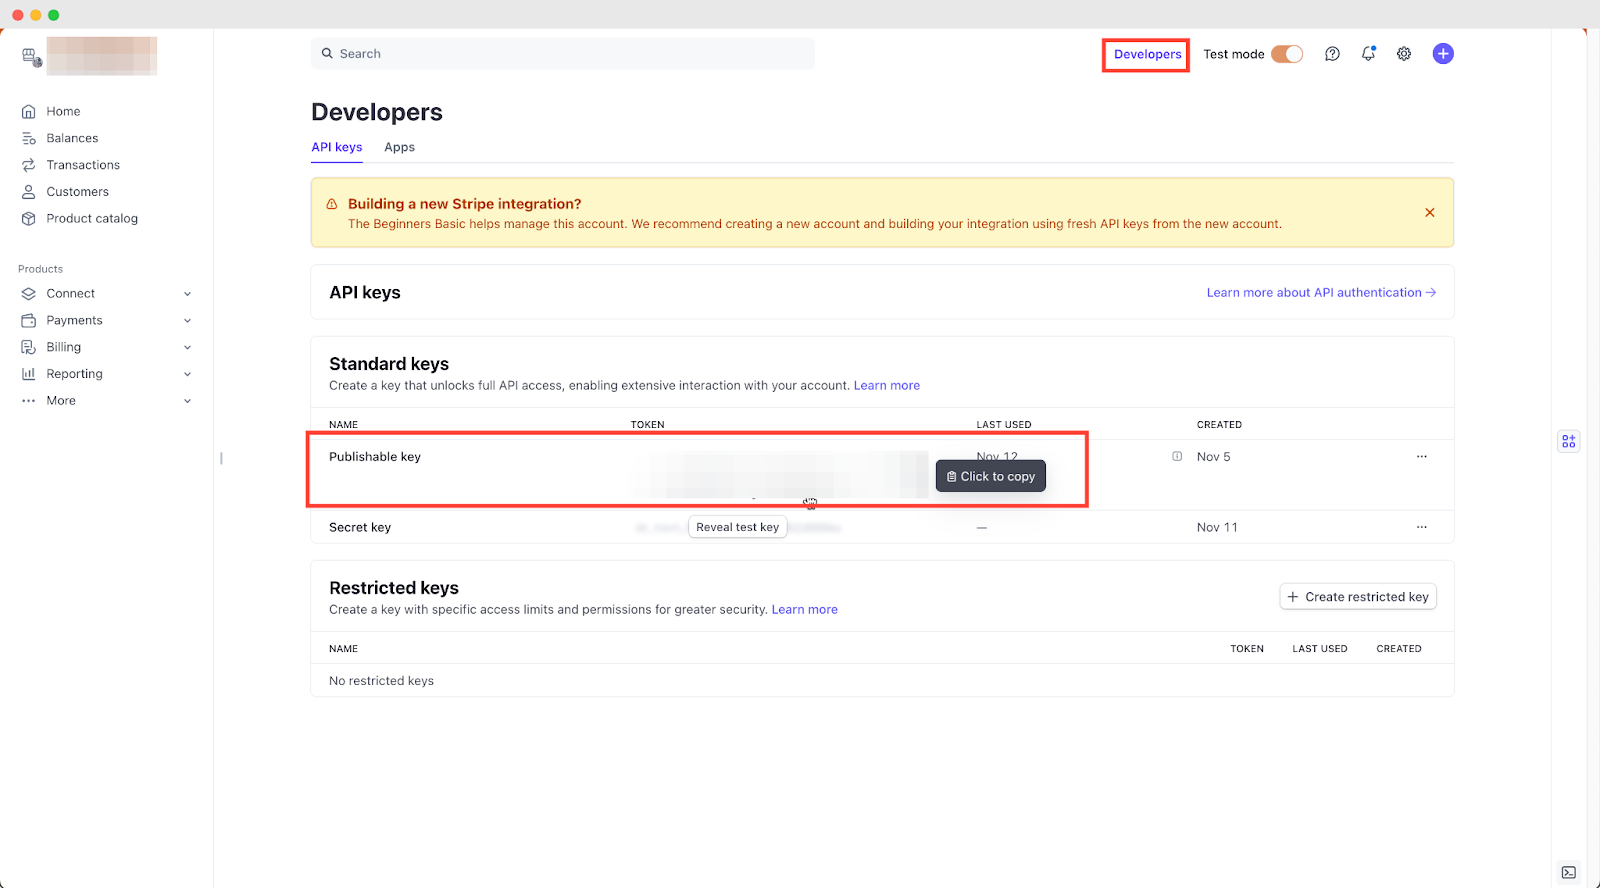
To collect the publishable key, log in to your Stripe account & head towards the Developers option on top in the dashboard. Under the ‘Developers’ section, you’ll get two options—API Keys & Apps. Click on ‘API Keys’ & copy your Stripe ‘Publishable Key.’
Implementing Stripe Publishable Key for Allowing 3D Secure Card Payments in xCloud White Label [Onboarding Flow]
While setting up your reseller account with xCloud White Label, you’ll go through an onboarding flow. After setting up your ‘Brand’, when you reach to ‘Payment Setup’ section, you’ll get an option named ‘3D Secure Card Compatibility for Your Clients.’ Now paste your Stripe ‘Publishable Key’ before heading to the next step of the onboarding flow.
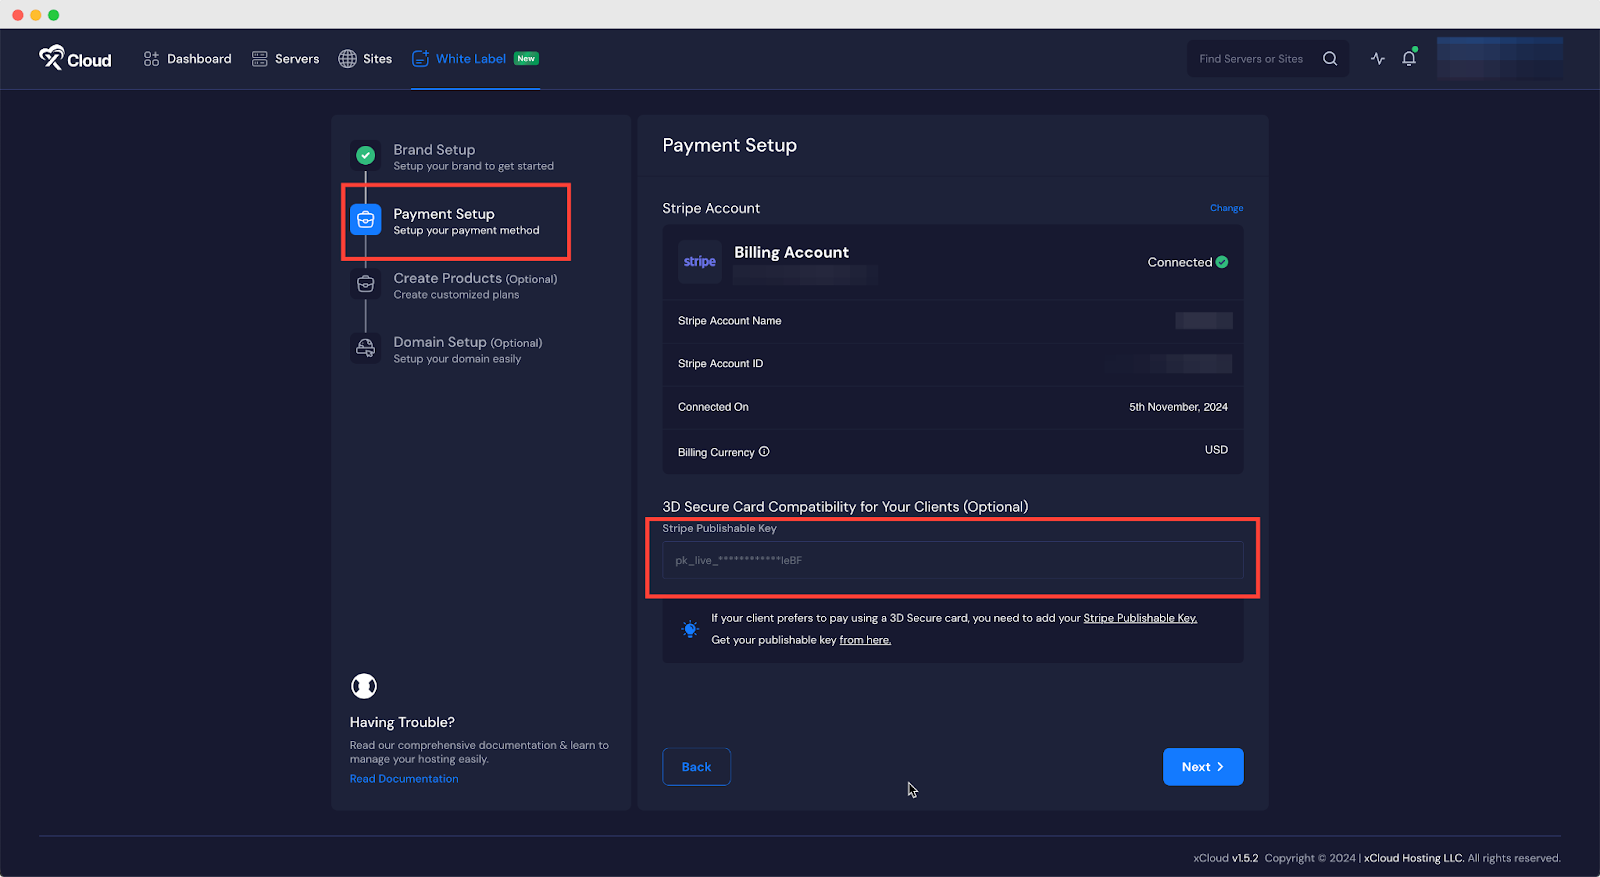
Note: By any chance, if you skip this part while getting onboard, you can do it later from the dashboard end as well.
Now, let’s see how you can apply your Stripe Publishable Key in xCloud White Label from the dashboard.
Implementing Stripe Publishable Key for Allowing 3D Secure Card Payments in xCloud White Label [Dashboard End]
Follow the below step-by-step guide to save your Stripe Publishable Key to allow your clients to make payments safely and boost their confidence.
Step 1: Access xCloud White Label
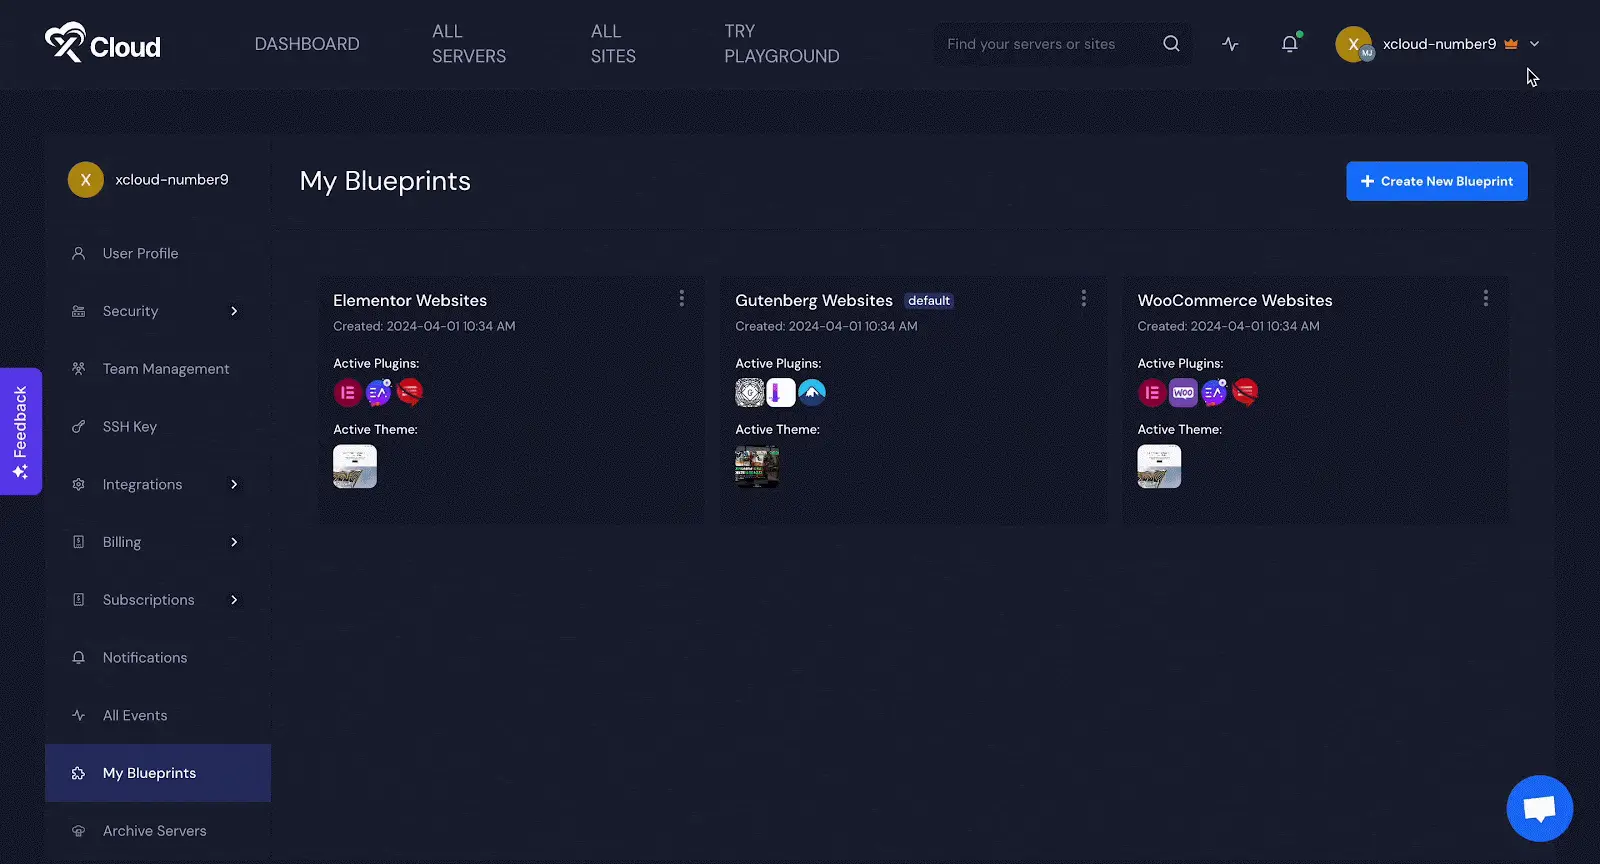
Login to your xCloud dashboard with the right credentials, & head over to the ‘White Label’ on top and click on it. And you’ll be redirected to your White Label dashboard as shown below.
Step 2: Setup Stripe 3DS Card
Once you’re in, navigate to the ‘Settings’ → ‘Payment’ option. On the resulting page, you’ll get your Stripe Account details & an option named ‘Stripe 3DS Card Setup.’ Now paste your Publishable Key to the respective box and click on ‘Add.’
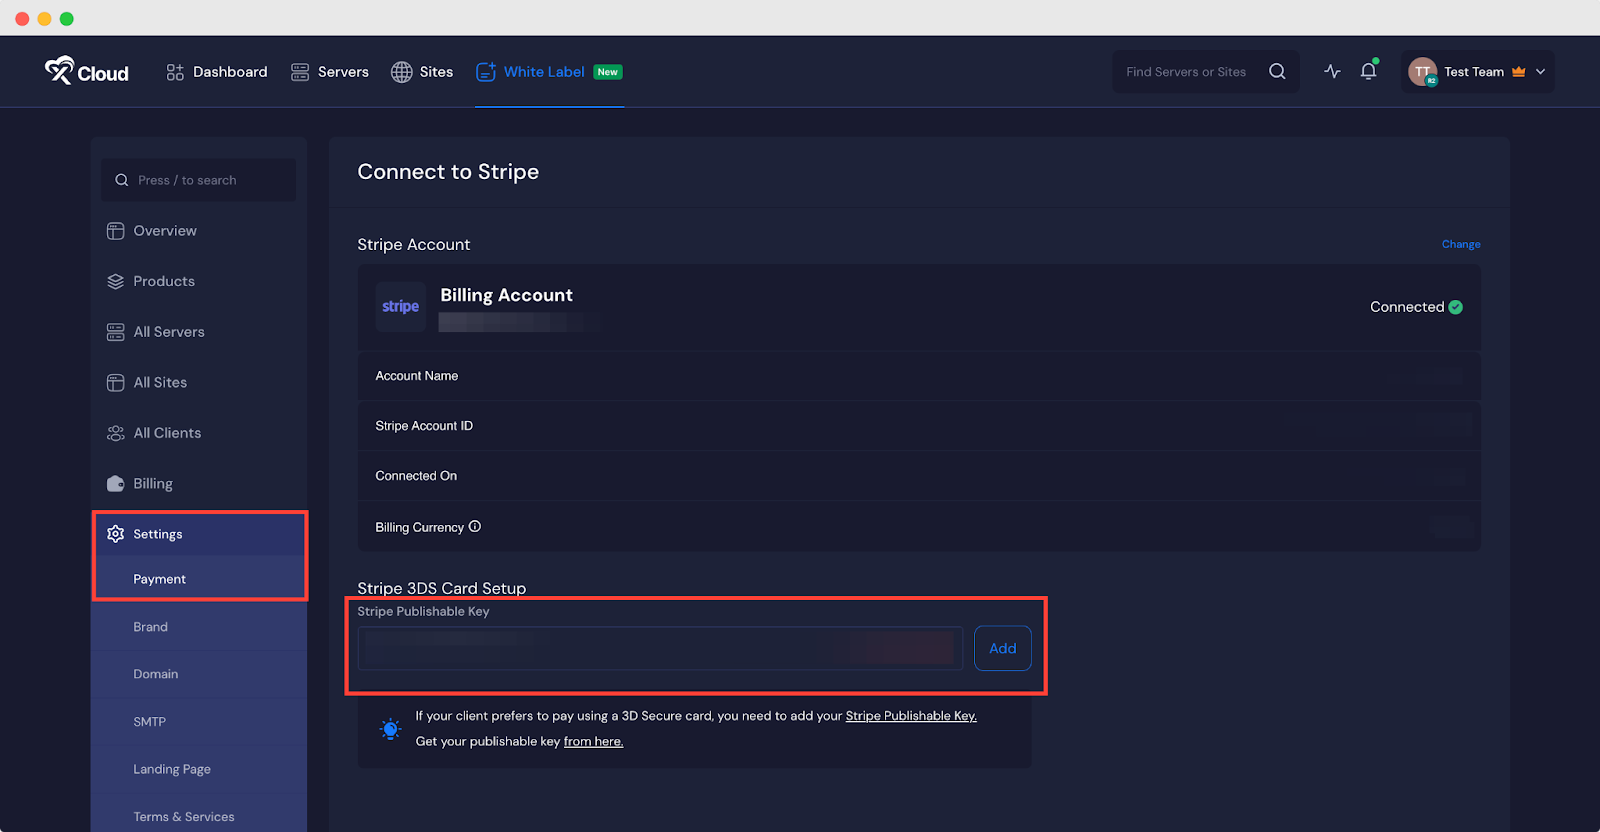
This is how you can easily access your Stripe Publishable Key for 3D Secure Card Payments and apply in xCloud White Label following any of the above-mentioned methods.
Still stuck? Contact our support team for any of your queries.