

How to Deploy Laravel Applications with xCloud?
Updated November 1, 2026 · 6 min read
You deploy a Laravel application on xCloud with Deploy via Git. Paste your repository URL, and xCloud detects that the app is Laravel, matches the PHP version to your composer.json, creates the database and fills in a deploy script. You review the settings on one page and click ‘Deploy’.
Deploy via Git replaced the old ‘Laravel’ tab and its ‘Clone A Git Repository’ option. If an older guide or video shows those, follow the steps below instead.
Before you start:
- A server in xCloud that runs Nginx or OpenLiteSpeed. See How to Set Up Laravel on DigitalOcean Server with xCloud if you need one.
- Your Laravel code in a Git repository. For a private repository, connect your Git provider first, or have admin access to add a deploy key.
Step 1: Add a new site
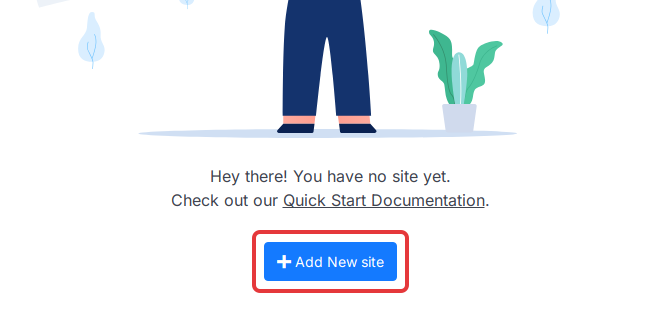
In your xCloud dashboard, open ‘Sites’ and click ‘Add New Site’. You land on ‘What would you like to host today?’, the list of everything you can host.
Step 2: Choose Deploy via Git
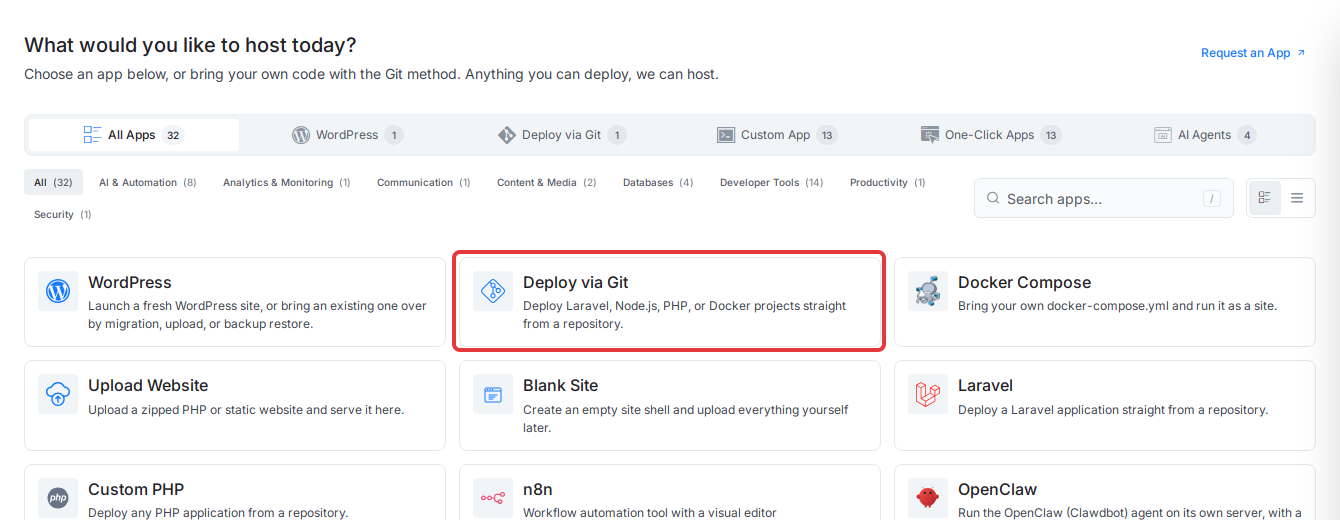
Click the ‘Deploy via Git’ card. The ‘Laravel’ card in the same list opens the same Git flow, so you can use either one.
Step 3: Pick the server
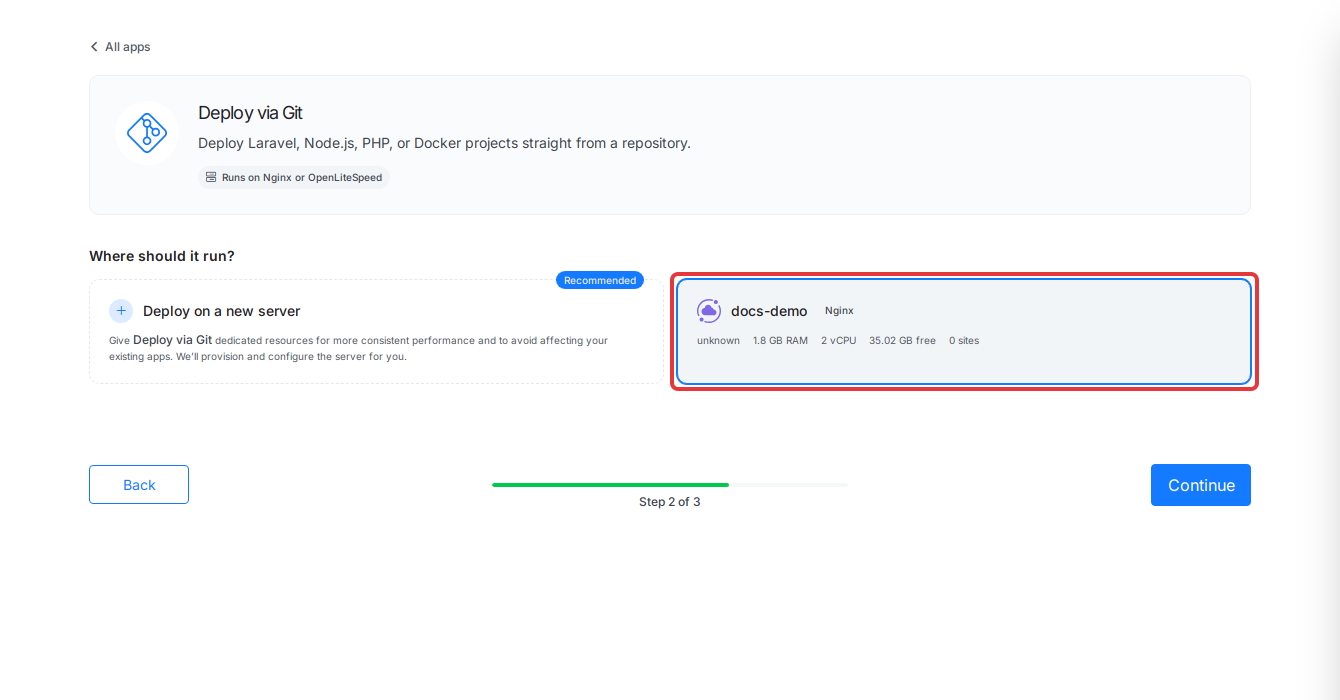
Under ‘Where should it run?’, select the server for your Laravel app and click ‘Continue’. You can also choose ‘Deploy on a new server’ to have xCloud create one first.
Step 4: Paste your repository URL
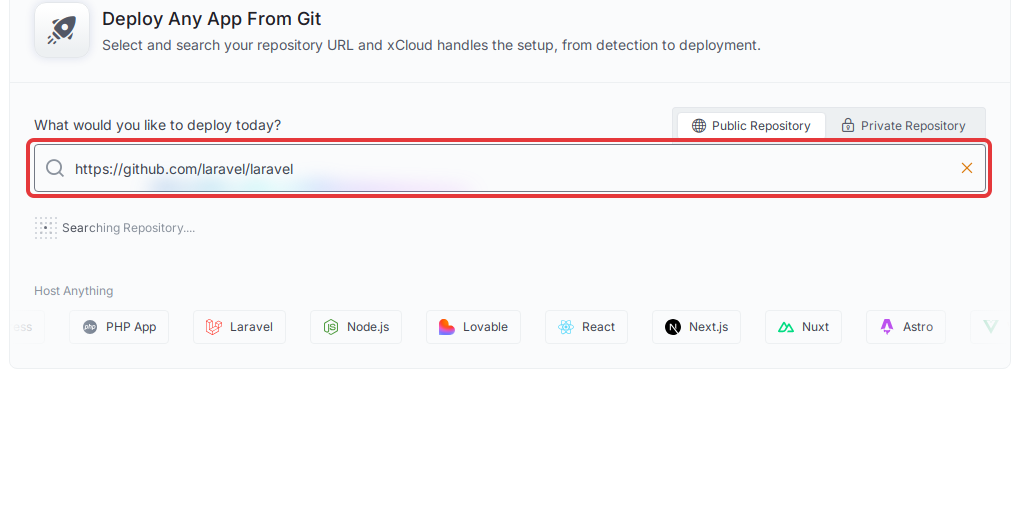
The ‘Deploy Any App From Git’ page opens. Paste your repository URL into the search box and press Enter.
- Public repository: keep the ‘Public Repository’ tab selected and paste the HTTPS URL, for example
https://github.com/your-name/your-app. - Private repository on GitHub: open the ‘Private Repository’ tab and connect your account with ‘Continue with GitHub’. Your repositories then show up as you type.
- Private repository on another host: paste its SSH URL (
git@…). xCloud shows an ‘SSH Public Key’. Add it to your repository’s deploy keys, then click ‘Verify connection’.
Step 5: Check the detected app type
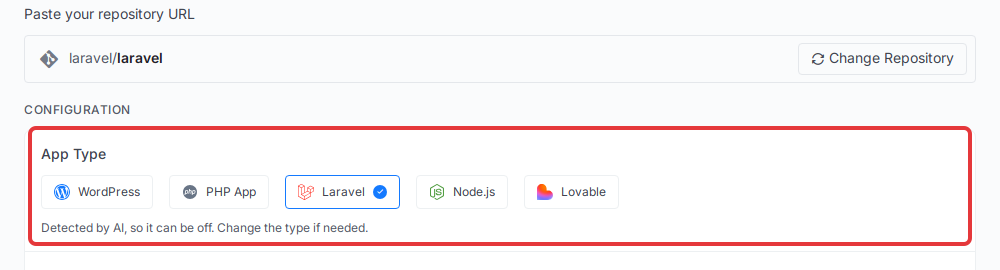
xCloud reads the repository and selects ‘Laravel’ under ‘App Type’. The detection is done by AI, so check it. If it picked the wrong type, click ‘Laravel’ yourself.
Step 6: Set the domain and branch
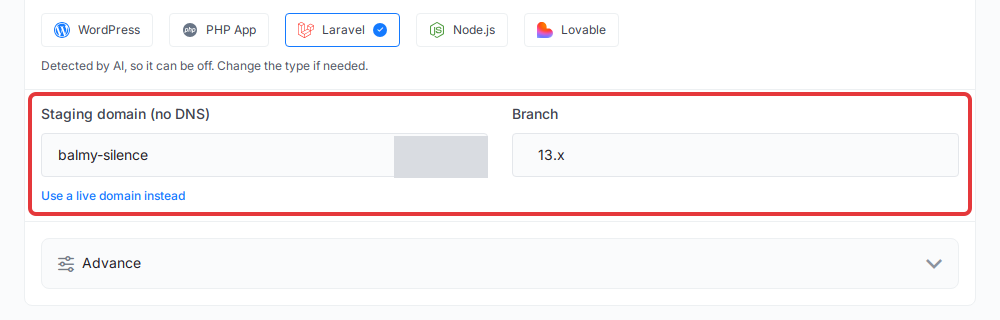
By default, the site gets a ‘Staging domain (no DNS)’, a free test address you can use right away. To use your own domain, click ‘Use a live domain instead’ and enter it. You then point its DNS to the server and can turn on HTTPS.
In ‘Branch’, check the branch to deploy. xCloud fills in the repository’s default branch.
If you connected your Git provider, you also see ‘Auto-deploy on push (webhook)’. Tick it to deploy each time you push to that branch. With admin access to the repository, also tick ‘Add the webhook to the repository automatically (needs admin access)’.
Step 7: Review PHP version and site user
Click ‘Advance’ to open the rest of the settings.
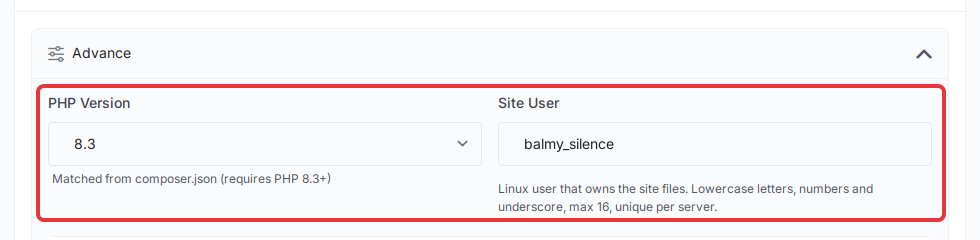
- ‘PHP Version’: xCloud matches it to your
composer.json. You see ‘Matched from composer.json’ with the version your app requires. - ‘Site User’: the Linux user that owns the site files. xCloud fills it from the domain. You can keep it.
Step 8: Set up the database
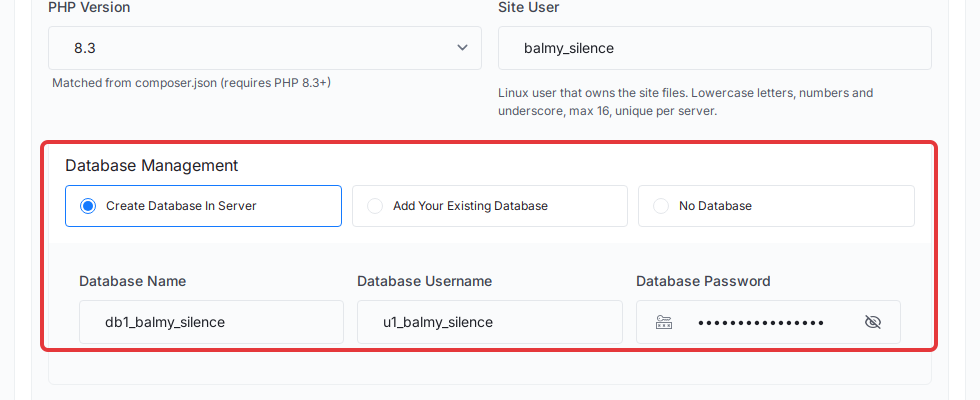
Under ‘Database Management’, choose one option:
- ‘Create Database In Server’: xCloud creates a database on this server. Keep the generated ‘Database Name’, ‘Database Username’ and ‘Database Password’, or change them.
- ‘Add Your Existing Database’: connect a database that runs somewhere else.
- ‘No Database’: skip the database.
If PostgreSQL is Ready on the server, a ‘Database engine’ menu also lets you pick PostgreSQL instead of MySQL. See How to Install Managed PostgreSQL and pgAdmin in xCloud.
If the server has no database server yet, you choose one under ‘Database Configuration’ instead. xCloud installs it during the deployment.
If your server has no Redis, you also see ‘Install Redis on the server’. Turn it on when your app uses Redis for cache, queues or sessions. Without Redis, those fall back to file or database drivers.
Step 9: Check the environment file and deploy script
Leave ‘Web root (optional)’ empty. Laravel then serves from public.
Under ‘Environment file (.env)’, xCloud fills in your .env from the repository’s example file. Check the values your app needs.
After deployment, edit the file in ‘Laravel’ → ‘Environment’. See Environment Variables (.env) and Git Deployments for how a Git deployment treats your .env file and how to keep it.
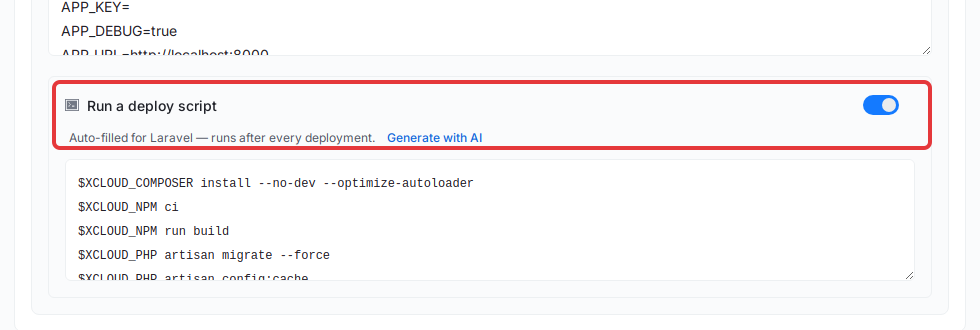
‘Run a deploy script’ is on and auto-filled for Laravel. It runs after every deployment:
$XCLOUD_COMPOSER install --no-dev --optimize-autoloader
$XCLOUD_PHP artisan migrate --force
$XCLOUD_PHP artisan config:cache
When the repository has a package.json, xCloud also adds the commands that install and build your front-end assets. Edit the script if your app needs more steps, or click ‘Generate with AI’ to draft one from your repository.
Step 10: Deploy
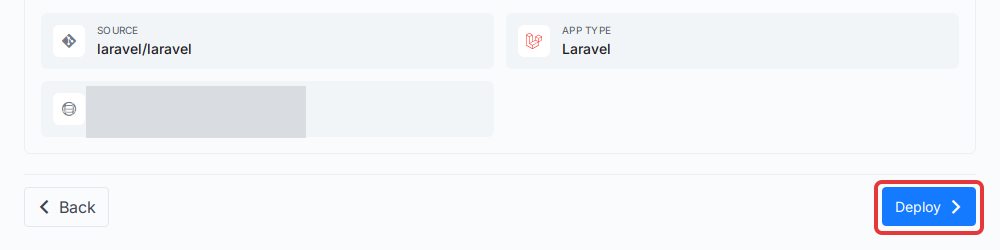
Check the ‘Summary’: the source, the app type (Laravel) and the domain. Then click ‘Deploy’.
xCloud clones the repository, sets up the site and runs your deploy script. When it finishes, open the site from ‘Sites’ to manage it. To see past deployments, see View Git Deployments in xCloud.
If the ‘Deploy’ button is greyed out, hover over it. The message tells you what is missing, such as an app type or a verified deploy key.
Set Up Push To Deploy After Deployment
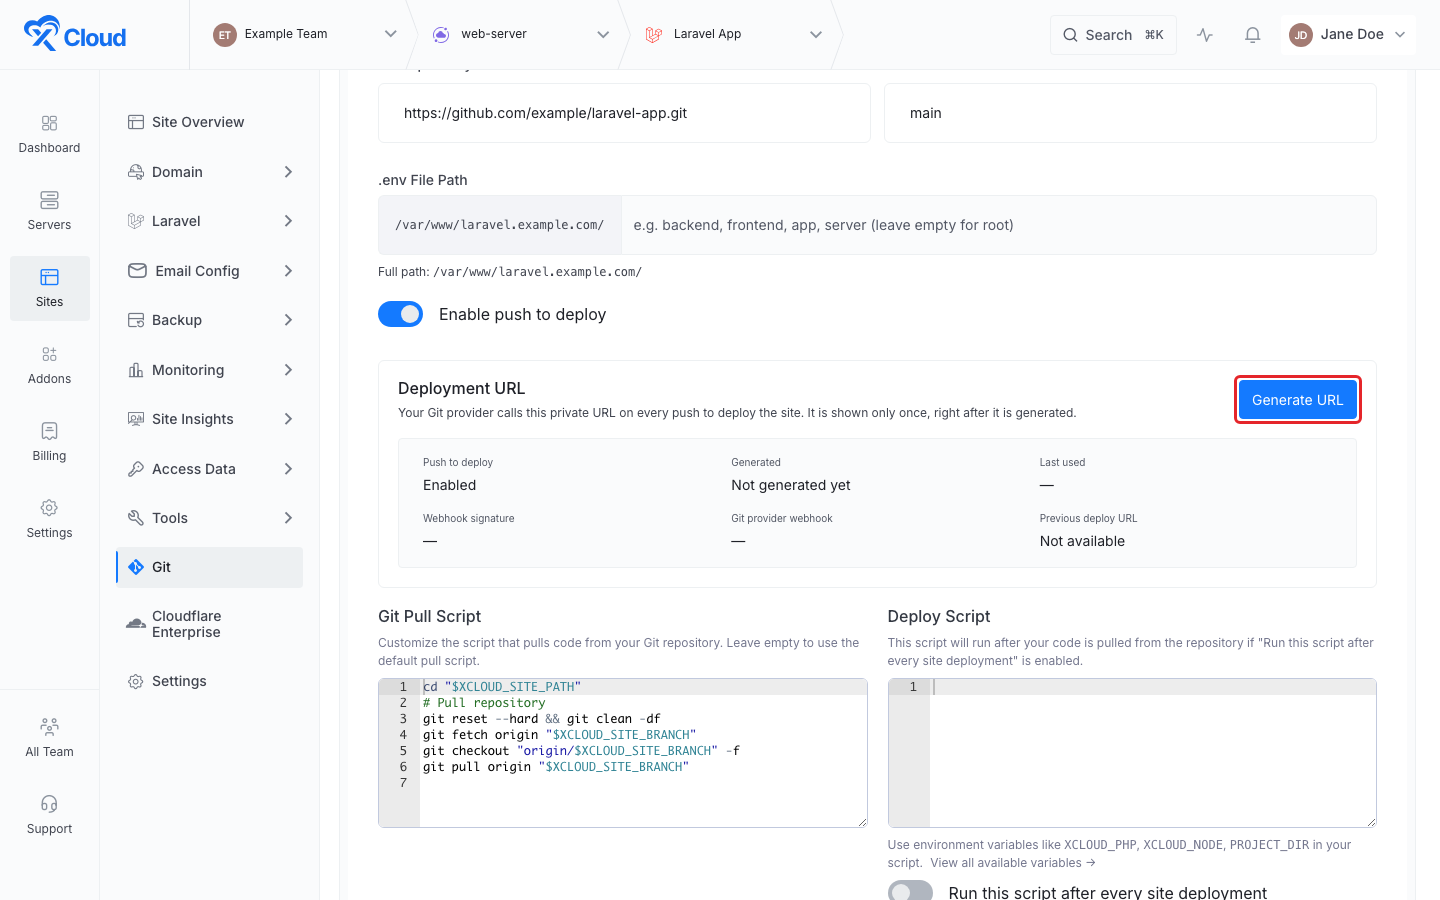
If xCloud did not add the webhook for you, generate the Deployment URL once the site exists and add it to your repository.
- Open the site and select Git in the sidebar.
- In the Deployment URL card, click Generate URL and confirm.
- Click Show, then copy the URL right away. It is shown only once, right after it is generated.
- In your GitHub repository, open Settings → Webhooks and add a webhook. Paste the URL into the Payload URL field and select application/json from the Content type dropdown.
- If xCloud also showed a Webhook secret, paste it into the webhook’s Secret field. Deliveries without a valid signature are refused.
Treat the URL like a password: anyone who has it can deploy the site. If you lose it or it leaks, click Regenerate URL. The old URL stops working right away, so update the webhook and any CI jobs or scripts that call it.
Related Laravel guides:
How to Use Supervisor for Process Management With xCloud
How to Set Up Laravel Horizon with xCloud
How to Set Up a Queue Worker for Laravel Applications
To run the Laravel scheduler, set up a cron job:
How To Configure xCloud Cron Job?
Frequently asked questions
Where is the Laravel tab and the ‘Clone A Git Repository’ option?
They were replaced by Deploy via Git. Click Add New Site, pick Deploy via Git (or the Laravel card), choose your server and paste your repository URL. xCloud detects that the app is Laravel for you.
Can I deploy a private Laravel repository?
Yes. Connect your GitHub account from the Private Repository tab, or paste the repository’s SSH URL (git@…) and add the deploy key xCloud shows to your repository, then click Verify connection.
What does the default Laravel deploy script run?
It installs Composer packages without dev dependencies, builds front-end assets when the repository has them, runs the database migrations and caches the config. It runs after every deployment, and you can edit it before you click Deploy.
If a deployment gets stuck, fails to clone or build, or won’t trigger, see Troubleshooting Git Deployments.
If you run into any issues while deploying your Laravel application, feel free to reach out to our support team.