

How to Deploy Uptime Kuma with xCloud One Click Apps
Updated June 15, 2025 · 5 min read
Uptime Kuma is a self-hosted monitoring tool that allows users to monitor websites, services, and applications with ease. It offers powerful uptime tracking, notifications, and intuitive dashboards.
If you are a developer, systems administrator, or hobbyist, you can deploy Uptime Kuma with xCloud to get a reliable, automated monitoring system. Follow the steps below to quickly set up Uptime Kuma with xCloud in a demo or production environment.
Step 1: Access the One Click Apps Dashboard
Begin by logging into your xCloud account. Once authenticated, navigate to your dashboard and click on the ‘New Site’ button.
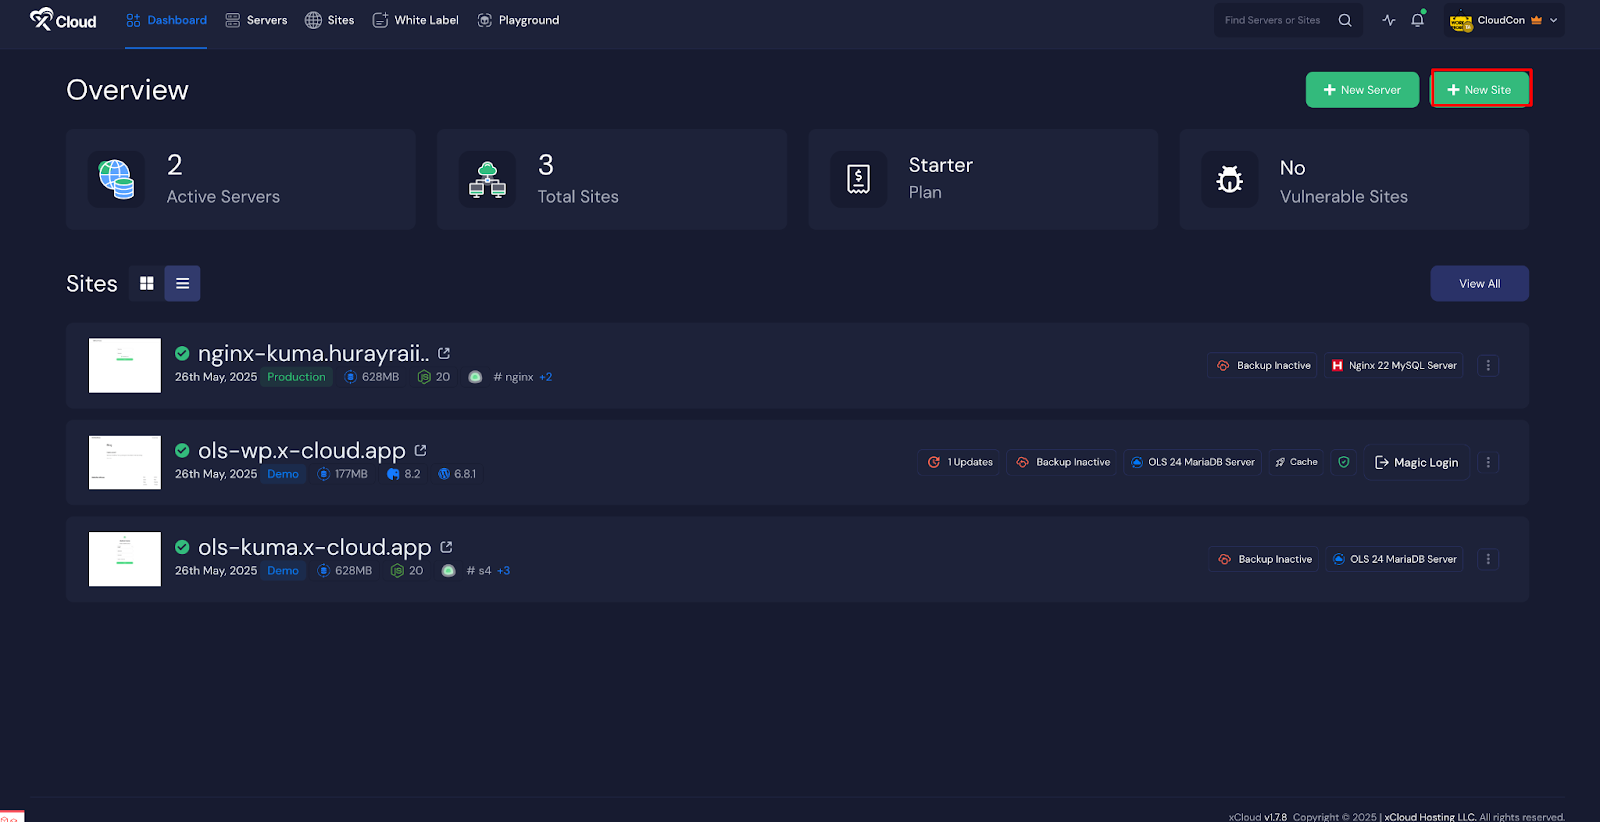
This will take you to the site creation interface. From here, choose the ‘Server’, then go to the ‘One Click Apps’ section. Select **‘**Uptime Kuma’ from the available applications to initiate the deployment process.
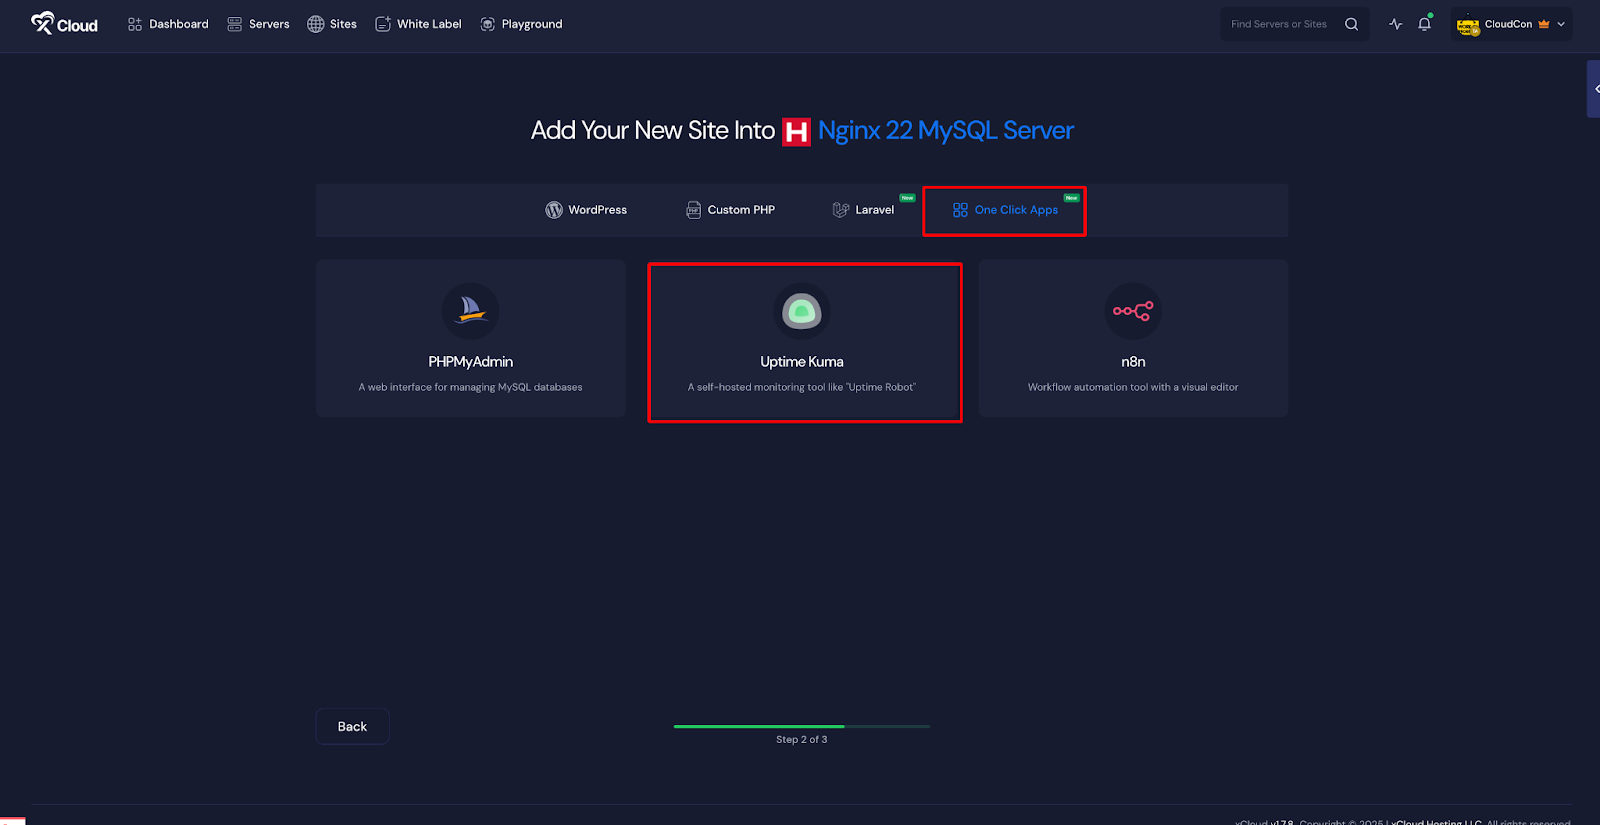
Ensure your server is already connected to xCloud. If not, follow the instructions on the dashboard to establish a server connection. Once connected, you can create a new site either from the main Dashboard or the Site List by selecting the **‘**Create New Site’ option.
Step 2: Set Up the Uptime Kuma Application
In the site setup screen, you will be prompted to enter basic site information. Provide a ‘Site Title’ and add relevant ‘Tags’ to help organize your deployment. At this point, you can choose between two deployment modes: ‘Go Live’ for a production-ready deployment or ‘Demo Site’ for testing purposes. Selecting ‘Go Live’ will immediately create a live environment, while choosing ‘Demo Site’ allows you to experiment in a staging environment before promoting to production.
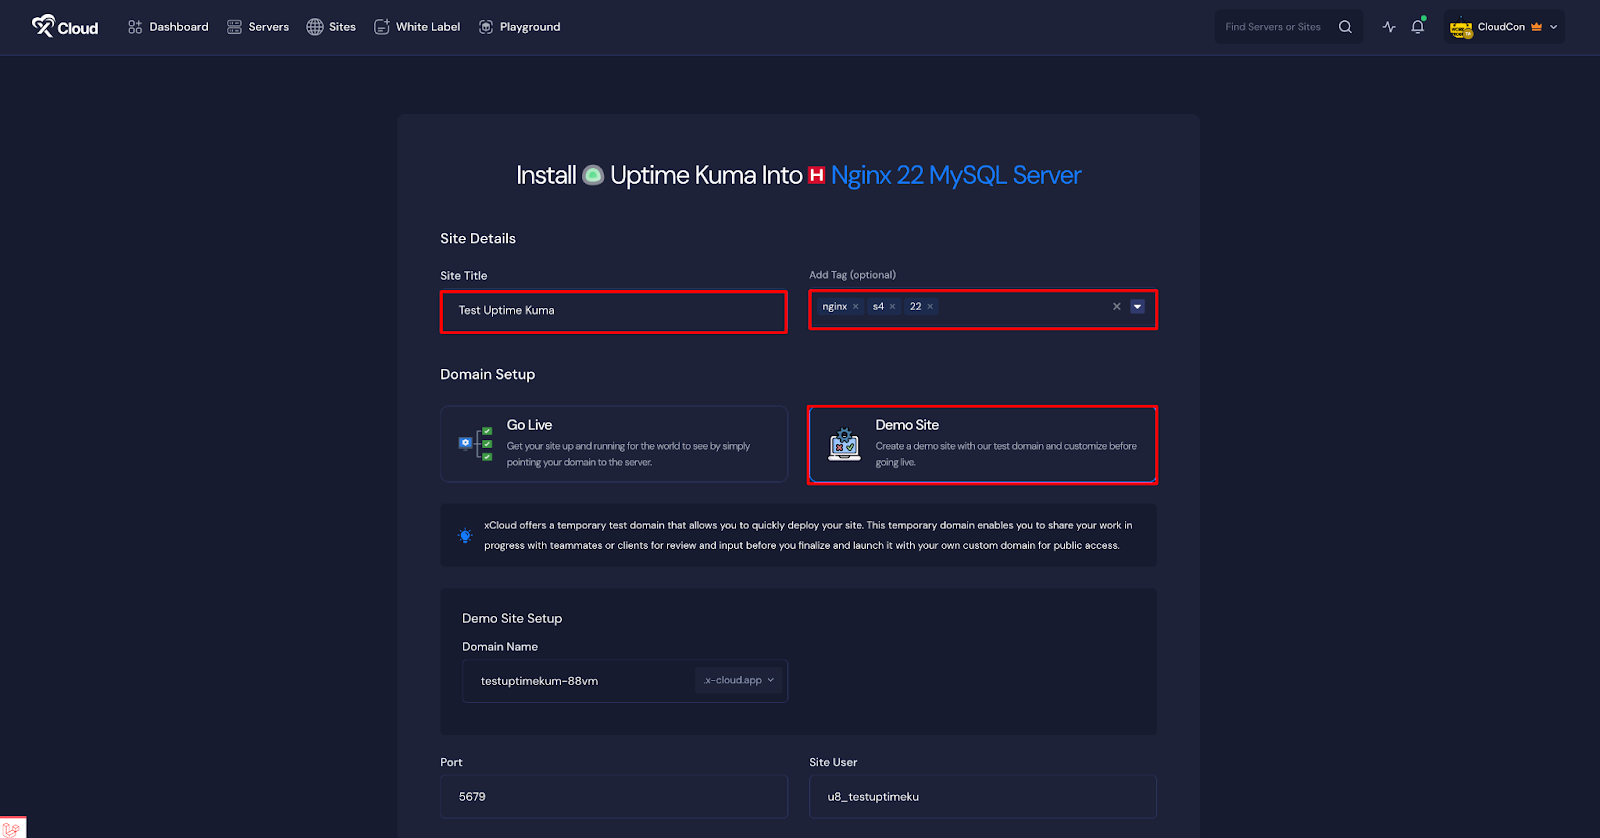
Step 3: Configure Domain Settings
If you select the ‘Demo Site’ option, xCloud will assign a temporary subdomain for your Uptime Kuma instance. Available subdomain extensions include .wp1.site and .wp1.sh, both managed through Cloudflare. These demo domains are intended for temporary use and should be used for testing and development purposes only.
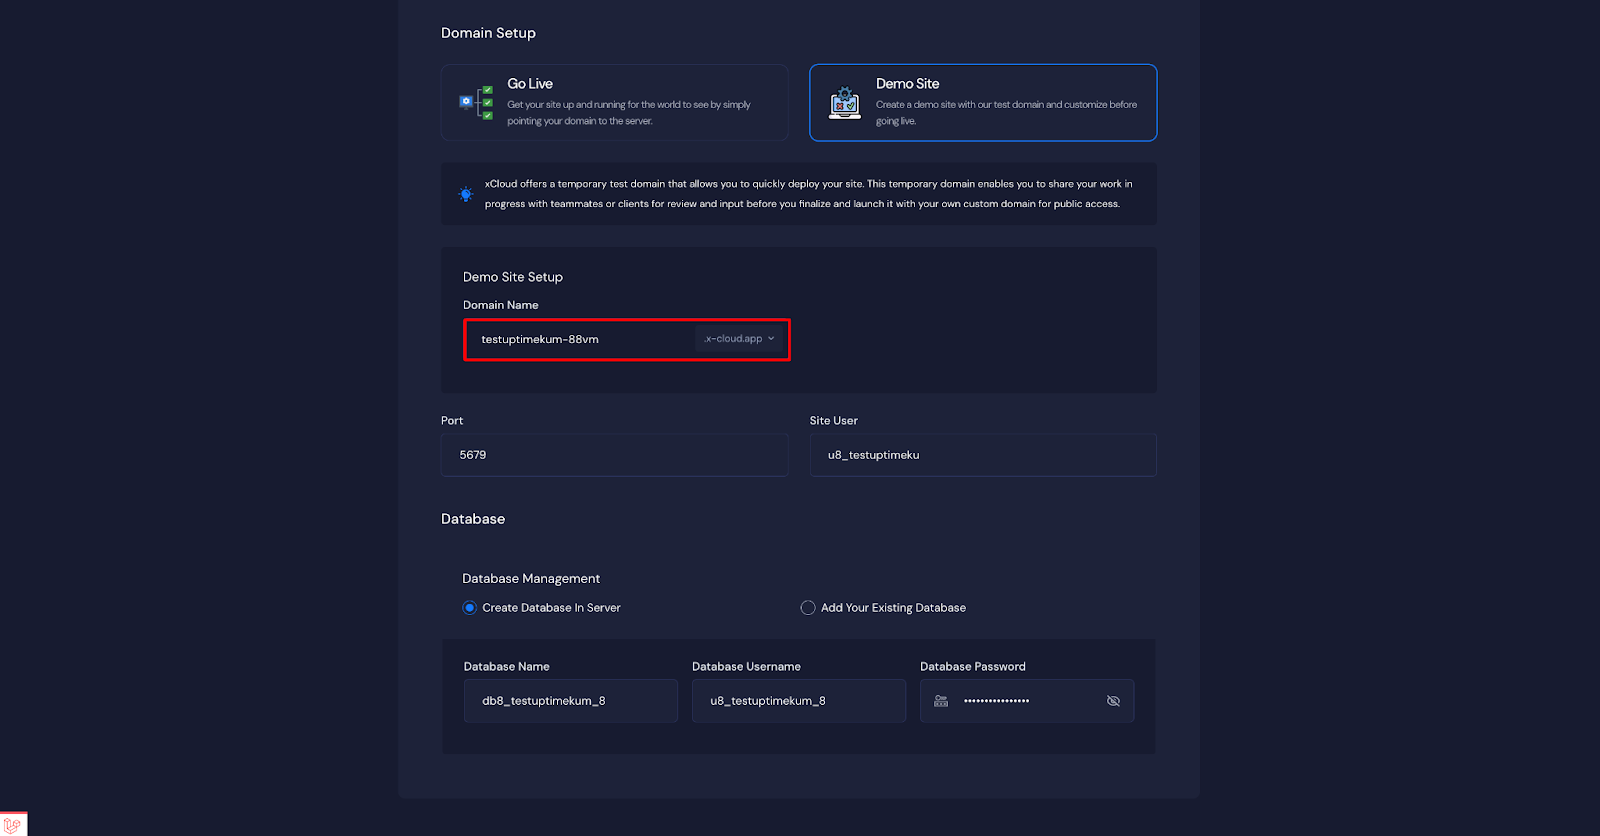
Note that once a demo site is promoted to a live environment, you cannot revert back to using the demo domain. Ensure your choice aligns with your deployment goals before proceeding.
Step 4: Configure and Install the Site
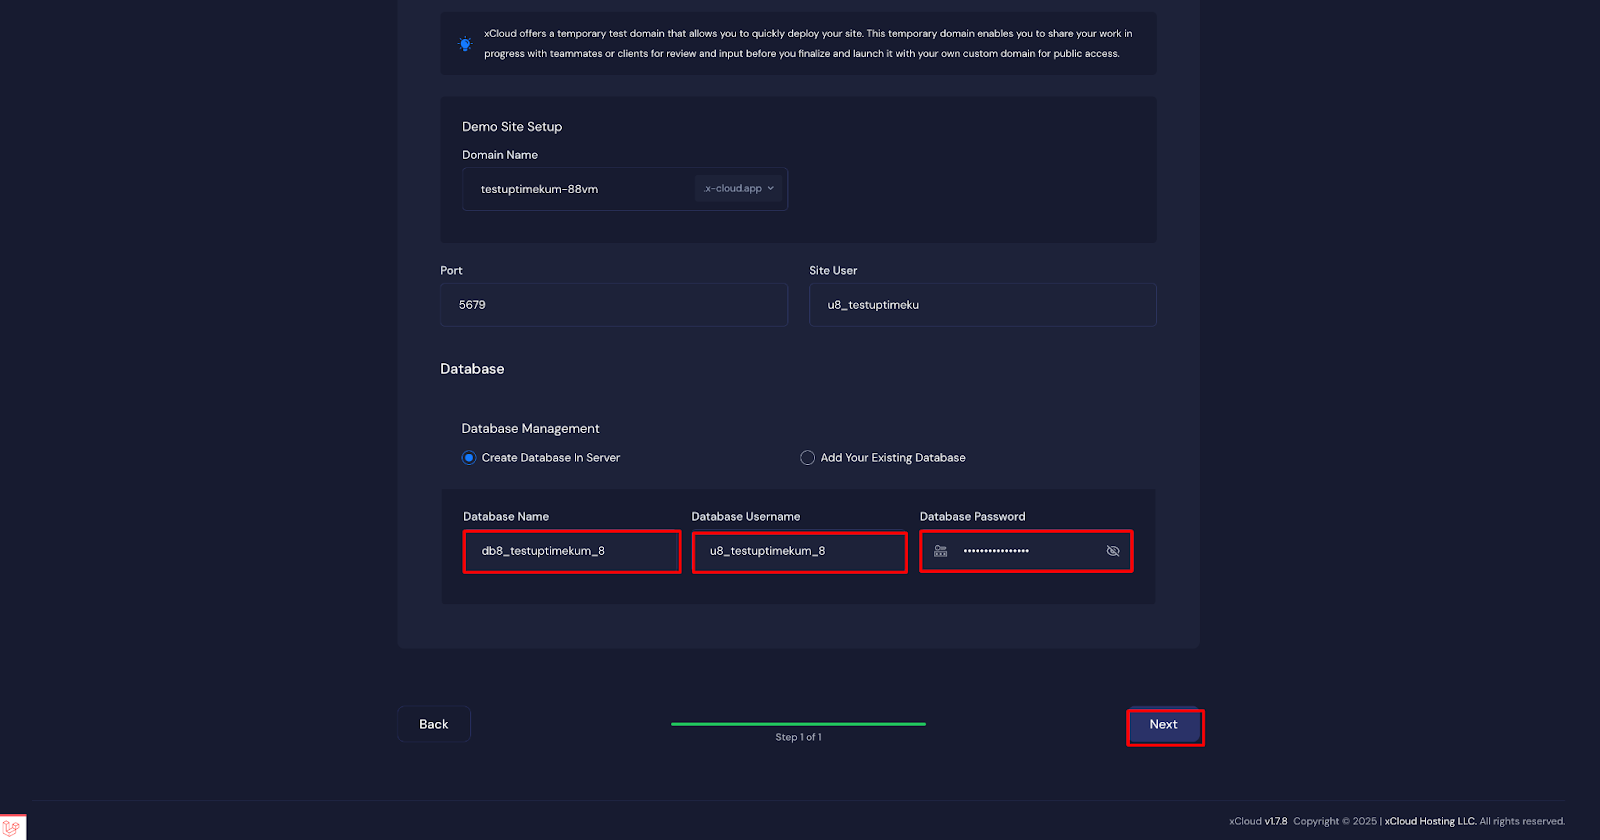
Then, a default ‘Port’ and ‘Site User’ will be selected automatically. Also, you can create a new database to ‘Create Database to a Server’ or ‘Add Your Existing Database’. Once all settings have been reviewed and configured, click the **‘**Next’ button to proceed.
Note: We recommend leaving the database settings as default xCloud will automatically create a ‘Database Name’, Database Username’ for you, if you are creating a new database.
Step 5: Visit the Uptime Kuma Site
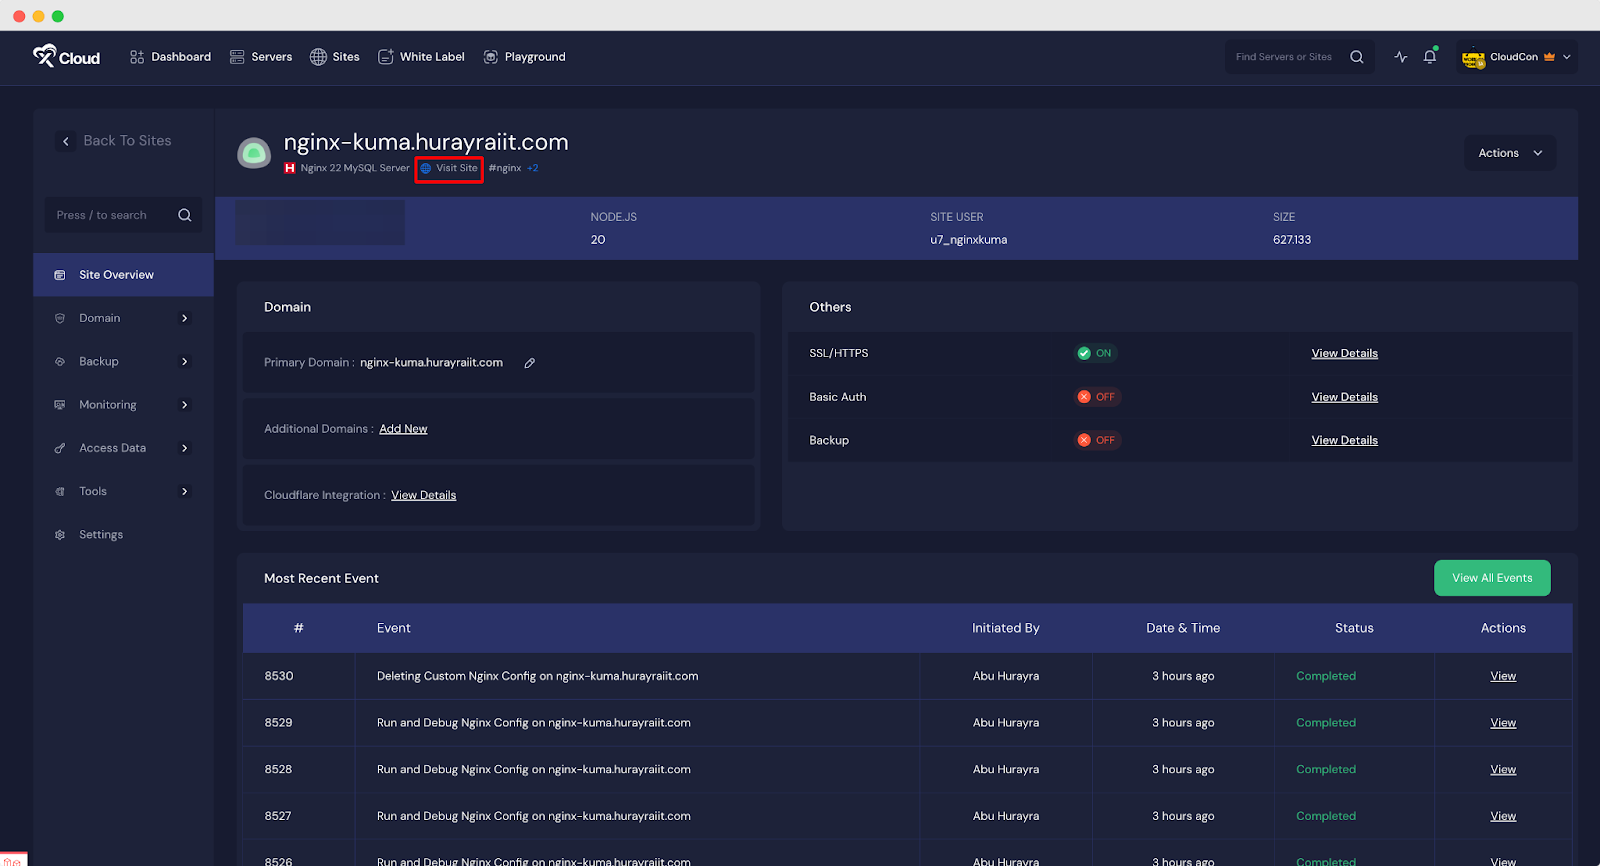
With Uptime Kuma set up with xCloud, you should be able to log in and confirm that it’s working. From the dashboard, click on the ‘Visit Site’ app.
Step 6: Go Live (optional)
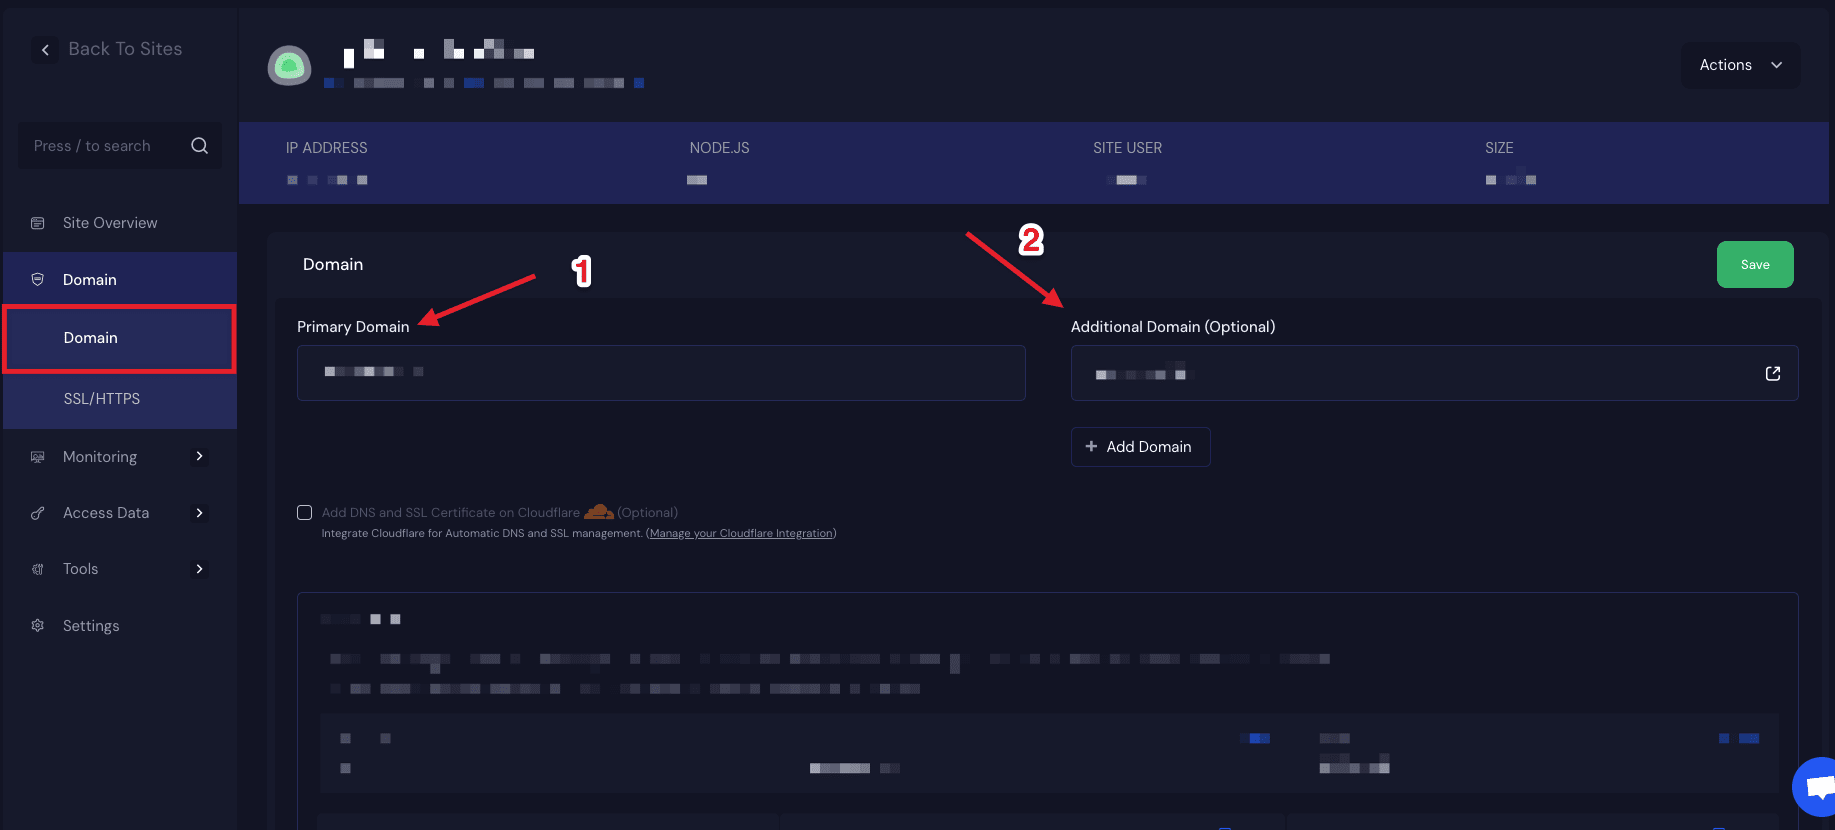
You can add your own domain to host the site by going to the Domain section. Also, you can add an Additional Domain to host the status page of Uptime Kuma with your custom domain.
Step 7: Creating a Public Status Page With a Custom Domain
Once you’ve set up your monitoring and notification systems, the next step is to build a public-facing status page. This page provides real-time visibility into the status of your services for end users, helping you communicate uptime and issues transparently.
Create a New Status Page
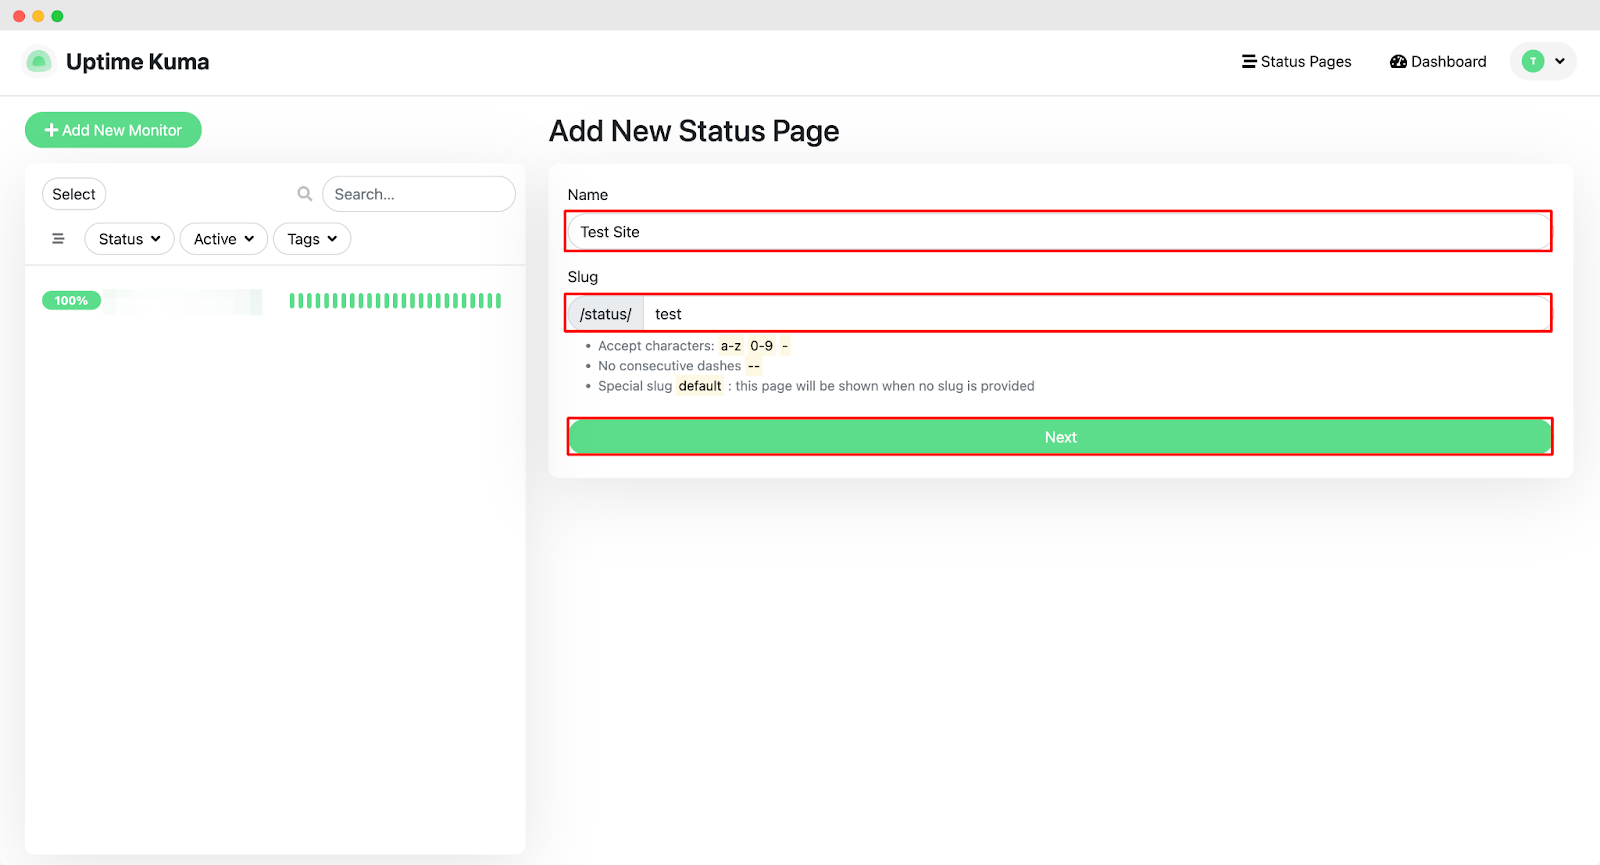
In the Uptime Kuma dashboard, locate the “Status Page” option in the navigation menu and click on it to get started. Click the “Create New Status Page” button.
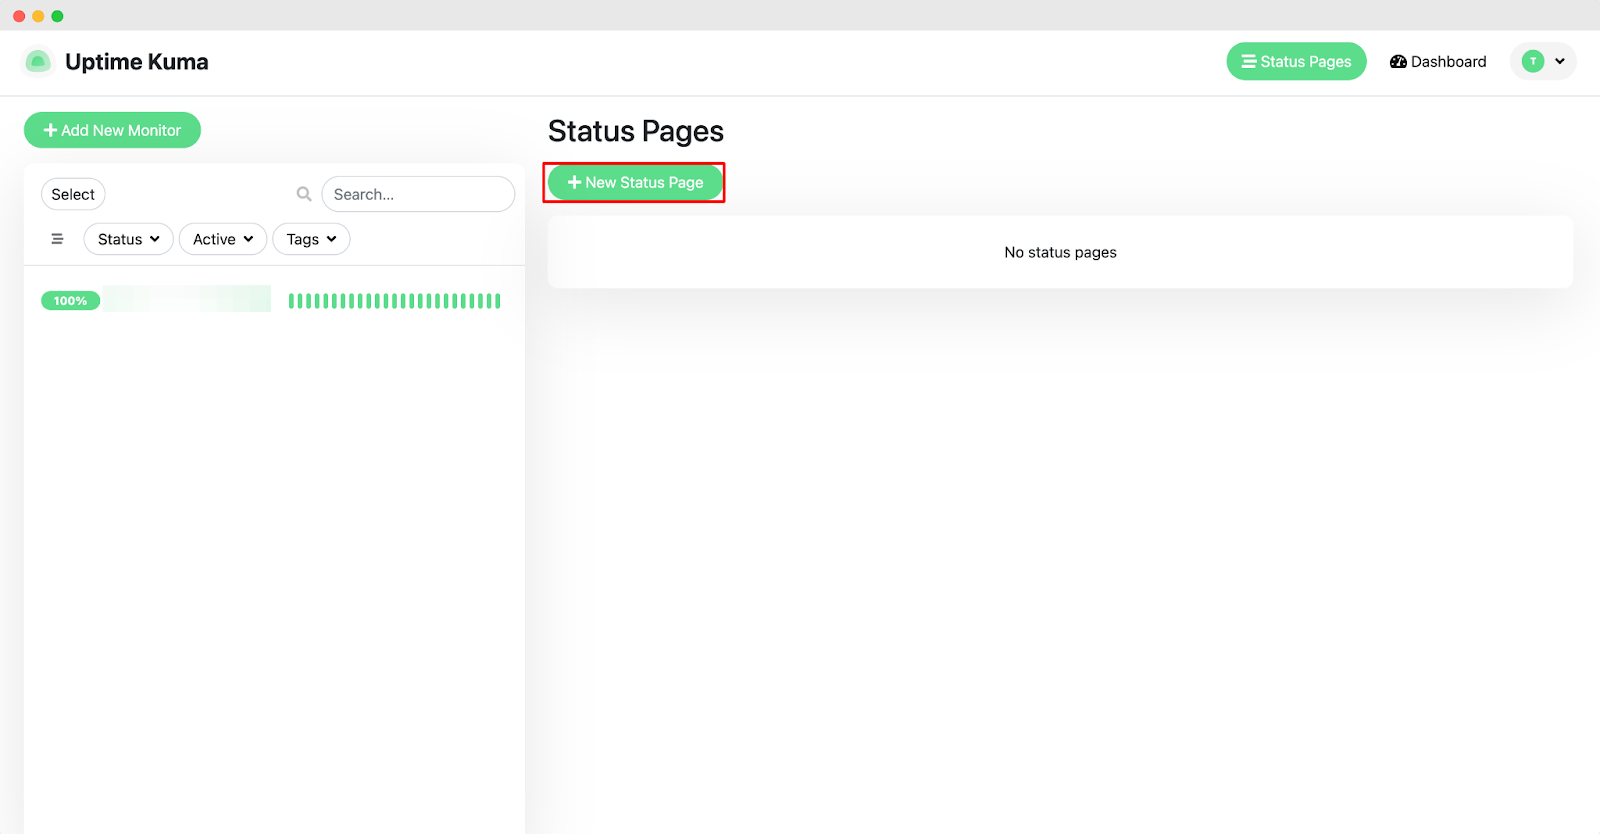
You’ll be taken to a form where you can configure basic settings. Give your page a ‘Name’. Define a custom ‘slug’ that will be used in the page URL. Then click Next once you’ve entered these initial details.
Assign Monitors & Customize the Page Information
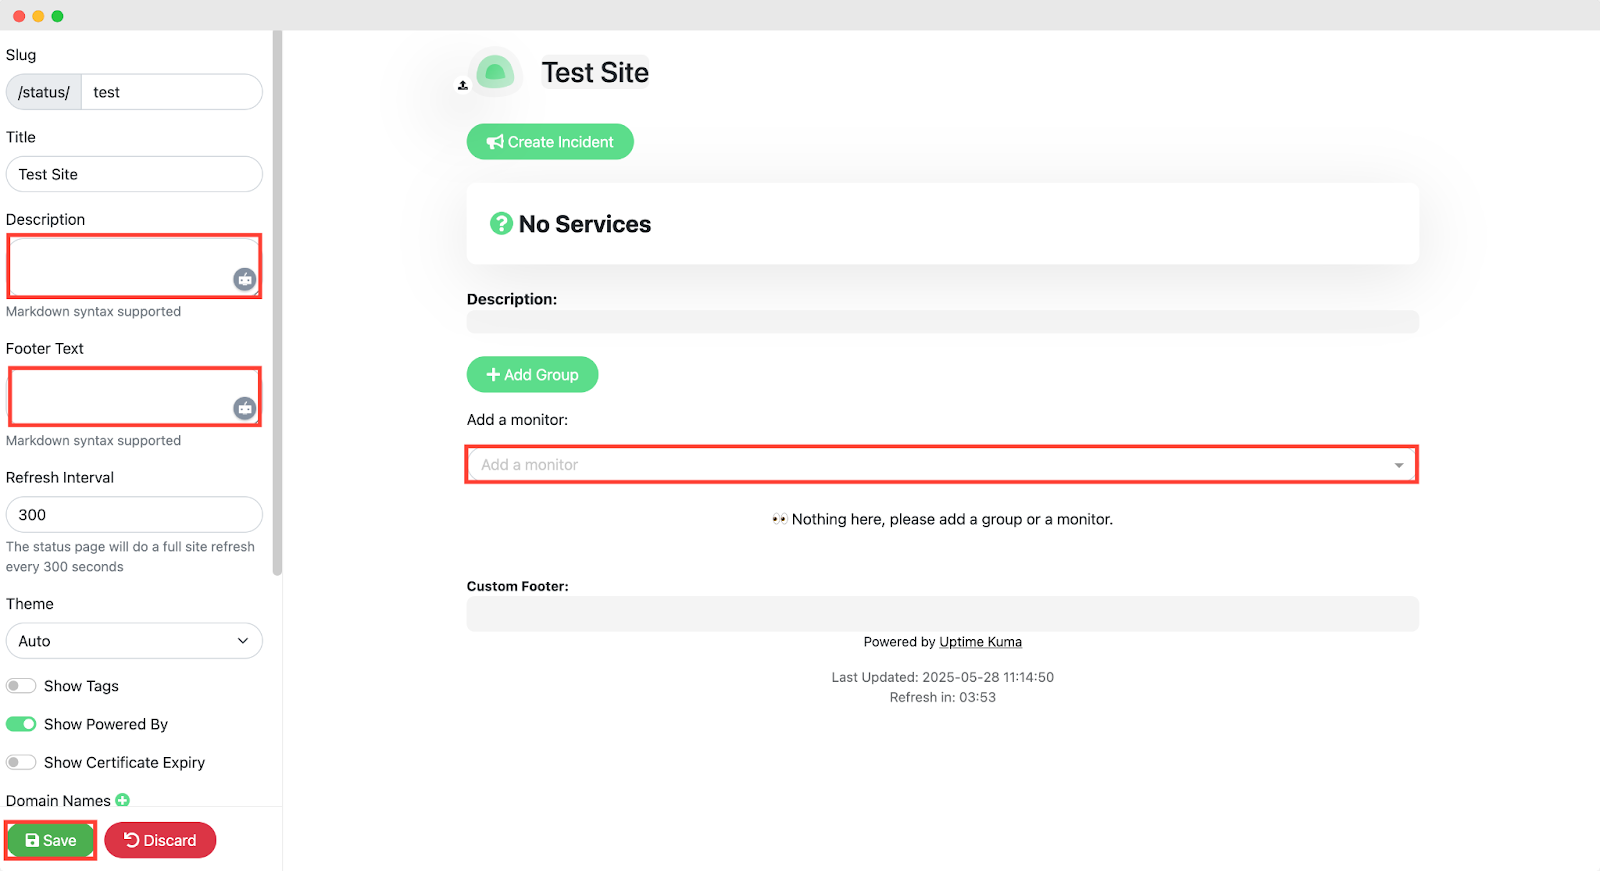
To display service statuses, click “Add Monitor” and choose which services or sites you want this page to track. These will appear on the public page as live status indicators.
You’ll now be able to add optional content to enhance the status page, such as a short ‘Description’. A ‘Footer Text’ that might include support contact info or disclaimers
Add Custom Domain
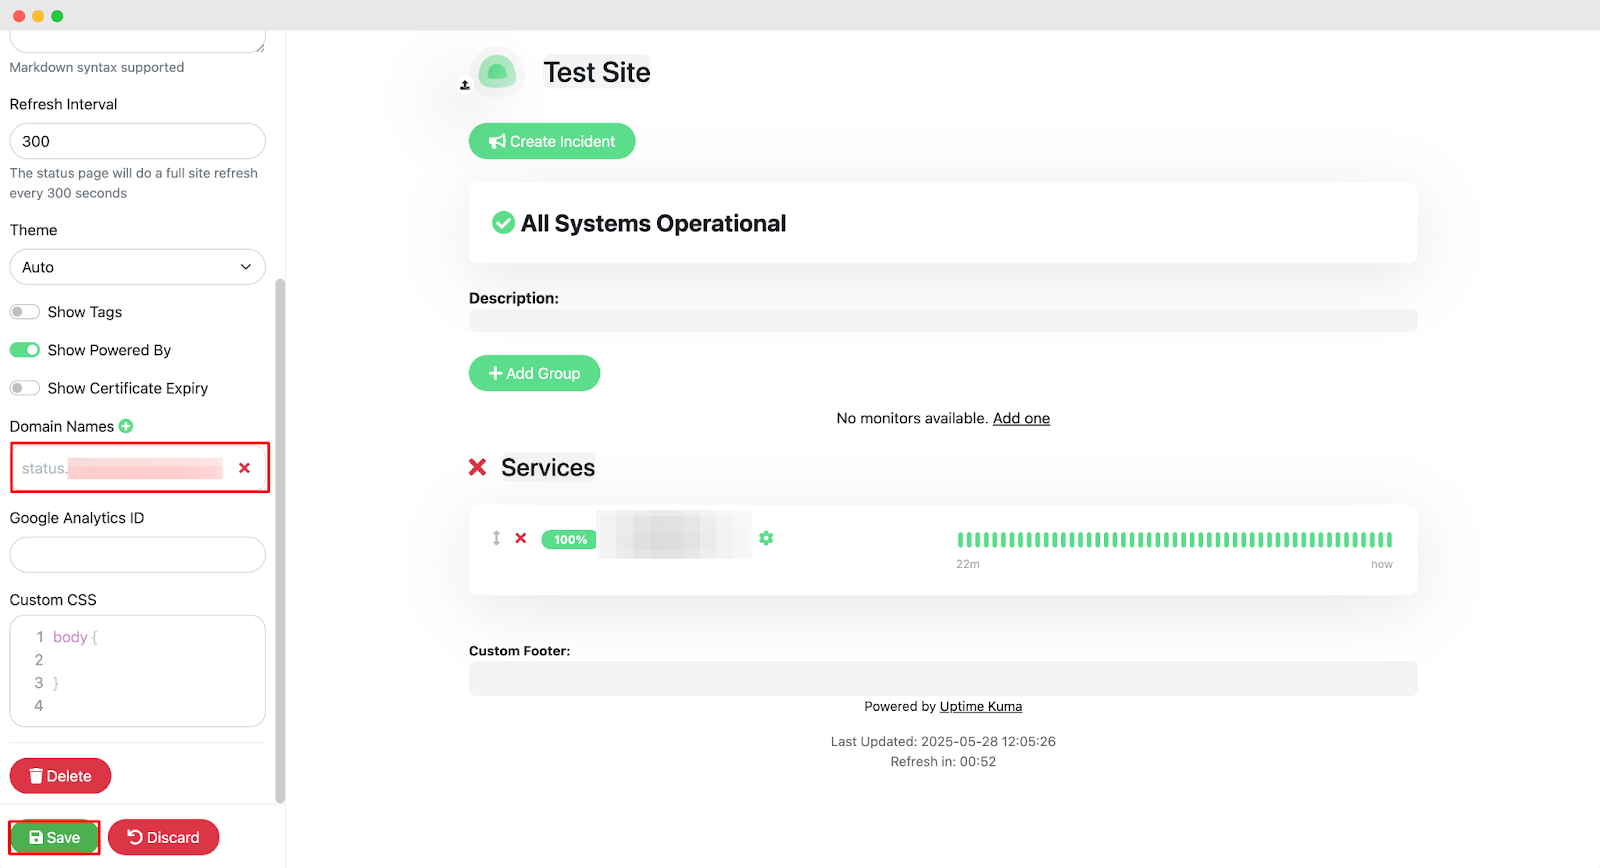
Then go to the ‘Domain Name’ and add your custom domain in the blank field. Add your custom domain here and click Save to finalize and publish the page. The status page becomes instantly accessible at the URL defined by your slug.
Step 8: Add Status Page Custom URL as an Additional Domain with xCloud
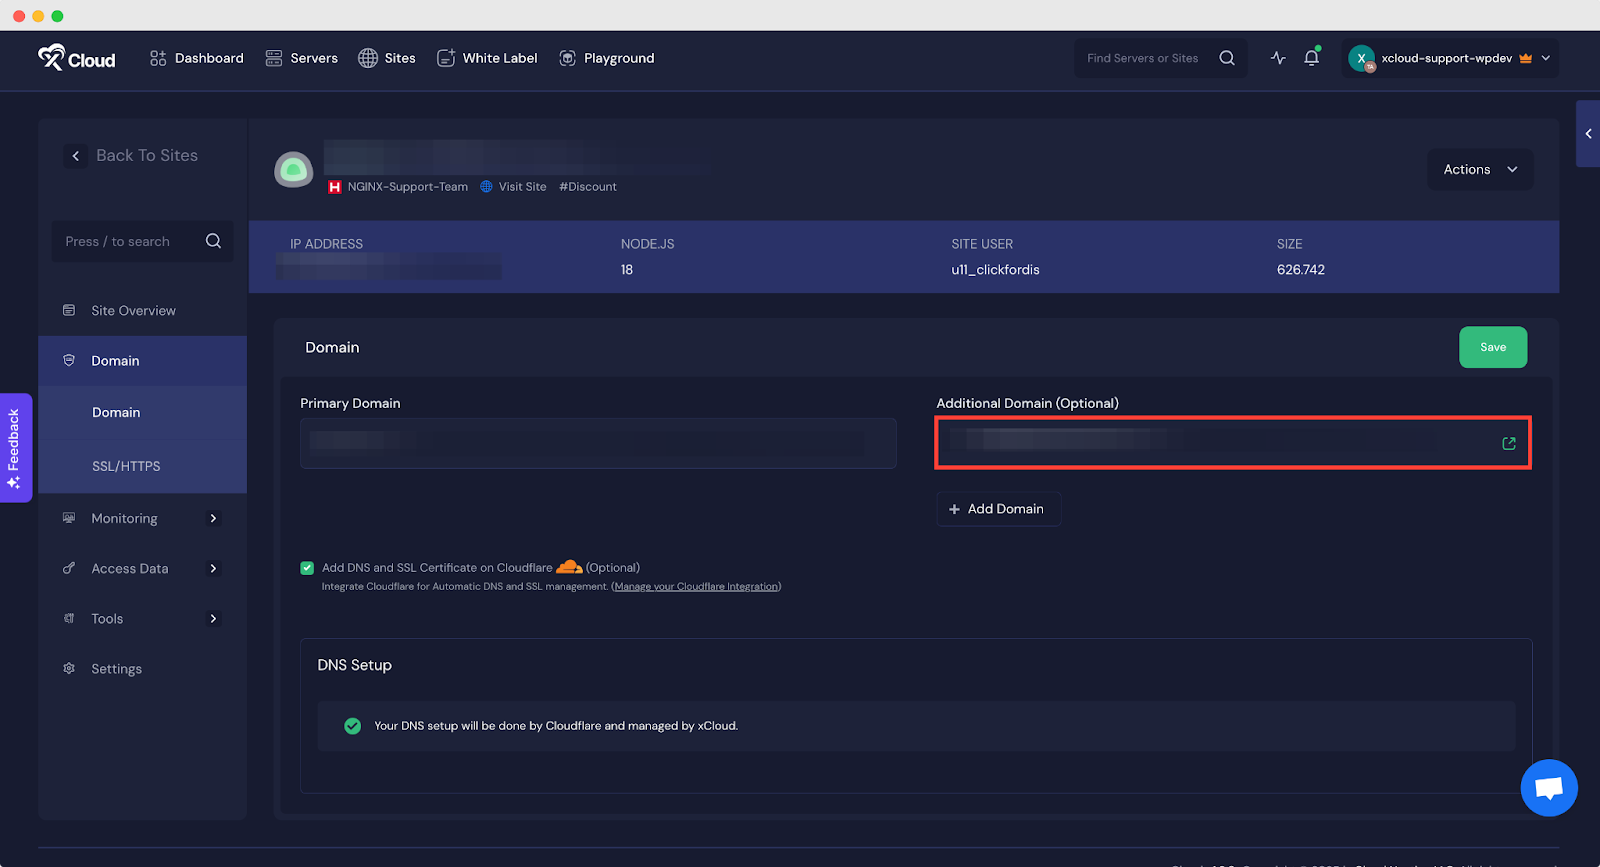
Next, go back to your Uptime Kuma site dashboard in xCloud. You can add your status page’s URL as an additional domain here. Just go to the ‘Domain’ and add the URL into the ‘Additional Domain’ and click on the save button.
Final Outcome
This will open the Uptime Kuma dialog window for registration, which should look something like the example below. Enter the registration details and hit the Next button. This should bring you to the Uptime Kuma Overview page. Now that your Uptime Kuma instance is up and running, let’s fine-tune its settings and other customizations. From here, go to the ‘Create workflow’, set according to your preferences.
And that’s it, this is how easily, within minutes, your Uptime Kuma instance will be live and accessible via the xCloud dashboard. With just a few configuration steps, you can launch a robust uptime monitoring service suited for both demo and production use.
Still stuck? Contact our support team for any of your queries.