

How to Configure Integration with Telegram in xCloud Hosting?
Updated October 29, 2026 · 4 min read
xCloud can send your server, site and team alerts to a Telegram chat through the xCloud bot, @xCloudHostingBot. You link the chat with a single-use code: xCloud shows you a command, you send it to the bot from the chat that should get the alerts, and xCloud shows you which chat sent it before you click Authorize on Telegram. Only that chat is connected.
Before you start
- Notification integrations need a paid plan. On the Free plan, xCloud does not create a link code and asks you to upgrade.
- You need a team role that can manage notifications.
- A team can connect one Telegram chat. To change it, disconnect the current one and add Telegram again.
- Telegram notifications are not available on white-label dashboards.
- Keep Telegram open on your phone or computer. You have 15 minutes to send the code.
Step 1: Open the notification integrations
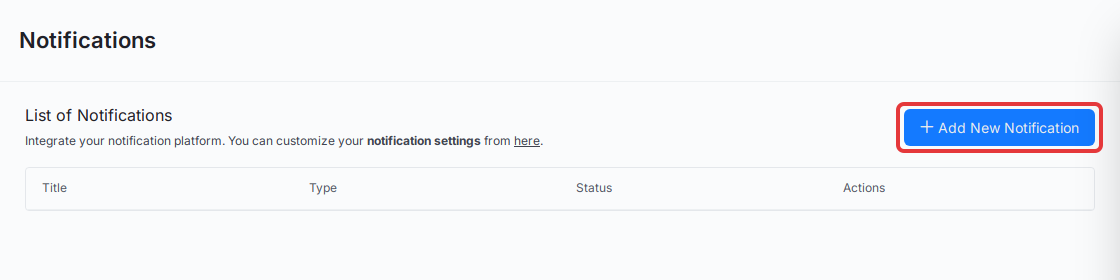
From the xCloud dashboard, go to Settings → Integrations → Notification. The Notifications page lists every notification platform your team has connected. Click Add New Notification.
Step 2: Choose Telegram
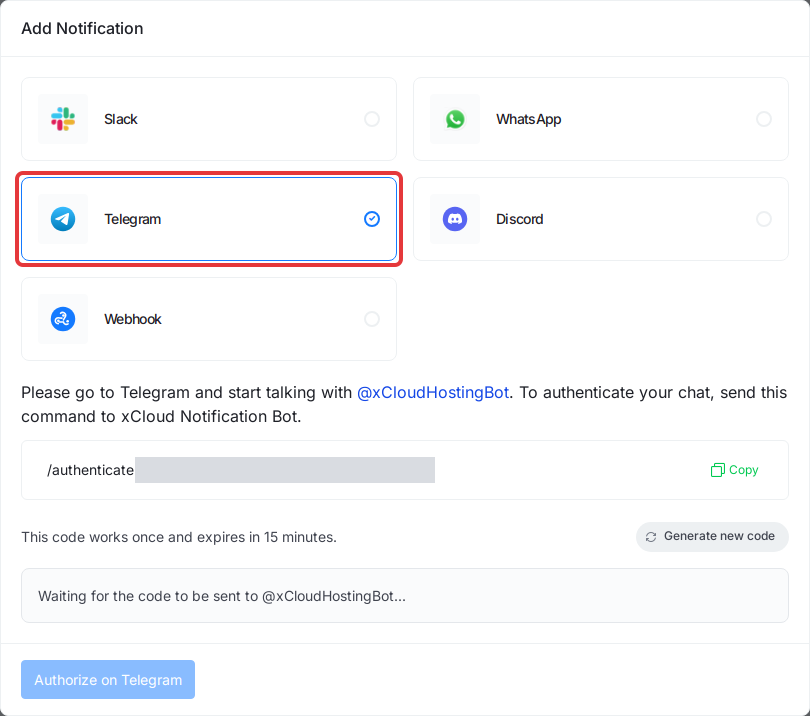
In the Add Notification window, select Telegram. xCloud creates a link code for you right away.
Step 3: Copy the command with your code
The window now shows a command that starts with /authenticate, followed by a random code. Click Copy to copy the whole command.
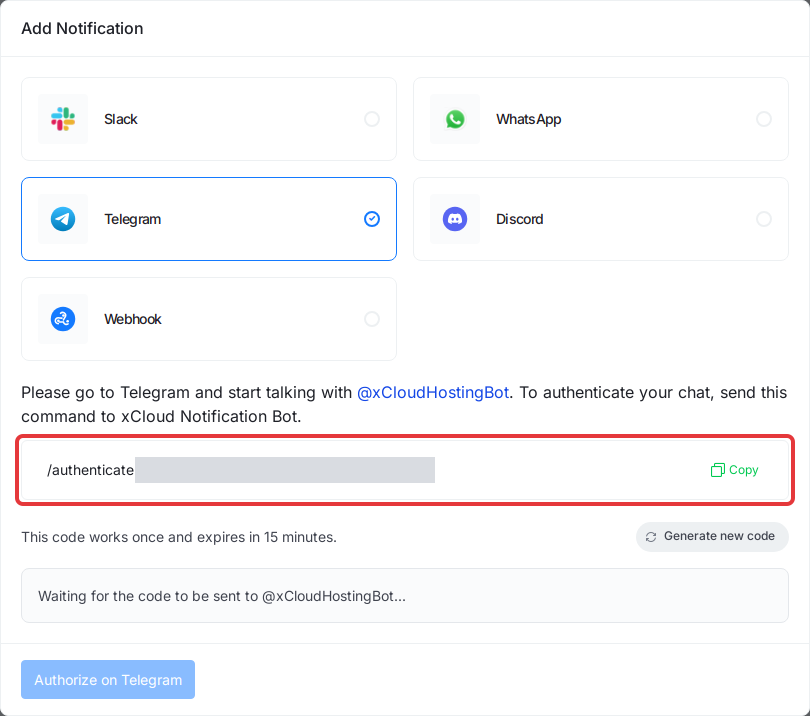
Under the command, xCloud reminds you that this code works once and expires in 15 minutes. Until a chat sends it, the box below says Waiting for the code to be sent to @xCloudHostingBot…, and Authorize on Telegram stays disabled.
Need a fresh code? Click Generate new code. The new code replaces the old one, and the old one stops working.
Step 4: Send the command to @xCloudHostingBot
Open Telegram and start a chat with @xCloudHostingBot from the account or chat that should receive your notifications. Paste the command and send it, for example:
/authenticate YOUR_CODEWhen the code is accepted, the bot replies: “Code received. Go back to xCloud, check that this chat is the one shown and click Authorize on Telegram.”
If the bot answers something else, see If the bot does not accept the code below.
Step 5: Check the chat and authorize it
Go back to xCloud. Within a few seconds, the window shows This chat sent the code and will receive your notifications:, followed by the chat’s name, its Telegram @username (if it has one) and its chat ID, such as #123456789.
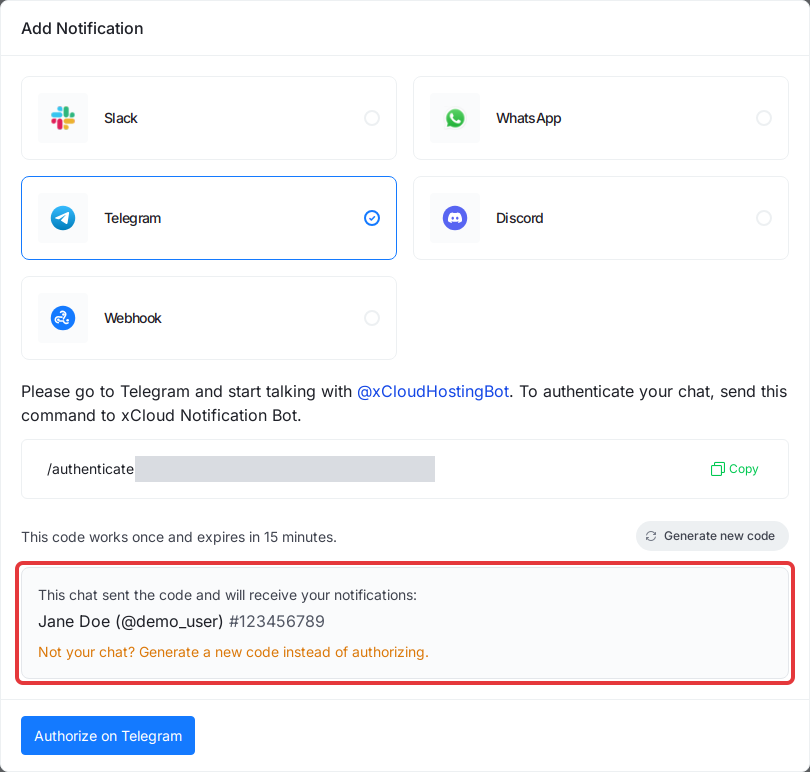
- It is your chat: click Authorize on Telegram. xCloud connects exactly that chat, shows Telegram is connected. and the bot confirms in Telegram.
- It is not your chat: follow the warning Not your chat? Generate a new code instead of authorizing. Click Generate new code and send the new command from your own chat. Never authorize a chat you don’t recognise: it would receive your server and site alerts.
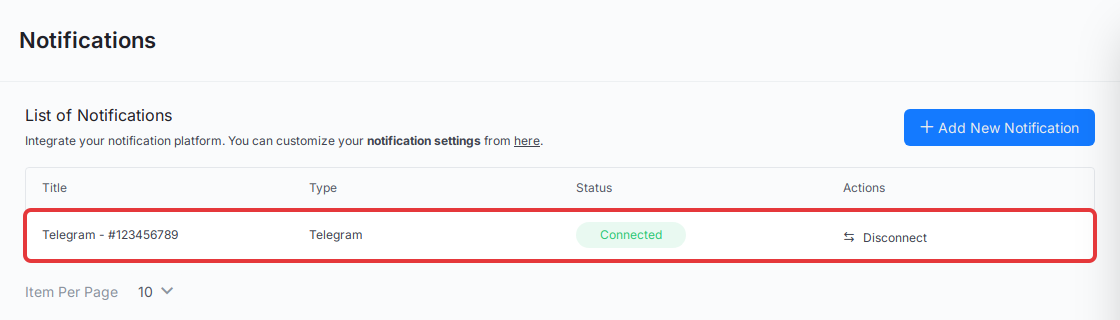
The connected chat now appears in the List of Notifications as Telegram - # followed by its chat ID, with the status Connected.
Step 6: Choose the notifications Telegram gets
Connecting the chat does not turn on any alerts by itself. Go to Settings → Notifications (or click here in the line above the list). Tick Telegram for Server Notifications, Site Notifications and Other Notifications, as you need, then click Save Changes.
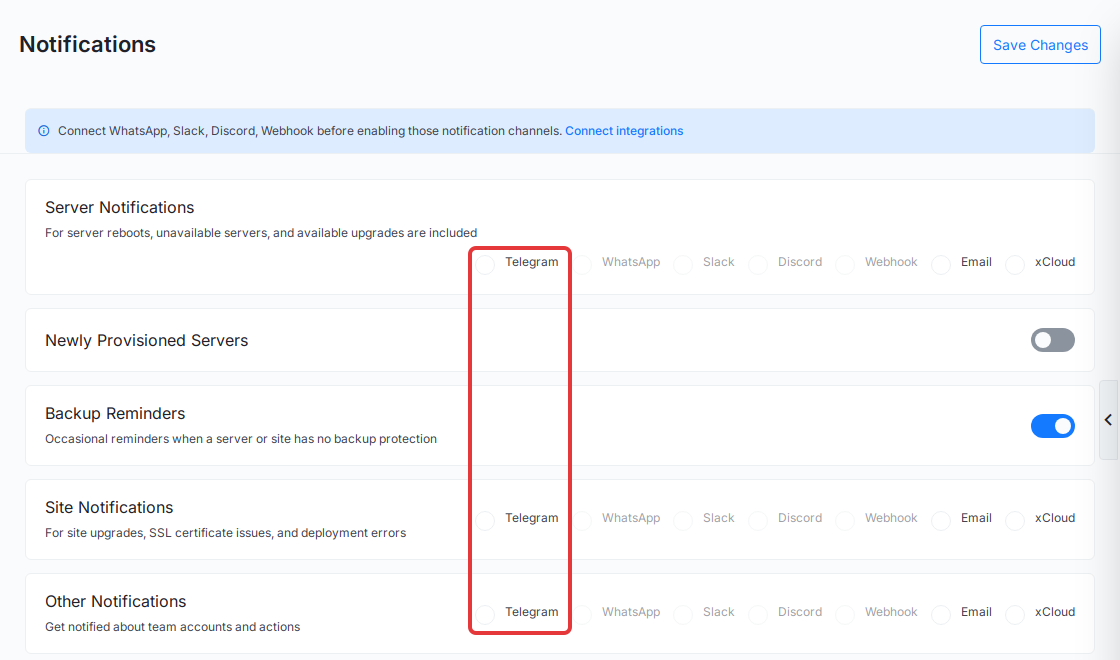
The Telegram options stay greyed out until a Telegram chat is connected.
If the bot does not accept the code
| The bot replies | What it means | What to do |
|---|---|---|
| “This code was already used by another chat.” | A different chat sent this code first. | Click Generate new code in xCloud and send the new command from your chat. Don’t authorize the chat xCloud shows. |
| “Sorry, unable to authenticate. Your code is invalid or has expired.” | The code is older than 15 minutes, was replaced by a newer code, was already used to connect a chat, or was mistyped. | Click Generate new code and send the new command. Copy it with Copy rather than typing it. |
| “This xCloud team already has a Telegram chat connected.” | Your team has a connected Telegram chat. | Disconnect the current chat first (see below), then add Telegram again. |
| “You must provide <token> to attempt authentication.” | You sent /authenticate without the code. |
Send the full command you copied in Step 3. |
If the window says This code has expired. Generate a new code., the 15 minutes are over or the code was replaced. Click Generate new code and start again from Step 4.
Disconnect Telegram
To stop Telegram alerts, go to Settings → Integrations → Notification, click Disconnect next to the Telegram chat, and confirm. Sending /revoke to the bot does not disconnect it; the bot points you to this button.
A chat you connected before the single-use code was introduced keeps working. You don’t need to link it again.
Frequently asked questions
How long does the Telegram link code last?
The code works once and expires 15 minutes after xCloud creates it. If it expires, or you close the window, click Generate new code and send the new command to @xCloudHostingBot.
What if the dashboard shows a chat that is not mine?
Do not click Authorize on Telegram. Click Generate new code instead: the old code stops working, and you can send the new one from your own chat.
Do I need to reconnect a Telegram chat I linked before?
No. A Telegram chat that is already connected keeps receiving notifications. The single-use code is only used when you connect a chat.
Can I connect more than one Telegram chat?
No. A team can have one connected Telegram chat. To use a different chat, click Disconnect on the current one, then add Telegram again.
Related docs
- Configure Slack integration in xCloud
- Configure integration with WhatsApp
- Send xCloud notifications to Discord or a webhook
- Disable notifications in xCloud
If you run into any issues while connecting Telegram, feel free to reach out to our support team.