

How to Integrate Backblaze Storage Provider For Site Backup With xCloud?
Updated June 12, 2025 · 3 min read
Backing up your website data is important for maintaining a reliable and secure cloud environment. Backblaze is a cloud storage and data backup service known for its affordability, simplicity, and security. A cost-effective object storage service, similar to Amazon S3, used for storing large volumes of data, backups, and hosting files.
In this guide, we will learn how to integrate Backblaze Storage provider with xCloud to set up a seamless, efficient backup solution for your site. Ready to set up Backblaze Storage in xCloud? Let’s dive into the step-by-step guide.
Note: Backblaze provides the first 10GB of B2 Cloud Storage for FREE
Steps to Integrate Backblaze Storage Provider With xCloud & Backup Site
Follow the steps below to integrate Backblaze B2 storage provider with xCloud and backup your site with ease:
Step 1: Create a New Storage Bucket
After logging in to your Backblaze account and go to the ‘Buckets’ page. Click on the ‘Create a Bucket’ button and enter a unique name for your bucket. Adjust the other settings, and click on the ‘Create a Bucket’ button to create a fresh bucket.
Note: Make sure you have chosen ‘Disable’ for the ‘Object lock’ option.
Step 2: Create a New Application Key
Next, we need to generate Backblaze API keys. Click on the ‘Application Keys’ button under the ‘Account’ menu to go to the API keys tab. Then hit on the
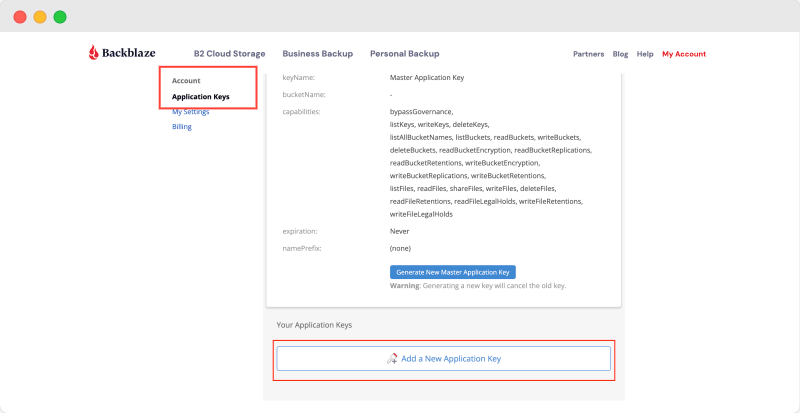
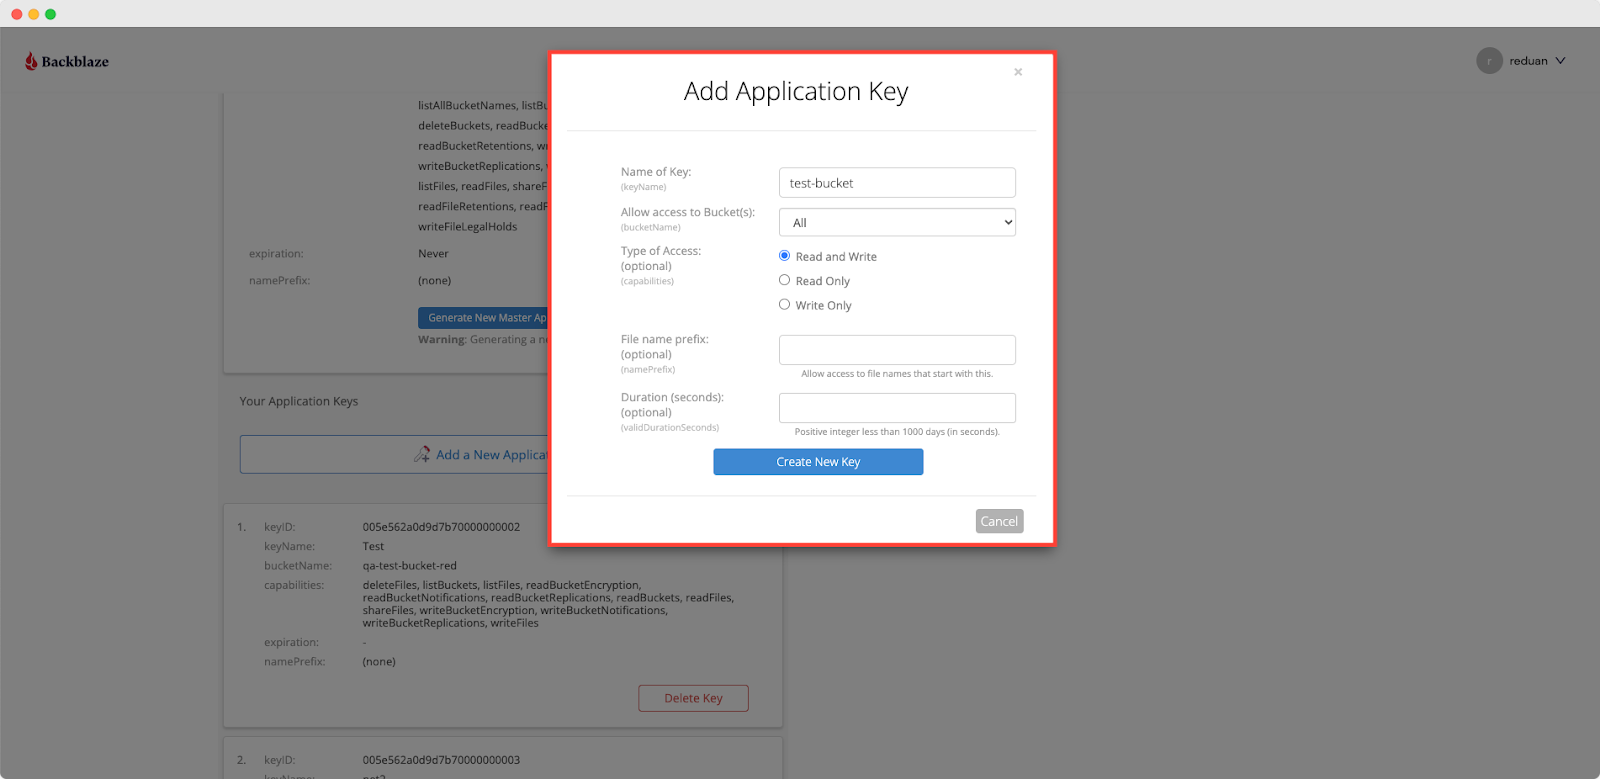
Enter a name for your key and select the bucket you created in the previous step. Choose ‘Read and Write’ as the access level, and then click on the ‘Create New Key’ button.
On the next screen, you will see the three find application credentials ‘Key ID’, ‘Key Name’ and ‘Application key’ that you need to copy for integrate with xCloud
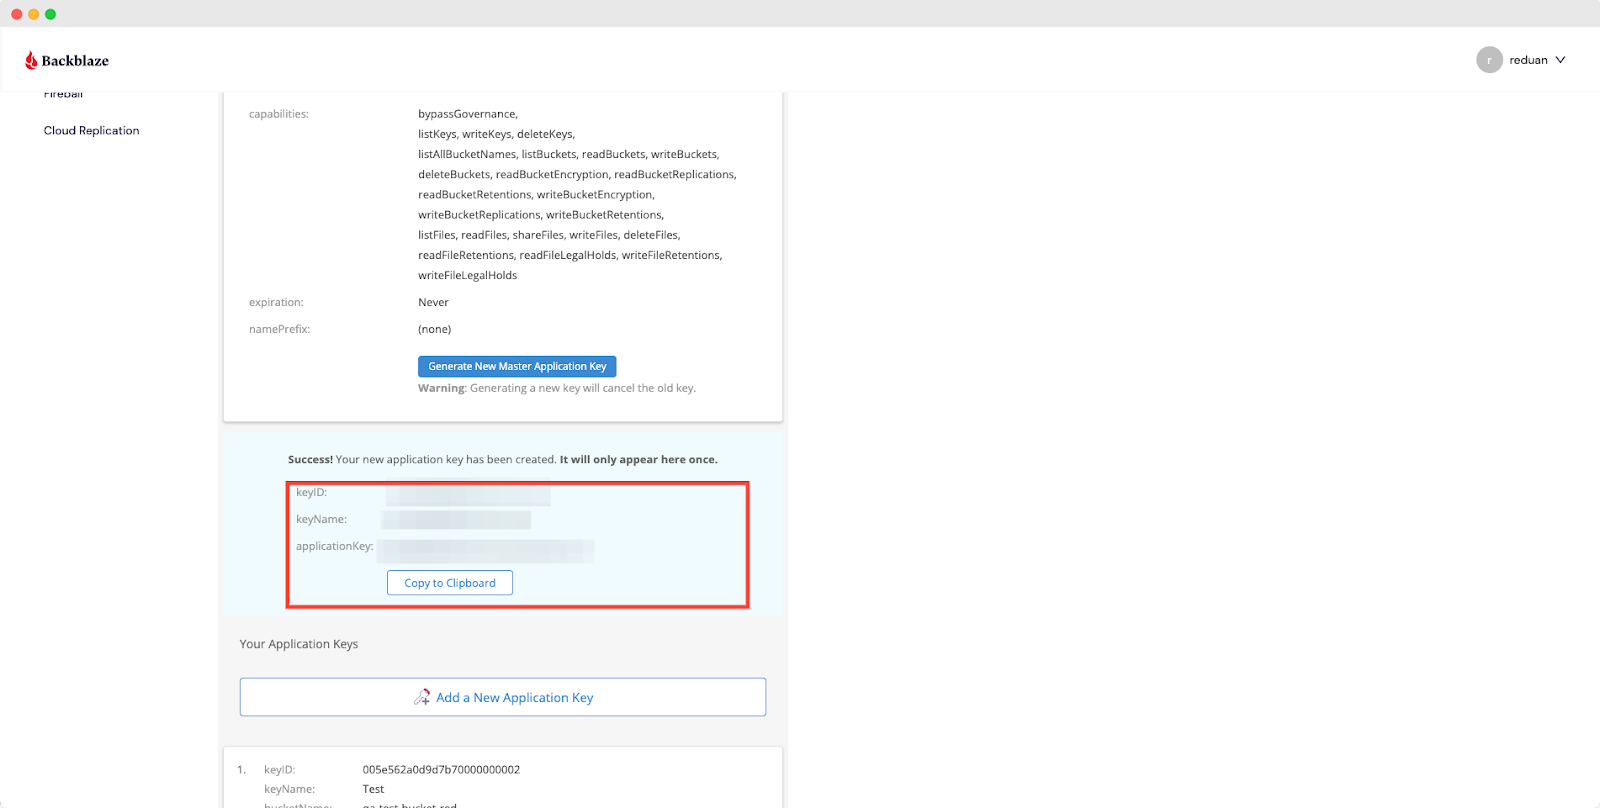
Note: Do not close this tab until you copy the keys, because you will only see these keys once.
Configure Backblaze Storage Provider For Site Backup With xCloud
Since you have collected everything that you need from the Backblaze end, now let’s see how you can configure Backblaze storage for site backup in xCloud.
Step 3: Login & Access New Provider
Login to your xCloud dashboard, and navigate to ‘Team Settings’ → ‘Integrations’ → ‘Storage Provider’ & click on ‘Add New Provider.’
Step 4: Select The Backblaze Storage Provider
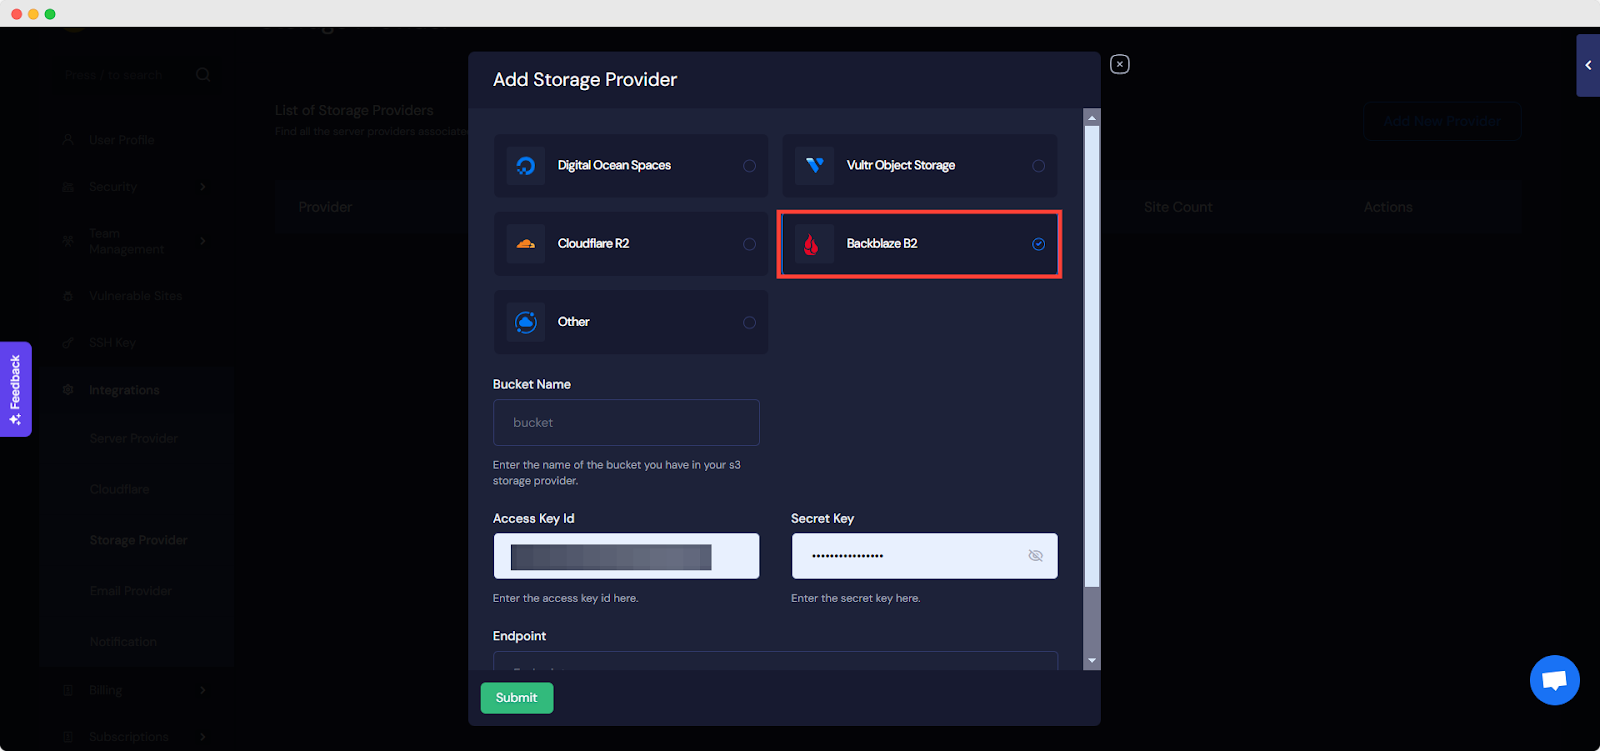
On the resulting page, click on ‘Select Provider‘ to expand the dropdown option. And select ‘Backblaze‘ as your storage provider.
Step 5: Fill Up All the Necessary Information
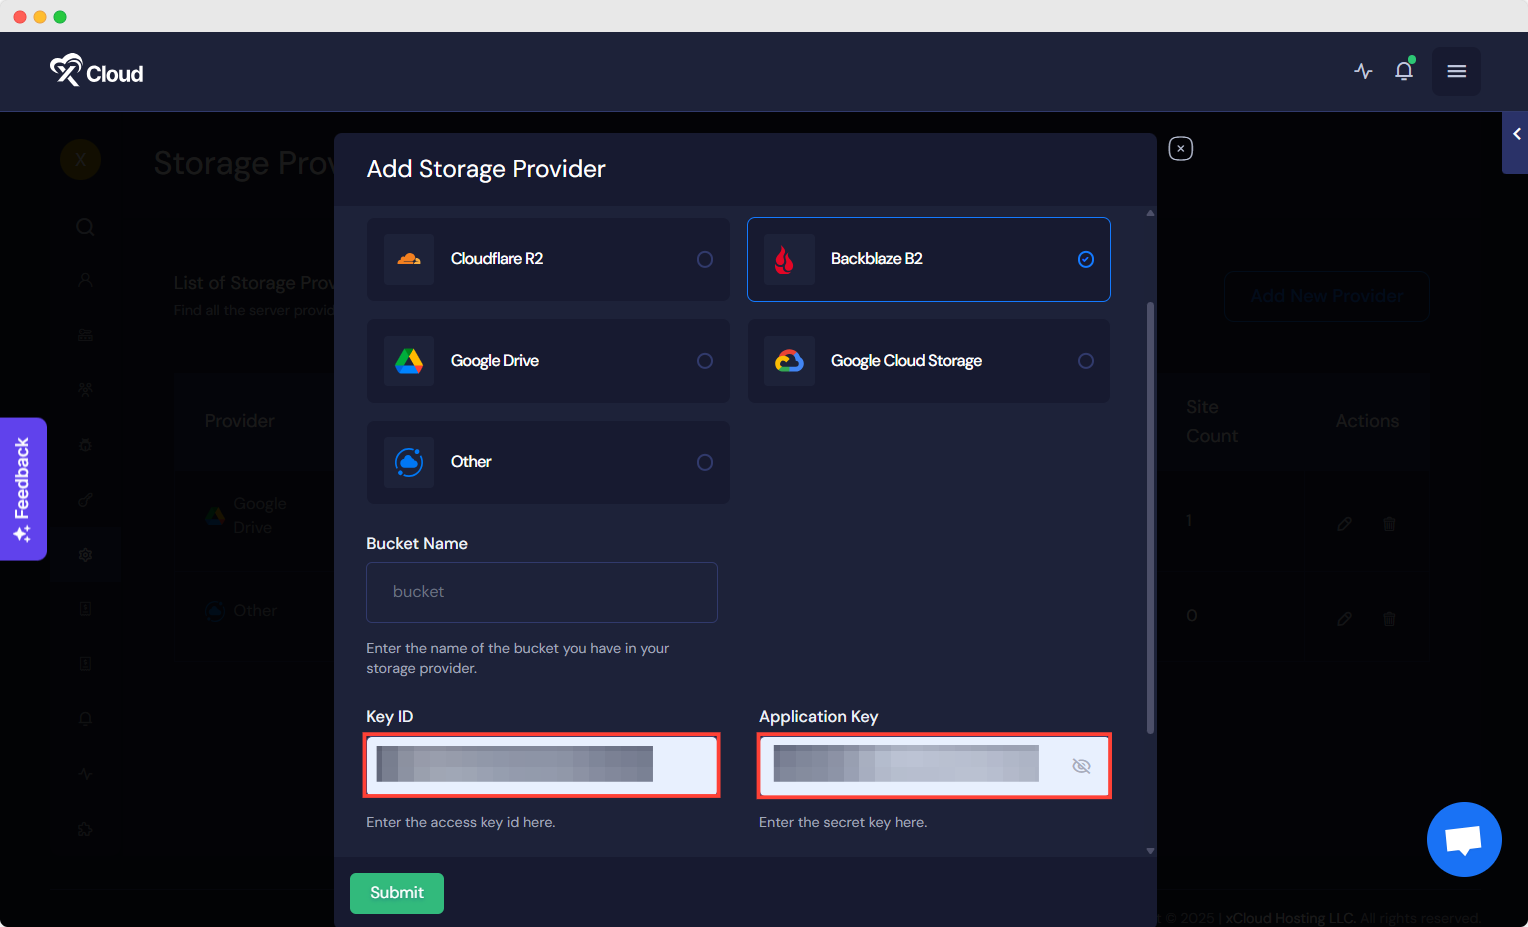
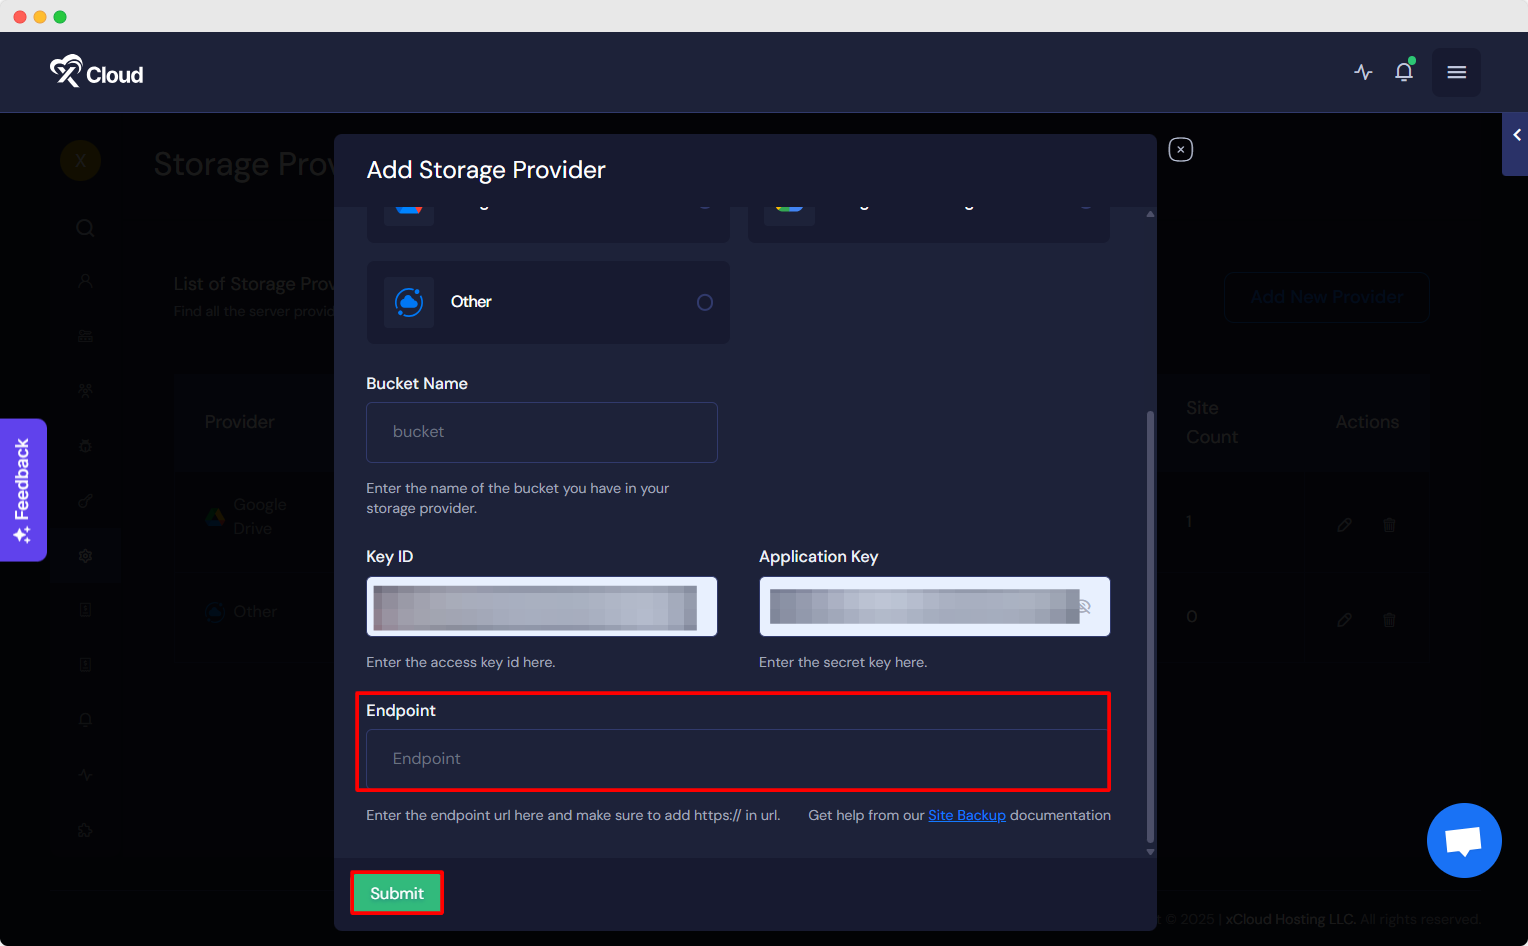
Now, fill in your ‘Bucket Name’, ‘Access Key ID’, ‘Secret Key’ that you have copied in the dedicated fields.
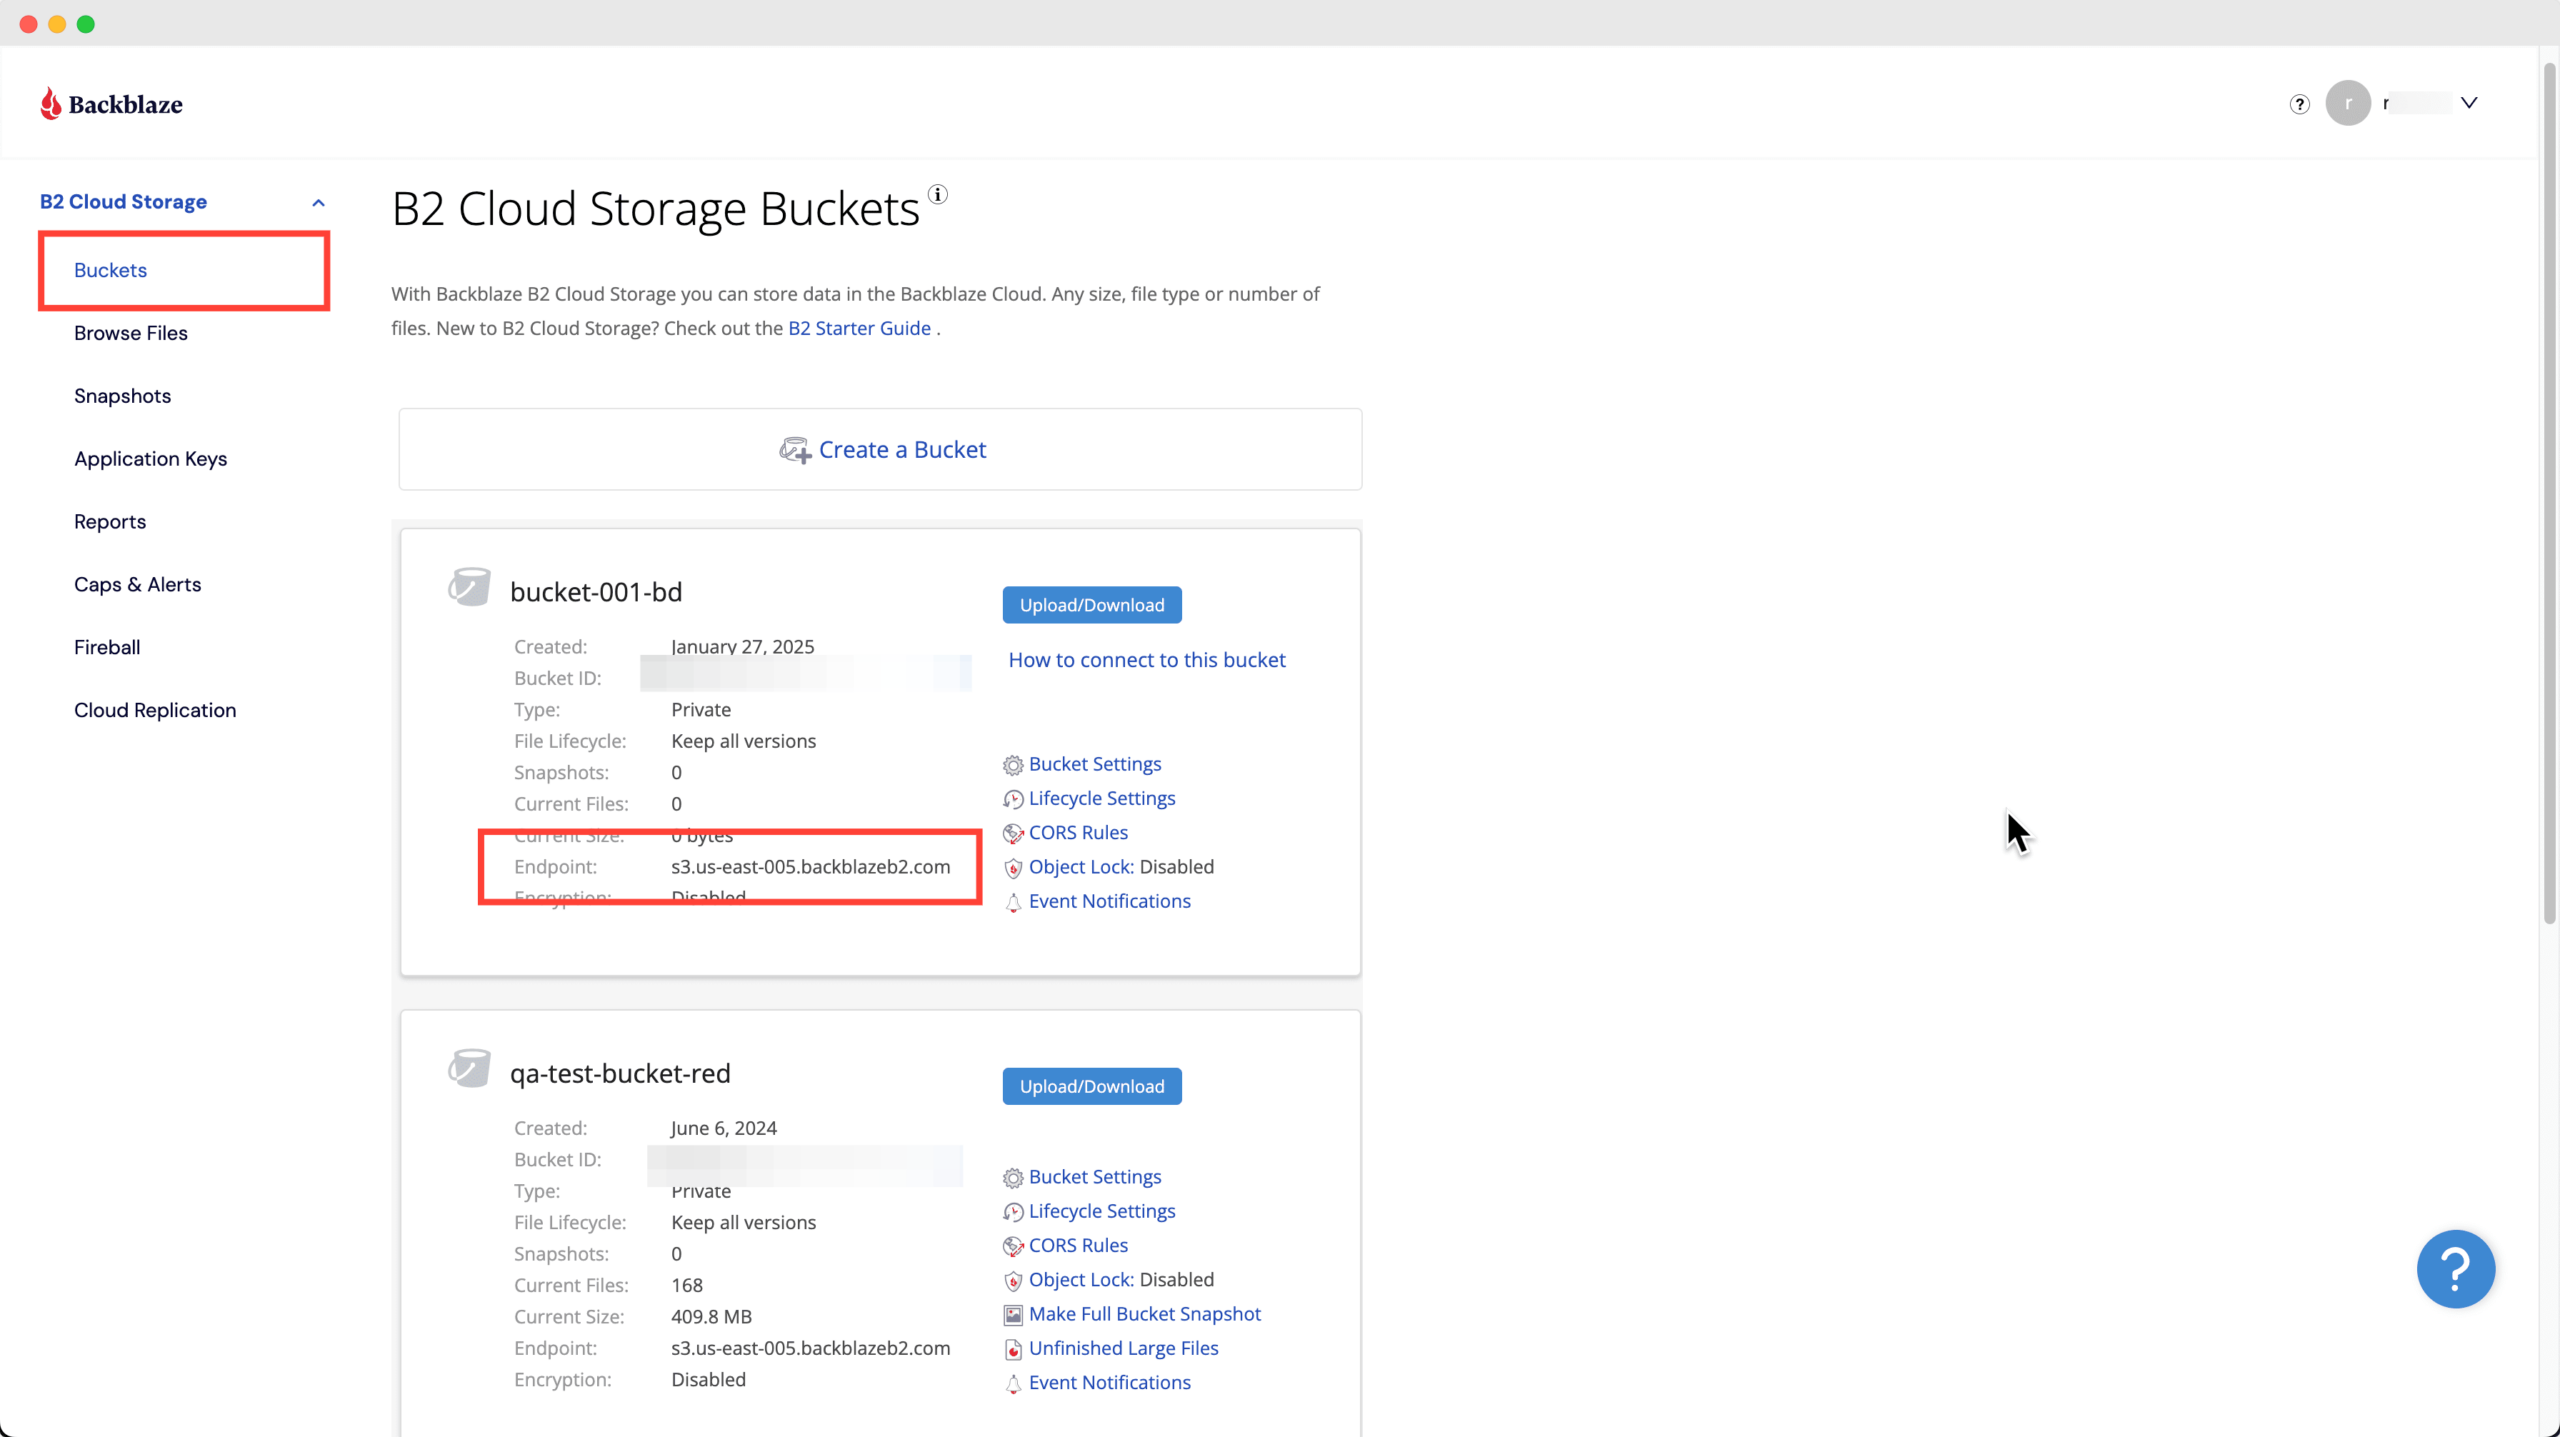
Next go back to the Backblaze dashboard, click on the ‘Buckets’ option. Then copy the ‘Endpoint’ from your created bucket.
Next, go back to your xCloud dashboard and paste the ‘Endpoint’ into the blank field. Once everything is done, click on ‘Submit’.
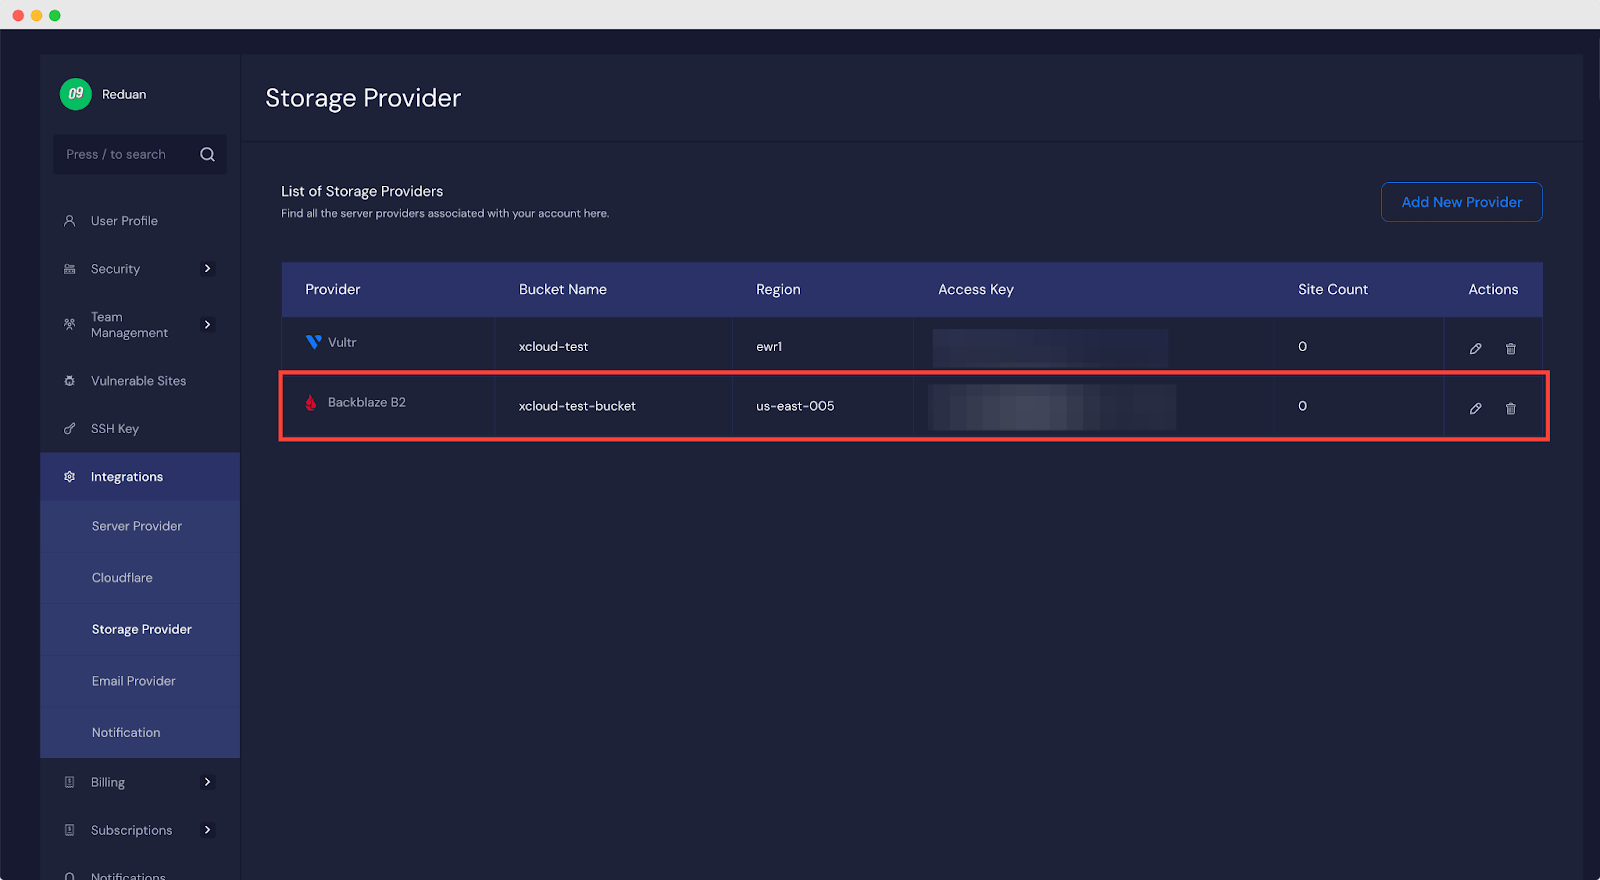
Once you have submitted it, your Backblaze storage will be added to xCloud, you can use it for site backup. Here’s how it looks in your dashboard once it gets connected successfully.
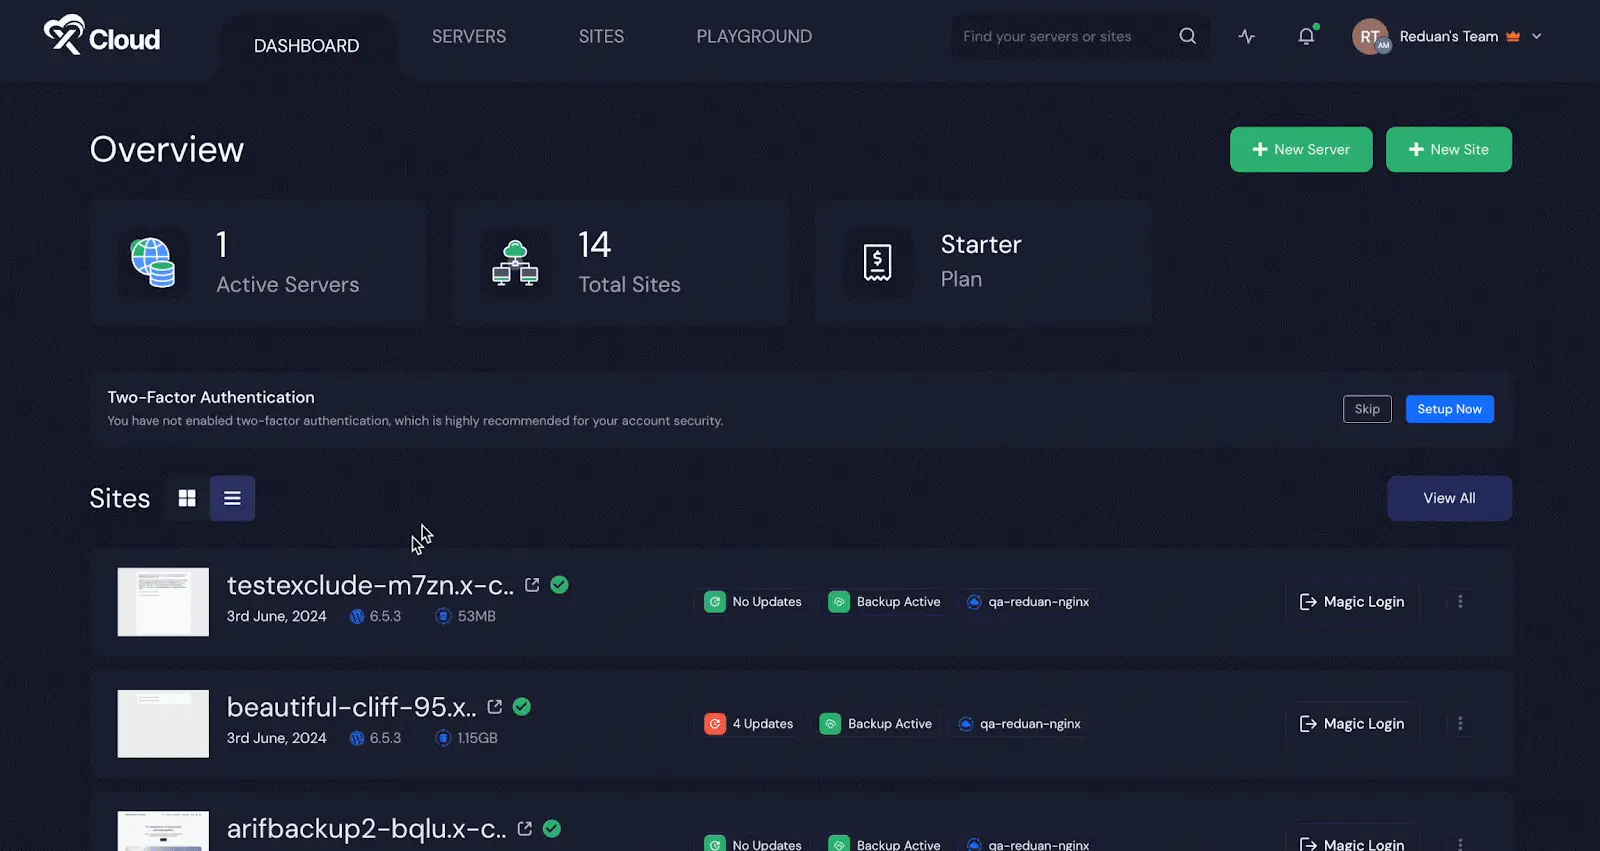
Step 6: Configure Site Backups Settings in xCloud
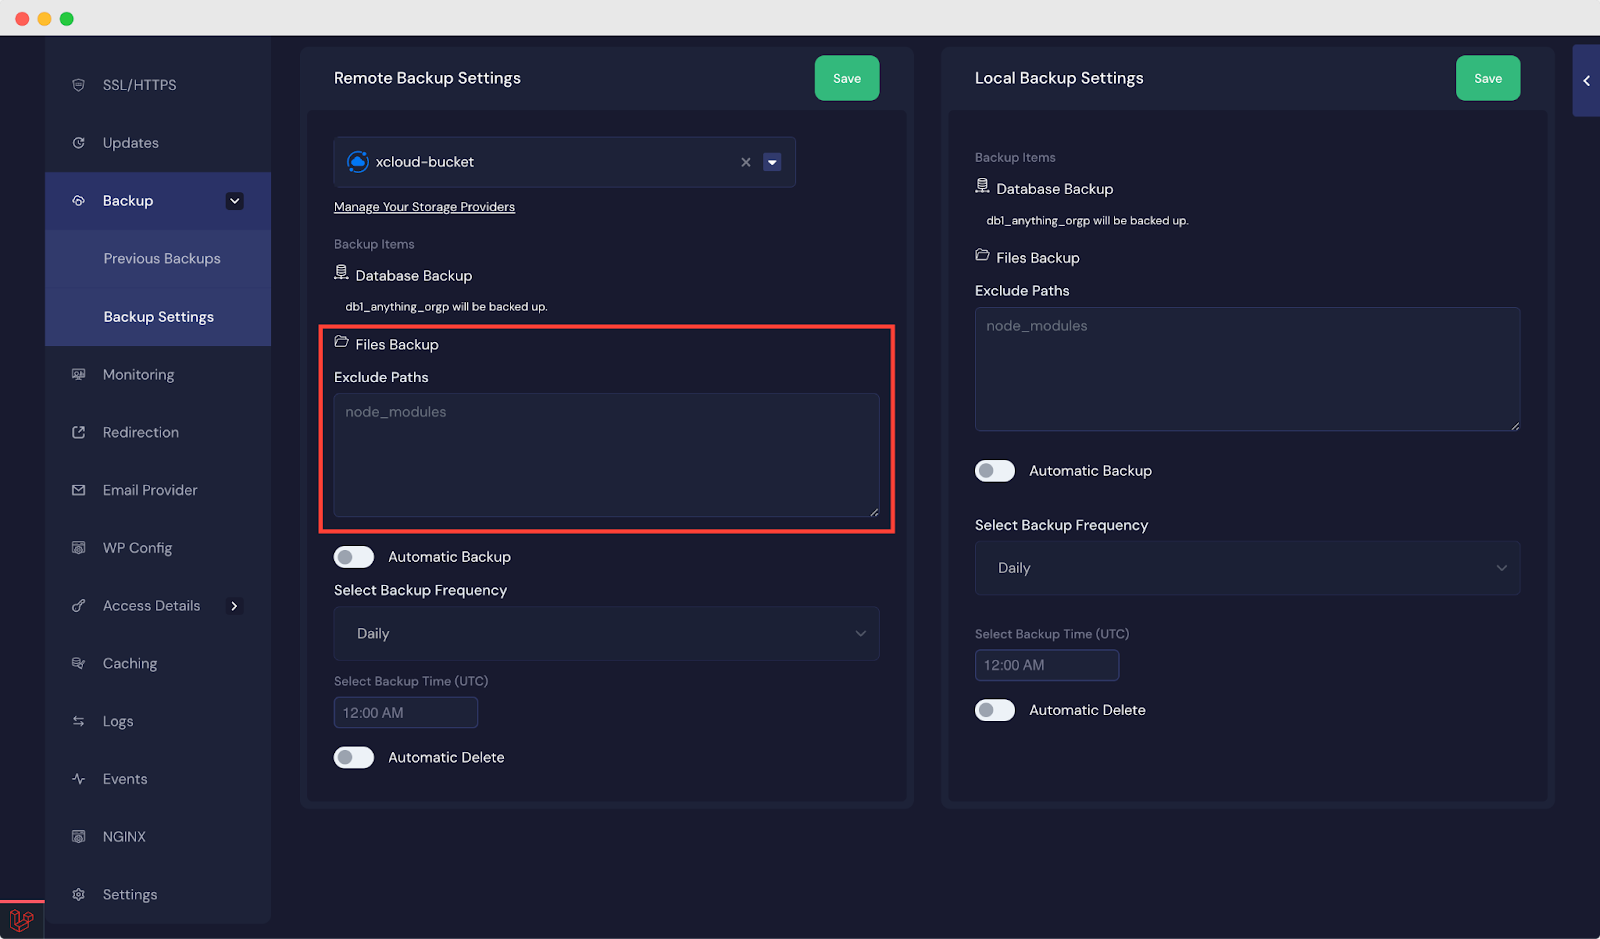
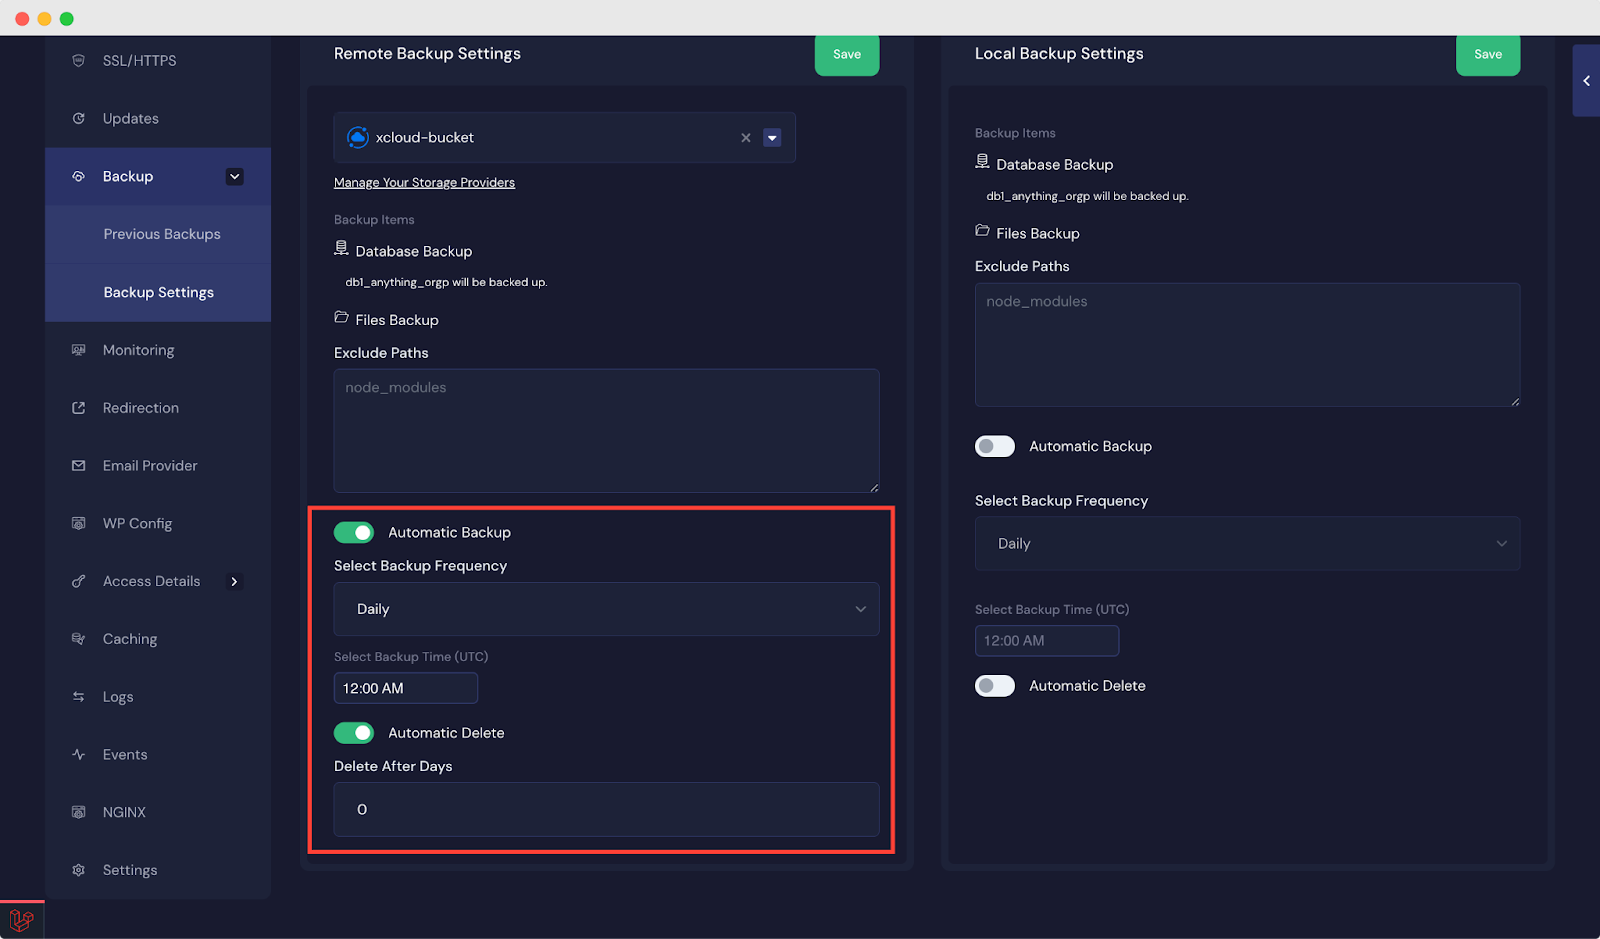
Once the integration process is done, you can move on to backup your site. As you can integrate more than one storage provider, choose one if you have multiple. For the Remote Backup Settings, choose your Bucket.
After that, you can exclude paths if required. You will find the box below the ‘File Backup’ field as shown below.
You can also choose to schedule ‘Automatic Backup’ and ‘Automatic Delete’. For automatic backup, you need to select backup frequency and backup time. On the other hand, you can set a value for how many days after a backup will be deleted automatically.
This is how you can easily integrate Backblaze storage provider and configurefor site backup in xCloud.
Still stuck? Contact our support team for any of your queries.