


Integrating Zoho Mail with WordPress allows you to send and receive emails using your custom domain, improving professionalism and email deliverability. This setup ensures authenticated and reliable communication, reducing the risk of emails being marked as spam. By using Zoho Mail with WordPress, you can efficiently manage website email correspondence through Zoho’s secure infrastructure.
Follow the step-by-step process to set up Zoho Mail and configure it with the FluentSMTP plugin in WordPress for seamless email communication.
Note: Before we continue, login to your Zoho mail website. Or, If you haven’t sign up yet, make sure to sign up and choose a plan according to your needs.
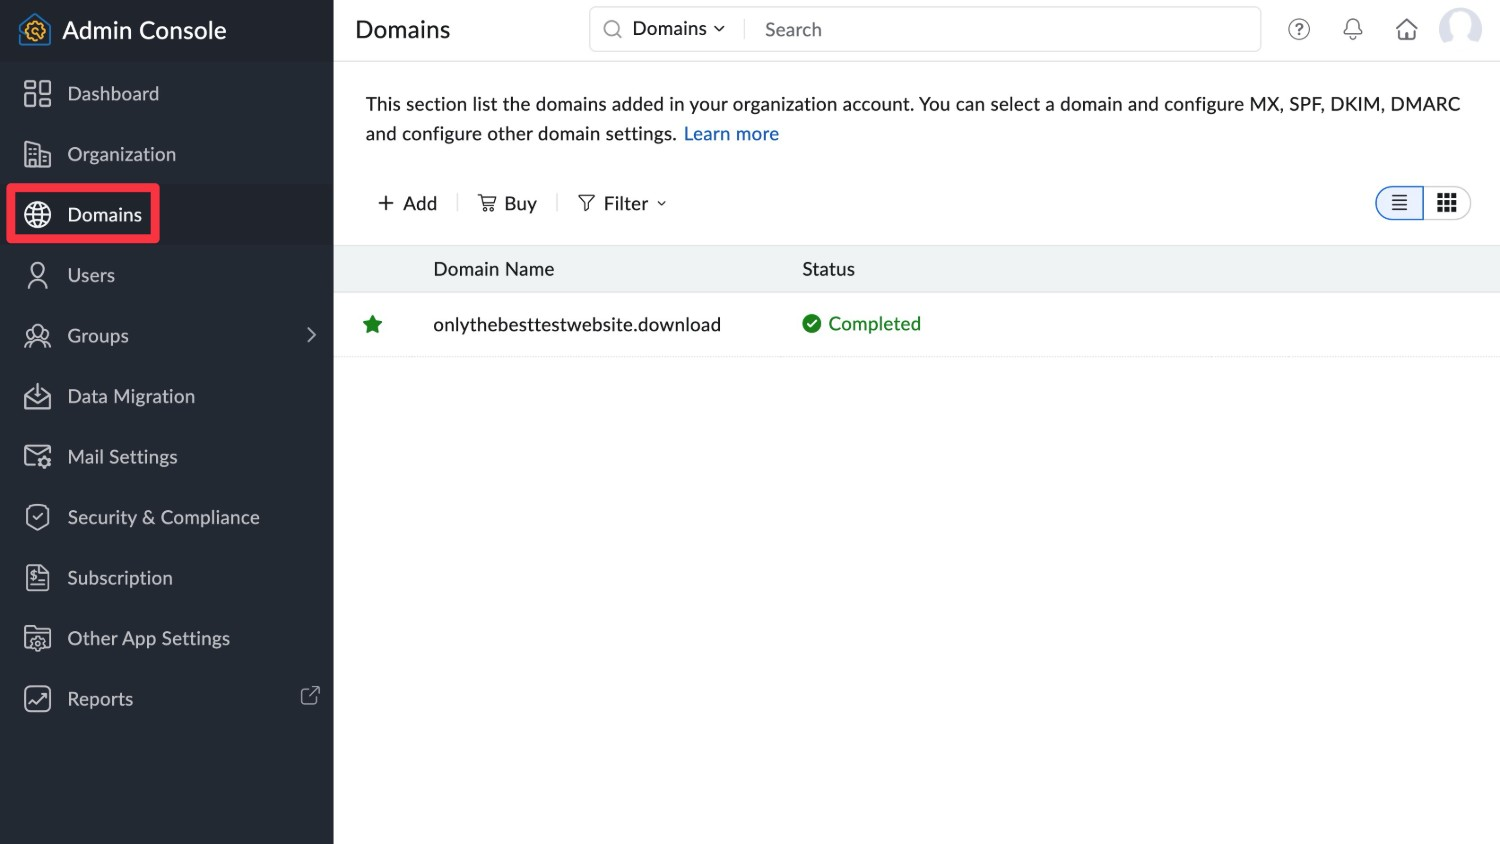
Step 2: Add and Verify Your Domain #
In the Zoho Mail Admin Console, navigate to the ‘Domains’ section and select ‘+Add’ button. Enter your domain name and proceed.
Zoho will provide DNS records (MX, TXT, CNAME) that you need to add to your domain’s DNS settings. Access your domain registrar’s DNS management panel and add the provided records. After adding the records, return to Zoho Mail and click Verify to confirm domain ownership.
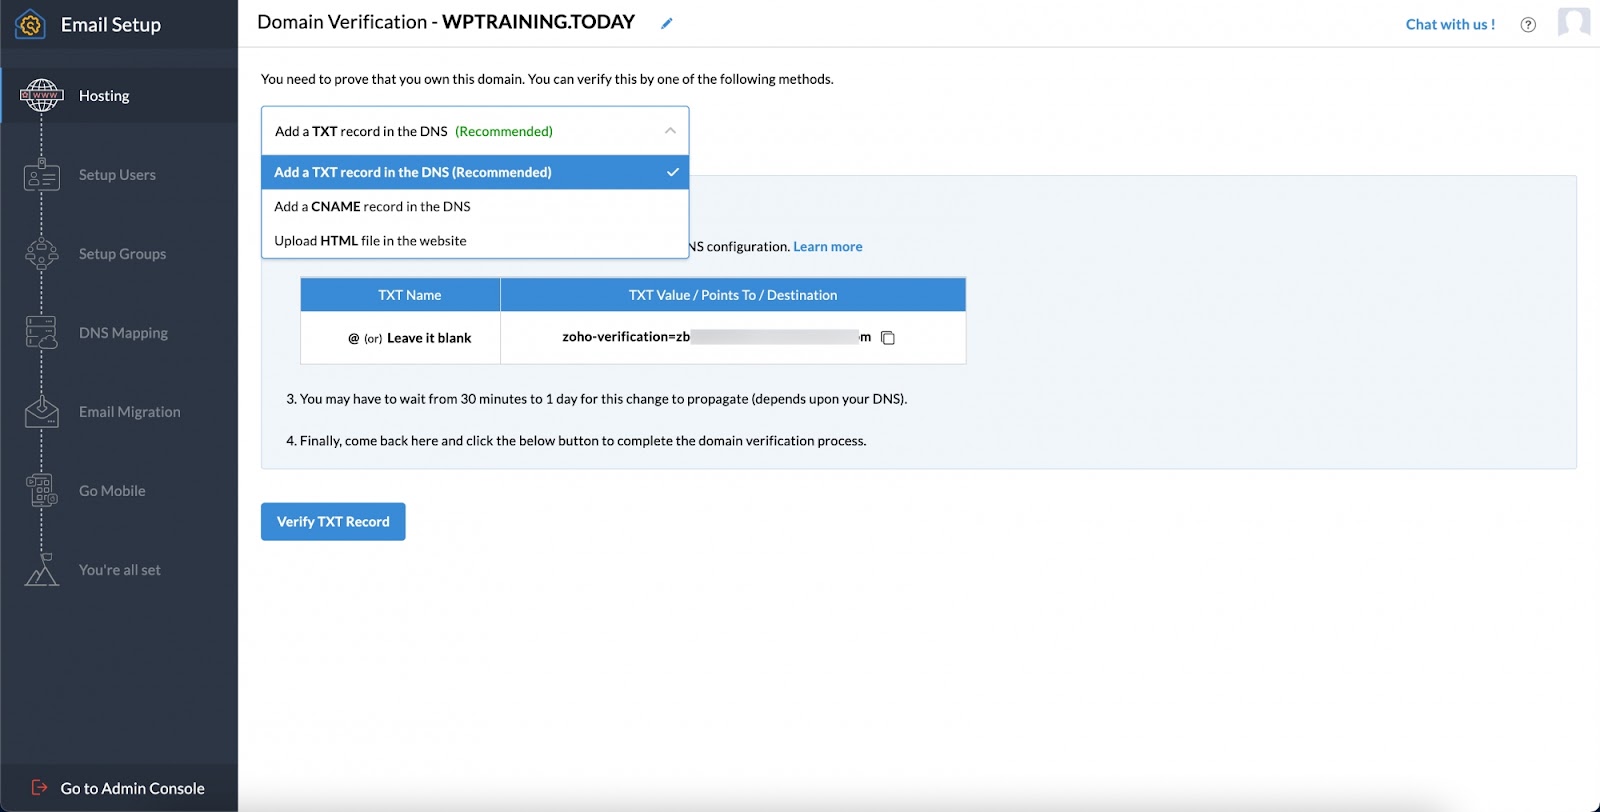
Note: DNS changes may take some time to propagate. It’s recommened to complete this step in advance to avoid delays.
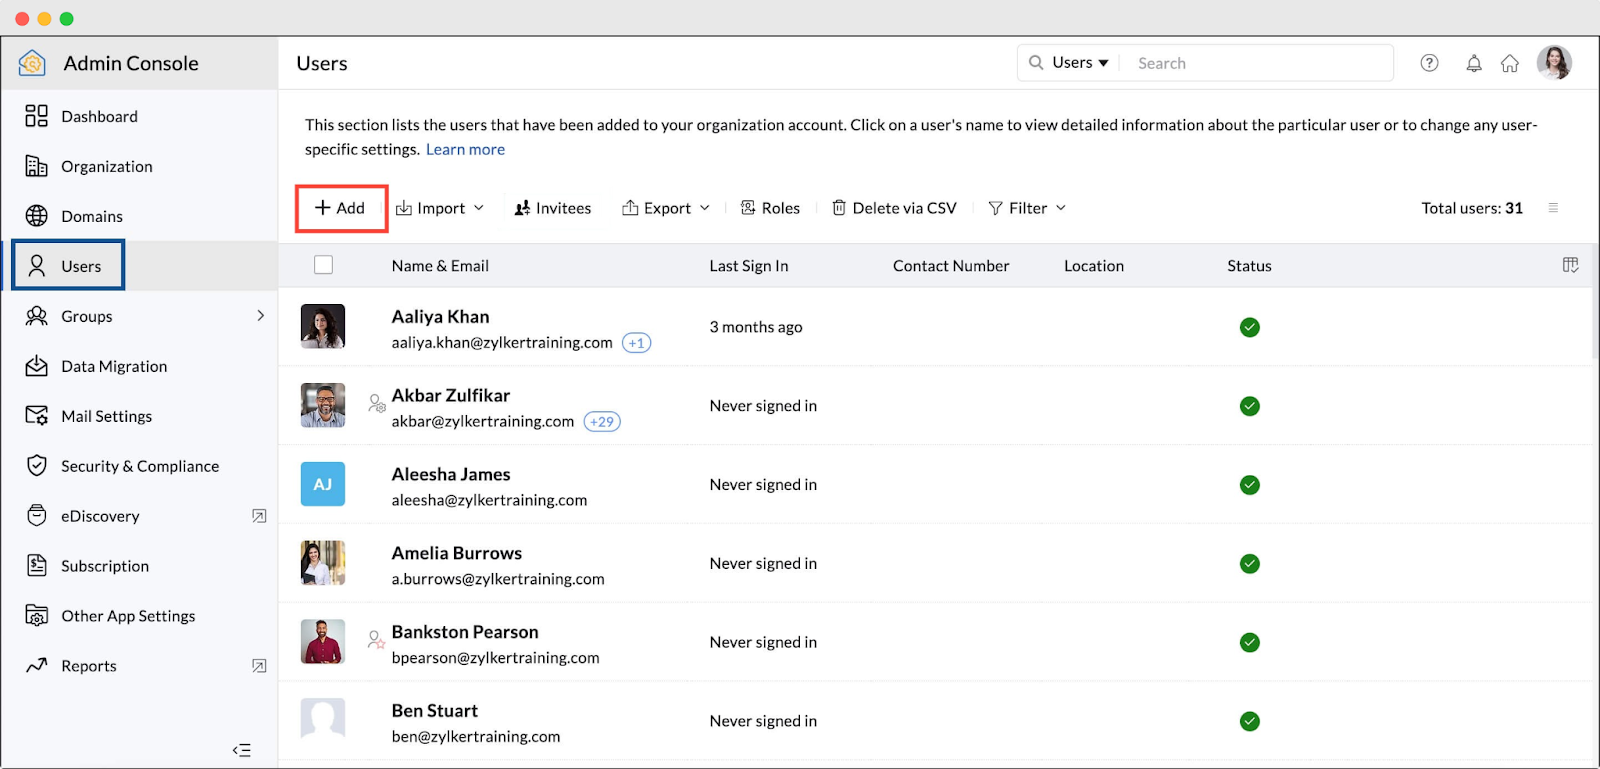
Step 3: Create User Accounts and Custom Email Addresses #
Once your domain is verified, go to the User Details section in the Zoho Mail Admin Console. Add users by assigning them custom email addresses under your domain (e.g., info@yourdomain.com).
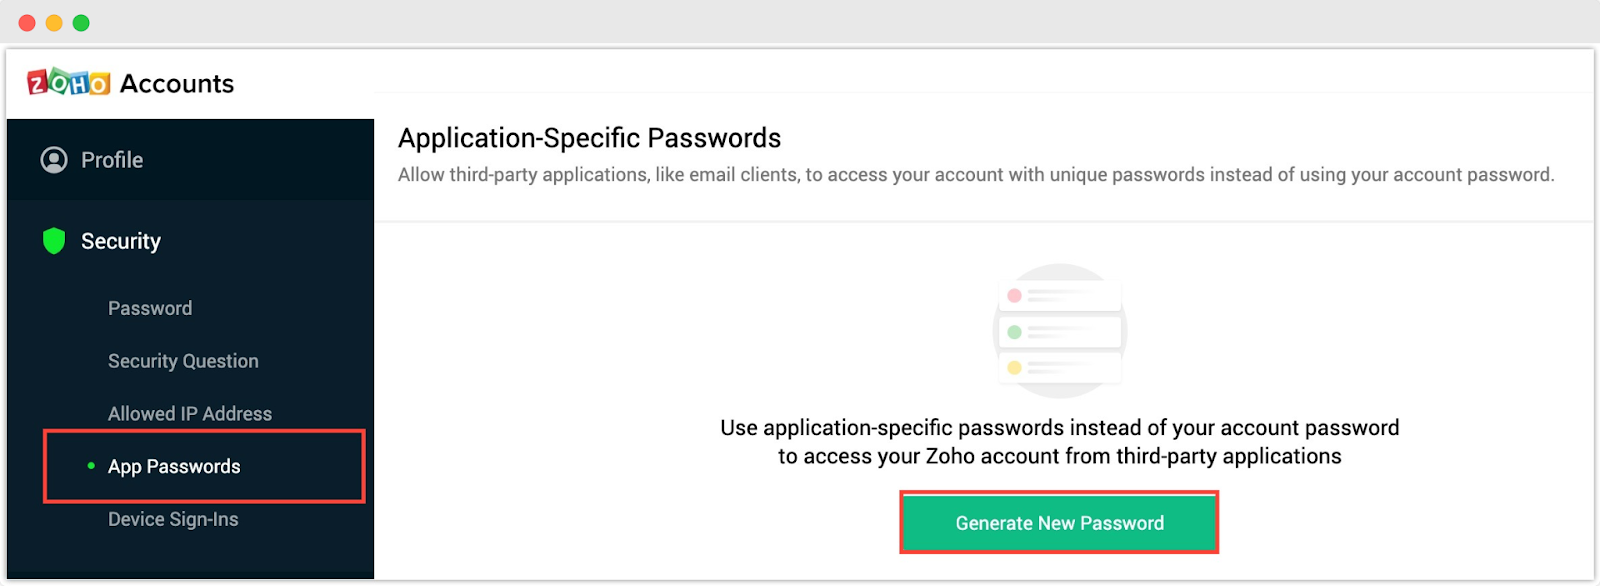
Step 4: Generate an Application-Specific Password in Zoho Mail #
Log in to your Zoho Mail account. Navigate to My Account → Security → App Passwords. Generate a new application-specific password for use with external applications like FluentSMTP.
Step 5: Install and Configure FluentSMTP in WordPress #
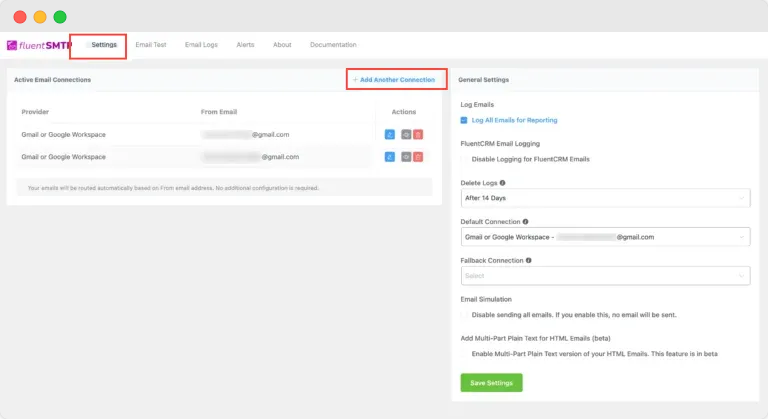
Log in to your WordPress Admin Dashboard. Navigate to Plugins→ Add New. Search for FluentSMTP, install, and activate the plugin. After activation, go to Settings → FluentSMTP.
Click on Add New Connection and select Zoho as the mailer. Then fill in the required fields:
- From Email Address: Your Zoho Mail email address (e.g., info@yourdomain.com).
- From Name: The name you want your emails to display.
- SMTP Host: smtp.zoho.com
- SMTP Port: 465 (for SSL) or 587 (for TLS)
- Encryption: Choose SSL or TLS based on the port selected.
- SMTP Username: Your full Zoho Mail email address.
- SMTP Password: The application-specific password generated earlier.
And save the settings and send a test email to ensure everything is configured correctly.

And that’s it. This is how easily following these steps, you can easily integrate Zoho Mail to your WordPress website, ensuring seamless email communication using your custom domain.
Still stuck? Feel free to reach out to our support team for assistance.


