

How to Easily Set up pCloud Storage in xCloud?
Updated April 8, 2026 · 3 min read
Ensuring the safety and reliability of your website data is crucial, and integrating pCloud storage for site backup is a smart way to achieve it. pCloud is a trusted cloud storage platform, offering a user-friendly interface, robust security, and scalable storage solutions. These features make it an ideal choice for protecting your site backups and ensuring easy accessibility whenever needed.
In this tutorial, we will show you how to seamlessly set up pCloud storage in xCloud for site backup with xCloud, enabling a smooth and efficient backup process. Ready to secure your data with pCloud? Let us dive into the step-by-step instructions!
Note: pCloud integration is now working for the both EU and US regions. In general, region selection is handled automatically by pCloud (check out their official documentation).
Steps to Integrate pCloud Storage for Site Backups with xCloud
Follow the steps below to integrate pCloud for site backups with xCloud and back up your websites effortlessly.
Step 1: Integrate pCloud into Your Account
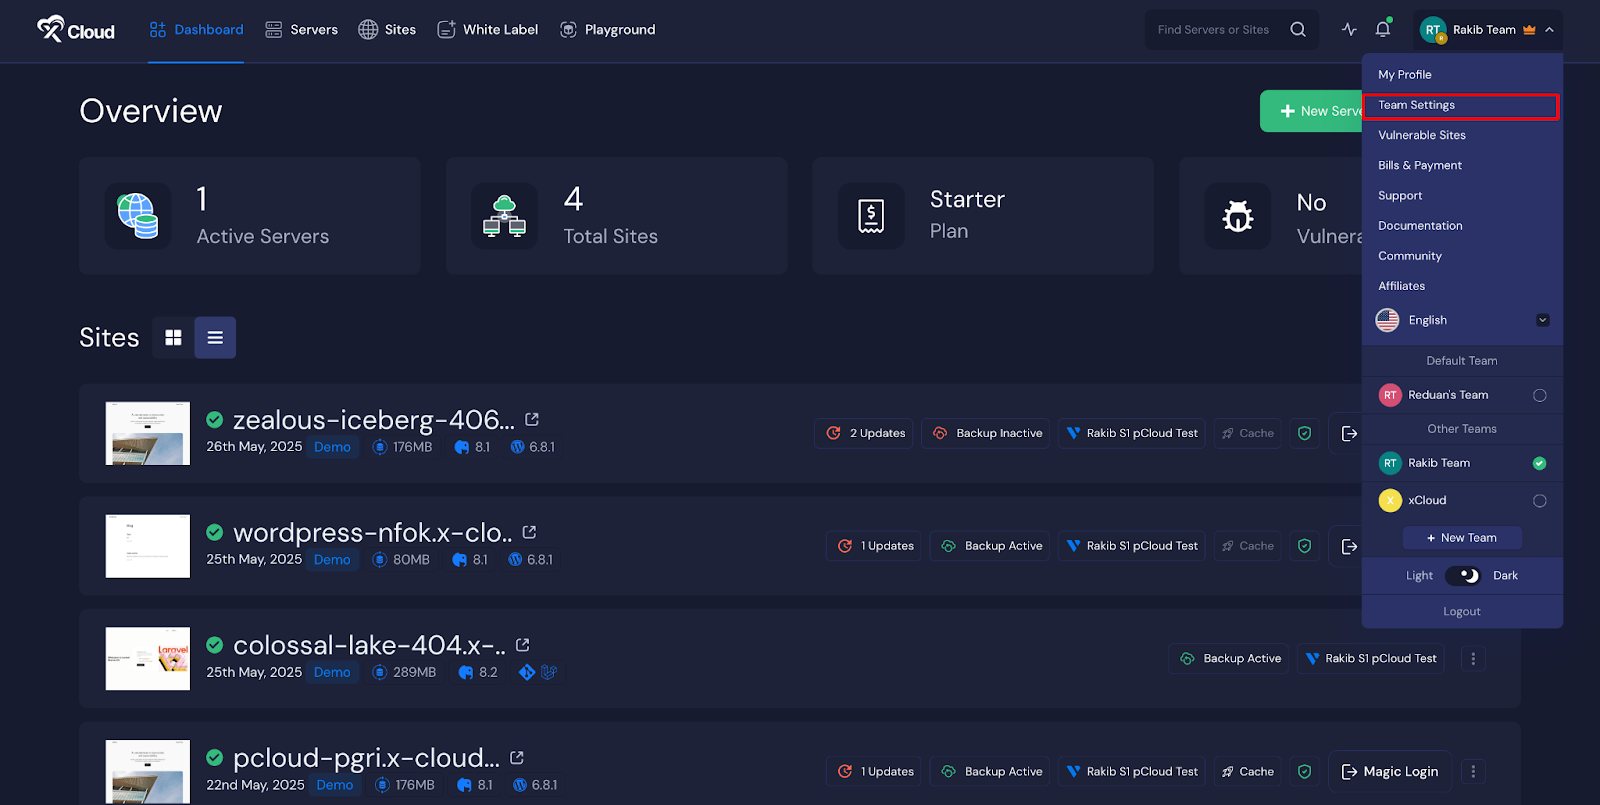
Before getting started to back up your websites with pCloud, you need to integrate the storage provider into xCloud. For that,log in to your xCloud account and navigate to ‘Team Settings’.
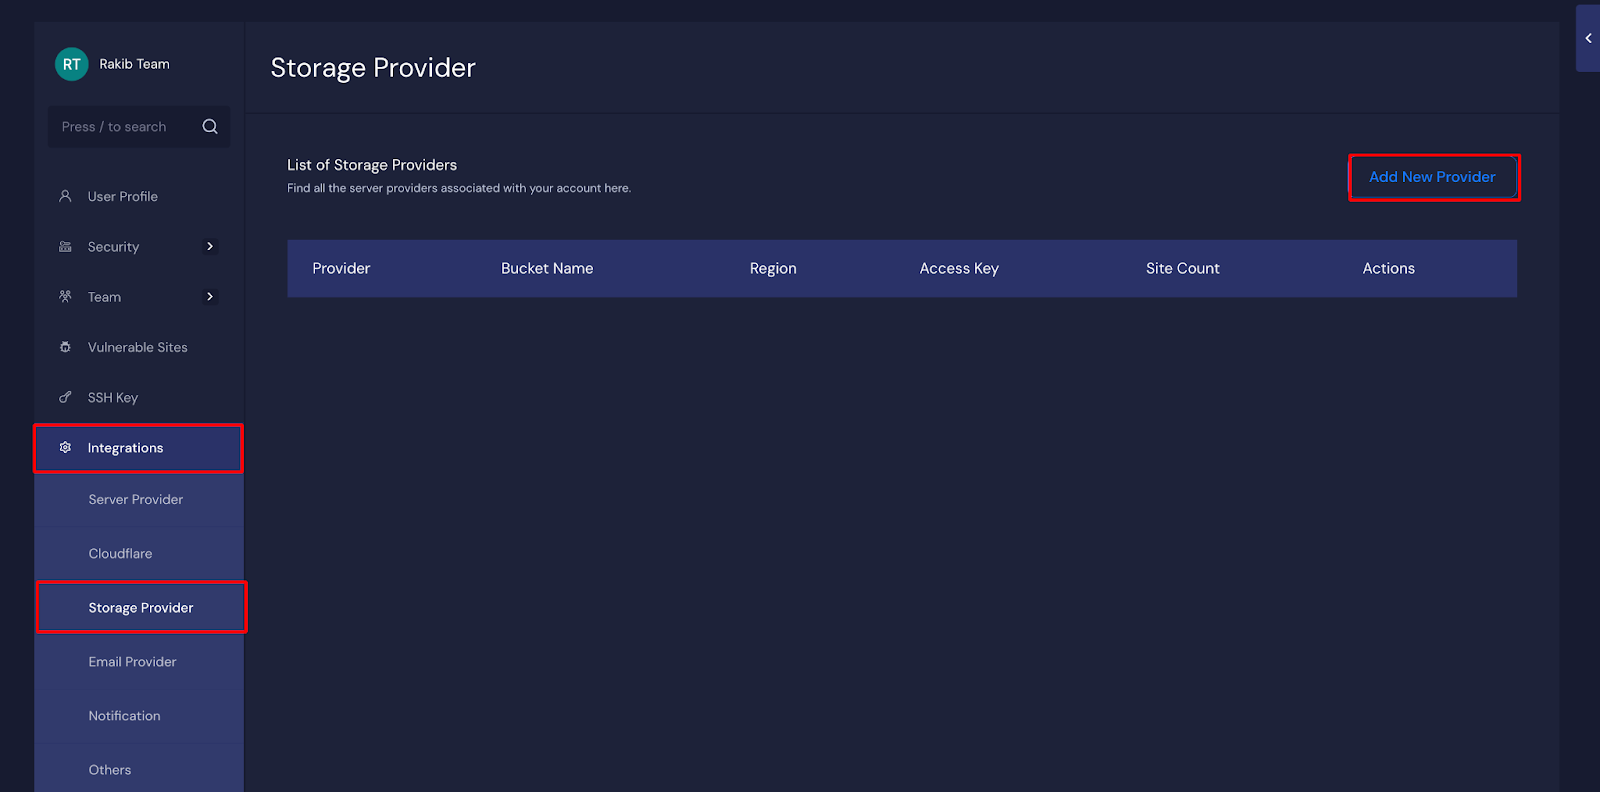
Then go to the ‘Integrations’ → ‘Storage Provider’ and click on the ‘Add New Provider’ button and choose pCloud as your provider.
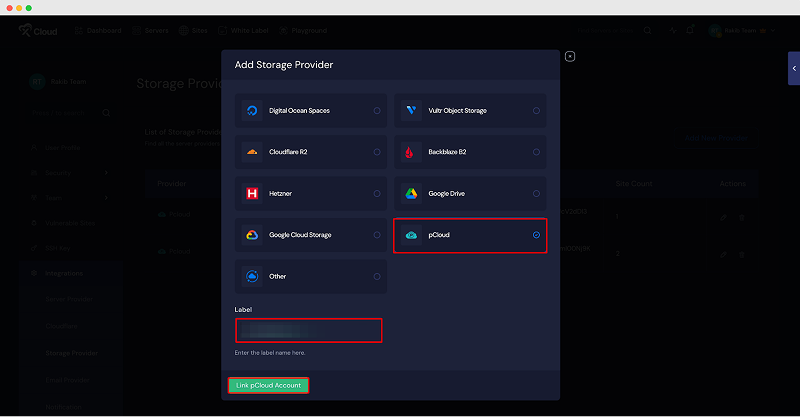
Next, select pCloud and enter a label of your choice. Then click on ‘Link pCloud Account’. You’ll be redirected to the pCloud sign-in page, where you can choose an account or create a new one to continue.
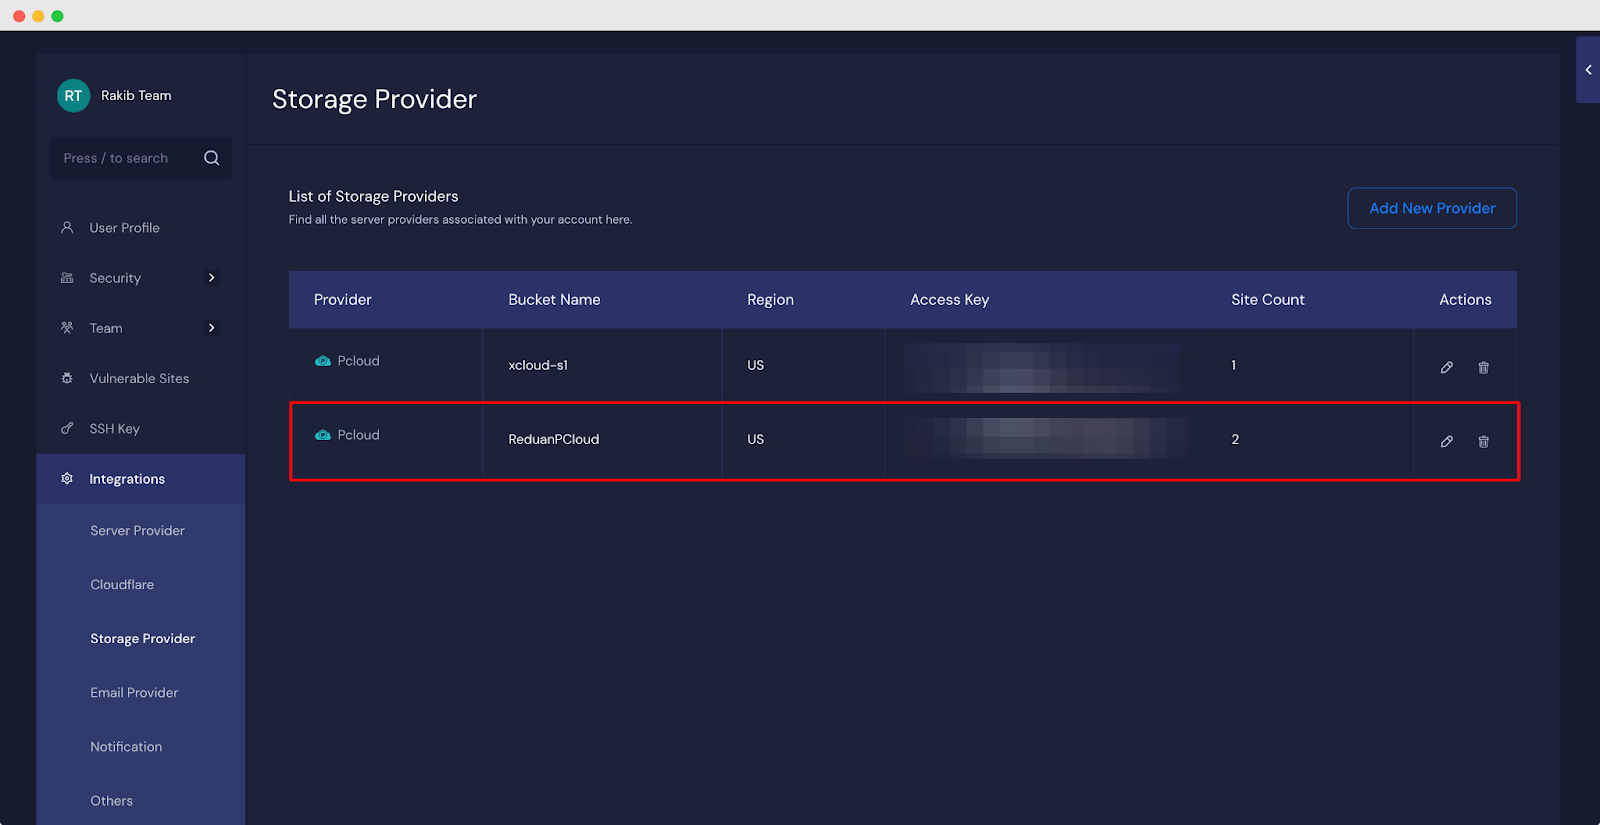
Once integrated, you will see the pCloud integrated and listed on the Storage Provider page in xCloud, as shown below.
Step 2: Configure Backup Settings for pCloud
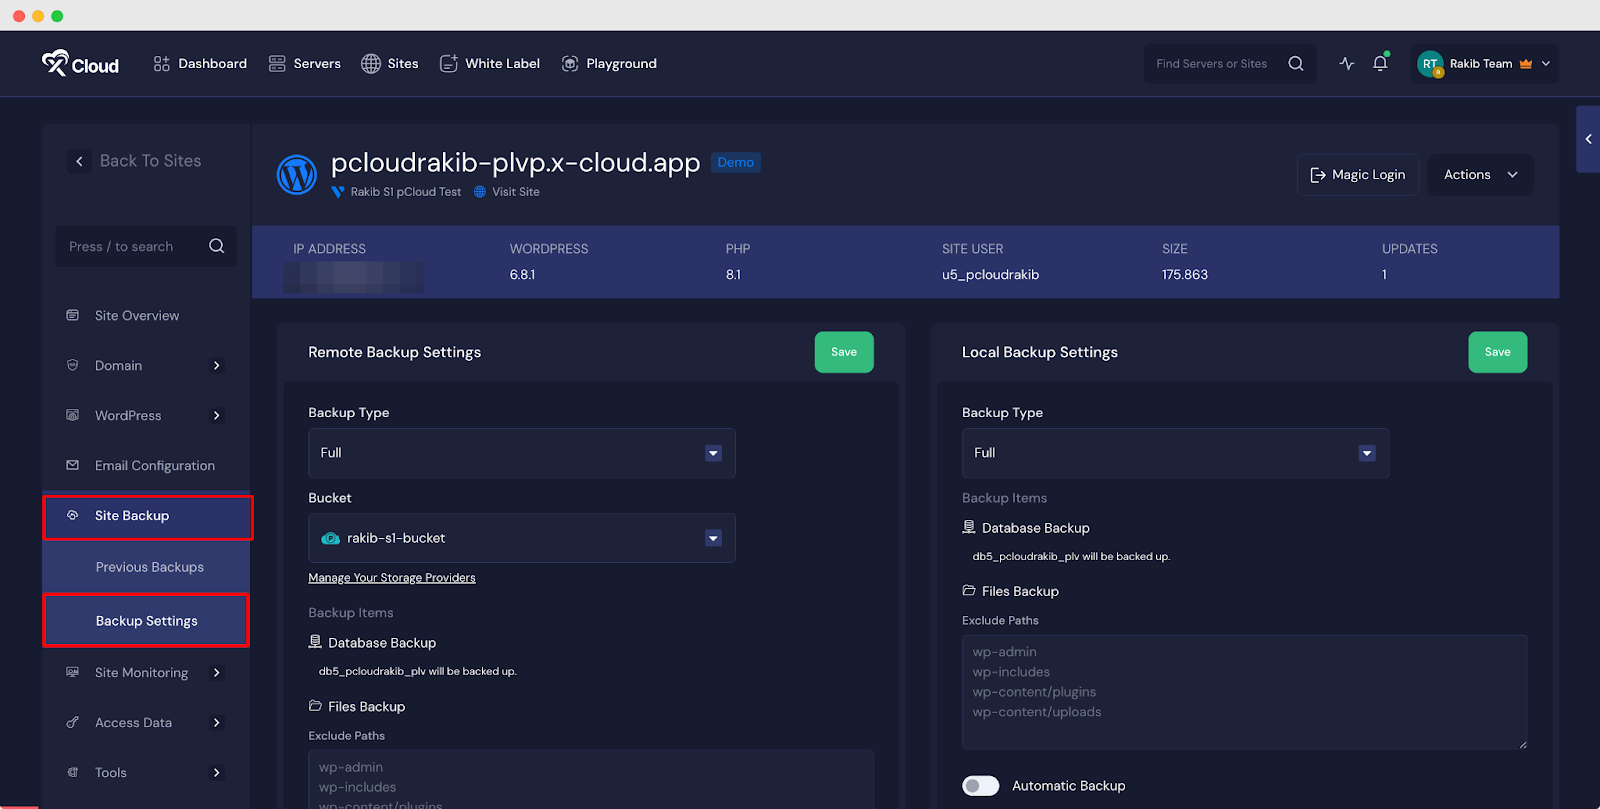
Once you are done integrating pCloud as a storage provider into xCloud, you can now configure ‘Backup Settings’ for taking backups with pCloud. Now, go to sites, choose the one you want to take backups and navigate to the ‘Site Backup’ → ‘Backup Settings’.
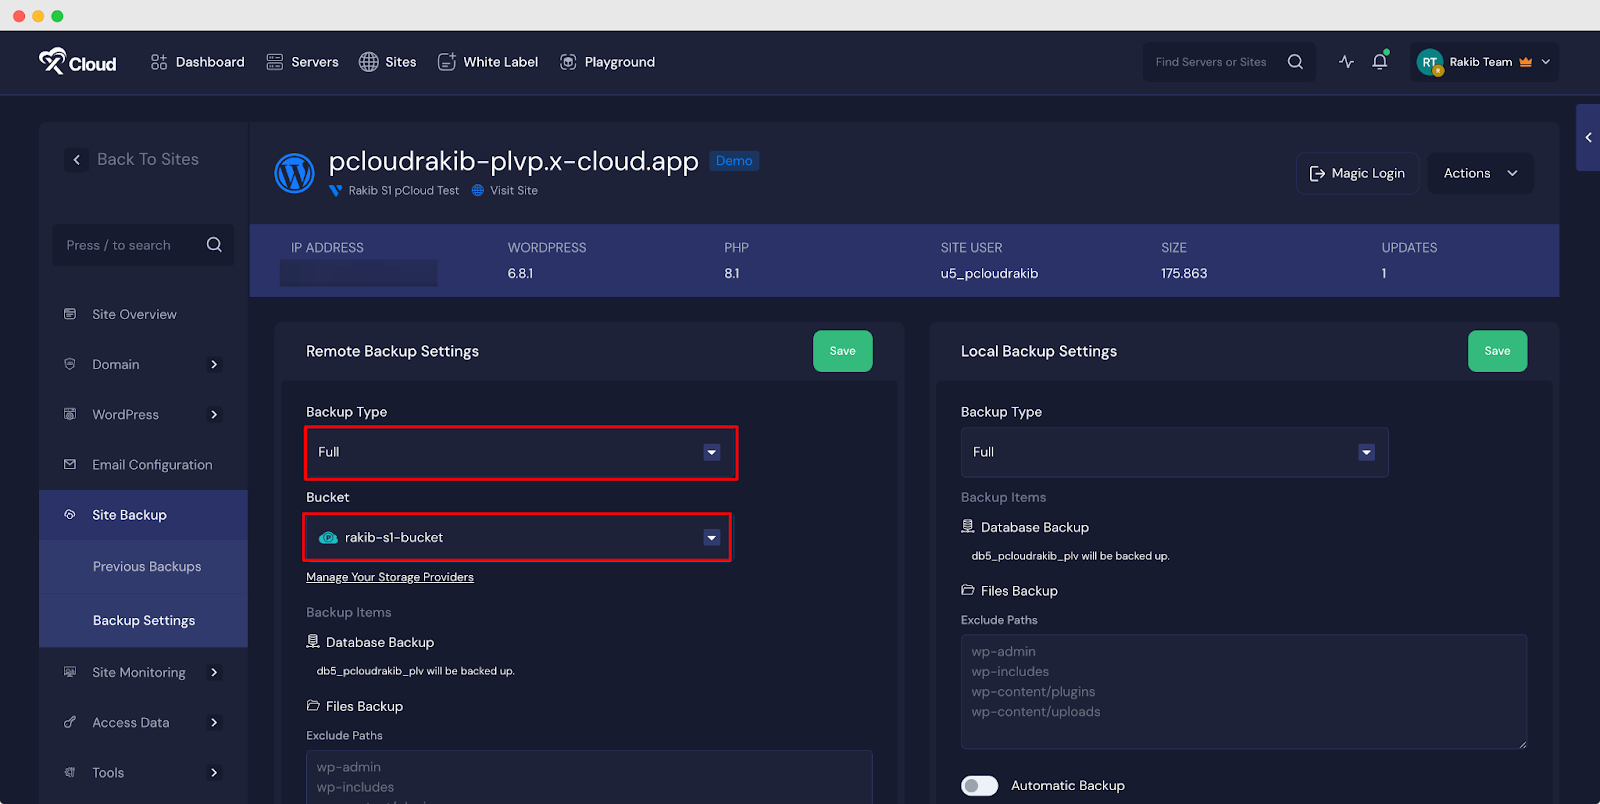
Now, in the ‘Remote Backup’ section, choose Backup Type as ‘Full’ or ‘Incremental’ and select the ‘Bucket’ you have just created for pCloud. You can then choose to exclude paths if necessary (for the paths you do not want to take a backup).
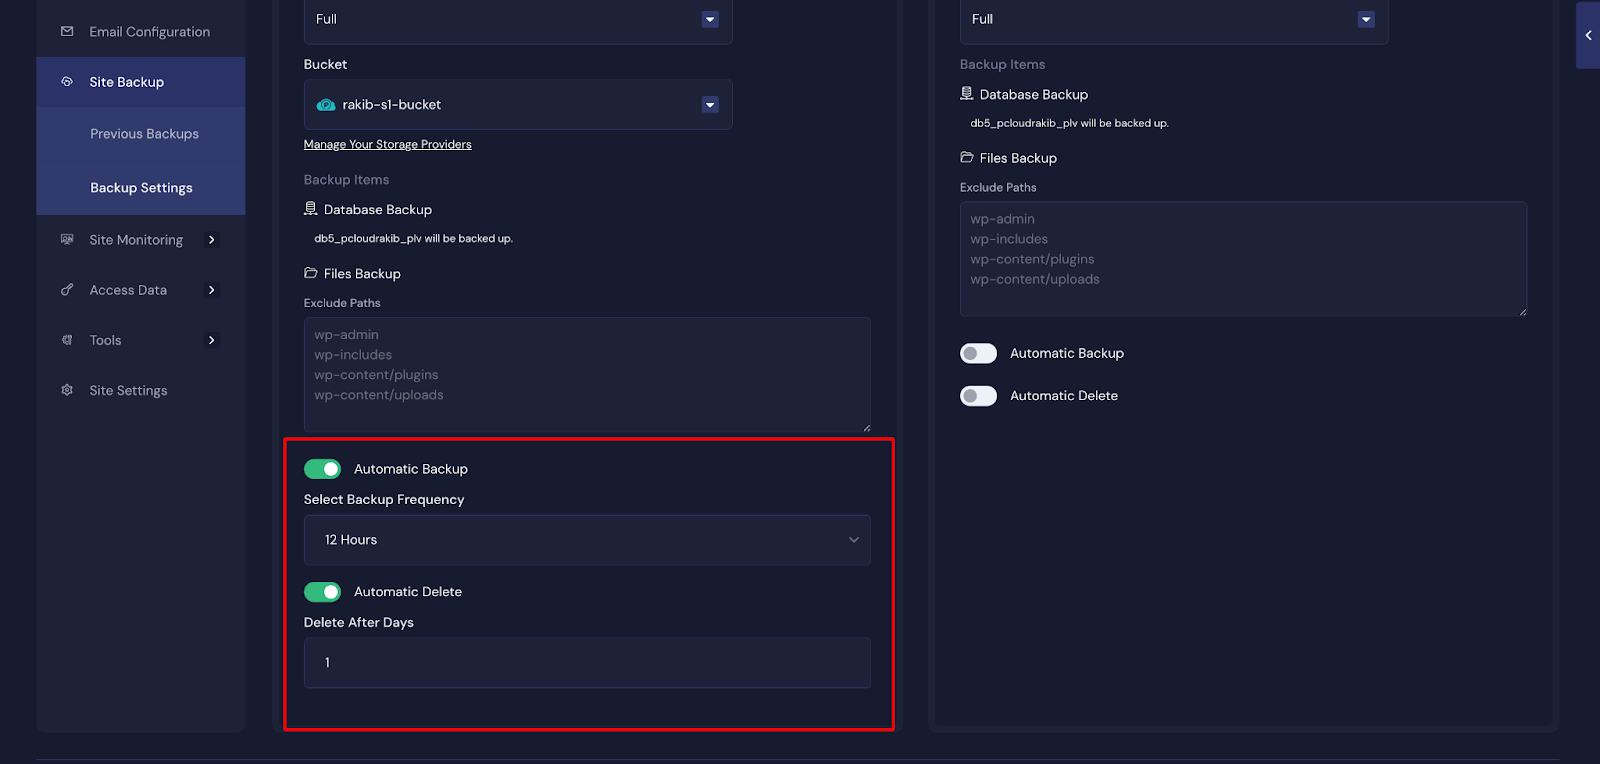
Then, you can also enable ‘Automatic Backup’ and choose the backup frequency. Plus, you have the option to use the ‘Automatic Delete’ option, with which you can set days after which your backup will be deleted automatically. Once done, hit the ‘Save’ button.
Step 3: Take a Backup of Your Site
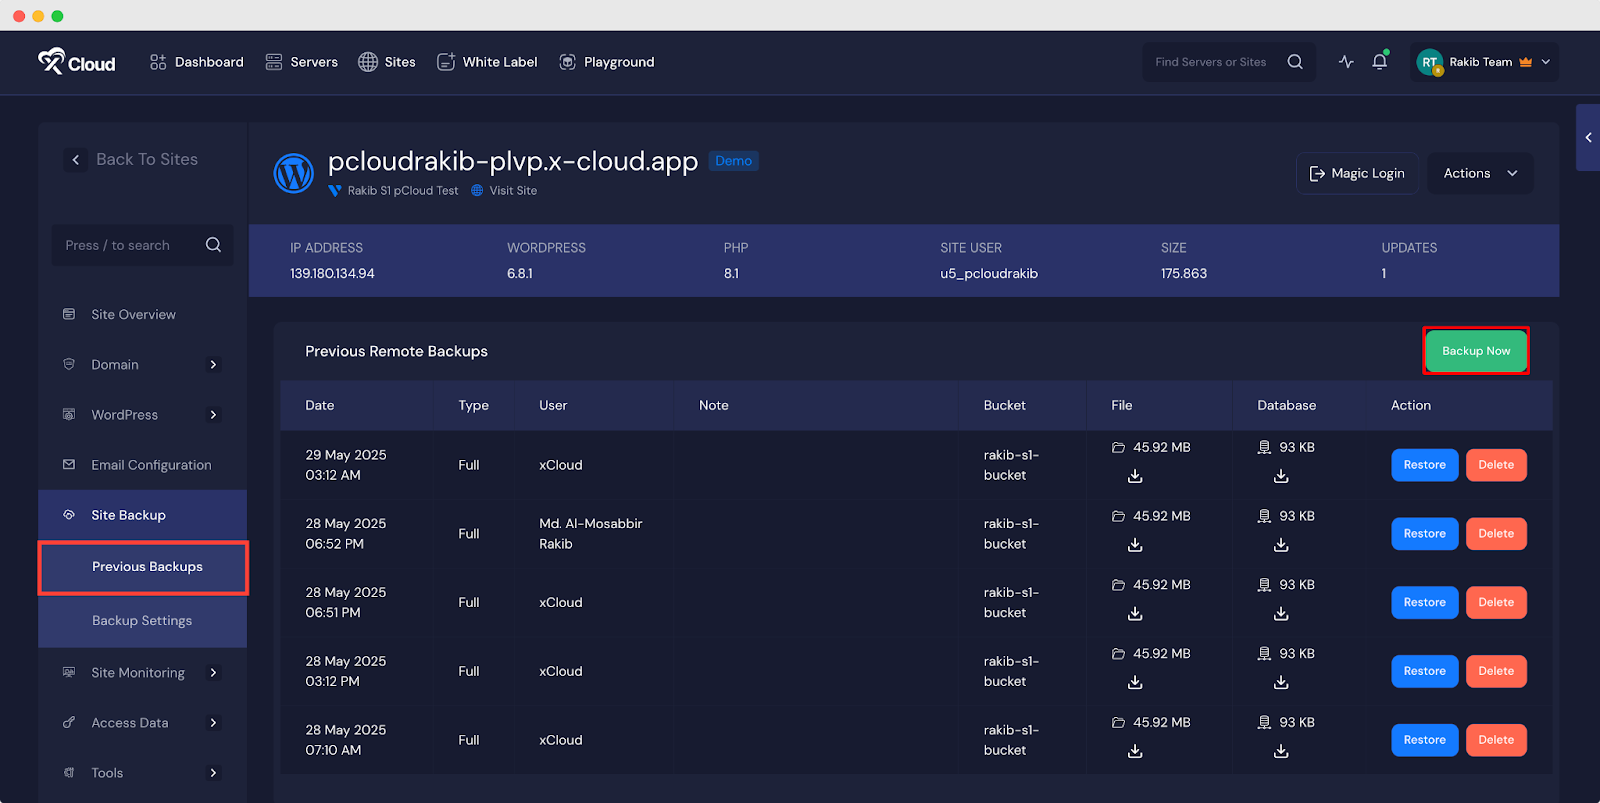
Once you are done configuring the site backups, you can now take backups of your websites using this provider. Now, go to the ‘Previous Backups’ of your site settings and you will see all the available remote backups and local backups. You can take a backup of your site from here by simply clicking on the ‘Backup Now’ button. Your backup process will be initiated and the backup files will be shown here once done.
You can also check your pCloud. A folder will be created with the name of your backup label, and your backups will be saved inside the folder.
And that’s it. This is how easily you can integrate pCloud for Site Backup with xCloud and take backups of your websites.
Still stuck? Contact our support team for any of your queries.