WordPress frequently requires sending site emails to you or your users, known as transactional emails. These may include admin notifications, new user signups, password resets, and form submissions. Sometimes, WordPress’s default email delivery system may fail, leading to potential issues like emails being flagged as spam or failing to reach their intended recipients.
Web hosting servers are not optimized for sending emails, and you may also want to avoid running your own mail server. Due to its focus on optimal performance and security, xCloud provides email services on its own. You can send up to 100 emails for free per team with the xCloud Managed Email services. Freelancers, small businesses, and individuals with portfolio websites can significantly benefit from this reliable and scalable email service.
Additionally, you can purchase 1000-8000 emails per month at a monthly charge of $1 to $8 only. To convert your site visitors into potential users and generate more leads, you can promptly and securely deliver emails to a large number of users with these plans.
Follow the step-by-step guide below to learn how to add xCloud Managed Email Service provider for your site emails.
Step 1: Add xCloud Managed Email Service Provider #
From your xCloud dashboard, navigate to My Profile → Integrations → Email Provider. For each team, you get 100 free emails automatically allocated here per month, as shown below.

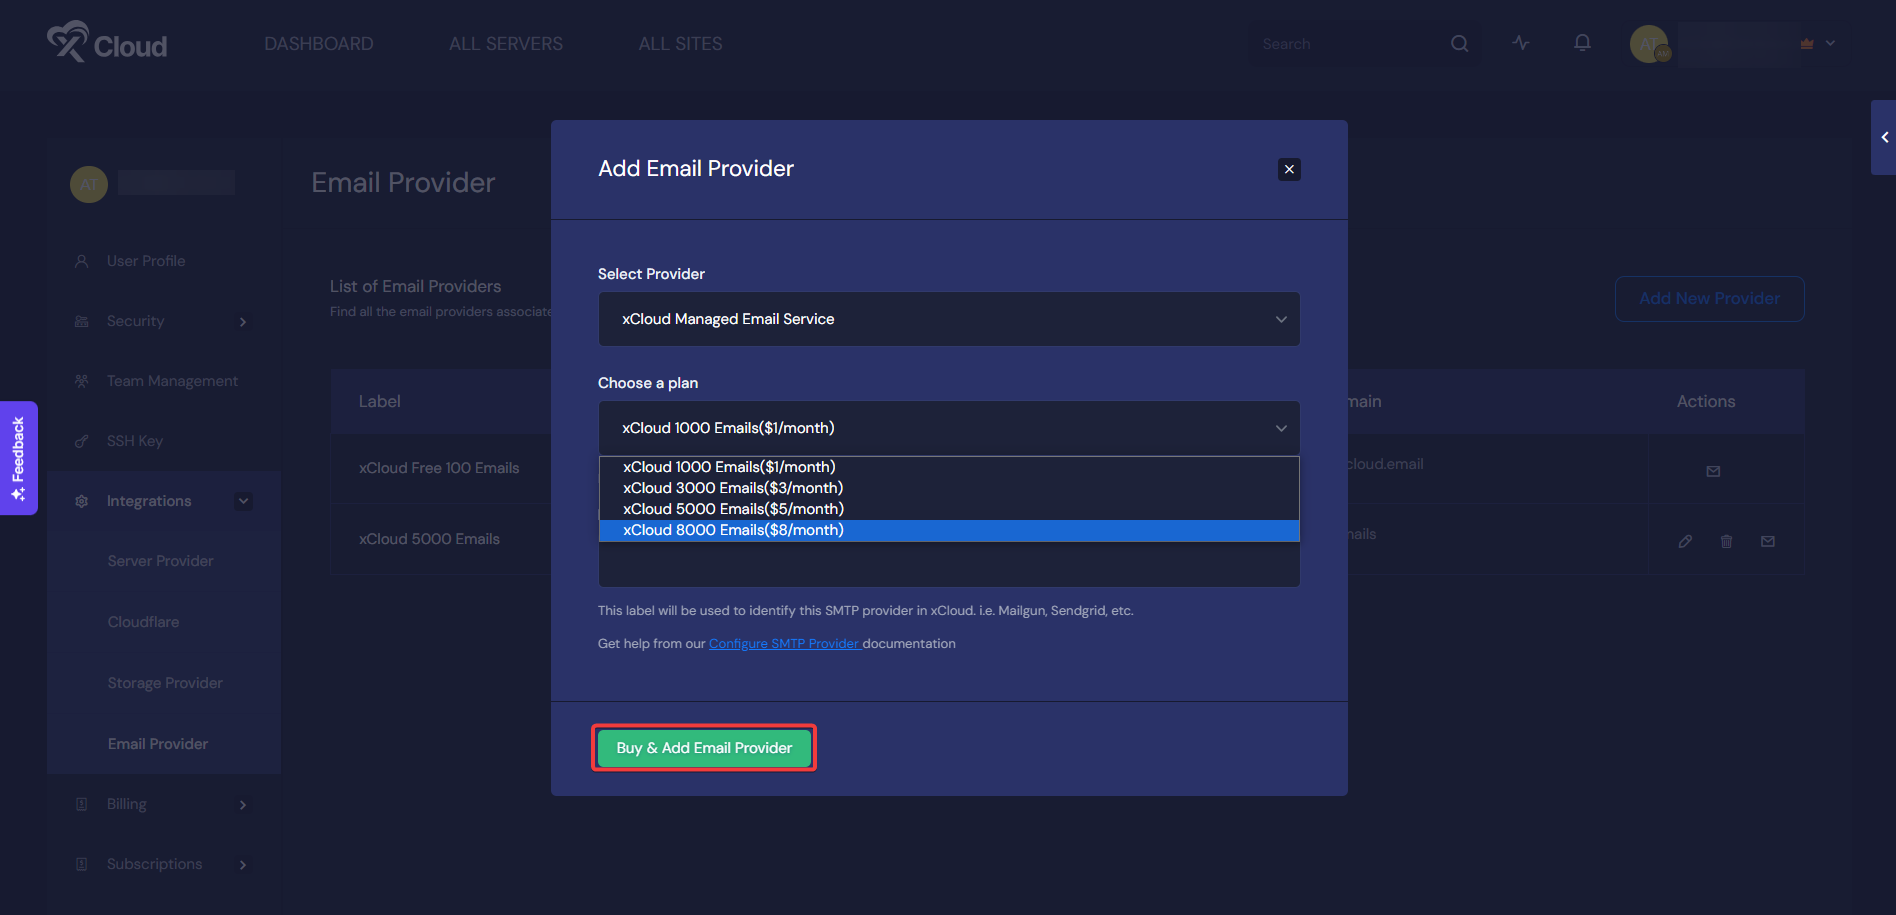
To purchase more emails from xCloud Email Provider, simply click the ‘Add New Provider’ button. Afterward, select xCloud Email Provider, choose your preferred plan (1000 for $1/mo, 3000 for $3/mo, 5000 for $5/mo, and 8000 for $8), and set a Label. Then click the ‘Buy & Add Email Provider’ button.

A payment gateway will appear for transactions. Once you are done paying with a valid payment method, the number of emails you purchase will be allocated to the ‘Email Provider‘ list.

Step 2: Testing Your Email Integration #
After adding the xCloud Email Provider successfully, you can test your email service by sending a test email straight from the Email Provider section.

Step 3: Add Email Service To Site #
After adding the xCloud Email Provider to integrate your xCloud environment, you just need to add the provider to the site. Go to All Sites and choose your website to add the email provider. Select your site and navigate to Email Provider tab.

Now select your xCloud Email Provider’s label from the ‘Email Provider’ options. Choose your Domain, set the sender’s name in the ‘From Name’ field, and input your email sender’s address in the ‘From Email’ field. Once done, hit the ‘Add This Provider To Site’ button. You can also send a test email from this page.

You can also check your email balance by navigating to Subscriptions → Email Subscriptions from your xCloud dashboard.

There are also options to choose to use xCloud Domain or use your own domain below the ‘Email Provider’ field. However, if you want to add other domains, you need to verify with a few records on the DNS provider. Then, hit the ‘Add This Provider To Site’ button.
That’s how easily you can add xCloud Managed Email Service provider for site emails for xCloud environment to streamline the email delivery process of transactional emails. You can check this documentation if you want to connect any SMTP provider to your xCloud environment for site emails.
Still stuck? Contact our support team for any of your queries.


