


Backing up your website is essential for ensuring data security, disaster recovery, and overall peace of mind. Integrating a reliable external storage provider like Hetzner with xCloud allows you to automate and manage your backups efficiently.
Hetzner’s Object Storage with your xCloud account, enabling you to set up seamless remote backups for your site. In this guide, we will learn how to integrate the Hetzner Object Storage provider with xCloud to set up a seamless, efficient backup solution for your site. Ready to set up Hetzner Storage in xCloud? Let’s dive into the step-by-step guide.
📑 Note #
Hetzner Object Storage and Storage Box are two completely different services.
- xCloud supports Hetzner Object Storage for remote site backups (S3-compatible).
- xCloud does NOT support Hetzner Storage Box, as it is not S3-compatible
Steps to Integrate Hetzner Storage Provider with xCloud & Backup Site #
Follow the steps below to integrate the Hetzner storage provider with xCloud and backup your site with ease:
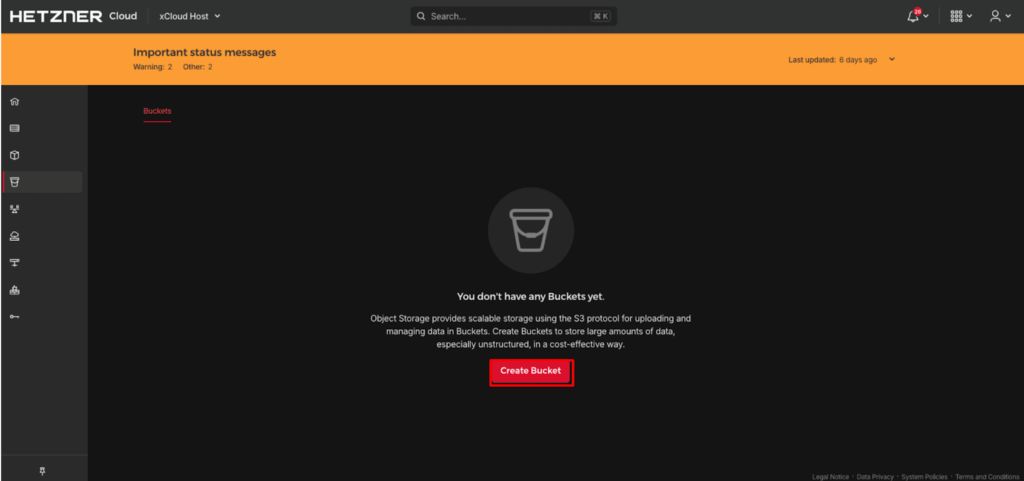
Step 1: Create a New Storage Bucket #
Once you are logged in, go to Object Storage from the dashboard and click on the ‘Create Bucket ’ option.
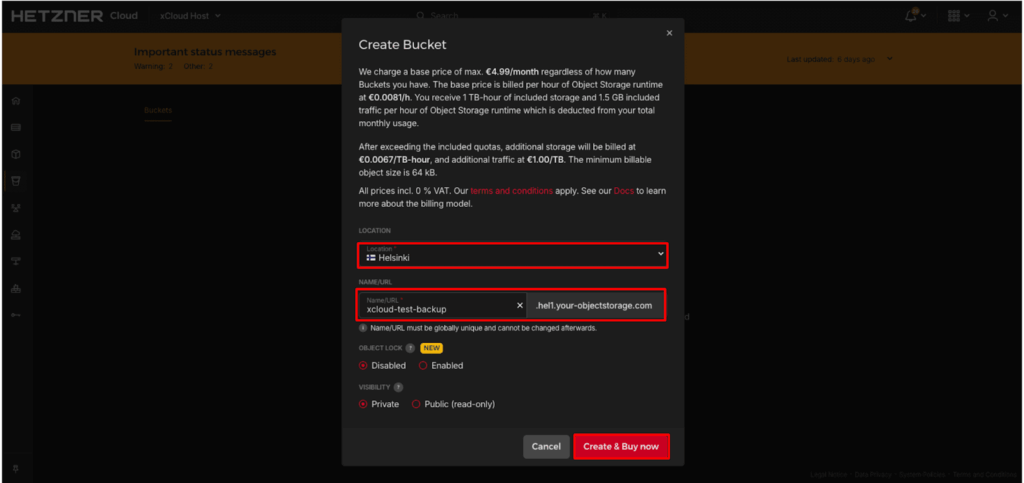
Select a data center region from the ‘Location’ that is near your server’s physical location. Next, input a name for your bucket (e.g., turnipjuice-media-backups) and proceed by clicking the ‘Create & Buy now’ button.
Note: You can leave the remaining settings at their default values.
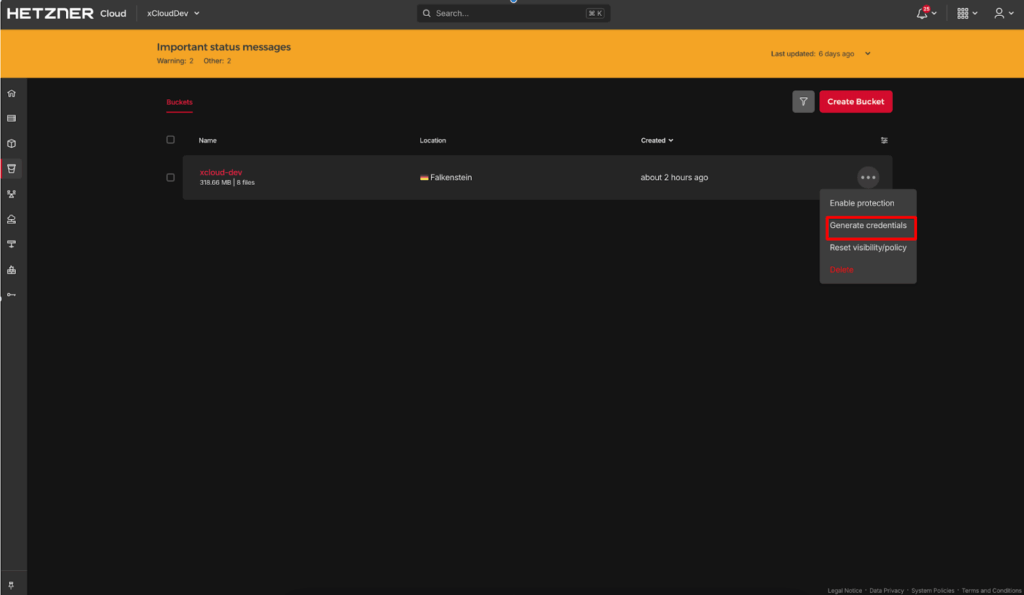
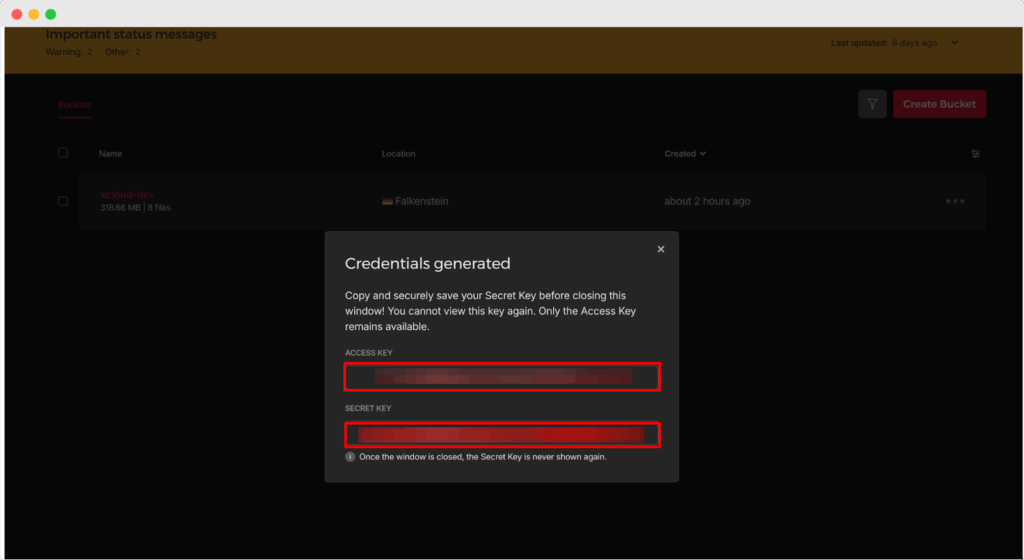
Step 2: Generate The Credentials #
Once you have created the bucket, go to the three-dot option and click on it. A menu will appear, choose the ‘Generate Credentials’ option from here to get the credentials to connect with xCloud.
Then give a description in the blank field and click on the ‘Generate Credentials’ button to proceed to the next step.
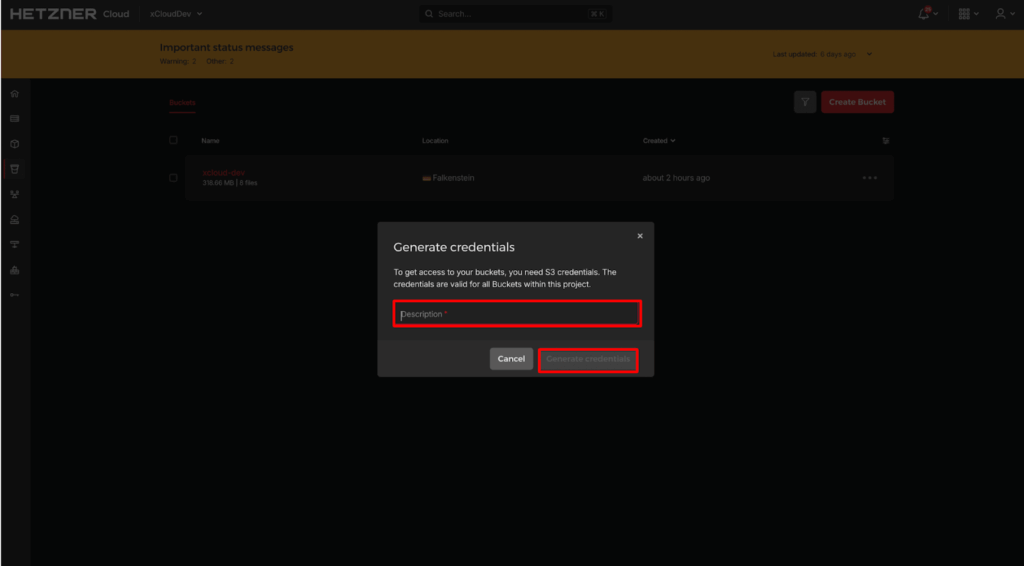
Here, you will get the ‘Access Key’ and the ‘Secret Key’. Copy both the credentials or you can keep the tab open and go to the xCloud site in a different tab.
Configure Hetzner Storage Provider for Site Backup with xCloud #
Since you have collected everything that you need from the Hetzner end, now let’s see how you can configure Hetzner storage for site backup in xCloud.
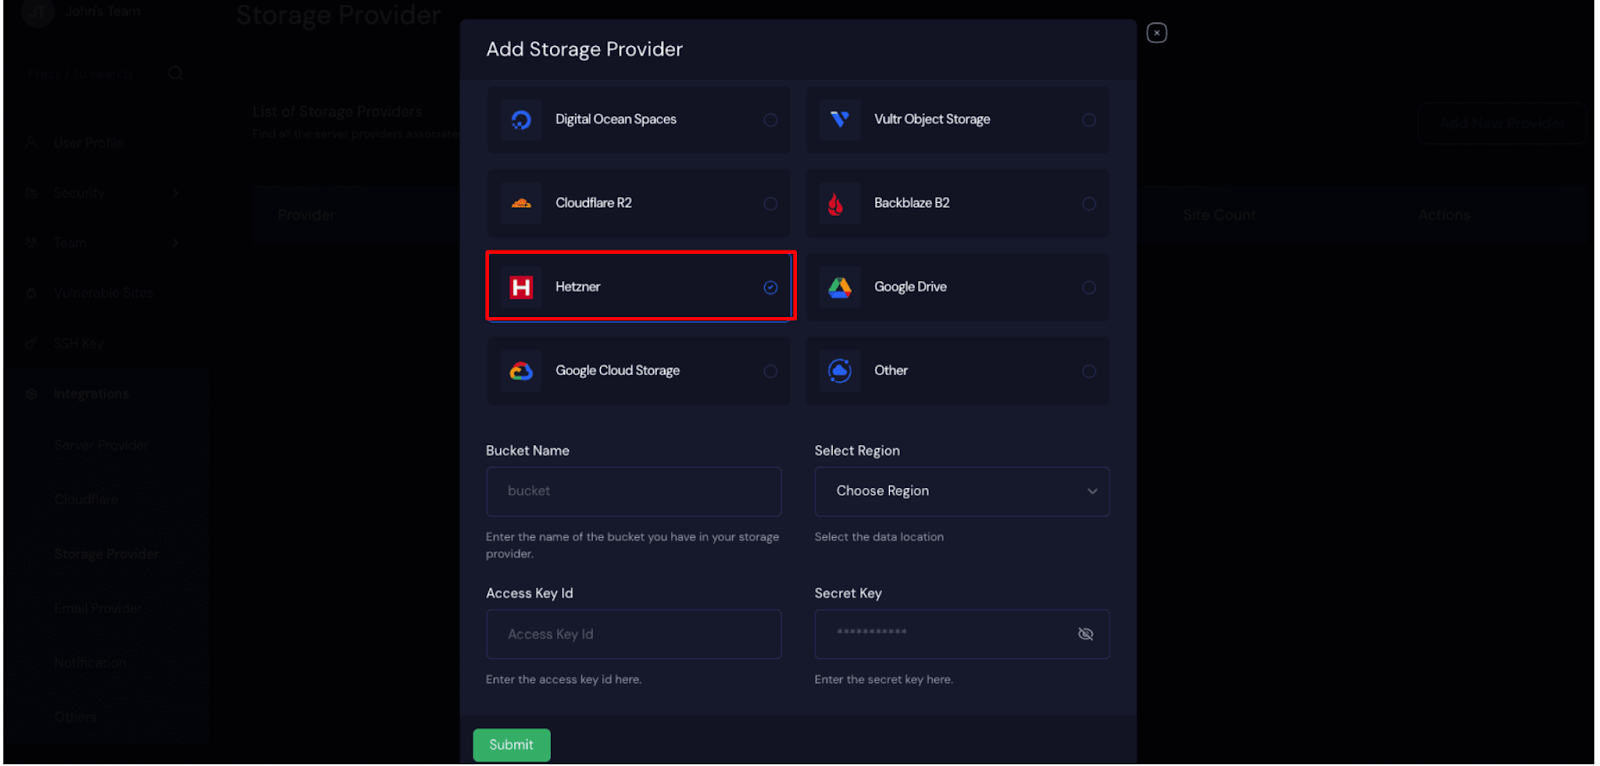
Step 3: Select The Hetzner Storage Provider #
Log in to your xCloud dashboard, and navigate to ‘Team Settings’ → ‘Integrations’ → ‘Storage Provider’ & click on ‘Add New Provider’. On the resulting page, sselect the ‘Hetzner’ as your storage provider
Step 4: Fill Up All the Necessary Information #
Now, fill in your ‘Bucket Name’, choose your ‘Region’ of the bucket that you have created with Hetzner.
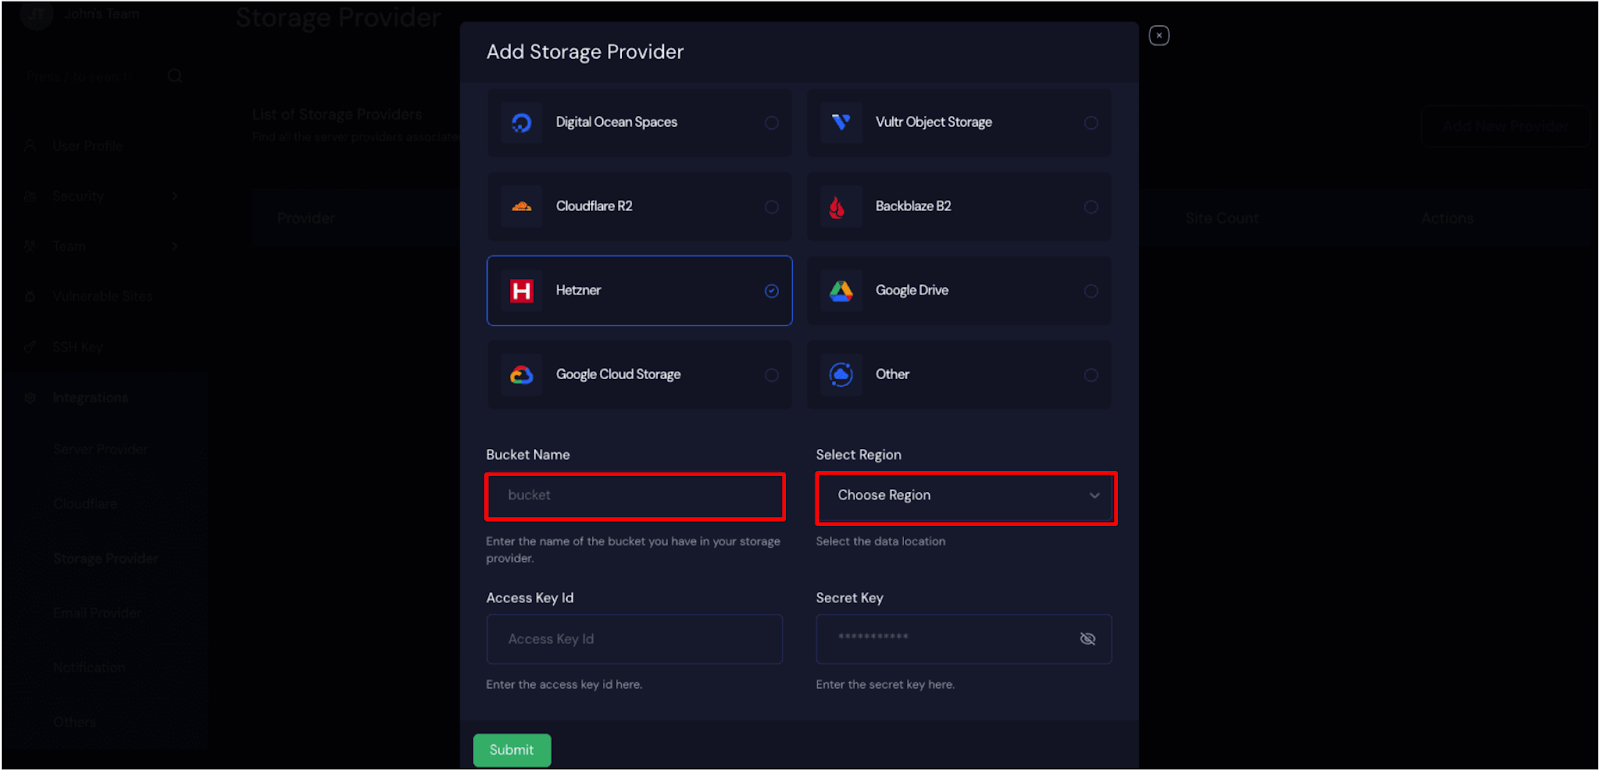
Next, go back to the Hetzner dashboard, copy the ‘Access ID’ and ‘Secret Key’ from your created bucket. Then, go back to your xCloud dashboard and paste them into the dedicated fields. Once everything is done, click on ‘Submit’.
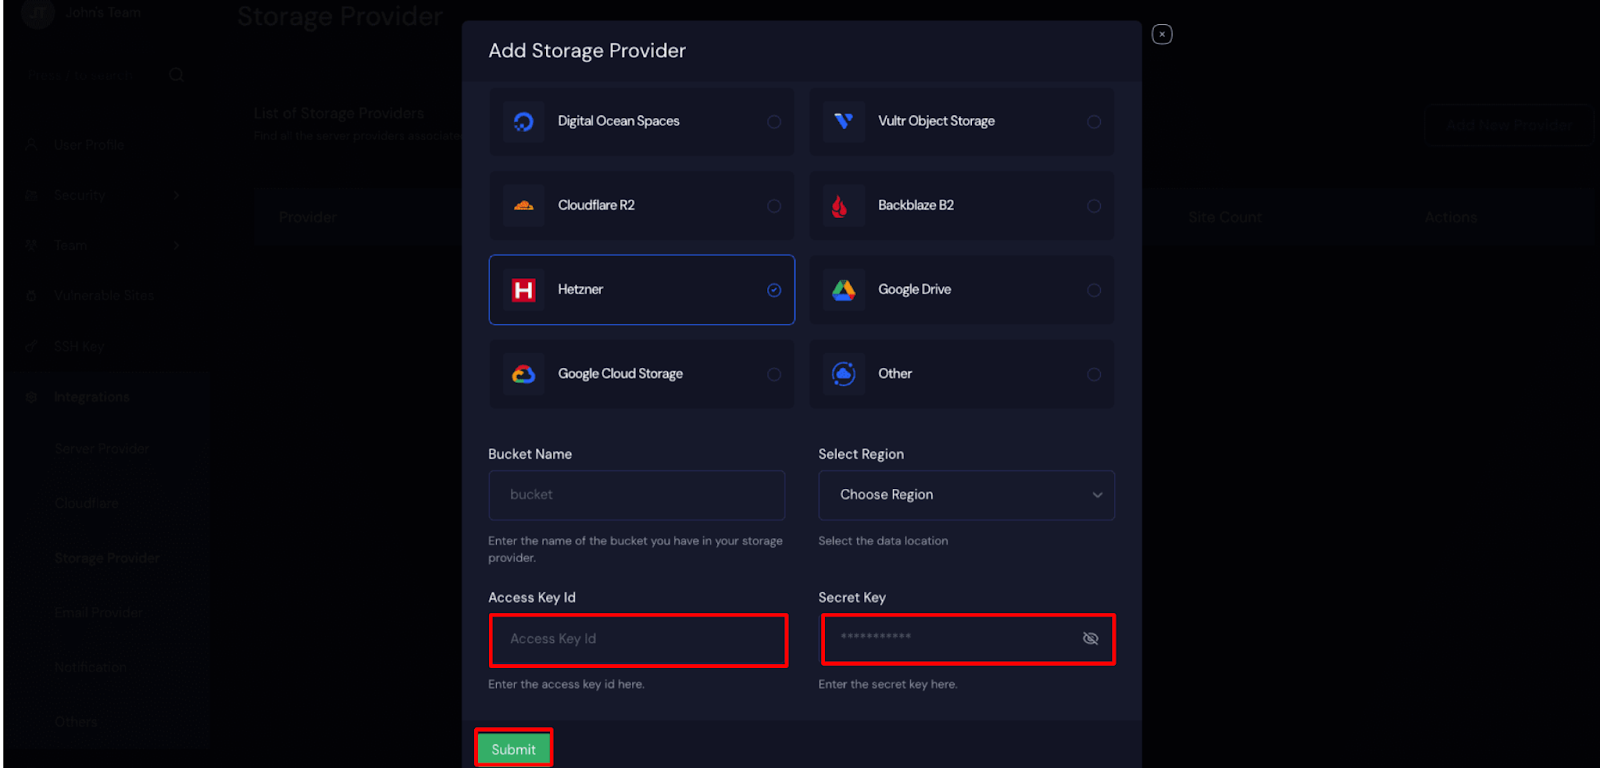
Once you have submitted it, your Hetzner storage will be added to xCloud, you can use it for site backup. Here’s how it looks in your dashboard once it gets connected successfully.
Step 6: Configure Site Backups Settings in xCloud #
Once the integration process is done, you can move on to backup your site. As you can integrate more than one storage provider, choose one if you have multiple. For the Remote Backup Settings, choose your Bucket.
This is how you can easily integrate Hetzner storage provider and configure it for site backup in xCloud.
Still stuck? Contact our support team for any of your queries.


