Deploying Laravel applications can often involve multiple steps and intricate configurations. xCloud simplifies this process by providing a streamlined platform tailored for deploying modern PHP applications, including Laravel, with minimal complexity. This tutorial provides a comprehensive, step-by-step guide to help you deploy your Laravel application using xCloud. If you are launching a new project or migrating an existing one, you’ll learn how to set up your server, configure your Git repository, manage your database, and finalize your deployment—all within the xCloud environment.
Follow this step-by-step guide to configure and deploy your fully functional Laravel website with ease.
Step 1: Choose Your Server #
Log in to your xCloud dashboard and click the ‘+New Site’ to add a new site. Then, choose a server from the list and go to ‘Next’.
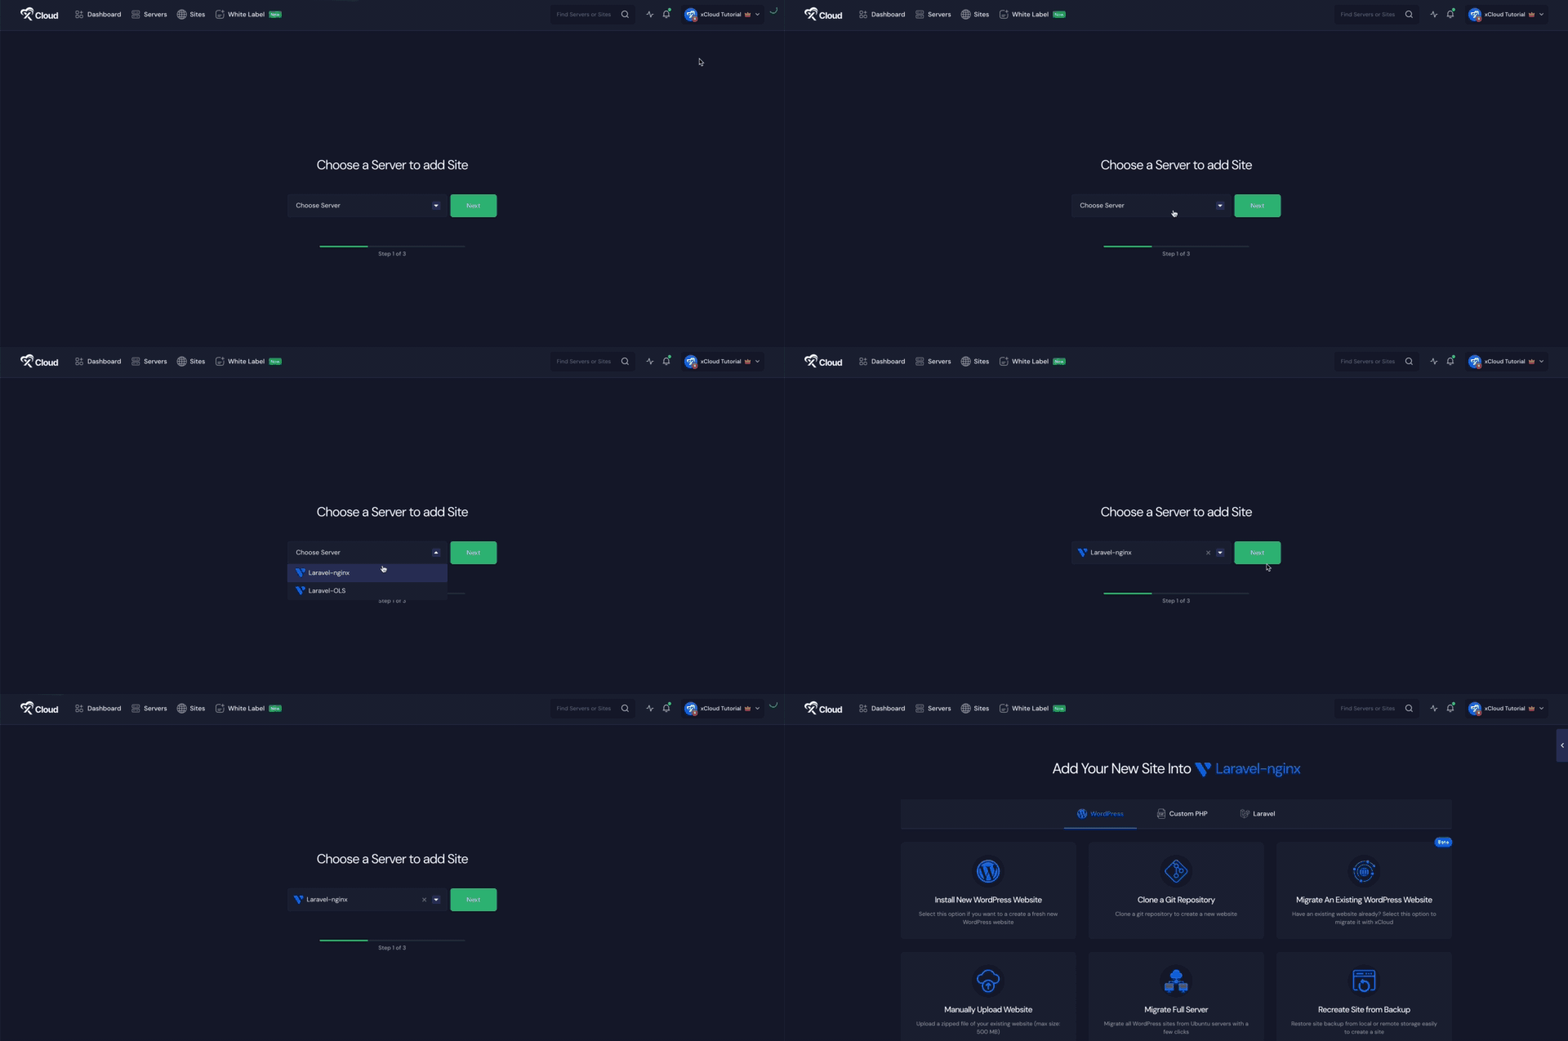
Step 2: Go to The Laravel Tab #
From here go to the ‘Laravel’ tab to deploy your Laravel applications. Now, choose ‘Clone A Git Repository’ to import your custom PHP site.
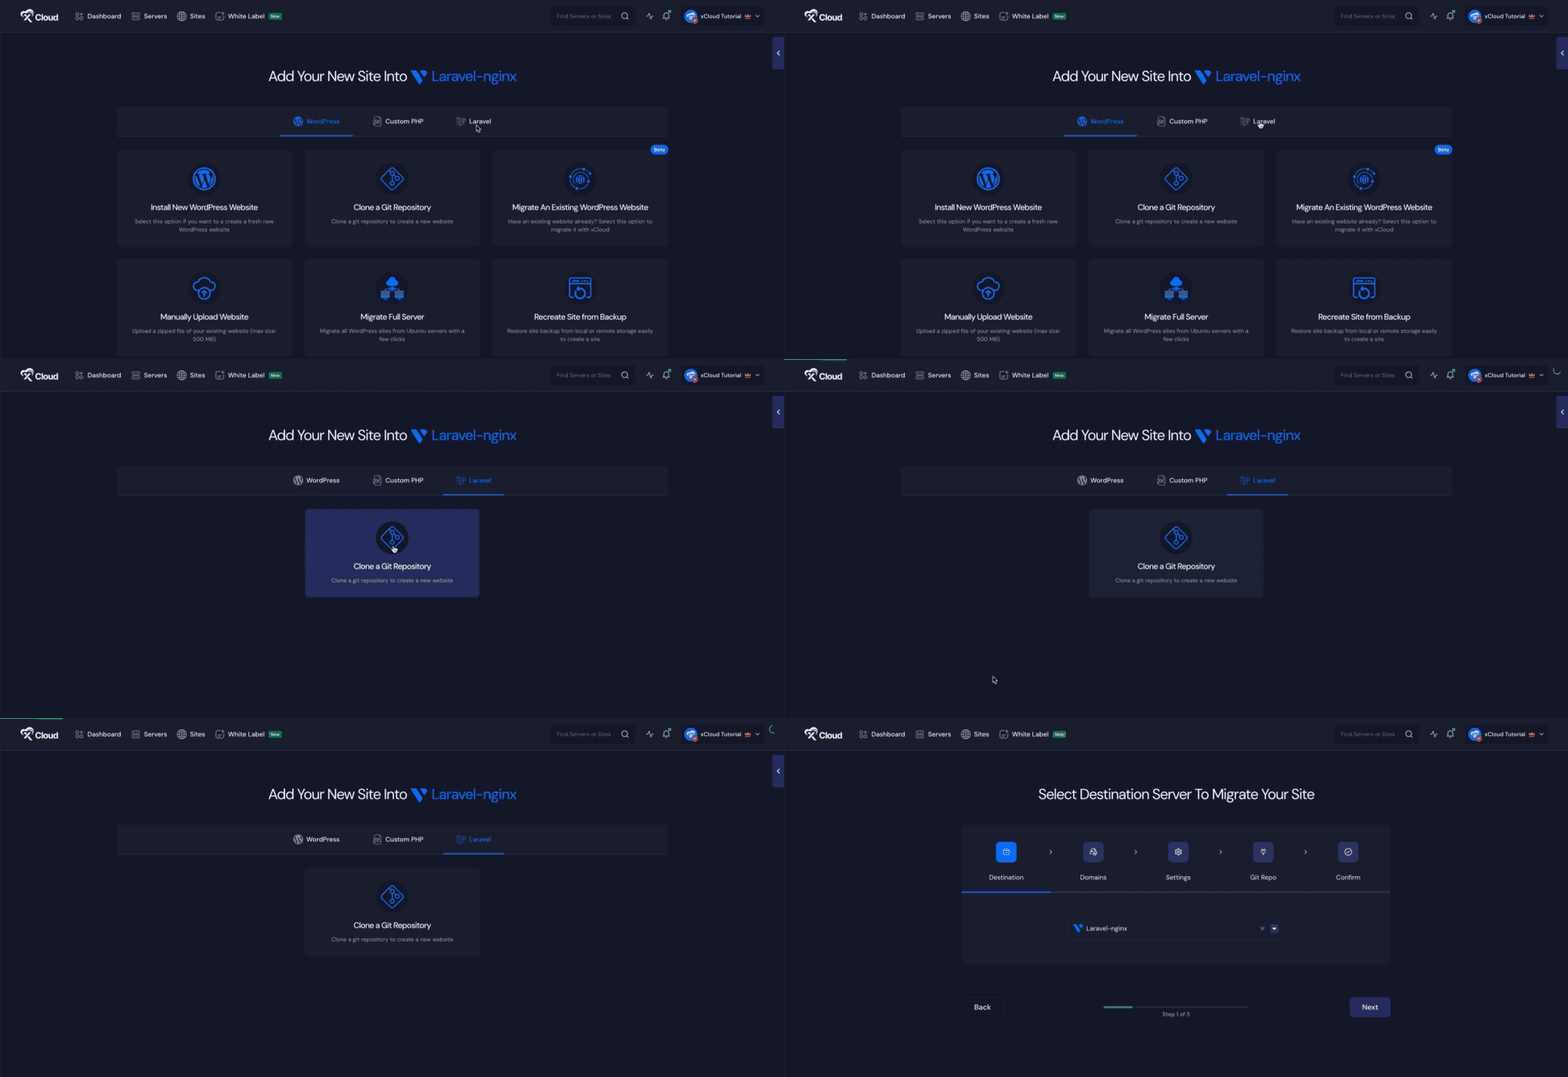
Step 3: Set Up Domains #
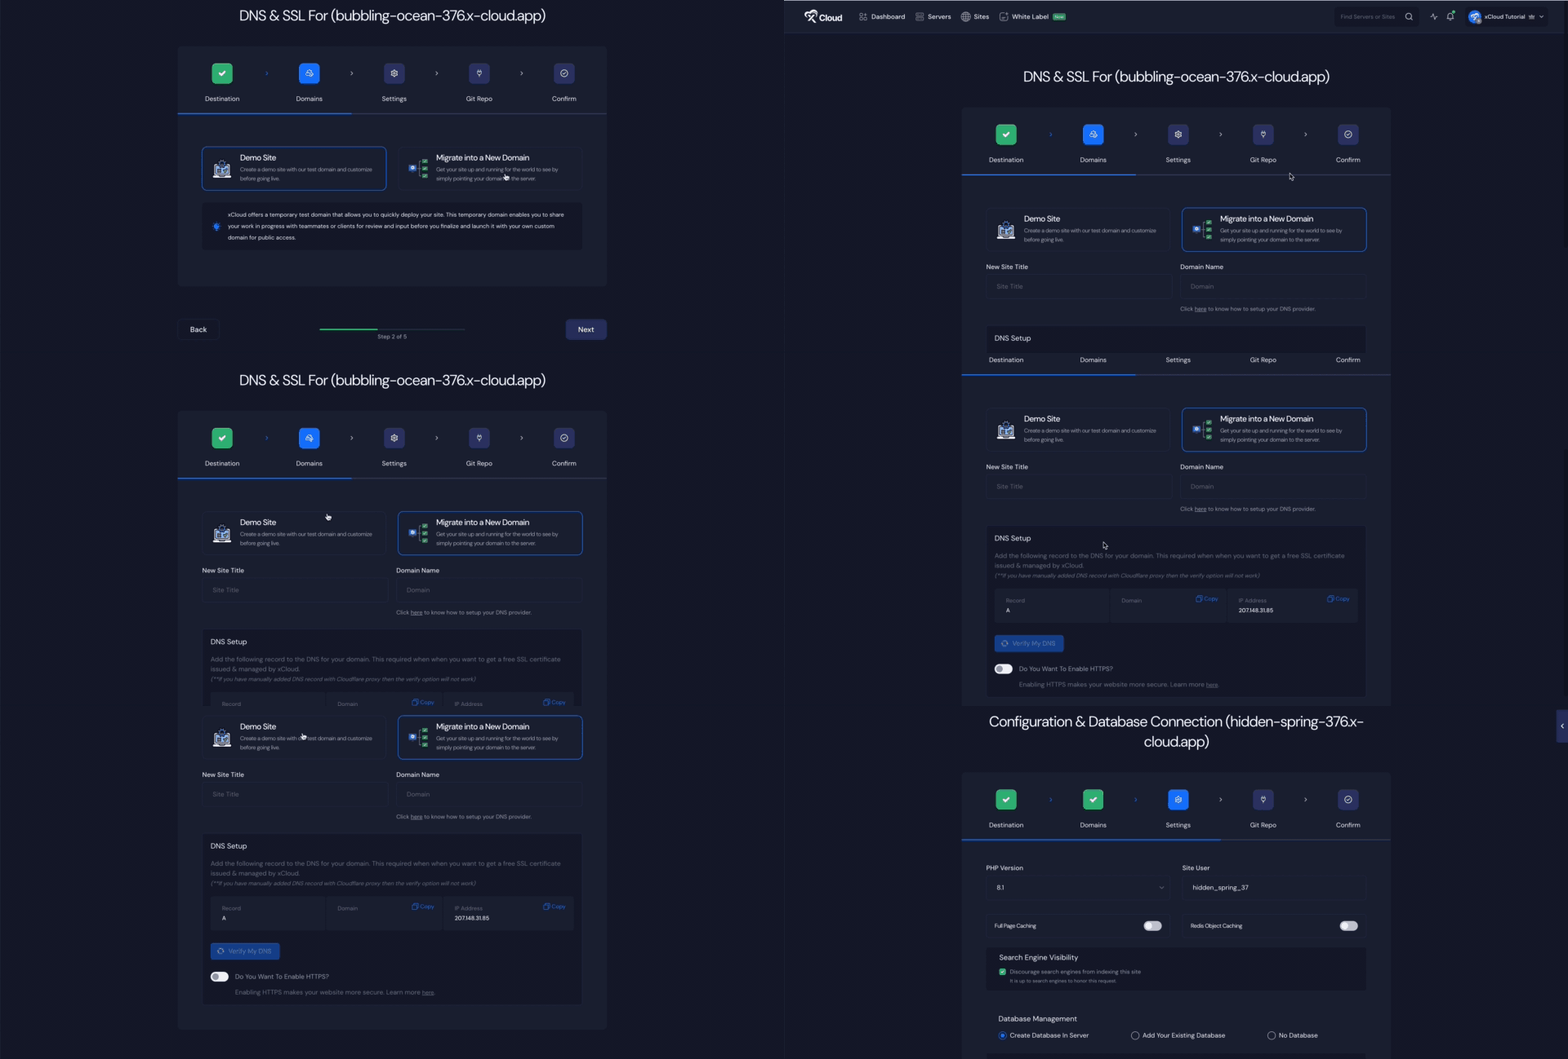
From the ‘Domains’ tab, you will get two options: either you can create a ‘Demo Site’ with a test domain and refine it until it is ready for launch, or, you can migrate into a new domain to get your site up and running in a new domain.
Or you can create your site with your live domain; you need to select the ‘Migrate into a New Domain’ option. Then you have to put ‘New Site Title’ and ‘Domain Name’. Here we are choosing the ‘Demo Site’ domain. Then click on ‘Next’.
Step 4: Settings To Manage Database #
Now, you will be sent to the ‘Settings’ step. Make sure to correctly add your ‘PHP Version’, ‘Site User’, ‘Web root’.
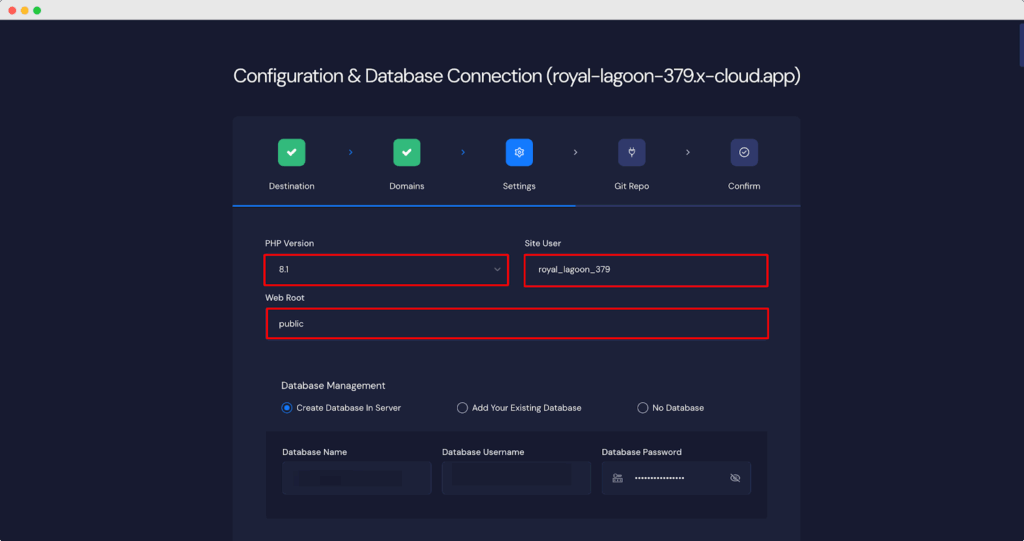
Now, it is time for database management. You will get three options. You can either create a new database on the server, you can add your existing database that is hosted on another server.
You can also proceed without any database. For this tutorial, we are going with the ‘Create Database In Server’ option.
If you select this option, enter your ‘Database Name’, ‘Database Username’ and ‘Database Password’. You can keep these auto-generated credentials, or you can modify them according to your choice.
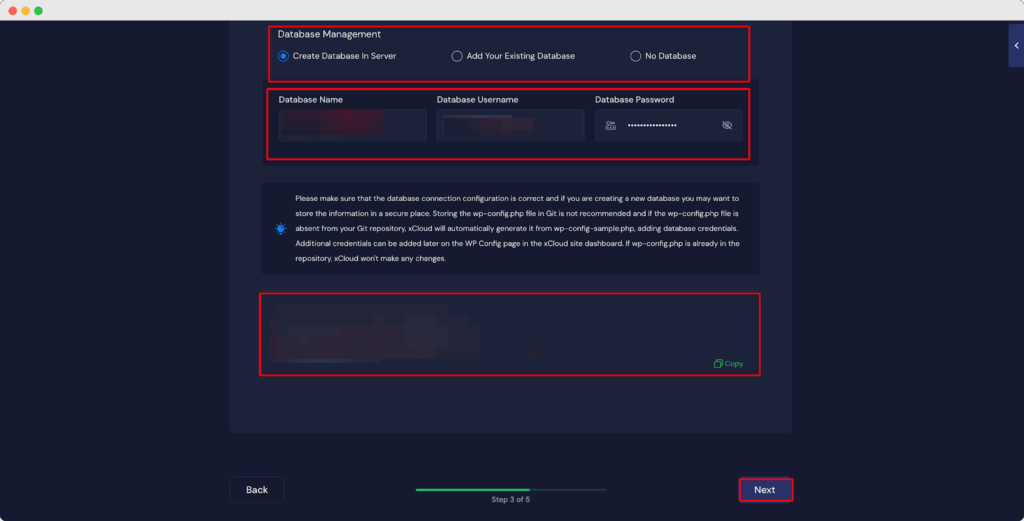
After selecting any one option and providing all essential information and credentials, click on ‘Next’.
Step 5: Insert Git Repository Credentials #
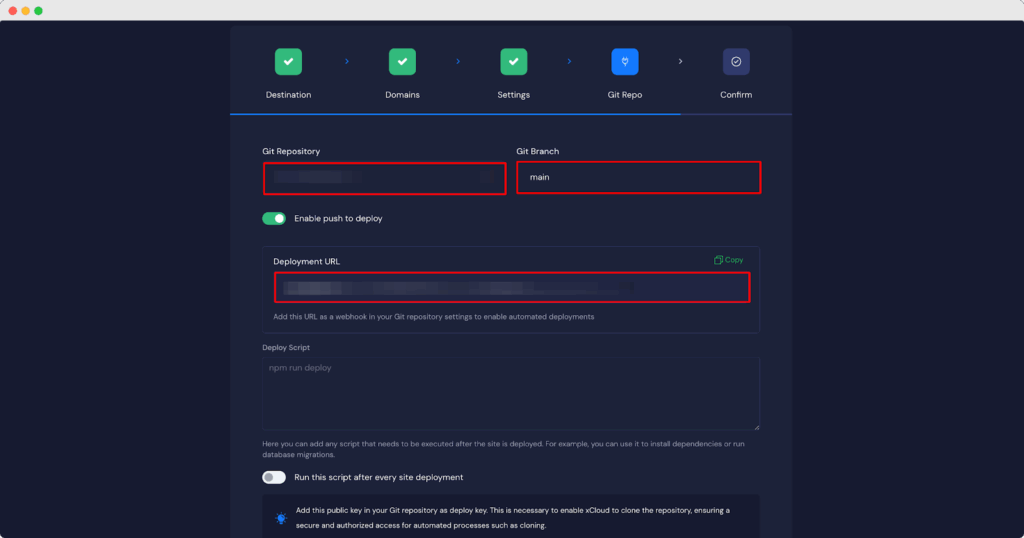
In the ‘Git Repo’ tab, add your ‘Git Repository’ and ‘Git Branch’. Also, toggle on the ‘Enable push to deploy’ option. Once you enable the ‘Push To Deploy’, it will generate a ‘Deployment
URL’. We can use this URL to CICD pipeline and copy the ‘Deployment URL’ from here.
Step 6: Add the Deployment URL to the Git Repository #
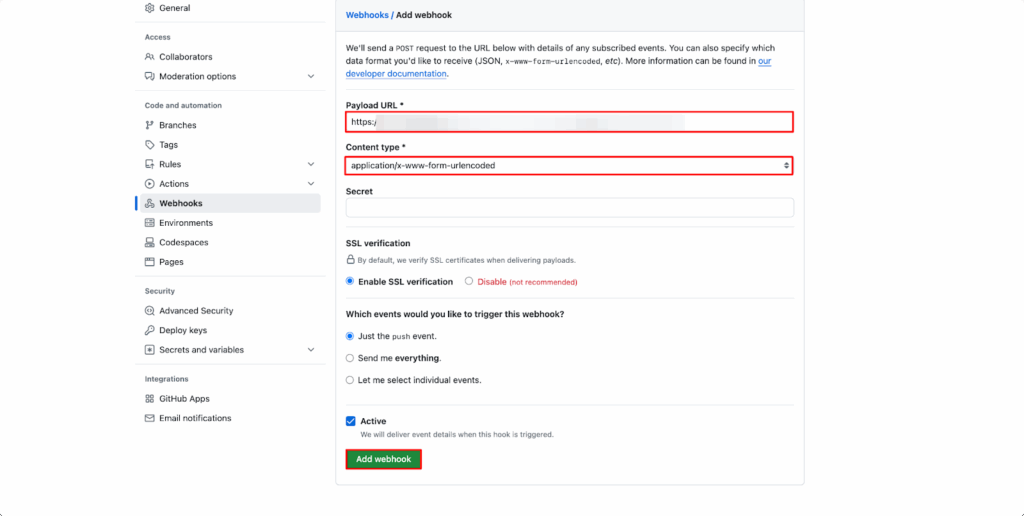
Now, go to your Git repository. From the ‘Code‘ tab, go to the ‘Settings’ tab and click on the ‘Webhooks’ page from the ‘Code and automation’ section of the left navigation. Insert the deployment URL into the ‘Payload URL’ field. Select ‘application/json’ from the ‘Content type’ dropdown.
Note: This step is optional. Adding a webhook enables automatic deployments when you push changes to the repository, but it’s not required if you prefer to deploy manually.
Step 7: Add Public Key to Git Repository #
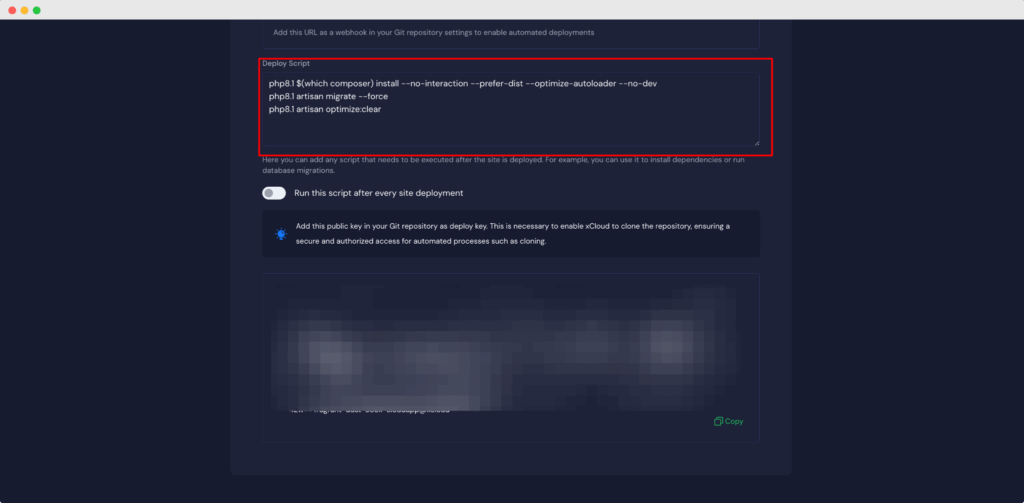
Next in the ‘Deploy Script’ field any script that needs to be executed after the site is deployed. For example, you can use it to install dependencies or run database migrations.
Next, in the ‘Deploy Script’ field, specify any commands that need to be executed after the site is deployed.
If your project uses PHP, you can specify the version (e.g., php8.1) and run Composer along with Laravel-specific commands like this:
php8.1 $(which composer) install --no-interaction --prefer-dist --optimize-autoloader --no-devphp8.1 artisan migrate --forcephp8.1 artisan optimize:clearIf your project also involves Node.js, you can include additional commands as well. These scripts ensure that your backend and frontend are fully prepared after deployment.
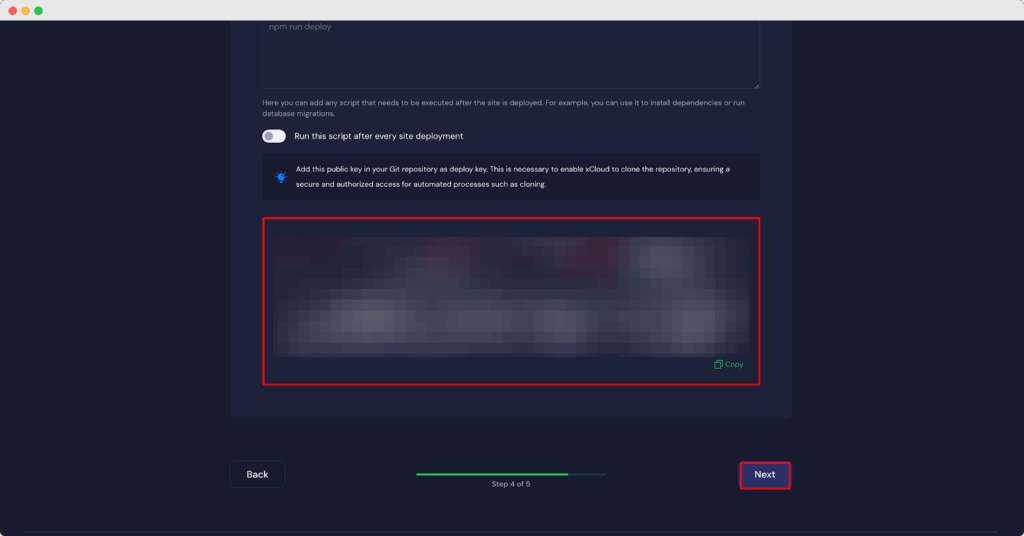
From the xCloud dashboard, copy the ‘Public Key’ to add it to your Git repository as a deploy key. Git migration uses the ‘Public Key’ for SSH authentication. This is necessary to enable xCloud to access your Git repository and clone it. It ensures secure and authorized access for the cloning process.
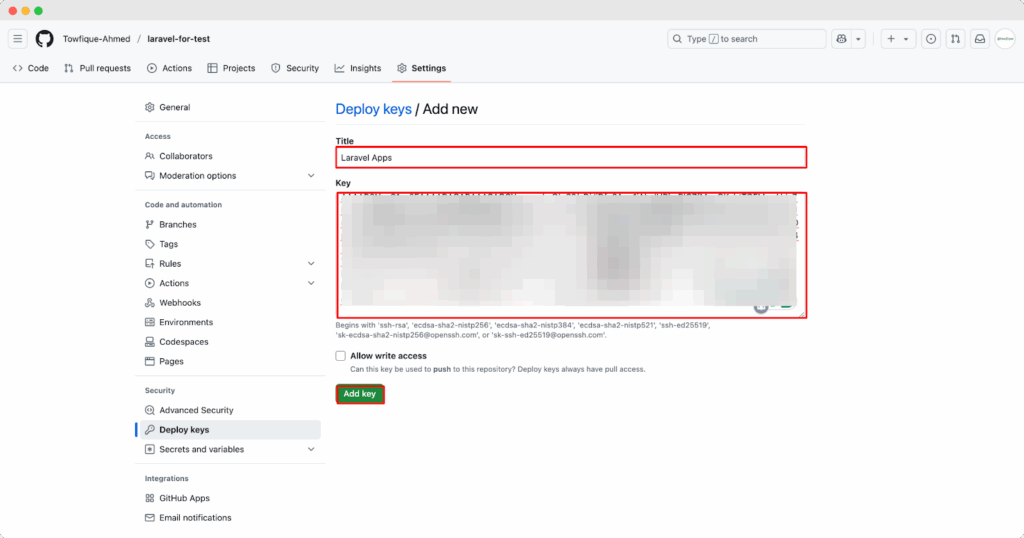
Now, again, go to your Git Repository. From the ‘Code‘ tab, go to the ‘Settings’ tab and click on ‘Deploy keys’ in the security section of the left navigation. Click on the ‘Add key’ button and paste the key that you copied from xCloud.
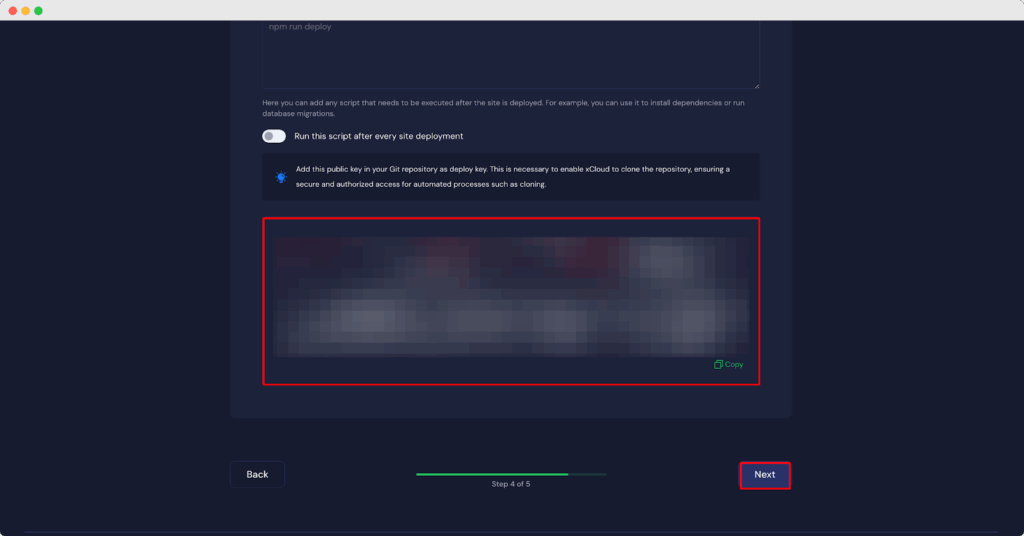
After inserting the deploy key in GitHub, click on ‘Next’ on your xCloud settings of the ‘Git Repo’ tab.
Step 8: Confirm Migrating The Website #
Now, to start the migration process, click on the ‘Start’ button. After clicking on the ‘Start’ button, the migration process will start and you will see the progress of migration.
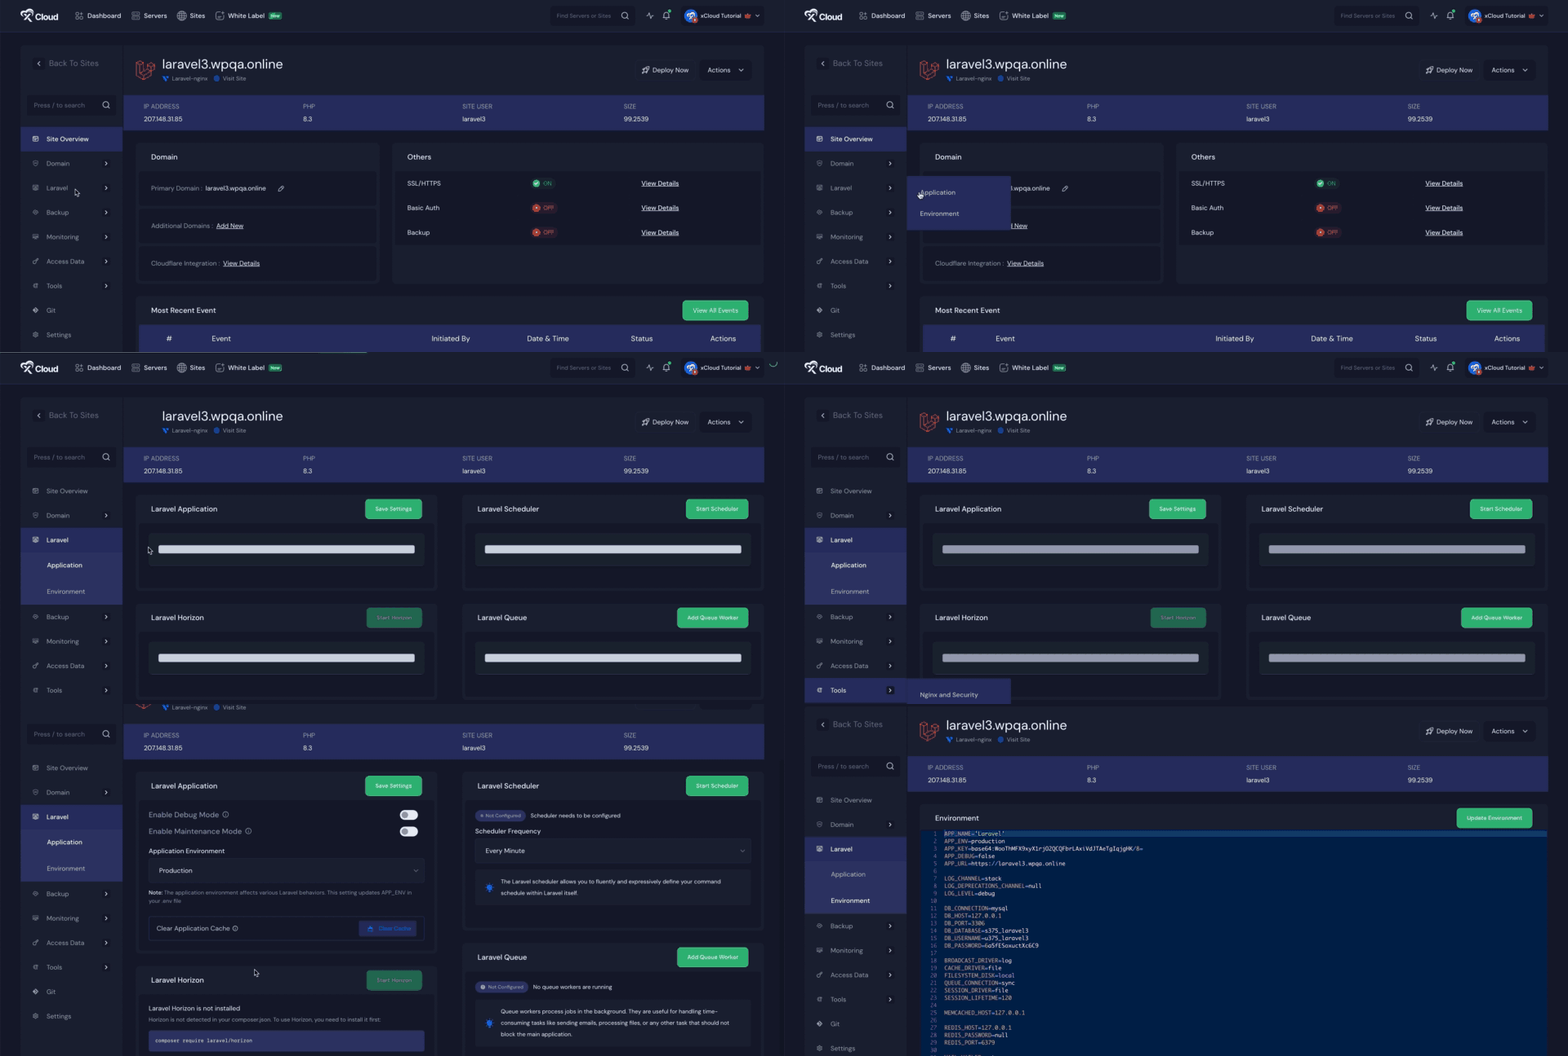
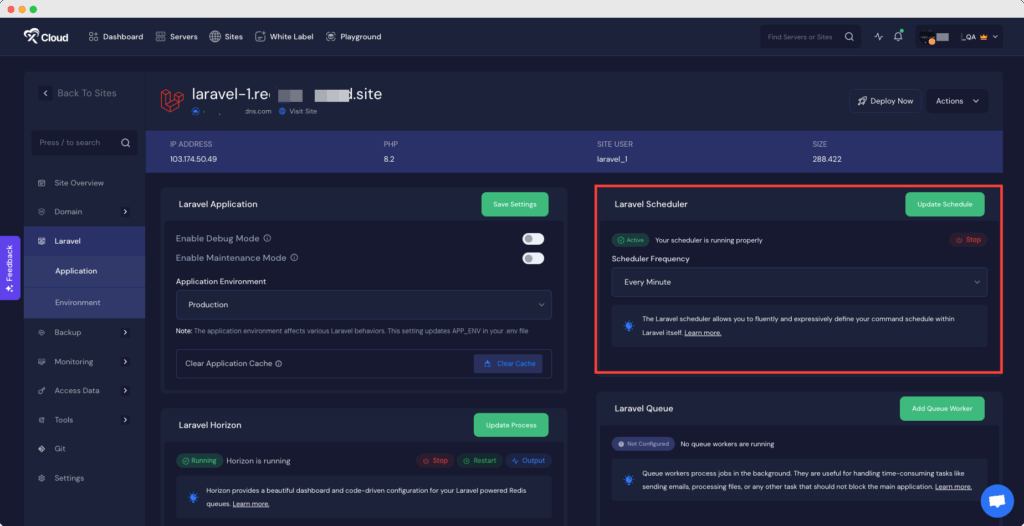
Once the migration is successfully complete will see the following screen. You go to the site dashboard from there. Go to the ‘Laravel’ Option from the menu and customize the ‘Application’ and ‘Environment’ as your preferences.
Check out the other features of Laravel:
How to Use Supervisor for Process Management With xCloud
How to Set Up Laravel Horizon with xCloud
How to Set Up a Queue Worker for Laravel Applications
Configure Laravel Scheduler with cron job for your Laravel projects with ease. Check out this documentation for more details:
How To Configure xCloud Cron Job?
And that’s it. This is how easily you can successfully deploy your Laravel application on xCloud. Now you can go to your site dashboard from xCloud and customize according to your preferences.
If you are still stuck, feel free to contact our support team.


