

How to Go Live From Demo Site With Custom Domain?
Updated September 27, 2026 · 1 min read
With xCloud, you can easily create a demo site in a few clicks and test everything before going live. A demo site serves as a test website where you can migrate sites, run experiments, use all necessary plugins and themes, and also go Live with a custom domain. But ever wondered how you can go live from a demo site with custom domain using xCloud?
Follow the steps below to go live from the demo site with a custom domain on xCloud
First, click on the ‘Domain’ → ‘Go Live’ option from the dashboard. Then go to the ‘Domain Setup’ section. Enter your ‘Domain name’ in the field.
Then go to the ‘DNS Setup’ section from the dashboard and add the records to your domain provider and verify the DNS.
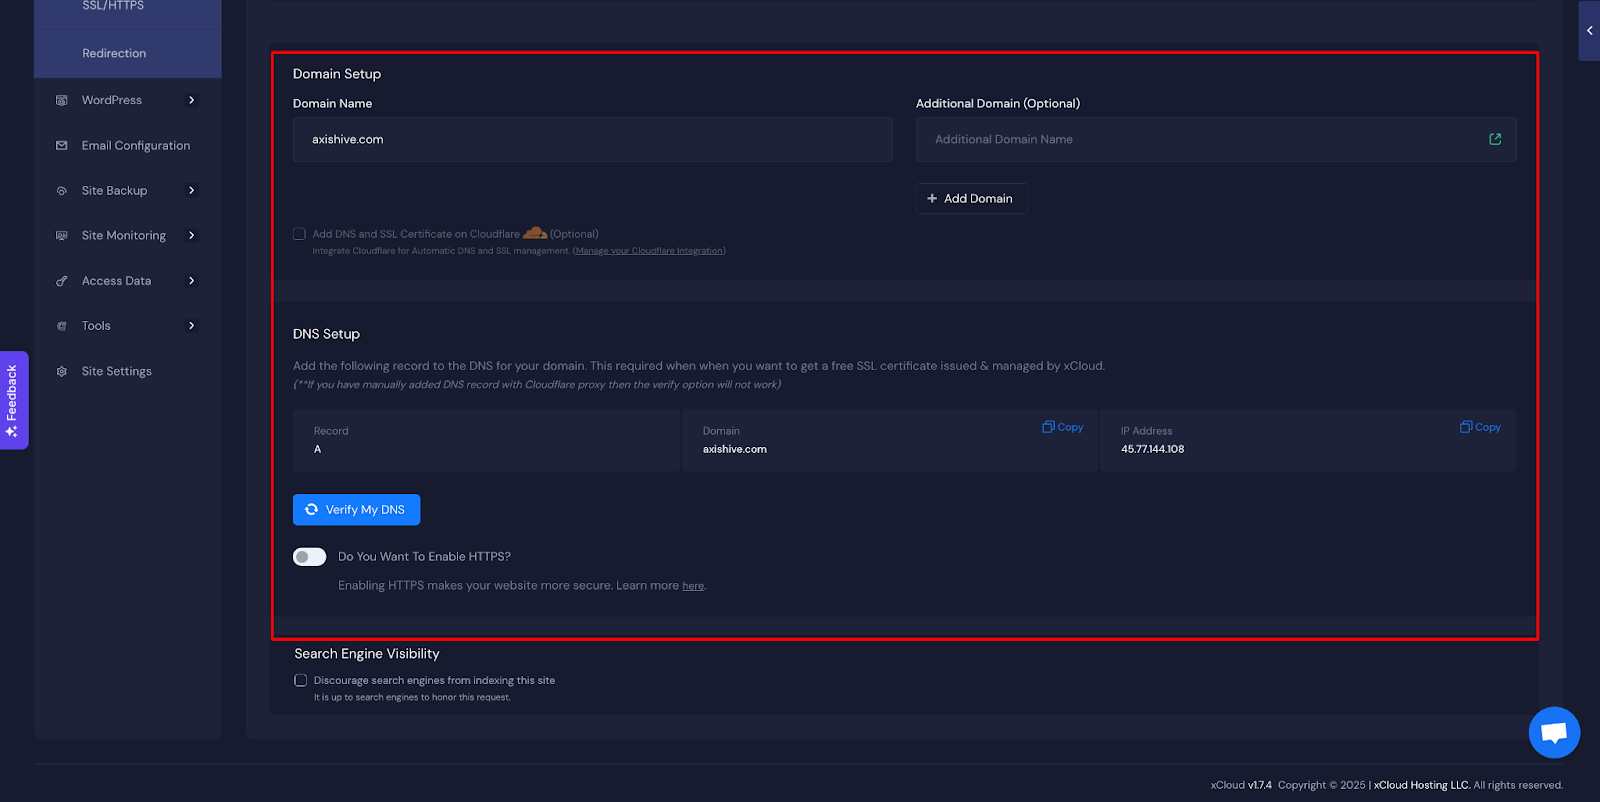
If you are using Cloudflare for DNS management, you can follow this guide for DNS Management with Cloudflare.
After that, click on the ‘Save’ button to complete the process. From the xCloud dashboard, you can easily go live from the demo site with a single click.
Want to learn about how to set up your DNS records?
What Go Live already does for you
For WordPress sites, Go Live already runs a database search-and-replace to swap the demo domain for the live one — you don’t need to do this yourself in the normal case. The Go Live dialog lets you choose the Search & Replace Mode and Table Mode; the defaults cover the standard WordPress tables.
Why old URLs can remain after Go Live
If images or links still point at the old demo domain afterward, it’s usually one of these:
- The domain was changed a different way (for example, only at DNS) instead of through the Go Live wizard’s search-and-replace.
- Some URLs aren’t plain database values — they’re hard-coded in theme or plugin code, or stored in page-builder data that the standard search-and-replace doesn’t reach.
- The page cache or a CDN cache is still serving the old, pre-Go-Live version of a page.
Fixing leftover old-domain URLs
- Purge caches first. Clear the site’s page cache and any CDN cache (Cloudflare or similar) — a stale cache is the simplest explanation and the quickest to rule out.
- Run WP-CLI search-replace if URLs are still wrong. Take a backup first, then run:
Use WP-CLI rather than raw SQL — it safely handles WordPress’s serialized PHP data, which a plain SQL replace can corrupt. Check links and media on the site afterward.wp search-replace 'old-domain.com' 'new-domain.com' --all-tables --precise - Check
homeandsiteurl. If either still points at the old domain, that’s very likely the direct cause and worth confirming before you look further.
Multisite
Multisite networks need extra care beyond the single-site steps above — the network’s domain configuration and any per-site URL caching can each hold onto the old domain independently. If old URLs persist on a multisite install after the steps above, contact support rather than editing multisite configuration blind.
Still stuck? Contact our support team for any of your queries.