
With xCloud, you can easily create a staging environment to push and pull site data between staging and production sites. This lets you test plugins, themes, or any site changes in a new environment and apply them as necessary to your production sites without the risk of breaking them.
Follow the step-by-step guidelines to learn how to create a staging environment to pull and push data between staging and production sites in xCloud.
Step 1: Create a Staging Site With xCloud #
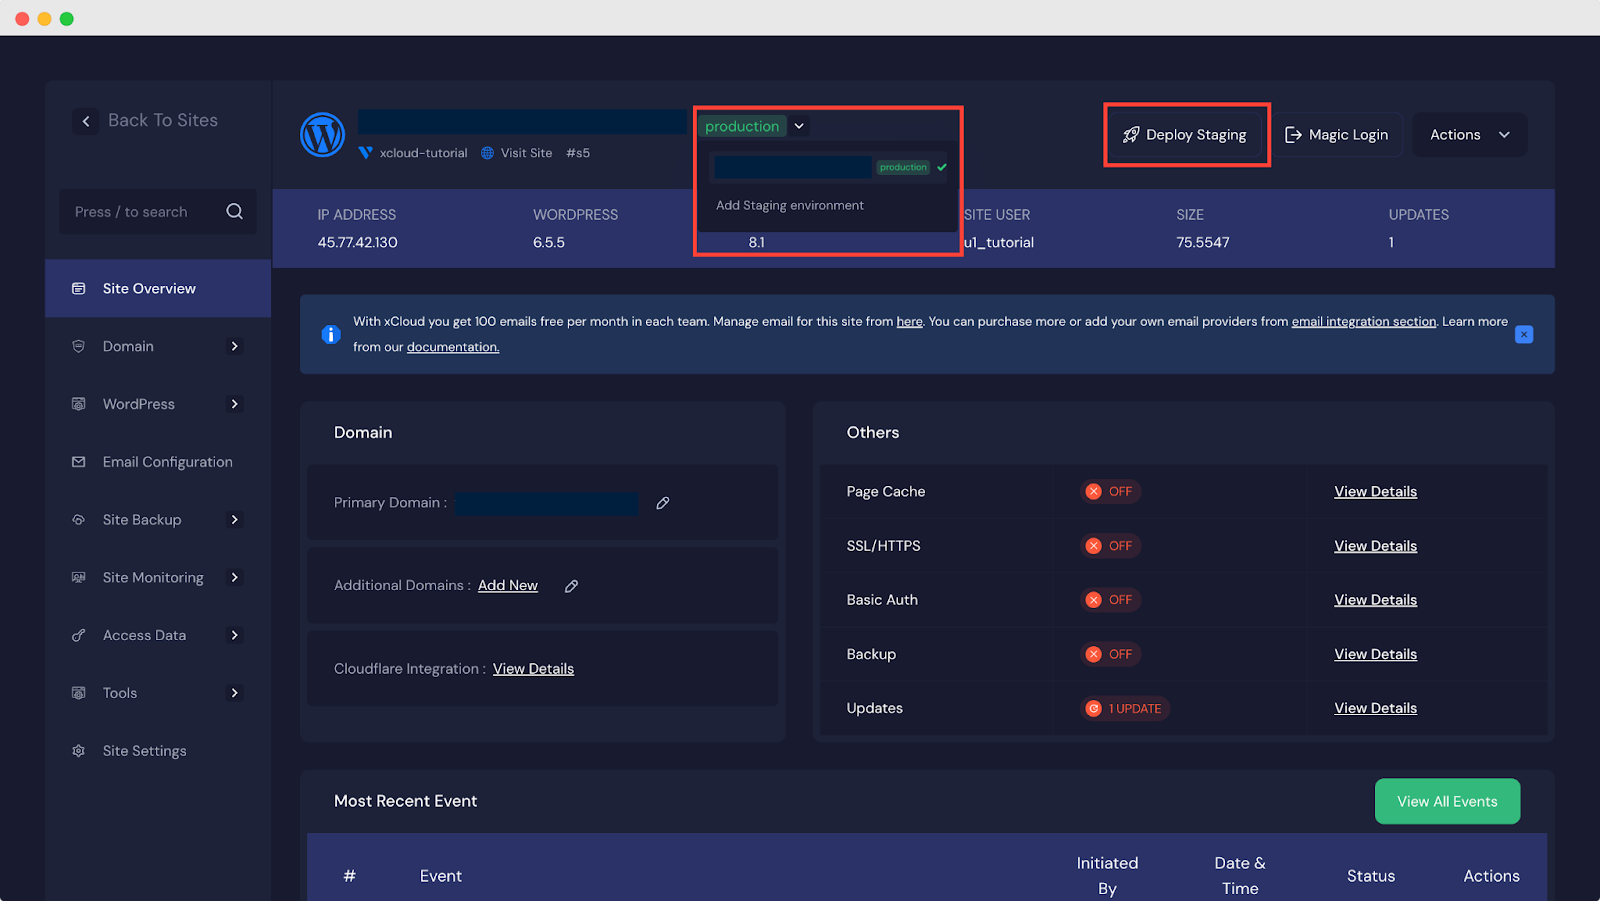
Log in to your xCloud dashboard, and go to your production site to deploy a staging site under that site. Once you are here, you can quickly create a staging environment from the drop-down found beside the site name or by clicking on the ‘Deploy Staging’ button.
Step 2: Choose The Domain Options #
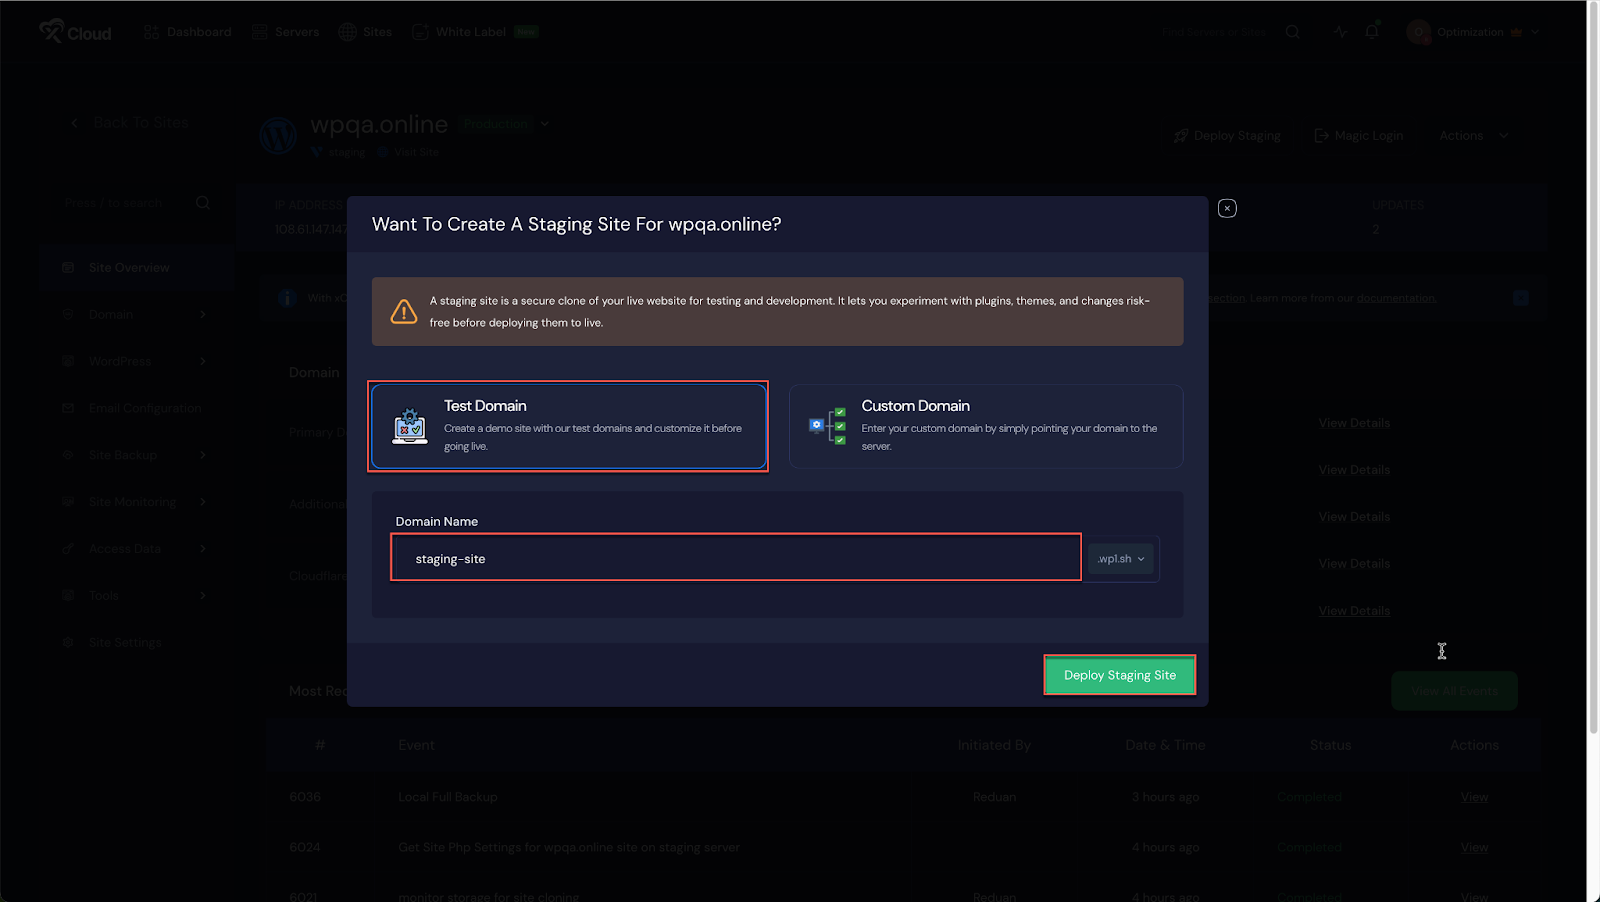
Once you click the ‘Deploy Staging’ button, here you will get two options ‘Test Domain’ & ‘Custom Domain’ for creating a staging environment.
Test Domain #
Now choose the ‘Test Domain’ option to create a staging site with our test domains. Next, in the ‘Domain Name’ field, enter your preferred ‘Domain Name’ and click on the ‘Deploy Staging Site’ to create a site.
Custom Domain #
Choose the ‘Custom Domain’ option to deploy your staging site with your domain. Then, at the ‘Domain Name’ field and enter your preferred domain and hit on the ‘Deploy Staging Site’ option.
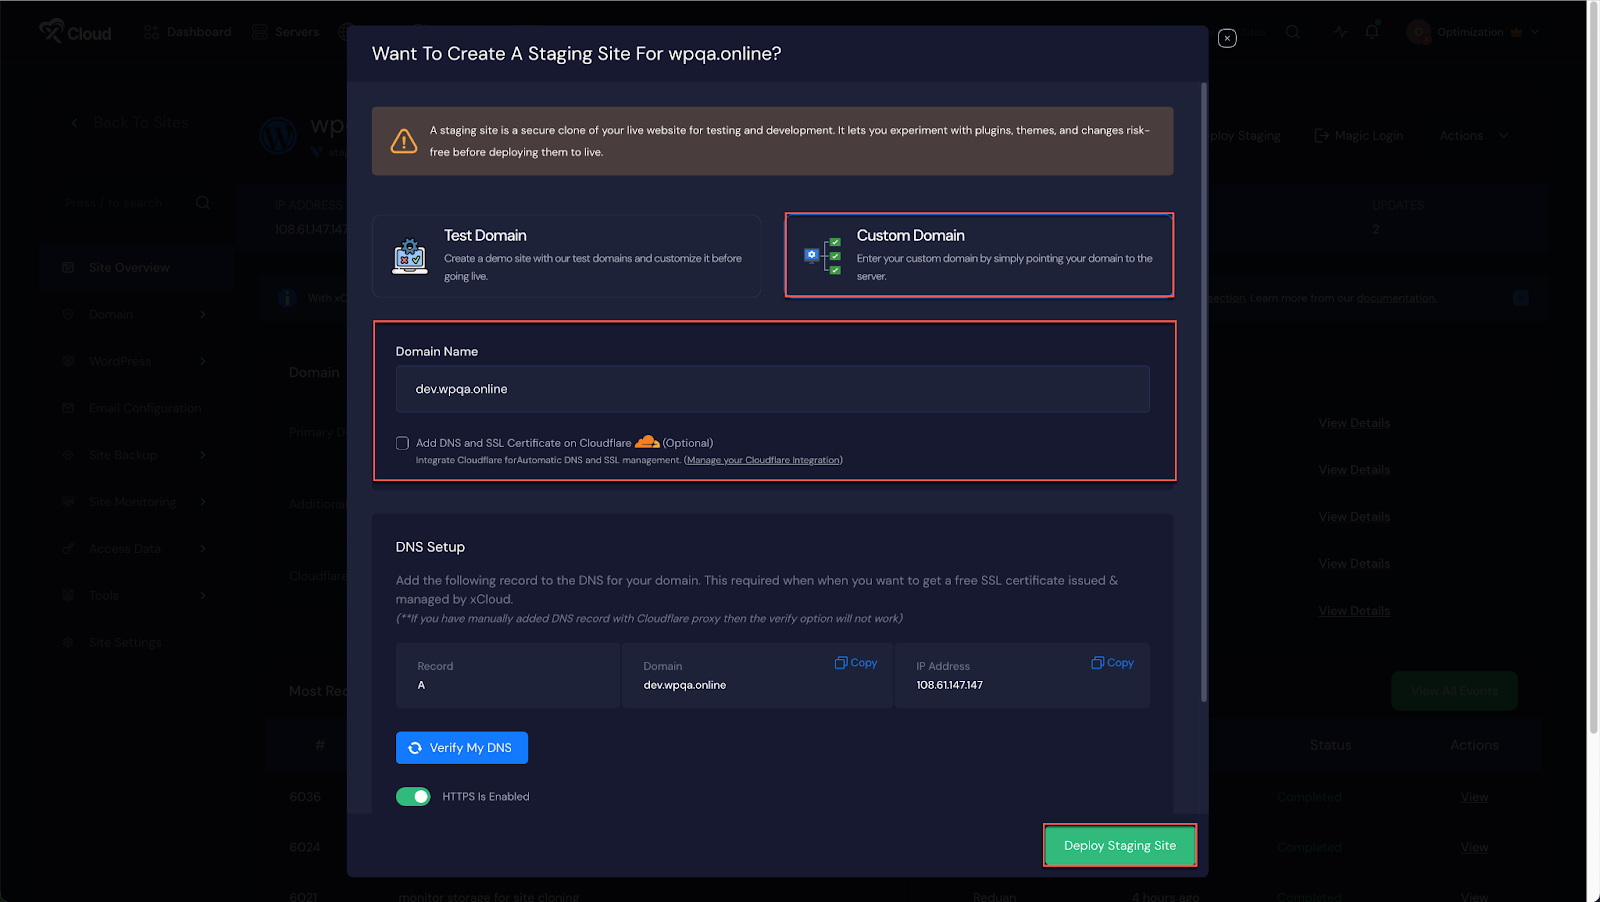
Note: If you have Cloudflare integrated with xCloud, simply check the box below and verify your DNS and SSL settings with Cloudflare.
Once you deploy your staging site under your production site, it will be created instantly. The site will also appear under the production site in the header menu.
Step 3: Pull And Push Site Data #
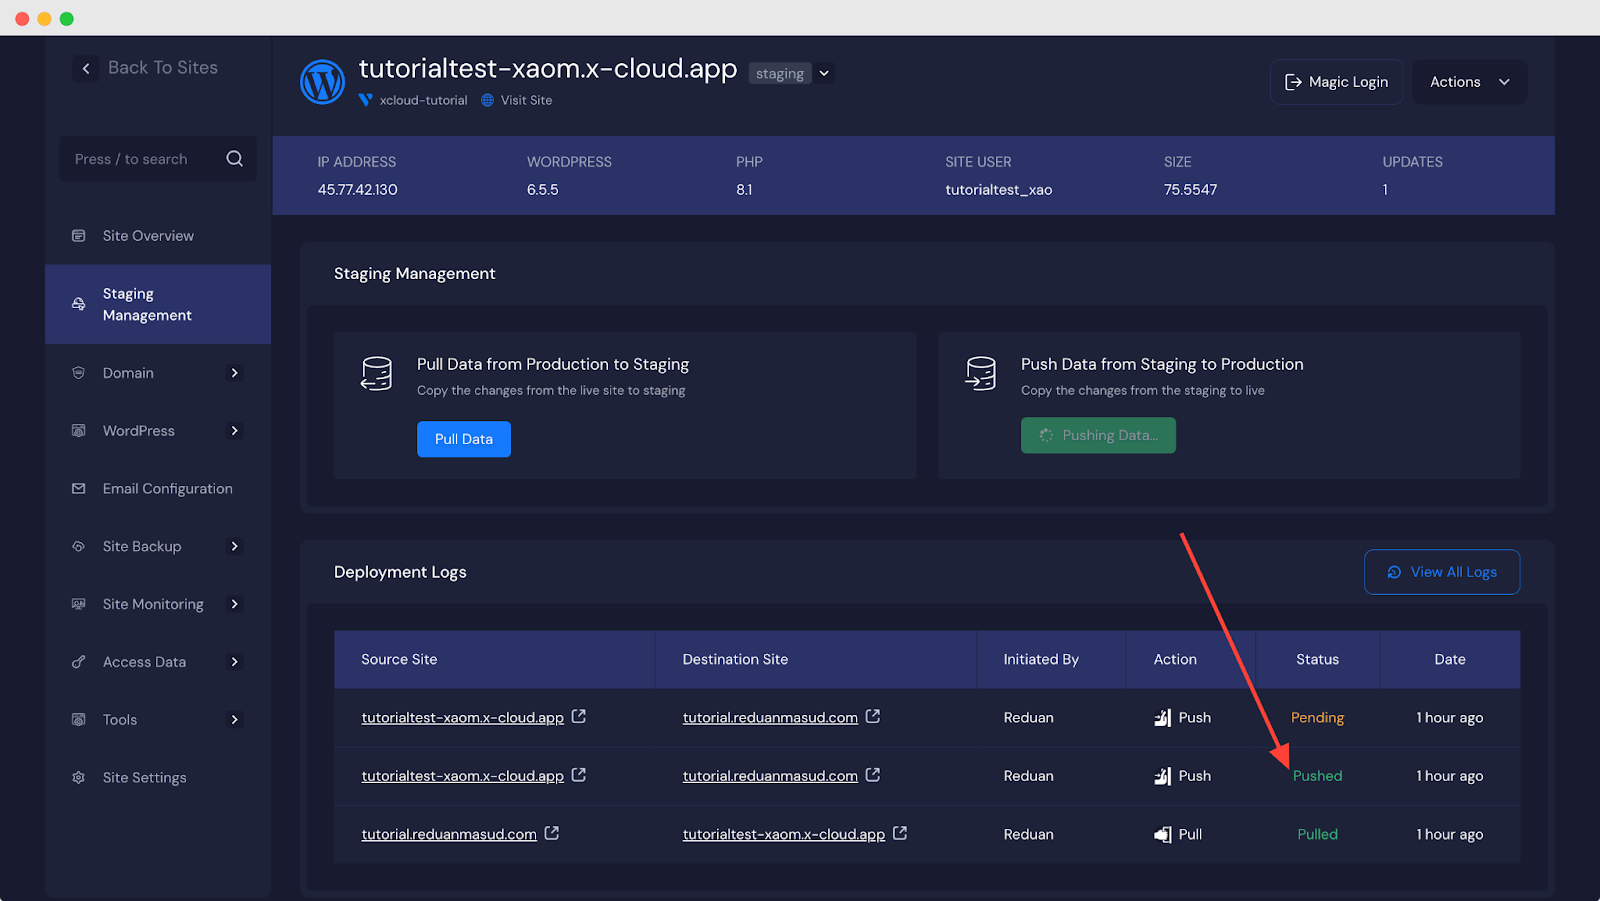
Once you are done creating a staging environment for your production site, it is time to pull and push site data between them. On your staging site page, go to the ‘Staging Management’ tab from the left menu to find the pull and push data options. You will also find the deployment logs to know when your changes have been made.
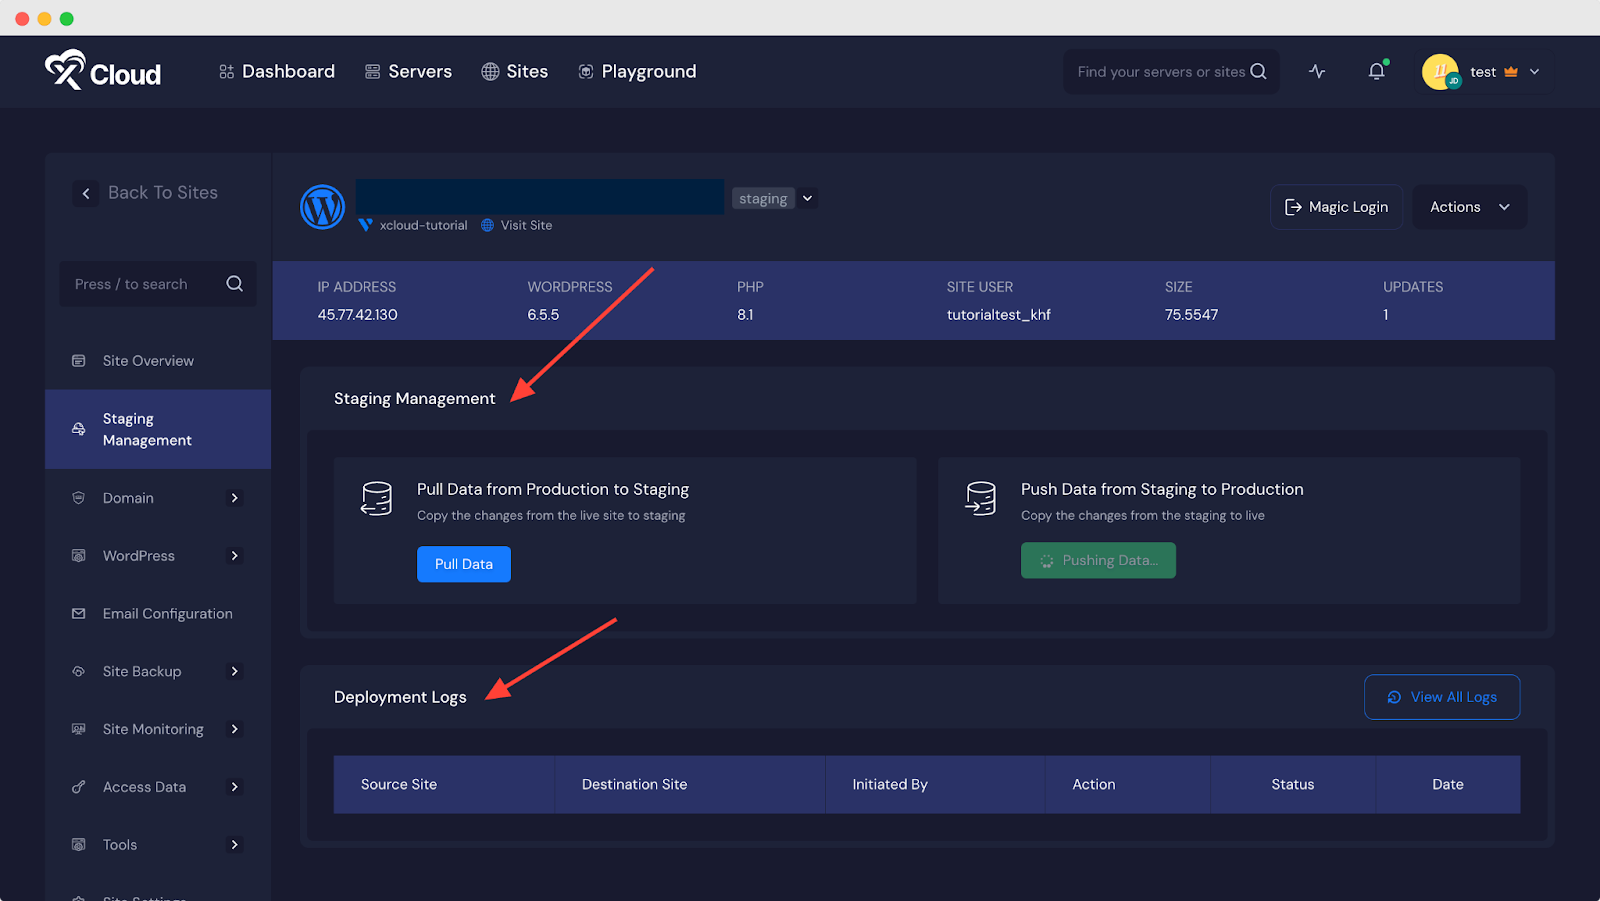
Now, if you need to pull any production site changes to the staging, press the ‘Pull Data’ button. You will have two options to pull: Files and Database. Plus, you can choose to overwrite all files or keep the most recent updates since the last pull with the ‘Incremental’ option.
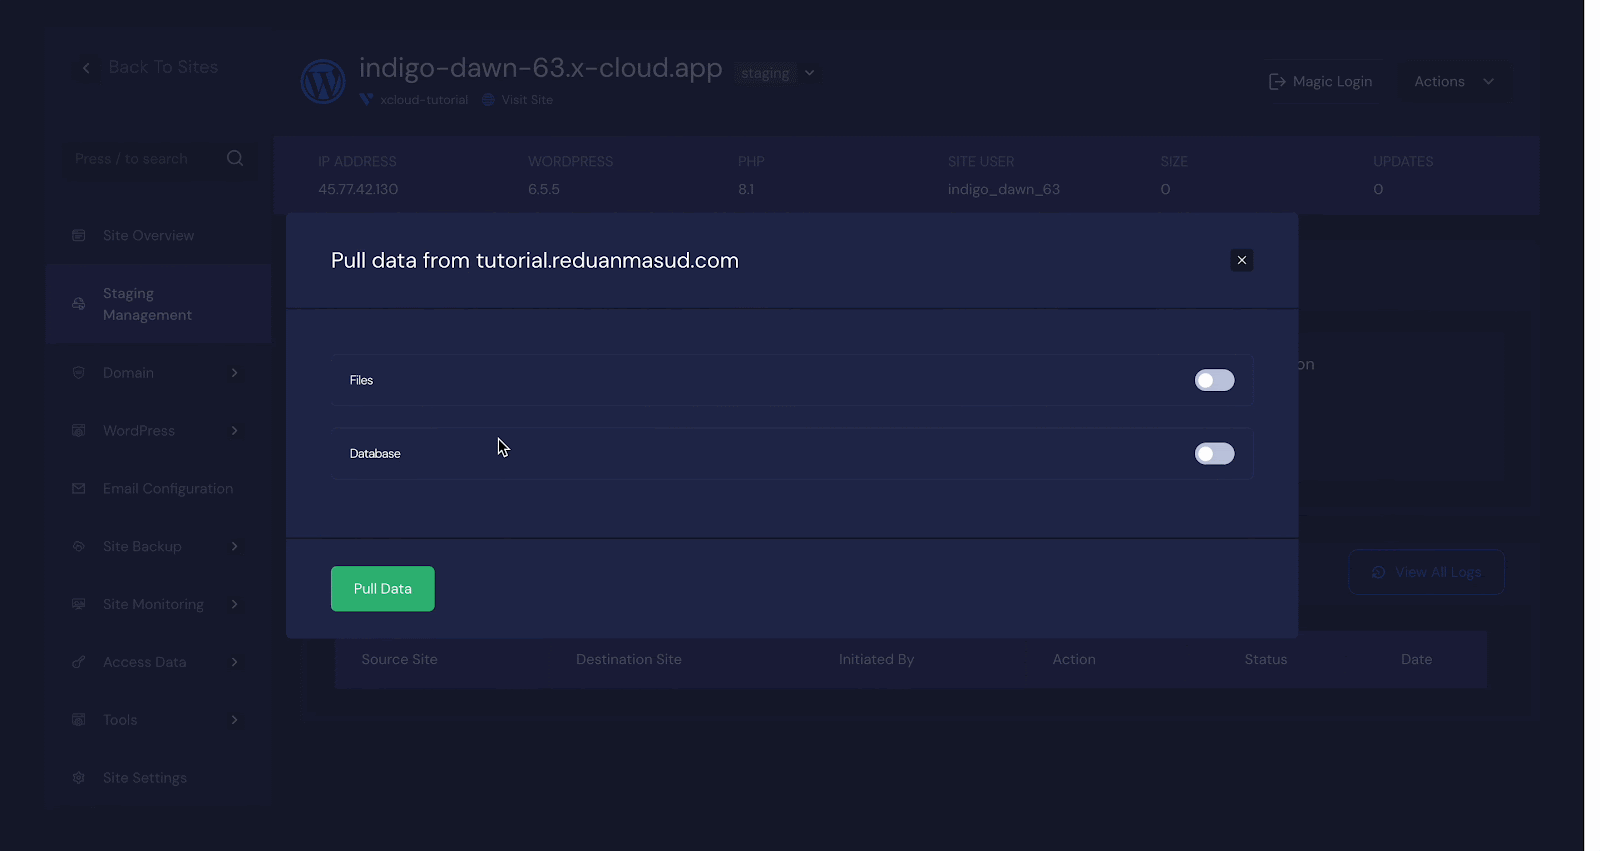
You can also select to pull the full database or select tables to pull specific data. Once you are done selecting, hit the ‘Pull Data’ button.
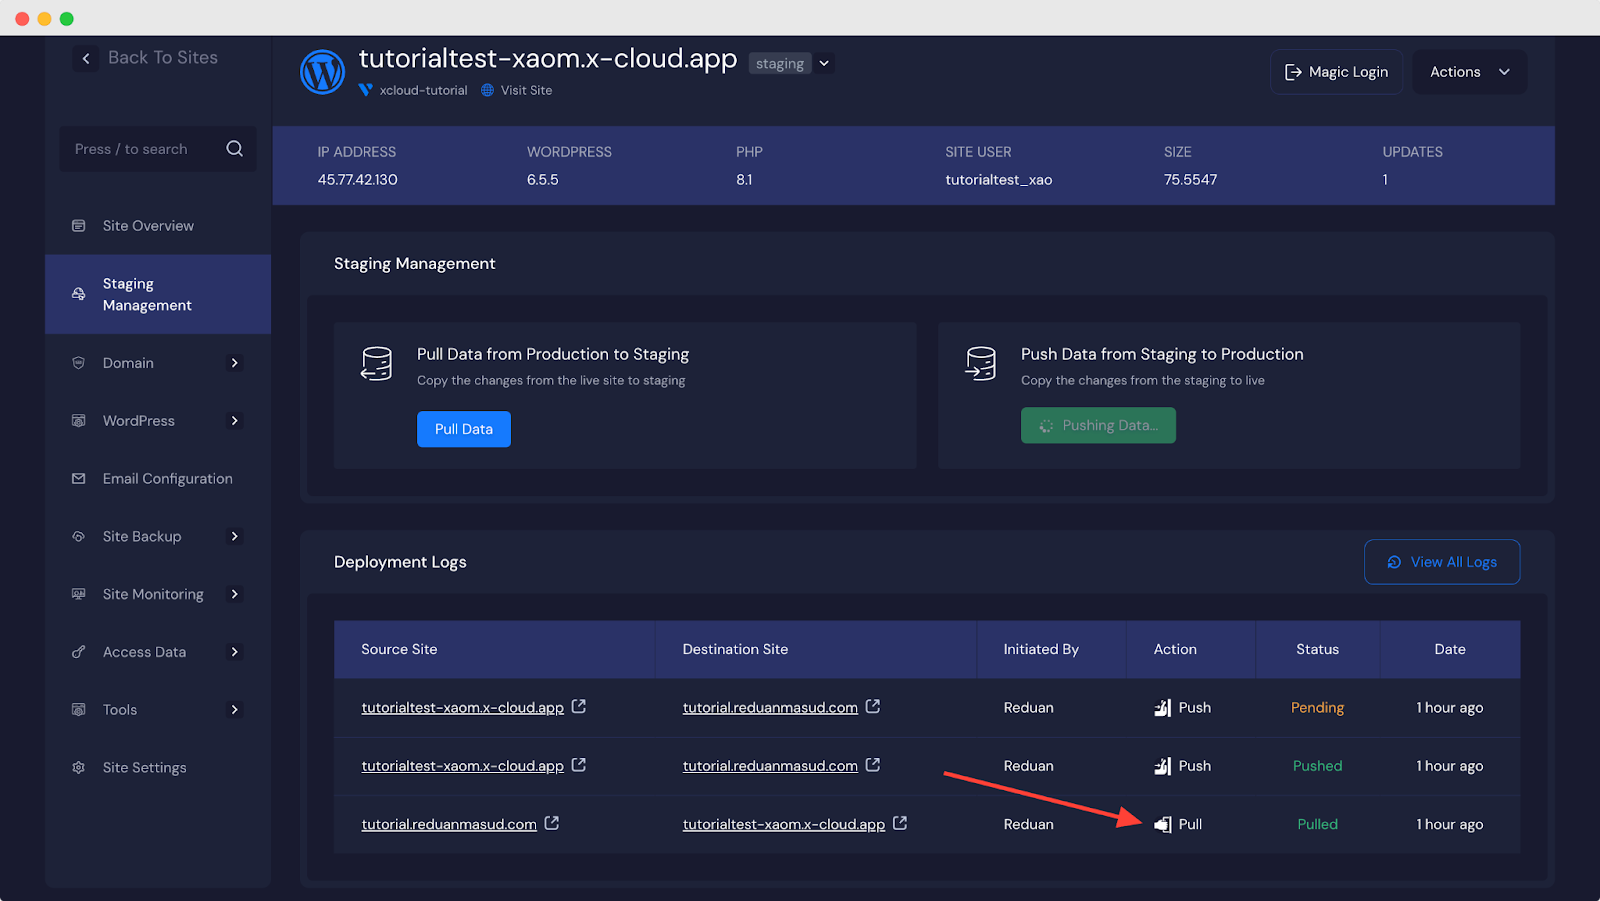
Your data pull will initiate and will be completed in a few seconds. You can see the pull status and record in the ‘Deployment Logs’.
You can also push data from the staging to the production site by clicking on the ‘Push Data’ button. Like pulling, you will also be shown a popup with the option to push files and databases. You can choose to overwrite all files or keep the most recent updates since the last push with the ‘Incremental’ option.
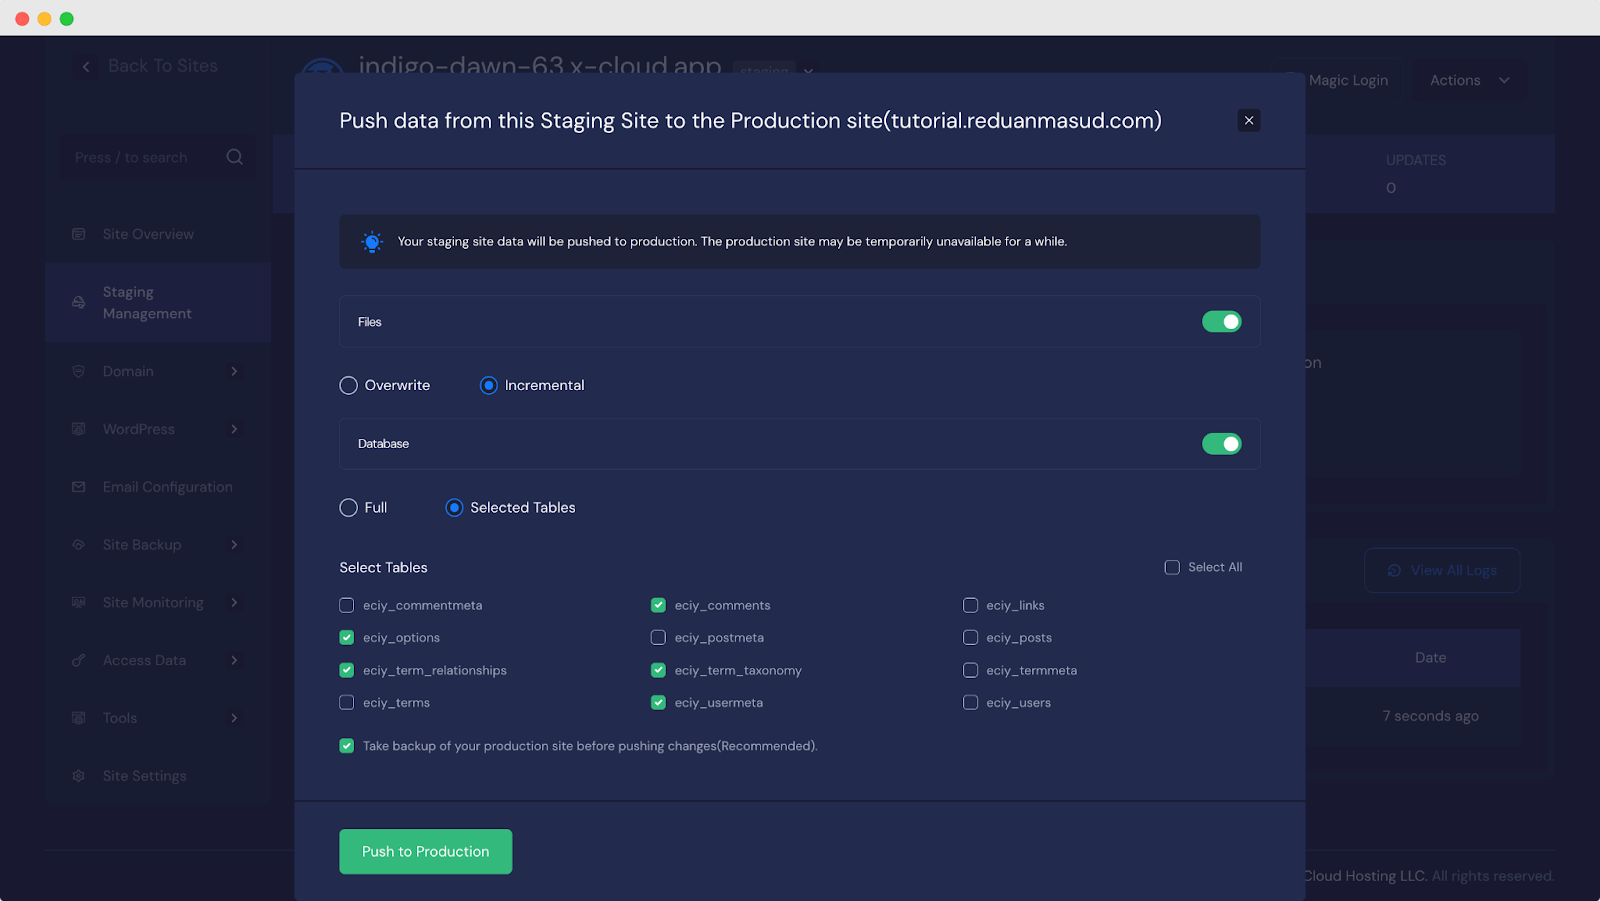
On the other hand, you can push the full database or select specific tables to push data from staging to live. However, xCloud highly recommends you take a backup of the production site before pushing the data from the staging environment to restore your production website to prevent any data loss if any accident or error occurs.
Once you select your preferred options, hit the ‘Push to Production’ button. Your data push will initiate and will be completed in a few seconds. Once the push process starts, xCloud backs up your environments, the destination is overwritten, and the cache is cleared on the destination. You can see the push status with the option and push record in the ‘Deployment Logs’.
NOTE: If you delete a production site then all staging sites attached to it will be removed as they become orphan. To keep the staging site you can clone them and create a new site separately.
This is how easily you can create a staging environment to pull and push site data in xCloud between your production site and staging.
Still stuck? Contact our support team for any of your queries.


