

How to Set up Auto Responder Email with xCloud MailBox Addon
Updated July 15, 2025 · 1 min read
Automated email responses are a helpful tool for maintaining communication when you’re unavailable or managing high volumes of messages. The xCloud MailBox Addon offers a simple way to set up an Auto Responder that sends automatic replies based on your preferences.
Follow the steps below to set up auto responder email easily with xCloud MailBox quickly.
Step 1: Log in to the MailBox
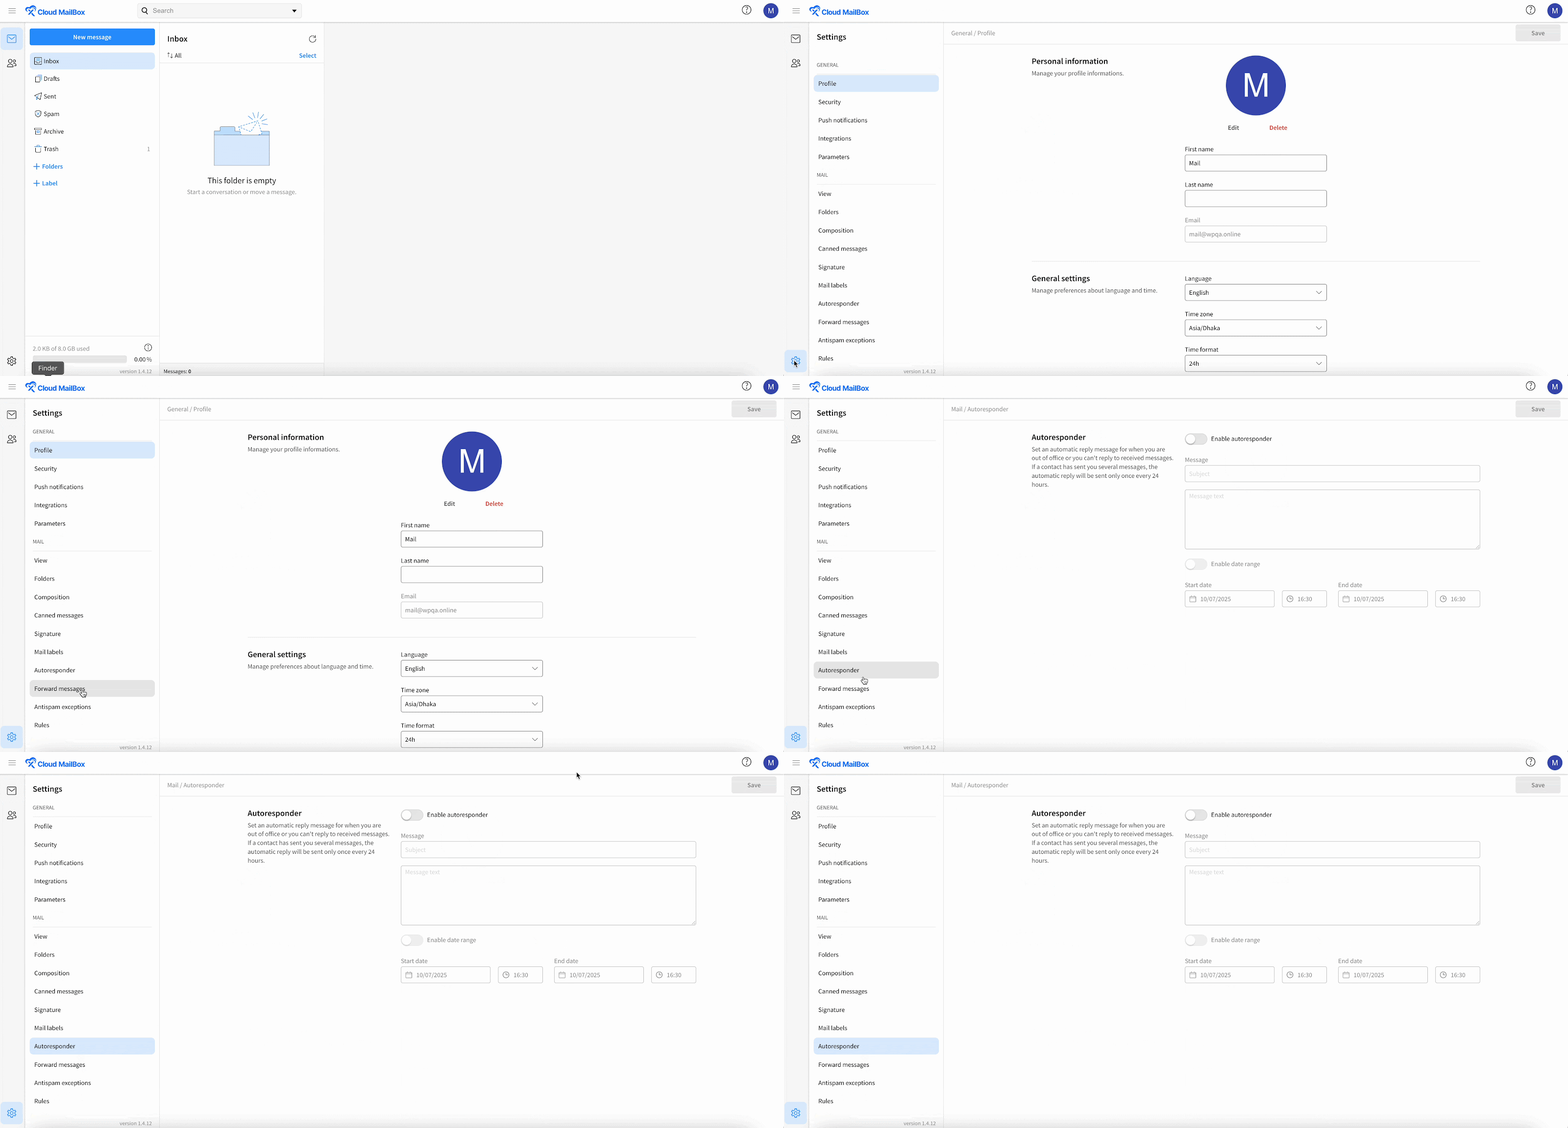
First, log in to your MailBox, go to the ‘Settings’ option, and click on the ‘Autoresponder’ option from the left sidebar.
Step 2: Set up Auto Responder Email
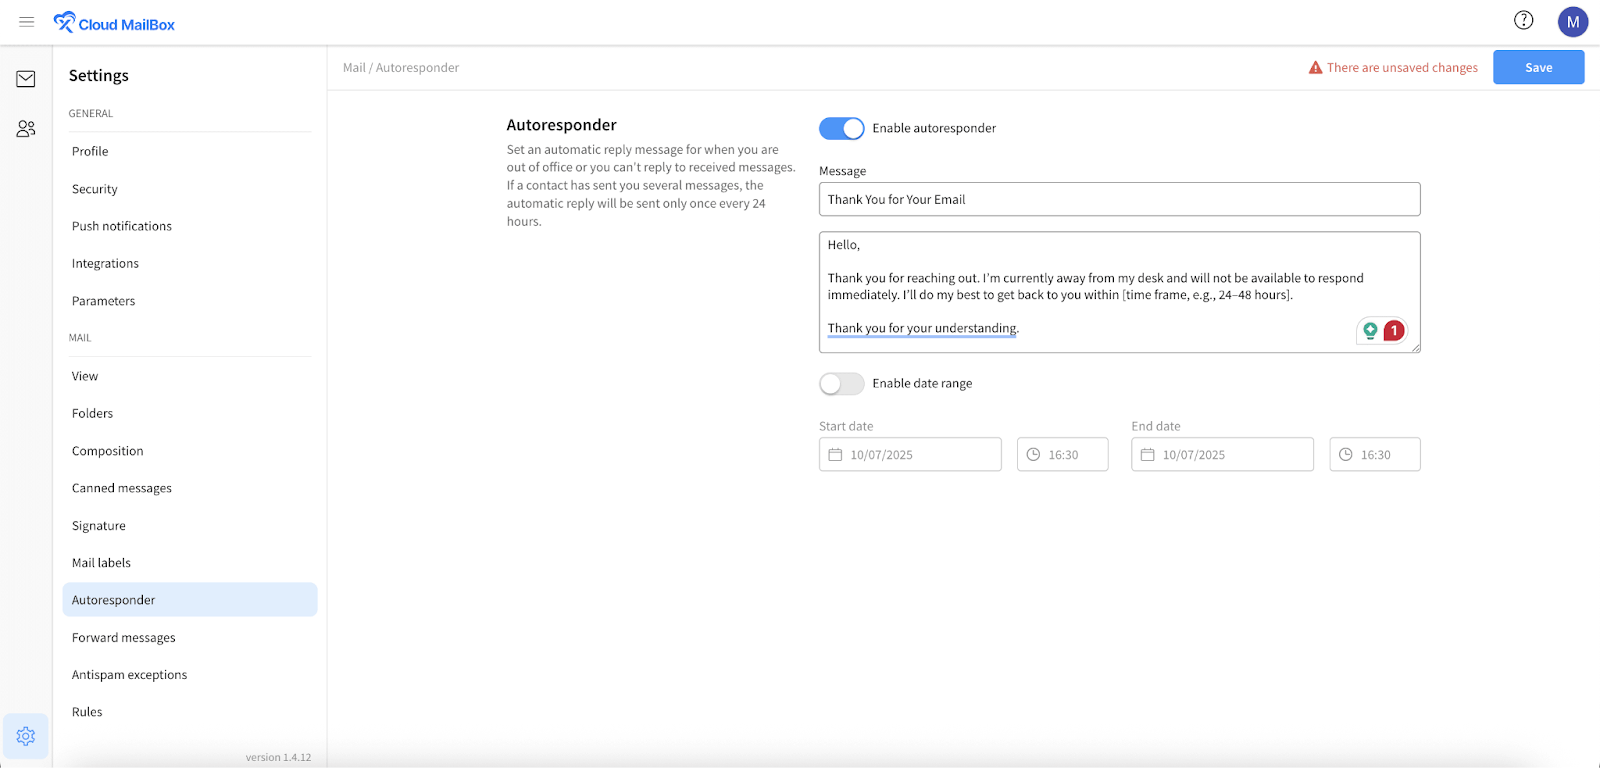
Next, enable the ‘Autoresponder’ option to start setting the email that will be sent automatically. Then write a ‘Subject’ and ‘Message’ into the dedicated fields.
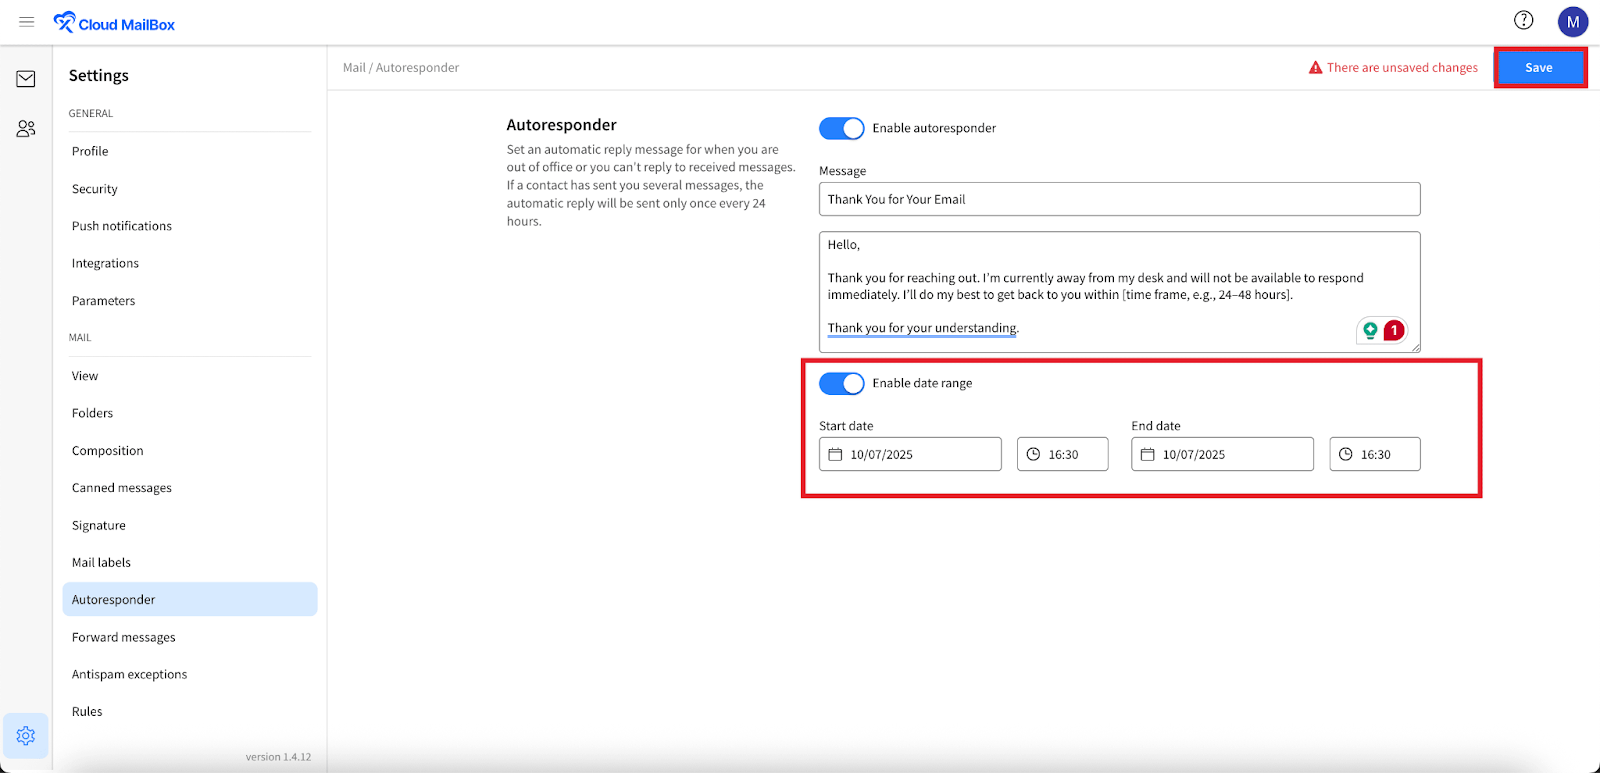
Then, enable the ‘Date Range’ button if you want to set it for a certain timeframe. Choose a ‘Start Date’, ‘Start Time’, ‘End Date ’ and**’ End Time’** of this email and hit on the ‘Save’ button.
And that’s it. This is how easily you can set up an Auto Responder with the xCloud MailBox Addon — an easy process that ensures your contacts receive timely replies, even when you’re unavailable.
Still stuck? Contact our support team for any of your queries.